Ultralytics:解读C3k2模块
- 前言
- 相关介绍
-
- [Ultralytics 简介](#Ultralytics 简介)
- 前提条件
- 实验环境
- [C3k2(灵活的 CSP 模块,支持多种子块组合)](#C3k2(灵活的 CSP 模块,支持多种子块组合))
- 参考文献
前言
- 由于本人水平有限,难免出现错漏,敬请批评改正。
- 更多精彩内容,可点击进入Python日常小操作专栏、OpenCV-Python小应用专栏、YOLO系列专栏、自然语言处理专栏、人工智能混合编程实践专栏或我的个人主页查看
- YOLOs-CPP:一个免费开源的YOLO全系列C++推理库(以YOLO26为例)
- PaddleOCR:Win10上安装使用PPOCRLabel标注工具
- 目标检测:使用自己的数据集微调DEIMv2进行物体检测
- 图像分割:PyTorch从零开始实现SegFormer语义分割
- 图像超分:使用自己的数据集微调Real-ESRGAN-x4plus进行超分重建
- 图像生成:PyTorch从零开始实现一个简单的扩散模型
- Stable Diffusion:使用自己的数据集微调 Stable Diffusion 3.5 LoRA 文生图模型
- 图像超分:使用自己的数据集微调Real-ESRGAN-x2plus进行超分重建
- Anomalib:使用Anomalib 2.1.0训练自己的数据集进行异常检测
- Anomalib:在Linux服务器上安装使用Anomalib 2.1.0
- 人工智能混合编程实践:C++调用封装好的DLL进行异常检测推理
- 人工智能混合编程实践:C++调用封装好的DLL进行FP16图像超分重建(v3.0)
- 隔离系统Python:源码编译3.11.8到自定义目录(含PGO性能优化)
- 在线机的Python环境迁移到离线机上
- Nuitka 将 Python 脚本封装为 .pyd 或 .so 文件
- Ultralytics:使用 YOLO11 进行速度估计
- Ultralytics:使用 YOLO11 进行物体追踪
- Ultralytics:使用 YOLO11 进行物体计数
- Ultralytics:使用 YOLO11 进行目标打码
- 人工智能混合编程实践:C++调用Python ONNX进行YOLOv8推理
- 人工智能混合编程实践:C++调用封装好的DLL进行YOLOv8实例分割
- 人工智能混合编程实践:C++调用Python ONNX进行图像超分重建
- 人工智能混合编程实践:C++调用Python AgentOCR进行文本识别
- 通过计算实例简单地理解PatchCore异常检测
- Python将YOLO格式实例分割数据集转换为COCO格式实例分割数据集
- YOLOv8 Ultralytics:使用Ultralytics框架训练RT-DETR实时目标检测模型
- 基于DETR的人脸伪装检测
- YOLOv7训练自己的数据集(口罩检测)
- YOLOv8训练自己的数据集(足球检测)
- YOLOv5:TensorRT加速YOLOv5模型推理
- YOLOv5:IoU、GIoU、DIoU、CIoU、EIoU
- 玩转Jetson Nano(五):TensorRT加速YOLOv5目标检测
- YOLOv5:添加SE、CBAM、CoordAtt、ECA注意力机制
- YOLOv5:yolov5s.yaml配置文件解读、增加小目标检测层
- Python将COCO格式实例分割数据集转换为YOLO格式实例分割数据集
- YOLOv5:使用7.0版本训练自己的实例分割模型(车辆、行人、路标、车道线等实例分割)
- 使用Kaggle GPU资源免费体验Stable Diffusion开源项目
- Stable Diffusion:在服务器上部署使用Stable Diffusion WebUI进行AI绘图(v2.0)
- Stable Diffusion:使用自己的数据集微调训练LoRA模型(v2.0)
相关介绍
Ultralytics 简介
Ultralytics 基于多年的计算机视觉和人工智能基础研究,创建了最先进的 (SOTA) YOLO 模型。我们的模型不断更新性能和灵活性,快速、准确且易于使用。他们擅长对象检测、跟踪、实例分割、语义分割、图像分类和姿势估计任务。
前提条件
- 熟悉Python、Pytorch
实验环境
bash
Package                  Version
------------------------ ------------
Python                   3.11.8
absl-py                  2.4.0
accelerate               1.13.0
annotated-doc            0.0.4
anyio                    4.13.0
calflops                 0.3.2
certifi                  2026.4.22
charset-normalizer       3.4.7
click                    8.3.3
colorama                 0.4.6
contourpy                1.3.3
cycler                   0.12.1
filelock                 3.29.0
flatbuffers              25.12.19
fonttools                4.62.1
fsspec                   2026.4.0
grpcio                   1.80.0
h11                      0.16.0
hf-xet                   1.5.0
httpcore                 1.0.9
httpx                    0.28.1
huggingface_hub          1.14.0
idna                     3.15
Jinja2                   3.1.6
kiwisolver               1.5.0
Markdown                 3.10.2
markdown-it-py           4.2.0
MarkupSafe               3.0.3
matplotlib               3.10.9
mdurl                    0.1.2
ml_dtypes                0.5.0
mpmath                   1.3.0
networkx                 3.6.1
numpy                    1.26.4
nvidia-cublas-cu12       12.8.3.14
nvidia-cuda-cupti-cu12   12.8.57
nvidia-cuda-nvrtc-cu12   12.8.61
nvidia-cuda-runtime-cu12 12.8.57
nvidia-cudnn-cu12        9.7.1.26
nvidia-cufft-cu12        11.3.3.41
nvidia-cufile-cu12       1.13.0.11
nvidia-curand-cu12       10.3.9.55
nvidia-cusolver-cu12     11.7.2.55
nvidia-cusparse-cu12     12.5.7.53
nvidia-cusparselt-cu12   0.6.3
nvidia-nccl-cu12         2.26.2
nvidia-nvjitlink-cu12    12.8.61
nvidia-nvtx-cu12         12.8.55
onnx                     1.19.0
onnxruntime-gpu          1.26.0
onnxslim                 0.1.94
opencv-python            4.6.0.66
packaging                26.2
pillow                   12.2.0
pip                      24.0
polars                   1.40.1
polars-runtime-32        1.40.1
protobuf                 7.34.1
psutil                   7.2.2
pycocotools              2.0.11
Pygments                 2.20.0
pyparsing                3.3.2
python-dateutil          2.9.0.post0
PyYAML                   6.0.3
regex                    2026.5.9
requests                 2.34.1
rich                     15.0.0
safetensors              0.7.0
scipy                    1.16.0
setuptools               65.5.0
shellingham              1.5.4
six                      1.17.0
sympy                    1.14.0
tabulate                 0.10.0
tensorboard              2.20.0
tensorboard-data-server  0.7.2
tokenizers               0.22.2
torch                    2.7.1+cu128
torchaudio               2.7.1+cu128
torchvision              0.22.1+cu128
tqdm                     4.67.3
transformers             5.8.1
triton                   3.3.1
typer                    0.25.1
typing_extensions        4.15.0
ultralytics              8.4.58
ultralytics-thop         2.0.19
urllib3                  2.7.0
Werkzeug                 3.1.8
C3k2(灵活的 CSP 模块,支持多种子块组合)
C3k2 是 C2f 的增强版本,它允许用户在每个块中灵活选择不同的子模块组合,包括 标准 Bottleneck 、C3k(可定制核大小的 CSP 块) 或 Bottleneck + PSABlock(自注意力增强) 。这种设计使得网络能够根据任务需求在精度和速度之间进行更精细的权衡,同时保持了 C2f 的高效级联结构。
代码实现
python
import cv2
import math
import torch
import torch.nn as nn
import torch.nn.functional as F
import numpy as np
import matplotlib.pyplot as plt

def autopad(k, p=None, d=1):  # kernel, padding, dilation
    """Pad to 'same' shape outputs."""
    if d > 1:
        k = d * (k - 1) + 1 if isinstance(k, int) else [d * (x - 1) + 1 for x in k]  # actual kernel-size
    if p is None:
        p = k // 2 if isinstance(k, int) else [x // 2 for x in k]  # auto-pad
    return p

class Conv(nn.Module):
    """Standard convolution module with batch normalization and activation.

    Attributes:
        conv (nn.Conv2d): Convolutional layer.
        bn (nn.BatchNorm2d): Batch normalization layer.
        act (nn.Module): Activation function layer.
        default_act (nn.Module): Default activation function (SiLU).
    """

    default_act = nn.SiLU()  # default activation

    def __init__(self, c1, c2, k=1, s=1, p=None, g=1, d=1, act=True):
        """Initialize Conv layer with given parameters.

        Args:
            c1 (int): Number of input channels.
            c2 (int): Number of output channels.
            k (int): Kernel size.
            s (int): Stride.
            p (int, optional): Padding.
            g (int): Groups.
            d (int): Dilation.
            act (bool | nn.Module): Activation function.
        """
        super().__init__()
        self.conv = nn.Conv2d(c1, c2, k, s, autopad(k, p, d), groups=g, dilation=d, bias=False)
        self.bn = nn.BatchNorm2d(c2)
        self.act = self.default_act if act is True else act if isinstance(act, nn.Module) else nn.Identity()

    def forward(self, x):
        """Apply convolution, batch normalization and activation to input tensor.

        Args:
            x (torch.Tensor): Input tensor.

        Returns:
            (torch.Tensor): Output tensor.
        """
        return self.act(self.bn(self.conv(x)))

    def forward_fuse(self, x):
        """Apply convolution and activation without batch normalization.

        Args:
            x (torch.Tensor): Input tensor.

        Returns:
            (torch.Tensor): Output tensor.
        """
        return self.act(self.conv(x))

class Bottleneck(nn.Module):
    """Standard bottleneck."""

    def __init__(
        self, c1: int, c2: int, shortcut: bool = True, g: int = 1, k: tuple[int, int] = (3, 3), e: float = 0.5
    ):
        """Initialize a standard bottleneck module.

        Args:
            c1 (int): Input channels.
            c2 (int): Output channels.
            shortcut (bool): Whether to use shortcut connection.
            g (int): Groups for convolutions.
            k (tuple): Kernel sizes for convolutions.
            e (float): Expansion ratio.
        """
        super().__init__()
        c_ = int(c2 * e)  # hidden channels
        self.cv1 = Conv(c1, c_, k[0], 1)
        self.cv2 = Conv(c_, c2, k[1], 1, g=g)
        self.add = shortcut and c1 == c2

    def forward(self, x: torch.Tensor) -> torch.Tensor:
        """Apply bottleneck with optional shortcut connection."""
        return x + self.cv2(self.cv1(x)) if self.add else self.cv2(self.cv1(x))

class C2f(nn.Module):
    """Faster Implementation of CSP Bottleneck with 2 convolutions."""

    def __init__(self, c1: int, c2: int, n: int = 1, shortcut: bool = False, g: int = 1, e: float = 0.5):
        """Initialize a CSP bottleneck with 2 convolutions.

        Args:
            c1 (int): Input channels.
            c2 (int): Output channels.
            n (int): Number of Bottleneck blocks.
            shortcut (bool): Whether to use shortcut connections.
            g (int): Groups for convolutions.
            e (float): Expansion ratio.
        """
        super().__init__()
        self.c = int(c2 * e)  # hidden channels
        self.cv1 = Conv(c1, 2 * self.c, 1, 1)
        self.cv2 = Conv((2 + n) * self.c, c2, 1)  # optional act=FReLU(c2)
        self.m = nn.ModuleList(Bottleneck(self.c, self.c, shortcut, g, k=((3, 3), (3, 3)), e=1.0) for _ in range(n))

    def forward(self, x: torch.Tensor) -> torch.Tensor:
        """Forward pass through C2f layer."""
        y = list(self.cv1(x).chunk(2, 1))
        y.extend(m(y[-1]) for m in self.m)
        return self.cv2(torch.cat(y, 1))

    def forward_split(self, x: torch.Tensor) -> torch.Tensor:
        """Forward pass using split() instead of chunk()."""
        y = self.cv1(x).split((self.c, self.c), 1)
        y = [y[0], y[1]]
        y.extend(m(y[-1]) for m in self.m)
        return self.cv2(torch.cat(y, 1))

class C3(nn.Module):
    """CSP Bottleneck with 3 convolutions."""

    def __init__(self, c1: int, c2: int, n: int = 1, shortcut: bool = True, g: int = 1, e: float = 0.5):
        """Initialize the CSP Bottleneck with 3 convolutions.

        Args:
            c1 (int): Input channels.
            c2 (int): Output channels.
            n (int): Number of Bottleneck blocks.
            shortcut (bool): Whether to use shortcut connections.
            g (int): Groups for convolutions.
            e (float): Expansion ratio.
        """
        super().__init__()
        c_ = int(c2 * e)  # hidden channels
        self.cv1 = Conv(c1, c_, 1, 1)
        self.cv2 = Conv(c1, c_, 1, 1)
        self.cv3 = Conv(2 * c_, c2, 1)  # optional act=FReLU(c2)
        self.m = nn.Sequential(*(Bottleneck(c_, c_, shortcut, g, k=((1, 1), (3, 3)), e=1.0) for _ in range(n)))

    def forward(self, x: torch.Tensor) -> torch.Tensor:
        """Forward pass through the CSP bottleneck with 3 convolutions."""
        return self.cv3(torch.cat((self.m(self.cv1(x)), self.cv2(x)), 1))

class C3k(C3):
    """C3k is a CSP bottleneck module with customizable kernel sizes for feature extraction in neural networks."""

    def __init__(self, c1: int, c2: int, n: int = 1, shortcut: bool = True, g: int = 1, e: float = 0.5, k: int = 3):
        """Initialize C3k module.

        Args:
            c1 (int): Input channels.
            c2 (int): Output channels.
            n (int): Number of Bottleneck blocks.
            shortcut (bool): Whether to use shortcut connections.
            g (int): Groups for convolutions.
            e (float): Expansion ratio.
            k (int): Kernel size.
        """
        super().__init__(c1, c2, n, shortcut, g, e)
        c_ = int(c2 * e)  # hidden channels
        # self.m = nn.Sequential(*(RepBottleneck(c_, c_, shortcut, g, k=(k, k), e=1.0) for _ in range(n)))
        self.m = nn.Sequential(*(Bottleneck(c_, c_, shortcut, g, k=(k, k), e=1.0) for _ in range(n)))

class Attention(nn.Module):
    """Attention module that performs self-attention on the input tensor.

    Args:
        dim (int): The input tensor dimension.
        num_heads (int): The number of attention heads.
        attn_ratio (float): The ratio of the attention key dimension to the head dimension.

    Attributes:
        num_heads (int): The number of attention heads.
        head_dim (int): The dimension of each attention head.
        key_dim (int): The dimension of the attention key.
        scale (float): The scaling factor for the attention scores.
        qkv (Conv): Convolutional layer for computing the query, key, and value.
        proj (Conv): Convolutional layer for projecting the attended values.
        pe (Conv): Convolutional layer for positional encoding.
    """

    def __init__(self, dim: int, num_heads: int = 8, attn_ratio: float = 0.5):
        """Initialize multi-head attention module.

        Args:
            dim (int): Input dimension.
            num_heads (int): Number of attention heads.
            attn_ratio (float): Attention ratio for key dimension.
        """
        super().__init__()
        self.num_heads = num_heads
        self.head_dim = dim // num_heads
        self.key_dim = int(self.head_dim * attn_ratio)
        self.scale = self.key_dim**-0.5
        nh_kd = self.key_dim * num_heads
        h = dim + nh_kd * 2
        self.qkv = Conv(dim, h, 1, act=False)
        self.proj = Conv(dim, dim, 1, act=False)
        self.pe = Conv(dim, dim, 3, 1, g=dim, act=False)

    def forward(self, x: torch.Tensor) -> torch.Tensor:
        """Forward pass of the Attention module.

        Args:
            x (torch.Tensor): The input tensor.

        Returns:
            (torch.Tensor): The output tensor after self-attention.
        """
        B, C, H, W = x.shape
        N = H * W
        qkv = self.qkv(x)
        q, k, v = qkv.view(B, self.num_heads, self.key_dim * 2 + self.head_dim, N).split(
            [self.key_dim, self.key_dim, self.head_dim], dim=2
        )

        attn = (q.transpose(-2, -1) @ k) * self.scale
        attn = attn.softmax(dim=-1)
        x = (v @ attn.transpose(-2, -1)).view(B, C, H, W) + self.pe(v.reshape(B, C, H, W))
        x = self.proj(x)
        return x

class PSABlock(nn.Module):
    """PSABlock class implementing a Position-Sensitive Attention block for neural networks.

    This class encapsulates the functionality for applying multi-head attention and feed-forward neural network layers
    with optional shortcut connections.

    Attributes:
        attn (Attention): Multi-head attention module.
        ffn (nn.Sequential): Feed-forward neural network module.
        add (bool): Flag indicating whether to add shortcut connections.

    Methods:
        forward: Performs a forward pass through the PSABlock, applying attention and feed-forward layers.

    Examples:
        Create a PSABlock and perform a forward pass
        >>> psablock = PSABlock(c=128, attn_ratio=0.5, num_heads=4, shortcut=True)
        >>> input_tensor = torch.randn(1, 128, 32, 32)
        >>> output_tensor = psablock(input_tensor)
    """

    def __init__(self, c: int, attn_ratio: float = 0.5, num_heads: int = 4, shortcut: bool = True) -> None:
        """Initialize the PSABlock.

        Args:
            c (int): Input and output channels.
            attn_ratio (float): Attention ratio for key dimension.
            num_heads (int): Number of attention heads.
            shortcut (bool): Whether to use shortcut connections.
        """
        super().__init__()

        self.attn = Attention(c, attn_ratio=attn_ratio, num_heads=num_heads)
        self.ffn = nn.Sequential(Conv(c, c * 2, 1), Conv(c * 2, c, 1, act=False))
        self.add = shortcut

    def forward(self, x: torch.Tensor) -> torch.Tensor:
        """Execute a forward pass through PSABlock.

        Args:
            x (torch.Tensor): Input tensor.

        Returns:
            (torch.Tensor): Output tensor after attention and feed-forward processing.
        """
        x = x + self.attn(x) if self.add else self.attn(x)
        x = x + self.ffn(x) if self.add else self.ffn(x)
        return x

class C3k2(C2f):
    """Faster Implementation of CSP Bottleneck with 2 convolutions."""

    def __init__(
        self,
        c1: int,
        c2: int,
        n: int = 1,
        c3k: bool = False,
        e: float = 0.5,
        attn: bool = False,
        g: int = 1,
        shortcut: bool = True,
    ):
        """Initialize C3k2 module.

        Args:
            c1 (int): Input channels.
            c2 (int): Output channels.
            n (int): Number of blocks.
            c3k (bool): Whether to use C3k blocks.
            e (float): Expansion ratio.
            attn (bool): Whether to use attention blocks.
            g (int): Groups for convolutions.
            shortcut (bool): Whether to use shortcut connections.
        """
        super().__init__(c1, c2, n, shortcut, g, e)
        self.m = nn.ModuleList(
            nn.Sequential(
                Bottleneck(self.c, self.c, shortcut, g),
                PSABlock(self.c, attn_ratio=0.5, num_heads=max(self.c // 64, 1)),
            )
            if attn
            else C3k(self.c, self.c, 2, shortcut, g)
            if c3k
            else Bottleneck(self.c, self.c, shortcut, g)
            for _ in range(n)
        )
功能
- CSP 级联结构 :继承自
C2f,通过cv1将输入通道扩展为2*self.c,拆分后一路直接保留,另一路依次通过self.m中的多个块(每个块类型可单独选择),每次输出追加到特征列表,最终拼接并通过cv2压缩到目标通道。 - 可配置块类型 :
attn=True:每个块由Bottleneck+PSABlock串联组成,先通过标准瓶颈提取特征,再经自注意力增强全局上下文。c3k=True:每个块为C3k模块(内部包含两个Bottleneck,核大小默认为 3,隐藏通道减半),提供更深的特征变换。- 默认(两者均为 False) :每个块为单个
Bottleneck,与C2f相同。
- 灵活组合 :所有块共享相同类型,不能混合不同种类,但可通过调整
n控制深度。
初始化参数
| 参数 | 类型 | 说明 |
|---|---|---|
c1 |
int | 输入通道数 |
c2 |
int | 输出通道数 |
n |
int | 块的数量(默认 1) |
c3k |
bool | 是否使用 C3k 作为块(默认 False) |
e |
float | 扩展比,self.c = int(c2 * e)(默认 0.5) |
attn |
bool | 是否使用 Bottleneck + PSABlock 作为块(默认 False) |
g |
int | 分组卷积组数(作用于 Bottleneck 和 C3k 内部的卷积) |
shortcut |
bool | 是否在 Bottleneck 和 C3k 内部使用残差连接(默认 True) |
self.c由父类C2f计算得到。- 若
attn=True且c3k=True,由于if attn优先,会使用注意力组合,忽略c3k。 C3k在调用时使用默认k=3(核大小),若需要自定义核,可修改源码或继承重写。
前向方法
forward(x):继承自C2f,流程与父类一致。forward_split(x):继承自C2f,使用split替代chunk。
数据流(与 C2f 相同):
y = self.cv1(x)→[B, 2*self.c, H, W]- 拆分为
[y0, y1],各[B, self.c, H, W] - 对
self.m中的每个块,取当前列表最后一个元素输入,输出追加到列表 - 拼接所有
(2+n)个张量 - 通过
self.cv2压缩到c2
使用示例
python
if __name__ == '__main__':
    # 1. 随机输入
    B, c1, c2, H, W = 2, 32, 64, 64, 64
    x = torch.randn(B, c1, H, W)

    # 2. 不同配置的 C3k2
    # 配置1:默认(仅 Bottleneck)
    model1 = C3k2(c1, c2, n=2, c3k=False, attn=False, e=0.5, shortcut=True)
    with torch.no_grad():
        out1 = model1(x)
    print("默认输出形状:", out1.shape)  # [2, 64, 64, 64]

    # 配置2:使用 C3k 块
    model2 = C3k2(c1, c2, n=2, c3k=True, attn=False, e=0.5)
    with torch.no_grad():
        out2 = model2(x)
    print("C3k 输出形状:", out2.shape)  # [2, 64, 64, 64]

    # 配置3:使用 Bottleneck + PSABlock
    model3 = C3k2(c1, c2, n=2, c3k=False, attn=True, e=0.5)
    with torch.no_grad():
        out3 = model3(x)
    print("注意力输出形状:", out3.shape)  # [2, 64, 64, 64]

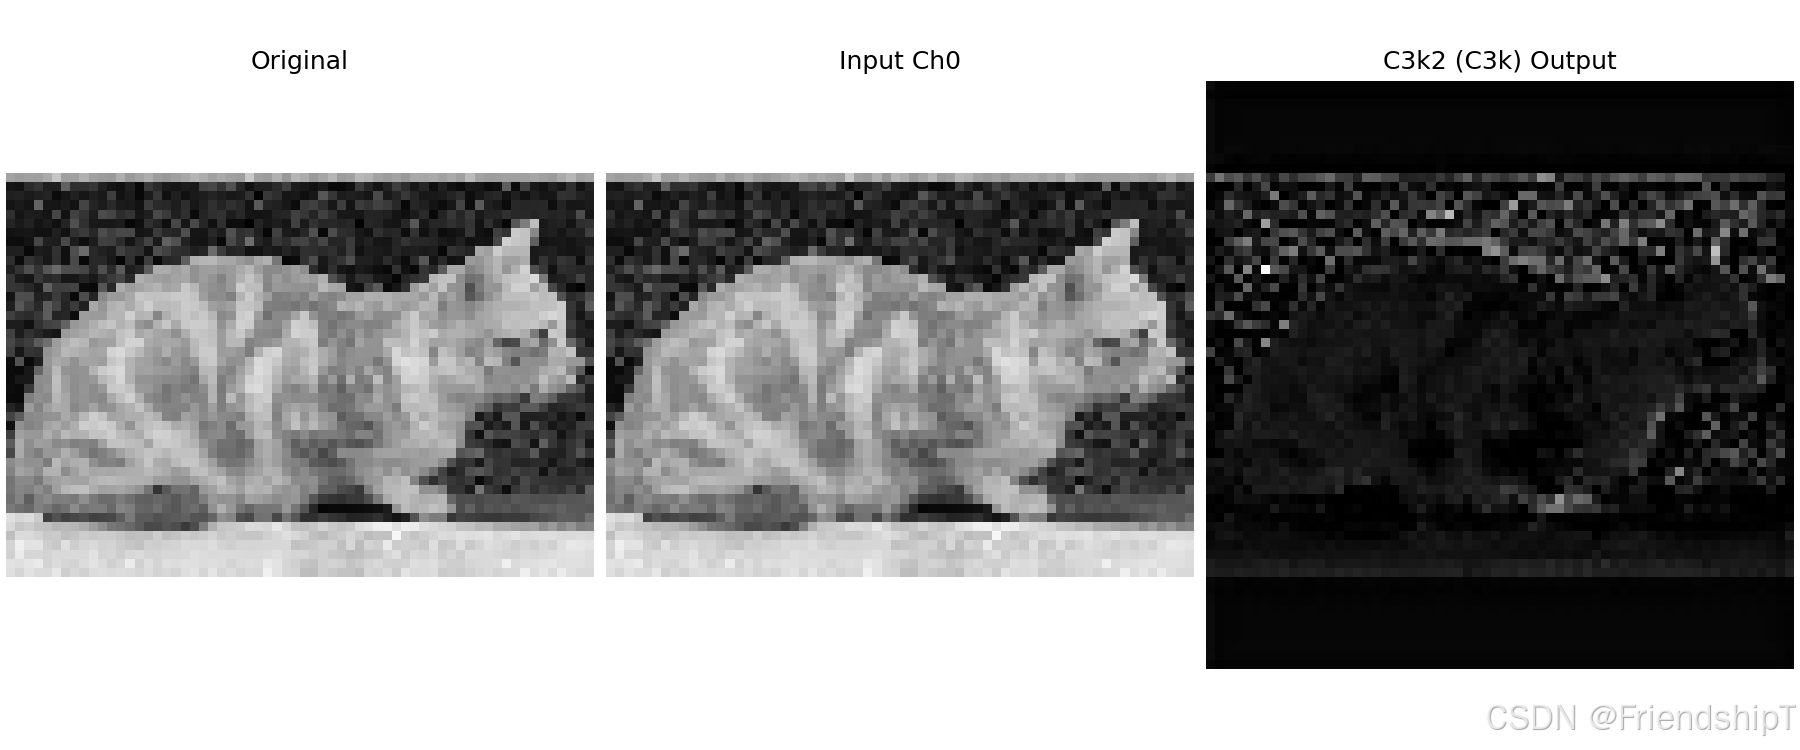
    # 4. 真实图像演示(单通道扩展)
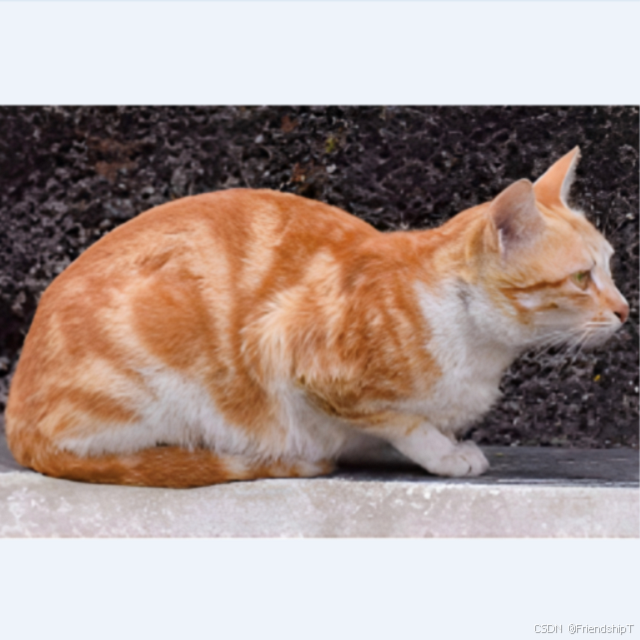
    img_path = "cat_640x640.png"
    img_bgr = cv2.imread(img_path)
    if img_bgr is not None:
        img_gray = cv2.cvtColor(cv2.resize(img_bgr, (64, 64)), cv2.COLOR_BGR2GRAY)
        img_tensor = torch.from_numpy(img_gray).float().unsqueeze(0).unsqueeze(0)  # [1,1,64,64]
        # 扩展至 c1=32
        x_img = img_tensor.repeat(1, c1, 1, 1)

        # 使用配置2(C3k)演示
        model_demo = C3k2(c1=32, c2=32, n=1, c3k=True, e=0.5)
        with torch.no_grad():
            out_img = model_demo(x_img)

        inp_ch0 = x_img[0, 0].cpu().numpy()
        out_ch0 = out_img[0, 0].cpu().numpy()

        def norm(arr):
            return (arr - arr.min()) / (arr.max() - arr.min() + 1e-8)

        plt.figure(figsize=(12, 5), constrained_layout=True)
        plt.subplot(1, 3, 1)
        plt.imshow(img_gray, cmap='gray')
        plt.title("Original")
        plt.axis("off")
        plt.subplot(1, 3, 2)
        plt.imshow(norm(inp_ch0), cmap='gray')
        plt.title("Input Ch0")
        plt.axis("off")
        plt.subplot(1, 3, 3)
        plt.imshow(norm(out_ch0), cmap='gray')
        plt.title("C3k2 (C3k) Output")
        plt.axis("off")
        plt.savefig("c3k2_demo.png", dpi=150)
print("可视化已保存为 c3k2_demo.png")输出示例:
默认输出形状: torch.Size([2, 64, 64, 64])
C3k 输出形状: torch.Size([2, 64, 64, 64])
注意力输出形状: torch.Size([2, 64, 64, 64])
可视化已保存为 c3k2_demo.png
流程示意图
#mermaid-svg-0aTsSg8b0viSOtFs{font-family:"trebuchet ms",verdana,arial,sans-serif;font-size:16px;fill:#333;}@keyframes edge-animation-frame{from{stroke-dashoffset:0;}}@keyframes dash{to{stroke-dashoffset:0;}}#mermaid-svg-0aTsSg8b0viSOtFs .edge-animation-slow{stroke-dasharray:9,5!important;stroke-dashoffset:900;animation:dash 50s linear infinite;stroke-linecap:round;}#mermaid-svg-0aTsSg8b0viSOtFs .edge-animation-fast{stroke-dasharray:9,5!important;stroke-dashoffset:900;animation:dash 20s linear infinite;stroke-linecap:round;}#mermaid-svg-0aTsSg8b0viSOtFs .error-icon{fill:#552222;}#mermaid-svg-0aTsSg8b0viSOtFs .error-text{fill:#552222;stroke:#552222;}#mermaid-svg-0aTsSg8b0viSOtFs .edge-thickness-normal{stroke-width:1px;}#mermaid-svg-0aTsSg8b0viSOtFs .edge-thickness-thick{stroke-width:3.5px;}#mermaid-svg-0aTsSg8b0viSOtFs .edge-pattern-solid{stroke-dasharray:0;}#mermaid-svg-0aTsSg8b0viSOtFs .edge-thickness-invisible{stroke-width:0;fill:none;}#mermaid-svg-0aTsSg8b0viSOtFs .edge-pattern-dashed{stroke-dasharray:3;}#mermaid-svg-0aTsSg8b0viSOtFs .edge-pattern-dotted{stroke-dasharray:2;}#mermaid-svg-0aTsSg8b0viSOtFs .marker{fill:#333333;stroke:#333333;}#mermaid-svg-0aTsSg8b0viSOtFs .marker.cross{stroke:#333333;}#mermaid-svg-0aTsSg8b0viSOtFs svg{font-family:"trebuchet ms",verdana,arial,sans-serif;font-size:16px;}#mermaid-svg-0aTsSg8b0viSOtFs p{margin:0;}#mermaid-svg-0aTsSg8b0viSOtFs .label{font-family:"trebuchet ms",verdana,arial,sans-serif;color:#333;}#mermaid-svg-0aTsSg8b0viSOtFs .cluster-label text{fill:#333;}#mermaid-svg-0aTsSg8b0viSOtFs .cluster-label span{color:#333;}#mermaid-svg-0aTsSg8b0viSOtFs .cluster-label span p{background-color:transparent;}#mermaid-svg-0aTsSg8b0viSOtFs .label text,#mermaid-svg-0aTsSg8b0viSOtFs span{fill:#333;color:#333;}#mermaid-svg-0aTsSg8b0viSOtFs .node rect,#mermaid-svg-0aTsSg8b0viSOtFs .node circle,#mermaid-svg-0aTsSg8b0viSOtFs .node ellipse,#mermaid-svg-0aTsSg8b0viSOtFs .node polygon,#mermaid-svg-0aTsSg8b0viSOtFs .node path{fill:#ECECFF;stroke:#9370DB;stroke-width:1px;}#mermaid-svg-0aTsSg8b0viSOtFs .rough-node .label text,#mermaid-svg-0aTsSg8b0viSOtFs .node .label text,#mermaid-svg-0aTsSg8b0viSOtFs .image-shape .label,#mermaid-svg-0aTsSg8b0viSOtFs .icon-shape .label{text-anchor:middle;}#mermaid-svg-0aTsSg8b0viSOtFs .node .katex path{fill:#000;stroke:#000;stroke-width:1px;}#mermaid-svg-0aTsSg8b0viSOtFs .rough-node .label,#mermaid-svg-0aTsSg8b0viSOtFs .node .label,#mermaid-svg-0aTsSg8b0viSOtFs .image-shape .label,#mermaid-svg-0aTsSg8b0viSOtFs .icon-shape .label{text-align:center;}#mermaid-svg-0aTsSg8b0viSOtFs .node.clickable{cursor:pointer;}#mermaid-svg-0aTsSg8b0viSOtFs .root .anchor path{fill:#333333!important;stroke-width:0;stroke:#333333;}#mermaid-svg-0aTsSg8b0viSOtFs .arrowheadPath{fill:#333333;}#mermaid-svg-0aTsSg8b0viSOtFs .edgePath .path{stroke:#333333;stroke-width:2.0px;}#mermaid-svg-0aTsSg8b0viSOtFs .flowchart-link{stroke:#333333;fill:none;}#mermaid-svg-0aTsSg8b0viSOtFs .edgeLabel{background-color:rgba(232,232,232, 0.8);text-align:center;}#mermaid-svg-0aTsSg8b0viSOtFs .edgeLabel p{background-color:rgba(232,232,232, 0.8);}#mermaid-svg-0aTsSg8b0viSOtFs .edgeLabel rect{opacity:0.5;background-color:rgba(232,232,232, 0.8);fill:rgba(232,232,232, 0.8);}#mermaid-svg-0aTsSg8b0viSOtFs .labelBkg{background-color:rgba(232, 232, 232, 0.5);}#mermaid-svg-0aTsSg8b0viSOtFs .cluster rect{fill:#ffffde;stroke:#aaaa33;stroke-width:1px;}#mermaid-svg-0aTsSg8b0viSOtFs .cluster text{fill:#333;}#mermaid-svg-0aTsSg8b0viSOtFs .cluster span{color:#333;}#mermaid-svg-0aTsSg8b0viSOtFs div.mermaidTooltip{position:absolute;text-align:center;max-width:200px;padding:2px;font-family:"trebuchet ms",verdana,arial,sans-serif;font-size:12px;background:hsl(80, 100%, 96.2745098039%);border:1px solid #aaaa33;border-radius:2px;pointer-events:none;z-index:100;}#mermaid-svg-0aTsSg8b0viSOtFs .flowchartTitleText{text-anchor:middle;font-size:18px;fill:#333;}#mermaid-svg-0aTsSg8b0viSOtFs rect.text{fill:none;stroke-width:0;}#mermaid-svg-0aTsSg8b0viSOtFs .icon-shape,#mermaid-svg-0aTsSg8b0viSOtFs .image-shape{background-color:rgba(232,232,232, 0.8);text-align:center;}#mermaid-svg-0aTsSg8b0viSOtFs .icon-shape p,#mermaid-svg-0aTsSg8b0viSOtFs .image-shape p{background-color:rgba(232,232,232, 0.8);padding:2px;}#mermaid-svg-0aTsSg8b0viSOtFs .icon-shape .label rect,#mermaid-svg-0aTsSg8b0viSOtFs .image-shape .label rect{opacity:0.5;background-color:rgba(232,232,232, 0.8);fill:rgba(232,232,232, 0.8);}#mermaid-svg-0aTsSg8b0viSOtFs .label-icon{display:inline-block;height:1em;overflow:visible;vertical-align:-0.125em;}#mermaid-svg-0aTsSg8b0viSOtFs .node .label-icon path{fill:currentColor;stroke:revert;stroke-width:revert;}#mermaid-svg-0aTsSg8b0viSOtFs :root{--mermaid-font-family:"trebuchet ms",verdana,arial,sans-serif;} 输入 x (B, c1, H, W)
Conv 1x1: c1 → 2*c (cv1)
chunk(2,1): y0, y1
y0 直接保留
y1
块 1
(类型由参数决定)
输出 y2
块 2
...
块 n
输出 y_{n+1}
拼接: y0, y1, ..., y_{n+1}
Conv 1x1: (2+n)*c → c2 (cv2)
输出 (B, c2, H, W)
代码解读
__init__:- 调用父类
C2f.__init__(c1, c2, n, shortcut, g, e),创建self.c、self.cv1、self.cv2以及父类的self.m。 - 根据参数
attn和c3k构造新的self.m:- 若
attn=True:每个块为nn.Sequential(Bottleneck(...), PSABlock(...))。 - 否则若
c3k=True:每个块为C3k(self.c, self.c, 2, shortcut, g)(注意n=2,即每个 C3k 包含两个 Bottleneck)。 - 否则:每个块为单个
Bottleneck(self.c, self.c, shortcut, g)。
- 若
- 列表推导生成
n个块。
- 调用父类
forward/forward_split:继承自C2f,无需重写。
注意事项
attn与c3k互斥 :attn优先级更高,若同时为 True,则忽略c3k。C3k的默认参数 :在c3k=True时,C3k使用默认e=0.5,会导致其内部隐藏通道减半(c_ = c // 2),可能改变计算量。若需调整,可修改源码。PSABlock的头数 :num_heads = max(self.c // 64, 1),当self.c < 64时头数为 1,可能影响注意力效果。- 通道约束 :
self.c = int(c2 * e)必须为正整数,且C3k内部要求c_为整数。 - 训练与推理差异 :若使用
PSABlock,其内部包含自注意力,训练时需注意学习率和正则化;推理时无特殊操作。 - 与
C2f的兼容性 :接口与C2f相似,但增加了attn和c3k参数,可灵活替换。
优缺点
优点
- 高度灵活:通过简单开关选择不同块类型,适应不同精度/速度需求。
- 组合丰富:可将标准卷积、CSP 扩展和自注意力混合使用,提升表达能力。
- 继承
C2f高效结构:级联梯度流和轻量设计依然保留。 - 即插即用 :与
C2f完全兼容,只需传递额外参数。
缺点
- 参数组合复杂 :
attn和c3k的优先级需明确,容易误用。 C3k的默认设置可能不最优 :e=0.5和k=3固定,若需自定义需修改代码。- 注意力块增加计算开销 :
PSABlock包含自注意力,在高分辨率时显存占用大。 - 所有块类型相同 :不能在同一个
C3k2中混合不同块类型,降低了组合灵活性。
在 YOLOv8 系列中,C3k2 可用于替换 C2f 以提供更多配置选项。建议根据任务需求选择 attn 或 c3k,并在小分辨率特征图(如 16×16)上启用注意力,以获得最佳平衡。
参考文献
1 https://docs.ultralytics.com/
2 https://github.com/ultralytics/ultralytics.git
- 由于本人水平有限,难免出现错漏,敬请批评改正。
- 更多精彩内容,可点击进入Python日常小操作专栏、OpenCV-Python小应用专栏、YOLO系列专栏、自然语言处理专栏、人工智能混合编程实践专栏或我的个人主页查看
- YOLOs-CPP:一个免费开源的YOLO全系列C++推理库(以YOLO26为例)
- PaddleOCR:Win10上安装使用PPOCRLabel标注工具
- 目标检测:使用自己的数据集微调DEIMv2进行物体检测
- 图像分割:PyTorch从零开始实现SegFormer语义分割
- 图像超分:使用自己的数据集微调Real-ESRGAN-x4plus进行超分重建
- 图像生成:PyTorch从零开始实现一个简单的扩散模型
- Stable Diffusion:使用自己的数据集微调 Stable Diffusion 3.5 LoRA 文生图模型
- 图像超分:使用自己的数据集微调Real-ESRGAN-x2plus进行超分重建
- Anomalib:使用Anomalib 2.1.0训练自己的数据集进行异常检测
- Anomalib:在Linux服务器上安装使用Anomalib 2.1.0
- 人工智能混合编程实践:C++调用封装好的DLL进行异常检测推理
- 人工智能混合编程实践:C++调用封装好的DLL进行FP16图像超分重建(v3.0)
- 隔离系统Python:源码编译3.11.8到自定义目录(含PGO性能优化)
- 在线机的Python环境迁移到离线机上
- Nuitka 将 Python 脚本封装为 .pyd 或 .so 文件
- Ultralytics:使用 YOLO11 进行速度估计
- Ultralytics:使用 YOLO11 进行物体追踪
- Ultralytics:使用 YOLO11 进行物体计数
- Ultralytics:使用 YOLO11 进行目标打码
- 人工智能混合编程实践:C++调用Python ONNX进行YOLOv8推理
- 人工智能混合编程实践:C++调用封装好的DLL进行YOLOv8实例分割
- 人工智能混合编程实践:C++调用Python ONNX进行图像超分重建
- 人工智能混合编程实践:C++调用Python AgentOCR进行文本识别
- 通过计算实例简单地理解PatchCore异常检测
- Python将YOLO格式实例分割数据集转换为COCO格式实例分割数据集
- YOLOv8 Ultralytics:使用Ultralytics框架训练RT-DETR实时目标检测模型
- 基于DETR的人脸伪装检测
- YOLOv7训练自己的数据集(口罩检测)
- YOLOv8训练自己的数据集(足球检测)
- YOLOv5:TensorRT加速YOLOv5模型推理
- YOLOv5:IoU、GIoU、DIoU、CIoU、EIoU
- 玩转Jetson Nano(五):TensorRT加速YOLOv5目标检测
- YOLOv5:添加SE、CBAM、CoordAtt、ECA注意力机制
- YOLOv5:yolov5s.yaml配置文件解读、增加小目标检测层
- Python将COCO格式实例分割数据集转换为YOLO格式实例分割数据集
- YOLOv5:使用7.0版本训练自己的实例分割模型(车辆、行人、路标、车道线等实例分割)
- 使用Kaggle GPU资源免费体验Stable Diffusion开源项目
- Stable Diffusion:在服务器上部署使用Stable Diffusion WebUI进行AI绘图(v2.0)
- Stable Diffusion:使用自己的数据集微调训练LoRA模型(v2.0)