
适用版本:HarmonyOS 5.0.0 / HarmonyOS NEXT / HarmonyOS 7 (API 12+)
难度:中级
预计阅读时间:30 分钟
一、动画的本质:为什么需要动效
在用户界面设计中,动画远不止是"让东西动起来"这么简单。它是一个沟通工具,一个叙事媒介,一个情感连接器。当 UI 状态发生变化时,如果没有动画过渡,用户的视觉焦点就会"跳转",这种突兀感会打断用户的思维流,增加认知负担。
ArkUI 的动画系统正是为了解决这个问题而生。它让界面变化从"跳变"变为"渐变",让用户能够:
- 理解变化关系:知道新界面从何而来,旧界面去向何方
- 感知操作反馈:确认自己的操作已被系统接收并处理
- 保持空间连续性:在复杂的界面导航中不迷失方向
- 享受愉悦体验:流畅的动效能带来情感上的积极反馈
但动画也是一把双刃剑。过度设计、时长过长、曲线不自然的动画,不仅不能提升体验,反而会让用户感到烦躁。ArkUI 动画体系的设计哲学是"恰到好处"------提供足够的能力,同时引导开发者遵循性能最佳实践。
二、ArkUI 动画体系全解析
ArkUI 的动画体系可以分为四大类:属性动画 、显式动画 、转场动画 和高级动画(粒子、路径、布局)。理解它们的适用场景和实现方式,是做出好动画的第一步。
2.1 属性动画:声明式与命令式
属性动画是 ArkUI 中最基础的动画类型,通过改变组件的可动画属性值来驱动视觉效果。
实现效果如下:
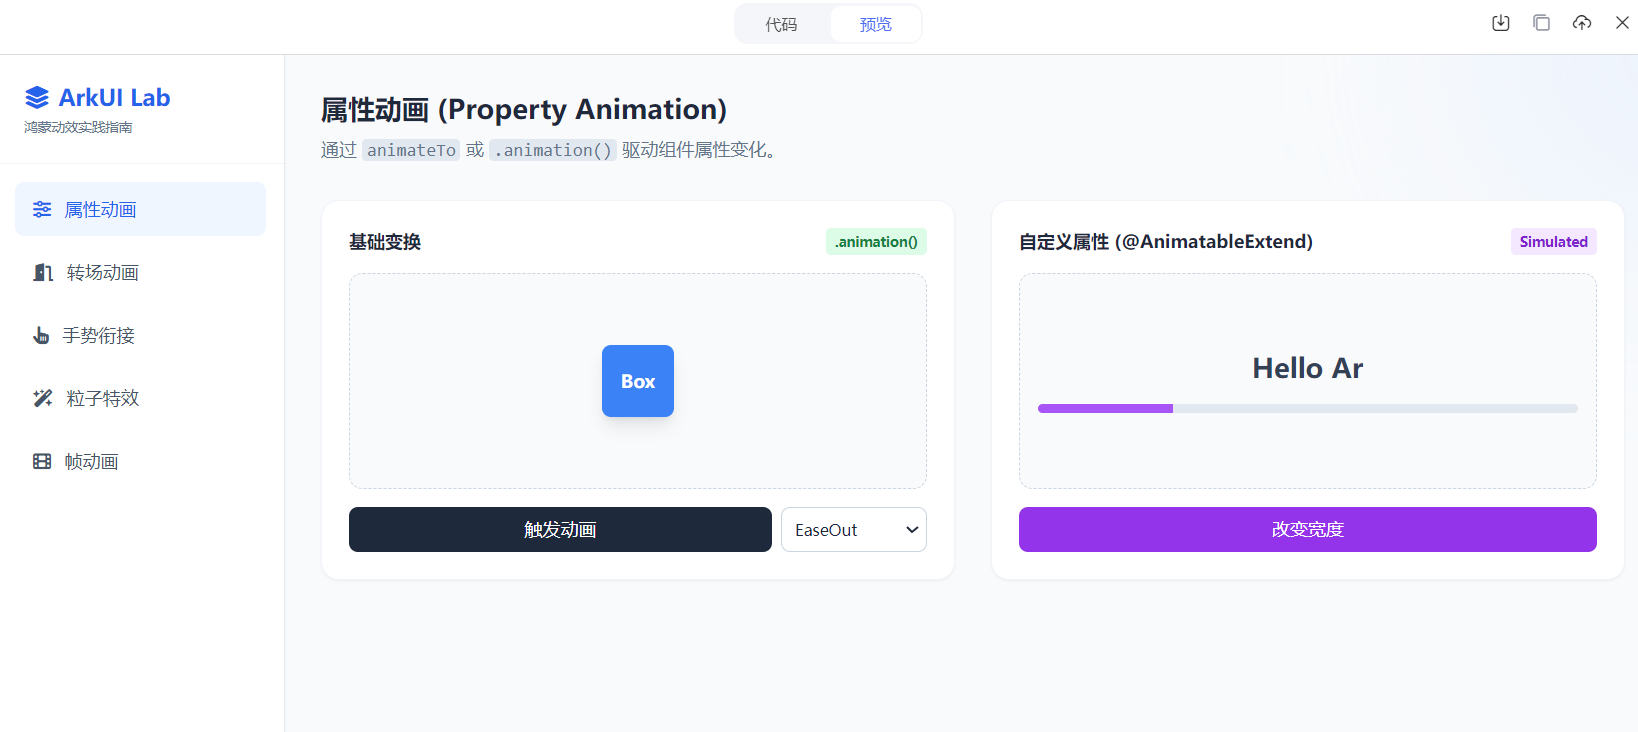
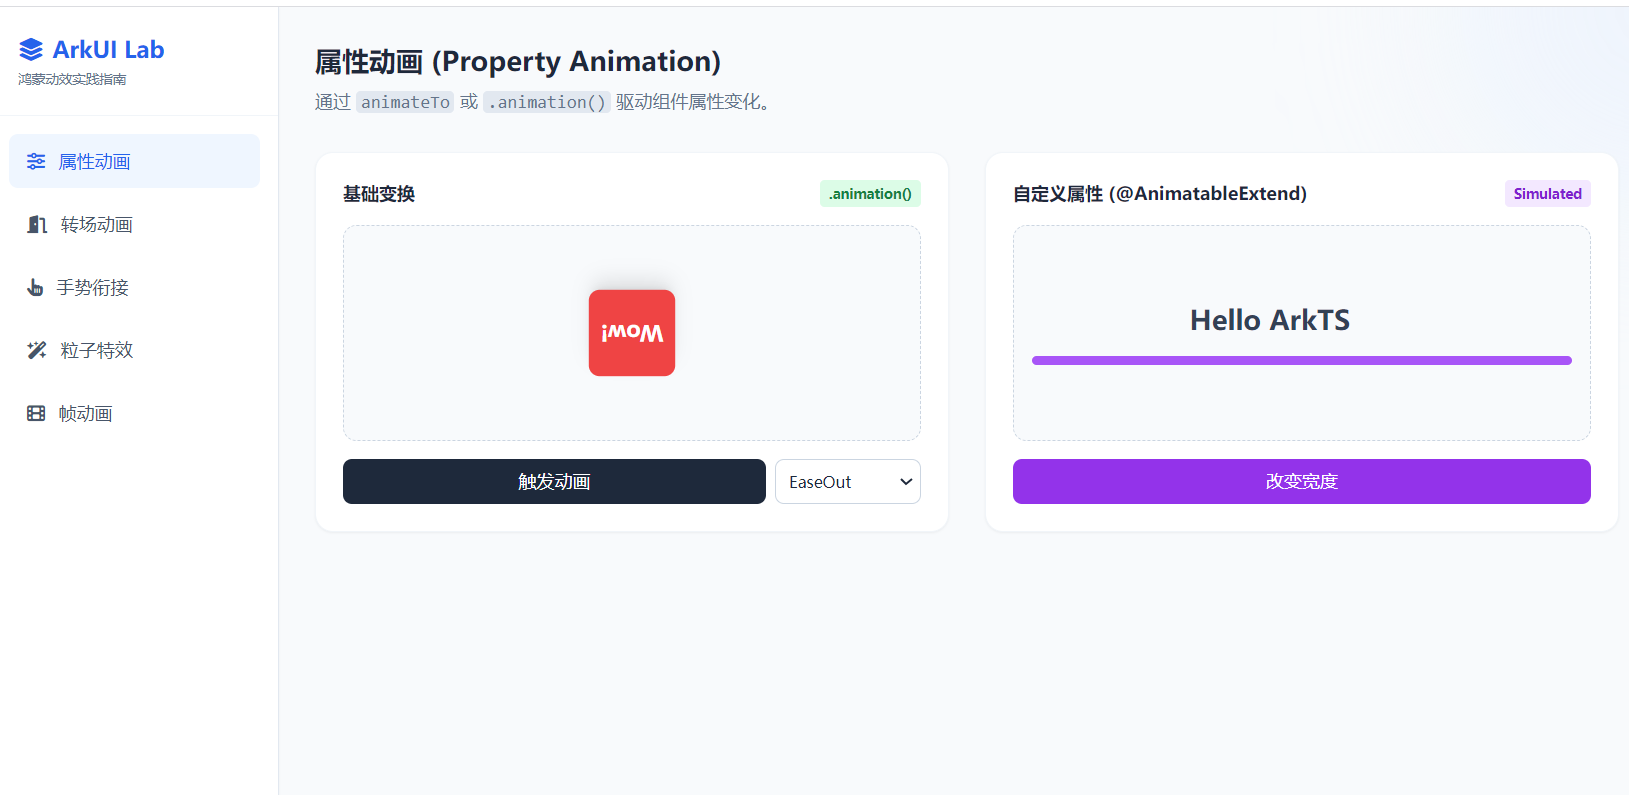
它有两种调用方式:
方式一:.animation() 声明式动画
声明式动画是 ArkUI 推荐的首选方式。你给组件加上 .animation() 修饰器,系统会自动监听修饰器前面所有可动画属性的变化,并自动插入过渡动画。
typescript
@Entry
@Component
struct DeclarativeAnimationPage {
  @State rotateAngle: number = 0;
  @State scaleValue: number = 1;
  @State bgColor: ResourceColor = Color.Blue;

  build() {
    Column({ space: 40 }) {
      Text('声明式动画')
        .fontSize(20)
        .fontWeight(FontWeight.Bold)

      Button('点击旋转')
        .width(120)
        .height(120)
        .backgroundColor(this.bgColor)
        .rotate({ angle: this.rotateAngle })
        .scale({ x: this.scaleValue, y: this.scaleValue })
        // 声明式动画:修饰器前面所有属性的变化都会自动产生动画
        .animation({
          duration: 500,
          curve: Curve.Spring,
          iterations: 1,
          playMode: PlayMode.Normal
        })
        .onClick(() => {
          // 状态变化触发自动动画
          this.rotateAngle += 180;
          this.scaleValue = this.scaleValue === 1 ? 1.2 : 1;
          this.bgColor = this.bgColor === Color.Blue ? Color.Green : Color.Blue;
        })
    }
    .width('100%')
    .height('100%')
    .justifyContent(FlexAlign.Center)
  }
}方式二:animateTo() 显式动画
当你需要在一次状态变化中同时控制多个组件的动画,或者需要在动画前后执行额外逻辑时,使用 animateTo()。
typescript
@Entry
@Component
struct ExplicitAnimationPage {
  @State offsetX: number = 0;
  @State opacityValue: number = 1;
  @State isExpanded: boolean = false;

  build() {
    Column({ space: 40 }) {
      Text('显式动画')
        .fontSize(20)
        .fontWeight(FontWeight.Bold)

      Row() {
        Text('卡片内容')
          .fontSize(16)
          .fontColor(Color.White)
      }
      .width(this.isExpanded ? '90%' : '60%')
      .height(this.isExpanded ? 200 : 100)
      .backgroundColor('#2196F3')
      .borderRadius(16)
      .translate({ x: this.offsetX })
      .opacity(this.opacityValue)

      Button(this.isExpanded ? '收起' : '展开')
        .onClick(() => {
          // animateTo 包裹的状态变化会作为一个整体动画
          animateTo({
            duration: 400,
            curve: Curve.EaseInOut,
            onFinish: () => {
              // 动画结束后的回调
              console.info('展开动画完成');
            }
          }, () => {
            this.isExpanded = !this.isExpanded;
            this.offsetX = this.isExpanded ? 0 : 20;
            this.opacityValue = this.isExpanded ? 1 : 0.8;
          });
        })
    }
    .width('100%')
    .height('100%')
    .justifyContent(FlexAlign.Center)
  }
}
声明式 vs 显式的选择指南:
| 场景 | 推荐方式 | 原因 |
|---|---|---|
| 单个组件的属性变化 | .animation() |
代码更简洁,声明式思维 |
| 多个组件同时动画 | animateTo() |
统一控制,保证同步 |
| 需要动画回调 | animateTo() |
支持 onFinish / onCancel |
| 列表项动画 | .animation() |
与 ForEach 配合更自然 |
| 复杂编排(序列/并行) | animateTo() + async |
可以链式控制 |
2.2 关键帧动画:让变化更细腻
当简单的从 A 到 B 不够用时,关键帧动画让你定义变化路径上的多个中间状态。
typescript
@Entry
@Component
struct KeyframeAnimationPage {
  @State translateX: number = 0;
  @State translateY: number = 0;
  @State rotateAngle: number = 0;

  build() {
    Column({ space: 40 }) {
      Text('关键帧动画')
        .fontSize(20)
        .fontWeight(FontWeight.Bold)

      Circle()
        .width(60)
        .height(60)
        .fill(Color.Orange)
        .translate({ x: this.translateX, y: this.translateY })
        .rotate({ angle: this.rotateAngle })

      Button('播放关键帧动画')
        .onClick(() => {
          // 定义三个关键帧
          this.getUIContext()?.keyframeAnimateTo({
            delay: 0,
            duration: 2000,
            iterations: 1
          }, [
            {
              // 第 0% ~ 33%:向右移动
              duration: 33,
              curve: Curve.EaseIn,
              event: () => {
                this.translateX = 150;
                this.translateY = 0;
                this.rotateAngle = 0;
              }
            },
            {
              // 第 33% ~ 66%:向下移动并旋转
              duration: 33,
              curve: Curve.Linear,
              event: () => {
                this.translateX = 150;
                this.translateY = 150;
                this.rotateAngle = 180;
              }
            },
            {
              // 第 66% ~ 100%:回到原点
              duration: 34,
              curve: Curve.EaseOut,
              event: () => {
                this.translateX = 0;
                this.translateY = 0;
                this.rotateAngle = 360;
              }
            }
          ]);
        })
    }
    .width('100%')
    .height('100%')
    .justifyContent(FlexAlign.Center)
  }
}关键帧动画特别适合路径运动 和多阶段状态转换。比如一个文件从文件夹 A 移动到文件夹 B,中间经过回收站的预览位置。
2.3 转场动画:优雅的入场与退场
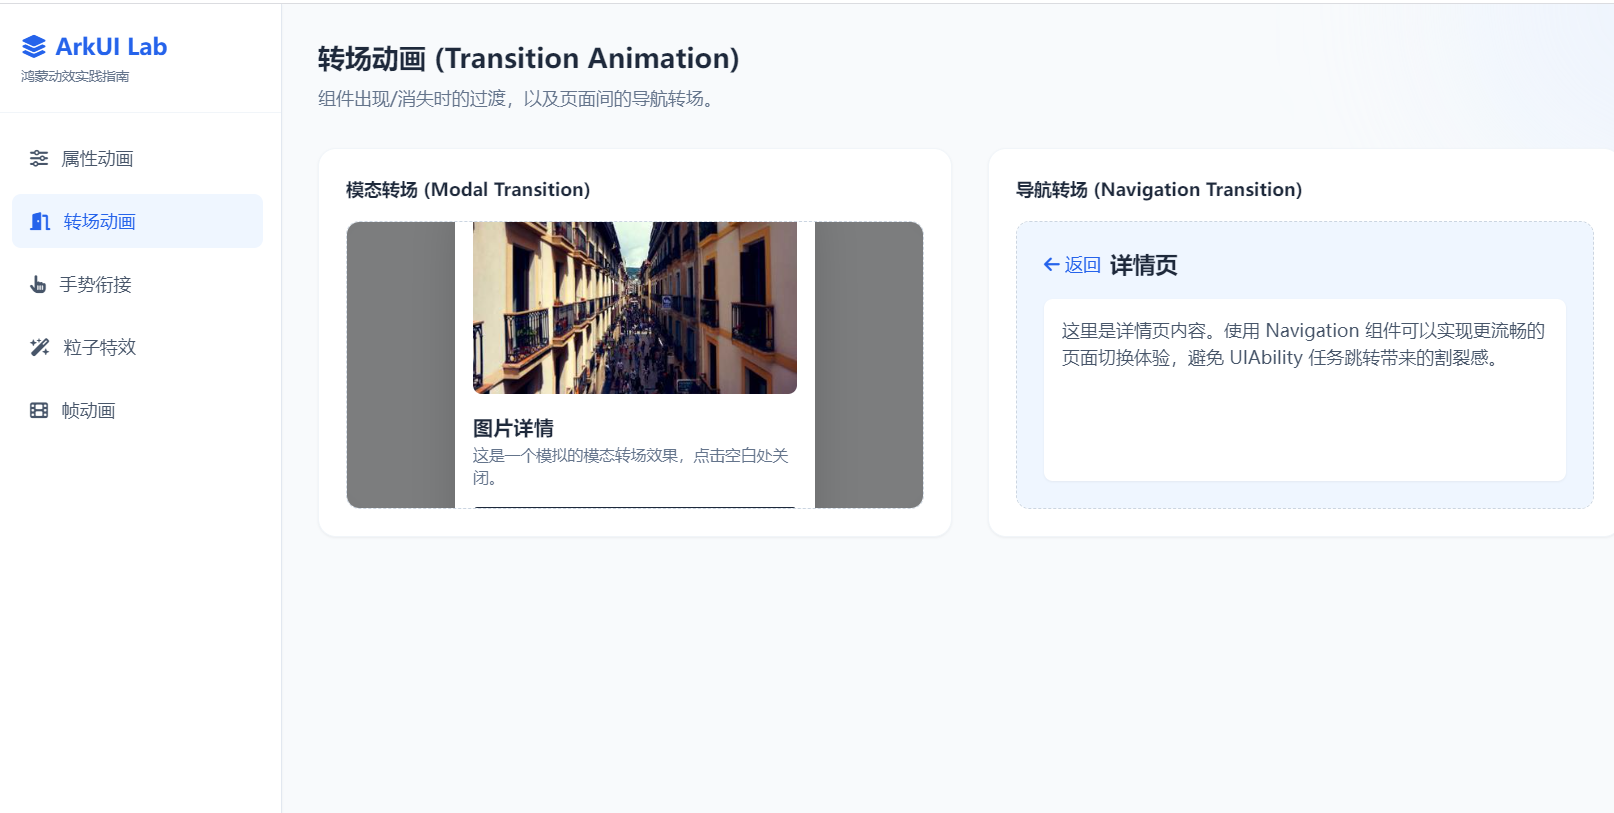
转场动画处理组件的出现 和消失 ,让界面变化有连贯感。ArkUI 提供了多种转场效果:
typescript
@Entry
@Component
struct TransitionPage {
  @State showPanel: boolean = false;

  build() {
    Stack() {
      Column() {
        Text('主页面内容')
          .fontSize(20)
          .margin(20)

        Button('打开面板')
          .onClick(() => {
            this.showPanel = true;
          })
      }
      .width('100%')
      .height('100%')

      if (this.showPanel) {
        Column() {
          Text('这是弹出的面板')
            .fontSize(18)
            .fontColor(Color.White)
            .margin(20)

          Button('关闭')
            .onClick(() => {
              this.showPanel = false;
            })
        }
        .width('80%')
        .height(300)
        .backgroundColor('#333')
        .borderRadius(20)
        // 入场动画:从下方滑入 + 淡入
        .transition(TransitionEffect.asymmetric(
          TransitionEffect.OPACITY.animation({ duration: 300 })
            .combine(TransitionEffect.translate({ y: 300 }).animation({ duration: 400, curve: Curve.EaseOut })),
          // 退场动画:淡出 + 向下滑出
          TransitionEffect.OPACITY.animation({ duration: 200 })
            .combine(TransitionEffect.translate({ y: 100 }).animation({ duration: 300, curve: Curve.EaseIn }))
        ))
      }
    }
    .width('100%')
    .height('100%')
  }
}
内置转场效果速查:
| 效果 | 代码 | 说明 |
|---|---|---|
| 淡入淡出 | TransitionEffect.OPACITY |
透明度变化 |
| 平移 | TransitionEffect.translate({ x: 100 }) |
沿坐标轴移动 |
| 缩放 | TransitionEffect.scale({ x: 0, y: 0 }) |
尺寸变化 |
| 旋转 | TransitionEffect.rotate({ angle: 90 }) |
角度旋转 |
| 滑动 | TransitionEffect.move(TransitionEdge.END) |
从边缘滑入 |
| 组合 | .combine(...) |
多个效果叠加 |
| 非对称 | TransitionEffect.asymmetric(in, out) |
入场和退场不同 |
2.4 共享元素转场:跨页面的视觉连贯
这是转场动画中最高级也最有"高级感"的效果。当用户从列表点击一个项进入详情页时,图片或标题从列表位置"飞"到详情页位置,其他元素依次补位。
typescript
// 列表页面
@Entry
@Component
struct ListPage {
  @State items: Item[] = [
    { id: 1, title: '海洋世界', image: $r('app.media.ocean'), color: '#2196F3' },
    { id: 2, title: '森林探险', image: $r('app.media.forest'), color: '#4CAF50' },
    { id: 3, title: '沙漠之旅', image: $r('app.media.desert'), color: '#FF9800' }
  ];

  build() {
    Column() {
      Text('共享元素转场')
        .fontSize(24)
        .fontWeight(FontWeight.Bold)
        .margin(20)

      List({ space: 16 }) {
        ForEach(this.items, (item: Item) => {
          ListItem() {
            Row({ space: 16 }) {
              Image(item.image)
                .width(80)
                .height(80)
                .borderRadius(12)
                // 共享元素标识:id 必须唯一
                .sharedTransition(`image_${item.id}`, {
                  duration: 500,
                  curve: Curve.EaseInOut,
                  type: SharedTransitionEffectType.STATIC
                })

              Column({ space: 8 }) {
                Text(item.title)
                  .fontSize(18)
                  .fontWeight(FontWeight.Bold)
                  .sharedTransition(`title_${item.id}`, {
                    duration: 400,
                    curve: Curve.EaseOut
                  })

                Text('点击查看详情')
                  .fontSize(14)
                  .fontColor('#999')
              }
              .alignItems(HorizontalAlign.Start)
              .layoutWeight(1)
            }
            .width('100%')
            .padding(16)
            .backgroundColor(Color.White)
            .borderRadius(16)
            .shadow({ radius: 8, color: 'rgba(0,0,0,0.08)', offsetY: 4 })
          }
          .onClick(() => {
            router.pushUrl({
              url: 'pages/DetailPage',
              params: item
            });
          })
        })
      }
      .padding(16)
      .layoutWeight(1)
    }
    .width('100%')
    .height('100%')
    .backgroundColor('#f5f5f5')
  }
}

// 详情页面
@Entry
@Component
struct DetailPage {
  @State item: Item = router.getParams() as Item;

  build() {
    Column() {
      Image(this.item.image)
        .width('100%')
        .height(300)
        .objectFit(ImageFit.Cover)
        // 共享元素标识必须与列表页一致
        .sharedTransition(`image_${this.item.id}`, {
          duration: 500,
          curve: Curve.EaseInOut,
          type: SharedTransitionEffectType.STATIC
        })

      Column({ space: 16 }) {
        Text(this.item.title)
          .fontSize(28)
          .fontWeight(FontWeight.Bold)
          .sharedTransition(`title_${this.item.id}`, {
            duration: 400,
            curve: Curve.EaseOut
          })

        Text('这里是详细内容描述...')
          .fontSize(16)
          .fontColor('#666')
          .lineHeight(24)
      }
      .padding(24)
      .alignItems(HorizontalAlign.Start)

      Button('返回')
        .onClick(() => {
          router.back();
        })
    }
    .width('100%')
    .height('100%')
    .backgroundColor(Color.White)
  }
}
共享元素转场的核心规则:
- 两端 ID 必须完全一致。 列表页的
.sharedTransition('image_1')和详情页的.sharedTransition('image_1')是配对关系。 - 过渡类型选择:
STATIC:元素本身直接飞过去(适合图片)EXCHANGE:原位置和目标位置的元素交换(适合两个不同元素间的过渡)
- 不要给太多元素加共享转场。 通常 1-2 个核心元素(图片 + 标题)就够了,多了会显得杂乱。
2.5 布局动画:让界面重排更自然
当列表插入、删除或重新排序时,默认情况下元素会"闪现"到新位置。布局动画让这种变化有平滑的过渡。
typescript
@Entry
@Component
struct LayoutAnimationPage {
  @State items: string[] = ['项目 A', '项目 B', '项目 C', '项目 D'];

  build() {
    Column({ space: 20 }) {
      Text('布局动画')
        .fontSize(20)
        .fontWeight(FontWeight.Bold)

      Row({ space: 12 }) {
        Button('添加')
          .onClick(() => {
            const newItem = `项目 ${String.fromCharCode(65 + this.items.length)}`;
            // 直接修改数组,布局动画自动处理插入效果
            this.items.splice(1, 0, newItem);
            this.items = [...this.items];
          })

        Button('删除')
          .onClick(() => {
            if (this.items.length > 0) {
              this.items.shift();
              this.items = [...this.items];
            }
          })

        Button('打乱')
          .onClick(() => {
            this.items = this.shuffleArray([...this.items]);
          })
      }

      List({ space: 12 }) {
        ForEach(this.items, (item: string, index: number) => {
          ListItem() {
            Row() {
              Text(item)
                .fontSize(16)
                .layoutWeight(1)

              Button('×')
                .width(32)
                .height(32)
                .fontSize(14)
                .backgroundColor('#ff4444')
                .onClick(() => {
                  this.items.splice(index, 1);
                  this.items = [...this.items];
                })
            }
            .width('100%')
            .height(56)
            .padding({ left: 16, right: 16 })
            .backgroundColor('#f0f0f0')
            .borderRadius(12)
          }
          // 列表项布局动画:插入和删除时自动产生过渡
          .transition(TransitionEffect.asymmetric(
            TransitionEffect.OPACITY
              .combine(TransitionEffect.translate({ x: -50 })),
            TransitionEffect.OPACITY
              .combine(TransitionEffect.translate({ x: 50 }))
          ))
        })
      }
      .padding(16)
      .layoutWeight(1)
    }
    .width('100%')
    .height('100%')
    .padding(16)
  }

  private shuffleArray(array: string[]): string[] {
    for (let i = array.length - 1; i > 0; i--) {
      const j = Math.floor(Math.random() * (i + 1));
      [array[i], array[j]] = [array[j], array[i]];
    }
    return array;
  }
}
布局动画的触发条件:
ForEach数据变化(增删改)if/else条件渲染变化visibility属性变化- 组件尺寸变化导致的布局重排
2.6 手势与动画的完美衔接
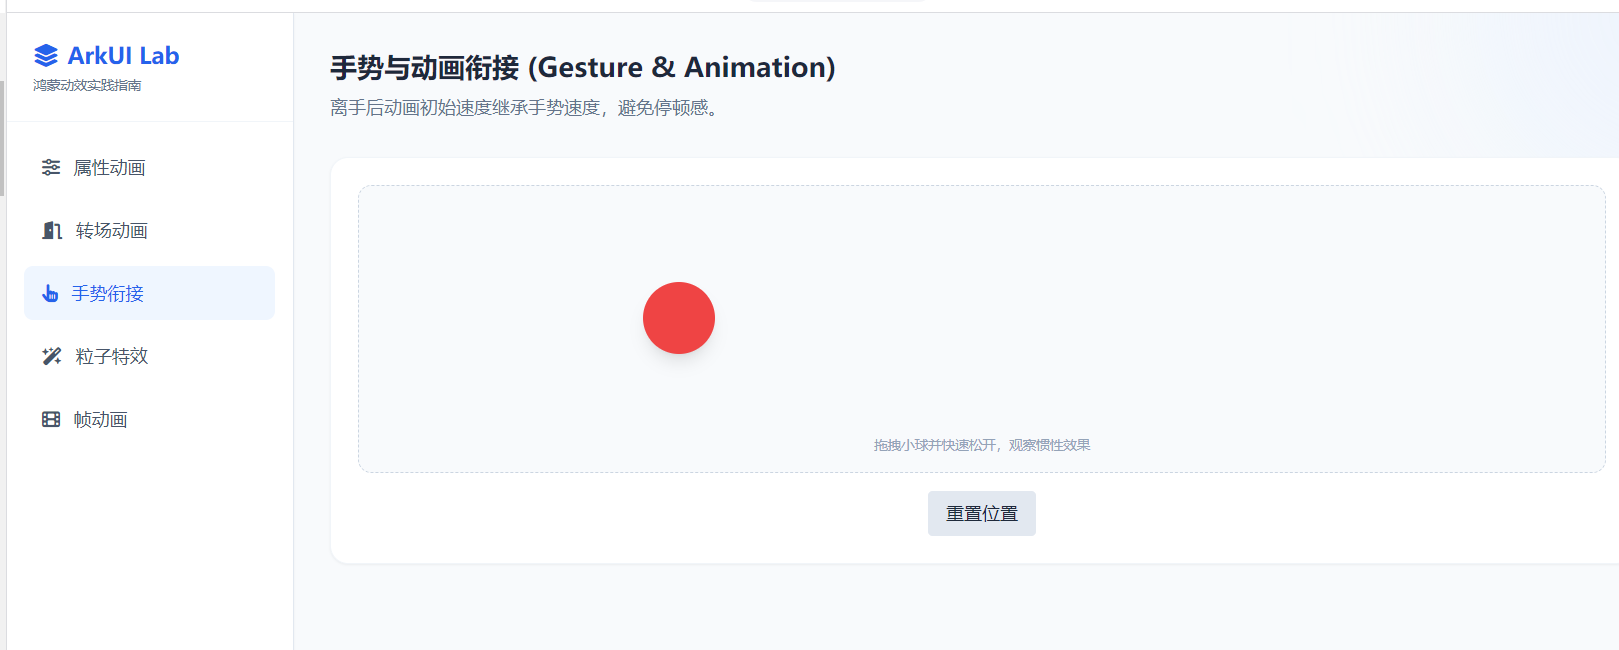
真正流畅的交互体验,需要手势操作与动画的无缝衔接。最关键的技术点是速度继承 ------手势松开的瞬间,动画应该以手势的速度作为初速度继续运动。
typescript
@Entry
@Component
struct GestureAnimationPage {
  @State offsetX: number = 0;
  @State offsetY: number = 0;
  private velocityX: number = 0;
  private velocityY: number = 0;
  private startX: number = 0;
  private startY: number = 0;

  build() {
    Stack() {
      // 背景参考线
      Column()
        .width('100%')
        .height('100%')
        .backgroundColor('#f5f5f5')

      // 可拖拽的卡片
      Column() {
        Text('拖拽我')
          .fontSize(16)
          .fontColor(Color.White)

        Text('松手后带有惯性')
          .fontSize(12)
          .fontColor('rgba(255,255,255,0.7)')
      }
      .width(150)
      .height(150)
      .backgroundColor('#2196F3')
      .borderRadius(20)
      .shadow({ radius: 16, color: 'rgba(33,150,243,0.3)', offsetY: 8 })
      .translate({ x: this.offsetX, y: this.offsetY })
      .gesture(
        PanGesture({ direction: PanDirection.All })
          .onActionStart(() => {
            // 记录起始位置
            this.startX = this.offsetX;
            this.startY = this.offsetY;
          })
          .onActionUpdate((event: GestureEvent) => {
            // 实时跟随手指
            this.offsetX = this.startX + event.offsetX;
            this.offsetY = this.startY + event.offsetY;
            // 记录当前速度(用于离手时的惯性计算)
            this.velocityX = event.velocityX;
            this.velocityY = event.velocityY;
          })
          .onActionEnd(() => {
            // 手势结束:计算带有惯性的目标位置
            const deceleration = 0.998; // 减速度系数
            const time = 500; // 惯性滑行时间(ms)

            // 简化的惯性位移计算
            const momentumX = (this.velocityX * time * 0.5) / 1000;
            const momentumY = (this.velocityY * time * 0.5) / 1000;

            // 边界限制(不能拖出屏幕)
            const screenWidth = display.getDefaultDisplaySync().width;
            const screenHeight = display.getDefaultDisplaySync().height;
            let targetX = this.offsetX + momentumX;
            let targetY = this.offsetY + momentumY;

            // 吸附边界
            if (targetX < -screenWidth / 2 + 75) targetX = -screenWidth / 2 + 75;
            if (targetX > screenWidth / 2 - 75) targetX = screenWidth / 2 - 75;
            if (targetY < -screenHeight / 2 + 75) targetY = -screenHeight / 2 + 75;
            if (targetY > screenHeight / 2 - 75) targetY = screenHeight / 2 - 75;

            // 使用摩擦力曲线实现自然的减速效果
            animateTo({
              duration: time,
              curve: Curve.Friction,
              onFinish: () => {
                // 可以在这里添加吸附到最近边缘的逻辑
              }
            }, () => {
              this.offsetX = targetX;
              this.offsetY = targetY;
            });
          })
      )
    }
    .width('100%')
    .height('100%')
  }
}
手势动画的三层体验:
- 跟手阶段(onActionUpdate):组件严格跟随手指,零延迟,让用户感到"这个物体是被我抓着的"。
- 离手阶段(onActionEnd) :根据速度计算惯性位移,使用
Curve.Friction或Curve.Spring模拟物理减速。 - 归位阶段(onFinish):可选的吸附效果,比如卡片自动贴到最近的屏幕边缘。
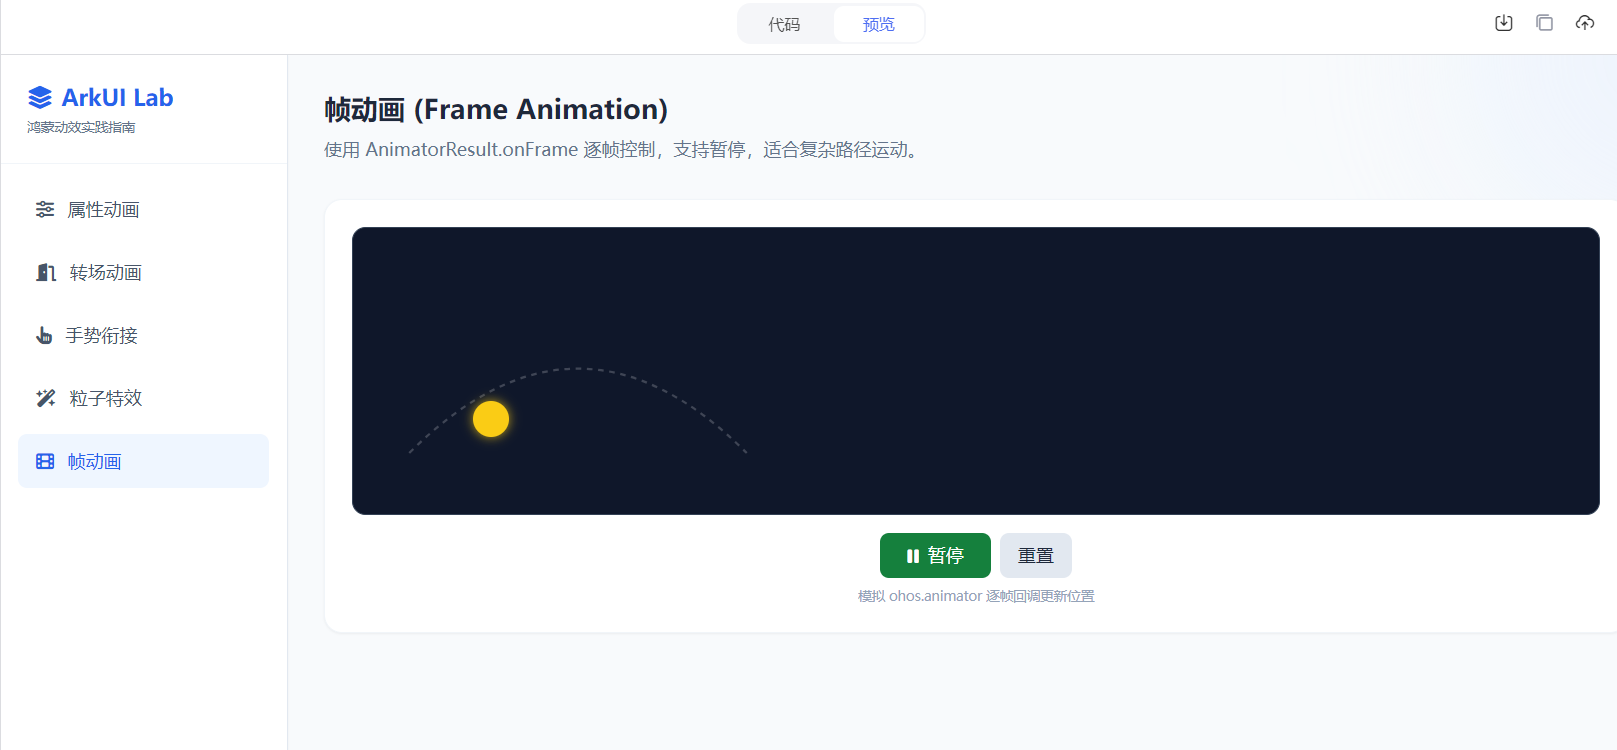
2.7 路径动画:沿着曲线运动
当元素需要沿复杂轨迹运动时,路径动画是最佳选择。
typescript
@Entry
@Component
struct PathAnimationPage {
  @State progress: number = 0;
  private path: Path = new Path();

  aboutToAppear() {
    // 定义一个贝塞尔曲线路径
    this.path.moveTo(50, 300);
    this.path.cubicTo(150, 100, 350, 500, 450, 300);
    this.path.cubicTo(550, 100, 750, 500, 850, 300);
  }

  build() {
    Column({ space: 20 }) {
      Text('路径动画')
        .fontSize(20)
        .fontWeight(FontWeight.Bold)

      Stack() {
        // 绘制路径参考线
        Shape() {
          Path({ commands: this.path.commands })
            .stroke('#ddd')
            .strokeWidth(2)
            .fill('none')
        }
        .width('100%')
        .height(400)

        // 沿路径运动的元素
        Circle()
          .width(24)
          .height(24)
          .fill(Color.Orange)
          // 使用路径动画
          .motionPath({
            path: this.path,
            from: 0,
            to: 1,
            rotatable: true // 元素随路径方向旋转
          })
          .translate({
            x: this.progress * 800,
            y: 0
          })
      }
      .width('100%')
      .height(400)

      Row({ space: 16 }) {
        Button('播放')
          .onClick(() => {
            animateTo({
              duration: 3000,
              curve: Curve.EaseInOut,
              iterations: -1, // 无限循环
              playMode: PlayMode.Alternate // 往返播放
            }, () => {
              this.progress = 1;
            });
          })

        Button('暂停')
          .onClick(() => {
            this.progress = 0;
          })
      }
    }
    .width('100%')
    .height('100%')
    .padding(16)
  }
}
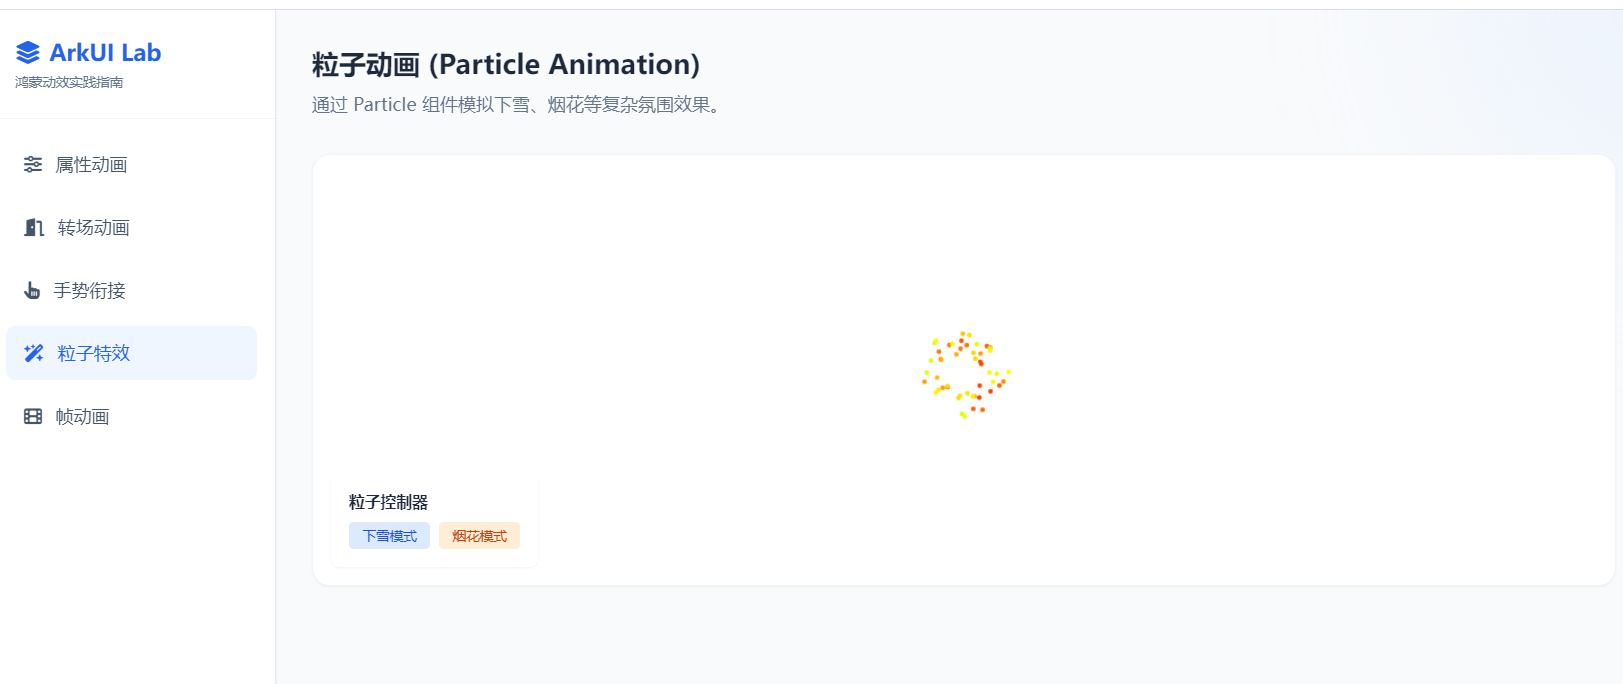
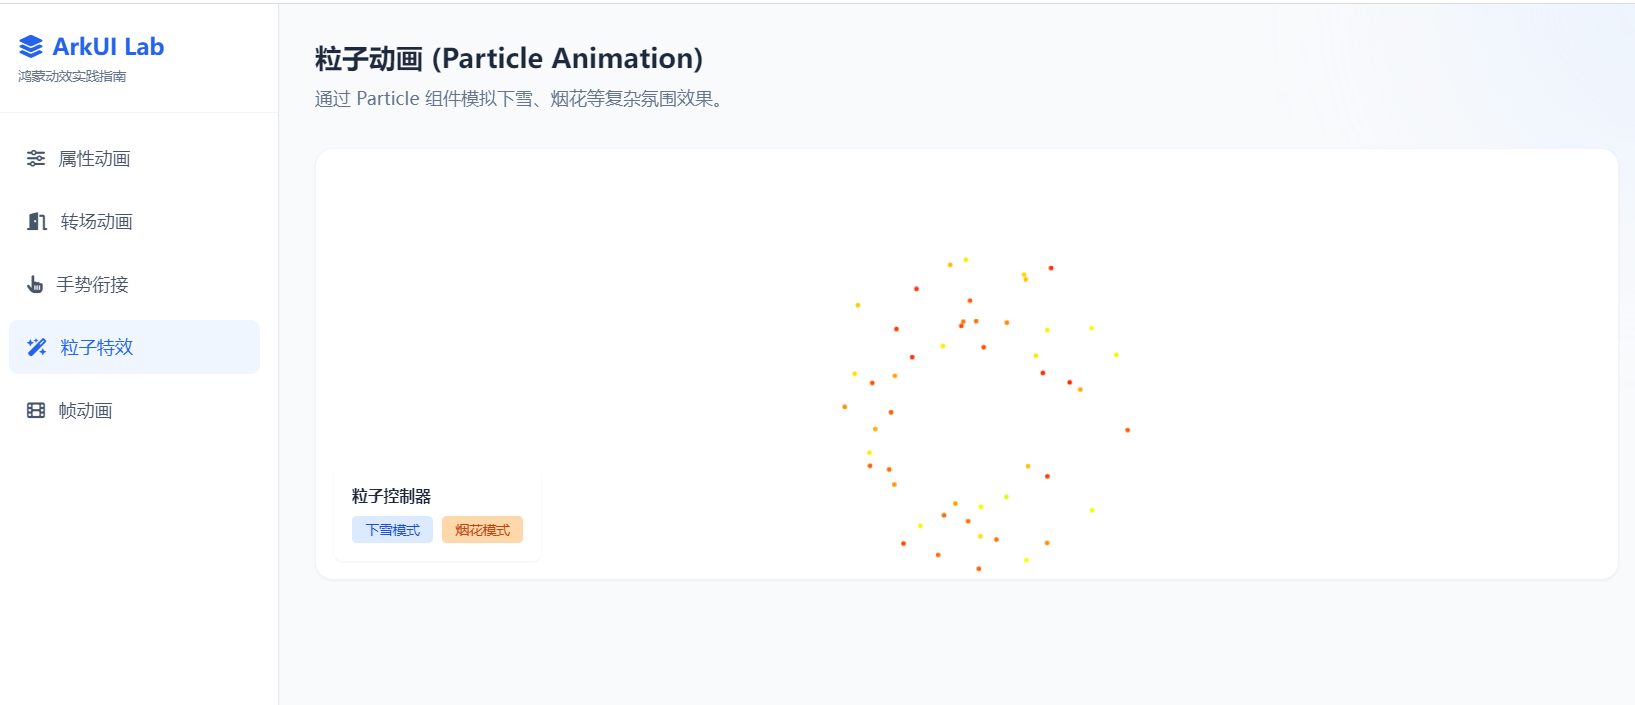
2.8 粒子动画:营造氛围
粒子动画不是必需品,但它是提升应用质感的"秘密武器"。ArkUI 提供了 Particle 组件,不需要手动用 Canvas 实现。
typescript
@Entry
@Component
struct ParticlePage {
  @State isSnowing: boolean = true;

  build() {
    Stack() {
      // 背景内容
      Column() {
        Text('粒子动画')
          .fontSize(20)
          .fontWeight(FontWeight.Bold)
          .fontColor(Color.White)

        Text('下雪效果')
          .fontSize(14)
          .fontColor('rgba(255,255,255,0.7)')
      }
      .width('100%')
      .height('100%')
      .backgroundColor('#1a1a2e')
      .justifyContent(FlexAlign.Center)

      // 粒子层
      if (this.isSnowing) {
        Particle({
          particles: [
            {
              emitter: {
                particle: {
                  type: ParticleType.POINT,
                  config: {
                    radius: 3
                  }
                },
                emitRate: 50, // 每秒发射50个粒子
                position: { x: 0, y: -50 },
                size: { width: '100%', height: 50 }
              },
              color: {
                range: ['#ffffff', '#e0e0ff'],
                updater: {
                  type: ParticleUpdater.CURVE,
                  config: [
                    { from: 0, to: 1, startColor: '#ffffff', endColor: '#a0a0ff' }
                  ]
                }
              },
              // 生命周期和下落轨迹
              lifetime: { range: [3000, 5000] }, // 存活3-5秒
              velocity: {
                range: [{ x: -20, y: 50 }, { x: 20, y: 150 }], // 随机下落速度
                updater: {
                  type: ParticleUpdater.RANDOM
                }
              },
              // 风力影响
              acceleration: {
                range: [{ x: -5, y: 0 }, { x: 5, y: 10 }]
              },
              opacity: {
                range: [0.6, 1.0],
                updater: {
                  type: ParticleUpdater.CURVE,
                  config: [
                    { from: 0, to: 0.8, startOpacity: 1.0, endOpacity: 0.8 },
                    { from: 0.8, to: 1, startOpacity: 0.8, endOpacity: 0 }
                  ]
                }
              }
            }
          ]
        })
        .width('100%')
        .height('100%')
        .hitTestBehavior(HitTestMode.None) // 粒子不阻挡点击
      }

      // 控制按钮
      Button(this.isSnowing ? '停止下雪' : '开始下雪')
        .position({ x: '50%', y: '80%' })
        .translate({ x: '-50%' })
        .onClick(() => {
          this.isSnowing = !this.isSnowing;
        })
    }
    .width('100%')
    .height('100%')
  }
}
粒子动画的性能建议:
- 移动端粒子数量控制在 100 个以内 ,低端设备建议 50 个以内
- 使用
hitTestBehavior(HitTestMode.None)避免粒子层阻挡用户点击 - 页面不可见时(
onPageHide)暂停粒子渲染,节省 GPU 资源 - 不要在整个页面背景铺满粒子,只在特定区域使用
三、动画曲线:动效的灵魂
如果说动画时长决定了"变化多久",那么动画曲线就决定了"如何变化"。同样的 300ms,用 Curve.Linear 和 Curve.Spring 是完全不同的感受。
3.1 内置曲线类型
| 曲线 | 特点 | 适用场景 |
|---|---|---|
Curve.Linear |
匀速运动 | 进度条、机械运动、循环动画 |
Curve.Ease |
默认缓动,轻微加速后减速 | 通用过渡,不知道用什么时选它 |
Curve.EaseIn |
慢速启动,快速结束 | 元素消失、离开视图 |
Curve.EaseOut |
快速启动,慢速结束 | 元素出现、进入视图 |
Curve.EaseInOut |
两端慢,中间快 | 对称的视图切换 |
Curve.FastOutSlowIn |
快速出、慢速入 | Material Design 标准曲线 |
Curve.Spring |
弹簧回弹效果 | 按钮反馈、手势释放、物理感交互 |
Curve.Friction |
摩擦力减速 | 惯性滑动、滚动停止 |
3.2 弹簧曲线:让动画有"生命"
弹簧曲线是 2026 年 ArkUI 动画中最值得深入理解的曲线类型。它不是简单的数学函数,而是模拟真实弹簧的物理模型。
typescript
// 基础弹簧
.animation({
  duration: 500,
  curve: Curve.Spring
})

// 精细控制的弹簧(HarmonyOS 5.0+)
.animation({
  duration: 1000,
  curve: curves.interpolatingSpring(
    0,    // 初始速度
    1,    // 质量
    300,  // 刚度(stiffness):值越大,弹簧越硬,回弹越快
    30    // 阻尼(damping):值越大,回弹次数越少
  )
})
弹簧参数调优指南:
| 参数组合 | 视觉感受 | 适用场景 |
|---|---|---|
| stiffness: 300, damping: 30 | 柔和回弹 | 列表项展开、卡片弹出 |
| stiffness: 500, damping: 20 | 弹性明显 | 按钮按压反馈、点赞动画 |
| stiffness: 800, damping: 15 | 快速干脆 | 开关切换、删除确认 |
| stiffness: 150, damping: 50 | 几乎没有回弹 | 需要稳重感的金融类应用 |
3.3 自定义贝塞尔曲线
当内置曲线不能满足需求时,可以用贝塞尔曲线精确定义速度变化。
typescript
import { curves } from '@kit.ArkUI';

// 创建自定义三次贝塞尔曲线
const customCurve = curves.cubicBezierCurve(0.68, -0.55, 0.265, 1.55);

animateTo({
  duration: 600,
  curve: customCurve
}, () => {
  this.targetScale = 1.5;
});
常用贝塞尔曲线值速查:
| 效果 | 贝塞尔值 | 说明 |
|---|---|---|
| 弹性回弹 | (0.68, -0.55, 0.265, 1.55) |
Overshoot 后回弹 |
| 快速进入 | (0.0, 0.0, 0.2, 1.0) |
Material Design 标准 |
| 快速退出 | (0.4, 0.0, 1.0, 1.0) |
Material Design 标准 |
| 戏剧性 | (0.87, 0.0, 0.13, 1.0) |
非常慢的启动和结束 |
四、性能优化实战技巧
动画是最容易让应用变卡的地方。一个 60fps 的流畅动画和一个 30fps 的卡顿动画,用户能立刻感受到差别。
4.1 GPU 加速 vs CPU 渲染
ArkUI 的动画属性分为两类:GPU 加速属性 和可能触发重排属性。
typescript
// ✅ 优先使用这些属性做动画(GPU 加速,性能最好)
.opacity()        // 透明度变化
.scale()          // 缩放
.rotate()         // 旋转
.translate()      // 位移
.transform()      // 综合变换矩阵

// ⚠️ 谨慎使用这些属性(可能触发 CPU 重排/重绘)
.width()          // 宽度变化
.height()         // 高度变化
.backgroundColor() // 背景色(某些情况下会触发重绘)
.padding()        // 内边距
.margin()         // 外边距
.borderRadius()   // 圆角
实战技巧: 如果你需要改变宽度/高度,优先考虑用 scale 模拟,或者用 layoutWeight 配合布局动画让系统处理过渡,而不是直接动画化 width/height。
4.2 避免动画性能陷阱
typescript
// ❌ 错误:每帧都创建新对象,触发深度比较
@State items: string[] = [];

animateTo({ duration: 1000 }, () => {
  // 每次创建新数组,ArkUI 需要重新比较整个数组
  this.items = [...this.items, 'new item'];
});

// ✅ 正确:直接修改数组,ArkUI 只处理变化的部分
animateTo({ duration: 1000 }, () => {
  this.items.push('new item');
});
typescript
// ❌ 错误:多个独立的动画,可能不同步
animateTo({ duration: 300 }, () => { this.opacityValue = 0.5; });
animateTo({ duration: 300 }, () => { this.scaleValue = 1.2; });

// ✅ 正确:合并为一个动画
animateTo({ duration: 300 }, () => {
  this.opacityValue = 0.5;
  this.scaleValue = 1.2;
});
4.3 列表动画优化
列表是最容易出现动画性能问题的场景。以下是几个关键优化点:
typescript
List({ space: 12 }) {
  ForEach(this.items, (item: Item) => {
    ListItem() {
      ItemCard({ data: item })
    }
    // 1. 为列表项添加独立的布局动画
    .transition(TransitionEffect.asymmetric(
      TransitionEffect.opacity(0).combine(TransitionEffect.translate({ y: 30 })),
      TransitionEffect.opacity(0).combine(TransitionEffect.translate({ y: -30 }))
    ))
    // 2. 启用懒加载,只渲染可视区域
    .lazyLoad(true)
  })
}
// 3. 设置预加载缓冲区,避免滑动时白屏
.cachedCount(5)
// 4. 启用列表项复用
.reuseId((item: Item) => item.type)
4.4 动画编排:序列与并行
复杂动画场景需要精确的顺序控制。
typescript
async function playIntroSequence(): Promise<void> {
  // 阶段1:Logo 淡入 + 放大
  await animateTo({ duration: 600, curve: Curve.EaseOut }, () => {
    this.logoOpacity = 1;
    this.logoScale = 1;
  });

  // 阶段2:Logo 上移,为标题腾出空间
  await animateTo({ duration: 400, curve: Curve.EaseInOut }, () => {
    this.logoTranslateY = -80;
  });

  // 阶段3:标题和按钮依次出现
  animateTo({ duration: 300, curve: Curve.EaseOut }, () => {
    this.titleOpacity = 1;
    this.titleTranslateY = 0;
  });

  // 阶段4:按钮延迟 100ms 后出现
  await new Promise(resolve => setTimeout(resolve, 100));
  animateTo({ duration: 300, curve: Curve.Spring }, () => {
    this.buttonOpacity = 1;
    this.buttonScale = 1;
  });
}
五、实际项目中的动画策略
5.1 建立动画设计规范
团队协作时,统一的动画规范能显著提升产品一致性。
yaml
# animation-guidelines.yaml(团队动画规范示例)
全局时长:
  微交互反馈: 150ms   # 按钮点击、开关切换
  状态过渡: 300ms     # 页面内状态变化
  视图转场: 400ms     # 页面间导航
  强调动效: 500ms     # 成就解锁、重要提示
  复杂序列: 800ms     # 引导页、 onboarding

曲线规范:
  元素出现: Curve.EaseOut      # 轻盈地进入
  元素消失: Curve.EaseIn       # 快速地离开
  视图切换: Curve.FastOutSlowIn # 自然的过渡
  手势反馈: Curve.Spring        # 物理感的回弹
  惯性滑动: Curve.Friction      # 自然的减速

性能分级:
  高端设备: 完整动效 + 粒子 + 模糊
  中端设备: 标准动效,关闭粒子
  低端设备: 仅保留必要反馈动画,时长缩短 30%
5.2 设备性能自适应
typescript
import { deviceInfo } from '@kit.BasicServicesKit';

class AnimationConfig {
  static getConfig(): AnimationProfile {
    const totalRAM = deviceInfo.getTotalMemory(); // 单位:字节
    const isLowEnd = totalRAM < 4 * 1024 * 1024 * 1024; // 4GB 以下

    if (isLowEnd) {
      return {
        enableParticles: false,
        enableBlur: false,
        defaultDuration: 200,      // 缩短时长
        enableSharedTransition: false, // 关闭复杂的共享转场
        listCacheCount: 3
      };
    }

    return {
      enableParticles: true,
      enableBlur: true,
      defaultDuration: 300,
      enableSharedTransition: true,
      listCacheCount: 8
    };
  }
}

interface AnimationProfile {
  enableParticles: boolean;
  enableBlur: boolean;
  defaultDuration: number;
  enableSharedTransition: boolean;
  listCacheCount: number;
}
5.3 无障碍访问:尊重用户的选择
typescript
import { accessibility } from '@kit.AccessibilityKit';

@Entry
@Component
struct AccessibleAnimationPage {
  @State reduceMotion: boolean = false;

  aboutToAppear() {
    // 检查用户是否开启了"减少动态效果"
    this.reduceMotion = accessibility.isReduceMotionEnabled();
  }

  private getAnimationConfig(): { duration: number; curve: Curve } {
    if (this.reduceMotion) {
      // 用户偏好减少动画:立即完成或极短时长
      return { duration: 50, curve: Curve.Linear };
    }
    return { duration: 300, curve: Curve.Spring };
  }

  build() {
    Column() {
      Button('执行动画')
        .onClick(() => {
          const config = this.getAnimationConfig();
          animateTo({
            duration: config.duration,
            curve: config.curve
          }, () => {
            this.targetState = !this.targetState;
          });
        })
    }
    .width('100%')
    .height('100%')
    .justifyContent(FlexAlign.Center)
  }
}
六、调试与测试
6.1 DevEco Studio 动画调试工具
DevEco Studio 提供了动画调试能力,可以实时查看动画的帧率和执行状态。
typescript
// 开发模式下启用动画调试信息
const DEBUG_ANIMATION = true;

@Component
struct AnimationDebugger {
  @State fps: number = 60;
  private frameCount: number = 0;
  private lastTime: number = Date.now();

  build() {
    Column() {
      // 你的正常 UI
      MainContent();

      // 调试浮层(仅在 DEBUG 模式显示)
      if (DEBUG_ANIMATION) {
        this.DebugOverlay();
      }
    }
  }

  @Builder
  DebugOverlay() {
    Column({ space: 4 }) {
      Text(`FPS: ${this.fps}`)
        .fontColor(this.fps < 55 ? '#ff4444' : '#44ff44')
        .fontSize(12)
      Text('动画调试')
        .fontColor('#999')
        .fontSize(10)
    }
    .position({ x: 12, y: 12 })
    .padding(8)
    .backgroundColor('rgba(0,0,0,0.7)')
    .borderRadius(4)
  }

  updateFrameStats() {
    this.frameCount++;
    const now = Date.now();
    if (now - this.lastTime >= 1000) {
      this.fps = this.frameCount;
      this.frameCount = 0;
      this.lastTime = now;
    }
  }
}
调试 checklist:
- 所有动画在 60fps 下流畅运行(帧率不低于 55fps)
- 低端设备上动画有降级策略
- 用户开启"减少动态效果"时动画被正确简化
- 页面不可见时(onPageHide)动画已暂停
- 手势动画有速度继承,不突兀
- 共享元素转场两端 ID 一致,无闪烁
6.2 动画自动化测试
typescript
import { describe, it, expect } from '@ohos/hypium';

describe('AnimationTests', () => {
  it('shouldCompleteWithinDuration', async () => {
    const duration = 300;
    const startTime = Date.now();

    await new Promise<void>((resolve) => {
      animateTo({
        duration: duration,
        onFinish: () => resolve()
      }, () => {
        // 测试状态变化
        AppStorage.set('testAnimValue', 100);
      });
    });

    const elapsed = Date.now() - startTime;
    // 允许 15% 的误差(系统调度误差)
    expect(elapsed).assertLargerOrEqual(duration * 0.85);
    expect(elapsed).assertLessOrEqual(duration * 1.15);
  });

  it('shouldUpdateStateCorrectly', () => {
    let currentValue = 0;

    animateTo({ duration: 100 }, () => {
      currentValue = 50;
    });

    // 动画是异步的,立即检查值应该是最终值
    //(ArkUI 的 animateTo 会立即应用状态变更,动画是视觉过渡)
    expect(currentValue).assertEqual(50);
  });
});
七、总结:动画设计哲学
通过本文的实践,可以总结出 ArkUI 动画设计的五个核心原则:
一致性原则
同一应用内的动画应该保持一致的时长、曲线和风格。用户会形成肌肉记忆,一致的动画模式能降低学习成本。
功能性原则
每个动画都应该有明确的目的:是引导注意力?是提供反馈?还是增强情感体验?没有目的的动画就是干扰。
性能优先原则
流畅的 60fps 动画比华丽的特效更重要。在低端设备上要优雅降级,确保基础体验不崩塌。
用户控制原则
尊重用户的偏好设置,特别是无障碍选项中的"减少动态效果"。动画应该增强体验,而不是强加体验。
上下文感知原则
根据当前的操作场景选择合适的动画。列表滚动需要高性能,页面转场需要连贯性,按钮反馈需要即时性。
附录:ArkUI 动画 API 速查表
| API | 类型 | 说明 |
|---|---|---|
.animation() |
声明式动画 | 组件属性变化的自动过渡 |
animateTo() |
显式动画 | 手动控制动画时机和范围 |
keyframeAnimateTo() |
关键帧动画 | 多阶段路径动画 |
.transition() |
转场动画 | 组件出现/消失的过渡效果 |
.sharedTransition() |
共享元素转场 | 跨页面的元素飞行效果 |
.motionPath() |
路径动画 | 沿自定义路径运动 |
Particle |
粒子动画 | 氛围效果 |
curves.interpolatingSpring() |
弹簧曲线 | 物理弹性效果 |
curves.cubicBezierCurve() |
贝塞尔曲线 | 自定义速度变化 |
PlayMode.Normal |
播放模式 | 正常播放一次 |
PlayMode.Reverse |
播放模式 | 倒放 |
PlayMode.Alternate |
播放模式 | 往返播放 |
PlayMode.AlternateReverse |
播放模式 | 倒放往返 |
如果你在动画开发中遇到了特别棘手的问题,或者有独特的动画实现技巧,欢迎在评论区分享。动画是一个需要不断打磨的细节,每一次优化都会直接反映在用户的感受上。