前言:
Seafile是一个由北京海文互知网络有限公司开发的企业级私有云存储与协作平台,专注于文件同步、共享和跨平台访问,发布于2012年10月。 其产品起源于创始人清华实验室时期,在开源版本基础上提供企业版解决方案,2013年获得经纬中国天使轮投资。 Seafile支持Windows、Mac、Linux、Android和iOS全平台客户端,提供文件同步、在线协同编辑、Wiki知识管理、细粒度权限控制及端到端加密等功能。 Seafile 在全球范围内被众多机构和企业信赖 :
- 阿里巴巴集团
- 卡巴斯基实验室(Kaspersky Lab)
- 柏林洪堡大学
- 中国平安
- 德国 Mainz 大学
- 法国 Strasbourg 大学
- 德国 Max Planck 科学院
- 芬兰 Turku 大学
Seafile 最适合以下几类用户/组织 :
- 企业与团队私有网盘:对数据隐私有要求、不能使用公有云的组织(政企、金融、科研、医疗)
- 跨设备文件同步:个人或多设备用户,希望替代 Dropbox/Google Drive,数据自主可控
- 大文件协作场景:媒体制作、工程设计、科研数据------这些场景文件大、协作频繁,Seafile 的块级增量同步优势明显
- 信创/国产化环境:Seafile 支持国产操作系统和数据库,可作为信创替代方案
- seafile 作为技术底座:很多国产化网盘、企业知识库产品基于 Seafile 做二次开发
Seafile 分两个版本 社区版和专业版,适用范围如下:
| 版本 | 协议 | 适用对象 | 核心能力 |
|---|---|---|---|
| **社区版(Community Edition)** | AGPLv3 开源 | 个人、开发者、小团队 | 文件同步、版本控制、团队共享、基础协作 |
| **专业版(Professional Edition)** | 需购买授权 | 中大型企业 | 全文搜索、细粒度权限、高可用集群、S3 存储集成、审计日志、防病毒、技术支持 |
seafile专业版三用户及以下免费:无需 license 文件,所有专业版功能完整开放,且无时间限制(永久性免费,不是 30 天试用)
管理员算 1 个用户:系统安装时创建的管理员账号,计入 3 个用户名额之内
按用户数阶梯订阅制 :
| 用户数 | 年费(USD) | 教育优惠(USD) |
|---|---|---|
| ≤ 3 用户 | 免费 | 免费 |
| 9 用户 | 总价 $100/年 | 总价 $100/年 |
| 10-249 用户 | $48/用户/年 | $24/用户/年 |
| 250-499 用户 | $44/用户/年 | $22/用户/年 |
| 500-749 用户 | $40/用户/年 | $18/用户/年 |
| 750-999 用户 | $35/用户/年 | $16/用户/年 |
| 1000+ 用户 | 联系销售定制 | 联系销售定制 |
教育行业享 50% 折扣,公共机构享 25% 折扣
9 用户 100/年的特殊优惠:这是面向小企业的特别包价,相当于每个用户每年约 11,比 10+ 用户的阶梯价便宜近 4 倍
本例部署的为社区版seafile,据官网所说,12版本以上建议使用docker compose 编排容器化部署,因此,本例采用docker compose 编排容器化部署,二进制部署不做过多介绍。
一、
环境初始化
这里需要着重强调一下docker的版本,docker20.10.10以上版本对SECCOMP更为友好,因此在centos7操作系统下,docker的版本至少是20.10.10,这样的话,runc版本才是1.1以上,很多内核参数,容器就不会拦截了
docker的版本和runc的版本如下:
bash
[root@localhost ~]# docker -v
Docker version 20.10.19, build d85ef84
[root@localhost ~]# runc -v
runc version 1.1.4
commit: v1.1.4-0-g5fd4c4d1
spec: 1.0.2-dev
go: go1.18.7
libseccomp: 2.5.1
如果确实只想用低版本的docker,那么,需要添加配置:
bash
    #security_opt:
    #  - seccomp:unconfined
ok,docker的安装就不在这里多余说了,如果不想多余折腾,用下面的阿里云源即可(建议适用二进制安装包部署):
bash
[docker-ce-stable]
name=Docker CE Stable - $basearch
baseurl=https://mirrors.aliyun.com/docker-ce/linux/centos/7/$basearch/stable
enabled=1
gpgcheck=1
gpgkey=https://mirrors.aliyun.com/docker-ce/linux/centos/gpg
同时把compose容器编排也安装了:
bash
yum install docker-compose-plugin docker-ce -y本例中docker compose是作为插件安装的,安装路径和版本如下:
bash
[root@localhost ~]# rpm -ql docker-compose-plugin
/usr/libexec/docker/cli-plugins/docker-compose
/usr/share/doc/docker-compose-plugin-2.27.1
/usr/share/doc/docker-compose-plugin-2.27.1/LICENSE
/usr/share/doc/docker-compose-plugin-2.27.1/MAINTAINERS
/usr/share/doc/docker-compose-plugin-2.27.1/NOTICE
/usr/share/doc/docker-compose-plugin-2.27.1/README.md
/usr/share/licenses/docker-compose-plugin-2.27.1
/usr/share/licenses/docker-compose-plugin-2.27.1/LICENSE
/usr/share/licenses/docker-compose-plugin-2.27.1/NOTICE
[root@localhost ~]# file /usr/libexec/docker/cli-plugins/docker-compose
/usr/libexec/docker/cli-plugins/docker-compose: ELF 64-bit LSB executable, x86-64, version 1 (SYSV), dynamically linked (uses shared libs), not stripped
[root@localhost ~]# docker compose version
Docker Compose version v2.27.1

[root@localhost ~]# ldd /usr/libexec/docker/cli-plugins/docker-compose
	linux-vdso.so.1 =>  (0x00007ffc4f3de000)
	libresolv.so.2 => /lib64/libresolv.so.2 (0x00007f5bac9da000)
	libpthread.so.0 => /lib64/libpthread.so.0 (0x00007f5bac7be000)
	libc.so.6 => /lib64/libc.so.6 (0x00007f5bac3f0000)
	/lib64/ld-linux-x86-64.so.2 (0x00007f5bacbf3000)
最后一个环境问题!!!!!libseccomp 2.3.1是centos7所能支撑到的最终版本,但该库版本有点过低,导致profile规则名单内放行了比如clone3规则,但内核库libseccomp不认识该内核底层函数,仍然拦截,导致容器启动不成功!!!!
查阅了很多资料,最终还是确定了一点,必须要升级此库,可以从centos8源内下载后本地安装即可:
bash
wget https://mirrors.aliyun.com/centos/8-stream/BaseOS/x86_64/os/Packages/libseccomp-2.5.2-1.el8.x86_64.rpm
yum localinstall -y libseccomp-2.5.2-1.el8.x86_64.rpm
ok,基础环境就搭建好了,总结一下,docker runtime环境,libseccomp-2.5.2-1.el8.x86_64.rpm升级安装,docker-compose-plugin插件安装就完事了
本次所用软件,配置文件都在以下网盘内,需要复现的同学请自取,离线包 包括四个镜像,一个docker二进制安装包,重要依赖rpm安装包和三个配置文件有任何部署方面的疑问请私信我:
通过网盘分享的文件:seafile-image-ce
链接: https://pan.baidu.com/s/1Z-UDEm_hT8p_xm2MZS2F5g?pwd=fdyw 提取码: fdyw
--来自百度网盘超级会员v8的分享
二、正式部署seafile私有网盘
首先从官网下载docker compose 容器编排 配置文件
env是整个项目的环境变量,可以定义开放端口,MySQL的密码等等,在初始化seafile-server组件的时候,这些环境变量会自动注入
seafile-server.yml 是compose编排文件,读取env的环境变量,这个文件管理三个容器,分别是MySQL,seafile-server,redis
seadoc.yml 也是compose的编排文件,这个使用的是轩辕镜像站的镜像,因此nginx的配置文件后面需要修改一下,否则文档功能会有问题,后面会详细说明。
caddy这个是https证书管理,需要有DNS可解析域名,一般环境变量里不使用即可
bash
# 1. 下载 .env(环境变量模板)
wget -O .env https://manual.seafile.com/13.0/repo/docker/ce/env

# 2. 下载 seafile-server.yml(核心编排文件:Seafile + MariaDB + Redis)
wget https://manual.seafile.com/13.0/repo/docker/ce/seafile-server.yml


# 4.(可选)下载 seadoc.yml(SeaDoc 在线协同文档)
wget https://manual.seafile.com/13.0/repo/docker/seadoc.yml
准备镜像(非官方的,从轩辕镜像下载的,这个要一会重新适配):
bash
docker pull docker.xuanyuan.run/seafileltd/sdoc-server:2.0-latest编辑.env文件(需要编辑的地方全部是中文标记):
bash
cat .env
#################################
# Docker compose configurations #
#################################
COMPOSE_FILE='seafile-server.yml,seadoc.yml'#docker容器编排使用哪些文件,seadoc如果不想使用可以删除
COMPOSE_PATH_SEPARATOR=','

## Images
SEAFILE_IMAGE=seafileltd/seafile-mc:13.0-latest
SEAFILE_DB_IMAGE=mariadb:10.11
SEAFILE_REDIS_IMAGE=redis
SEAFILE_CADDY_IMAGE=lucaslorentz/caddy-docker-proxy:2.12-alpine
SEADOC_IMAGE=seafileltd/sdoc-server:2.0-latest
NOTIFICATION_SERVER_IMAGE=seafileltd/notification-server:13.0-latest
MD_IMAGE=seafileltd/seafile-md-server:13.0-latest

## Persistent Storage
BASIC_STORAGE_PATH=/data#这个是容器持久化目录定义,所有持久化文件放在/data目录下
SEAFILE_VOLUME=$BASIC_STORAGE_PATH/seafile-data
SEAFILE_MYSQL_VOLUME=$BASIC_STORAGE_PATH/seafile-mysql/db
SEAFILE_CADDY_VOLUME=$BASIC_STORAGE_PATH/seafile-caddy
SEADOC_VOLUME=$BASIC_STORAGE_PATH/seadoc-data

#################################
#      Startup parameters       #
#################################
SEAFILE_SERVER_HOSTNAME=部署服务器的IP+端口,我这里使用的是10086:10086
SEAFILE_SERVER_PROTOCOL=http
TIME_ZONE=Asia/Shanghai #这个是国产化,时区改成中国的
JWT_PRIVATE_KEY=$(pwgen -s 40 1 2>/dev/null || openssl rand -hex 20)#这里不改,安全用的

#####################################
# Third-party service configuration #
#####################################

## Database
SEAFILE_MYSQL_DB_HOST=db
SEAFILE_MYSQL_DB_USER=seafile
SEAFILE_MYSQL_DB_PASSWORD=#自定义密码
SEAFILE_MYSQL_DB_CCNET_DB_NAME=ccnet_db
SEAFILE_MYSQL_DB_SEAFILE_DB_NAME=seafile_db
SEAFILE_MYSQL_DB_SEAHUB_DB_NAME=seahub_db

## Cache
CACHE_PROVIDER=redis # or memcached

### Redis
REDIS_HOST=redis
REDIS_PORT=6379
REDIS_PASSWORD=

### Memcached
MEMCACHED_HOST=memcached
MEMCACHED_PORT=11211

######################################
#        Initial variables           #
# (Only valid in first-time startup) #
######################################

## Database root password, Used to create Seafile users
INIT_SEAFILE_MYSQL_ROOT_PASSWORD=Shiguang_32

## Seafile admin user
INIT_SEAFILE_ADMIN_EMAIL=#自定义邮箱,后面登陆就这个用户了@126.com
INIT_SEAFILE_ADMIN_PASSWORD=#登陆密码 ,自定义密码

############################################
# Additional configurations for extensions #
############################################

## SeaDoc service
ENABLE_SEADOC=true

## Notification
ENABLE_NOTIFICATION_SERVER=false
NOTIFICATION_SERVER_URL=

## Seafile AI #这里没有部署大模型,因此选择不接入,false,如果有可以配置
ENABLE_SEAFILE_AI=false
ENABLE_FACE_RECOGNITION=false
SEAFILE_AI_LLM_TYPE=openai
SEAFILE_AI_LLM_URL=
SEAFILE_AI_LLM_KEY= # your llm key
SEAFILE_AI_LLM_MODEL=gpt-4o-mini

## Metadata server
MD_FILE_COUNT_LIMIT=100000
seafile-server.yml 只需要更改端口和上面的端口呼应即可,env里设置的是10086,因此,这个文件里也改成10086:
bash
[root@localhost ~]# cat seafile-server.yml
services:
  db:
    image: ${SEAFILE_DB_IMAGE:-mariadb:10.11}
    #security_opt:
    #  - seccomp:unconfined
    container_name: seafile-mysql
    restart: unless-stopped
    environment:
      - MYSQL_ROOT_PASSWORD=${INIT_SEAFILE_MYSQL_ROOT_PASSWORD:-}
      - MYSQL_LOG_CONSOLE=true
      - MARIADB_AUTO_UPGRADE=1
    volumes:
      - "${SEAFILE_MYSQL_VOLUME:-/opt/seafile-mysql/db}:/var/lib/mysql"
    networks:
      - seafile-net
    healthcheck:
      test:
        [
          "CMD",
          "/usr/local/bin/healthcheck.sh",
          "--connect",
          "--mariadbupgrade",
          "--innodb_initialized",
        ]
      interval: 20s
      start_period: 30s
      timeout: 5s
      retries: 10

  redis:
    image: ${SEAFILE_REDIS_IMAGE:-redis}
    #security_opt:
    #  - seccomp:unconfined
    container_name: seafile-redis
    restart: unless-stopped
    command:
      - /bin/sh
      - -c
      - exec redis-server --requirepass "$$REDIS_PASSWORD" --save "" --appendonly no
    environment:
      - REDIS_PASSWORD=${REDIS_PASSWORD:-}
    networks:
      - seafile-net

  seafile:
    image: ${SEAFILE_IMAGE:-seafileltd/seafile-pro-mc:13.0-latest}
    #security_opt:
    #  - seccomp:unconfined
    ports:
      - "10086:80"
    container_name: seafile
    restart: unless-stopped
    # ports:
    #   - "80:80"
    volumes:
      - ${SEAFILE_VOLUME:-/opt/seafile-data}:/shared
    environment:
      - SEAFILE_MYSQL_DB_HOST=${SEAFILE_MYSQL_DB_HOST:-db}
      - SEAFILE_MYSQL_DB_PORT=${SEAFILE_MYSQL_DB_PORT:-3306}
      - SEAFILE_MYSQL_DB_USER=${SEAFILE_MYSQL_DB_USER:-seafile}
      - SEAFILE_MYSQL_DB_PASSWORD=${SEAFILE_MYSQL_DB_PASSWORD:?Variable is not set or empty}
      - INIT_SEAFILE_MYSQL_ROOT_PASSWORD=${INIT_SEAFILE_MYSQL_ROOT_PASSWORD:-}
      - SEAFILE_MYSQL_DB_CCNET_DB_NAME=${SEAFILE_MYSQL_DB_CCNET_DB_NAME:-ccnet_db}
      - SEAFILE_MYSQL_DB_SEAFILE_DB_NAME=${SEAFILE_MYSQL_DB_SEAFILE_DB_NAME:-seafile_db}
      - SEAFILE_MYSQL_DB_SEAHUB_DB_NAME=${SEAFILE_MYSQL_DB_SEAHUB_DB_NAME:-seahub_db}
      - TIME_ZONE=${TIME_ZONE:-Etc/UTC}
      - INIT_SEAFILE_ADMIN_EMAIL=${INIT_SEAFILE_ADMIN_EMAIL:-me@example.com}
      - INIT_SEAFILE_ADMIN_PASSWORD=${INIT_SEAFILE_ADMIN_PASSWORD:-asecret}
      - SEAFILE_SERVER_HOSTNAME=${SEAFILE_SERVER_HOSTNAME:?Variable is not set or empty}
      - SEAFILE_SERVER_PROTOCOL=${SEAFILE_SERVER_PROTOCOL:-http}
      - SITE_ROOT=${SITE_ROOT:-/}
      - NON_ROOT=${NON_ROOT:-false}
      - JWT_PRIVATE_KEY=${JWT_PRIVATE_KEY:?Variable is not set or empty}
      - SEAFILE_LOG_TO_STDOUT=${SEAFILE_LOG_TO_STDOUT:-false}
      - ENABLE_GO_FILESERVER=${ENABLE_GO_FILESERVER:-true}
      - ENABLE_SEADOC=${ENABLE_SEADOC:-true}
      - SEADOC_SERVER_URL=${SEAFILE_SERVER_PROTOCOL:-http}://${SEAFILE_SERVER_HOSTNAME:?Variable is not set or empty}/sdoc-server
      - CACHE_PROVIDER=${CACHE_PROVIDER:-redis}
      - REDIS_HOST=${REDIS_HOST:-redis}
      - REDIS_PORT=${REDIS_PORT:-6379}
      - REDIS_PASSWORD=${REDIS_PASSWORD:-}
      - MEMCACHED_HOST=${MEMCACHED_HOST:-memcached}
      - MEMCACHED_PORT=${MEMCACHED_PORT:-11211}
      - ENABLE_NOTIFICATION_SERVER=${ENABLE_NOTIFICATION_SERVER:-false}
      - INNER_NOTIFICATION_SERVER_URL=${INNER_NOTIFICATION_SERVER_URL:-http://notification-server:8083}
      - NOTIFICATION_SERVER_URL=${NOTIFICATION_SERVER_URL:-${SEAFILE_SERVER_PROTOCOL:-http}://${SEAFILE_SERVER_HOSTNAME:?Variable is not set or empty}/notification}
      - ENABLE_SEAFILE_AI=${ENABLE_SEAFILE_AI:-false}
      - ENABLE_FACE_RECOGNITION=${ENABLE_FACE_RECOGNITION:-false}
      - SEAFILE_AI_SERVER_URL=${SEAFILE_AI_SERVER_URL:-http://seafile-ai:8888}
      - SEAFILE_AI_SECRET_KEY=${JWT_PRIVATE_KEY:?Variable is not set or empty}
      - MD_FILE_COUNT_LIMIT=${MD_FILE_COUNT_LIMIT:-100000}
    labels:
      caddy: ${SEAFILE_SERVER_PROTOCOL:-http}://${SEAFILE_SERVER_HOSTNAME:?Variable is not set or empty}
      caddy.reverse_proxy: "{{upstreams 80}}"
    healthcheck:
      test: ["CMD-SHELL", "curl -f http://localhost:80 || exit 1"]
      interval: 30s
      timeout: 10s
      retries: 3
      start_period: 10s
    depends_on:
      db:
        condition: service_healthy
      redis:
        condition: service_started
    networks:
      - seafile-net

networks:
  seafile-net:
    name: seafile-net
seadoc.yml 文件不需要太多修改,镜像直接用轩辕的镜像就可以了,只是一会要把seadoc的端口配置到nginx里即可:
bash
services:

  seadoc:
    image: docker.xuanyuan.run/seafileltd/sdoc-server:2.0-latest
    #image: ${SEADOC_IMAGE:-seafileltd/sdoc-server:2.0-latest}
    container_name: seadoc
    #security_opt:
    #  - seccomp:unconfined
    restart: unless-stopped
    volumes:
      - ${SEADOC_VOLUME:-/data/seadoc-data/}:/shared
    #ports:
    #  - "80:80"
    environment:
      - DB_HOST=${SEAFILE_MYSQL_DB_HOST:-db}
      - DB_PORT=${SEAFILE_MYSQL_DB_PORT:-3306}
      - DB_USER=${SEAFILE_MYSQL_DB_USER:-seafile}
      - DB_PASSWORD=${SEAFILE_MYSQL_DB_PASSWORD:?Variable is not set or empty}
      - DB_NAME=${SEADOC_MYSQL_DB_NAME:-${SEAFILE_MYSQL_DB_SEAHUB_DB_NAME:-seahub_db}}
      - TIME_ZONE=${TIME_ZONE:-Etc/UTC}
      - JWT_PRIVATE_KEY=${JWT_PRIVATE_KEY:?Variable is not set or empty}
      - NON_ROOT=${NON_ROOT:-false}
      - SEAHUB_SERVICE_URL=${SEAHUB_SERVICE_URL:-http://seafile}
    labels:
      caddy: ${SEAFILE_SERVER_PROTOCOL:-http}://${SEAFILE_SERVER_HOSTNAME:?Variable is not set or empty}
      caddy.1_handle_path: "/socket.io/*"
      caddy.1_handle_path.0_rewrite: "* /socket.io{uri}"
      caddy.1_handle_path.1_reverse_proxy: "{{upstreams 80}}"
      caddy.2_handle_path: "/sdoc-server/*"
      caddy.2_handle_path.0_rewrite: "* {uri}"
      caddy.2_handle_path.1_reverse_proxy: "{{upstreams 80}}"
    depends_on:
      db:
        condition: service_healthy
    networks:
      - seafile-net

networks:
  seafile-net:
    name: seafile-net
nginx配置文件修改,主要是把seadoc的7070端口配置好,配置文件注入后,重启seafile-server里的nginx就可以了:
bash
cat <<'EOF' | docker exec -i seafile tee /etc/nginx/sites-enabled/seafile.nginx.conf
server {
    listen 80;

    client_max_body_size 10m;

    location / {
        proxy_pass http://127.0.0.1:8000/;
        proxy_read_timeout 310s;
        proxy_set_header Host $http_host;
        proxy_set_header X-Forwarded-For $proxy_add_x_forwarded_for;
        proxy_set_header X-Forwarded-Host $server_name;
        proxy_set_header X-Real-IP $remote_addr;
        proxy_set_header Connection "";
        proxy_http_version 1.1;

        add_header Access-Control-Allow-Origin *;
        client_max_body_size 0;
        access_log      /shared/seafile/logs/seahub.access.log seafileformat;
        error_log       /shared/seafile/logs/seahub.error.log;
    }

    location /seafhttp {
        rewrite ^/seafhttp(.*)$ $1 break;
        proxy_pass http://127.0.0.1:8082;
        proxy_set_header X-Forwarded-For $proxy_add_x_forwarded_for;
        client_max_body_size 0;
        proxy_read_timeout  36000s;

        proxy_buffering off;
        proxy_request_buffering off;

        access_log      /shared/seafile/logs/seafhttp.access.log seafileformat;
        error_log       /shared/seafile/logs/seafhttp.error.log;
    }

    location /seafdav {
        rewrite ^/seafdav$ /seafdav/ permanent;
    }

    location /seafdav/ {
        proxy_pass         http://127.0.0.1:8080/seafdav/;
        proxy_set_header   Host $host;
        proxy_set_header   X-Real-IP $remote_addr;
        proxy_set_header   X-Forwarded-For $proxy_add_x_forwarded_for;
        proxy_set_header   X-Forwarded-Host $server_name;
        proxy_read_timeout  1200s;
        client_max_body_size 0;

        access_log      /shared/seafile/logs/seafdav.access.log seafileformat;
        error_log       /shared/seafile/logs/seafdav.error.log;
    }

    location /:dir_browser {
        proxy_pass         http://127.0.0.1:8080/:dir_browser;
    }

    location /media {
        root /opt/seafile/seafile-server-latest/seahub;
    }

    # SeaDoc 反代
    location /sdoc-server/ {
        proxy_pass http://seadoc:7070/;
        proxy_redirect off;
        proxy_set_header Host $host;
        proxy_set_header X-Real-IP $remote_addr;
        proxy_set_header X-Forwarded-For $proxy_add_x_forwarded_for;
        proxy_set_header X-Forwarded-Host $server_name;
        proxy_set_header X-Forwarded-Proto $scheme;
        client_max_body_size 100m;
    }

    location /socket.io {
        proxy_pass http://seadoc:7070;
        proxy_http_version 1.1;
        proxy_set_header Upgrade $http_upgrade;
        proxy_set_header Connection "upgrade";
        proxy_redirect off;
        proxy_set_header X-Real-IP $remote_addr;
        proxy_set_header X-Forwarded-For $proxy_add_x_forwarded_for;
        proxy_set_header Host $http_host;
    }
}
EOF


docker exec seafile nginx -s reload
在启动前镜像拉取配置:
bash
[root@localhost ~]# cat /etc/docker/daemon.json
{"registry-mirrors": [
    "https://docker.m.daocloud.io",
    "https://dockerproxy.com",
    "https://docker.mirrors.ustc.edu.cn",
    "https://docker.nju.edu.cn",
    "https://hub-mirror.c.163.com",
    "https://xuanyuan.cloud",
    "https://mirror.baidubce.com"
  ]
}
以上配置好后,重启docker,seadoc镜像需要单独到轩辕镜像拉取,镜像准备好后,就可以启动docker compose的容器组了:
bash
[root@localhost ~]# docker images
REPOSITORY                                   TAG           IMAGE ID       CREATED        SIZE
redis                                        latest        0458cdd27215   13 days ago    146MB
mariadb                                      10.11         1a3c5f4fdaa7   2 weeks ago    326MB
seafileltd/seafile-mc                        13.0-latest   c61b3d647da4   5 weeks ago    1.65GB
docker.xuanyuan.run/seafileltd/sdoc-server   2.0-latest    a6cd4318bb58   8 months ago   1.14GB
docker compose 的三个编排相关文件放置在同一个目录下即可,seafile-server.yml ,seadoc.yml , .env 是这三个文件
docker compose 的启停:
bash
docker compose up -d  #启动容器组
docker compose down  #停止容器组
docker compose ps   #查看容器组状态
docker compose restart  #重启容器组
输出如下:
bash
[root@localhost ~]# docker compose ps   #查看容器组状态
NAME            IMAGE                                                   COMMAND                  SERVICE   CREATED        STATUS                  PORTS
seadoc          docker.xuanyuan.run/seafileltd/sdoc-server:2.0-latest   "/sbin/my_init -- /s..."   seadoc    18 hours ago   Up 17 hours             80/tcp
seafile         seafileltd/seafile-mc:13.0-latest                       "/sbin/my_init -- /s..."   seafile   18 hours ago   Up 17 hours (healthy)   0.0.0.0:10086->80/tcp, :::10086->80/tcp
seafile-mysql   mariadb:10.11                                           "docker-entrypoint.s..."   db        18 hours ago   Up 17 hours (healthy)   3306/tcp
seafile-redis   redis                                                   "docker-entrypoint.s..."   redis     18 hours ago   Up 17 hours             6379/tcp
bash
[root@localhost ~]# docker compose up -d
[+] Running 4/4
 ✔ Container seafile-redis  Running                                                                                                                                                                                                                                                                                        0.0s
 ✔ Container seafile-mysql  Healthy                                                                                                                                                                                                                                                                                       10.8s
 ✔ Container seadoc         Started                                                                                                                                                                                                                                                                                       11.2s
 ✔ Container seafile        Running
bash
[root@localhost ~]# docker compose down
[+] Running 5/5
 ✔ Container seafile        Removed                                                                                                                                                                                                                                                                                        2.3s
 ✔ Container seadoc         Removed                                                                                                                                                                                                                                                                                       10.3s
 ✔ Container seafile-redis  Removed                                                                                                                                                                                                                                                                                        0.2s
 ✔ Container seafile-mysql  Removed                                                                                                                                                                                                                                                                                        0.2s
 ✔ Network seafile-net      Removed
ok,看镜像状态正常后,打开浏览器输入服务器IP+10086端口就可以登录seafile了:
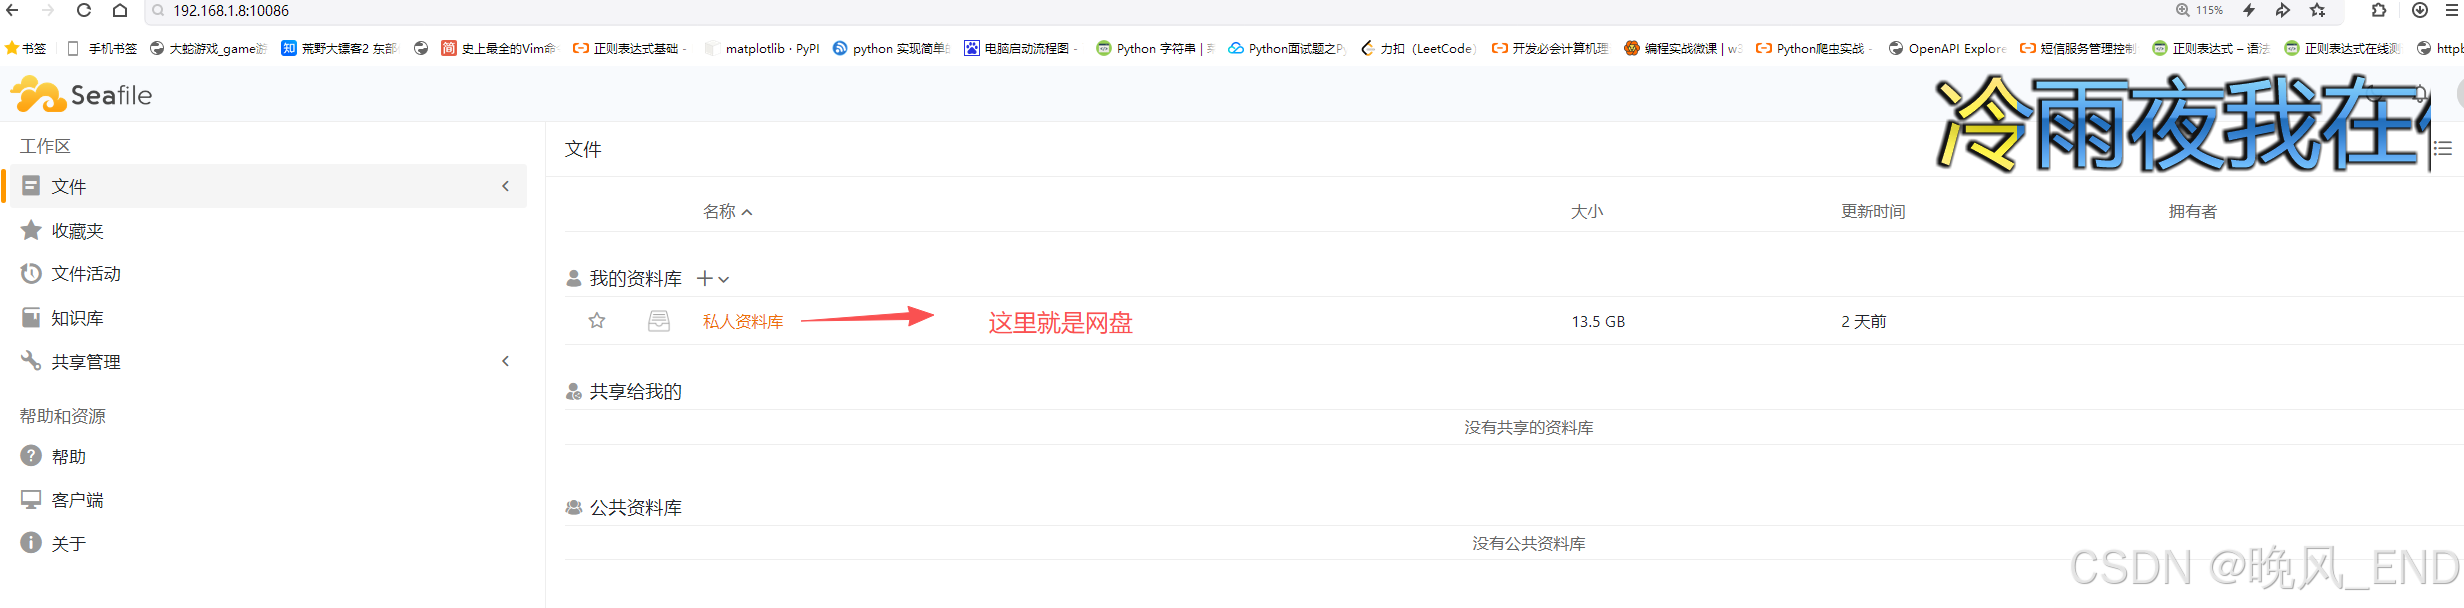
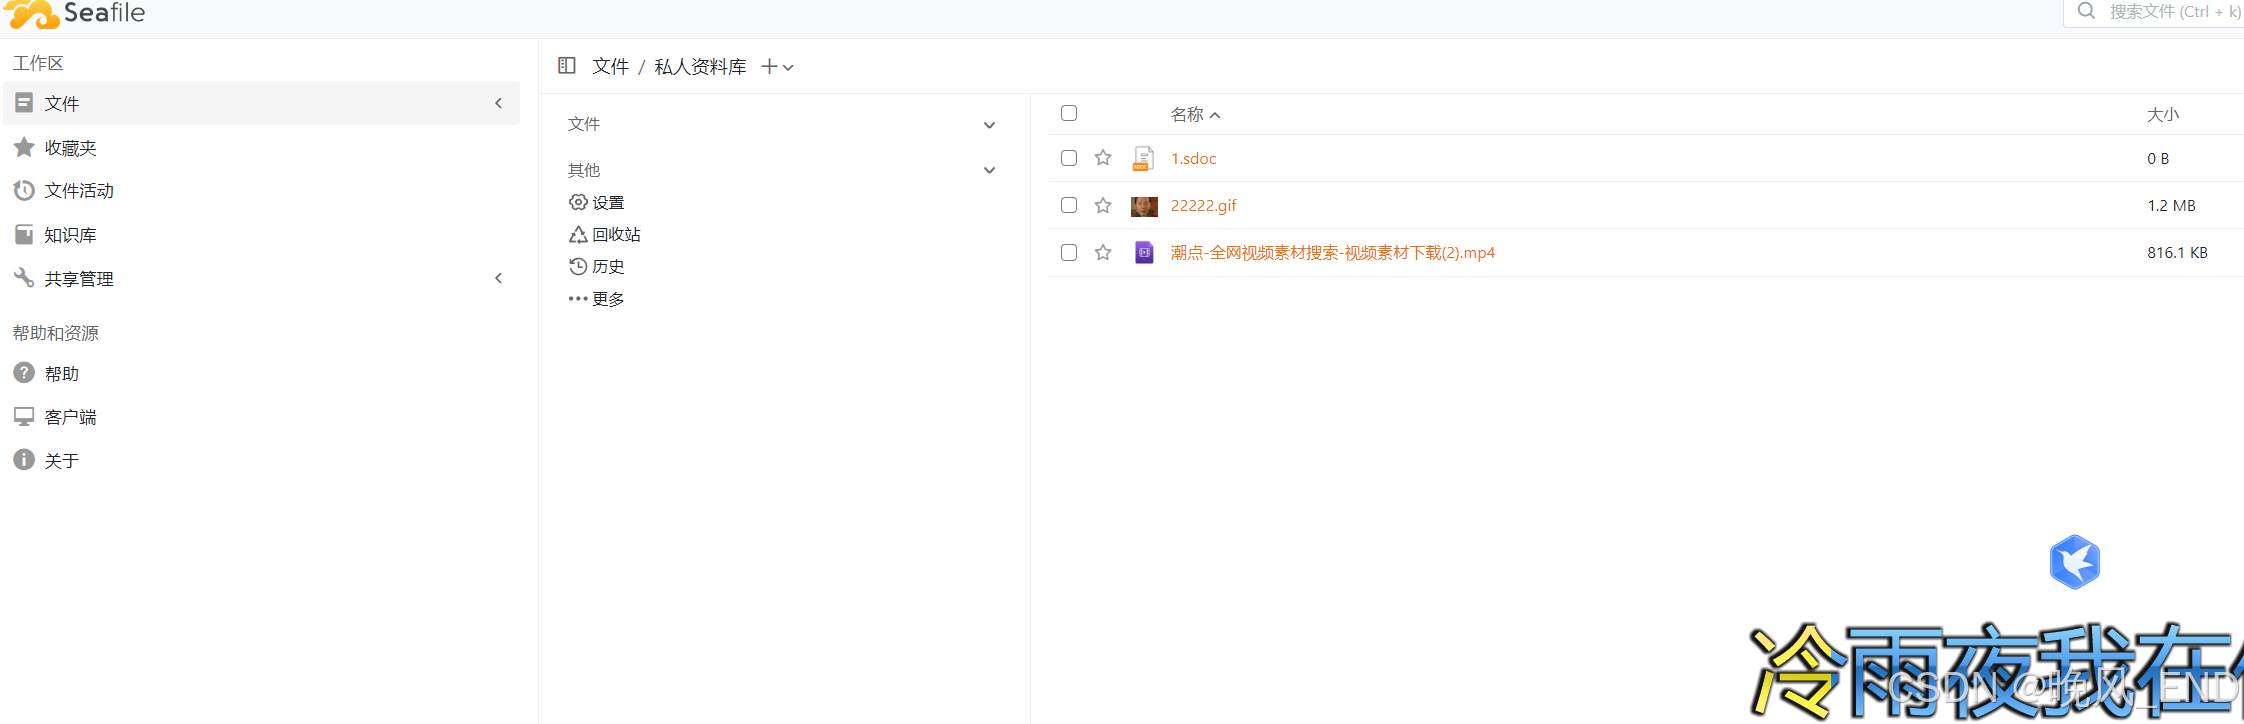
新建一个sdoc文件,如果该文件能正常打开,表示seadoc文档系统没有问题,如果不能打开,请在执行一下上面的nginx配置,镜像里没有自动注入,只有手动注入了
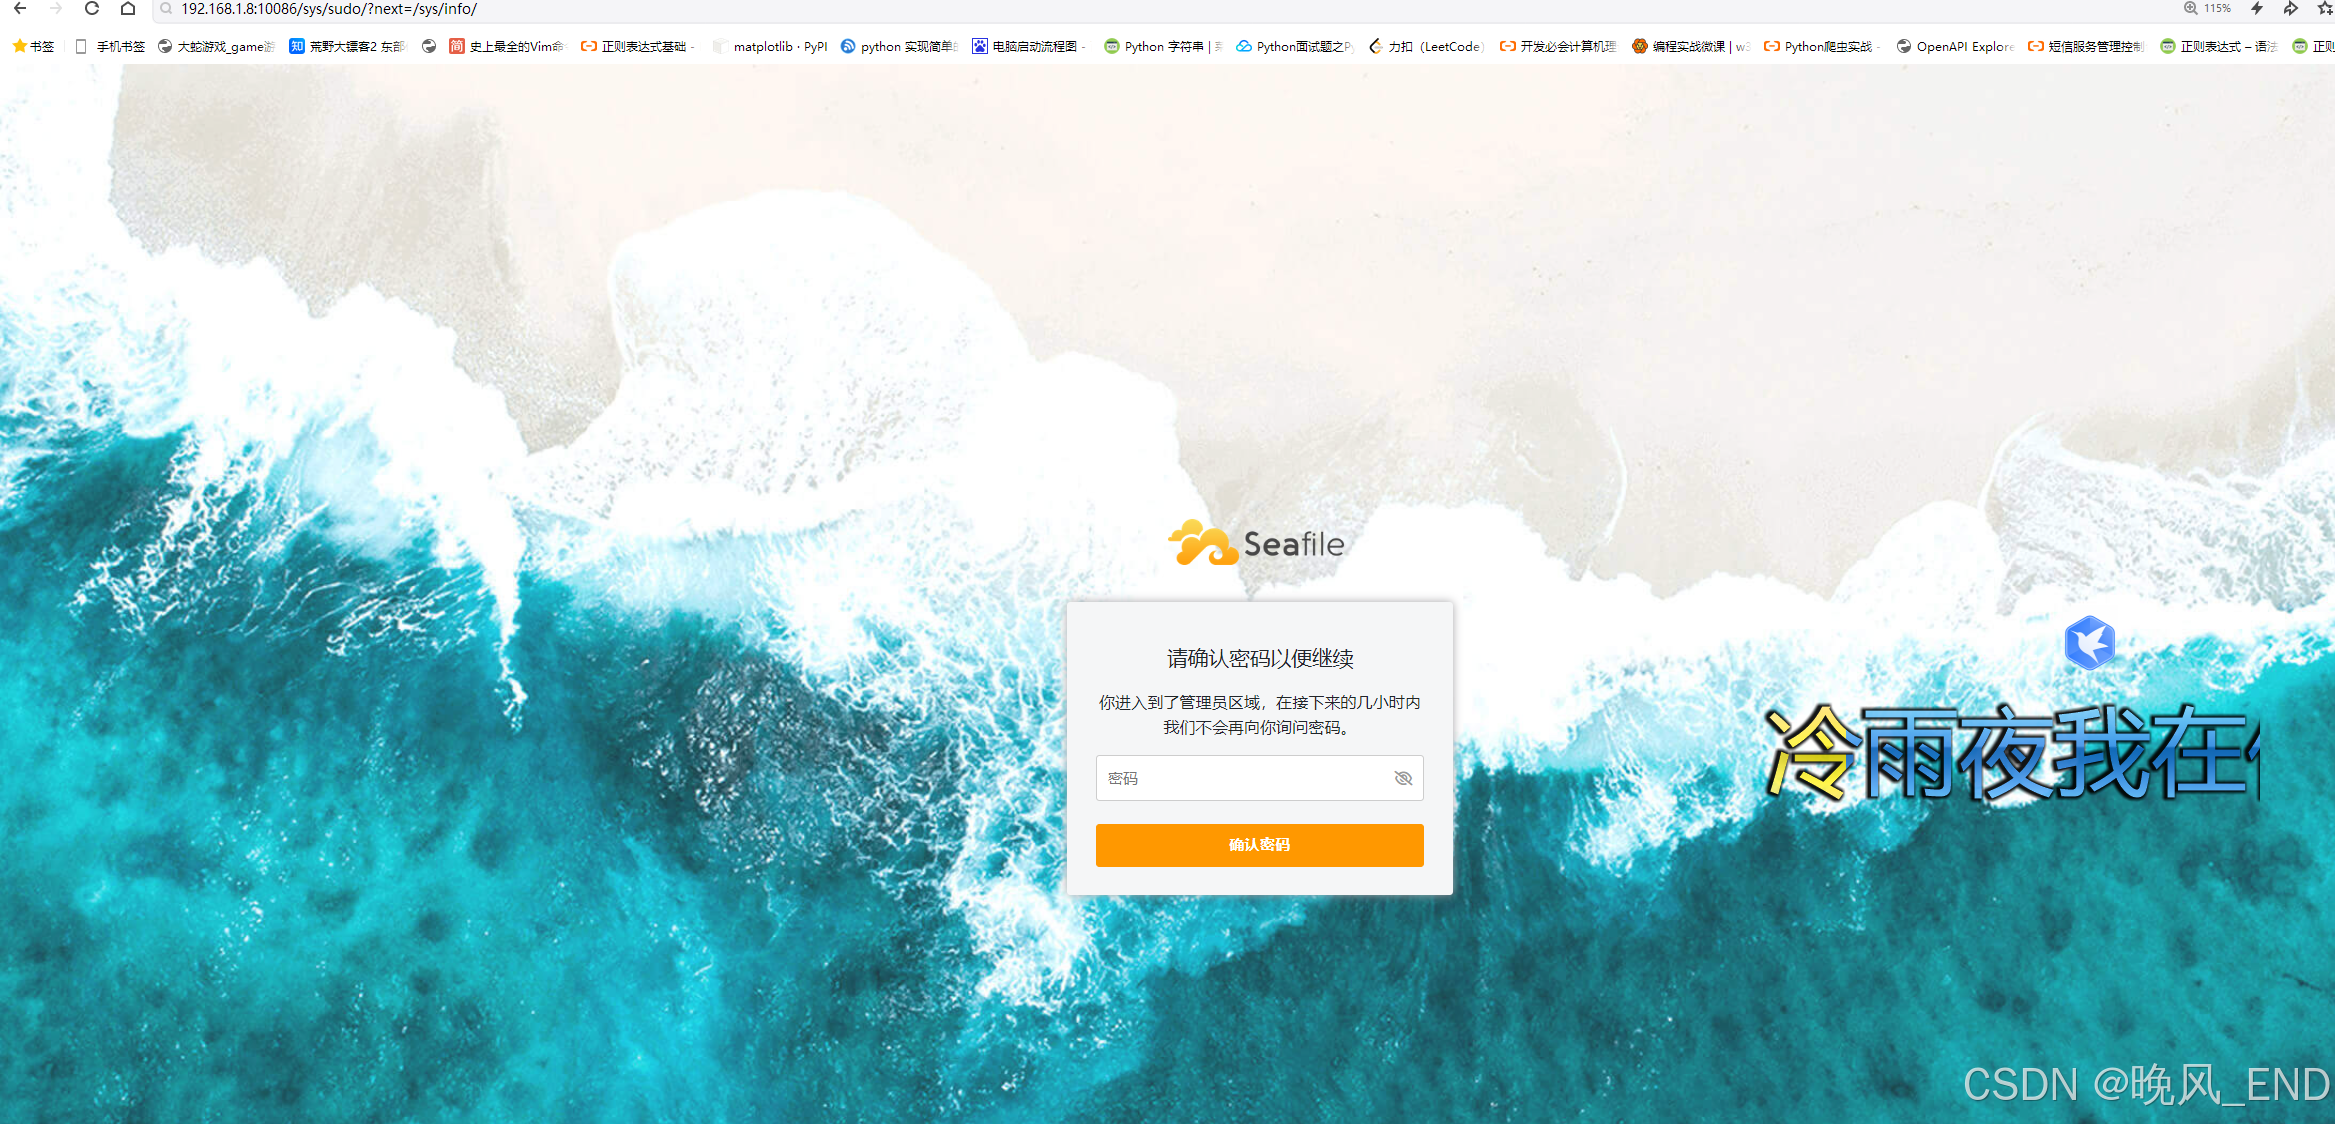
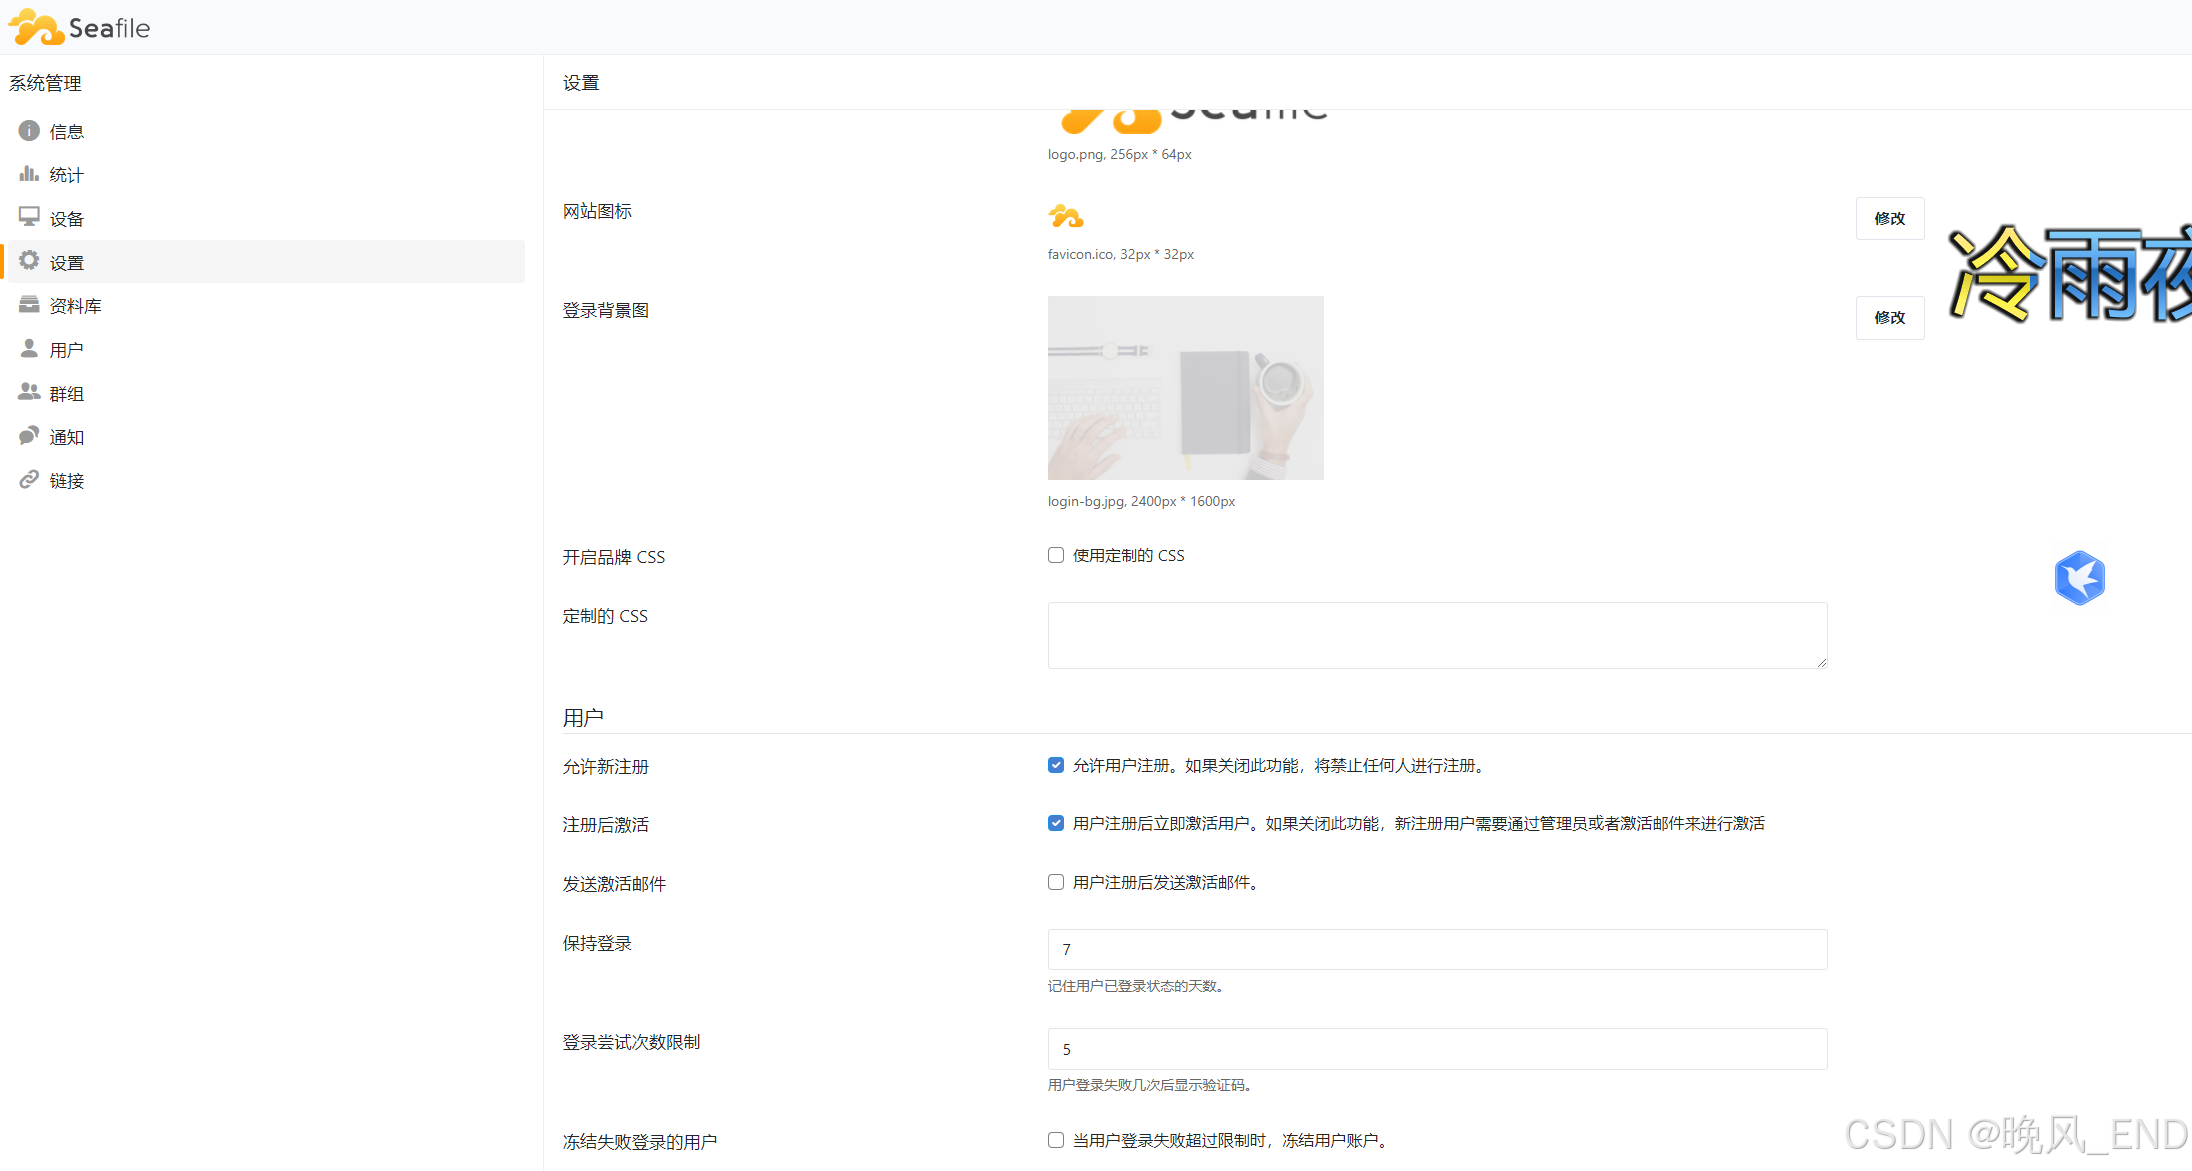
seafile默认是不开放注册的,可以通过设置打开注册开关:
系统管理这里会校验一次密码:
ok,seafile社区版就这么简简单单的部署完毕了,完结撒花!!!!!~~~~~~~~~