《SpringBoot 3:入门与应用实战》第 9 章 使用 WebMvc 开发应用 阅读笔记 1
Spring Framework 和 Spring Boot 的效用通常体现在基于 Web 的应用开发,无论是简单地搭建网站,抑或是构建大型分布式应用,最终呈现的形态通常是 Web 应用。本章开始讲解基于 Spring Boot 应用的 Web 开发场景使用,后续章节将继续讲解进阶 WebMvc 功能特性和 Web 容器。
Spring Framework 体系中用于开发 Web 应用的框架分为基于 Servlet 的 WebMvc 以及基于响应式编程的 WebFlux。在当前企业应用开发中,WebMvc 框架占据主流地位。自从 2017 年 Spring Framework 5.0 发布后,WebFlux 吸引了大批开发者,但最终大多数开发者仍然选择使用WebMvc 作为 Web 应用开发的底层框架,所以本书着重讲解 WebMvc 框架。
9.1 整合Web 和 WebMvc
在讲解 WebMvc 之前,先来回顾一下 MVC 三层架构的思想,以及传统 Web 应用的整合方式。
9.1.1 MVC 三层架构
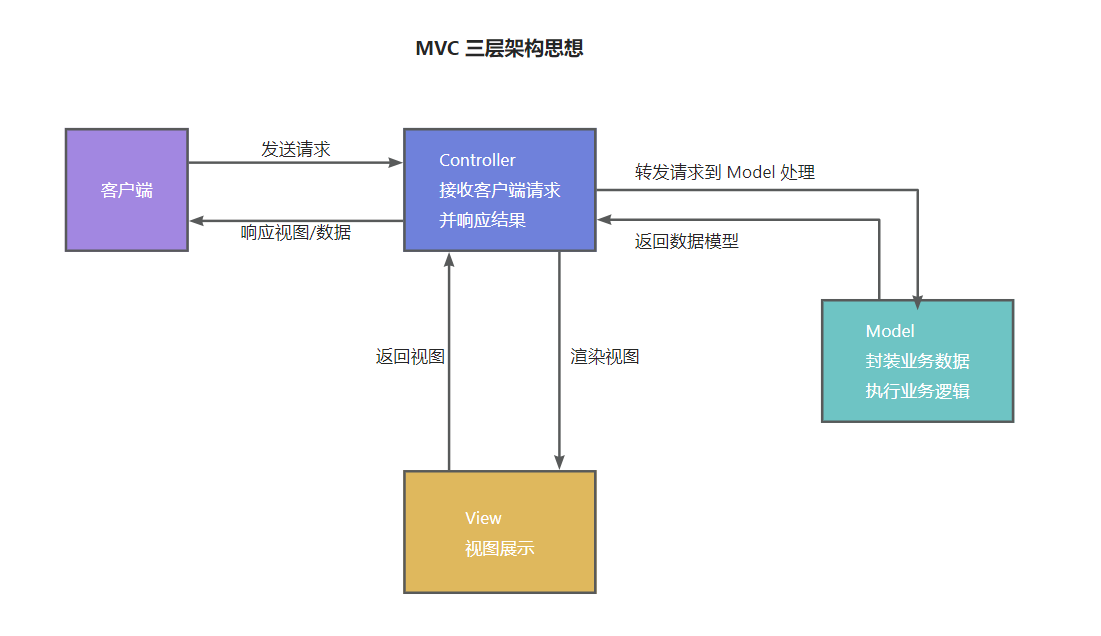
MVC 架构是 Web 应用中常见的架构风格,MVC 的三个字母 M、V、C 分别代表 Model、View、Controller。在这个架构中,客户端与服务端应用的直接交互会通过 Controller(控制器),控制器接收客户端的请求并转发给后端的 Model 处理,后端业务逻辑执行完毕后将数据返回给控制器,随后控制器将数据转移给 View 令其渲染视图,并在最后响应视图内容,或者在没有渲染视图时直接返回数据。
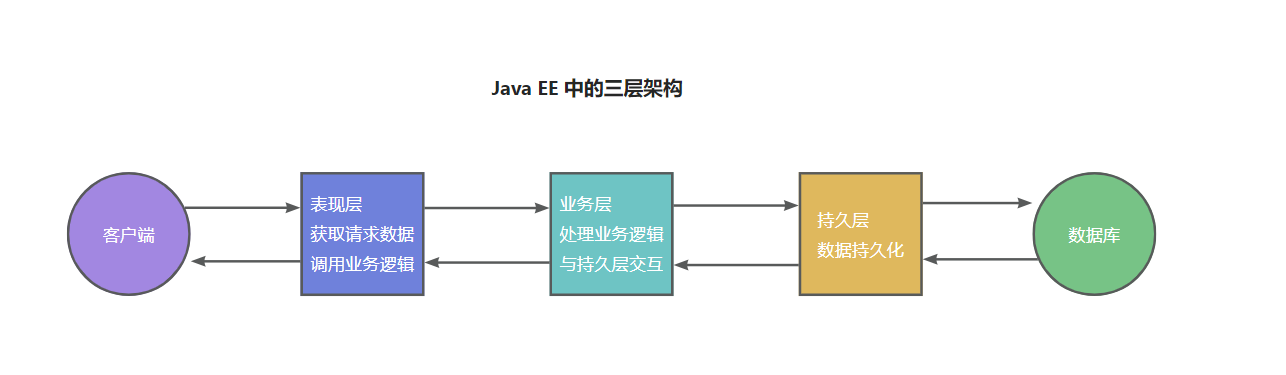
Java EE 中的三层架构是实现代码逻辑解耦的经典设计模式,三层架构分别为 web 层(表现层)、service 层(业务层)、dao 层(持久层),它们的职责及调用逻辑如图所示。仅从服务端的业务逻辑处理来看,客户端的请求到达服务端时,由表现层接收请求并获取请求中携带的数据,并在校验和整合后交给业务层,业务层负责处理复杂的业务逻辑,并在必要时与持久层交互,从而完成数据的读写操作,业务层处理完数据后,将数据返回给表现层,由表现层负责渲染视图或者响应数据。
9.1.2 基于 Servlet 3.0 规范整合 Web 开发
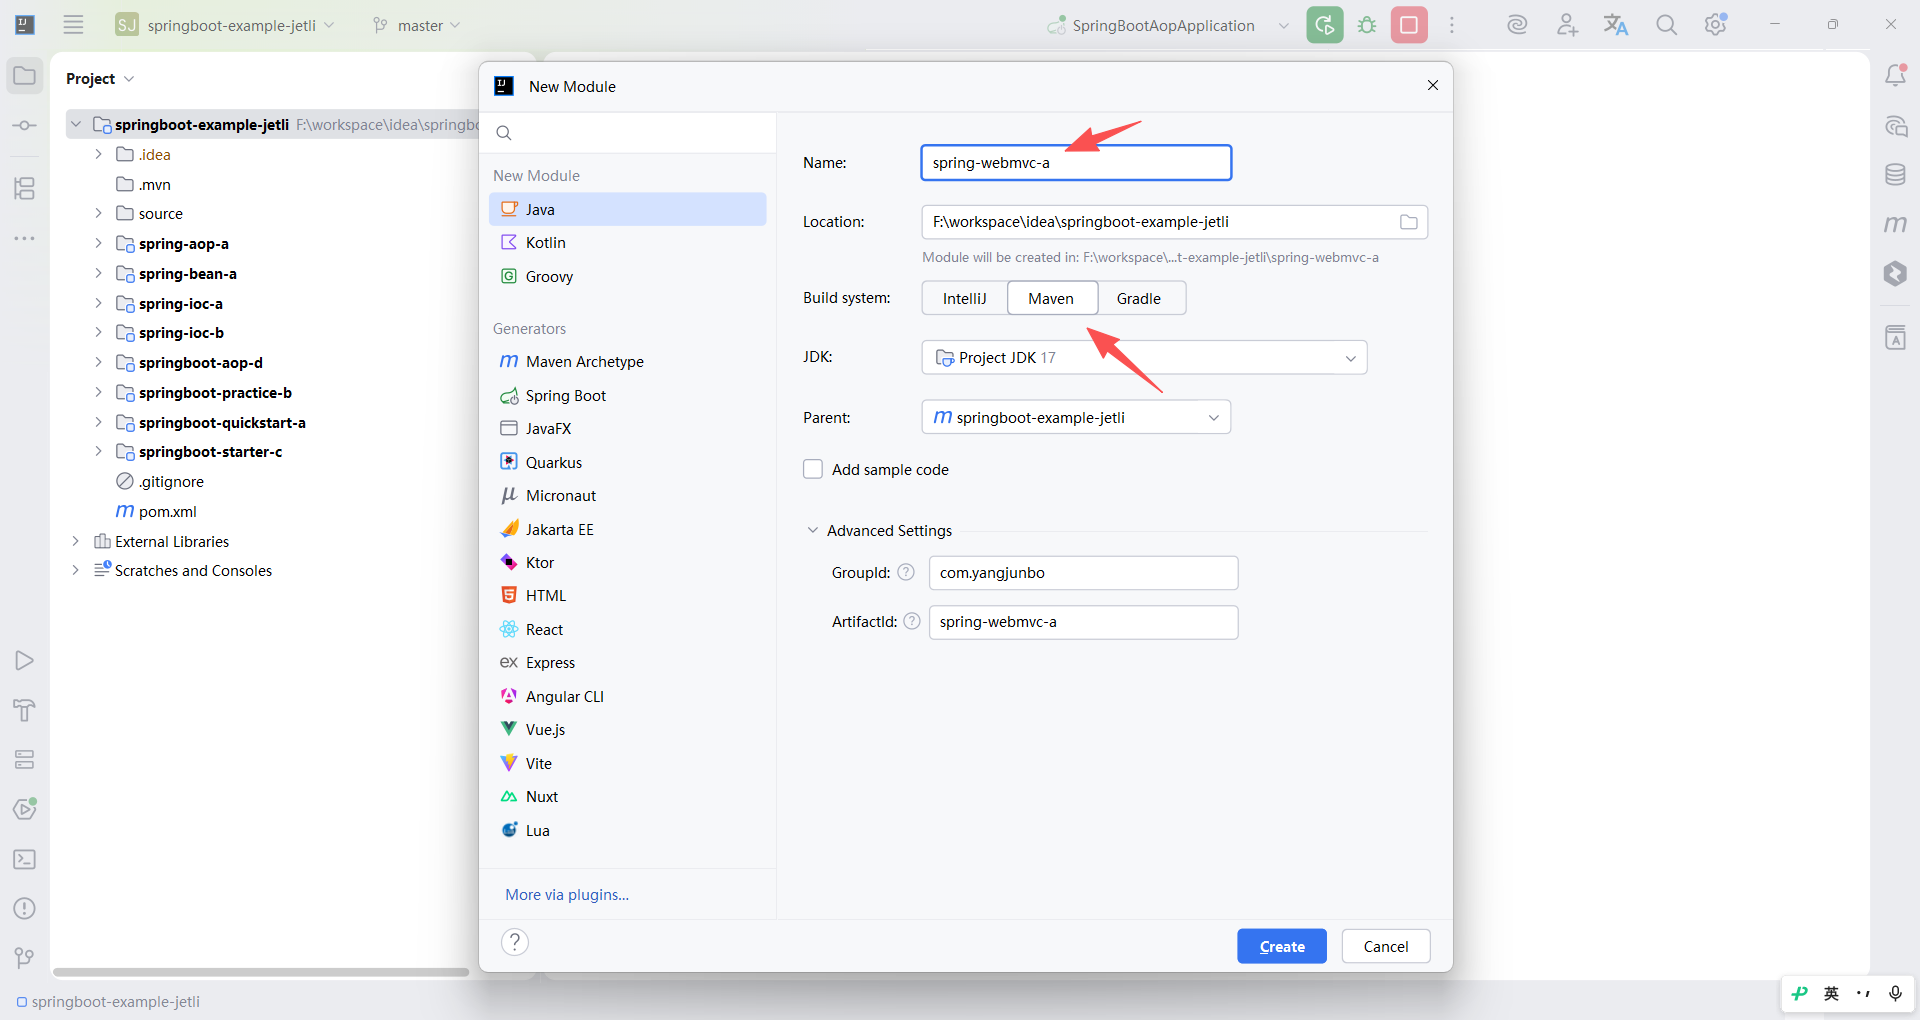
下面讲解的是原生 Spring Framework 整合 Web 应用的开发。前面几章中讲解的大多是基于普通应用,几乎没有涉及 Web 应用的开发,接下来的两节会先讲解 Spring Framework 原生整合 Web 的方式,了解和回顾原生的整合方式对于理解后面 WebMvc 的整合会有所帮助。
1.工程搭建
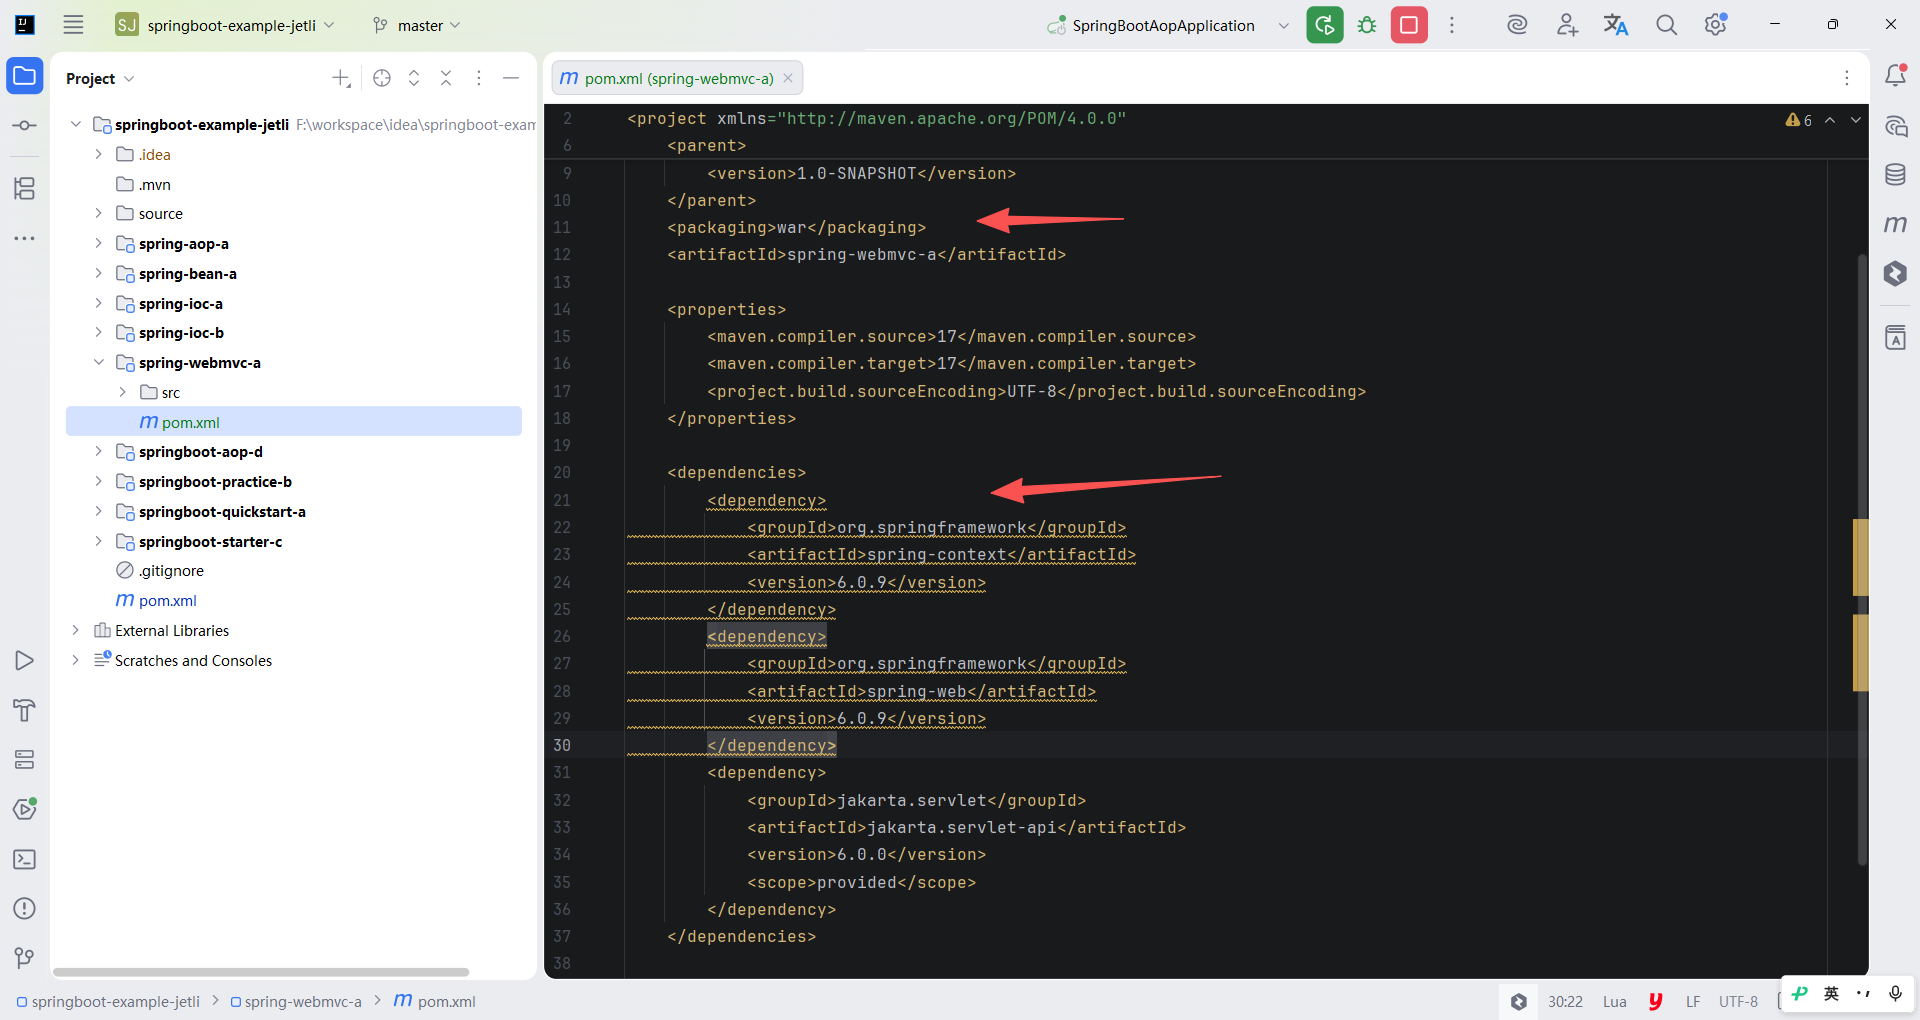
第一步搭建工程,这次要搭建的是一个 Web 应用,所以 pom.xml 文件中需要将打包方式改为 war 包,然后添加依赖的部分,需要导入 Spring Framework 的核心包 spring-context 和 Spring Framework 支持 Web 的模块 spring-web。此外,还要导入 Servlet 的 API。
导入完毕后,我们需要将当前应用部署到 Tomcat 中。配置完成后启动 Tomcat,若无任何报错,则说明一切配置正确,可以继续向下进行。
xml
<?xml version="1.0" encoding="UTF-8"?>
<project xmlns="http://maven.apache.org/POM/4.0.0"
         xmlns:xsi="http://www.w3.org/2001/XMLSchema-instance"
         xsi:schemaLocation="http://maven.apache.org/POM/4.0.0 http://maven.apache.org/xsd/maven-4.0.0.xsd">
    <modelVersion>4.0.0</modelVersion>
    <parent>
        <groupId>com.yangjunbo</groupId>
        <artifactId>springboot-example-jetli</artifactId>
        <version>1.0-SNAPSHOT</version>
    </parent>
    <packaging>war</packaging>
    <artifactId>spring-webmvc-a</artifactId>

    <properties>
        <maven.compiler.source>17</maven.compiler.source>
        <maven.compiler.target>17</maven.compiler.target>
        <project.build.sourceEncoding>UTF-8</project.build.sourceEncoding>
    </properties>

    <dependencies>
        <dependency>
            <groupId>org.springframework</groupId>
            <artifactId>spring-context</artifactId>
            <version>6.0.9</version>
        </dependency>
        <dependency>
            <groupId>org.springframework</groupId>
            <artifactId>spring-web</artifactId>
            <version>6.0.9</version>
        </dependency>
        <dependency>
            <groupId>jakarta.servlet</groupId>
            <artifactId>jakarta.servlet-api</artifactId>
            <version>6.0.0</version>
            <scope>provided</scope>
        </dependency>
    </dependencies>

</project>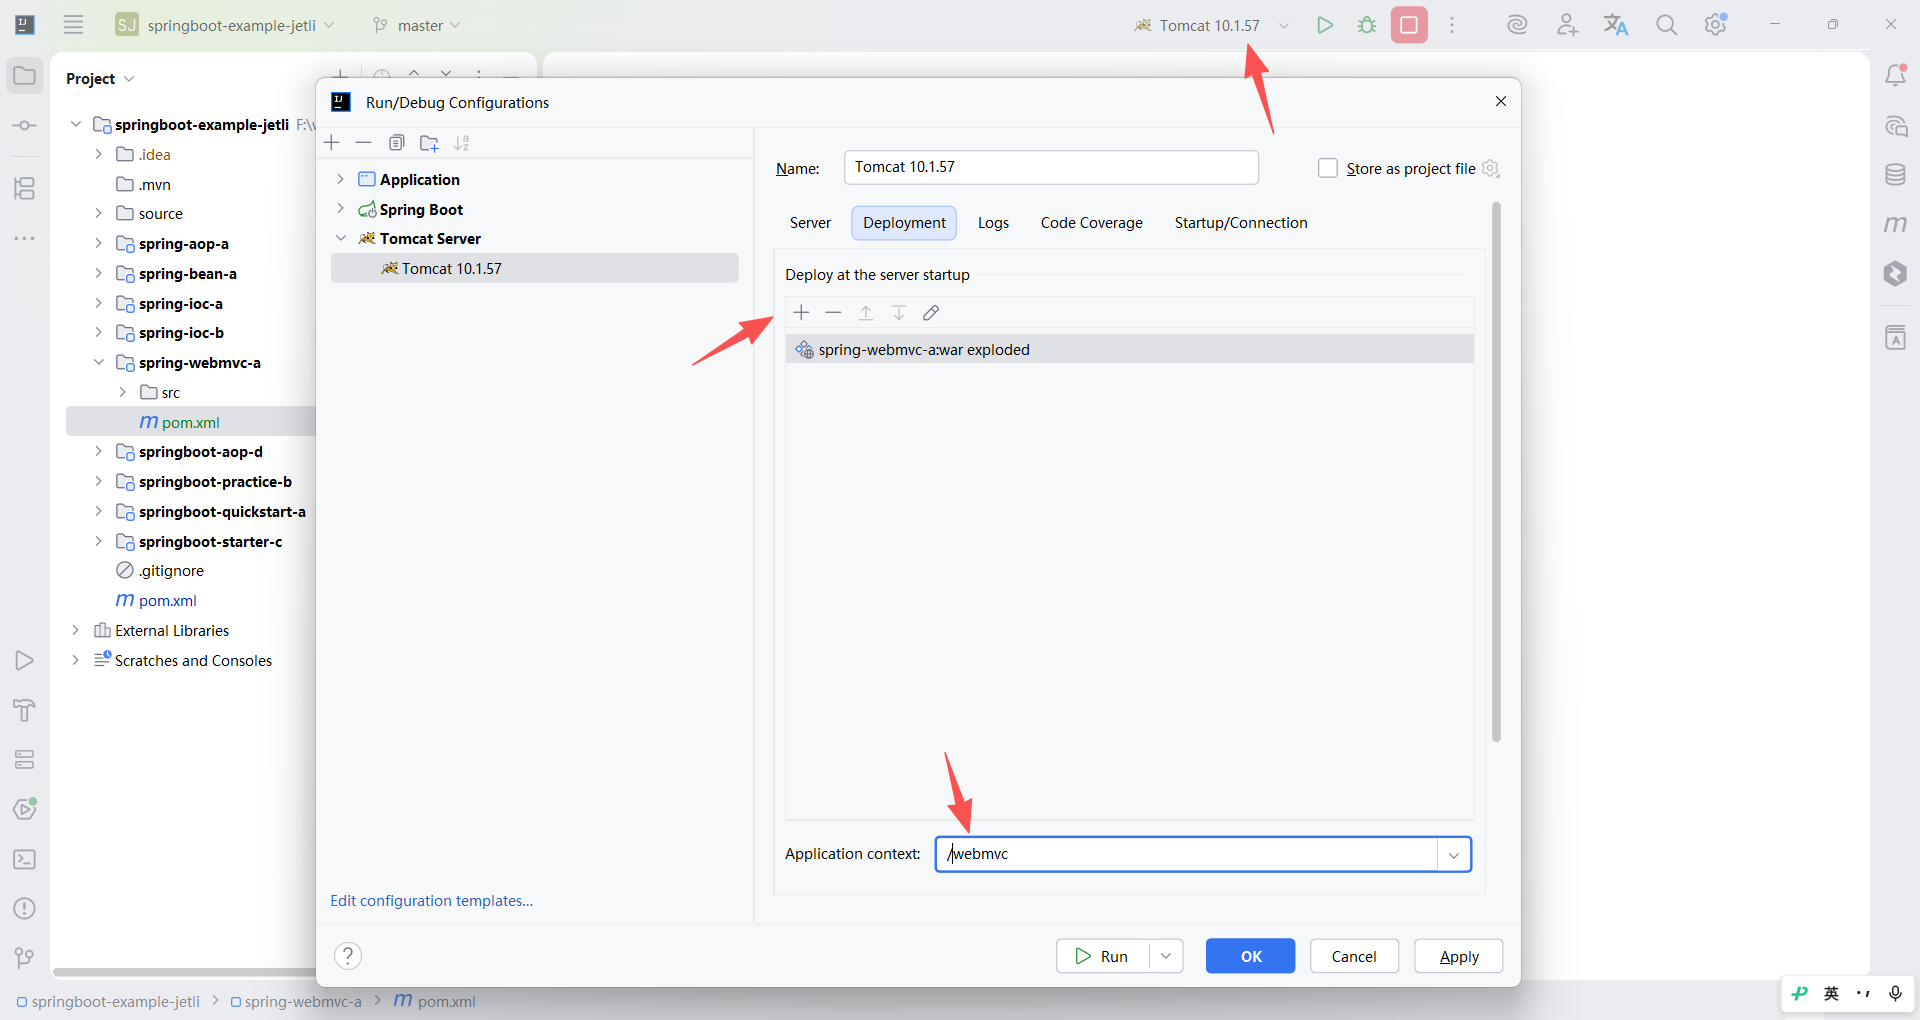
2.基础代码准备
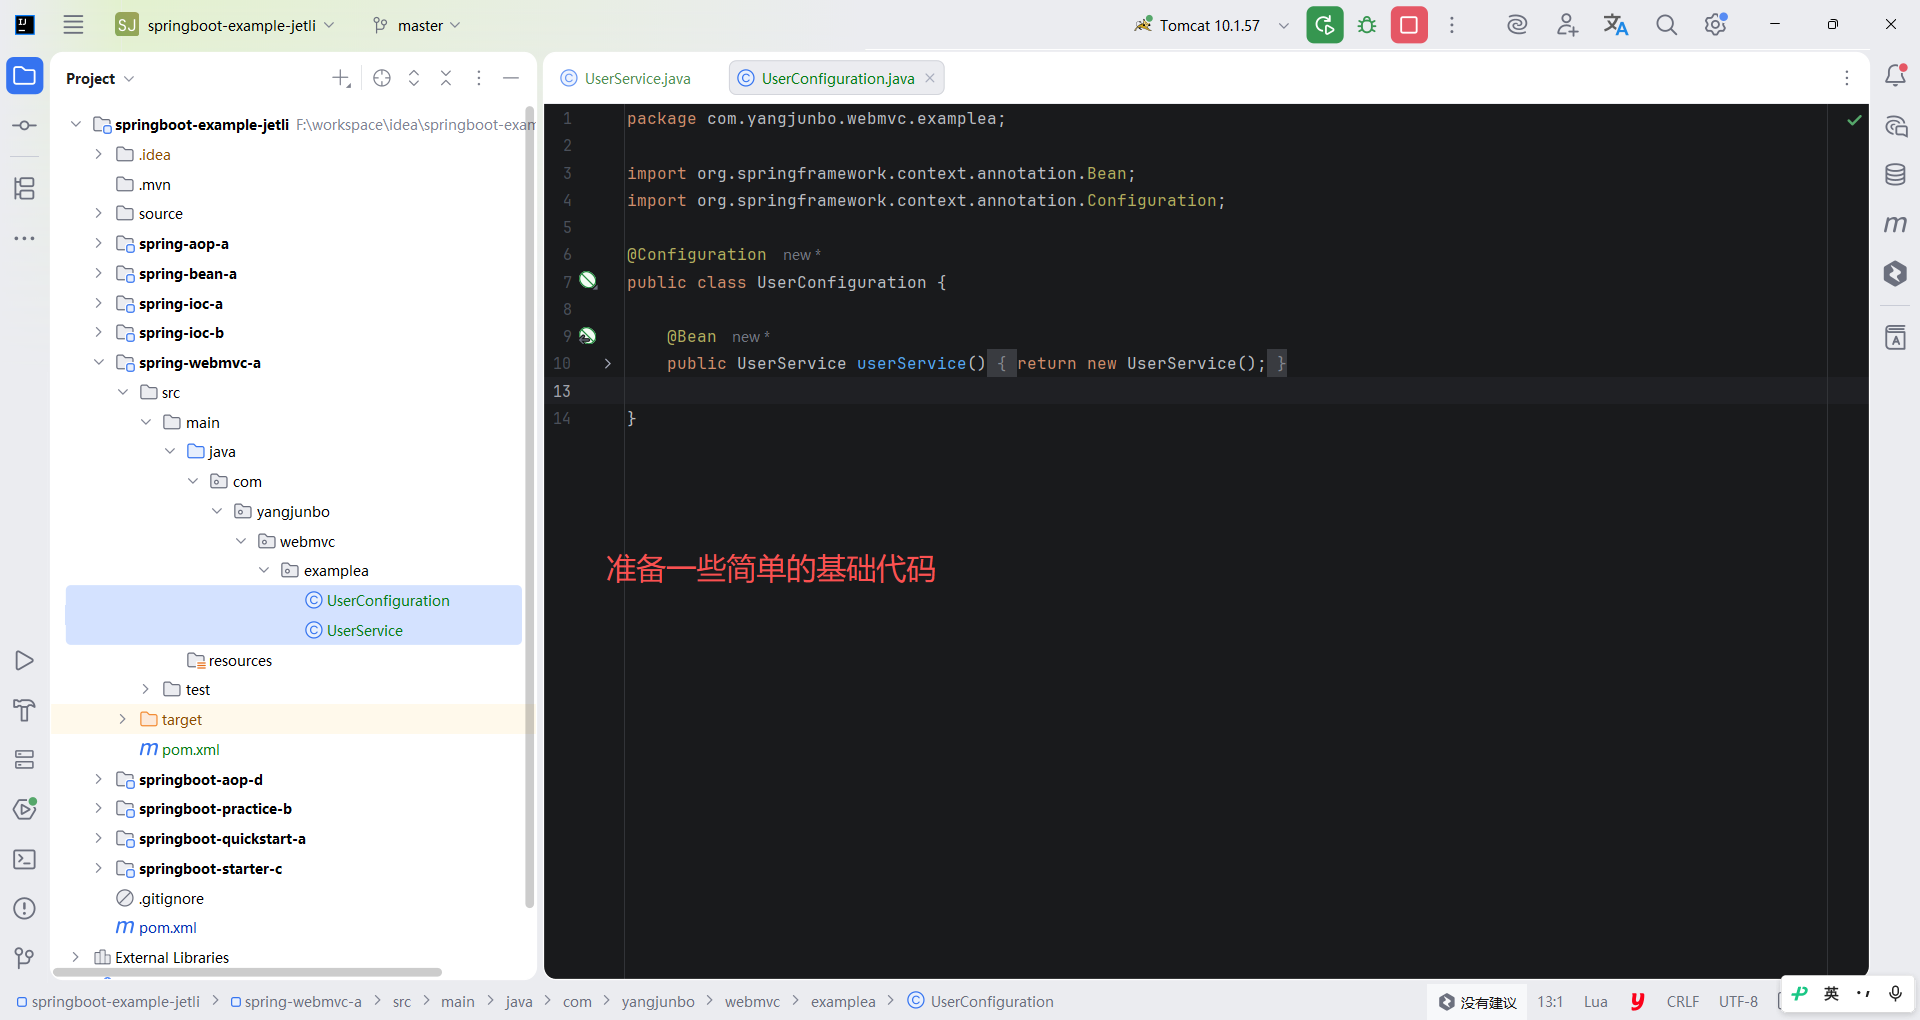
接下来准备一些简单的基础代码,包括一个注解配置类和一个 UserService 类,并将 UserService 注册到 IOC 容器中。
java
package com.yangjunbo.webmvc.examplea;

public class UserService {

    public String get() {
        return "hahaha";
    }

}
java
package com.yangjunbo.webmvc.examplea;

import org.springframework.context.annotation.Bean;
import org.springframework.context.annotation.Configuration;

@Configuration
public class UserConfiguration {

    @Bean
    public UserService userService() {
        return new UserService();
    }

}
3.Servlet 3.0 规范节选
4.Spring Framework 支持 Servlet 3.0 规范
5.WebApplicationInitializer 的编写
3 4 5 属于底层原理讲解,读不懂,先跳过。
9.1.3 Spring MVC 的历史
了解 Spring Framework 整合 Web 场景的开发后,下面正式开始 WebMvc 的学习。照例需要先对 WebMvc 有一个基本的认识。
在 Spring Framework 最初发布正式版本时,Spring MVC 也在同期发布,在那个年代 Spring MVC 的出现是为了给 J2EE 体系的解决方案提供轻量级替代方案。当时的 Spring Framework 对市面上流行的重量级 Web 框架持不同观点,团队成员认为可以制作轻量级的 Web 框架,于是在Spring Framework 发行时同步推出了 Spring MVC 框架。WebMvc 基于 Servlet 规范实现,所以运行基于 WebMvc 的项目需要 Servlet 容器(Tomcat、Jetty 等)服务器支撑。
除 WebMvc 之外,同期还有一个比较流行的 Web 框架是 Struts2,这两个框架共同占据了表现层框架的绝大部分份额。这两个框架最大的区别是,WebMv c的核心是 Servlet,而 Struts2 的核心是 Filter(过滤器)。随着 WebMvc 愈发强大,以及 Struts2 被连续多次曝出有高危漏洞,在2012 年 WebMvc 已经全面超越了 Struts2,成为非常流行的 Java EE 表现层框架。
到了 2017 年,微服务、响应式的概念开始流行,加上互联网应用的并发量要求越来越高,Spring 家族的开发者自然能看清局势,于是在 Spring Framework 5.0 中正式推出了 WebMvc 的兄弟 WebFlux。不同于 WebMvc,WebFlux 不基于 Servlet 规范设计,而是基于响应式、异步非阻塞等理念。响应式、非阻塞代表着承载更高的并发量,所以基于 WebFlux 的项目可以承载单位时间内更多的请求。因为 WebFlux 不基于 Servlet规范,所以 WebFlux 也就不再强依赖于 Servlet 环境,而是必须运行在非阻塞环境的 Web 容器(如 Netty、Undertow 等)。另外 WebFlux 基于响应式设计,所以它也需要有一套响应式框架作为支撑。在 Reactor 和 RxJava 中,Spring Framework 最终选择了 Reactor,这就意味着使用 WebFlux 之前还要先了解和熟悉响应式编程、Reactor 编程。
9.1.4 基于 Servlet 3.0 规范整合 WebMvc
属于底层原理讲解,先跳过。
9.1.5 Spring Boot 整合 WebMvc
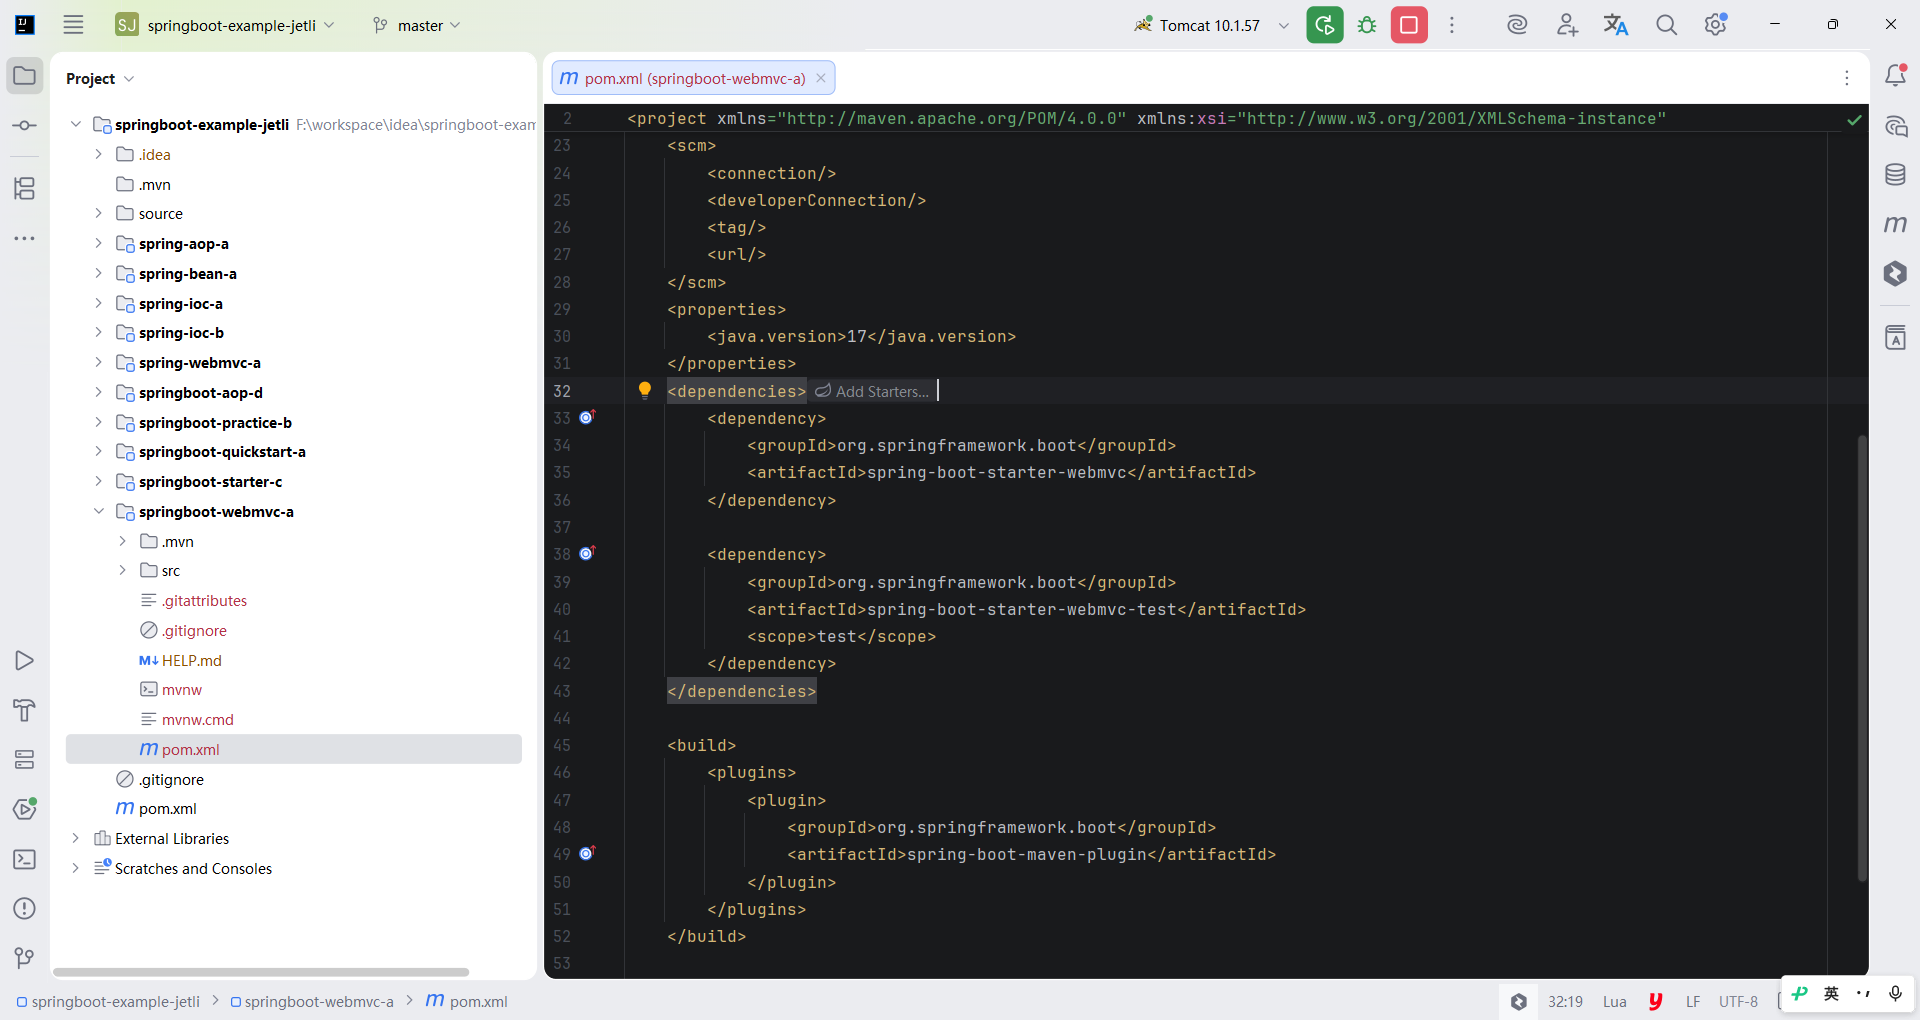
相较于手动整合而言,Spring Boot 整合 WebMvc 的方式显得异常简单,只需要在 pom.xml 文件中引入 spring-boot-starter-web 依赖,即可将WebMvc 场景的所有依赖都导入进来。spring-boot-starter-web 依赖中整合了 WebMvc 的核心,以及必备的依赖包(如处理 JSON 的库Jackson、支持独立运行应用的嵌入式 Web 容器等)。注意,此时并没有导入 JSP 的相关依赖。
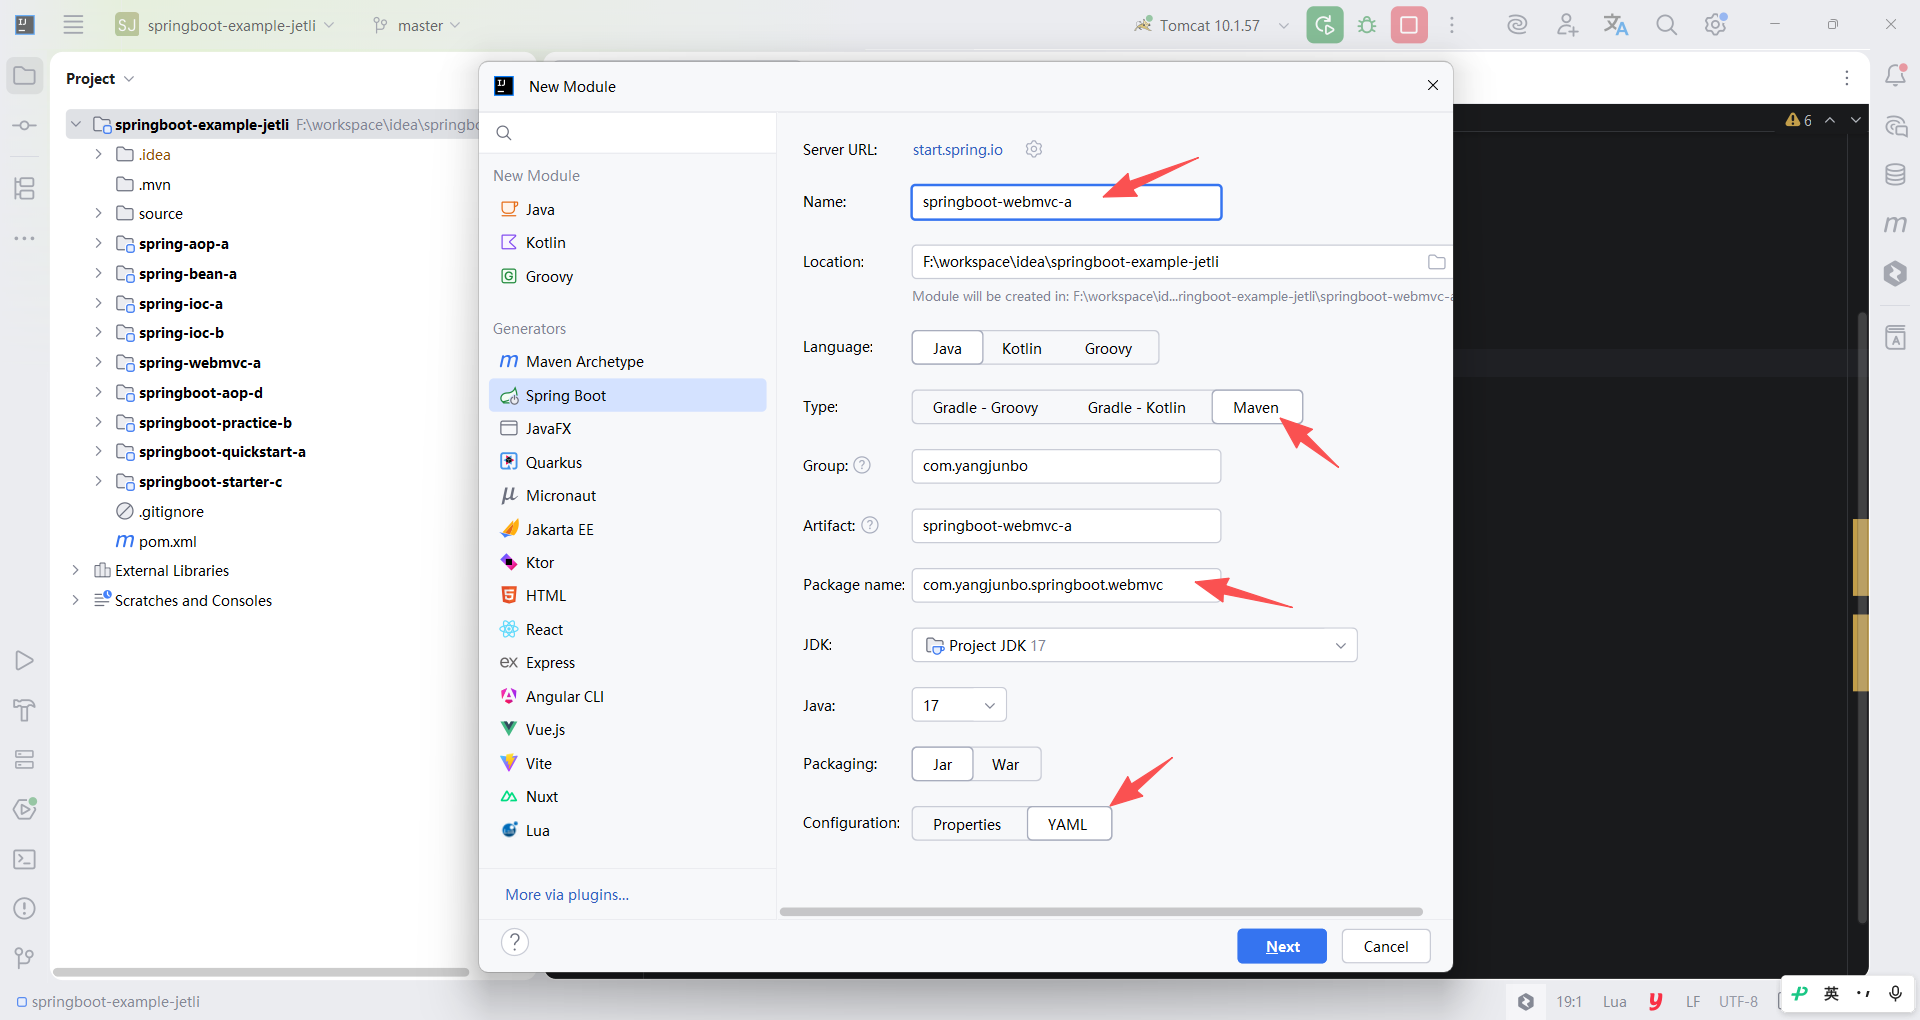
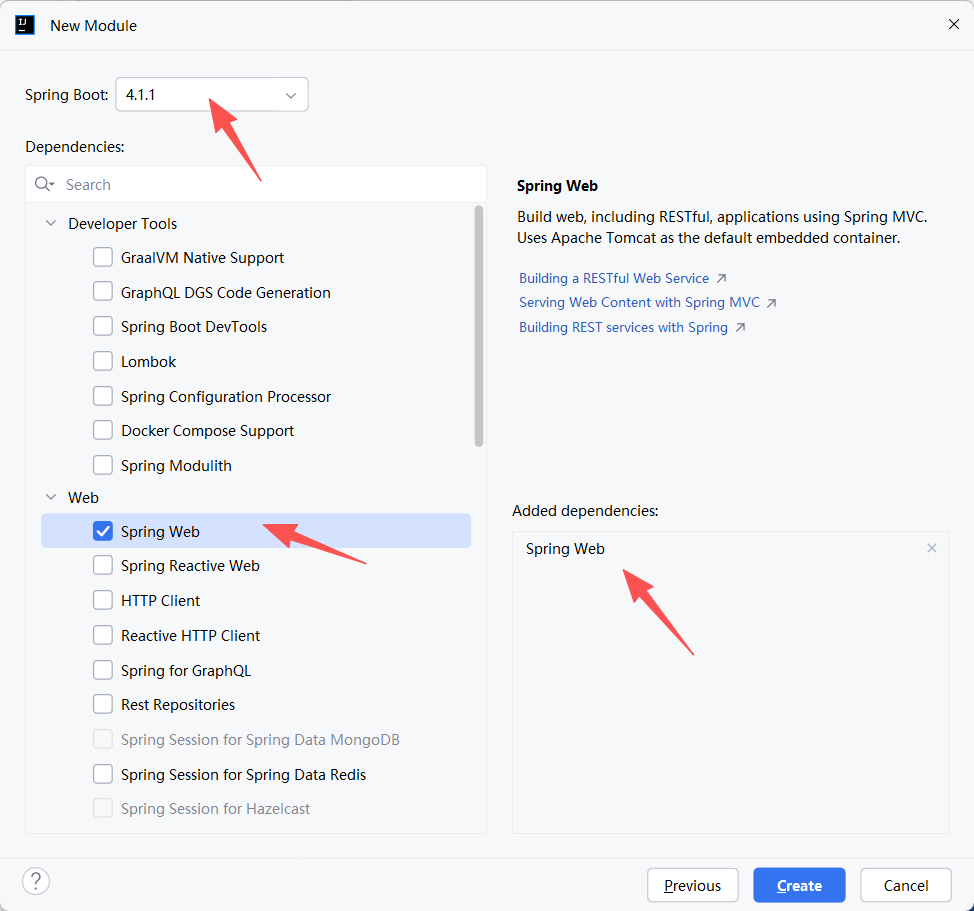
xml
<?xml version="1.0" encoding="UTF-8"?>
<project xmlns="http://maven.apache.org/POM/4.0.0" xmlns:xsi="http://www.w3.org/2001/XMLSchema-instance"
         xsi:schemaLocation="http://maven.apache.org/POM/4.0.0 https://maven.apache.org/xsd/maven-4.0.0.xsd">
    <modelVersion>4.0.0</modelVersion>
    <parent>
        <groupId>org.springframework.boot</groupId>
        <artifactId>spring-boot-starter-parent</artifactId>
        <version>4.1.1</version>
        <relativePath/> <!-- lookup parent from repository -->
    </parent>
    <groupId>com.yangjunbo</groupId>
    <artifactId>springboot-webmvc-a</artifactId>
    <version>0.0.1-SNAPSHOT</version>
    <name>springboot-webmvc-a</name>
    <description>springboot-webmvc-a</description>
    <url/>
    <licenses>
        <license/>
    </licenses>
    <developers>
        <developer/>
    </developers>
    <scm>
        <connection/>
        <developerConnection/>
        <tag/>
        <url/>
    </scm>
    <properties>
        <java.version>17</java.version>
    </properties>
    <dependencies>
        <dependency>
            <groupId>org.springframework.boot</groupId>
            <artifactId>spring-boot-starter-webmvc</artifactId>
        </dependency>

        <dependency>
            <groupId>org.springframework.boot</groupId>
            <artifactId>spring-boot-starter-webmvc-test</artifactId>
            <scope>test</scope>
        </dependency>
    </dependencies>

    <build>
        <plugins>
            <plugin>
                <groupId>org.springframework.boot</groupId>
                <artifactId>spring-boot-maven-plugin</artifactId>
            </plugin>
        </plugins>
    </build>

</project>
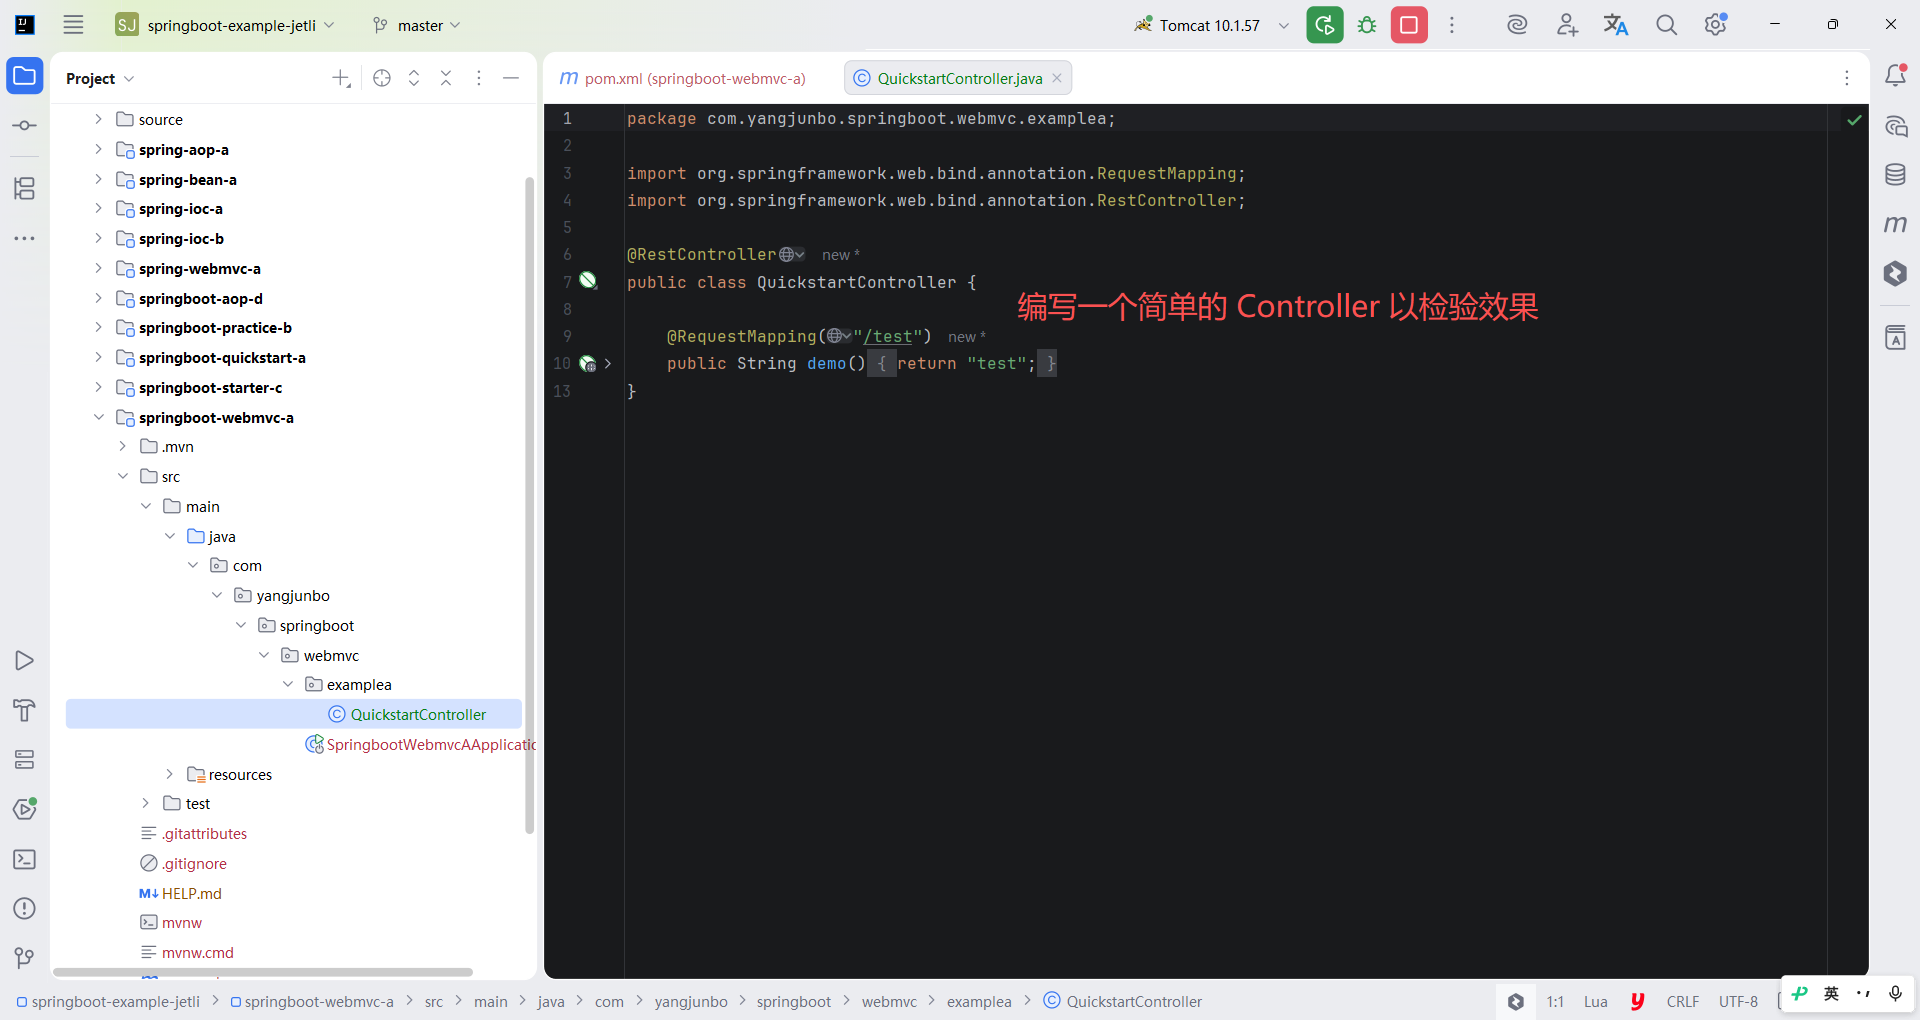
下面可以编写一个简单的 Controller 以检验效果,在 webmvc 包下新建一个 examplea.QuickstartController,并在类上声明 @RestController 注解,这个注解是 @Controller 注解的派生注解,代表当前 Controller 下所有标注了 @RequestMapping 注解的方法都会将方法的返回值作为响应体,例如代码中声明的 test 方法就会把返回值 "test" 字符串作为响应体显示在浏览器上。
java
package com.yangjunbo.springboot.webmvc.examplea;

import org.springframework.web.bind.annotation.RequestMapping;
import org.springframework.web.bind.annotation.RestController;

@RestController
public class QuickstartController {

    @RequestMapping("/test")
    public String demo() {
        return "test";
    }
}
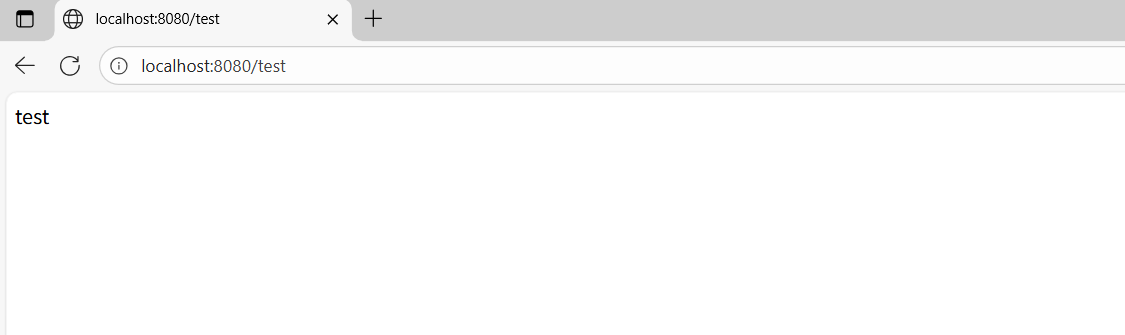
使用 Spring Boot 整合 WebMvc 的工程不需要再部署到 Tomcat,而是直接运行主启动类即可,Spring Boot 整合 WebMvc 时默认引入了嵌入式Tomcat 作为 Web 容器,这也是 Spring Boot 应用可独立运行的体现。启动完成后,通过浏览器访问 /test 请求,可以发现浏览器中收到了 "test" 字符串的响应,证明 Spring Boo t的 WebMvc 场景整合成功。若没有特别说明,后续的所有内容均基于 Spring Boot 工程的 WebMvc 开发。
9.2 视图技术
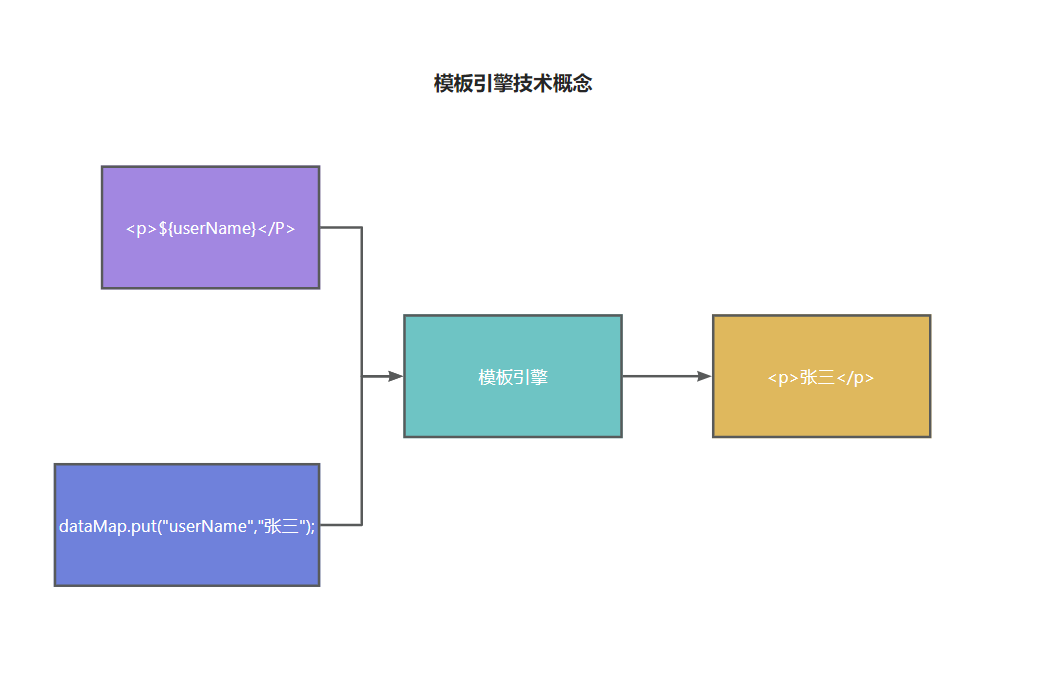
由于 Spring Boot 默认使用 jar 包的形式运行工程,并且使用内置 Web 容器后默认不支持 JSP 开发,因此必须考虑其他视图层技术。Spring Boot 给的选择之一是使用模板引擎。说起模板引擎,其实 JSP 本身就是一个模板引擎,包括早期的 FreeMarker、Velocity 以及后起之秀 Thymeleaf、Mustache 等,都是 Spring Boot 当下或者之前支持的模板引擎。模板引擎的本质是将一个页面模板和动态数据组装起来,渲染为一个带有动态数据的页面,如图所示。
当使用模板引擎时,Web 应用通常是一体式应用,即一个工程中同时包含后端代码和前端页面,此时后端应用需要同时负责请求响应、业务逻辑执行以及页面间跳转,此时模板引擎就作为静态模板页面和动态数据的组装器,将二者结合并渲染出真正的动态页面并响应给客户端;
除了使用模板引擎之外,另一种 Web 应用开发的方式是前后端分离开发,这种方式下前端与后端通常分属两个不同的工程,前端工程编写的页面向后端发送请求,后端服务器只负责执行业务逻辑和响应数据,不负责页面跳转。相应的简单架构如图所示。
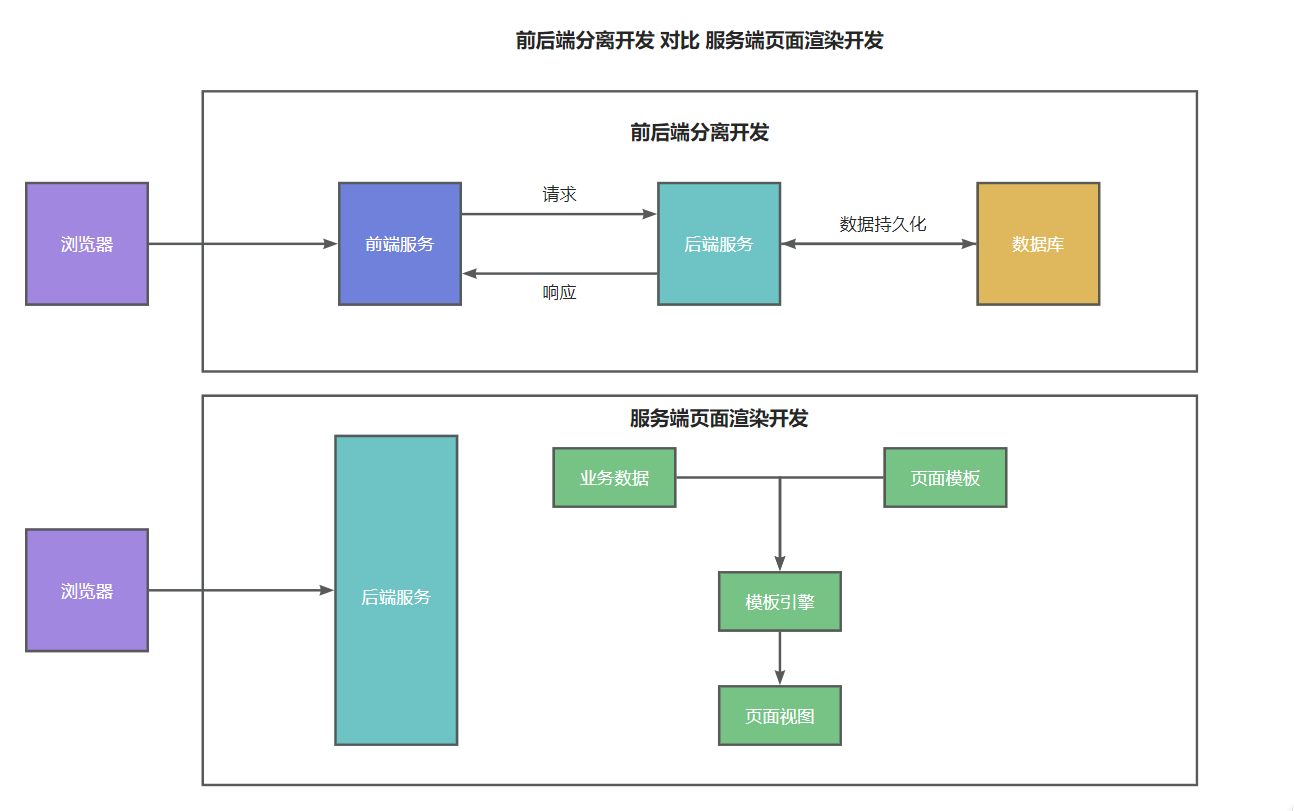
目前 Spring Boot 推荐使用的模板引擎是 Thymeleaf,本节主要讲解 Spring Boot 整合 Thymeleaf 后的简单页面开发和相关语法,前后端分离开发的内容会后续讲解。
9.2.1 Thymeleaf 概述与整合
Thymeleaf 之所以能被 Spring Boot 选中,成为服务端页面渲染的模板引擎首选,是因为 Thymeleaf 的语法简单、功能强大,而且使用Thymeleaf 时直接面向 HTML 文件,不需要先转换页面为 JSP 或其他格式,直接在 HTML 页面上做二次开发即可完成动态渲染。可以从 Thymeleaf 的官网中找到相关的在线文档。
Spring Boo t官方已经提供了 Thymeleaf 的场景启动器,只需要在 pom.xml 文件中引入坐标。
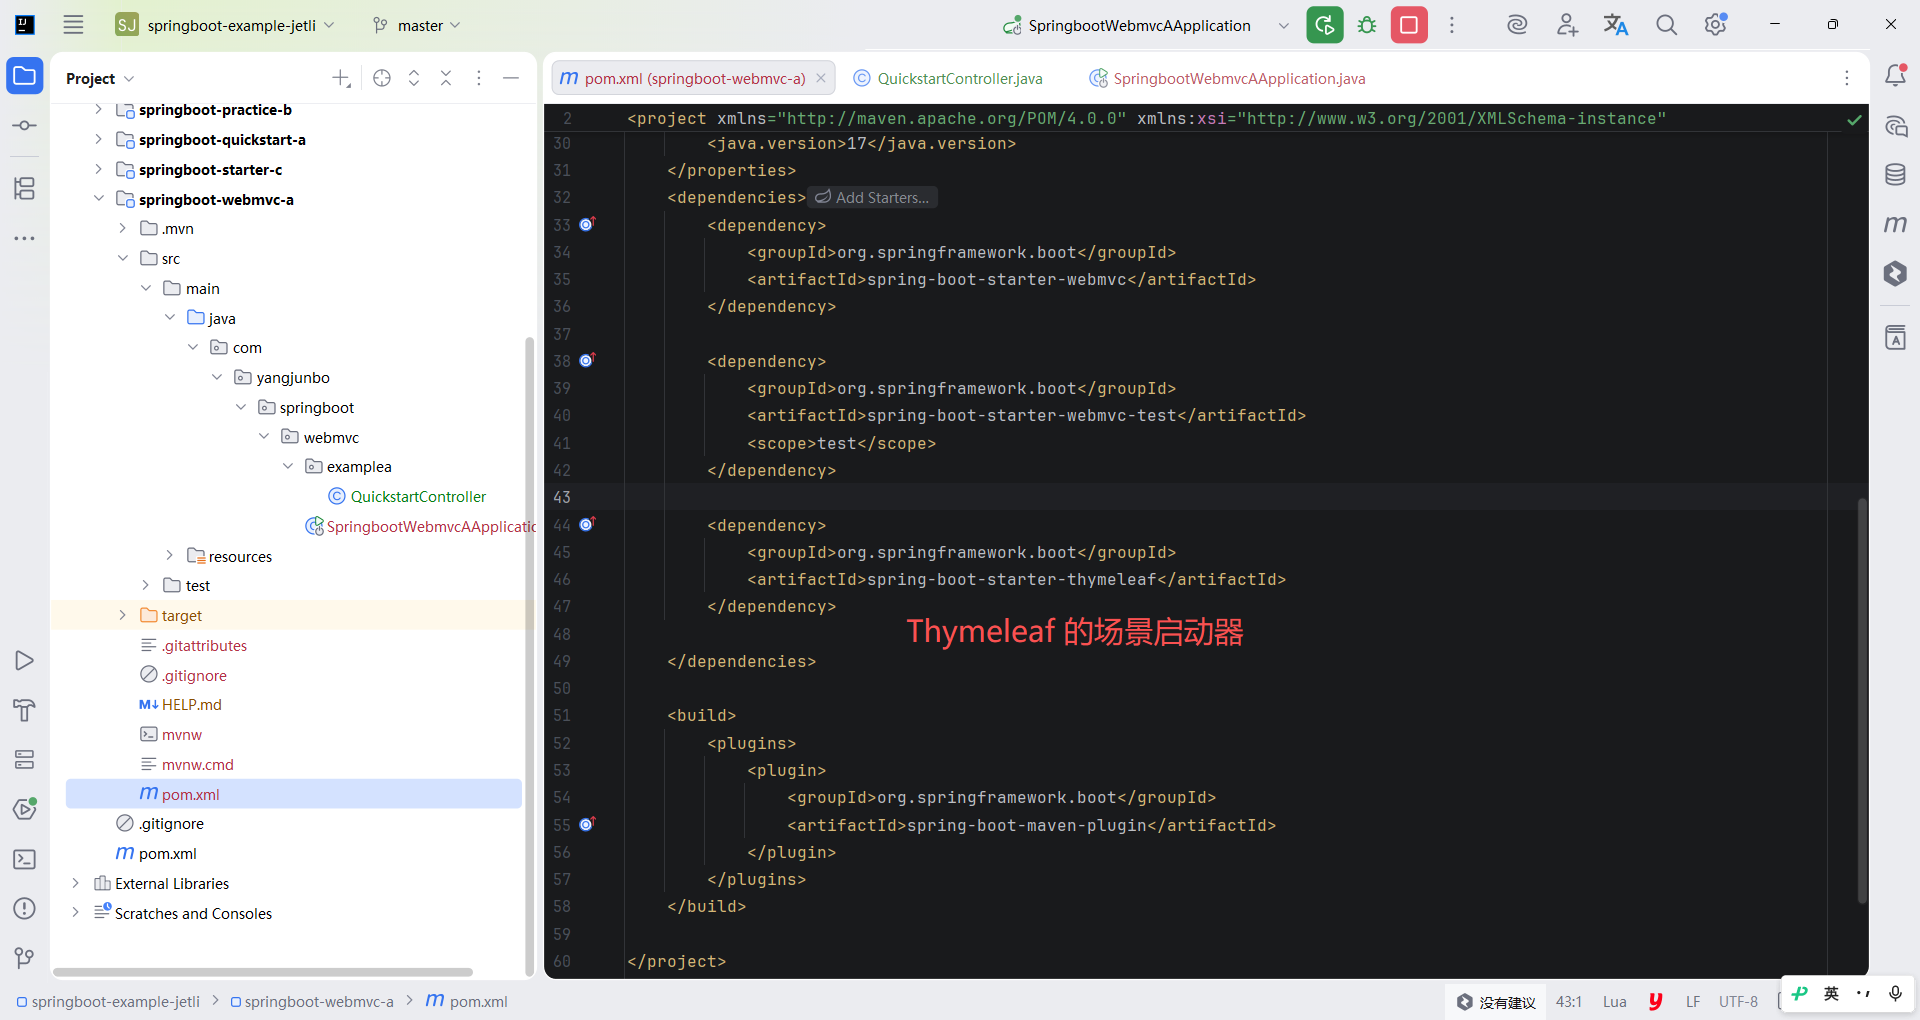
xml
<?xml version="1.0" encoding="UTF-8"?>
<project xmlns="http://maven.apache.org/POM/4.0.0" xmlns:xsi="http://www.w3.org/2001/XMLSchema-instance"
         xsi:schemaLocation="http://maven.apache.org/POM/4.0.0 https://maven.apache.org/xsd/maven-4.0.0.xsd">
    <modelVersion>4.0.0</modelVersion>
    <parent>
        <groupId>org.springframework.boot</groupId>
        <artifactId>spring-boot-starter-parent</artifactId>
        <version>4.1.1</version>
        <relativePath/> <!-- lookup parent from repository -->
    </parent>
    <groupId>com.yangjunbo</groupId>
    <artifactId>springboot-webmvc-a</artifactId>
    <version>0.0.1-SNAPSHOT</version>
    <name>springboot-webmvc-a</name>
    <description>springboot-webmvc-a</description>
    <url/>
    <licenses>
        <license/>
    </licenses>
    <developers>
        <developer/>
    </developers>
    <scm>
        <connection/>
        <developerConnection/>
        <tag/>
        <url/>
    </scm>
    <properties>
        <java.version>17</java.version>
    </properties>
    <dependencies>
        <dependency>
            <groupId>org.springframework.boot</groupId>
            <artifactId>spring-boot-starter-webmvc</artifactId>
        </dependency>

        <dependency>
            <groupId>org.springframework.boot</groupId>
            <artifactId>spring-boot-starter-webmvc-test</artifactId>
            <scope>test</scope>
        </dependency>

        <dependency>
            <groupId>org.springframework.boot</groupId>
            <artifactId>spring-boot-starter-thymeleaf</artifactId>
        </dependency>

    </dependencies>

    <build>
        <plugins>
            <plugin>
                <groupId>org.springframework.boot</groupId>
                <artifactId>spring-boot-maven-plugin</artifactId>
            </plugin>
        </plugins>
    </build>

</project>
当引入场景启动器后,与 Thymeleaf 相关的自动配置将会生效,包括自动配置视图解析器、核心引擎等。在 Spring Boot 的 Web 应用中,默认情况下需要把 HTML 文件放在 src/main/resources/templates 目录下,相关的静态文件则放在 src/main/resources/static 目录下,这样做的目的是迎合 Spring Boot 约定大于配置中的"约定项",当按照约定的方式完成操作后,便可自动得到预期的效果。
为了验证整合是否正确,可以在 resources/templates 目录下新建一个 demo.html 页面,并简单声明一些结构。相应地还需要编写一个DemoController 用于页面跳转,注意 DemoController 类上声明的注解是 @Controller 而不是 @RestController。
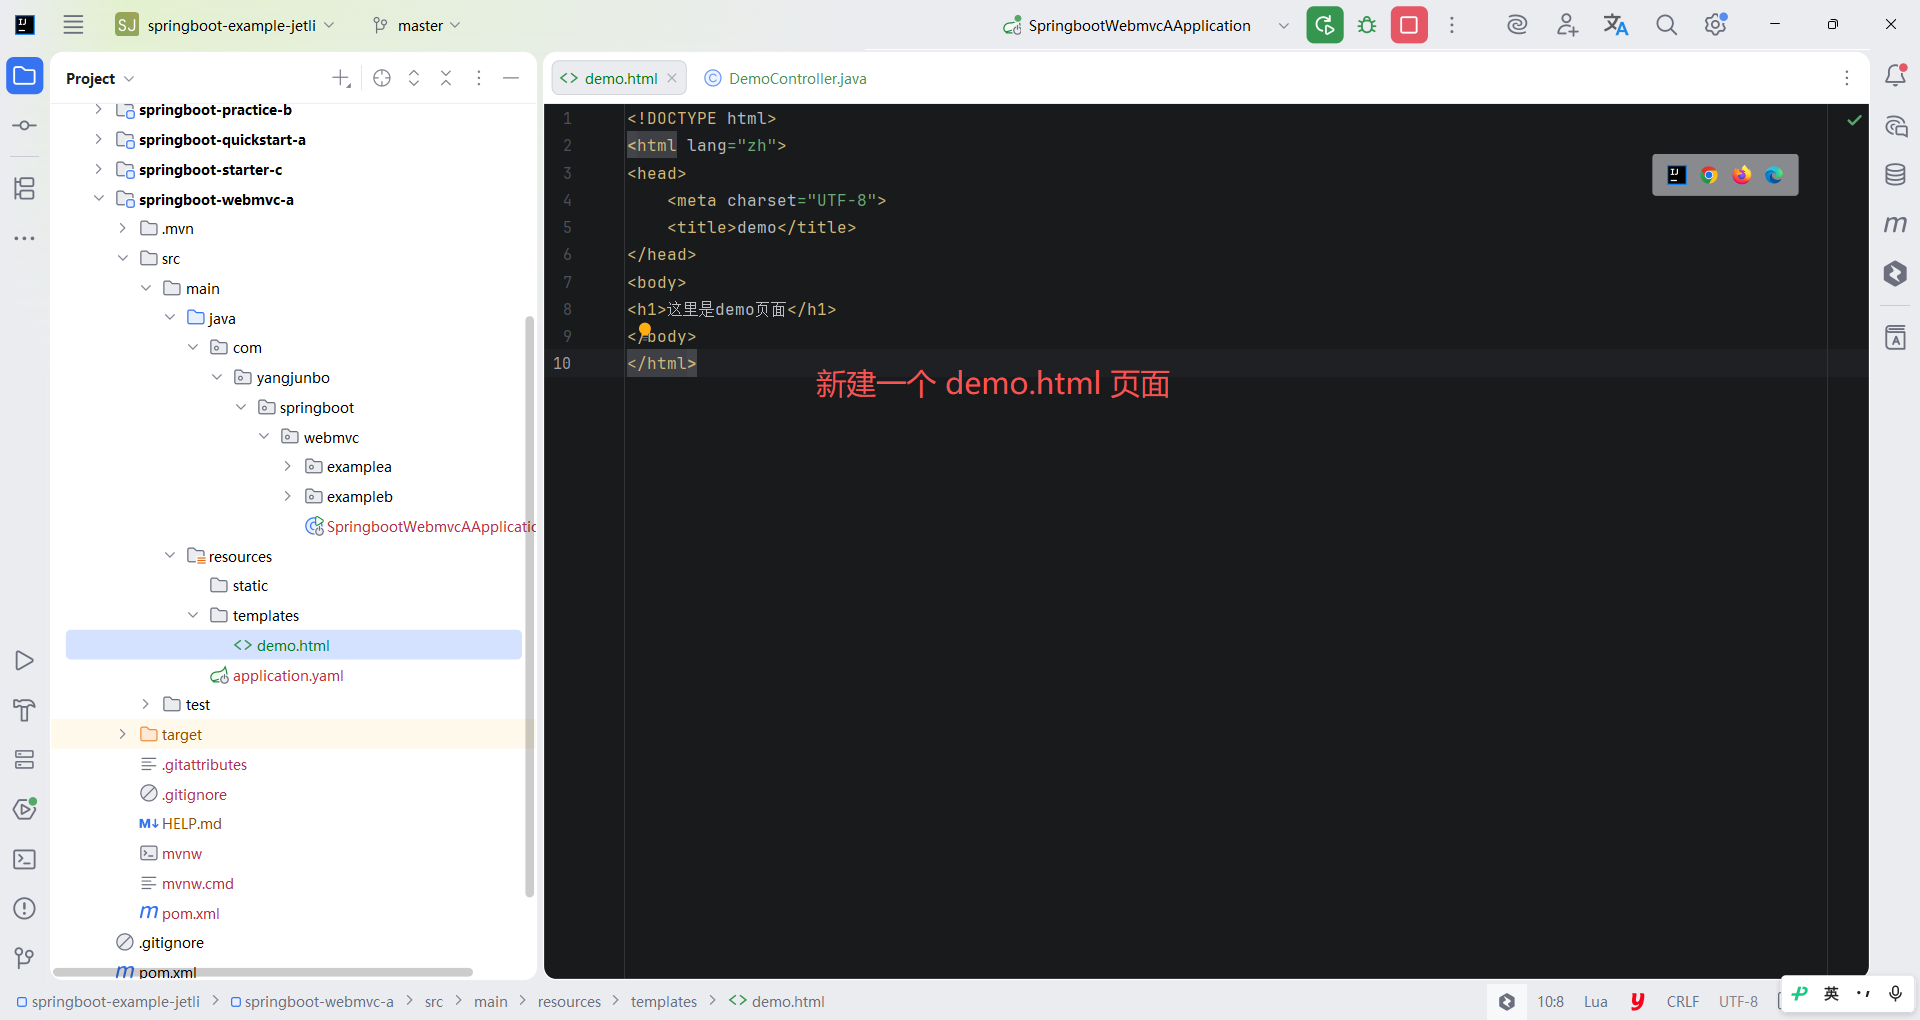
html
<!DOCTYPE html>
<html lang="zh">
<head>
    <meta charset="UTF-8">
    <title>demo</title>
</head>
<body>
<h1>这里是demo页面</h1>
</body>
</html>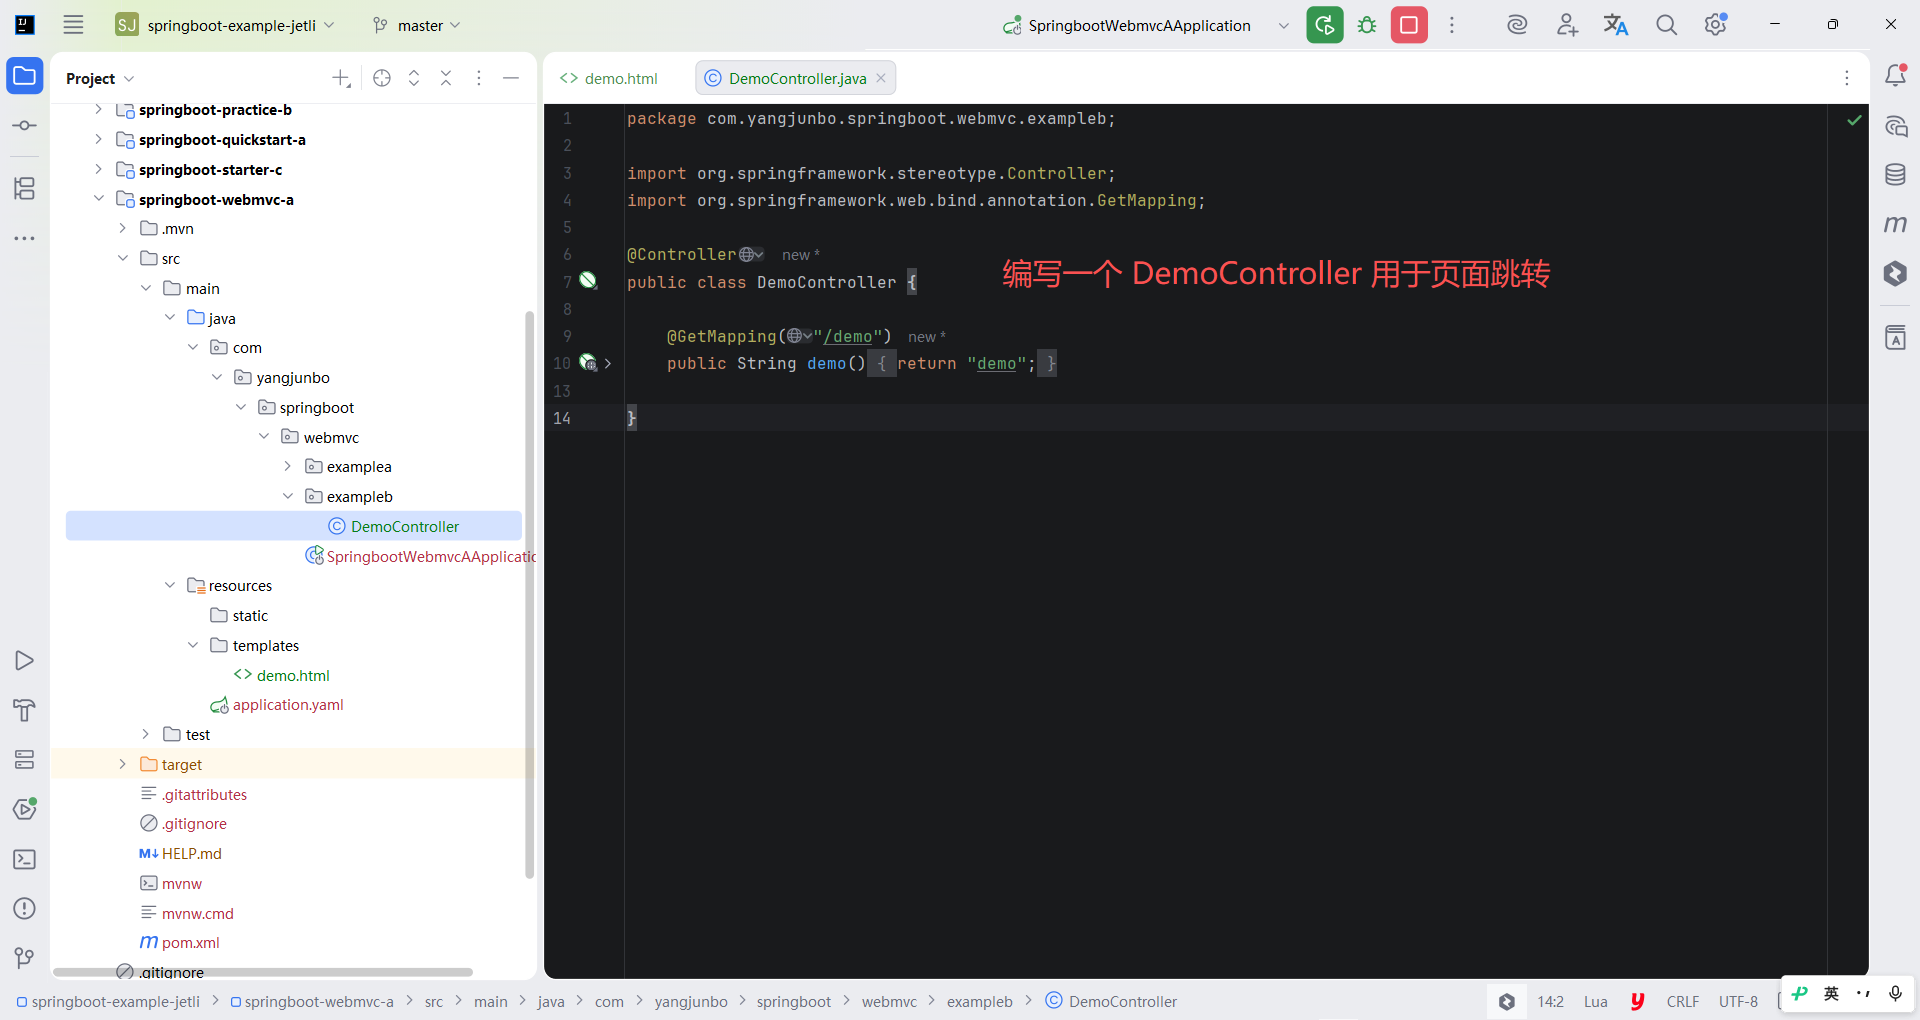
java
package com.yangjunbo.springboot.webmvc.exampleb;

import org.springframework.stereotype.Controller;
import org.springframework.web.bind.annotation.GetMapping;

@Controller
public class DemoController {

    @GetMapping("/demo")
    public String demo() {
        return "demo";
    }

}
编写完毕后,可以运行主启动类 SpringbootWebmvcAApplication,随后在浏览器中访问 /demo 路径,可以发现 demo.html 的内容被成功响应在浏览器上,证明整合 Thymeleaf 成功。
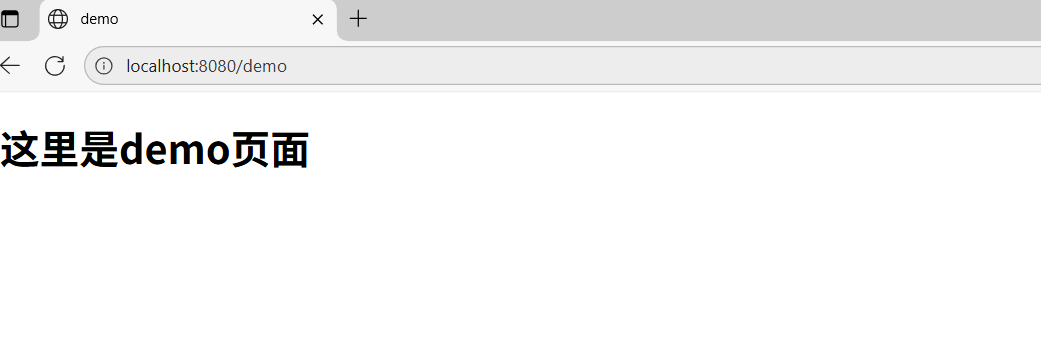
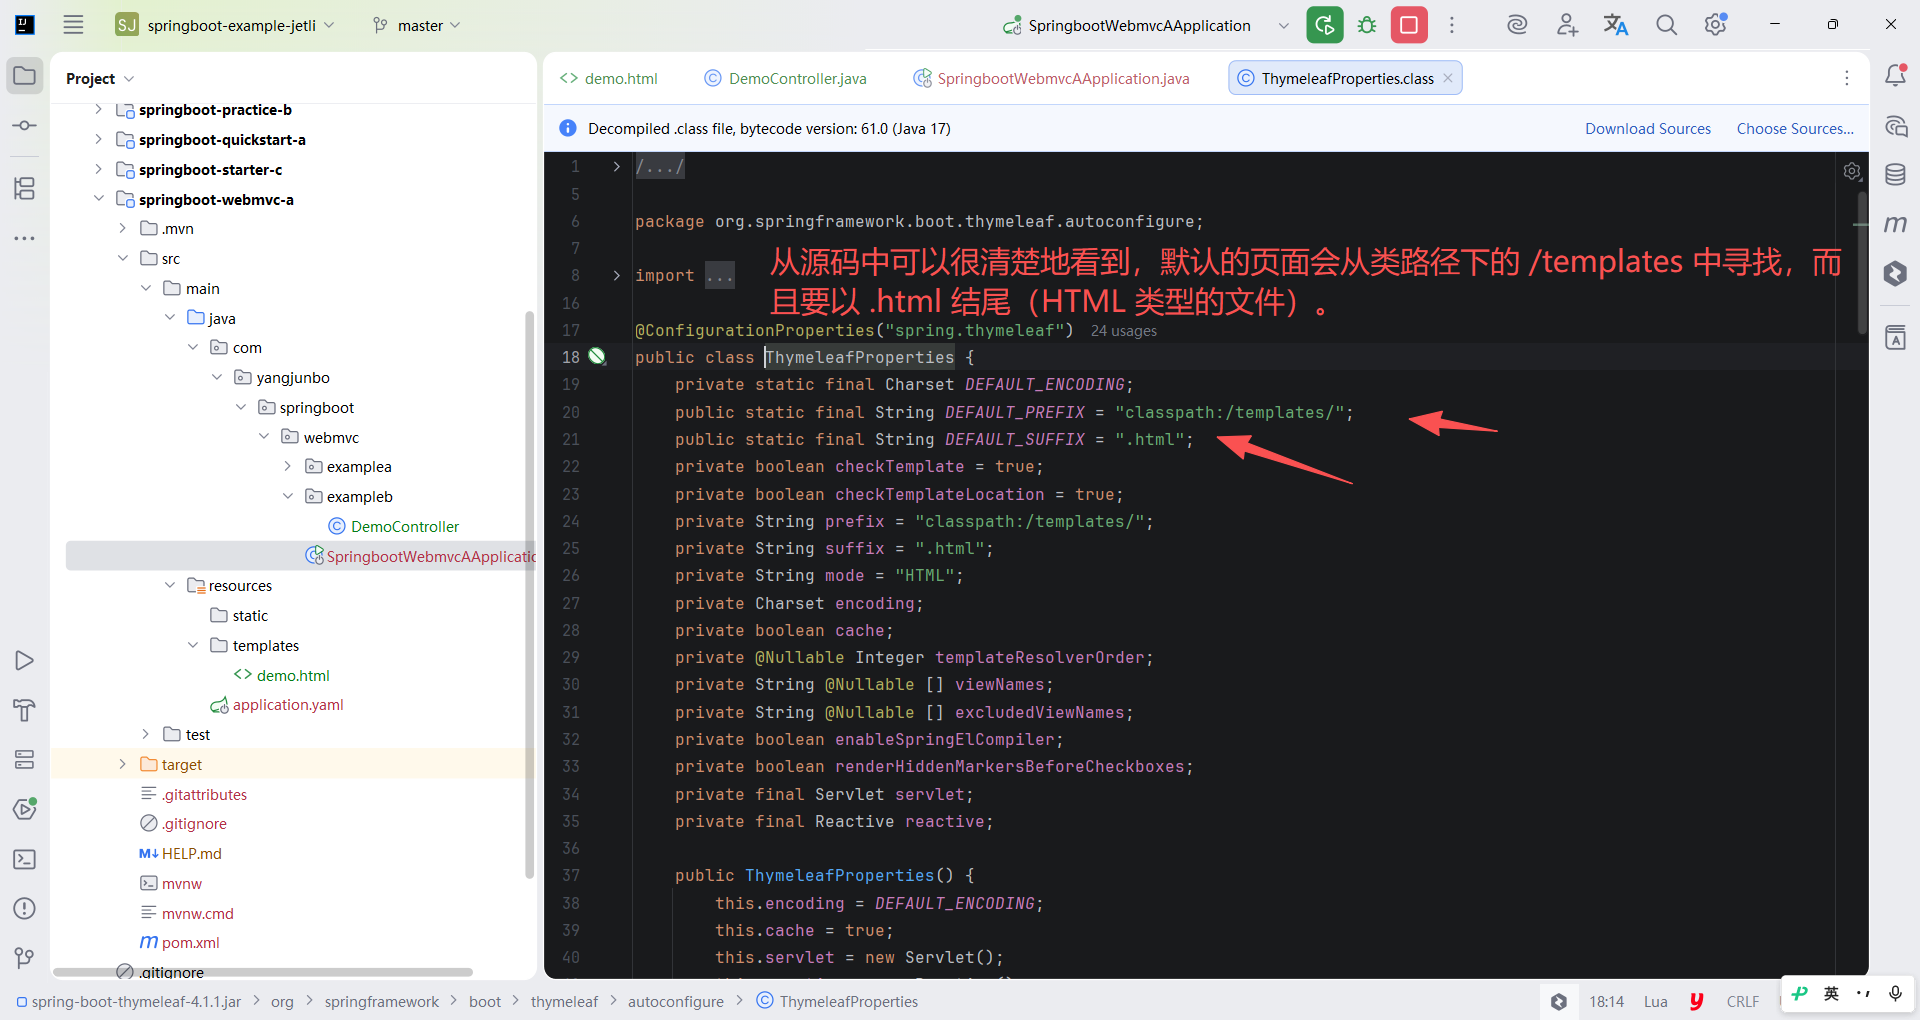
之所以将 HTML 文件放在 resources/templates 路径下能正常被访问,是因为 Spring Boot 整合 Thymeleaf 时默认给了两个配置,这些配置项都被封装在 ThymeleafProperties 类中。从源码中可以很清楚地看到,默认的页面会从类路径下的 /templates 中寻找,而且要以 .html 结尾(HTML 类型的文件)。
静态页面的开发过程中,浏览器可能会对静态页面进行缓存,这样会影响前端页面的开发效率,可以通过声明spring.thymeleaf.cache=false 使 Thymeleaf 禁用页面缓存,从而避免一些不必要的麻烦。
9.2.2 Thymeleaf 快速上手
1.th 指令
Thymeleaf 之所以能够兼顾静态页面呈现和动态渲染数据,得益于它的核心动态指令 th 系列,以 th: 开头的属性代表在页面经过Thymeleaf 渲染时动态渲染,而不带 th: 开头的属性就是 html 的原生属性,这样做可以保证两个属性共存不冲突,当直接打开 html 文件时,原生属性生效,而经过 Thymeleaf 渲染后原生属性会被 th 开头的属性动态覆盖,达到动态渲染的效果。
要想使用 Thymeleaf的语法和指令,需要在 标签上引入 Thymeleaf 的名称空间。引入名称空间后,编写代码时 IDE 也会有相应的语法提示。
html
<!DOCTYPE html>
<html lang="zh" xmlns:th="http://www.thymeleaf.org">
......
</html>
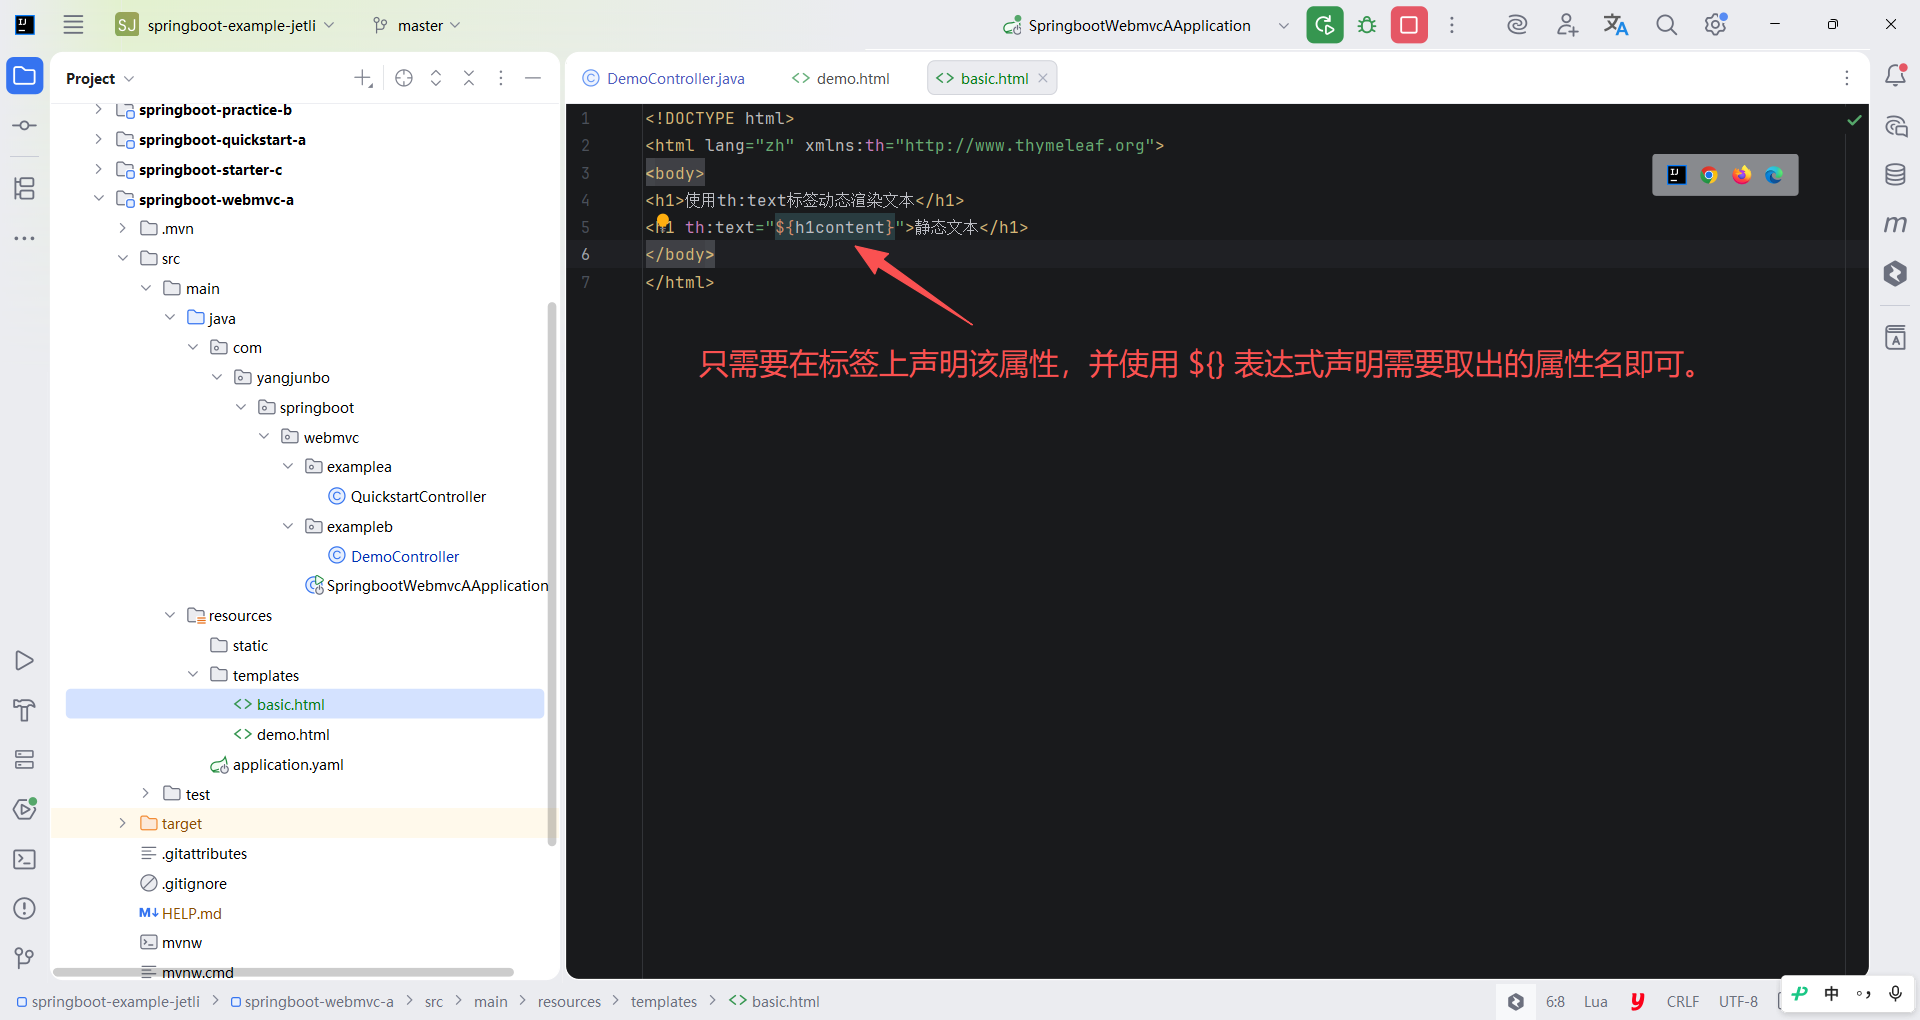
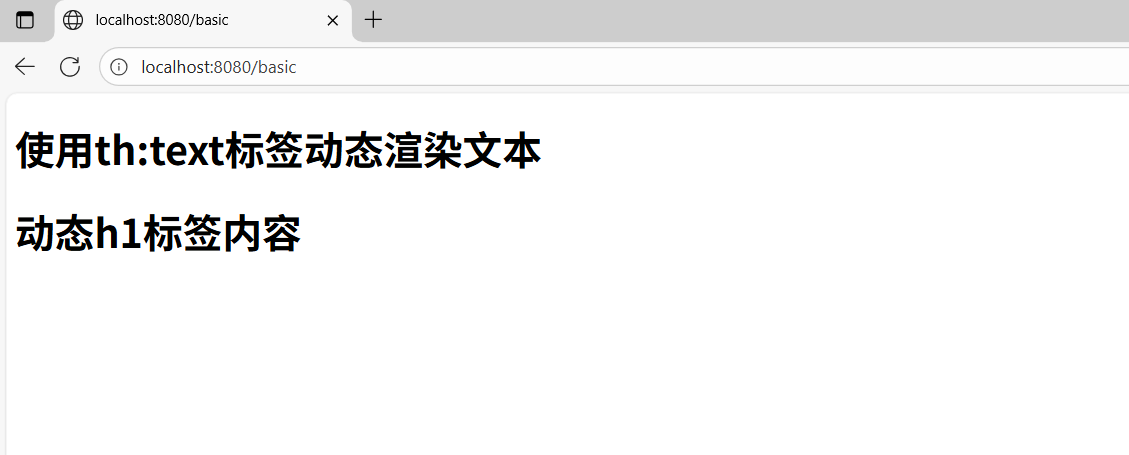
首先介绍与数据渲染相关的指令,th:text 的作用是给标签体内渲染文本值,比如给 span 标签、div 标签、h1 标题标签等,它的使用方式非常简单,只需要在标签上声明该属性,并使用 ${} 表达式声明需要取出的属性名即可。对应的,需要在 Controller 的代码中设置 h1content 的值,以确保 Thymeleaf 取到值。
html
<!DOCTYPE html>
<html lang="zh" xmlns:th="http://www.thymeleaf.org">
<body>
<h1>使用th:text标签动态渲染文本</h1>
<h1 th:text="${h1content}">静态文本</h1>
</body>
</html>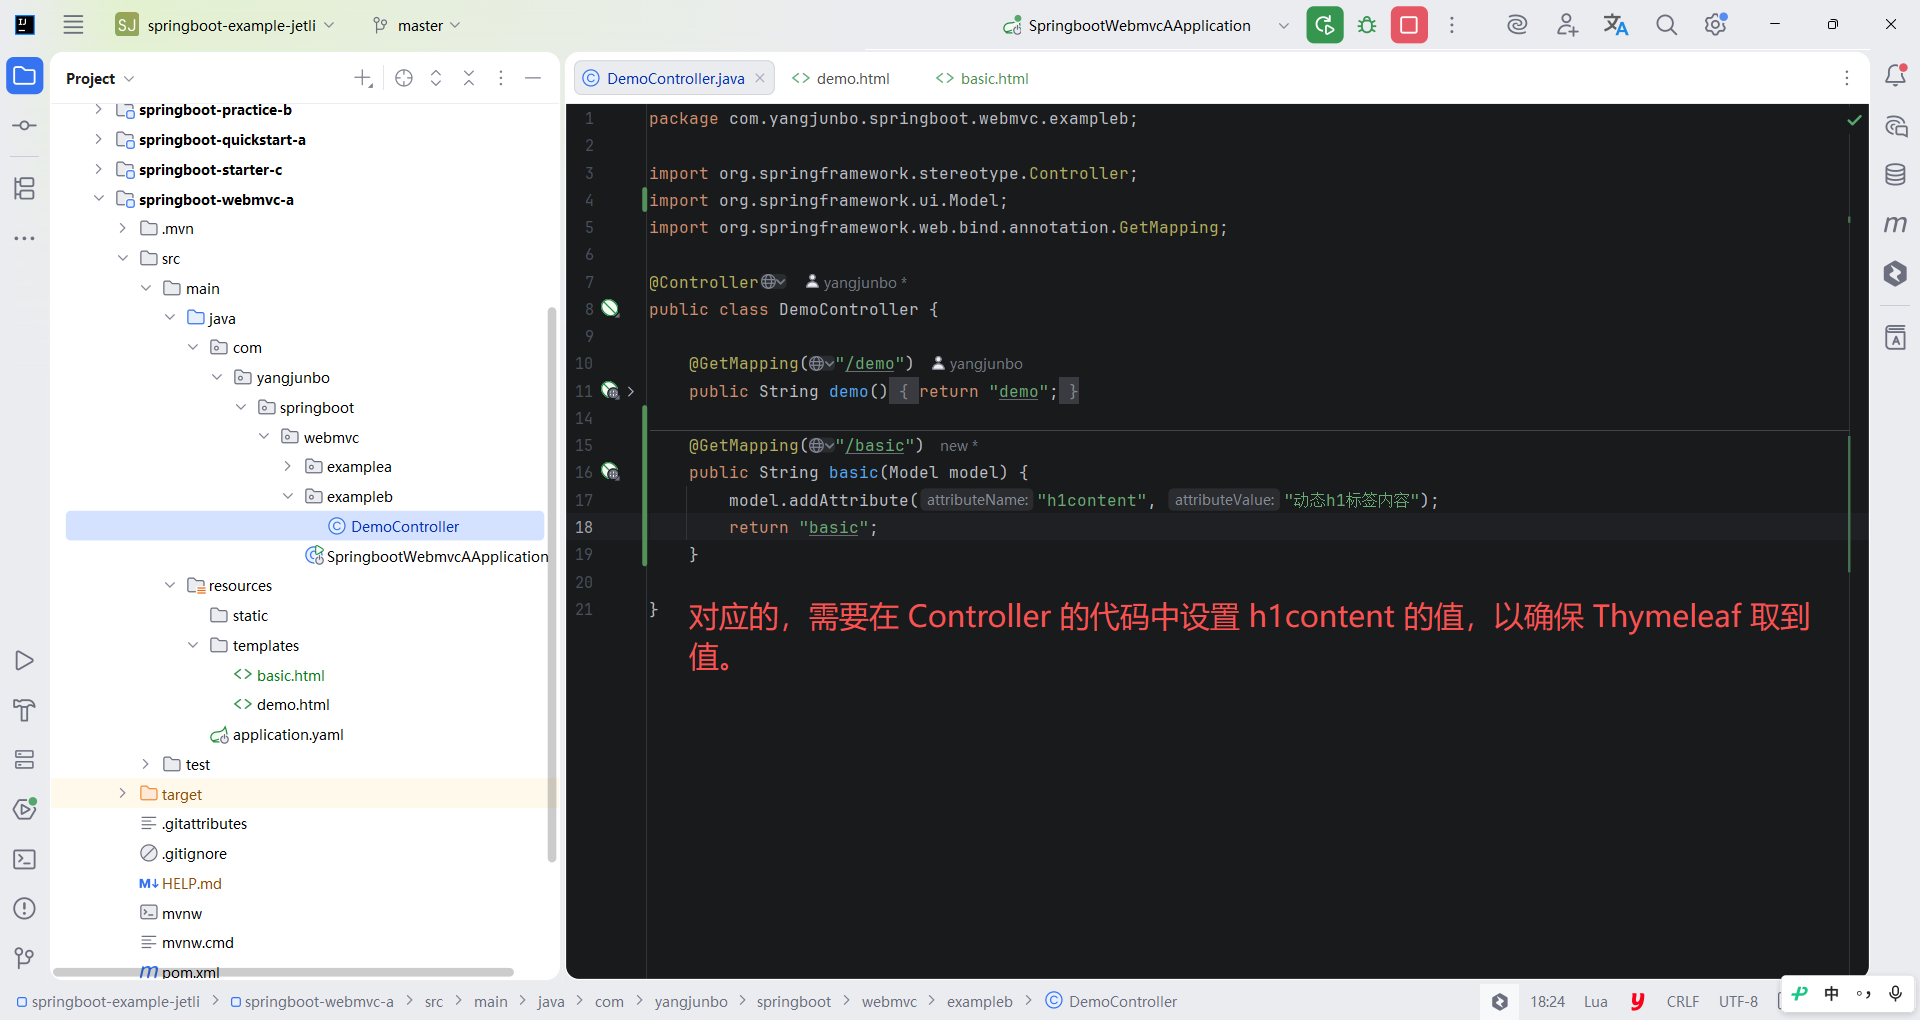
java
package com.yangjunbo.springboot.webmvc.exampleb;

import org.springframework.stereotype.Controller;
import org.springframework.ui.Model;
import org.springframework.web.bind.annotation.GetMapping;

@Controller
public class DemoController {

    @GetMapping("/demo")
    public String demo() {
        return "demo";
    }

    @GetMapping("/basic")
    public String basic(Model model) {
        model.addAttribute("h1content", "动态h1标签内容");
        return "basic";
    }

}
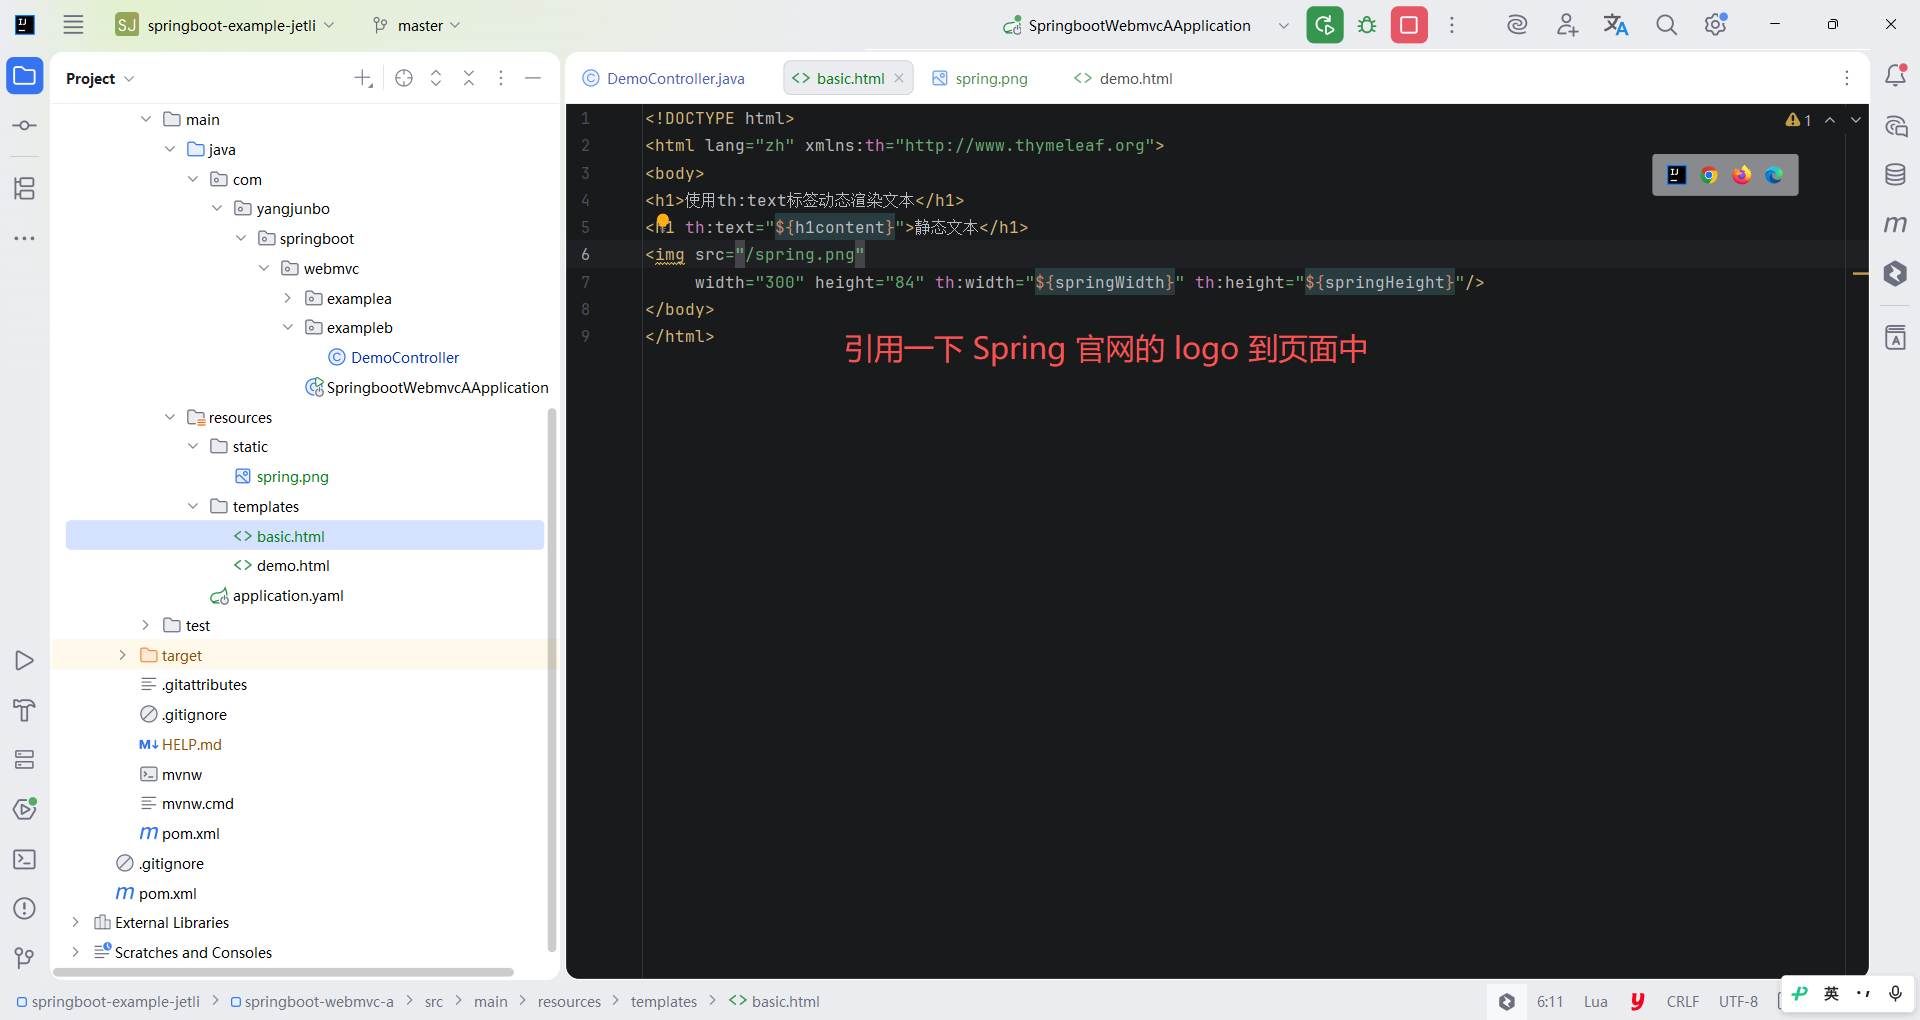
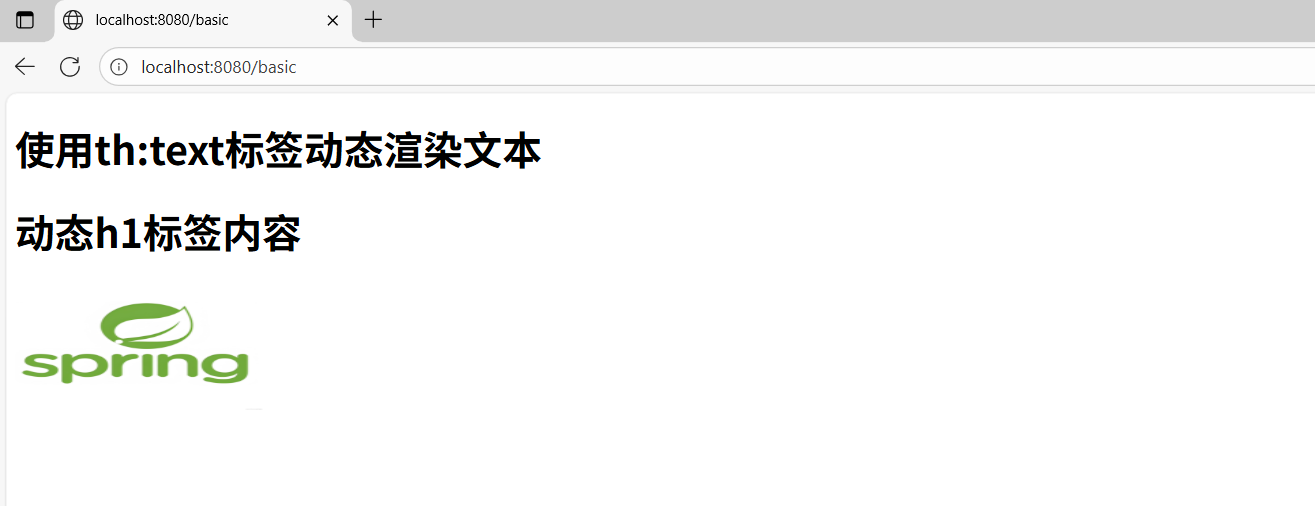
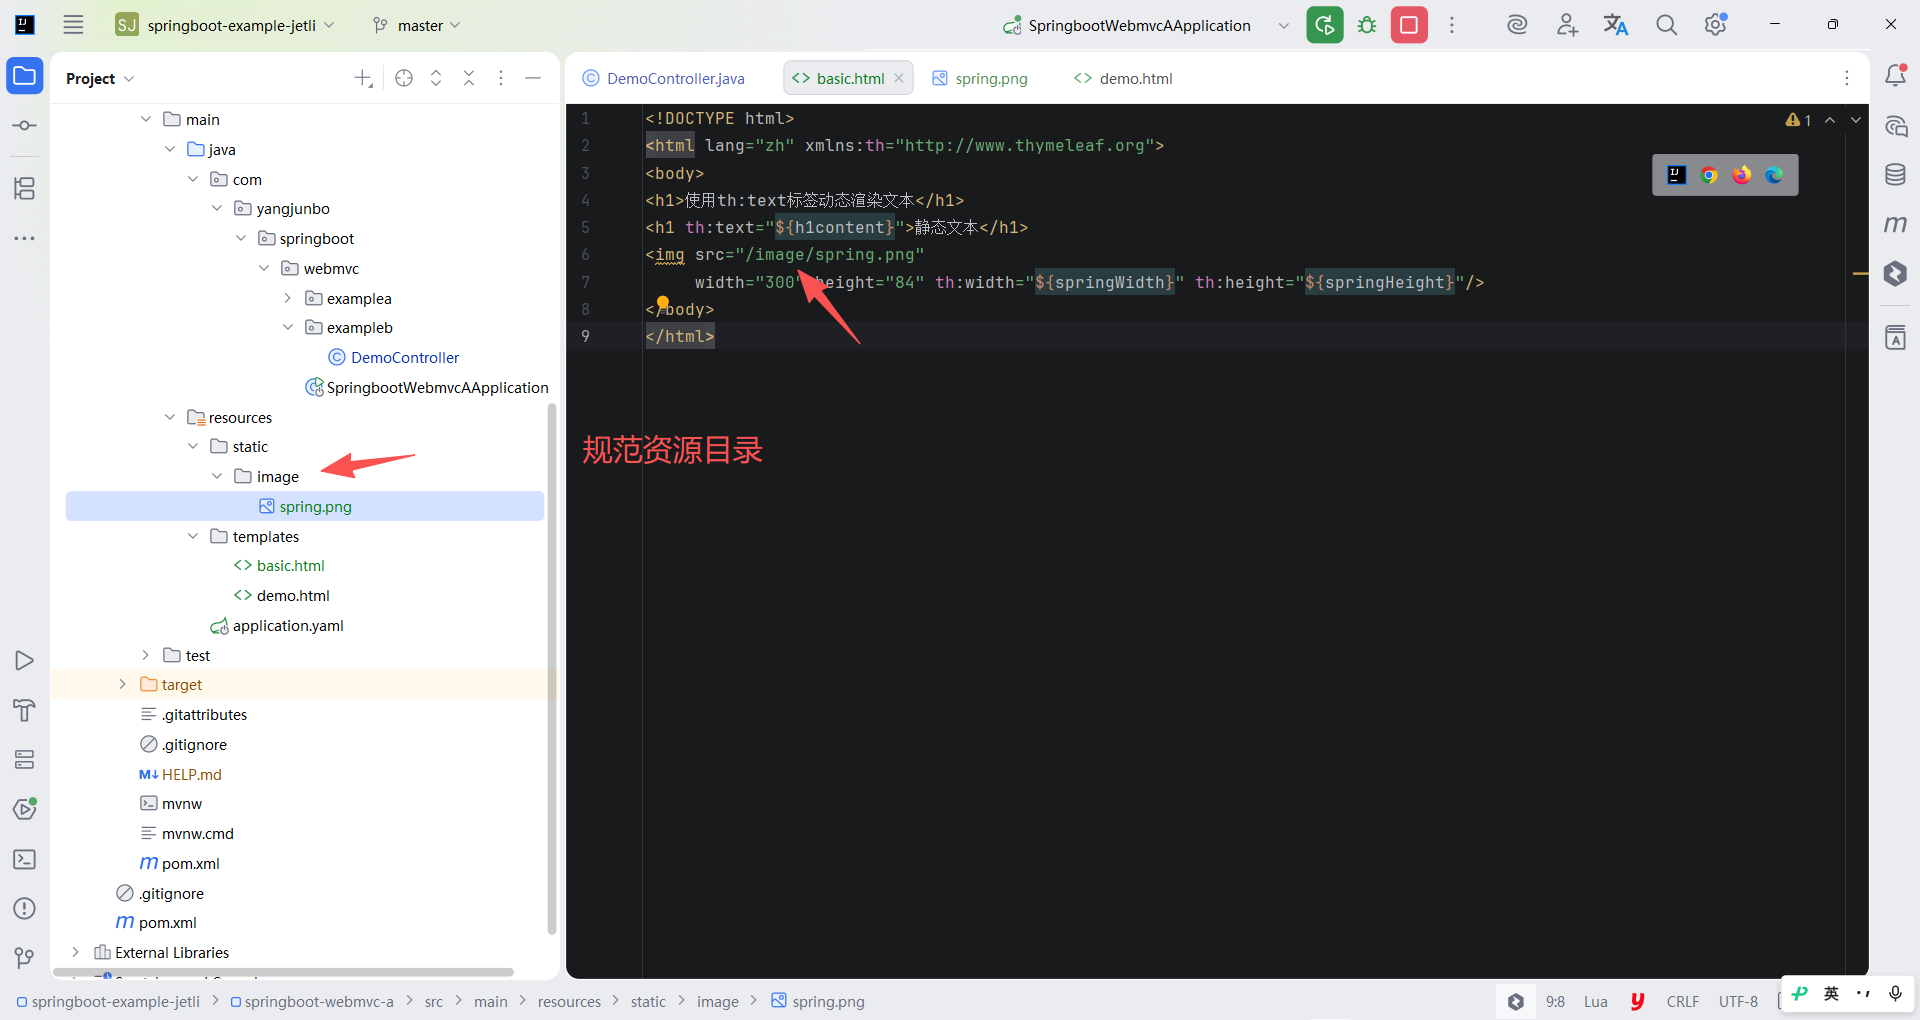
使用 th:text 可以渲染标签体内的文本,而渲染标签的属性就需要用到 Thymeleaf 的另一套指令,它们都以 th 开头,需要渲染哪个属性就对应哪个指令,例如引用一下 Spring 官网的 logo 到页面中,并指定一个静态的尺寸。如果需要动态指定图片的 width 和 height,就可以使用 th:width 和 th:height 指令来设置,设置的属性值同样可以从 Controller 中放入,并在 html 中使用 ${} 表达式取值。

html
<!DOCTYPE html>
<html lang="zh" xmlns:th="http://www.thymeleaf.org">
<body>
<h1>使用th:text标签动态渲染文本</h1>
<h1 th:text="${h1content}">静态文本</h1>
<img src="/spring.png"
     width="300" height="84" th:width="${springWidth}" th:height="${springHeight}"/>
</body>
</html>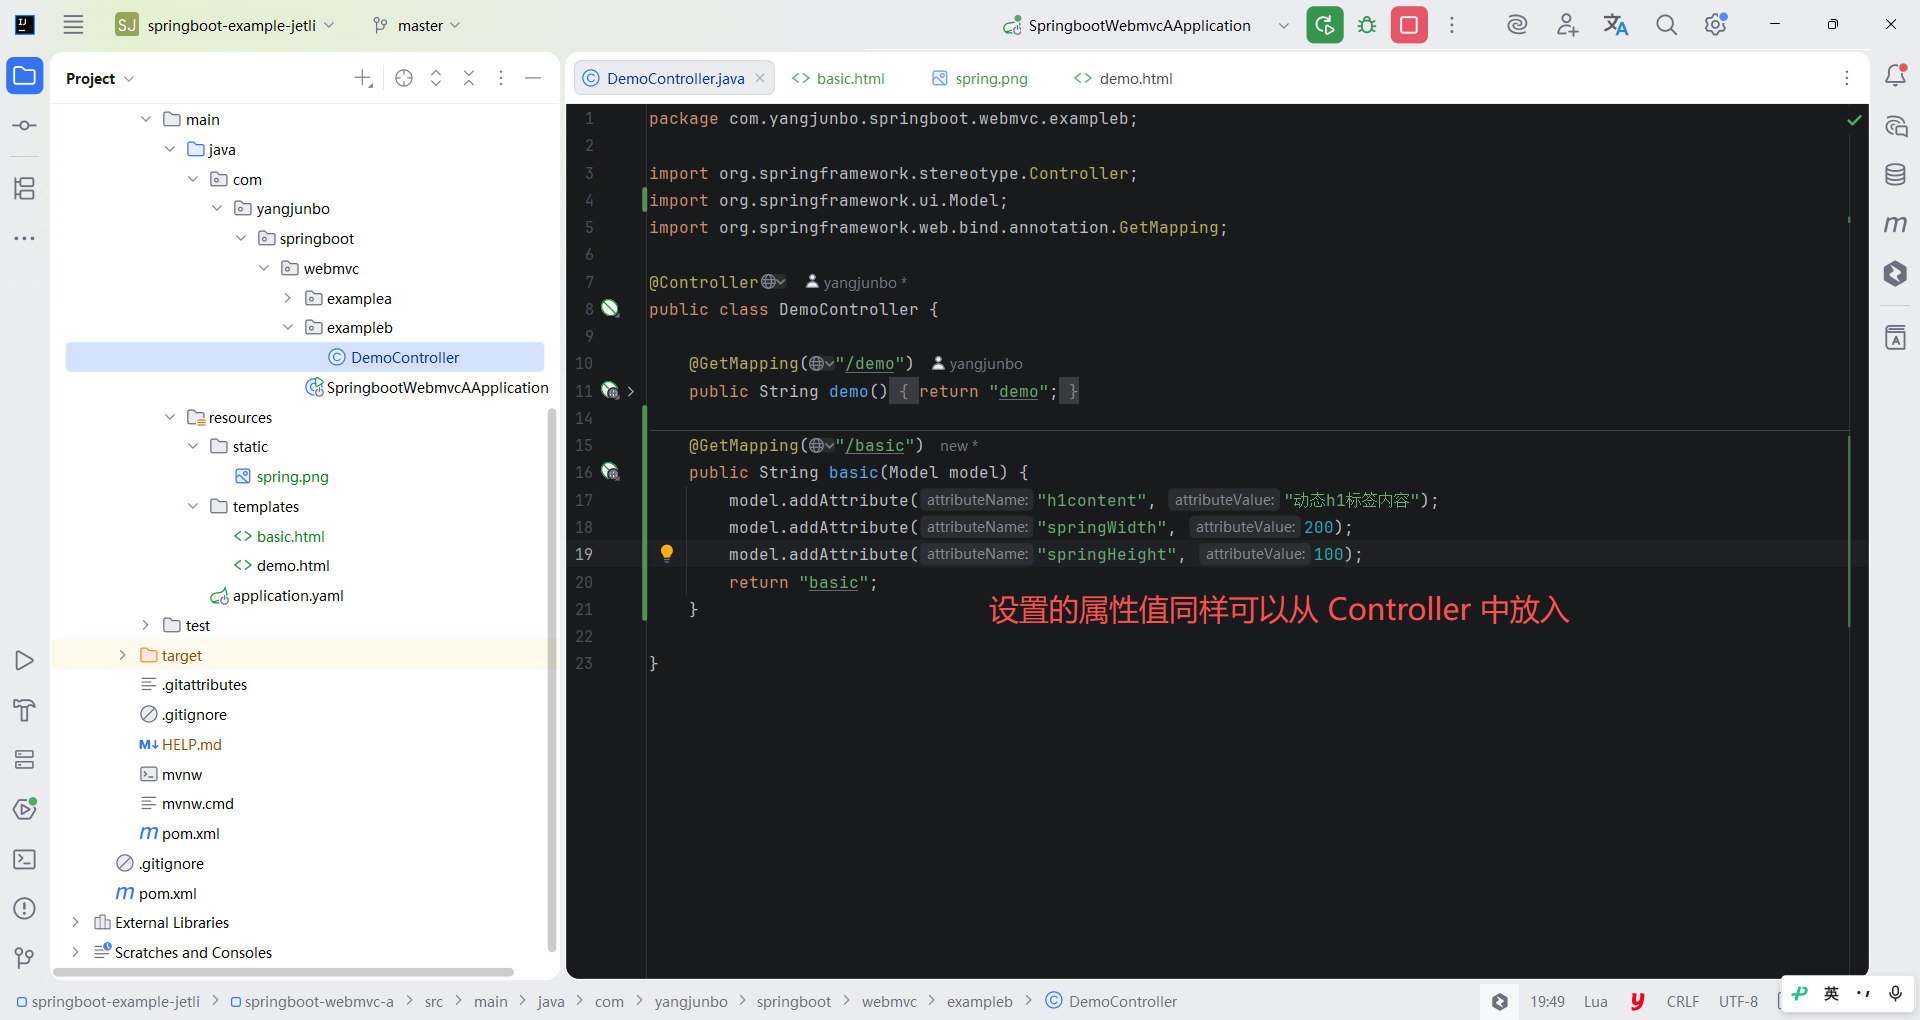
java
package com.yangjunbo.springboot.webmvc.exampleb;

import org.springframework.stereotype.Controller;
import org.springframework.ui.Model;
import org.springframework.web.bind.annotation.GetMapping;

@Controller
public class DemoController {

    @GetMapping("/demo")
    public String demo() {
        return "demo";
    }

    @GetMapping("/basic")
    public String basic(Model model) {
        model.addAttribute("h1content", "动态h1标签内容");
        model.addAttribute("springWidth", 200);
        model.addAttribute("springHeight", 100);
        return "basic";
    }

}
2.表达式
在上一小节中,大量使用了 ${} 表达式从后端取值,Thymeleaf 支持的表达式有5种,下面介绍几种相对常用的表达式,全部的表达式使用方式读者可以参考 Thymeleaf 的官方文档。
${} 是最常使用的表达式写法,它的作用是从上下文中取值。
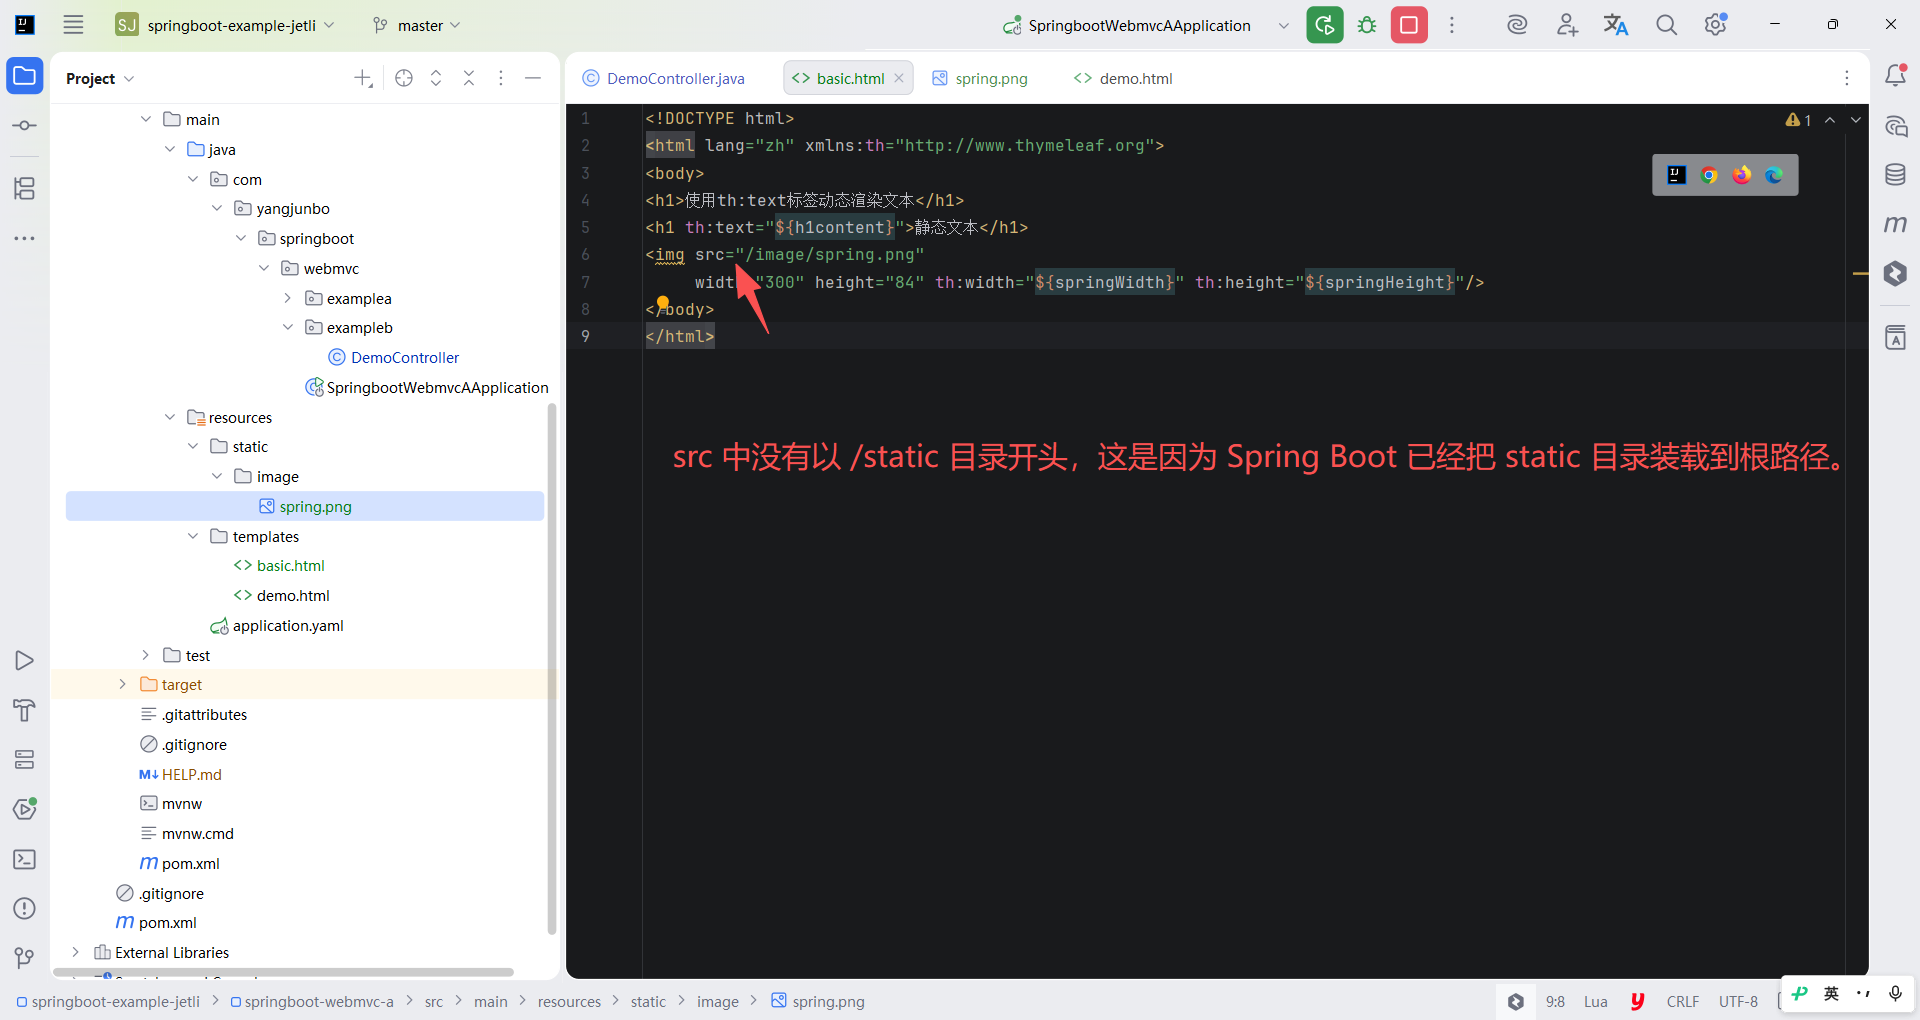
@{} 又称链接表达式,它专门用来封装和制作与工程路径相关的表达式。如果需要将图片引用在 html 中,声明路径时就需要考虑相对路径的写法。请注意,src 中没有以 /static 目录开头,这是因为 Spring Boot 已经把 static 目录装载到根路径,引用 static 目录下的资源只需要声明内部的路径即可。
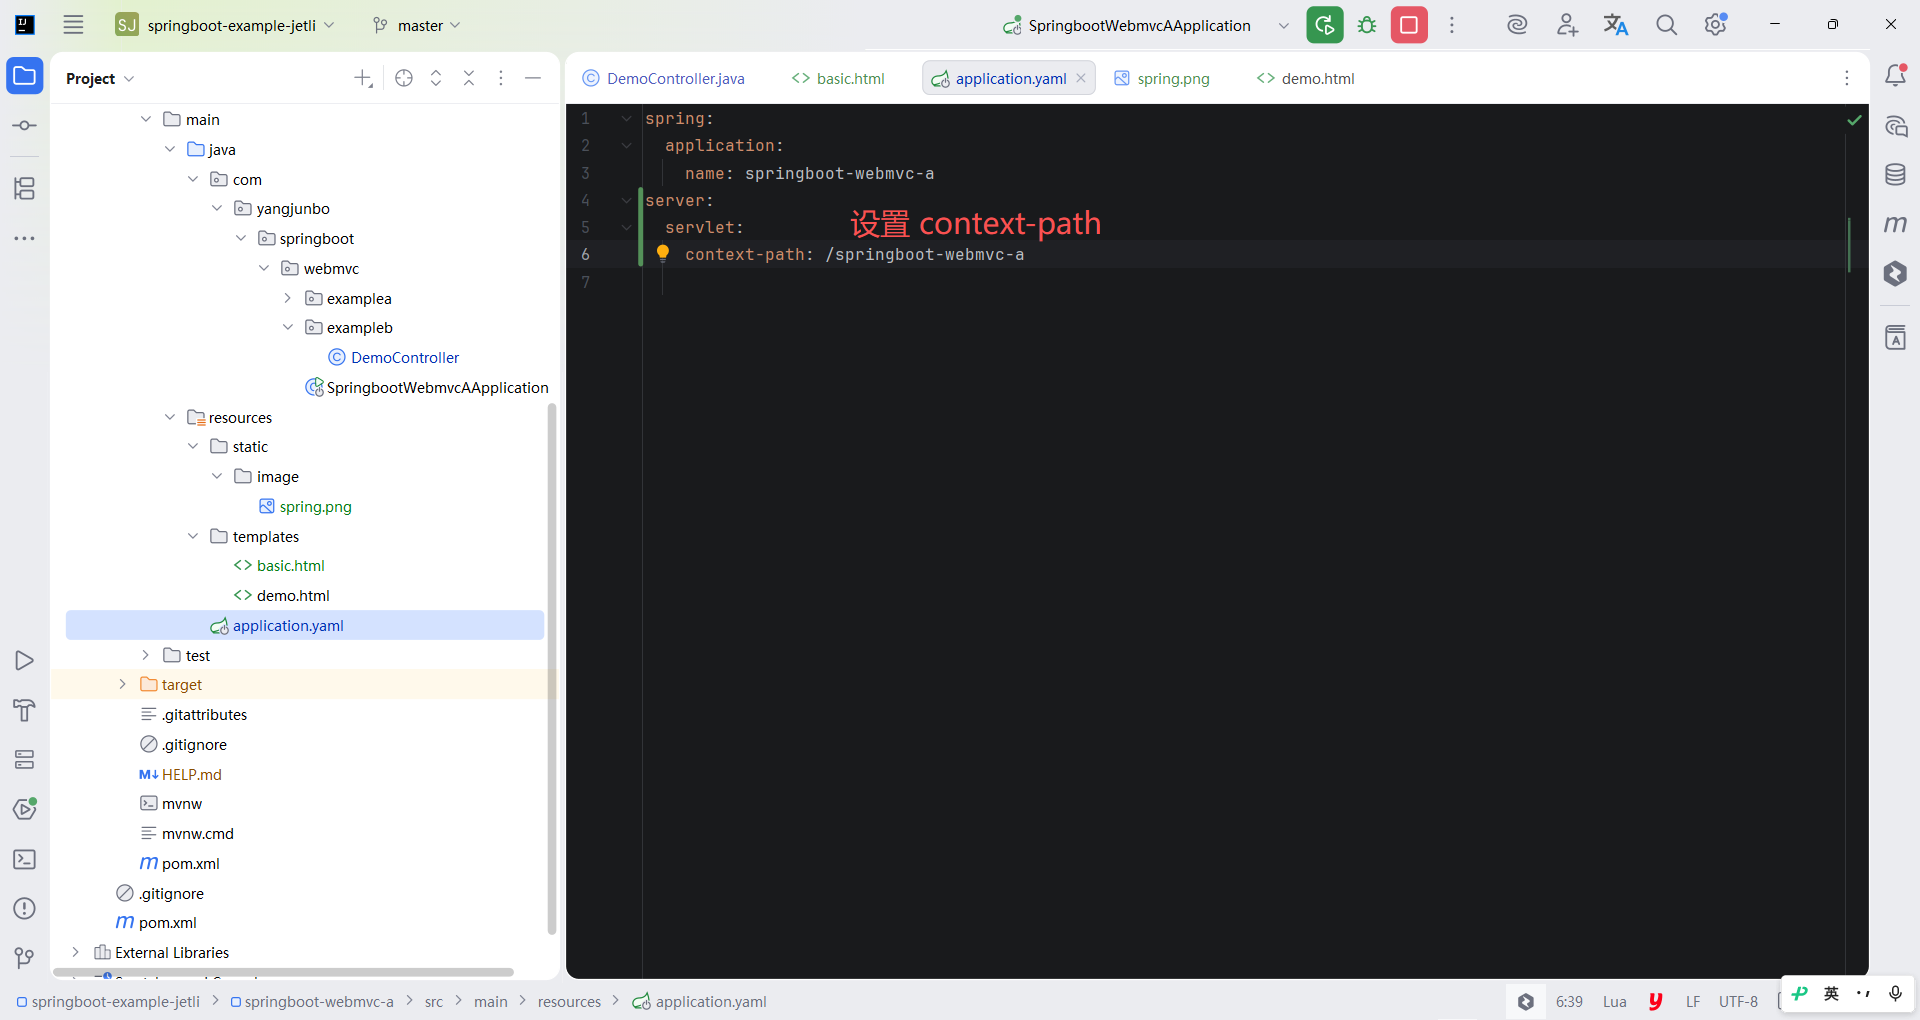
虽然这样写可以将图片正常呈现在浏览器上,但前提是当前工程的 server.servlet.context-path 必须设置为 "/",即标准访问路径为根路径,倘若设置了 context-path 后,上述写法就会失效。context-path 在 Java Web 中多见于外置 Web 容器部署 war 包的场景,当 war包被解压后,对应的文件夹名称即是 context-path,只有将 war 包的资源解压到 ROOT 目录时,访问资源时才不需要追加 context-path的前缀。
yaml
spring:
  application:
    name: springboot-webmvc-a
server:
  servlet:
    context-path: /springboot-webmvc-a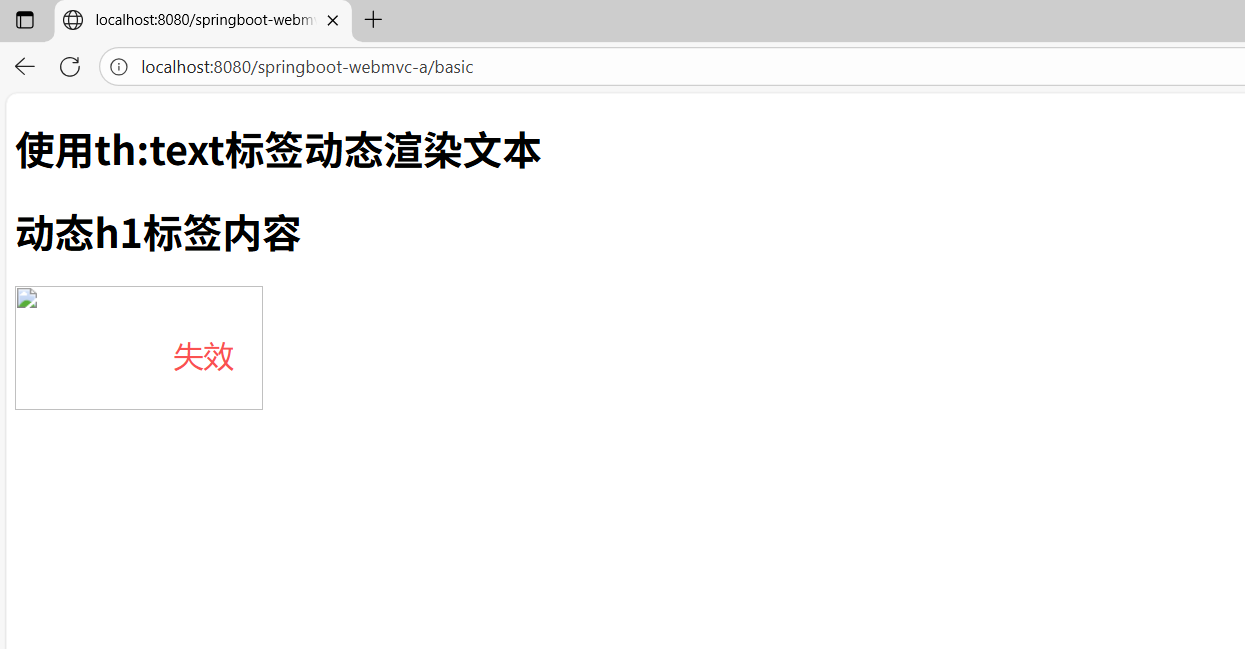
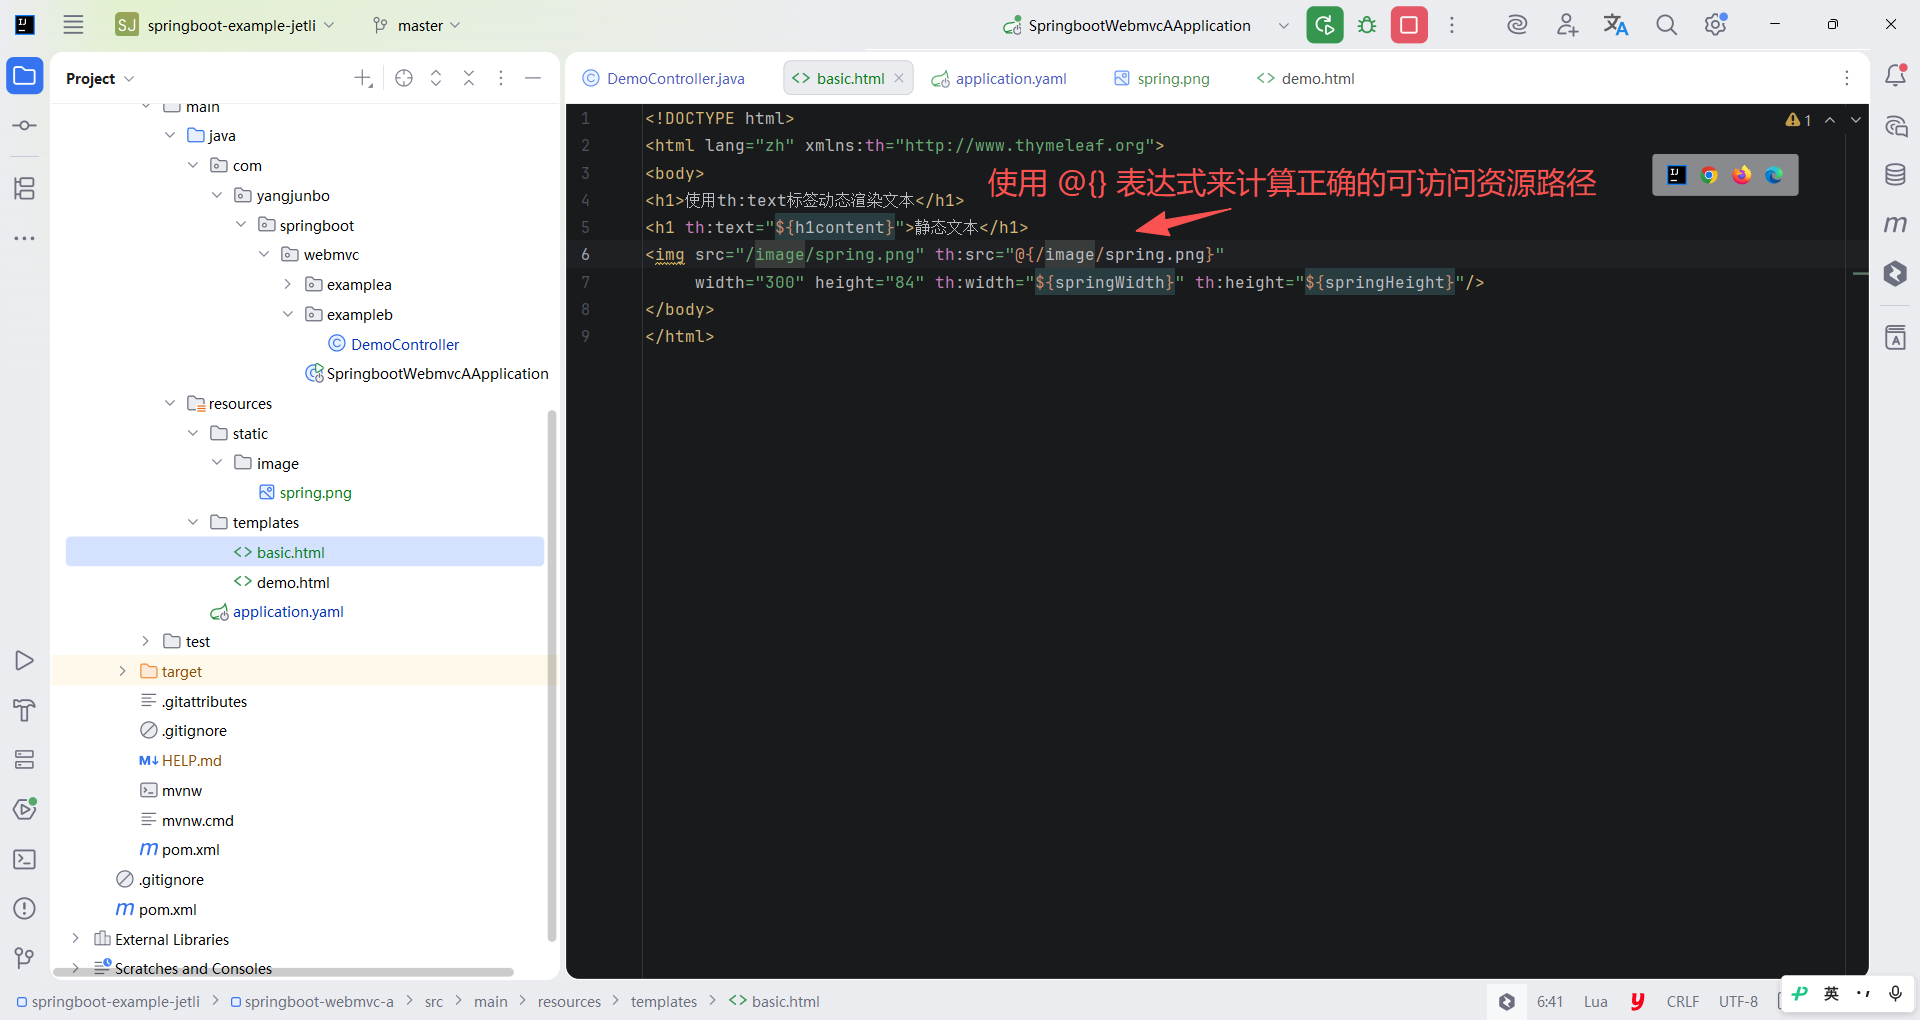
如何应对不确定的 context-path 给引用静态资源时带来的不稳定性,这就需要使用 @{} 表达式来计算正确的可访问资源路径。可以给上面的 标签添加动态属性指令 th:src,并使用 @{} 表达式将原来的路径包裹。如此编写后,即便配置 server.servlet.context-path后, 标签的 src 属性仍然可以正确拼接 context-path,使图片正常显示。
html
<!DOCTYPE html>
<html lang="zh" xmlns:th="http://www.thymeleaf.org">
<body>
<h1>使用th:text标签动态渲染文本</h1>
<h1 th:text="${h1content}">静态文本</h1>
<img src="/image/spring.png" th:src="@{/image/spring.png}"
     width="300" height="84" th:width="${springWidth}" th:height="${springHeight}"/>
</body>
</html>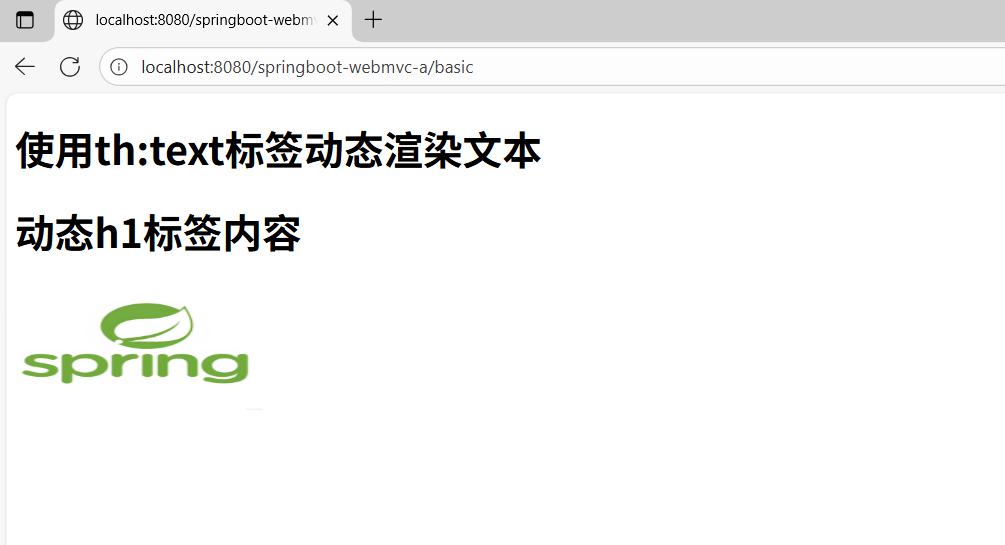
3.内置对象应用
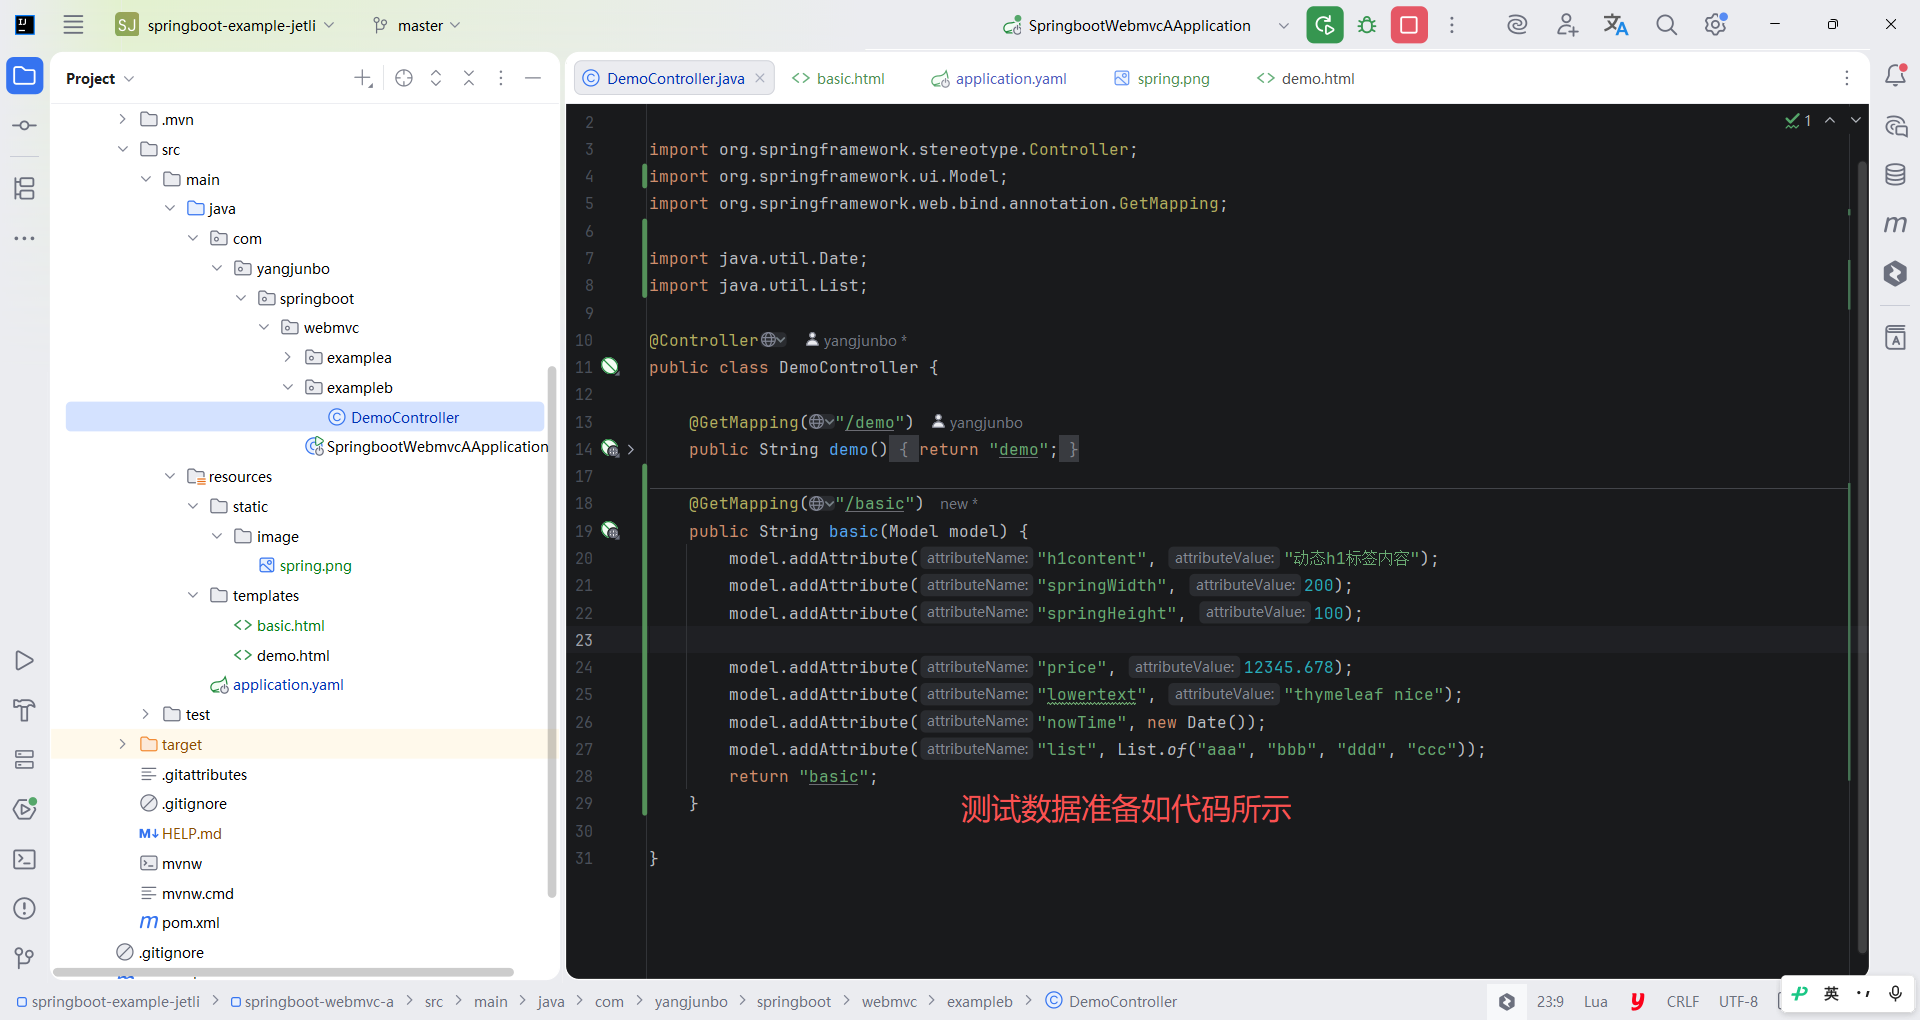
Thymeleaf 的上下文中内置了一些常用的对象,下面简单举几个例子,完整的内置对象和相应提供的方法,读者可以参照 Thymeleaf 官方文档的第 19 章进行了解。测试数据准备如代码所示。
java
package com.yangjunbo.springboot.webmvc.exampleb;

import org.springframework.stereotype.Controller;
import org.springframework.ui.Model;
import org.springframework.web.bind.annotation.GetMapping;

import java.util.Date;
import java.util.List;

@Controller
public class DemoController {

    @GetMapping("/demo")
    public String demo() {
        return "demo";
    }

    @GetMapping("/basic")
    public String basic(Model model) {
        model.addAttribute("h1content", "动态h1标签内容");
        model.addAttribute("springWidth", 200);
        model.addAttribute("springHeight", 100);

        model.addAttribute("price", 12345.678);
        model.addAttribute("lowertext", "thymeleaf nice");
        model.addAttribute("nowTime", new Date());
        model.addAttribute("list", List.of("aaa", "bbb", "ddd", "ccc"));
        return "basic";
    }

}
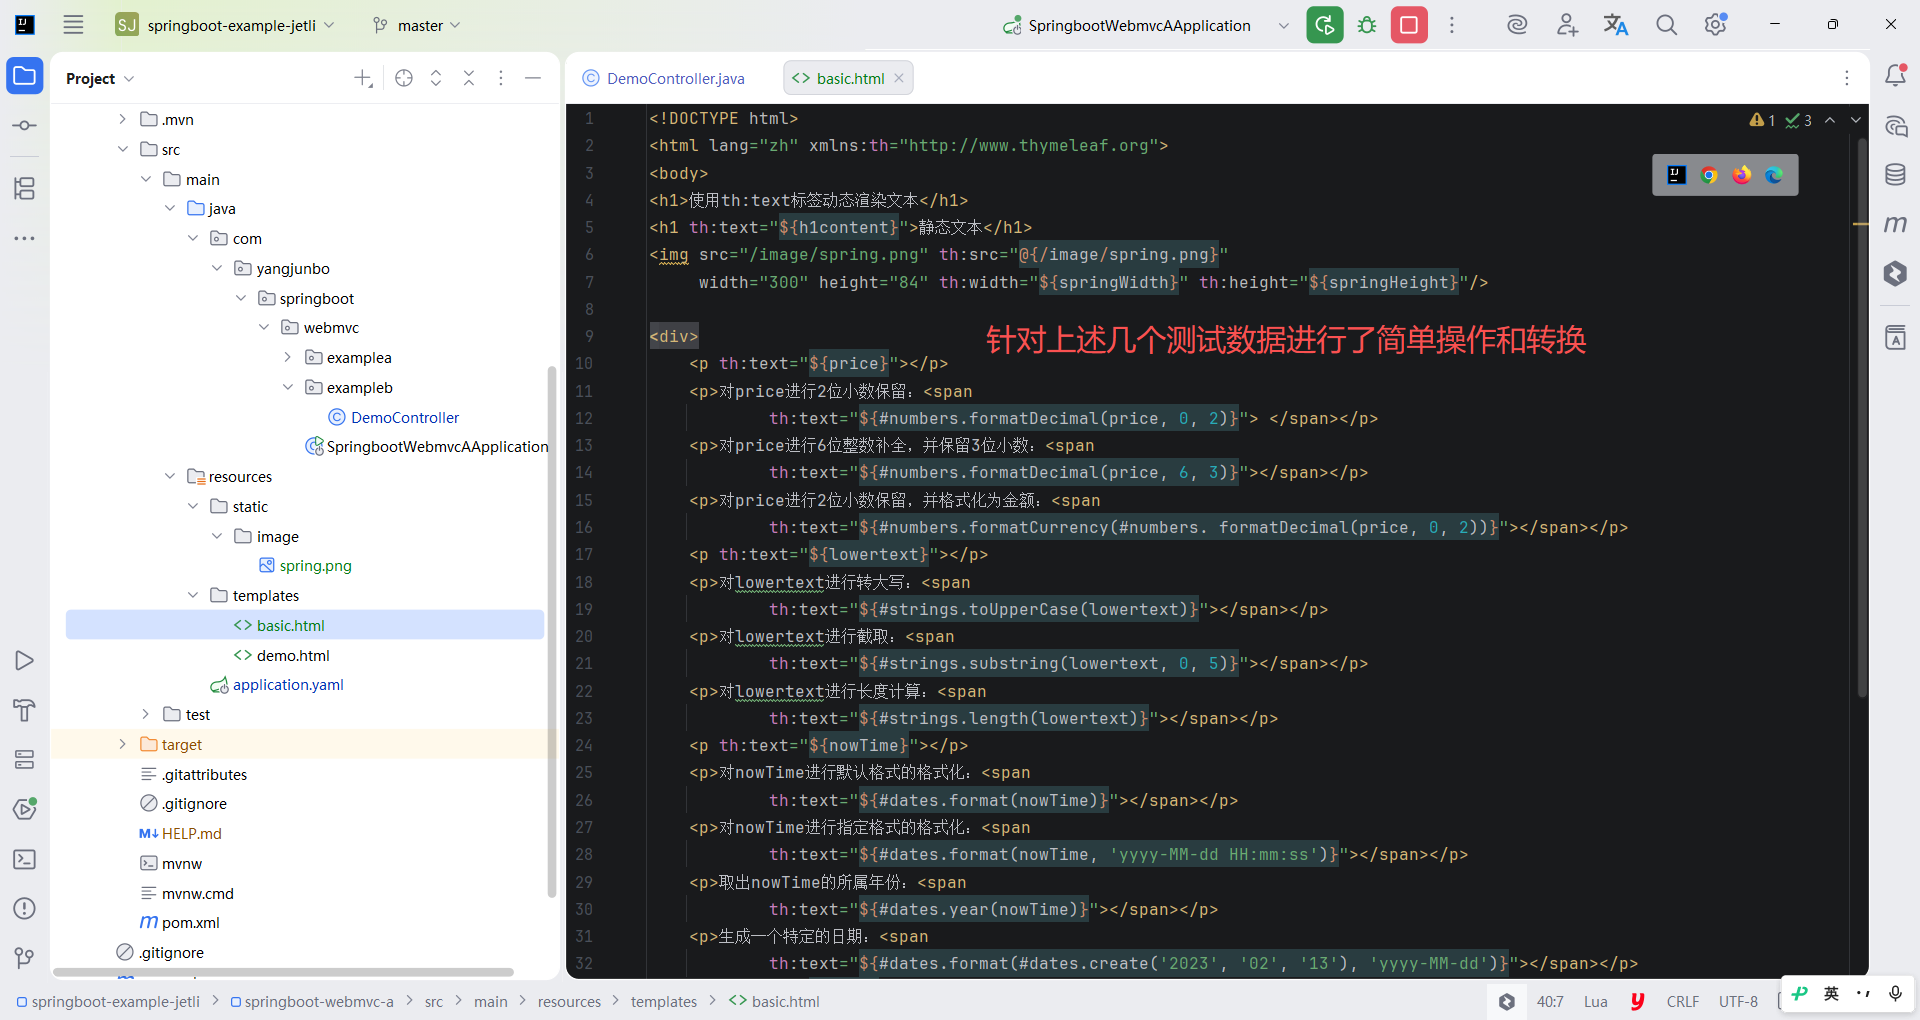
代码中准备了 4 种常见的数据类型,包含数值、字符串、日期、集合,对应的在 Thymeleaf 中有相应的内置对象,代码中针对上述几个测试数据进行了简单操作和转换,根据对象名称和调用的方法,读者可以很快理解对应的操作。内置对象方法使用都比较简单,输出的结果也都很好理解。
html
<!DOCTYPE html>
<html lang="zh" xmlns:th="http://www.thymeleaf.org">
<body>
<h1>使用th:text标签动态渲染文本</h1>
<h1 th:text="${h1content}">静态文本</h1>
<img src="/image/spring.png" th:src="@{/image/spring.png}"
     width="300" height="84" th:width="${springWidth}" th:height="${springHeight}"/>

<div>
    <p th:text="${price}"></p>
    <p>对price进行2位小数保留:<span
            th:text="${#numbers.formatDecimal(price, 0, 2)}"> </span></p>
    <p>对price进行6位整数补全,并保留3位小数:<span
            th:text="${#numbers.formatDecimal(price, 6, 3)}"></span></p>
    <p>对price进行2位小数保留,并格式化为金额:<span
            th:text="${#numbers.formatCurrency(#numbers. formatDecimal(price, 0, 2))}"></span></p>
    <p th:text="${lowertext}"></p>
    <p>对lowertext进行转大写:<span
            th:text="${#strings.toUpperCase(lowertext)}"></span></p>
    <p>对lowertext进行截取:<span
            th:text="${#strings.substring(lowertext, 0, 5)}"></span></p>
    <p>对lowertext进行长度计算:<span
            th:text="${#strings.length(lowertext)}"></span></p>
    <p th:text="${nowTime}"></p>
    <p>对nowTime进行默认格式的格式化:<span
            th:text="${#dates.format(nowTime)}"></span></p>
    <p>对nowTime进行指定格式的格式化:<span
            th:text="${#dates.format(nowTime, 'yyyy-MM-dd HH:mm:ss')}"></span></p>
    <p>取出nowTime的所属年份:<span
            th:text="${#dates.year(nowTime)}"></span></p>
    <p>生成一个特定的日期:<span
            th:text="${#dates.format(#dates.create('2023', '02', '13'), 'yyyy-MM-dd')}"></span></p>
    <p th:text="${list}"></p>
    <p>对list进行长度计算:<span
            th:text="${#lists.size(list)}"></span></p>
    <p>对list进行contains运算:<span
            th:text="${#lists.contains(list, 'aaa')}"></span></p>
    <p>对list进行排序:
        <span th:text="${#lists.sort(list)}"></span></p>
</div>

</body>
</html>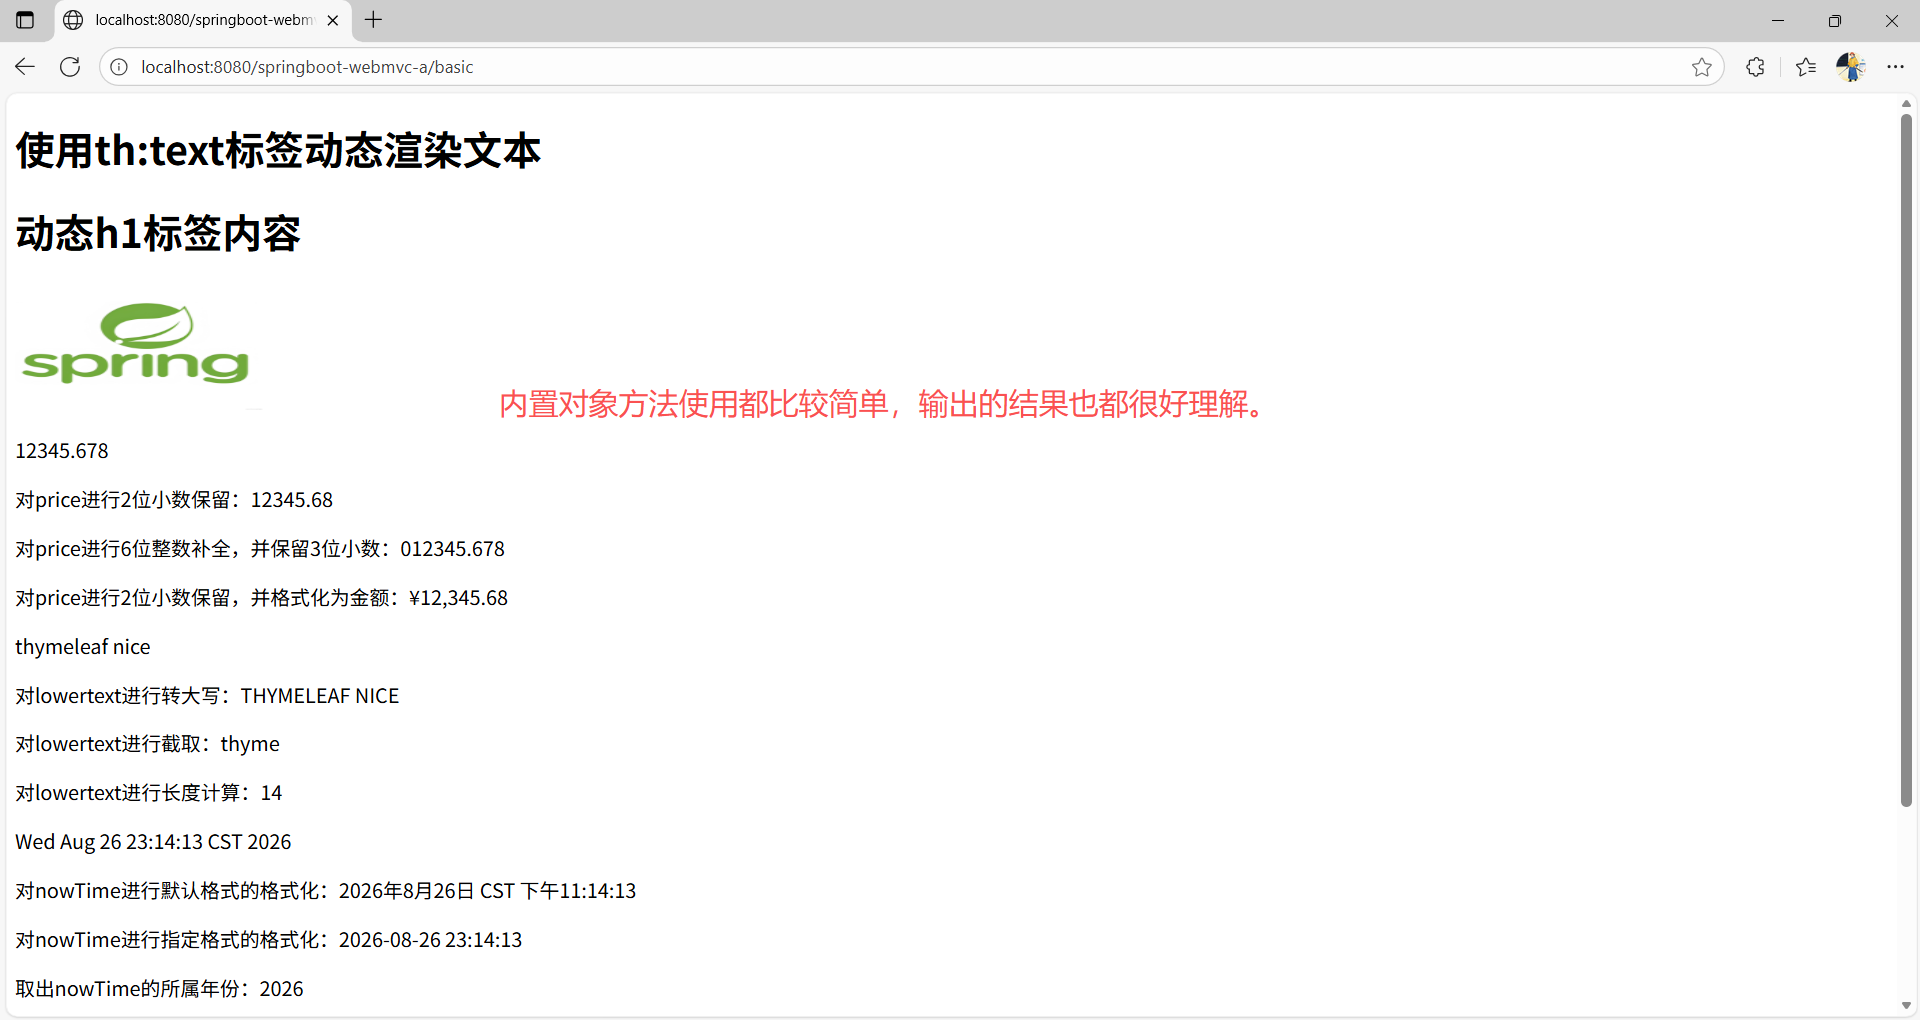
4.判断与遍历
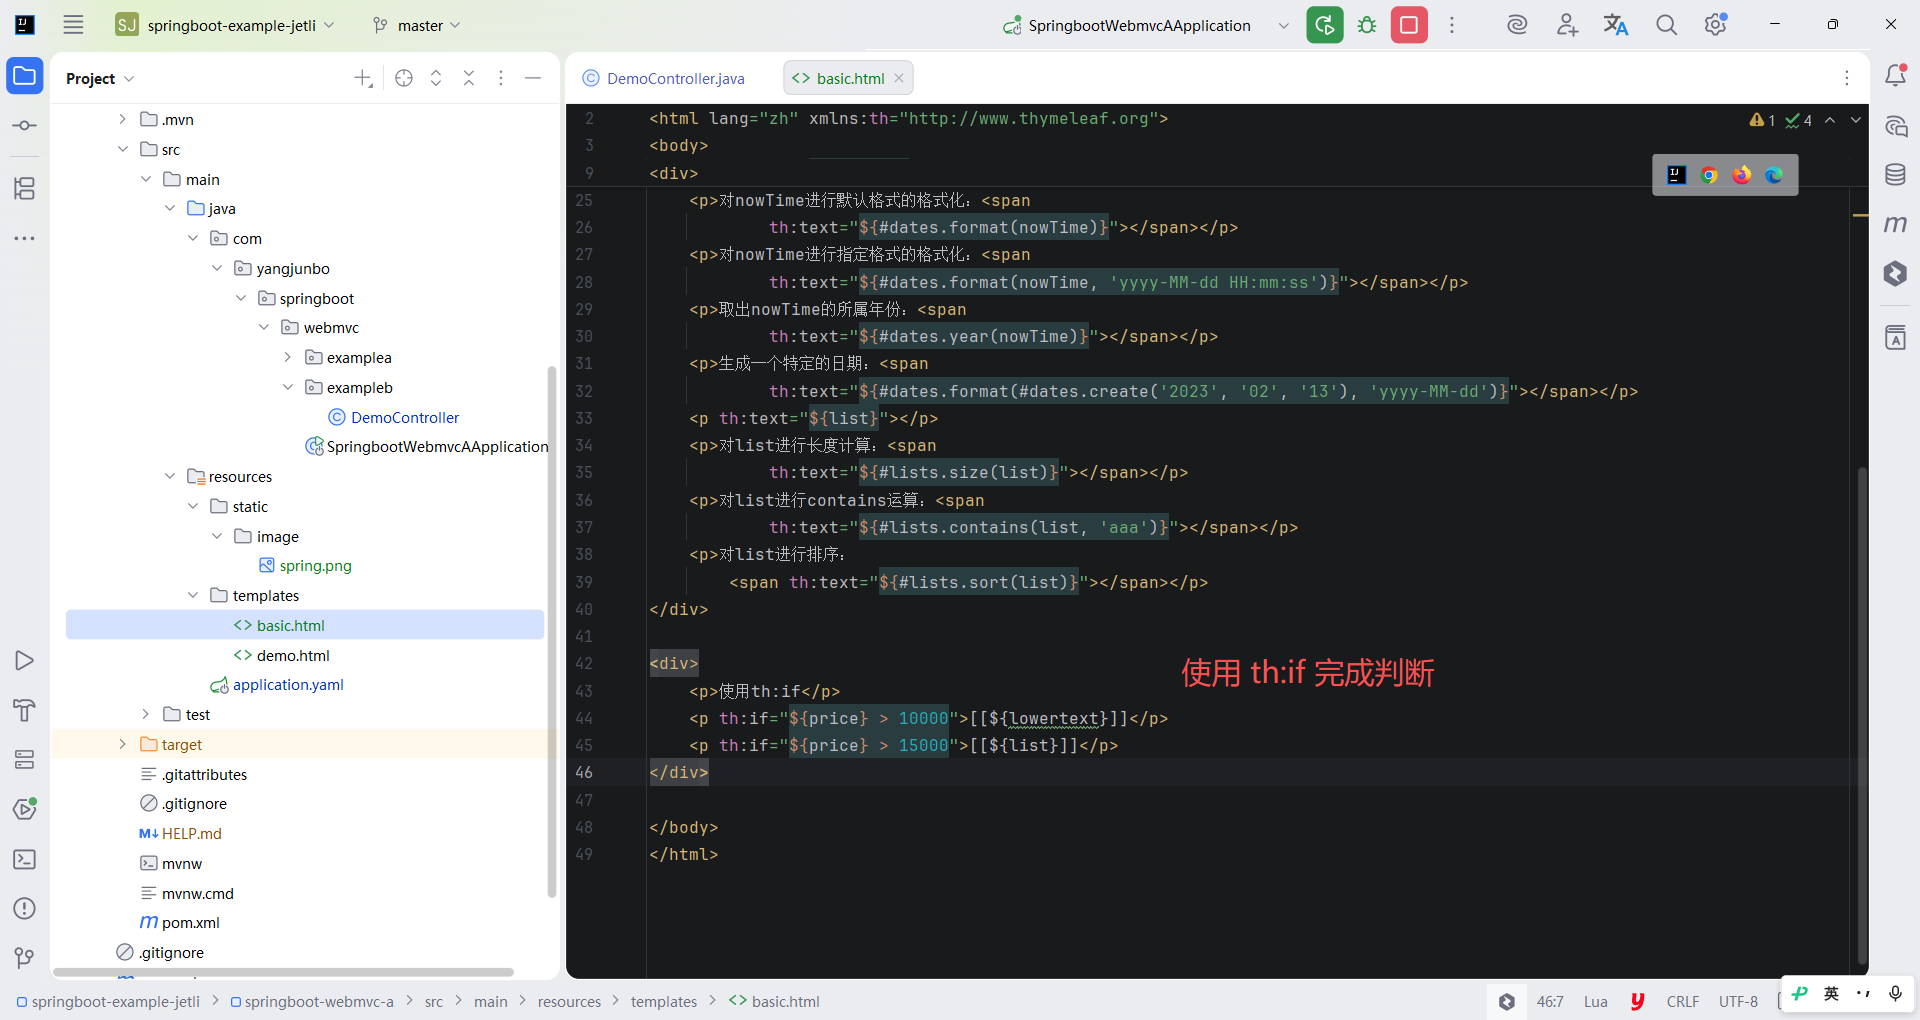
Thymeleaf 提供了判断和遍历的指令,可以利用这些指令完成一些简单的判断和循环逻辑处理。最常使用 th:if 完成判断。接着用上一个小节的数据进行场景模拟,希望当 price 的数值大于 10000 时,展示 lowertext 的内容,当 price 大于 15000 时展示 list 的值。重新运行应用并刷新浏览器,可以发现 lowertext 的内容被正常显示,而 list 没有出现在页面上,与预期运行效果一致。
html
<!DOCTYPE html>
<html lang="zh" xmlns:th="http://www.thymeleaf.org">
<body>
<h1>使用th:text标签动态渲染文本</h1>
<h1 th:text="${h1content}">静态文本</h1>
<img src="/image/spring.png" th:src="@{/image/spring.png}"
     width="300" height="84" th:width="${springWidth}" th:height="${springHeight}"/>

<div>
    <p th:text="${price}"></p>
    <p>对price进行2位小数保留:<span
            th:text="${#numbers.formatDecimal(price, 0, 2)}"> </span></p>
    <p>对price进行6位整数补全,并保留3位小数:<span
            th:text="${#numbers.formatDecimal(price, 6, 3)}"></span></p>
    <p>对price进行2位小数保留,并格式化为金额:<span
            th:text="${#numbers.formatCurrency(#numbers. formatDecimal(price, 0, 2))}"></span></p>
    <p th:text="${lowertext}"></p>
    <p>对lowertext进行转大写:<span
            th:text="${#strings.toUpperCase(lowertext)}"></span></p>
    <p>对lowertext进行截取:<span
            th:text="${#strings.substring(lowertext, 0, 5)}"></span></p>
    <p>对lowertext进行长度计算:<span
            th:text="${#strings.length(lowertext)}"></span></p>
    <p th:text="${nowTime}"></p>
    <p>对nowTime进行默认格式的格式化:<span
            th:text="${#dates.format(nowTime)}"></span></p>
    <p>对nowTime进行指定格式的格式化:<span
            th:text="${#dates.format(nowTime, 'yyyy-MM-dd HH:mm:ss')}"></span></p>
    <p>取出nowTime的所属年份:<span
            th:text="${#dates.year(nowTime)}"></span></p>
    <p>生成一个特定的日期:<span
            th:text="${#dates.format(#dates.create('2023', '02', '13'), 'yyyy-MM-dd')}"></span></p>
    <p th:text="${list}"></p>
    <p>对list进行长度计算:<span
            th:text="${#lists.size(list)}"></span></p>
    <p>对list进行contains运算:<span
            th:text="${#lists.contains(list, 'aaa')}"></span></p>
    <p>对list进行排序:
        <span th:text="${#lists.sort(list)}"></span></p>
</div>

<div>
    <p>使用th:if</p>
    <p th:if="${price} > 10000">[[${lowertext}]]</p>
    <p th:if="${price} > 15000">[[${list}]]</p>
</div>

</body>
</html>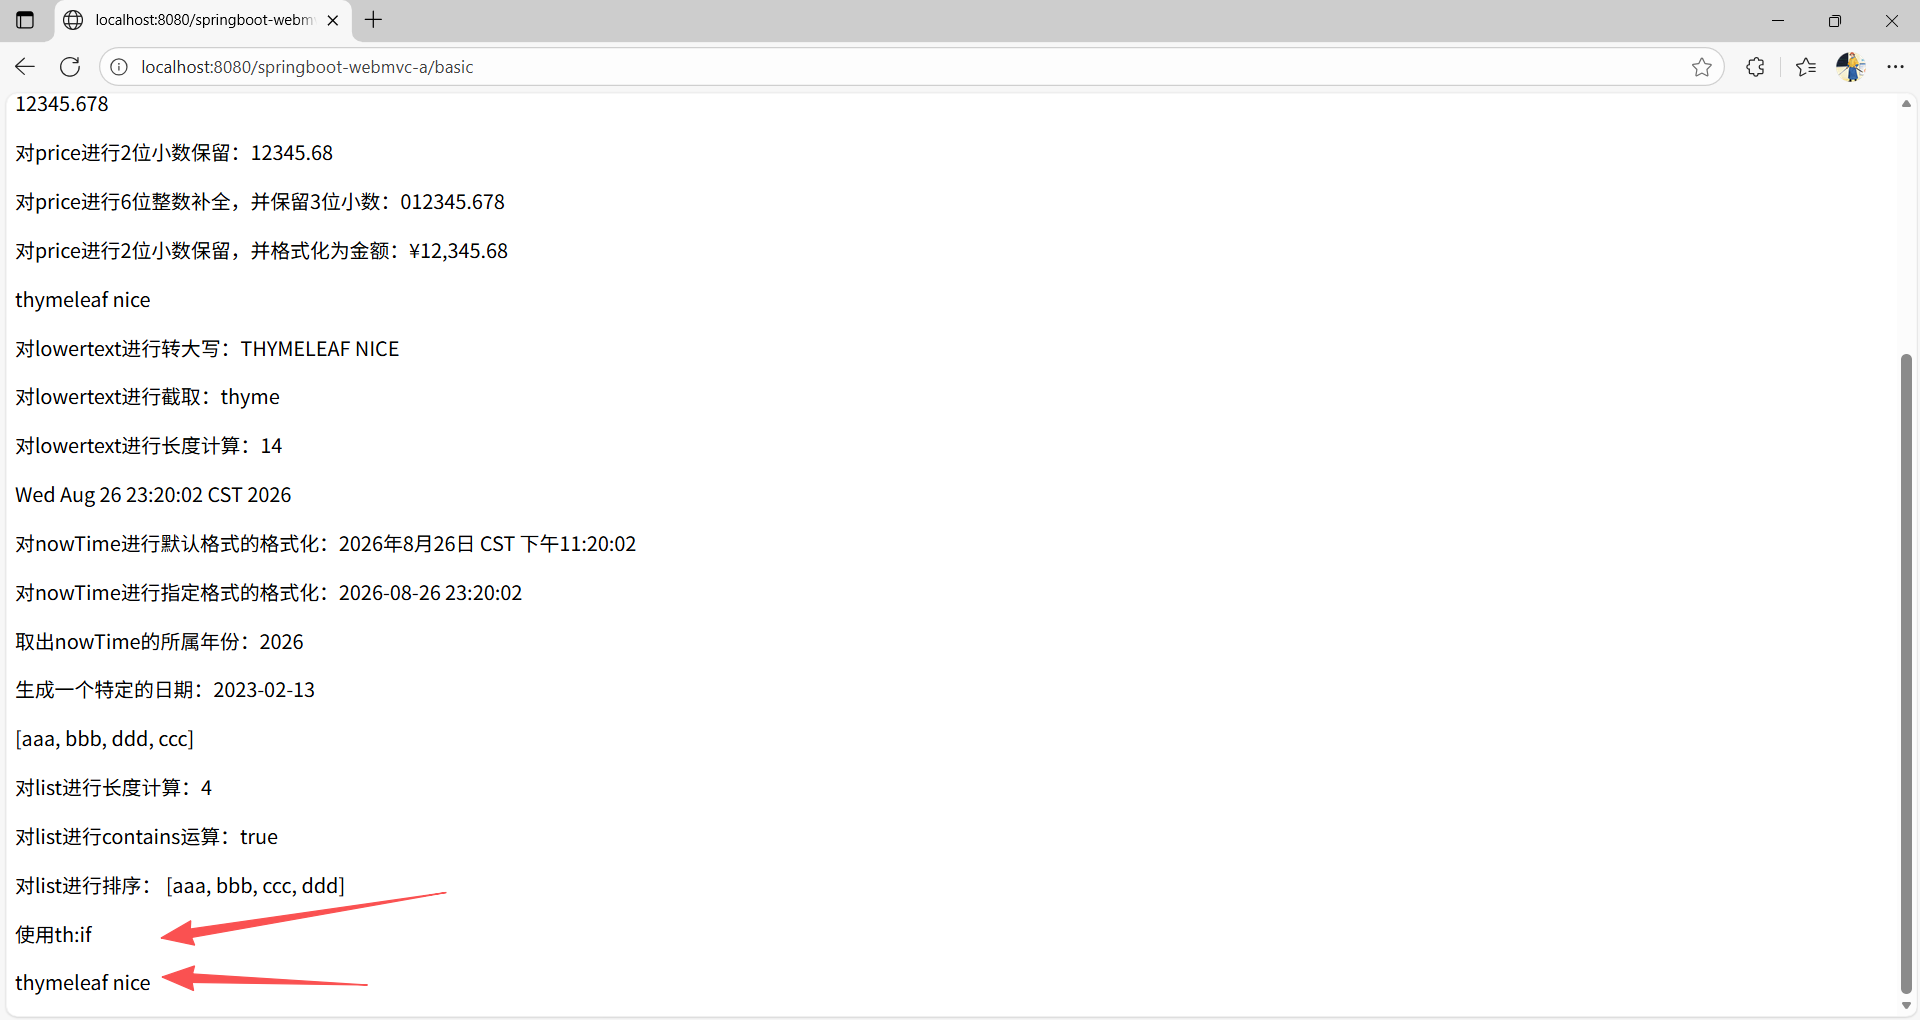
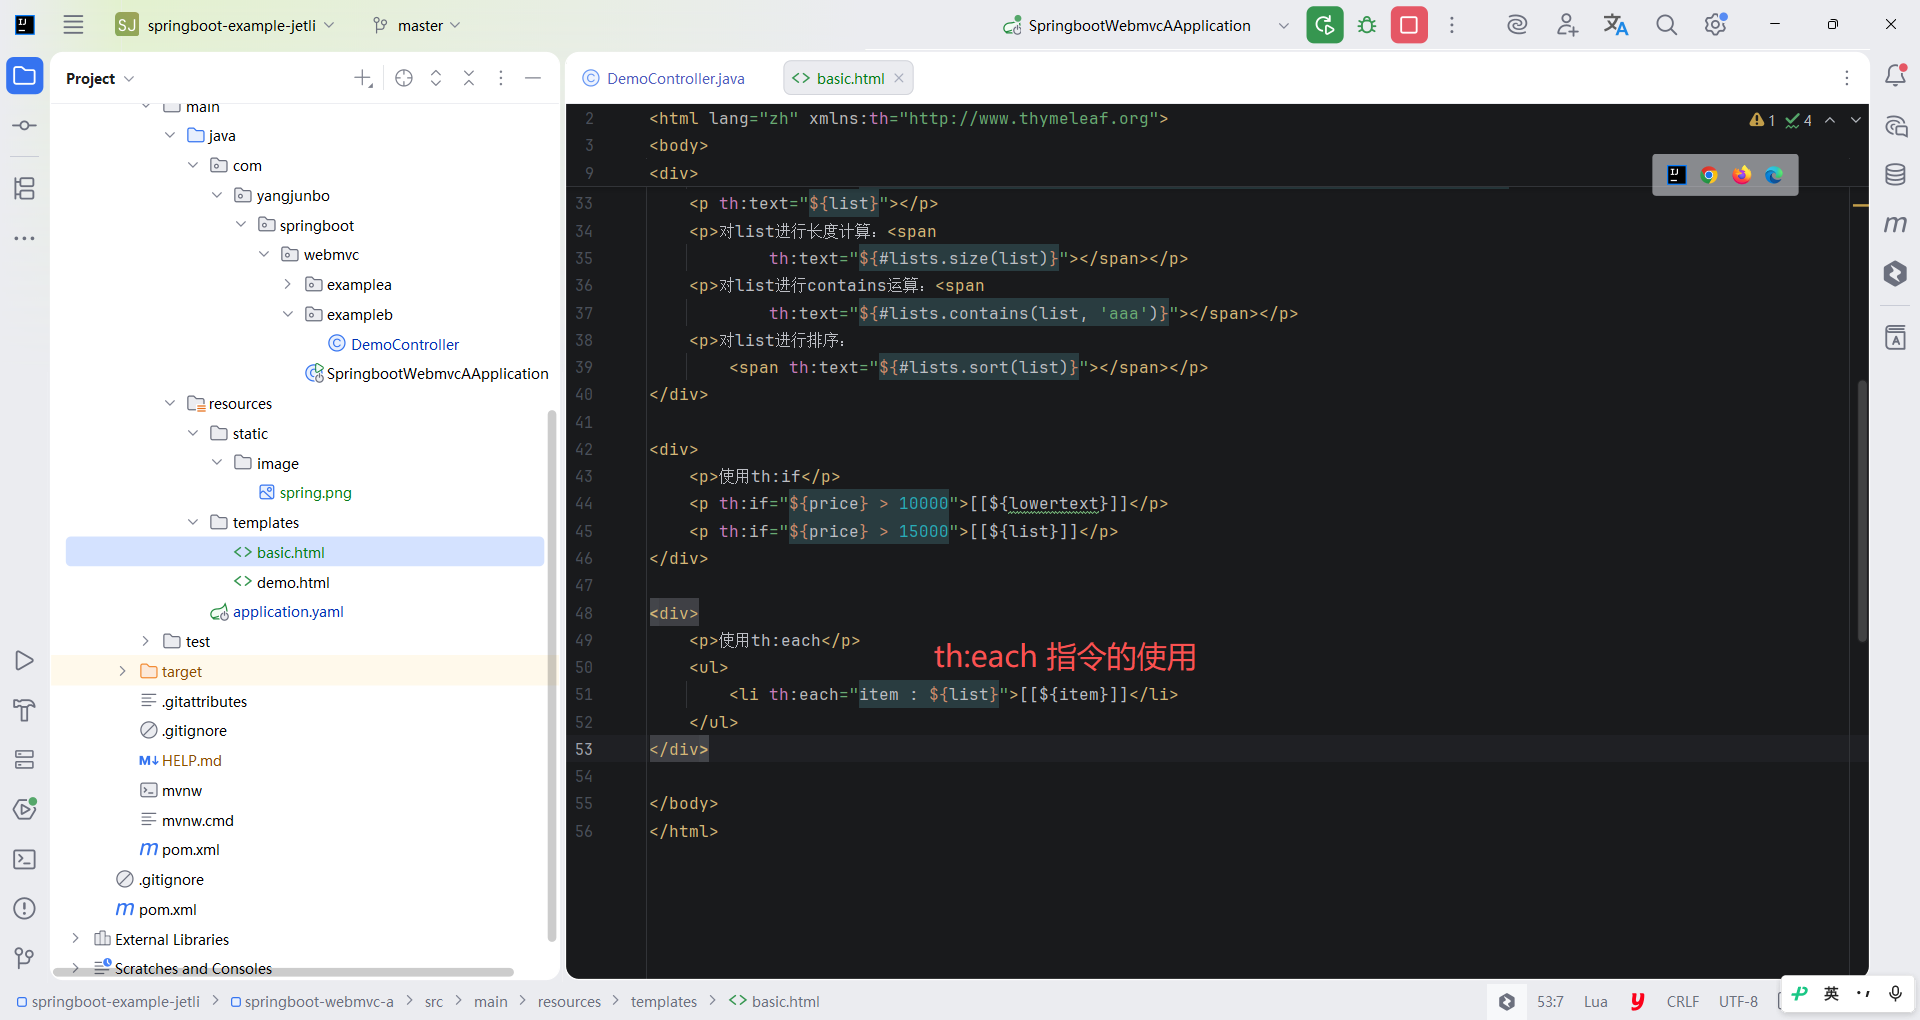
th:each 指令可以遍历循环数组、集合等。准备一个简单集合 list 来演示 th:each 指令的使用。如果只是循环数组或集合的元素本身,那么循环指令的语法与增强 for 循环非常类似,这段代码经过渲染后,浏览器中会正确地渲染一个无序列表。
html
<!DOCTYPE html>
<html lang="zh" xmlns:th="http://www.thymeleaf.org">
<body>
<h1>使用th:text标签动态渲染文本</h1>
<h1 th:text="${h1content}">静态文本</h1>
<img src="/image/spring.png" th:src="@{/image/spring.png}"
     width="300" height="84" th:width="${springWidth}" th:height="${springHeight}"/>

<div>
    <p th:text="${price}"></p>
    <p>对price进行2位小数保留:<span
            th:text="${#numbers.formatDecimal(price, 0, 2)}"> </span></p>
    <p>对price进行6位整数补全,并保留3位小数:<span
            th:text="${#numbers.formatDecimal(price, 6, 3)}"></span></p>
    <p>对price进行2位小数保留,并格式化为金额:<span
            th:text="${#numbers.formatCurrency(#numbers. formatDecimal(price, 0, 2))}"></span></p>
    <p th:text="${lowertext}"></p>
    <p>对lowertext进行转大写:<span
            th:text="${#strings.toUpperCase(lowertext)}"></span></p>
    <p>对lowertext进行截取:<span
            th:text="${#strings.substring(lowertext, 0, 5)}"></span></p>
    <p>对lowertext进行长度计算:<span
            th:text="${#strings.length(lowertext)}"></span></p>
    <p th:text="${nowTime}"></p>
    <p>对nowTime进行默认格式的格式化:<span
            th:text="${#dates.format(nowTime)}"></span></p>
    <p>对nowTime进行指定格式的格式化:<span
            th:text="${#dates.format(nowTime, 'yyyy-MM-dd HH:mm:ss')}"></span></p>
    <p>取出nowTime的所属年份:<span
            th:text="${#dates.year(nowTime)}"></span></p>
    <p>生成一个特定的日期:<span
            th:text="${#dates.format(#dates.create('2023', '02', '13'), 'yyyy-MM-dd')}"></span></p>
    <p th:text="${list}"></p>
    <p>对list进行长度计算:<span
            th:text="${#lists.size(list)}"></span></p>
    <p>对list进行contains运算:<span
            th:text="${#lists.contains(list, 'aaa')}"></span></p>
    <p>对list进行排序:
        <span th:text="${#lists.sort(list)}"></span></p>
</div>

<div>
    <p>使用th:if</p>
    <p th:if="${price} > 10000">[[${lowertext}]]</p>
    <p th:if="${price} > 15000">[[${list}]]</p>
</div>

<div>
    <p>使用th:each</p>
    <ul>
        <li th:each="item : ${list}">[[${item}]]</li>
    </ul>
</div>

</body>
</html>
如果在循环的过程中要同时了解当前的索引下标,或者当前是否为第一个/最后一个,就可以在循环指令中额外声明一个 "循环状态" 的变量,利用它就可以得到一些额外的信息(循环状态的变量名没有硬性要求)。示例中将每一条循环的结果索引下标都进行了打印。循环状态可以获取当前循环的元素索引 index、集合元素个数 size,以及判断当前元素是否为第一个/最后一个/奇数行偶数行等信息。
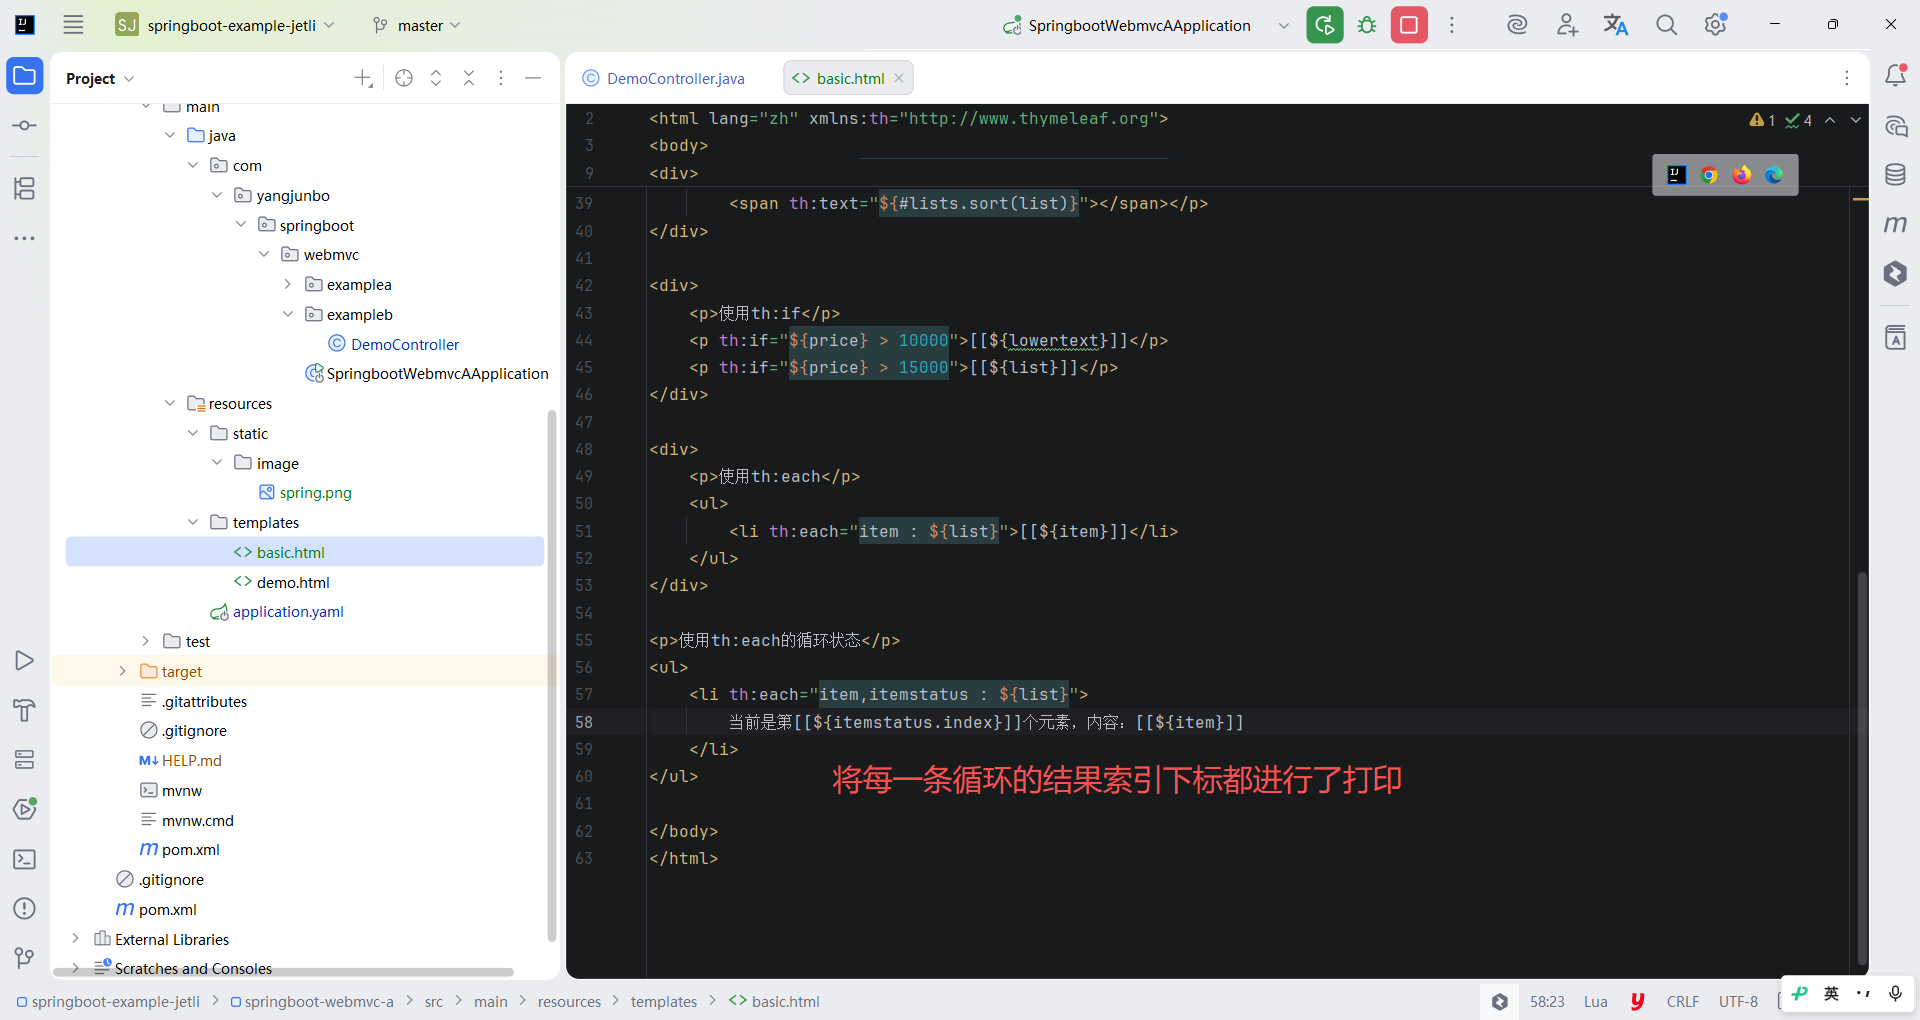
html
<!DOCTYPE html>
<html lang="zh" xmlns:th="http://www.thymeleaf.org">
<body>
<h1>使用th:text标签动态渲染文本</h1>
<h1 th:text="${h1content}">静态文本</h1>
<img src="/image/spring.png" th:src="@{/image/spring.png}"
     width="300" height="84" th:width="${springWidth}" th:height="${springHeight}"/>

<div>
    <p th:text="${price}"></p>
    <p>对price进行2位小数保留:<span
            th:text="${#numbers.formatDecimal(price, 0, 2)}"> </span></p>
    <p>对price进行6位整数补全,并保留3位小数:<span
            th:text="${#numbers.formatDecimal(price, 6, 3)}"></span></p>
    <p>对price进行2位小数保留,并格式化为金额:<span
            th:text="${#numbers.formatCurrency(#numbers. formatDecimal(price, 0, 2))}"></span></p>
    <p th:text="${lowertext}"></p>
    <p>对lowertext进行转大写:<span
            th:text="${#strings.toUpperCase(lowertext)}"></span></p>
    <p>对lowertext进行截取:<span
            th:text="${#strings.substring(lowertext, 0, 5)}"></span></p>
    <p>对lowertext进行长度计算:<span
            th:text="${#strings.length(lowertext)}"></span></p>
    <p th:text="${nowTime}"></p>
    <p>对nowTime进行默认格式的格式化:<span
            th:text="${#dates.format(nowTime)}"></span></p>
    <p>对nowTime进行指定格式的格式化:<span
            th:text="${#dates.format(nowTime, 'yyyy-MM-dd HH:mm:ss')}"></span></p>
    <p>取出nowTime的所属年份:<span
            th:text="${#dates.year(nowTime)}"></span></p>
    <p>生成一个特定的日期:<span
            th:text="${#dates.format(#dates.create('2023', '02', '13'), 'yyyy-MM-dd')}"></span></p>
    <p th:text="${list}"></p>
    <p>对list进行长度计算:<span
            th:text="${#lists.size(list)}"></span></p>
    <p>对list进行contains运算:<span
            th:text="${#lists.contains(list, 'aaa')}"></span></p>
    <p>对list进行排序:
        <span th:text="${#lists.sort(list)}"></span></p>
</div>

<div>
    <p>使用th:if</p>
    <p th:if="${price} > 10000">[[${lowertext}]]</p>
    <p th:if="${price} > 15000">[[${list}]]</p>
</div>

<div>
    <p>使用th:each</p>
    <ul>
        <li th:each="item : ${list}">[[${item}]]</li>
    </ul>
</div>

<p>使用th:each的循环状态</p>
<ul>
    <li th:each="item,itemstatus : ${list}">
        当前是第[[${itemstatus.index}]]个元素,内容:[[${item}]]
    </li>
</ul>

</body>
</html>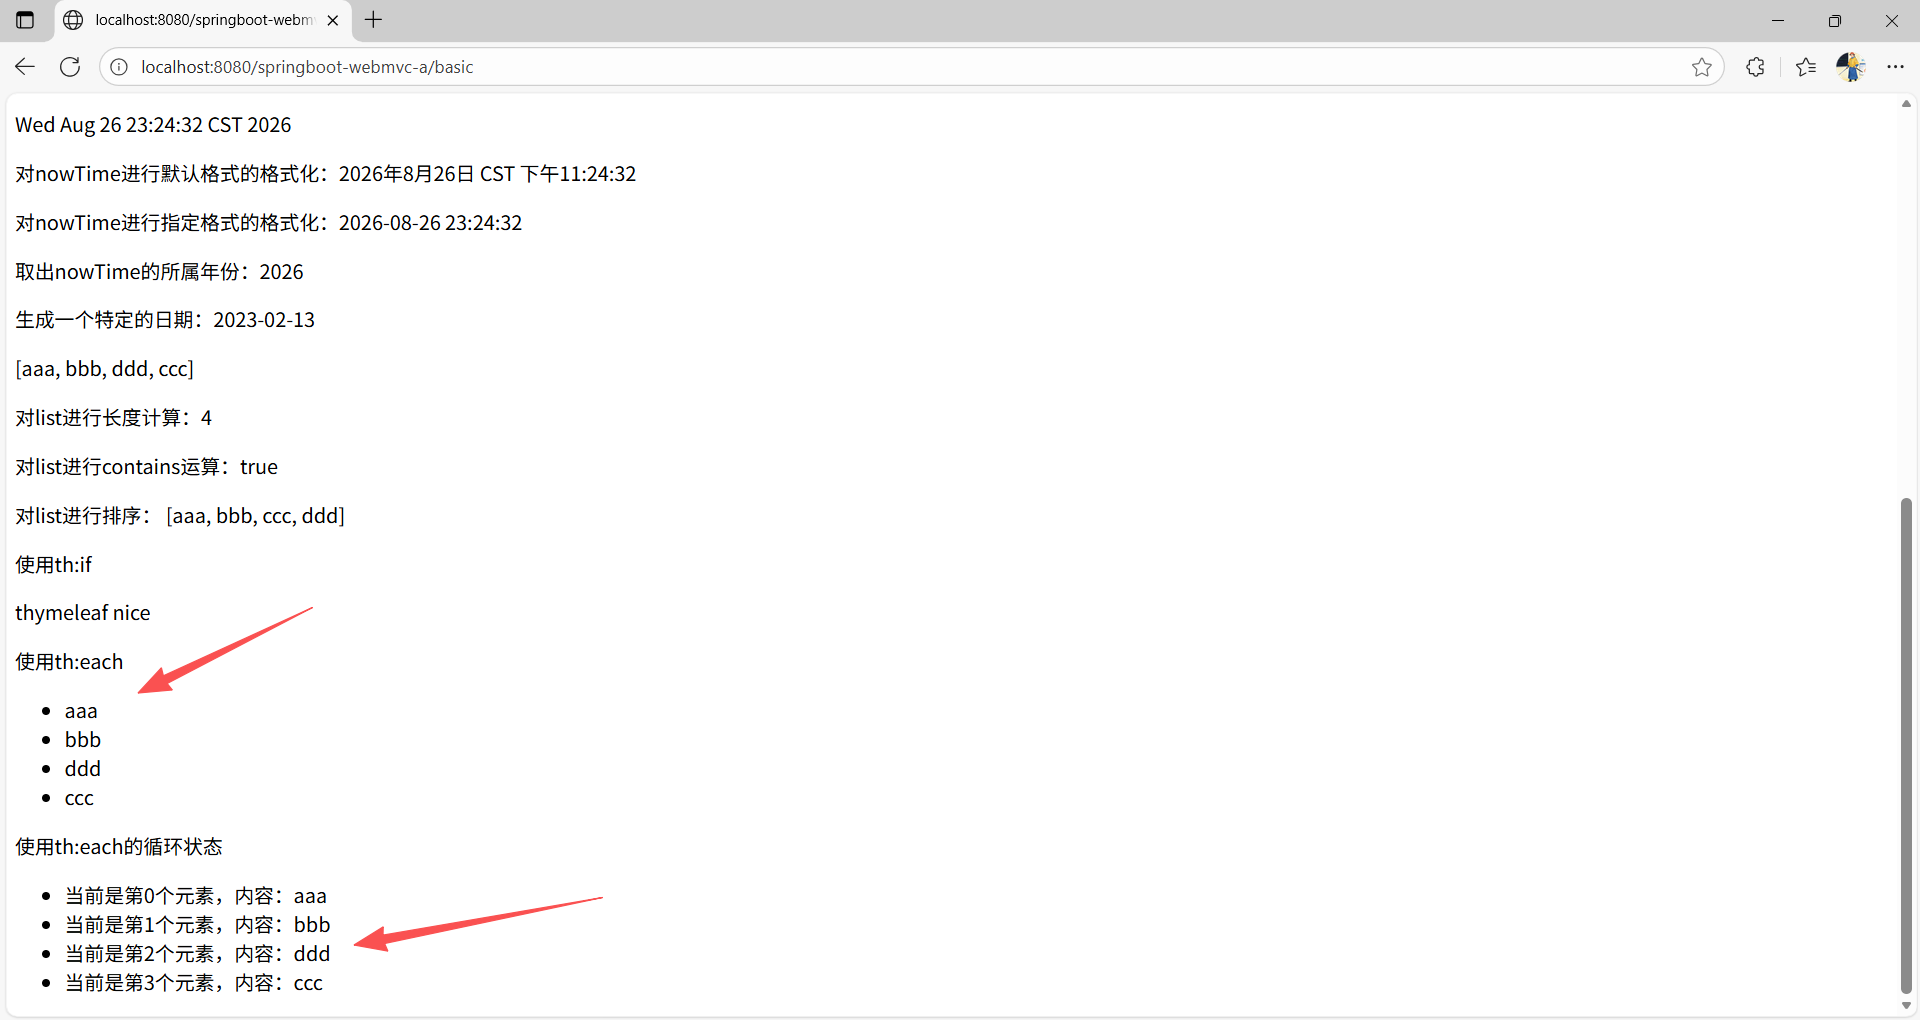
以上就是 Thymeleaf 中常用的语法和指令介绍,更多使用方式与语法规则,读者可以参照 Thymeleaf 的官方文档,在遇到对应的需求场景时查阅文档即可。