文章目录
-
- [1. 带有setAll功能的哈希表](#1. 带有setAll功能的哈希表)
- [2. LRU缓存结构](#2. LRU缓存结构)
- [3. O(1)时间插入删除随机(去重)](#3. O(1)时间插入删除随机(去重))
- [4. O(1)时间插入删除随机(不去重)](#4. O(1)时间插入删除随机(不去重))
- [5. 快速获取数据流中的中位数](#5. 快速获取数据流中的中位数)
- [6. 最大频率栈](#6. 最大频率栈)
- [7. 全O(1)结构](#7. 全O(1)结构)
- [8. LFU缓存结构](#8. LFU缓存结构)
本节的内容比较难, 大多是leetcodeHard难度级别的题目
1. 带有setAll功能的哈希表
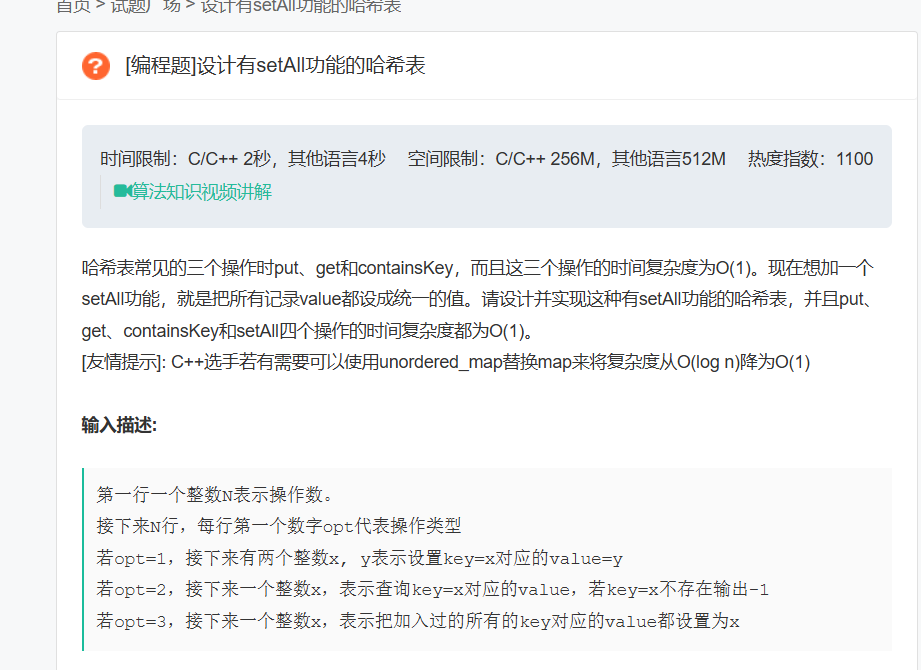
哈希表常见的三个操作时put、get和containsKey,而且这三个操作的时间复杂度为O(1)。现在想加一个setAll功能,就是把所有记录value都设成统一的值。请设计并实现这种有setAll功能的哈希表,并且put、get、containsKey和setAll四个操作的时间复杂度都为O(1)。
思路分析 :
原始的哈希表的put,get,containsKey方法的时间复杂度都是O(1), 现在我们需要添加一个setAll方法, 把表中所有元素的值都改为一个特定的value,显然直接遍历的时间复杂度肯定不是O(1)
为了做到时间复杂度是O(1)我们采用时间戳计数的方法
给定一个属性time记录下本次操作的时间节点, 然后给定一个属性是setAllValue和setAllTime,记录下来我们的setAll调用时候是时间节点和设置的变量, 然后get方法返回的时候如果是大于该节点我们就进行返回原有的值, 如果小于该节点, 我们就返回setAllValue的值
代码实现如下...
java
/**
 * 下面这个高频的数据结构是带有setAll功能的HashMap实现
 * 原理就是传入一个时间戳, 然后进行模拟的判断
 */
class HashMapConSetAll {

    //基础的HashMap结构
    private HashMap<Integer, int[]> map = new HashMap<>();
    //定义一个时间戳
    private int time = 0;
    //定义一个是用setAll方法的时间节点以及相关的值
    private int setAllValue = 0;
    private int setAllTime = -1;

    //给一个无参的构造方法
    public HashMapConSetAll() {

    }

    //我们实现的特殊HashMap的put方法
    public void put(int key, int value) {
        if (!map.containsKey(key)) {
            map.put(key, new int[]{value, time++});
        } else {
            int[] temp = map.get(key);
            temp[0] = value;
            temp[1] = time++;
        }
    }

    //我们实现的特殊的HashMap的get方法
    public int get(int key) {
        if (!map.containsKey(key)) {
            return -1;
        }
        //代码执行到这里说明我们的map里面没有这个元素
        int[] temp = map.get(key);
        if (temp[1] > setAllTime) {
            return temp[0];
        } else {
            return setAllValue;
        }
    }

    //特殊的containsKey方法
    public boolean containsKey(int key) {
        return map.containsKey(key);
    }

    //最重要的setAll方法
    public void setAll(int value) {
        this.setAllTime = time++;
        this.setAllValue = value;
    }
}
2. LRU缓存结构
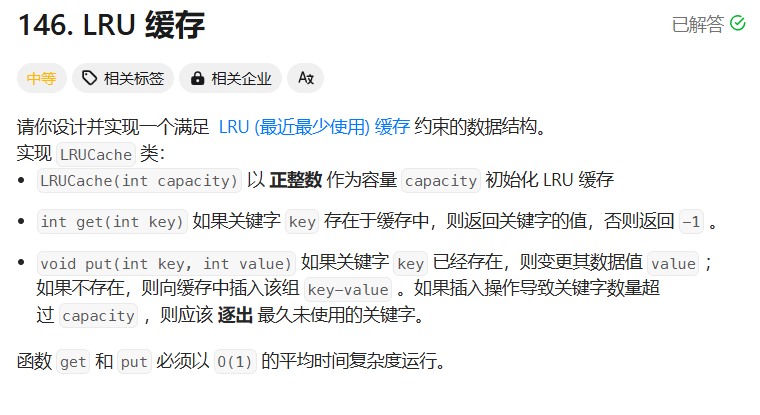
该数据结构的实现借助的是哈希表加上双向链表的方式, 我们定义一个节点类Node, 里面的基础属性就是key与val, 我们的哈希表中的key就是节点中的key,我们的val就是该节点的地址, 为什么要用节点的地址作为val其实也非常的好理解, 用Node作为地址我们可以直接找到这个节点的位置然后进行操作,下面是我们的代码实现
java
/**
 * LRU缓存结构
 * 实现的方法就是双向链表 + 哈希表, 可以直接通过哈希表在O(1)的时间复杂度下获取到位置节点的地址
 * 手写一个双向链表就行了
 */
class LRUCache {

    // 首先定义的是双向链表的节点类
    public static class Node {
        int key;
        int val;
        Node prev;
        Node next;

        public Node(int key, int val) {
            this.key = key;
            this.val = val;
        }
    }

    // 双向链表的实现方式
    public static class DoubleLinkedList {
        // 链表的头部(代表的是最早操作的数据)
        public Node first;
        // 链表的尾部(代表的是最新操作的数据)
        public Node last;

        // 给一个无参数的构造方法
        public DoubleLinkedList() {
            first = null;
            last = null;
        }

        // 添加节点的方法
        public void addNode(Node node) {
            if (node == null) {
                return;
            }
            if (first == null && last == null) {
                first = node;
                last = node;
                return;
            }
            last.next = node;
            node.prev = last;
            last = node;
        }

        //重构一下remove()和removeToLast()方法
        public Node remove() {
            //没节点你删除个damn啊
            if (first == null && last == null) {
                return null;
            }

            //只有一个节点的情况
            Node node = first;
            if (first == last) {
                last = null;
                first = null;
            } else {
                Node next = first.next;
                first.next = null;
                first = next;
                next.prev = null;
            }
            return node;
        }

        //下面是重构的removeToLast方法
        public void removeToLast(Node node) {
            //首先排除掉特殊的情况
            if (node == null || first == null) {
                return;
            }

            //如果只有一个的话或者是尾巴节点
            if (first == last || node == last) {
                return;
            }

            //如果是头节点的节点 / 普通的节点
            if (node == first) {
                Node next = node.next;
                node.next = null;
                first = next;
                first.prev = null;
            } else {
                node.prev.next = node.next;
                node.next.prev = node.prev;
                node.prev = null;
                node.next = null;
            }
            //此时node节点完全是一个独立的节点
            last.next = node;
            node.prev = last;
            last = node;
        }
    }

    private HashMap<Integer, Node> map = new HashMap<>();
    DoubleLinkedList list = new DoubleLinkedList();
    private int capacity;

    public LRUCache(int capacity) {
        this.capacity = capacity;
    }

    public int get(int key) {
        if (!map.containsKey(key)) {
            return -1;
        }
        Node node = map.get(key);
        list.removeToLast(node);
        return node.val;
    }

    public void put(int key, int value) {
        if (map.containsKey(key)) {
            Node node = map.get(key);
            node.val = value;
            list.removeToLast(node);
        } else {
            Node node = new Node(key, value);
            if (map.size() < capacity) {
                map.put(key, node);
                list.addNode(node);
            } else {
                Node nde = list.remove();
                map.remove(nde.key);
                list.addNode(node);
                map.put(key, node);
            }
        }
    }

    public static void main(String[] args) {
        LRUCache lruCache = new LRUCache(2);
        lruCache.put(1, 0);
        lruCache.put(2, 2);
        int res = lruCache.get(1);
        lruCache.put(3, 3);
        int res1 = lruCache.get(2);
        lruCache.put(4, 4);
        int res2 = lruCache.get(1);
        int res3 = lruCache.get(3);
        int res4 = lruCache.get(4);
    }
}
3. O(1)时间插入删除随机(去重)
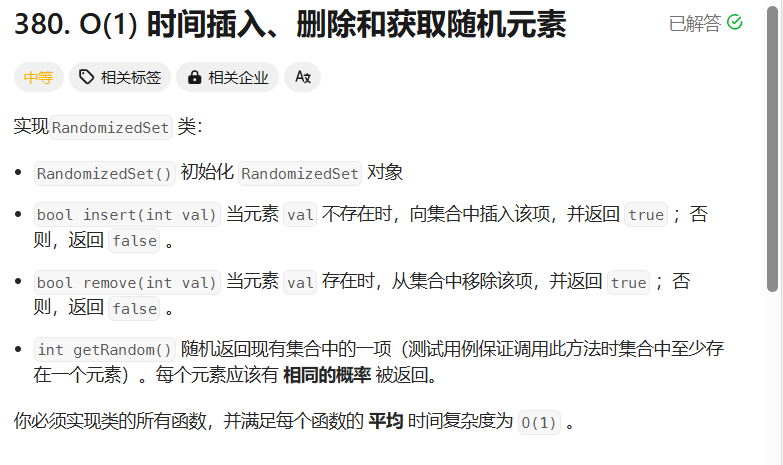
这个类的实现还是基于的哈希表, 外加上一个动态数组, key就是该数字, val是在动态数组里面的下标的位置, 如果删除元素, 动态数组中的那个空位置我们就用最后一个元素去填充, 然后删掉最后一个游戏(这样就保证了这个时间的复杂度O(1)), 同时在哈希表里面删除该值, 并该变最后一个元素的val为删除元素的之前的下标, 代码实现如下
java
class RandomizedSet {

    //其实现的方式是通过动态数组也就是我们的ArrayList跟HashMap共同实现的
    //其实从我们的经验可以了解到, 凡是涉及到O(1)的操作一般都是通过散列表的形式实现的
    HashMap<Integer, Integer> map = new HashMap<>();
    ArrayList<Integer> list = new ArrayList<>();

    //构造方法这里其实没什么用, 我们直接设置为空方法体的
    public RandomizedSet() {

    }

    //常规的insert方法, 我们的map结构第一个整数存储的就是值, 第二个是下标
    public boolean insert(int val) {
        if (!map.containsKey(val)) {
            list.add(val);
            map.put(val, list.size() - 1);
            return true;
        }
        return false;
    }

    //remove方法是一个比较重要的方法
    public boolean remove(int val) {
        if (map.containsKey(val)) {
            int valIndex = map.get(val);
            int endValue = list.get(list.size() - 1);
            map.put(endValue, valIndex);
            list.set(valIndex, endValue);
            map.remove(val);
            list.remove(list.size() - 1);
            return true;
        }
        return false;
    }

    public int getRandom() {
        int randIndex = (int) (Math.random() * list.size());
        return list.get(randIndex);
    }

    public static void main1(String[] args) {
        RandomizedSet randomizedSet = new RandomizedSet();
        randomizedSet.remove(0);
        randomizedSet.remove(0);
        randomizedSet.insert(0);
        int res = randomizedSet.getRandom();
        randomizedSet.remove(0);
        randomizedSet.insert(0);
    }
}
4. O(1)时间插入删除随机(不去重)
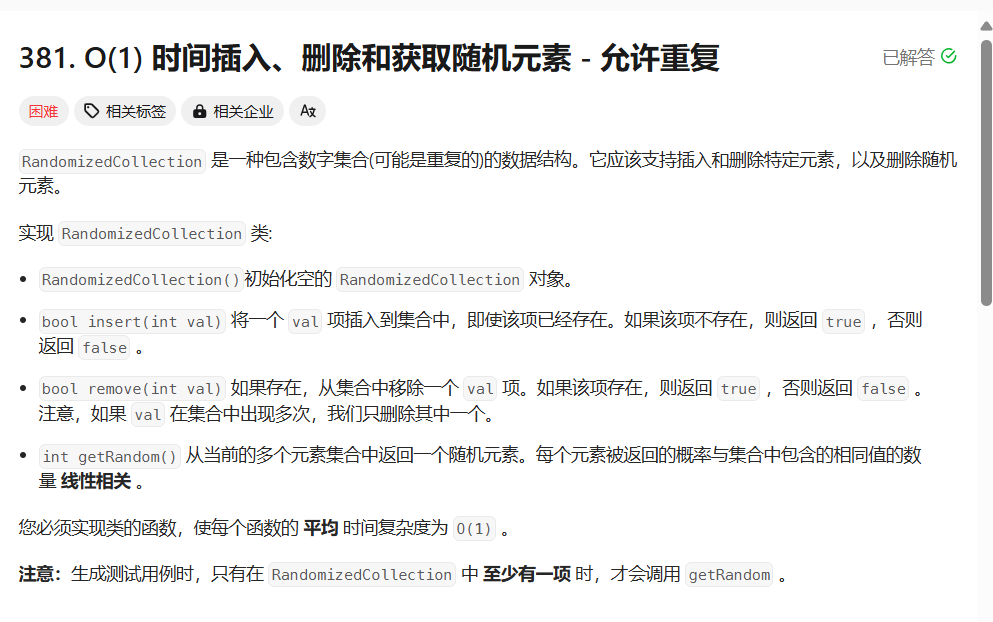
这个题目跟上一个题目只有一个不一样的地方就是这个哈希表的val是我们的HashSet,也就是一个下标集合, 我们进行元素删除的时候我们就随意选择一个待删除元素的下标进行删除即可, 我们的getRandom方法是用动态顺序表的数据进行返回的, 所以自带加权的功能, 代码实现如下
java
class RandomizedCollection {

    // 这个其实原来的HashMap中的value不再是整数, 而是一个HashSet集合
    ArrayList<Integer> arr = new ArrayList<>();
    HashMap<Integer, HashSet<Integer>> map = new HashMap<>();

    public RandomizedCollection() {

    }

    //insert方法是比较简单的, 就是直接放入元素即可
    public boolean insert(int val) {
        HashSet<Integer> set = map.get(val);
        if(set == null){
            HashSet<Integer> tempSet = new HashSet<>();
            tempSet.add(arr.size());
            map.put(val,tempSet);
            arr.add(val);
            return true;
        }else{
            set.add(arr.size());
            arr.add(val);
            return false;
        }
    }

    public boolean remove(int val) {
        HashSet<Integer> set = map.get(val);
        if(set == null){
            return false;
        }
        int indexValue = set.iterator().next();
        int swapValue = arr.get(arr.size() - 1);
        int swapIndex = arr.size() - 1;
        if(swapValue == val){
            arr.remove(arr.size() - 1);
            set.remove(arr.size());

        }else{
            HashSet<Integer> end = map.get(swapValue);
            end.remove(swapIndex);
            end.add(indexValue);
            set.remove(indexValue);
            arr.set(indexValue,swapValue);
            arr.remove(swapIndex);
        }
        if(set.size() == 0){
            map.remove(val);
        }
        return true;
    }

    public int getRandom() {
        return arr.get((int) (Math.random() * arr.size()));
    }
}

/**
 * Your RandomizedCollection object will be instantiated and called as such:
 * RandomizedCollection obj = new RandomizedCollection();
 * boolean param_1 = obj.insert(val);
 * boolean param_2 = obj.remove(val);
 * int param_3 = obj.getRandom();
 */
5. 快速获取数据流中的中位数
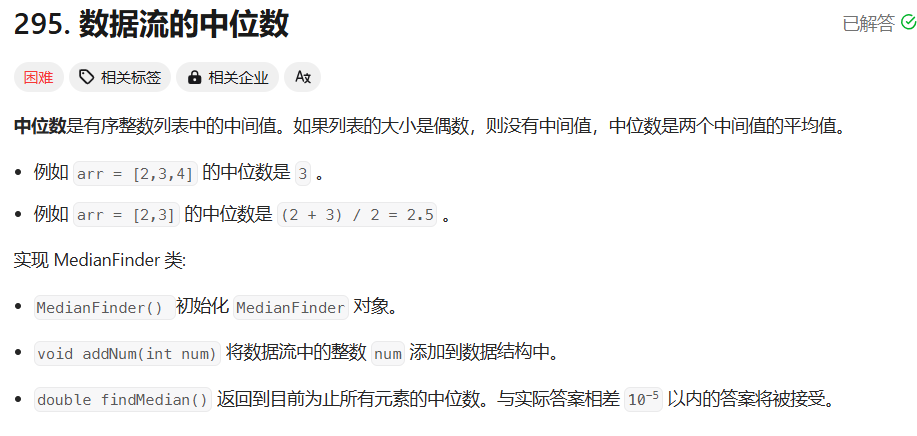
该数据结构的实现就是通过我们的堆结构来实现的, 建立一个大根堆来装入小半部分的数据, 建立一个小根堆来建立大半部分的数据, 记住在装入数据的过程中我们要保持我们的堆中的元素的大小, 也就是通过一个balance方法, 来保持两边的数量差值不超过1, 获取中位数的时候我们, 如果两边数量不一致, 就返回多的哪一方的堆顶, 如果一致, 我们就返回两个堆顶的平均值, 代码实现如下
java
class MedianFinder {
    private PriorityQueue<Integer> maxHeap = new PriorityQueue<>(new Comparator<Integer>() {
        @Override
        public int compare(Integer o1, Integer o2) {
            return o2 - o1;
        }
    });
    // 默认就是小根堆
    private PriorityQueue<Integer> minHeap = new PriorityQueue<>();

    public MedianFinder() {

    }

    public void addNum(int num) {
        if (maxHeap.isEmpty() || num < maxHeap.peek()) {
            maxHeap.offer(num);
        } else {
            minHeap.offer(num);
        }
        balance();
    }

    public double findMedian() {
        if (minHeap.size() == maxHeap.size()) {
            return (minHeap.peek() + maxHeap.peek()) / 2.0;
        } else if (maxHeap.size() < minHeap.size()) {
            return minHeap.peek();
        } else {
            return maxHeap.peek();
        }
    }

    // 平衡堆结构的方法
    private void balance() {
        if (Math.abs(minHeap.size() - maxHeap.size()) == 2) {
            if (minHeap.size() - maxHeap.size() == 2) {
                maxHeap.offer(minHeap.poll());
            } else {
                minHeap.offer(maxHeap.poll());
            }
        }
    }
}

/**
 * Your MedianFinder object will be instantiated and called as such:
 * MedianFinder obj = new MedianFinder();
 * obj.addNum(num);
 * double param_2 = obj.findMedian();
6. 最大频率栈
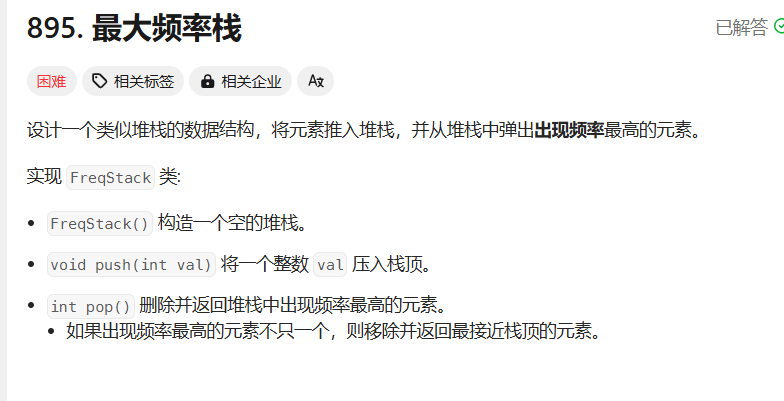
这道题目的思路就是用两个哈希表, 第一个哈希表存储的是词频统计, 第二个哈希表是一个类似桶的结构, key就是出现的词频, val是一个动态的顺序表, 代码实现如下
java
class FreqStack {
    //本质就是通过哈希来模拟
    //哈希表的key是词频统计, val是一个动态的顺序表, 里面存放这该词频的数字
    HashMap<Integer,ArrayList<Integer>> map = new HashMap<>();
    //再创建一个哈希表用于词频的统计
    HashMap<Integer,Integer> frq = new HashMap<>();
    //最大的词频(用于pop()操作指示)
    private int maxFrq = 0;
    public FreqStack() {
        //构造方法里面不写东西
    }

    public void push(int val){
        //首先进行词频的统计
        frq.put(val,frq.getOrDefault(val,0) + 1);
        maxFrq = Math.max(maxFrq,frq.get(val));
        ArrayList res = map.get(frq.get(val));
        if(res == null){
            ArrayList<Integer> arr = new ArrayList<>();
            arr.add(val);
            map.put(frq.get(val),arr);
        }else{
            res.add(val);
        }
    }

    //pop方法的时候应该进行的元素的删除操作
    public int pop() {
        ArrayList<Integer> arr = map.get(maxFrq);
        if(arr.size() == 1){
            int temp = arr.remove(0);
            map.remove(maxFrq--);
            if(frq.get(temp) == 1){
                frq.remove(temp);
            }else{
                frq.put(temp,frq.get(temp) - 1);
            }
            return temp;
        }else{
            int temp = arr.remove(arr.size() - 1);
            if(frq.get(temp) == 1){
                frq.remove(temp);
            }else{
                frq.put(temp,frq.get(temp) - 1);
            }
            return temp;
        }
    }
}

/**
 * Your FreqStack object will be instantiated and called as such:
 * FreqStack obj = new FreqStack();
 * obj.push(val);
 * int param_2 = obj.pop();
 */
7. 全O(1)结构
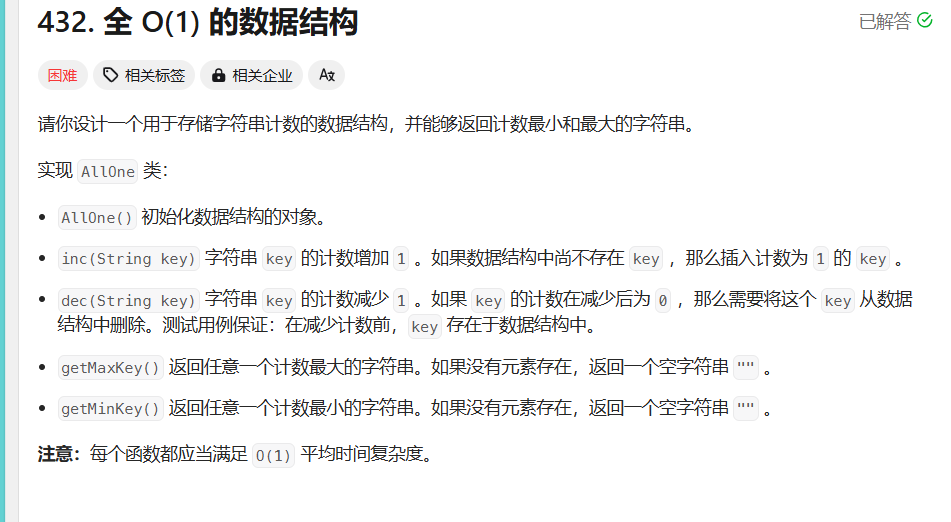
这个就是哈希表加上双向链表桶的思路, 哈希表中保存的是该字符串的所在桶的地址, 桶里面存放的是该词频的字符串的情况, 代码实现如下, 下面有一个LFU缓存也是这样的一个结构, 双向链表(桶), 桶里面再嵌套一个双向链表实现的堆结构...
java
class RandomizedCollection {

    //这个其实原来的HashMap中的value不再是整数, 而是一个HashSet集合
    ArrayList<Integer> arr = new ArrayList<>();
    HashMap<Integer, HashSet<Integer>> map = new HashMap<>();

    public RandomizedCollection() {

    }

    //insert方法是比较简单的, 就是直接放入元素即可
    public boolean insert(int val) {
        HashSet<Integer> set = map.get(val);
        if (set == null) {
            HashSet<Integer> tempSet = new HashSet<>();
            tempSet.add(arr.size());
            map.put(val, tempSet);
            arr.add(val);
            return true;
        } else {
            set.add(arr.size());
            arr.add(val);
            return false;
        }
    }

    public boolean remove(int val) {
        HashSet<Integer> set = map.get(val);
        if (set == null) {
            return false;
        }
        int indexValue = set.iterator().next();
        int swapValue = arr.get(arr.size() - 1);
        int swapIndex = arr.size() - 1;
        if (swapValue == val) {
            arr.remove(arr.size() - 1);
            set.remove(arr.size());

        } else {
            HashSet<Integer> end = map.get(swapValue);
            end.remove(swapIndex);
            end.add(indexValue);
            set.remove(indexValue);
            arr.set(indexValue, swapValue);
            arr.remove(swapIndex);
        }
        if (set.size() == 0) {
            map.remove(val);
        }
        return true;
    }

    public int getRandom() {
        return arr.get((int) (Math.random() * arr.size()));
    }

    public static void main(String[] args) {
        RandomizedCollection set = new RandomizedCollection();
        set.insert(1);
        set.remove(1);
        set.insert(1);

    }
}
8. LFU缓存结构
java
/**
 * LFU缓存 :
 * 1. 首先定义一个节点的对象, 里面保存的是该传入数据的key和value(ListNode)
 * 这个东西也是一个双向链表的结构(模拟队列使用) --> 不可以用LinkedList(源码的remove方法是遍历删除的结构)
 * 2. 其次我们定义一个桶结构, 里面有一个val用来保存操作的次数, 还有一个双向的链表(也就是我们的上面定义的队列结构)
 * 这个桶的结构也是类似于双端的链表(模拟双向链表使用)
 * 3. 然后我们需要定义两个哈希表
 * 第一个HashMap中的val保存的是该数字的所在桶的地址(方便定位桶的位置进行操作)
 * 第二个HashMap中的val保存的是该数字本身的ListNode的地址(方便进行删除操作)
 * 4. 返回使用量最小的元素就去最左边的桶里面拿队列中的first元素
 * 5. 桶的左右两侧我们定义了0操作次数, 以及Integer.MAX_VALUE桶, 减少了边界位置的判断
 */

class LFUCache {

    /**
     * 基础的节点的元素定义
     */
    static class Node {

        int key;
        int val;
        Node prev;
        Node next;

        public Node(int key, int val) {
            this.key = key;
            this.val = val;
        }
    }

    /**
     * 模拟的队列的实现类
     */
    static class MQueue {
        //属性定义为这样是为了和下面的桶结构区分开
        Node head;
        Node tail;
        int size;

        //无参数的构造方法
        public MQueue() {
            this.head = null;
            this.tail = null;
        }

        //remove方法用来移除掉指定位置的节点
        public Node remove(Node node) {
            if (head == null || tail == null) {
                throw new RuntimeException("没有节点无法移动");
            }

            if (head == tail) {
                tail = null;
                head = null;
            } else if (node == this.head) {
                Node temp = this.head.next;
                this.head.next = null;
                this.head = temp;
                this.head.prev = null;
            } else if (node == tail) {
                Node temp = tail.prev;
                tail.prev = null;
                tail = temp;
                tail.next = null;
            } else {
                node.prev.next = node.next;
                node.next.prev = node.prev;
                node.next = null;
                node.prev = null;
            }
            size--;
            return node;
        }

        //下面是我们的pop方法
        public Node pop() {
            return remove(head);
        }

        //下面是我们的offer()方法
        public void offer(Node node) {
            if (head == null && tail == null) {
                head = node;
                tail = node;
                size++;
                return;
            }
            tail.next = node;
            node.prev = tail;
            tail = node;
            size++;
        }
    }

    /**
     * 下面我们要完成我们的桶结构的实现(桶结构的val是出现的次数, 桶结构里面有一个我们手写的一个队列结构)
     */
    static class Bucket {
        //出现的频率
        int time;
        //我们想要的队列结构
        MQueue mQueue;
        //模拟双向链表必须的实现
        Bucket prev;
        Bucket next;

        //构造方法
        public Bucket(int time) {
            this.time = time;
            mQueue = new MQueue();
        }
    }

    static class MBucket {

        //用作基石的两个桶
        Bucket min = new Bucket(0);
        Bucket max = new Bucket(Integer.MAX_VALUE);

        public MBucket(){
            min.next = max;
            max.prev = min;
        }

        //桶的插入插入操作(cur是参照结构)
        public void insert(Bucket cur, Bucket pos) {
            cur.next.prev = pos;
            pos.next = cur.next;
            cur.next = pos;
            pos.prev = cur;
        }

        //桶的删除操作
        public void remove(Bucket cur) {
            cur.prev.next = cur.next;
            cur.next.prev = cur.prev;
        }
    }


    //那个容量大小
    int capacity;

    //两个重要的HashMap结构
    HashMap<Integer, Node> nodeIndexMap = new HashMap<>();
    HashMap<Integer, Bucket> bucketIndexMap = new HashMap<>();

    MBucket mBucket = new MBucket();

    public LFUCache(int capacity) {
        this.capacity = capacity;
    }

    public int get(int key) {
        if (!nodeIndexMap.containsKey(key)) {
            return -1;
        } else {
            Bucket curBucket = bucketIndexMap.get(key);
            Node curNode = nodeIndexMap.get(key);
            if (curBucket.next.time > curBucket.time + 1) {
                Bucket newBucket = new Bucket(curBucket.time + 1);
                mBucket.insert(curBucket, newBucket);
                curBucket.mQueue.remove(curNode);
                newBucket.mQueue.offer(curNode);
            } else {
                curBucket.mQueue.remove(curNode);
                curBucket.next.mQueue.offer(curNode);
            }
            bucketIndexMap.put(key, curBucket.next);
            //判断先前的那个桶是不是空的(是空桶就删掉)
            if (curBucket.mQueue.size == 0) {
                mBucket.remove(curBucket);
            }
            return curNode.val;
        }
    }

    public void put(int key, int value) {
        if (nodeIndexMap.containsKey(key)) {
            Node curNode = nodeIndexMap.get(key);
            Bucket curBucket = bucketIndexMap.get(key);
            curNode.val = value;
            if (curBucket.next.time > curBucket.time + 1) {
                Bucket newBucket = new Bucket(curBucket.time + 1);
                mBucket.insert(curBucket, newBucket);
                curBucket.mQueue.remove(curNode);
                newBucket.mQueue.offer(curNode);
            } else {
                curBucket.mQueue.remove(curNode);
                curBucket.next.mQueue.offer(curNode);
            }
            bucketIndexMap.put(key, curBucket.next);
            //判断先前的那个桶是不是空的(是空桶就删掉)
            if (curBucket.mQueue.size == 0) {
                mBucket.remove(curBucket);
            }
        } else {
            Node newNode = new Node(key, value);
            if (nodeIndexMap.size() < capacity) {
                if (mBucket.min.next.time != 1) {
                    Bucket newBucket = new Bucket(1);
                    newBucket.mQueue.offer(newNode);
                    mBucket.insert(mBucket.min, newBucket);
                    nodeIndexMap.put(key, newNode);
                    bucketIndexMap.put(key, newBucket);
                } else {
                    Bucket oneBucket = mBucket.min.next;
                    oneBucket.mQueue.offer(newNode);
                    nodeIndexMap.put(key, newNode);
                    bucketIndexMap.put(key, oneBucket);
                }
            } else {
                Node removeNode = mBucket.min.next.mQueue.pop();
                nodeIndexMap.remove(removeNode.key);
                bucketIndexMap.remove(removeNode.key);
                if(mBucket.min.next.mQueue.size == 0){
                    mBucket.remove(mBucket.min.next);
                }
                if(mBucket.min.next.time != 1){
                    Bucket newBucket = new Bucket(1);
                    newBucket.mQueue.offer(newNode);
                    mBucket.insert(mBucket.min, newBucket);
                    nodeIndexMap.put(key, newNode);
                    bucketIndexMap.put(key, newBucket);
                }else{
                    Bucket oneBucket = mBucket.min.next;
                    oneBucket.mQueue.offer(newNode);
                    nodeIndexMap.put(key, newNode);
                    bucketIndexMap.put(key, oneBucket);
                }
            }
        }
    }

    public static void main(String[] args) {
        LFUCache lfu = new LFUCache(2);
        lfu.put(1,1);
        lfu.put(2,2);
        lfu.get(1);
        lfu.put(3,3);
        lfu.get(2);
        lfu.get(3);
        lfu.put(4,4);
        lfu.get(1);
        lfu.get(3);
        lfu.get(4);
    }
}