暑期学习总结
前言
暑假在学校完成了五个项目,总的来说学习到了很多新的知识,这里对暑假中学习的内容进行一个小的总结,整理一些个人认为比较重点的内容。
无限轮播图
无限轮播图的原理是在轮播的图片两边加上两个假页,通过判断是否到了这两个假页的位置,而后将滚动视图展示位置移动,从而可以实现视觉效果上的无限轮播效果。

如图所示,当我插入三张图片时,两边的假页分别是第三、一张,这样一来,在展示时当移动到第五张时,函数检测后将滚动视图重置至第二张,就不会有间断效果,前面的移动也是如此。
objectivec
self.scrollview = [[UIScrollView alloc] init];
    self.scrollview.frame = CGRectMake(0, [UIScreen mainScreen].bounds.size.height/2-200, [UIScreen mainScreen].bounds.size.width, [UIScreen mainScreen].bounds.size.height-320);
    self.scrollview.pagingEnabled = YES;
    self.scrollview.scrollEnabled = YES;
    self.scrollview.contentSize = CGSizeMake([UIScreen mainScreen].bounds.size.width * 5 , [UIScreen mainScreen].bounds.size.height / 2);
    for (int i = 0; i <= 5; i++) {
        NSString *strName = [NSString stringWithFormat:@"%d.JPG", (i % 3) + 1];
        // 创建图片
        UIImage *image = [UIImage imageNamed:strName];
        // 创建视图
        UIImageView *iView = [[UIImageView alloc] initWithImage:image];
        if (i == 5) {
            iView.frame = CGRectMake(0, 0, [UIScreen mainScreen].bounds.size.width, [UIScreen mainScreen].bounds.size.height - 300);
        }
        else {
            iView.frame = CGRectMake([UIScreen mainScreen].bounds.size.width * (i + 1), 0, [UIScreen mainScreen].bounds.size.width, [UIScreen mainScreen].bounds.size.height - 320);
        }
    // 将图片添加到滚动视图,不要添加到主视图
    [self.scrollview addSubview:iView];
    }
    [self.view addSubview:self.scrollview];
    // 设置初始偏移量到第二张图片
    [self.scrollview setContentOffset:CGPointMake([UIScreen mainScreen].bounds.size.width, 0) animated:NO];
    // 实现滚动到最后一张视图时,再次滚动能回到第一张视图
    self.scrollview.delegate = self;


- (void)scrollViewDidScroll:(UIScrollView *)scrollView {
    //当前滚动到的x位置
    CGFloat X = scrollView.contentOffset.x;
    //滚动视图展示宽度,即已经滚动过的宽度
    CGFloat screenWidth = CGRectGetWidth(scrollView.frame);
    //滚动视图内容的宽度,在我的视图中,就是5个屏幕的宽度
    CGFloat contentWidth = scrollView.contentSize.width;

    // 滚动到最后一张视图之后,将滚动位置重置到第二张图片;这样做的话,滚动视图位置被提前,就可以继续对视图进行从左到右的滚动
    if (X >= contentWidth - screenWidth) {
        [scrollView setContentOffset:CGPointMake(screenWidth, 0) animated:NO];
    }
    // 滚动到第一张视图之前,将滚动位置重置到倒数第二张图片;这样做的话,滚动视图位置被滞后,就可以继续对视图进行从右向左的滚动
    else if (X < screenWidth - scrollView.frame.size.width) {
        [scrollView setContentOffset:CGPointMake(contentWidth - 2 * screenWidth, 0) animated:NO];
    }
}
换头像
这个功能是一个在自己创建的照片墙中选择图片并且传递到上一个页面,在头像框内显示的操作,这里我使用了协议传值的方法,通过将图片传递给上一个界面实现了该功能,这里通过代码展示。
objectivec
if(self.selectedCount == 0) {
        self.elertView = [UIAlertController alertControllerWithTitle:@"警告" message:@"请选择一张图片更换" preferredStyle:UIAlertControllerStyleAlert];
        UIAlertAction* action = [UIAlertAction actionWithTitle:@"确认" style:UIAlertActionStyleDefault handler:^(UIAlertAction* action){}];
        [self.elertView addAction:action];
        [self presentViewController:self.elertView animated:YES completion:nil];
    } else if (self.selectedCount == 1) {
        for(UIView* subview in self.scrollview.subviews) {
            if([subview isKindOfClass:[UIButton class]]) {
                UIButton* button = (UIButton*) subview;
                if(button.selected) {
                    UIImage* image = [button imageForState:UIControlStateNormal];
                    [self.delegate ChangePhoto:image];
                    button.selected = NO;
                    [self.navigationController popViewControllerAnimated:YES];
                    break;
                }
            }
        }
    } else {
        self.elertView = [UIAlertController alertControllerWithTitle:@"警告" message:@"禁止一次选用多张图片更换" preferredStyle:UIAlertControllerStyleAlert];
        UIAlertAction* action = [UIAlertAction actionWithTitle:@"确认" style:UIAlertActionStyleDefault handler:^(UIAlertAction* action){}];
        [self.elertView addAction: action];
        [self presentViewController:self.elertView animated:YES completion:nil];
    }
简单的网络请求
简单的网络请求主要有以下几个步骤:
- 创建请求地址
- 创建请求类
- 创建会话
- 根据会话创建任务
- 启动任务
这里就不详细讲解网络请求的内容了,如果需要了解内容,可以看看本人的这篇博客:【iOS】APP仿写------天气预报 主要需要注意网络请求异步的问题。
UISearchController
UISearchController提供了一个搜索栏和搜索结果视图的管理器,使得在应用中集成搜索功能变得简单。它可以用于在单个视图控制器中添加搜索功能,也可以与其他视图控制器(如UITableViewController)一起使用。 我们要实现UISearchControllerDelegate, UISearchResultsUpdatig两个协议来实现想要显示的效果,下面通过代码展示:
objectivec
self.search = [[UISearchController alloc] initWithSearchResultsController:nil];
    self.search.delegate = self;
    self.search.searchResultsUpdater = self;
    //设置searchbar的尺寸
    [self.search.searchBar sizeToFit];
    //在搜索时将背景模糊化,因为模糊背景的目的是将焦点集中在搜索结果上,而不是与背景内容进行交互。
    self.search.obscuresBackgroundDuringPresentation = YES;
    //隐藏导航控制栏
    self.search.hidesNavigationBarDuringPresentation = YES;
    //设置未编辑状态的searchbar的位置
    self.search.searchBar.frame = CGRectMake(0, 150, [UIScreen mainScreen].bounds.size.width, 55);
//    _tableview.tableHeaderView = self.search.searchBar;
    [self.view addSubview:self.search.searchBar];
    self.search.searchBar.searchBarStyle = UISearchBarStyleDefault;
    UISearchBar* searchbar = self.search.searchBar;
    searchbar.placeholder = @"请输入搜索的城市";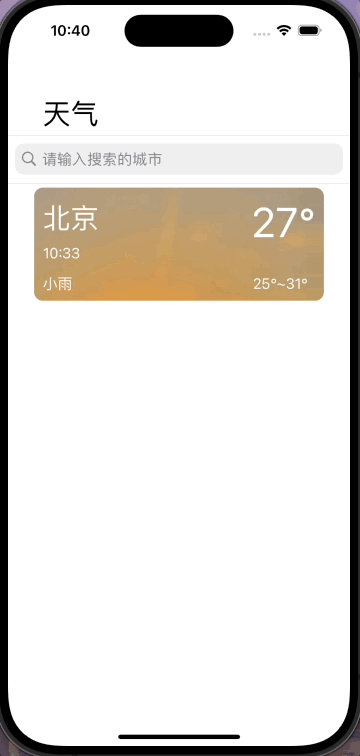
上面是本人在完成项目中一些觉得比较有代表性的学习的内容,如果你还想了解更多的内容,去看看笔者之前写的博客吧。