简介
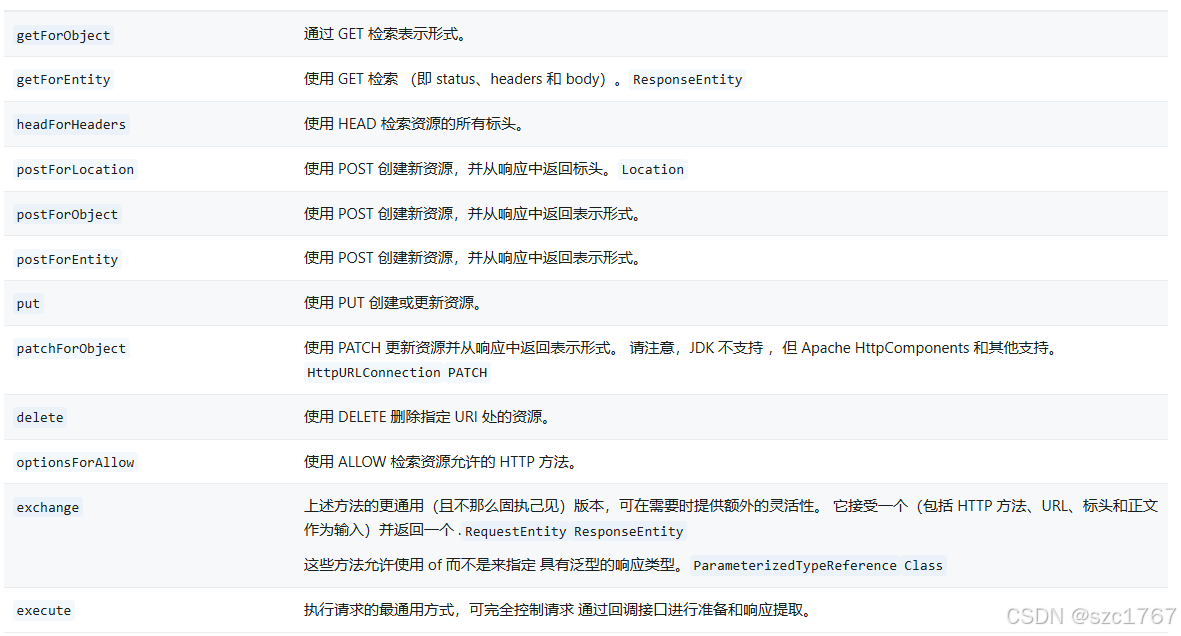
RestTemplate是一个执行HTTP请求的同步阻塞式工具类,它仅仅只是在 HTTP 客户端库(例如 JDK HttpURLConnection,Apache HttpComponents,okHttp 等)基础上,封装了更加简单易用的模板方法 API,方便程序员利用已提供的模板方法发起网络请求和处理,能很大程度上提升我们的开发效率
依赖
1、非Spring环境下使用RestTemplate
<dependency>
  <groupId>org.springframework</groupId>
  <artifactId>spring-web</artifactId>
</dependency>
2、Spring环境下使用 RestTemplate
<dependency>
    <groupId>org.springframework.boot</groupId>
    <artifactId>spring-boot-starter-web</artifactId>
</dependency>
初始化配置
@Configuration
public class RestTemplateConfig {

    @Bean
    public RestTemplate restTemplate(){
        RestTemplate restTemplate = new RestTemplate(simpleClientHttpRequestFactory());
        return restTemplate;
    }


    public ClientHttpRequestFactory simpleClientHttpRequestFactory() {
        SimpleClientHttpRequestFactory factory = new SimpleClientHttpRequestFactory();
        factory.setReadTimeout(150000); // ms
        factory.setConnectTimeout(150000); // ms
        return factory;
    }

}这种初始化方法,是使用了JDK自带的HttpURLConnection作为底层HTTP客户端实现。
可以执行配置不同的连接方式,如
HttpClient
@Configuration
public class RestTemplateConfig {


    @Bean
    public RestTemplate restTemplate(){
        RestTemplate restTemplate = new RestTemplate(getClientHttpRequestFactory());
        return restTemplate;
    }

    /**
     * 使用HttpClient作为底层客户端
     * @return
     */
    private ClientHttpRequestFactory getClientHttpRequestFactory() {
        int timeout = 5000;
        RequestConfig config = RequestConfig.custom()
                .setConnectTimeout(timeout)
                .setConnectionRequestTimeout(timeout)
                .setSocketTimeout(timeout)
                .build();
        CloseableHttpClient client = HttpClientBuilder
                .create()
                .setDefaultRequestConfig(config)
                .build();
        return new HttpComponentsClientHttpRequestFactory(client);
    }
}
OkHttp
/**
 * 使用OkHttpClient作为底层客户端
 * @return
 */
private ClientHttpRequestFactory getClientHttpRequestFactory(){
    OkHttpClient okHttpClient = new OkHttpClient.Builder()
            .connectTimeout(5, TimeUnit.SECONDS)
            .writeTimeout(5, TimeUnit.SECONDS)
            .readTimeout(5, TimeUnit.SECONDS)
            .build();
    return new OkHttp3ClientHttpRequestFactory(okHttpClient);
}
使用
restTemplate 提供的api

1、设置Header和 body
// 创建 HttpEntity
String jsonBody = JSONObject.toJSONString(weChatRefundsRequestDto);
HttpEntity<String> entity = new HttpEntity<>(jsonBody, headers);

ResponseEntity<WechatRefundsResponseDto> responseEntity =restTemplate.postForEntity("url",entity,WechatRefundsResponseDto.class);
其中在entity 中设置请求头和请求体;WechatRefundsResponseDto为设置接受返回信息的对象,其他postObject 类似以上方式
public <T> ResponseEntity<T> postForEntity(String url, @Nullable Object request,
			Class<T> responseType, Object... uriVariables) throws RestClientException
其中postObeject,postForEntity的请求方式中的request如果类型为HttpEntity则直接使用,不是就将request当成body放入HttpEntity中使用
2、get请求设置带参数的请求
@Autowired
private RestTemplate restTemplate;
 /**
 * 单元测试(带参的get请求)
 */
@Test
public void testGetByRestFul(){
    //请求地址
    String url = "http://localhost:8080/testGetByRestFul/{1}/{2}";

    //发起请求,直接返回对象(restful风格)
    ResponseBean responseBean = restTemplate.getForObject(url, ResponseBean.class, "001", "张三");
    System.out.println(responseBean.toString());
}

@Autowired
private RestTemplate restTemplate;

 /**
 * 单元测试(带参的get请求)
 */
@Test
public void testGetByParam(){
    //请求地址
    String url = "http://localhost:8080/testGetByParam?userName={userName}&userPwd={userPwd}";

    //请求参数
    Map<String, String> uriVariables = new HashMap<>();
    uriVariables.put("userName", "唐三藏");
    uriVariables.put("userPwd", "123456");

    //发起请求,直接返回对象(带参数请求)
    ResponseBean responseBean = restTemplate.getForObject(url, ResponseBean.class, uriVariables);
    System.out.println(responseBean.toString());
}
3、文件上传
@Autowired
private RestTemplate restTemplate;

/**
 * 文件上传,post请求
 */
@Test
public void upload(){
    //需要上传的文件
    String filePath = "/Users/panzhi/Desktop/Jietu20220205-194655.jpg";

    //请求地址
    String url = "http://localhost:8080/upload";

    // 请求头设置,multipart/form-data格式的数据
    HttpHeaders headers = new HttpHeaders();
    headers.setContentType(MediaType.MULTIPART_FORM_DATA);

    //提交参数设置
    MultiValueMap<String, Object> param = new LinkedMultiValueMap<>();
    param.add("uploadFile", new FileSystemResource(new File(filePath)));
    //服务端如果接受额外参数,可以传递
    param.add("userName", "张三");

    // 组装请求体
    HttpEntity<MultiValueMap<String, Object>> request = new HttpEntity<>(param, headers);

    //发起请求
    ResponseBean responseBean = restTemplate.postForObject(url, request, ResponseBean.class);
    System.out.println(responseBean.toString());
}
4、文件下载
@Autowired
private RestTemplate restTemplate;

/**
 * 小文件下载
 * @throws IOException
 */
@Test
public void downloadFile() throws IOException {
    String userName = "张三";
    String fileName = "c98b677c-0948-46ef-84d2-3742a2b821b0.jpg";
    //请求地址
    String url = "http://localhost:8080/downloadFile/{1}/{2}";

    //发起请求,直接返回对象(restful风格)
    ResponseEntity<byte[]> rsp = restTemplate.getForEntity(url, byte[].class, userName,fileName);
    System.out.println("文件下载请求结果状态码:" + rsp.getStatusCode());

    // 将下载下来的文件内容保存到本地
    String targetPath = "/Users/panzhi/Desktop/"  + fileName;
    Files.write(Paths.get(targetPath), Objects.requireNonNull(rsp.getBody(), "未获取到下载文件"));
}