文章目录
前言
轮廓发现是图像处理中一个重要的操作,可以帮助找到图像中的边界并识别物体的形状。在 OpenCV 中,findContours 函数可以用来检测图像中的轮廓,广泛应用于图像分割、形状分析、物体检测等场景。本篇文章将详细介绍如何在 OpenCV 中实现轮廓发现,并通过完整的 C++ 代码示例进行演示。
1.理论基础
1.1轮廓发现
轮廓发现是基于图像边缘提取的基础寻找对象轮廓的方法。 所以边缘提取的阈值选定会影响最终轮廓发现结果。

1.2轮廓发现步骤
- 图像预处理 :
cvtColor将输入的图像转为灰度图像,并使用Canny边缘检测算法来提取边缘。 - 发现轮廓 :使用
findContours函数从二值图像中发现轮廓。findContours函数会输出一个包含轮廓的列表。 - 绘制轮廓 :使用
drawContours函数将发现的轮廓绘制在图像上。
1.3相关API
(1)轮廓发现(find contour)
cpp
cv::findContours(
InputOutputArray image, // 输入图像,非0的像素被看成1,0的像素值保持不变,8-bit
OutputArrayOfArrays contours,//  全部发现的轮廓对象
OutputArray hierachy,// 图该的拓扑结构,可选,该轮廓发现算法正是基于图像拓扑结构实现。
int mode, //  轮廓返回的模式
int method,// 发现方法
Point offset=Point()//  轮廓像素的位移,默认(0, 0)没有位移
)
(2)轮廓绘制(draw contour)
cpp
void drawContours(
InputOutputArray image, //输出图像
InputArrayOfArrays contours,//全部发现的轮廓对象
int contourIdx, //轮廓索引号
const Scalar& color,//绘制时候颜色
int thickness = 1, //绘制线宽
int lineType = LINE_8,//线的类型LINE_8
InputArray hierarchy = noArray(),//拓扑结构图
int maxLevel = INT_MAX,// 最大层数, 0只绘制当前的,1表示绘制绘制当前及其内嵌的轮廓
Point offset = Point() // 轮廓位移,可选
);
2.代码实现
2.1图像预处理
对输入图像进行预处理。将图像转为灰度图,然后使用 Canny 边缘检测算法提取图像的边缘。
cpp
// 将图像转为灰度图
cvtColor(src, src, COLOR_BGR2GRAY);
// 使用Canny边缘检测
Canny(src, dst, threshold_value, threshold_value * 2, 3, false);
2.2轮廓发现
在二值化图像上使用 findContours 函数来发现轮廓,findContours 返回轮廓列表 contours 以及层次结构 hierarchy。
cpp
vector<vector<Point>> contours;
vector<Vec4i> hierarchy;
// 寻找轮廓
findContours(dst, contours, hierarchy, RETR_TREE, CHAIN_APPROX_SIMPLE, Point(0, 0));
2.3绘制轮廓
通过 drawContours 函数在图像上绘制检测到的轮廓。为了直观显示不同的轮廓,可以为每个轮廓使用不同颜色。
cpp
Mat drawImg = Mat::zeros(dst.size(), CV_8UC3);
RNG rng(12345);
for (size_t i = 0; i < contours.size(); i++) {
Scalar color = Scalar(rng.uniform(0, 255), rng.uniform(0, 255), rng.uniform(0, 255));
drawContours(drawImg, contours, i, color, 2, LINE_8, hierarchy);
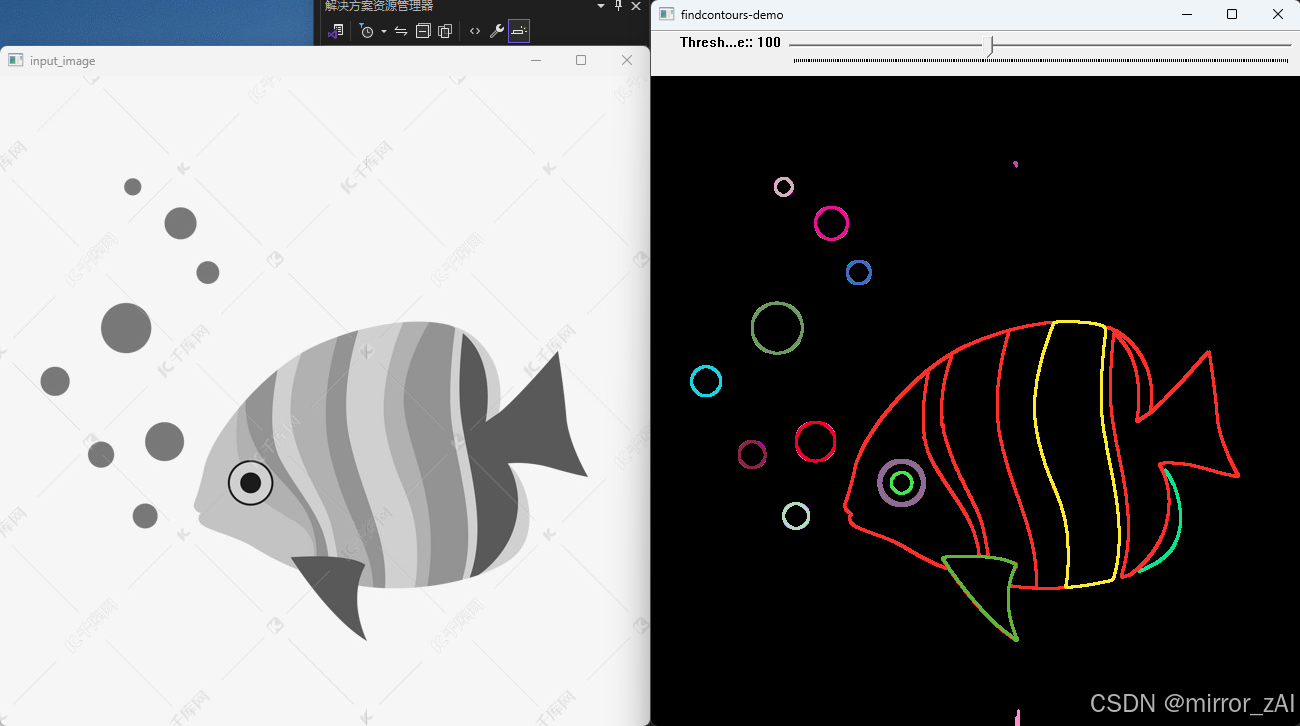
}2.4Trackbar 调整阈值
动态调整 Canny 算法的阈值,使用 OpenCV 的 createTrackbar 函数,通过滑动条实时改变阈值并重新检测轮廓。
cpp
createTrackbar("Threshold Value:", output_win, &threshold_value, threshold_max, Demo_Contours);
Demo_Contours(0, 0);
效果展示
3.完整代码
cpp
#include<opencv2/opencv.hpp>
#include<highgui.hpp>
#include<iostream>
#include<math.h>

using namespace cv;
using namespace std;

Mat src, dst;
int threshold_value = 100;
int threshold_max = 255;

const char* output_win = "findcontours-demo";
void Demo_Contours(int, void*)
{
	vector<vector<Point>>contours;
	vector<Vec4i>hierarchy;
	Canny(src, dst, threshold_value, threshold_value * 2, 3, false);
	findContours(dst, contours, hierarchy, RETR_TREE, CHAIN_APPROX_SIMPLE, Point(0, 0));
	Mat drawImg = Mat::zeros(dst.size(), CV_8UC3);
	RNG rng(12345);
	for (size_t i = 0; i < contours.size(); i++) {
		Scalar color = Scalar(rng.uniform(0, 255), rng.uniform(0, 255), rng.uniform(0, 255));
		drawContours(drawImg, contours, i, color, 2, LINE_8, hierarchy);
	}
	imshow(output_win, drawImg);
}

void find_contour()
{
	src = imread("fish.jpg");
	if (src.empty())
	{
		cout << "ERROR: Could not load image." << endl;
		return;
	}
	namedWindow("input_image", WINDOW_AUTOSIZE);
	namedWindow(output_win, WINDOW_AUTOSIZE);
	cvtColor(src, src, COLOR_BGR2GRAY);

	const char* trackbar_title = "Threshold Value:";
	createTrackbar(trackbar_title, output_win, &threshold_value, threshold_max, Demo_Contours);
	Demo_Contours(0, 0);

	imshow("input_image", src);
	waitKey(0);

}
int main()
{
  find_contour();
  return 0;
}