🎼个人主页:【Y小夜】
😎作者简介:一位双非学校的大三学生,编程爱好者,
专注于基础和实战分享,欢迎私信咨询!
🎈热门专栏:🎊【 Python,Javaweb,Vue框架】
++感谢您的点赞、关注、评论、收藏、是对我最大的认可和支持!❤️++

🎯 分组校验
在Spring Boot中,我们可以使用Hibernate Validator进行分组校验。Hibernate Validator是一个Java Bean验证框架,用于对Java Bean对象的数据进行校验。
🎃导入依赖
XML
<dependency>
    <groupId>org.springframework.boot</groupId>
    <artifactId>spring-boot-starter-validation</artifactId>
</dependency>
🎃定义分组
java
public interface CreateGroup {
}

public interface UpdateGroup {
}
🎃定义校验项时指定归属的分组
java
import javax.validation.constraints.NotBlank;
import javax.validation.constraints.Size;

public class User {

    @NotBlank(message = "姓名不能为空", groups = {UpdateGroup.class})
    private String name;

    @NotBlank(message = "用户名不能为空", groups = {CreateGroup.class, UpdateGroup.class})
    @Size(min = 5, max = 20, message = "用户名长度必须在5-20个字符之间", groups = {CreateGroup.class, UpdateGroup.class})
    private String username;

    // getter和setter方法省略...
}
🎃校验时指定要校验的分组
java
import org.springframework.validation.annotation.Validated;
import org.springframework.web.bind.annotation.PostMapping;
import org.springframework.web.bind.annotation.RequestBody;
import org.springframework.web.bind.annotation.RestController;
import javax.validation.Valid;
@RestController
public class UserController {
@PostMapping("/create")
public String createUser(@Validated({CreateGroup.class}) @RequestBody User user, BindingResult bindingResult) {
if (bindingResult.hasErrors()) {
return bindingResult.getFieldError().getDefaultMessage();
}
// 保存用户信息的逻辑...
return "创建成功";
}
@PostMapping("/update")
public String updateUser(@Validated({UpdateGroup.class}) @RequestBody User user, BindingResult bindingResult) {
if (bindingResult.hasErrors()) {
return bindingResult.getFieldError().getDefaultMessage();
}
// 更新用户信息的逻辑...
return "更新成功";
}
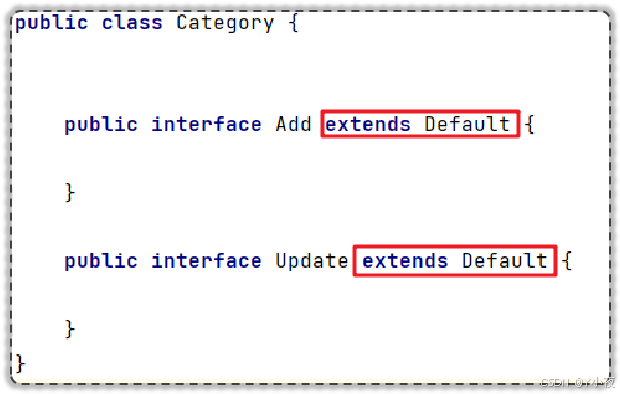
}定义校验项时如果没有指定分组,则属于Default分组,分组可以继承
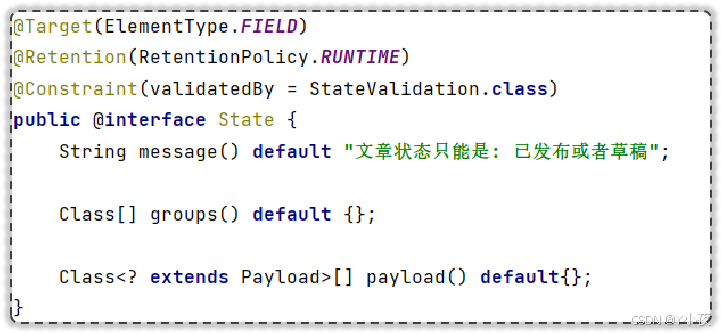
🎯自定义注解
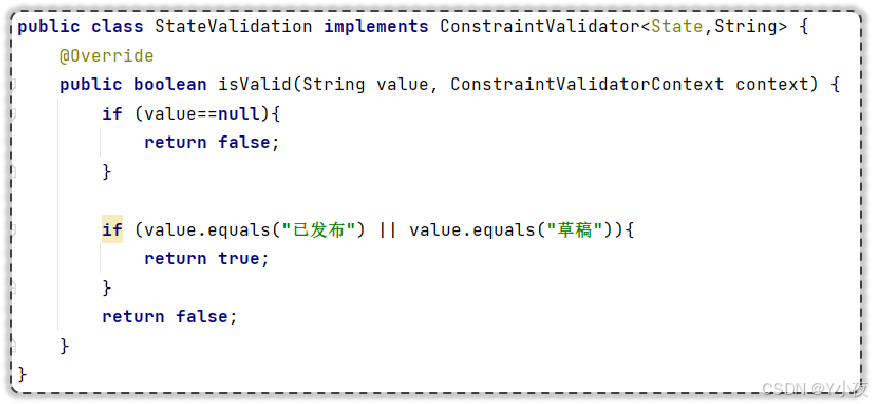
已有的注解不能满足所有的校验需求,特殊的情况需要自定义校验(自定义校验注解)
在Spring Boot中,自定义注解是一种强大的机制,允许开发者创建具有特殊含义的标记,用于修饰代码元素并给它们附加元数据。这些元数据可以在编译时、运行时被读取,并根据其含义执行特定的操作。
要创建一个自定义注解,需要使用Java提供的元注解来定义注解的自身属性和行为。其中最常用的包括@Target、@Retention、@Documented和@Inherited等。通过这些元注解,可以指定自定义注解的应用目标(如方法、类或字段)、保留策略(如源代码、编译期或运行期)以及是否可被继承和文档化。例如,一个简单自定义注解的定义可能如下所示:
🎯分页查询
XML
<!-- PageHelper -->
<dependency>
    <groupId>com.github.pagehelper</groupId>
    <artifactId>pagehelper-spring-boot-starter</artifactId>
    <version>1.2.13</version>
</dependency>
🎯登入验证(集成redis)
🎃令牌主动失效机制
- 登录成功后,给浏览器响应令牌的同时,把该令牌存储到redis中
- LoginInterceptor拦截器中,需要验证浏览器携带的令牌,并同时需要获取到redis中存储的与之相同的令牌
- 当用户修改密码成功后,删除redis中存储的旧令牌
🎃SpringBoot集成redis
✨导入spring-boot-starter-data-redis起步依赖

✨在yml配置文件中, 配置redis连接信息
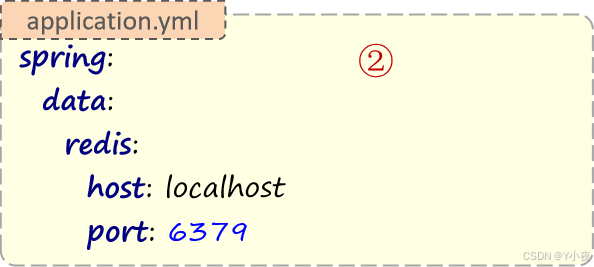
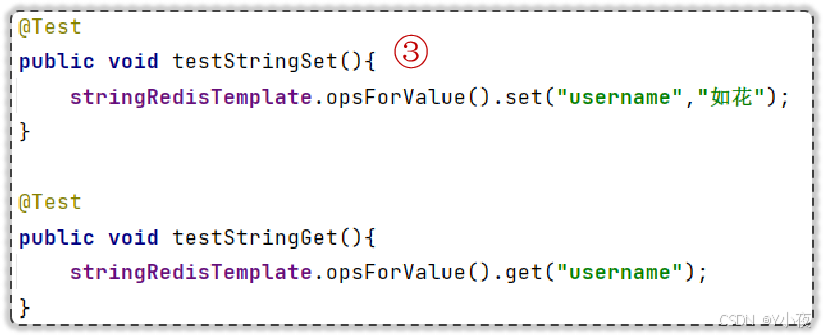
✨调用API(StringRedisTemplate)完成字符串的存取操作
🎯SpringBoot项目部署
引入插件(在build标签中)
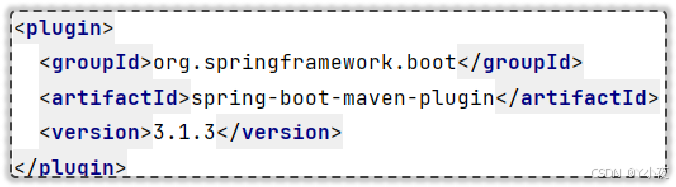
注意:jar包部署,要求服务器必须有jre环境
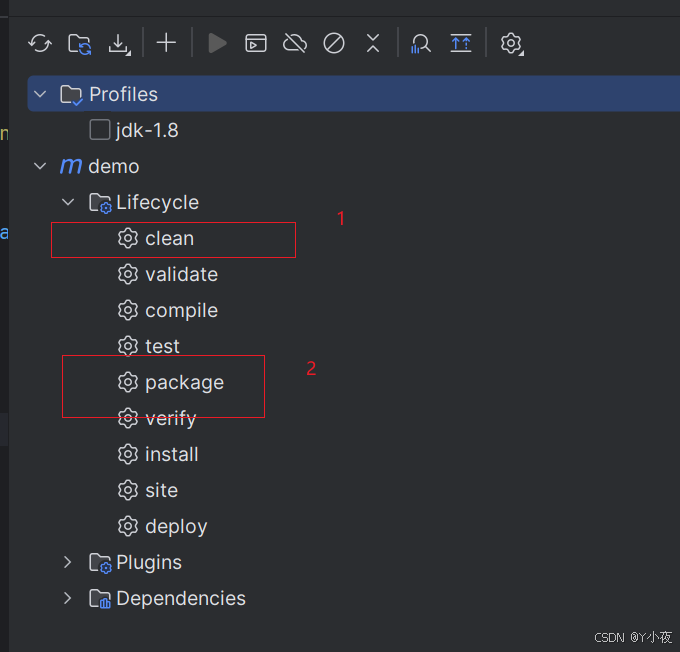
然后在j生成jar包的目录下,打开cmd窗口,运行
XML
Java --jar jar包位置🎯属性配置方式
🎃项目配置文件方式
这种运维人员没法修改的


🎃命令行参数方式

例如

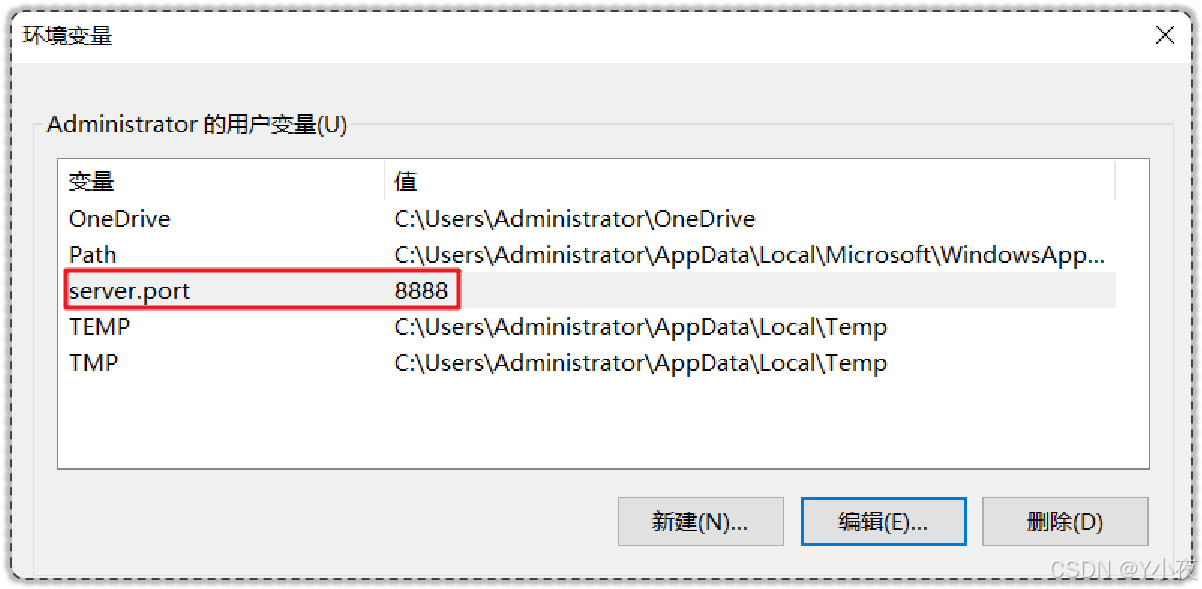
🎃环境变量方式
🎃外部配置文件方式

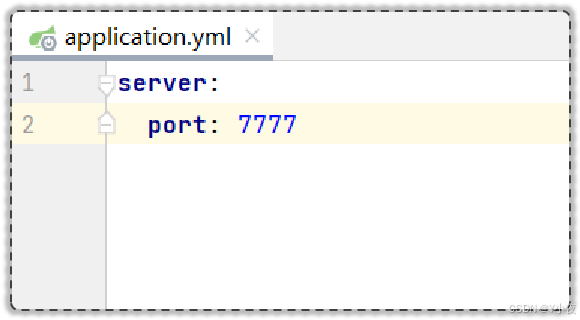
🎃配置文件优先级
优先级依次增强
- 项目中resources目录下的application.yml
- Jar包所在目录下的application.yml
- 操作系统环境变量
- 命令行参数
🎯多环境开发-Pofiles
🎃单文件配置
- --- 分隔不同环境的配置
- spring.config.activate.on-profile 配置所属的环境
- spring.profiles.active 激活环境
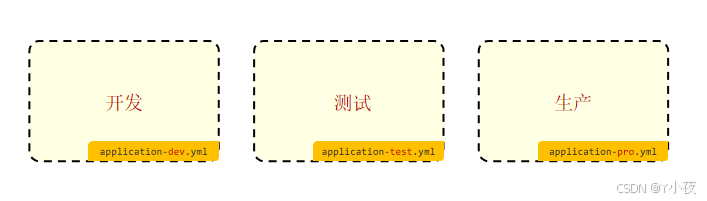
🎃多文件配置
- 通过多个文件分别配置不同环境的属性
- 文件的名字为 application-环境名称.yml
- 在application.yml中激活环境