1、引言
前面几篇已经加深了我们对Spring Ai的体系结构,核心概念,以及也有初步集成实现了一个简单demo。今天,我们通过使用Spring AI框架与OpenAI API集成,构建一个功能完善的智能对话系统,加深我们对Spring AI从概念到实际代码实现的理解,最终完成一个可运行的智能对话应用。
2、所属环境
- IntelliJ IDEA 2024.3
- JDK 17+
- 硅基流动API,这里需要提前注册申请。如果获取API Key这里就不赘述了,可以看我以往的文章搜索查看。
- SpringBootI 3.4.2
3、代码集成
再次赘述一遍,Spring AI所需要的JDK,必须为17+,我这里使用的是Java 21进行演示。
3.1、Spring Boot添加依赖
如果构建一个初始的Spring Boot项目,这里就不赘述了。默认大家应该都会了。添加Spring Ai相关依赖,以及Spring-web相关依赖:
xml
<dependencies>

        <dependency>
            <groupId>group.springframework.ai</groupId>
            <artifactId>spring-ai-openai-spring-boot-starter</artifactId>
            <version>1.1.0</version>
            <exclusions>
                <exclusion>
                    <groupId>org.springframework.cloud</groupId>
                    <artifactId>spring-cloud-function-context</artifactId>
                </exclusion>
                <exclusion>
                    <groupId>org.springframework.cloud</groupId>
                    <artifactId>spring-cloud-function-core</artifactId>
                </exclusion>
            </exclusions>
        </dependency>

        <dependency>
            <groupId>group.springframework.ai</groupId>
            <artifactId>spring-ai-spring-boot-autoconfigure</artifactId>
            <version>1.1.0</version>
        </dependency>

        <dependency>
            <groupId>org.projectlombok</groupId>
            <artifactId>lombok</artifactId>
        </dependency>

        <dependency>
            <groupId>org.springframework.boot</groupId>
            <artifactId>spring-boot-starter</artifactId>
        </dependency>

        <dependency>
            <groupId>org.springframework.boot</groupId>
            <artifactId>spring-boot-starter-test</artifactId>
            <scope>test</scope>
        </dependency>

        <dependency>
            <groupId>org.springframework.boot</groupId>
            <artifactId>spring-boot-starter-web</artifactId>
        </dependency>

        <!-- Spring Boot DevTools (Optional for auto-reloading during development) -->
        <dependency>
            <groupId>org.springframework.boot</groupId>
            <artifactId>spring-boot-devtools</artifactId>
            <scope>runtime</scope>
        </dependency>
    </dependencies>

    <dependencyManagement>
        <dependencies>

            <dependency>
                <groupId>group.springframework.ai</groupId>
                <artifactId>spring-ai-bom</artifactId>
                <version>1.1.0</version>
                <type>pom</type>
            </dependency>

            <dependency>
                <groupId>org.projectlombok</groupId>
                <artifactId>lombok</artifactId>
                <version>1.18.36</version>
            </dependency>
        </dependencies>
    </dependencyManagement>
3.2、配置application.yml
yml
spring:
  application:
    name: spring-ai-demo
  ai:
    openai:
      # 聊天模型
      chat:
        options:
          # 这里使用deepseek模型
          model: deepseek-ai/DeepSeek-V2.5
      # openai 供应商申请下来的api key
      api-key: xxxx
      # 调用openai的接口地址
      base-url: https://api.siliconflow.cn/

server:
  servlet:
    encoding:
      charset: UTF-8  # 这里强制设置servlet编码为utf-8,避免后续流式输出中文乱码
      enabled: true
      force: true
3.3、普通对话模式
这个是最常见的对话模式,没有任何的语境前提,没有任何的上下文,就是最简单的一问一答的形式。先来实现Service代码:
java
@Service
public class ChatService {

    @Autowired
    private OpenAiChatModel openAiChatModel;

    /**
     * 普通对话
     * @param message
     * @return
     */
    public String chat(String message) {
        // 简单的单轮对话
        return openAiChatModel
                .call(new Prompt(message))
                .getResult().getOutput().getContent();
    }
}
controller相关代码:
java
@RestController
@RequestMapping("/api/chat")
public class ChatController {

    private final ChatService chatService;

    public ChatController(ChatService chatService) {
        this.chatService = chatService;
    }

    @GetMapping("/simple")
    public String simpleChat(@RequestParam String message) {
        return chatService.chat(message);
    }
}
直接运行看下回显:
bash
curl -i -X GET \
 'http://localhost:8080/api/chat/simple?message=你是谁'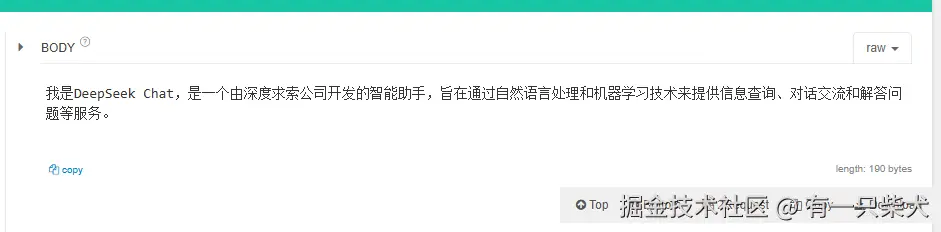
3.4、上下文对话
上下文对话,需要在对话的时候引入上下文,作为和AI交互的语境。Service相关代码:
java
public String chatWithContext(String message, String context) {
    // 带上下文的对话
    SystemPromptTemplate systemPromptTemplate = new SystemPromptTemplate("""
        你是一个专业的AI助手。请根据以下上下文回答问题:
        {context}
        """);
    Message systemMessage = systemPromptTemplate.createMessage(
            Map.of("context", context)
    );

    UserMessage userMessage = new UserMessage(message);
    Prompt prompt = new Prompt(List.of(systemMessage, userMessage));
    return openAiChatModel.call(prompt).getResult().getOutput().getContent();
}
Controller代码:
java
@GetMapping("/with-context")
public String chatWithContext(
        @RequestParam String message,
        @RequestParam String context) {
    return chatService.chatWithContext(message, context);
}
查看结果:
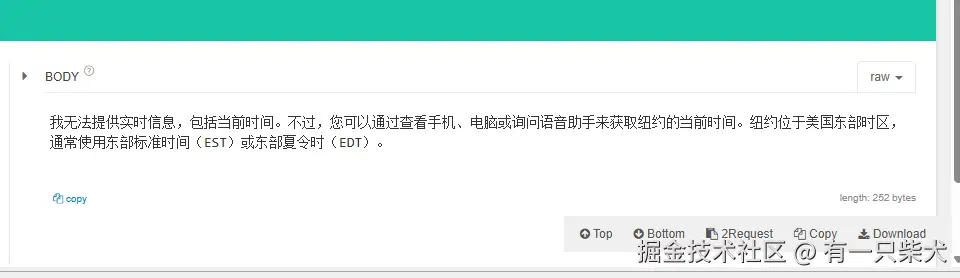
bash
# 当我们在不同的地点询问几点了的时候,看看ai的回答
curl -i -X GET \
 'http://localhost:8080/api/chat/with-context?message=几点了&context=现在在北京'


 curl -i -X GET \
 'http://localhost:8080/api/chat/with-context?message=几点了&context=现在在纽约'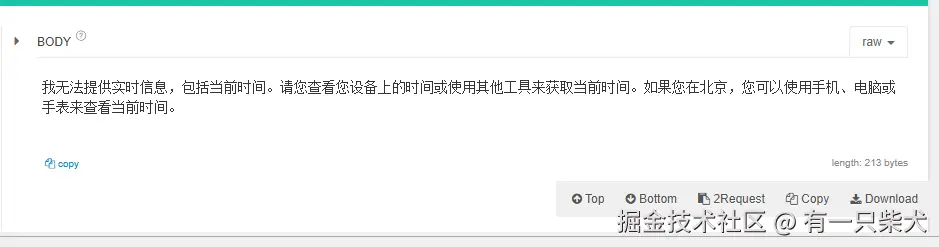
3.5、多轮对话
多轮对话,需要AI大模型记住我们前面的对话记录。多轮对话中,回答和结果会受到前面历史记录的影响。Service代码:
java
// 用于保存多轮的会话记录
private final List<Message> conversationHistory = new ArrayList<>();

public String multiTurnChat(String message) {
    // 添加用户消息到历史
    conversationHistory.add(new UserMessage(message));
    // 多轮对话
    Prompt prompt = new Prompt(conversationHistory);
    String aiResponse = openAiChatModel.call(prompt).getResult().getOutput().getContent();

    // 添加AI回复到历史
    conversationHistory.add(new MyAssistantMessage(aiResponse));
    return aiResponse;
}
controller代码:
java
@GetMapping("/multi-turn")
public String multiTurnChat(@RequestParam String message) {
    return chatService.multiTurnChat(message);
}
运行结果:
bash
# 第一轮会话,我先告诉他我叫小明
curl -i -X GET \
 'http://localhost:8080/api/chat/multi-turn?message=我叫小明'

# 第二轮会话,我再问他我是谁
curl -i -X GET \
 'http://localhost:8080/api/chat/multi-turn?message=我是谁'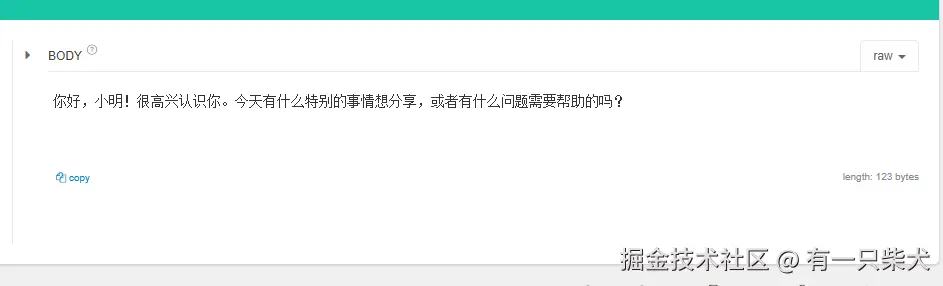
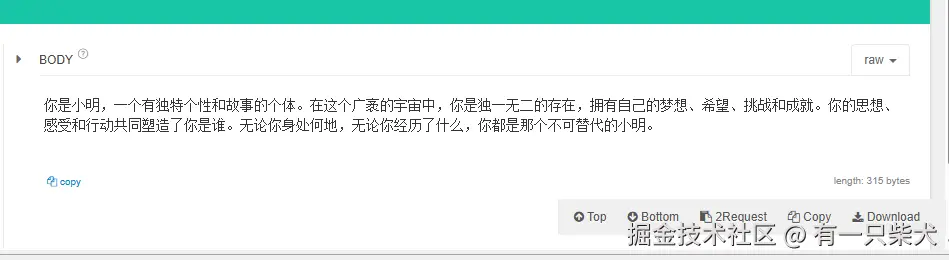
这个实现其实Spring AI提供了相应的支持,我们等下后面会讲到。
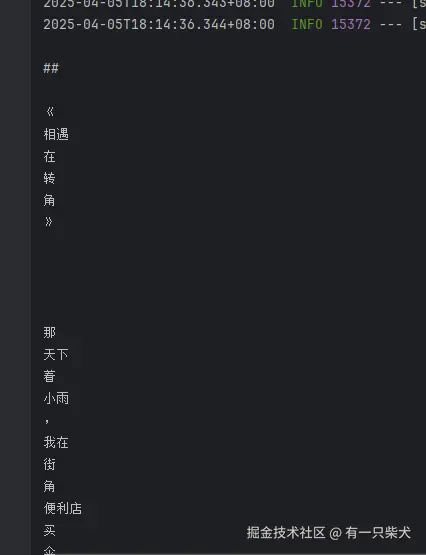
3.6、流式输出
流式输出有两种不同的方式,一种是Spring AI本身提供的流式调用方式,另一种是常见的SSE的获取方式。
3.6.1、Stream输出
我们先使用Spring AI提供的流式调用方式,Service方法:
java
/**
 * 流式对话
 * @param message
 * @return
 */
public Flux<String> chatWithStream(String message) {
    return openAiChatModel.stream(message);
}
controller直接调用即可:
java
@GetMapping(value = "/with-stream")
    public Flux<String> chatWithStream(@RequestParam String message) {

        return chatService.chatWithStream(message)
                .doOnNext(System.out::println)
//                .delayElements(Duration.ofMillis(500))    // 设置流速
                .doOnComplete(() -> System.out.println("Flux 对话结束"));
    }
Flux是spring webflux提供的流式响应类。想要了解更多,可以去看下Spriing WebFlux。
我们直接浏览器运行这个接口,方便查看。如果自己运行的话,会发现浏览器正在一段一段的流式输出,而不是一下子全部内容显示出来。

通过控制台的打印,我们也能看到他并不是一次性的渲染出来结果。
这里我用Flux输出的时候,浏览器一直中文乱码。就算设置了produces的编码格式也不行,最后通过前面application.yml里配置了servlet编码格式才解决。
原因是http响应编码默认是iso-8859-1,而非utf-8,因此导致中文显示乱码。
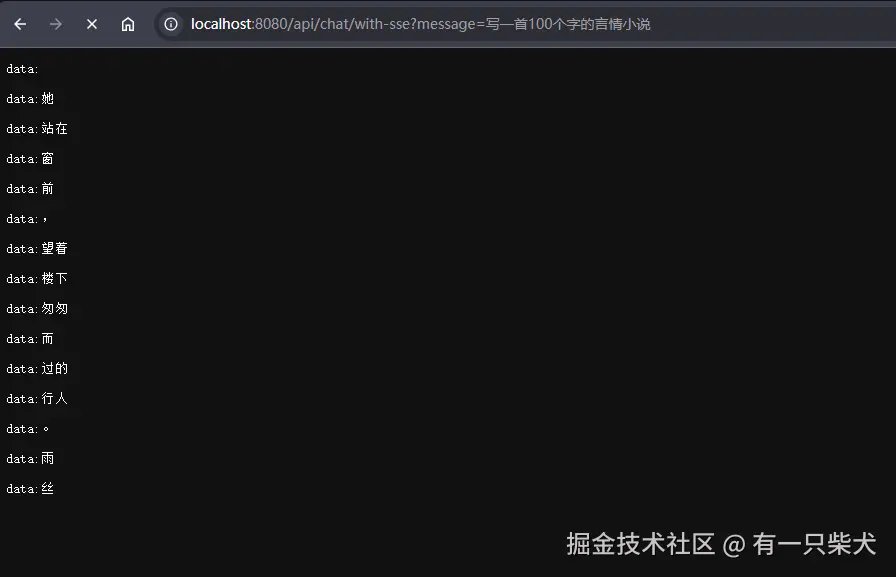
3.6.2、SSE实现
除了上面flux的实现方式外,我们可以按需采用sse的输出方式来实现:
java
@GetMapping(value = "/with-sse", produces = MediaType.TEXT_EVENT_STREAM_VALUE)
public SseEmitterUTF8 chatWithSSE(@RequestParam String message) {
    SseEmitterUTF8 emitter = new SseEmitterUTF8(5000L);

    chatService.getOpenAiChatModel().stream(new Prompt(message))
            .subscribe(
                    chunk -> {
                        try {
                            emitter.send(chunk.getResult().getOutput().getContent());
                        } catch (IOException e) {
                            emitter.completeWithError(e);
                        }
                    },
                    emitter::completeWithError,
                    emitter::complete
            );

    return emitter;
}
同样的,这里需要注意中文乱码问题。默认的SseEmitter编码默认为ISO-8859-1,因此中文是会乱码的。这里的解决方式是重新定义SseEmmiter的响应编码格式;
java
class SseEmitterUTF8 extends SseEmitter {
    @Override
    protected void extendResponse(ServerHttpResponse outputMessage) {
        super.extendResponse(outputMessage);
        HttpHeaders headers = outputMessage.getHeaders();
        headers.setContentType( new MediaType("text", "event-stream", StandardCharsets.UTF_8));
    }

    public SseEmitterUTF8(Long timeout) {
        super(timeout);
    }
}
使用sse的输出方式,需要指定事件协议,否则会被当作纯文本输出。
ini
produces = MediaType.TEXT_EVENT_STREAM_VALUE查看结果:
3.7、实现上下记忆
上面提到了多轮对话,其实就是上下文记忆能力。只是上文中自己实现了一个List集合来存储会话记录。这里只是简单的演示示例,这么实现无可厚非。但是当我们项目中的对话可能不止一个语境,需要根据我们的会话记录来区分上下文,这时候这个List集合就可能显得力不从心。
很幸运的是,Spring AI支持了这样的上下记忆能力:ChatMemory。
我们先来使用他,后续再来介绍他是如何实现的。
首先我们需要定义一个简单的会话记忆的管理器,Spring AI提供了关于ChatMemory的内存实现,也就是类似与我们上文中的list。只不过为了区分不同的会话,必然采用了Map来实现,这里我们只需要声明注入即可:
java
@Configuration
class AiConfig {

    /**
     * 会话记忆管理器
     * @return
     */
    @Bean
    public ChatMemory chatMemory() {
        return new InMemoryChatMemory();
    }
}
接下来定义一个简单的带有记忆能力的Service:
java
@Service
public class ChatMemoryService {

    @Autowired
    private OpenAiChatModel openAiChatModel;

    private final ChatMemory chatMemory;

    public ChatMemoryService(ChatMemory chatMemory) {
        this.chatMemory = chatMemory;
    }


    public Flux<String> chatWithMemoryStream(String conversationId, String message) {

        ChatClient.StreamResponseSpec resp = ChatClient.builder(openAiChatModel)
                // 设置历史对话的保存方式,这里我们使用内存保存
                .defaultAdvisors(new PromptChatMemoryAdvisor(chatMemory))
                .build()
                .prompt().user(message)
                .advisors(advisor ->
                        // 设置保存的历史对话ID
                        advisor.param(AbstractChatMemoryAdvisor.CHAT_MEMORY_CONVERSATION_ID_KEY, conversationId)
                                // 设置需要保存几轮的历史对话,用于避免内存溢出,因为这里我们没做持久化
                                .param(AbstractChatMemoryAdvisor.CHAT_MEMORY_RETRIEVE_SIZE_KEY, 50)
                ).stream();
        return resp.content();
    }

}
Controller直接调用:
java
@GetMapping(value = "/with-memory")
public Flux<String> chatWithMemoryStream(@RequestParam String requestId, @RequestParam String message) {
    return chatMemoryService.chatWithMemoryStream(requestId, message);
}
查看效果,这里我区分两个会话,一个会话requestId为1,告诉他我是小明。第二个会话requestId为2,告诉他我是小白。接着两个会话,我分别问他我是谁。 会话requestId=1:


会话requestId=2,当我换了个会话ID时,由于记忆根据会话进行了隔离。他已经无法根据识别到我是谁:

当我们再次告诉他,我叫小红:


4、小结
通过本文,我们详细介绍了如何使用Spring AI与OpenAI集成构建智能对话系统。从基础配置到高级功能,我们涵盖了实现一个生产级对话系统所需的关键组件。Spring AI的抽象层使得与OpenAI的集成变得简单而灵活,同时保持了Spring开发者熟悉的编程模型。
随着AI技术的不断发展,这种集成方式将为应用程序带来更多创新的可能性。读者可以在此基础上进一步探索,如实现多模态交互、结合企业知识库构建专业领域助手等。
此外,代码我已经上传Github,地址:github.com/Shamee99/sp...。需要的可以自取。