Linux_架构篇
欢迎来到Linux的世界,看笔记好好学多敲多打,每个人都是大神!
题目:
版本号 : 1.0,0
作者 : @老王要学习
日期 : 2025.05.11
适用环境: Centos7
文档说明
本文围绕 Linux 服务器监控与 NGINX 优化展开。介绍了 sysstat、sar 等监控工具的使用方法,包括 iostat、mpstat、vmstat 等命令操作及压测实践。同时详细阐述了 NGINX 的三项优化措施,如调整配置参数、隐藏版本号、设置 CPU 亲和力,助力提升服务器性能
环境准备
硬件要求
- 服务器: 4核CPU、4GB内存,20GB硬盘空间
- 网络: 确保服务器具有固定的IP地址,并且防火墙允许FTP端口(默认22端口)的通信
软件要求
- 操作系统:Centos7
- FTP软件:SecureCRT
- 软件包:NGINX
实验前准备:
| 服务器 | IP地址 |
|---|---|
| nginx_master | 192.168.174.30 |
| 服务器随便一台(安装httpd-tools即可) | 192.168.174.* |
查看系统版本:
cat /etc/redhat-release

#结果如下:
CentOS Linux release 7.9.2009 (Core)
一、sysstat
安装并查看包:
yum -y install sysstat
rpm -ql sysstat
1.iostat
iostat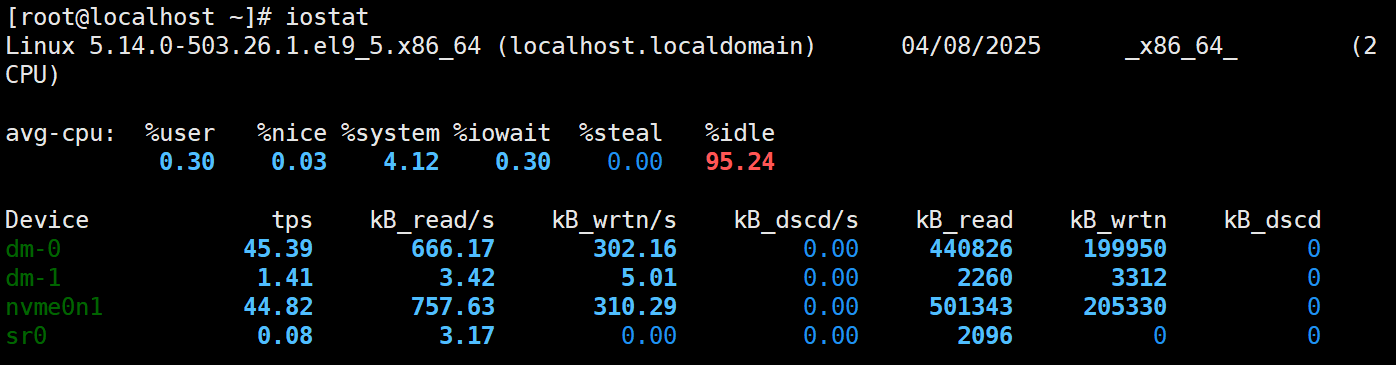
2.mpstat(CPU检测多核)
mpstat
2.1查看全部CPU1秒查看一次
mpstat -P ALL 1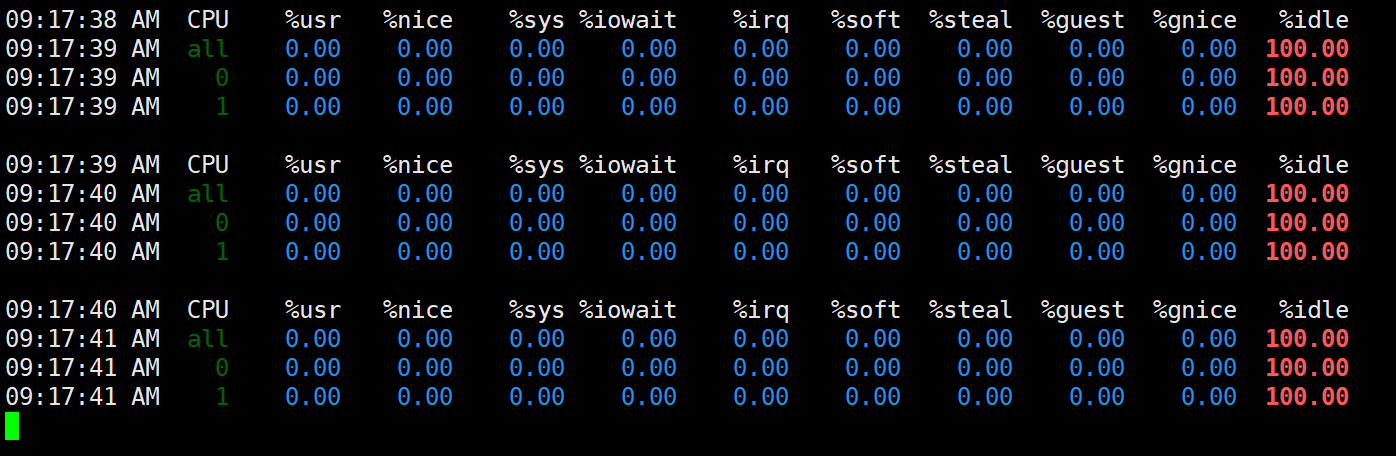
2.2安装压测工具
dnf install -y stress-ng
stress-ng --cpu 1
2.3查找进程kill
ps aux
kill -9 62375
2.4查看监控现状

3.vmstat(mem内存检测)
3.1压测
stress-ng --vm 1 --vm-bytes 1024M3.2查看压测前后状态
free -h
3.3使用vmstat检测(每一秒一次一共5次)
vmstat 1 53.4压测查看前后数据变化

4.iostat(IO检测)
iostat -d 1
4.1进行压测
while true;do dd if=/dev/zero of=/tmp/disk bs=1M count=1024 oflag=direct;done4.2查看变化
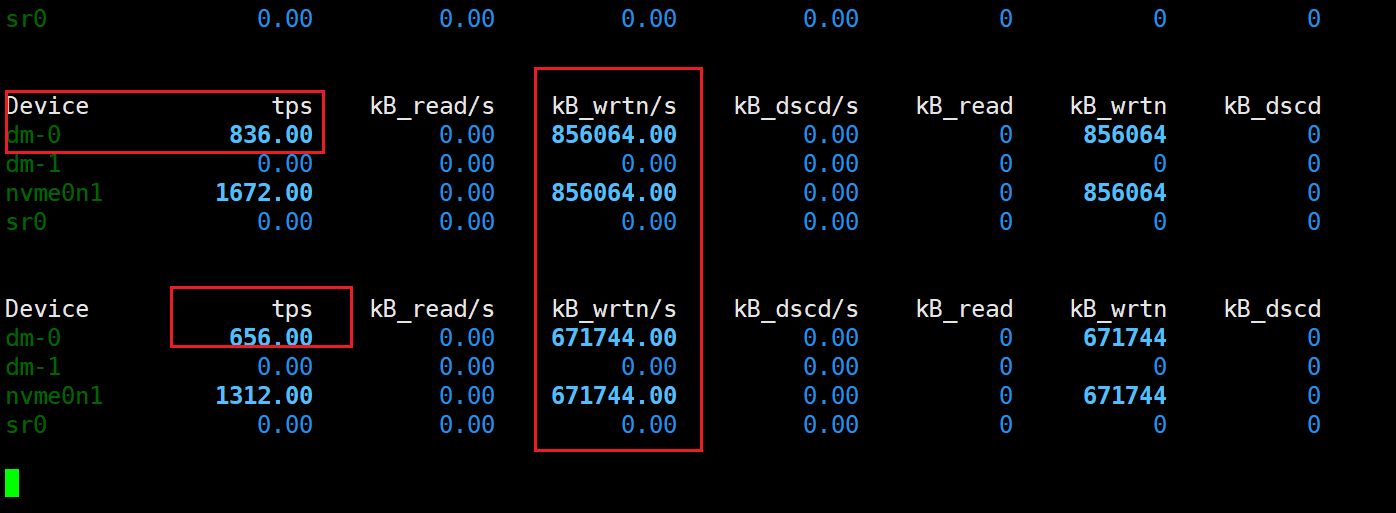
4.3定位dm-0进行检测
iostat -d dm-0 1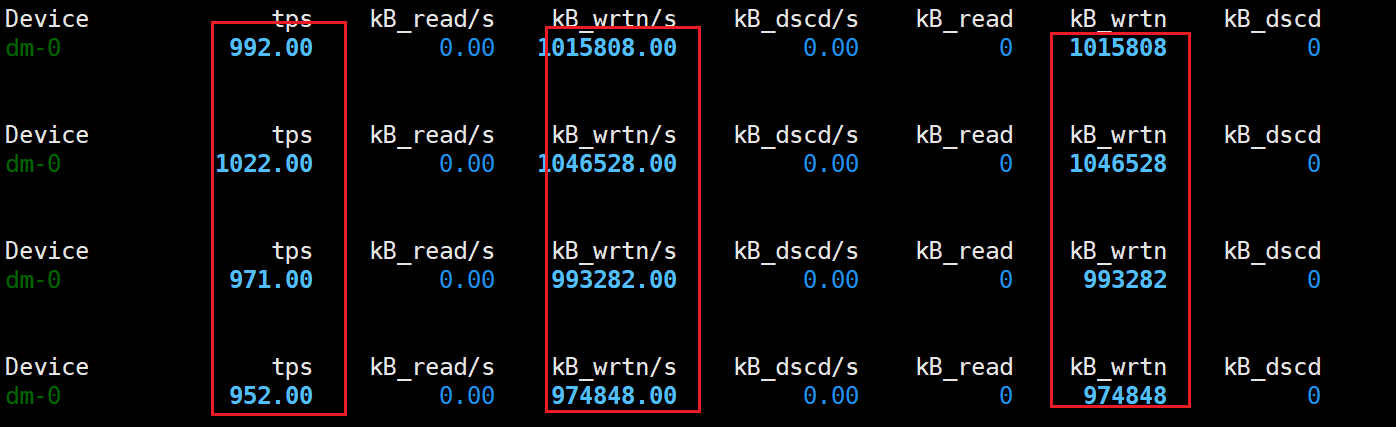
二、sar
systemctl enable sysstat --now介绍 :
sar -u  #查看CPU状态
sar -r  $查看mem状态
sar -d  #查看I/O状态
三、NIGNX的优化
1.优化一:
1.1查看服务状态
ss -antpl | grep nginx1.2发送并发压测
dnf -y install httpd-tools
ab -c 1000 -n 1000000 http://192.168.174.30:80/
注:发送2000并发失败进行优化处理
1.3iostat查看CPU个数
iostat
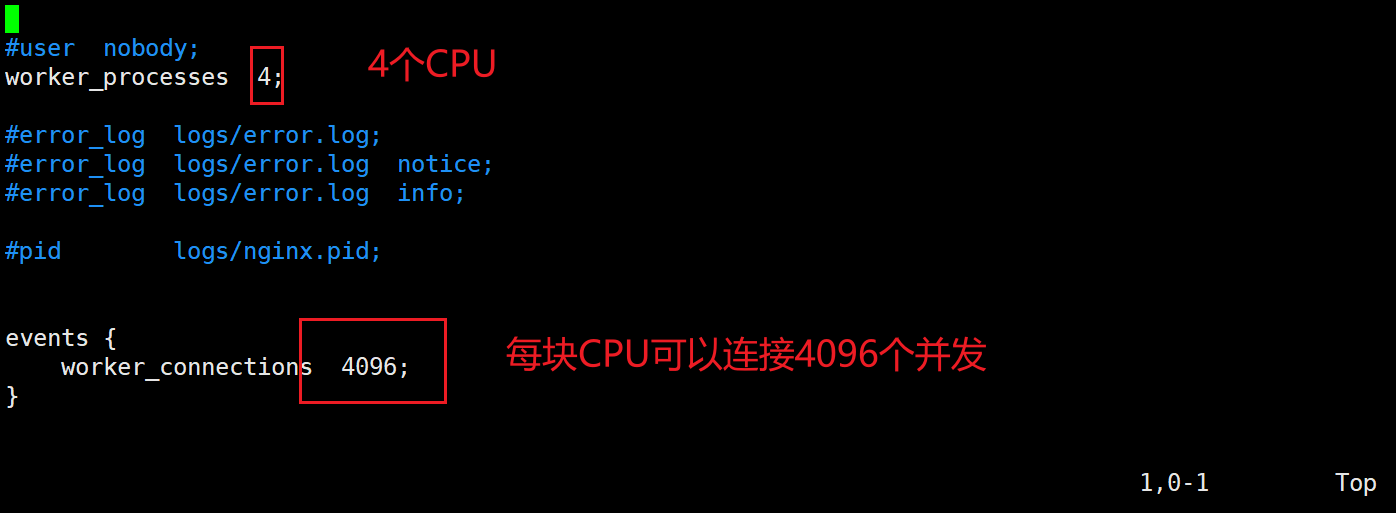
vim /usr/local/nginx/conf/nginx.conf
#修改如下:
worker_processes 4;
worker_connections 4096;
#重启nginx
/usr/local/nginx/sbin/nginx -s reload
1.4优化完没有效果进行如下优化:
vim /etc/security/limits.conf

#添加如下:
60 *               -       nproc   65535
61 *               -       nofile  65535
1.5重新登陆并查看ulimit
exit
ulimit -n
1.6压力测试发送2000并发成功
ab -c 2000 -n 100000 http://192.168.174.30:80/优化二:隐藏版本号
2.1进入配置文件修改
vim /usr/local/nginx/conf/nginx.conf

#添加如下
server_tokens off;

#重启NGINX
/usr/local/nginx/sbin/nginx -s reload
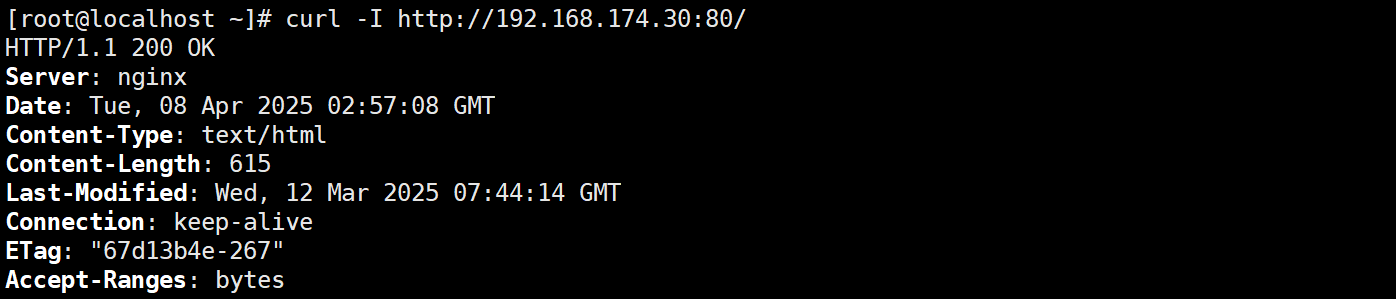
2.2查看网页信息
2.2.1虚拟机
curl -I http://192.168.174.30:80/输出结果:
2.2.2网页页面
http://192.168.174.30:80/
优化三:NIGNX运行CPU亲和力
vim /usr/local/nginx/conf/nginx.conf

#添加如下:
worker_cpu_affinity 0001 0010 0100 1000;

#重启:
/usr/local/nginx/sbin/nginx -s reload
优化四:NGINX启用gzip压缩
进入配置文件添加如下:
vim /usr/local/nginx/conf/nginx.conf
http {
    # 其他 HTTP 全局配置...

    # Gzip 压缩配置
    gzip on;
    gzip_types text/plain text/css application/json;
    gzip_comp_level 6;
    # 其他 gzip 参数...
}
将 Gzip 配置单独存为文件
cat>/etc/nginx/conf.d/gzip.conf<<EOF
# gzip.conf
gzip on;
gzip_types text/plain text/css application/json;
gzip_comp_level 6;
gzip_min_length 256;
# 其他参数...
EOF
在 nginx.conf 中通过 include 引用:
http {
    include /etc/nginx/conf.d/*.conf;  # 包含所有 .conf 文件
}
检查配置文件语法
nginx -t重启NGINX服务
/usr/local/nginx/sbin/nginx -s reload