啦啦啦啦啦啦,所有心事都放晴,永远相信,没有的事情即将发生!!!
项目地址: GitHub - Intellindust-AI-Lab/DEIM:CVPR 2025 DEIM:DETR 改进了匹配,可实现快速收敛
本过程深度学习了up主:CVPR2025-DEIM|新一代目标检测SOTA|基础课程八-改进HGNetV2中的特征聚合_哔哩哔哩_bilibili
还有各种AI软件,以及不放弃的自己!!
特别致谢!!
Step1:制作自己的数据集:
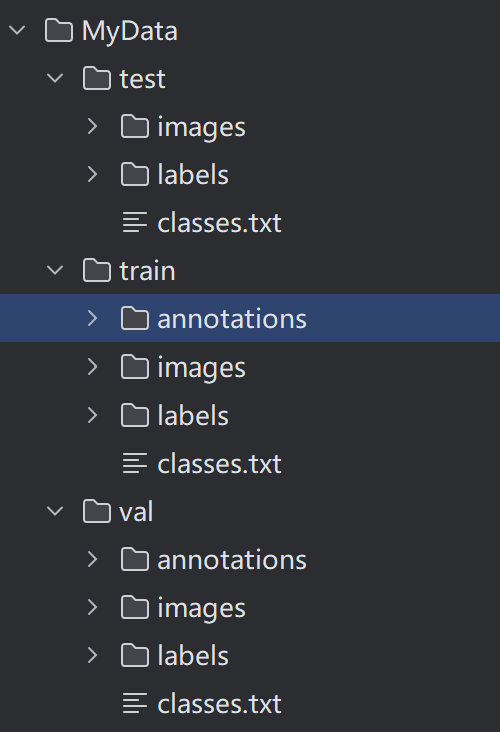
首先,我们将数据划分为train,val,test.
每个部分包含img,labels,classes,txt
Step2:yolo2coco格式转换:
因为DEIM需要json格式的标签数据集格式,所以我们需要进行转换。
这里我们用转换文件:(资源已经绑定)
python
import os
import cv2
import json
from tqdm import tqdm
from sklearn.model_selection import train_test_split
import argparse

# python yolo2coco.py --root_dir VisDrone2019-DET-train --save_path train.json
# python yolo2coco.py --root_dir VisDrone2019-DET-val --save_path val.json
# python yolo2coco.py --root_dir VisDrone2019-DET-test-dev --save_path test.json

parser = argparse.ArgumentParser()
parser.add_argument('--root_dir', default='./dataset/valid', type=str,
                    help="root path of images and labels, include ./images and ./labels and classes.txt")
parser.add_argument('--save_path', type=str, default='./valid.json',
                    help="if not split the dataset, give a path to a json file")
parser.add_argument('--random_split', action='store_true', help="random split the dataset, default ratio is 8:1:1")
parser.add_argument('--split_by_file', action='store_true',
                    help="define how to split the dataset, include ./train.txt ./val.txt ./test.txt ")

arg = parser.parse_args()


def train_test_val_split_random(img_paths, ratio_train=0.8, ratio_test=0.1, ratio_val=0.1):
    # 这里可以修改数据集划分的比例。
    assert int(ratio_train + ratio_test + ratio_val) == 1
    train_img, middle_img = train_test_split(img_paths, test_size=1 - ratio_train, random_state=233)
    ratio = ratio_val / (1 - ratio_train)
    val_img, test_img = train_test_split(middle_img, test_size=ratio, random_state=233)
    print("NUMS of train:val:test = {}:{}:{}".format(len(train_img), len(val_img), len(test_img)))
    return train_img, val_img, test_img


def train_test_val_split_by_files(img_paths, root_dir):
    # 根据文件 train.txt, val.txt, test.txt(里面写的都是对应集合的图片名字) 来定义训练集、验证集和测试集
    phases = ['train', 'val', 'test']
    img_split = []
    for p in phases:
        define_path = os.path.join(root_dir, f'{p}.txt')
        print(f'Read {p} dataset definition from {define_path}')
        assert os.path.exists(define_path)
        with open(define_path, 'r') as f:
            img_paths = f.readlines()
            img_paths = [os.path.split(img_path.strip())[1] for img_path in img_paths]  # NOTE 取消这句备注可以读取绝对地址。
            img_split.append(img_paths)
    return img_split[0], img_split[1], img_split[2]


def yolo2coco(arg):
    root_path = arg.root_dir
    print("Loading data from ", root_path)

    assert os.path.exists(root_path)
    originLabelsDir = os.path.join(root_path, 'labels')
    originImagesDir = os.path.join(root_path, 'images')
    with open(os.path.join(root_path, 'classes.txt')) as f:
        classes = f.read().strip().split()
    # images dir name
    indexes = os.listdir(originImagesDir)

    if arg.random_split or arg.split_by_file:
        # 用于保存所有数据的图片信息和标注信息
        train_dataset = {'categories': [], 'annotations': [], 'images': []}
        val_dataset = {'categories': [], 'annotations': [], 'images': []}
        test_dataset = {'categories': [], 'annotations': [], 'images': []}

        # 建立类别标签和数字id的对应关系, 类别id从0开始。
        for i, cls in enumerate(classes, 0):
            train_dataset['categories'].append({'id': i, 'name': cls, 'supercategory': 'mark'})
            val_dataset['categories'].append({'id': i, 'name': cls, 'supercategory': 'mark'})
            test_dataset['categories'].append({'id': i, 'name': cls, 'supercategory': 'mark'})

        if arg.random_split:
            print("spliting mode: random split")
            train_img, val_img, test_img = train_test_val_split_random(indexes, 0.8, 0.1, 0.1)
        elif arg.split_by_file:
            print("spliting mode: split by files")
            train_img, val_img, test_img = train_test_val_split_by_files(indexes, root_path)
    else:
        dataset = {'categories': [], 'annotations': [], 'images': []}
        for i, cls in enumerate(classes, 0):
            dataset['categories'].append({'id': i, 'name': cls, 'supercategory': 'mark'})

    # 标注的id
    ann_id_cnt = 0
    for k, index in enumerate(tqdm(indexes)):
        # 支持 png jpg 格式的图片。
        txtFile = index.replace('images', 'txt').replace('.jpg', '.txt').replace('.png', '.txt')
        # 读取图像的宽和高
        im = cv2.imread(os.path.join(root_path, 'images/') + index)
        height, width, _ = im.shape
        if arg.random_split or arg.split_by_file:
            # 切换dataset的引用对象,从而划分数据集
            if index in train_img:
                dataset = train_dataset
            elif index in val_img:
                dataset = val_dataset
            elif index in test_img:
                dataset = test_dataset
        # 添加图像的信息
        dataset['images'].append({'file_name': index,
                                  'id': k,
                                  'width': width,
                                  'height': height})
        if not os.path.exists(os.path.join(originLabelsDir, txtFile)):
            # 如没标签,跳过,只保留图片信息。
            continue
        with open(os.path.join(originLabelsDir, txtFile), 'r') as fr:
            labelList = fr.readlines()
            for label in labelList:
                label = label.strip().split()
                x = float(label[1])
                y = float(label[2])
                w = float(label[3])
                h = float(label[4])

                # convert x,y,w,h to x1,y1,x2,y2
                H, W, _ = im.shape
                x1 = (x - w / 2) * W
                y1 = (y - h / 2) * H
                x2 = (x + w / 2) * W
                y2 = (y + h / 2) * H
                # 标签序号从0开始计算, coco2017数据集标号混乱,不管它了。
                cls_id = int(label[0])
                width = max(0, x2 - x1)
                height = max(0, y2 - y1)
                dataset['annotations'].append({
                    'area': width * height,
                    'bbox': [x1, y1, width, height],
                    'category_id': cls_id,
                    'id': ann_id_cnt,
                    'image_id': k,
                    'iscrowd': 0,
                    # mask, 矩形是从左上角点按顺时针的四个顶点
                    'segmentation': [[x1, y1, x2, y1, x2, y2, x1, y2]]
                })
                ann_id_cnt += 1

    # 保存结果
    folder = os.path.join(root_path, 'annotations')
    if not os.path.exists(folder):
        os.makedirs(folder)
    if arg.random_split or arg.split_by_file:
        for phase in ['train', 'val', 'test']:
            json_name = os.path.join(root_path, 'annotations/{}.json'.format(phase))
            with open(json_name, 'w') as f:
                if phase == 'train':
                    json.dump(train_dataset, f)
                elif phase == 'val':
                    json.dump(val_dataset, f)
                elif phase == 'test':
                    json.dump(test_dataset, f)
            print('Save annotation to {}'.format(json_name))
    else:
        json_name = os.path.join(root_path, 'annotations/{}'.format(arg.save_path))
        with open(json_name, 'w') as f:
            json.dump(dataset, f)
            print('Save annotation to {}'.format(json_name))


if __name__ == "__main__":
    yolo2coco(arg)
代码里面有其他功能,大家可以探索一下。
这里我们运行
python
python yolo2coco.py --root_dir F:\DEIM\MyData\train --save_path ./train.json其中,F:\DEIM\MyData\train是你的文件路径,然后我们需要把train和val都执行一遍。
执行完后就可以转换为json文件
Step3:配置文件修改:
PS:(以下文件建议新建复制,便于后面使用)
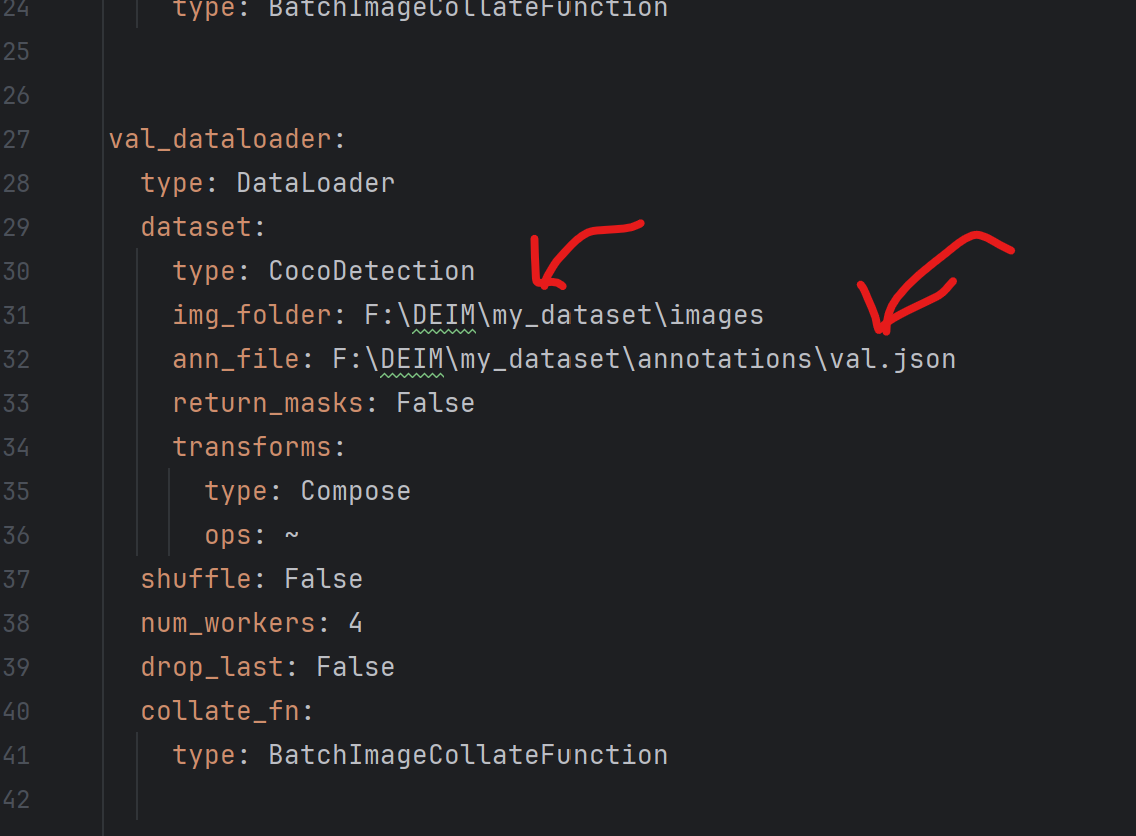
3.1 对数据集文件的修改
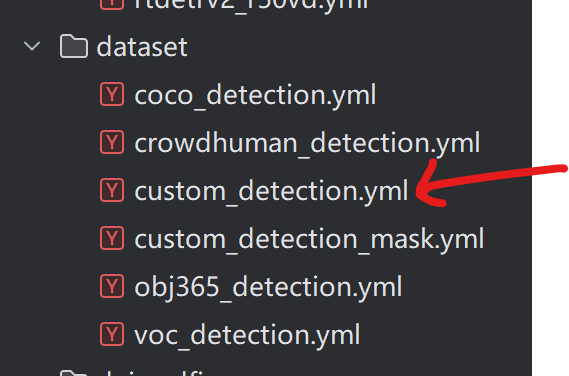
修改如下:将num_classes修改为你要识别的种类数,将img_folder和ann_folder修改为你的图片路径和json文件路径
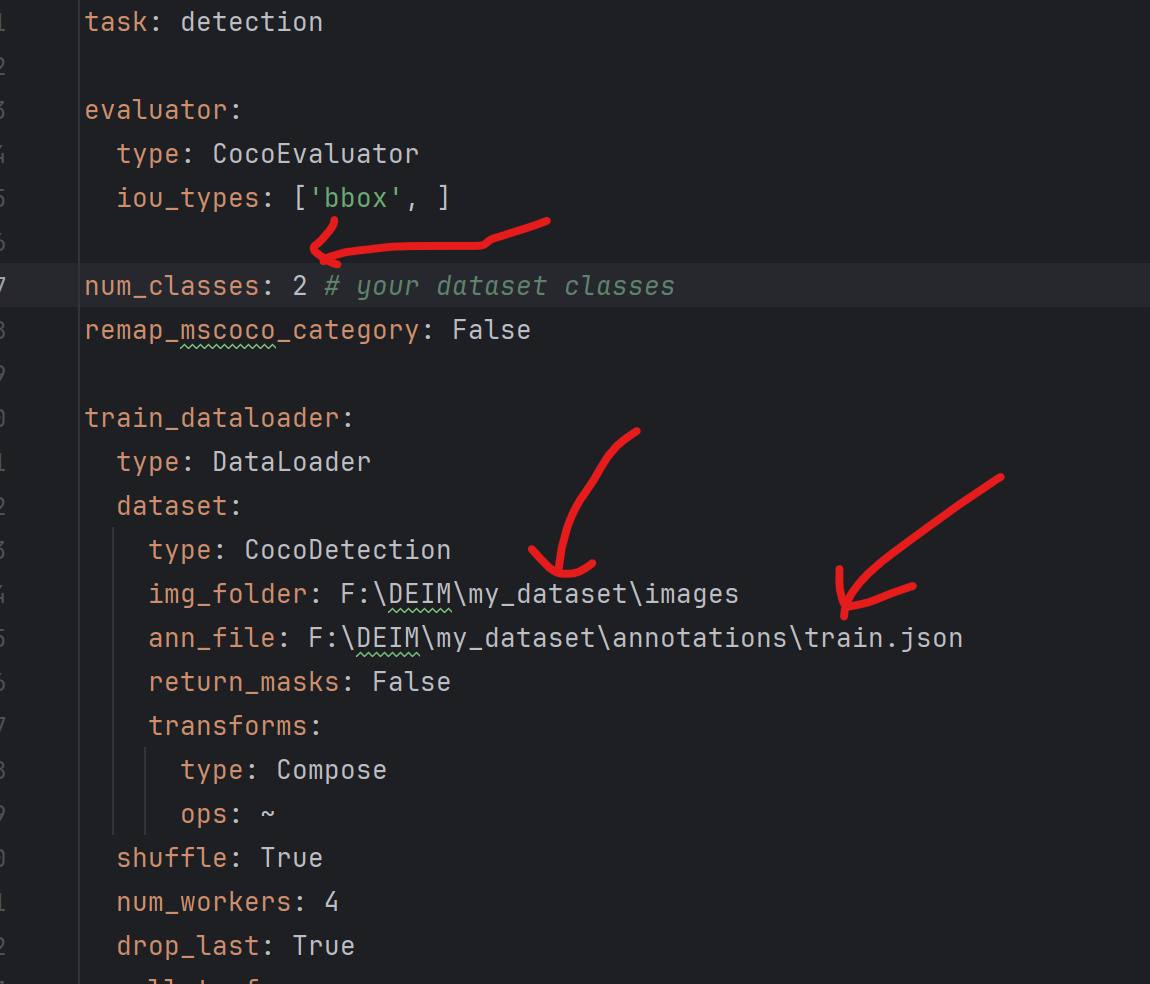
还有一点:
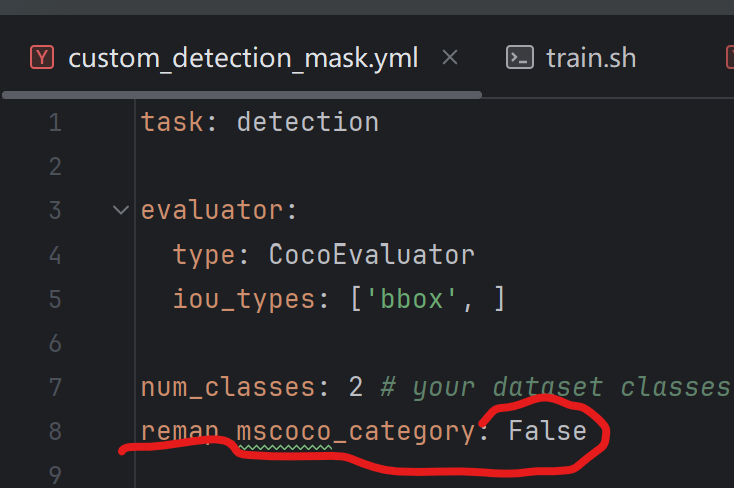
这里要为False,检查一下。
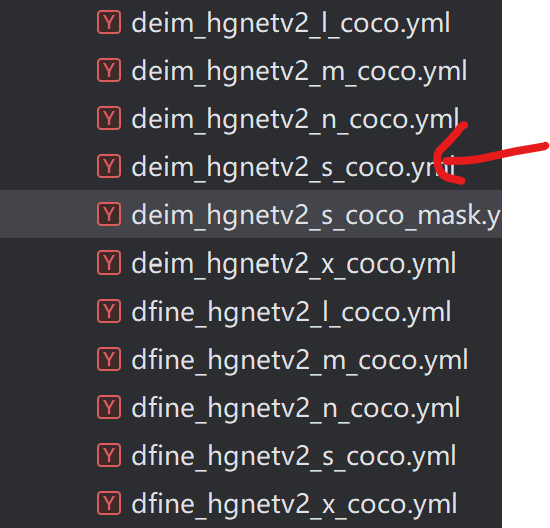
3.2 对CoCo配置文件的修改:
这里我们选用的是deim_hgnetv2_s_coco.yml
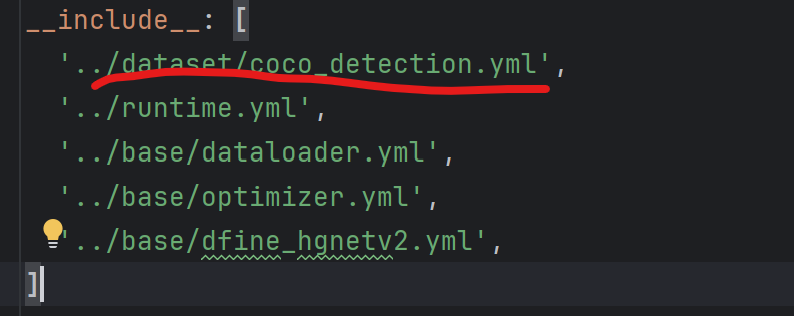
step1:将数据集文件路径进行添加
(注意前面添加逗号)

把原来的'./dfine_hgnetv2_s_coco.yml',替换成你的yml
一定要注意顺序一致!!!不然可能会把deim.yml覆盖了
3.3 对deim_hgnetv2_s_coco.yml文件的修改
把这条替换成你的
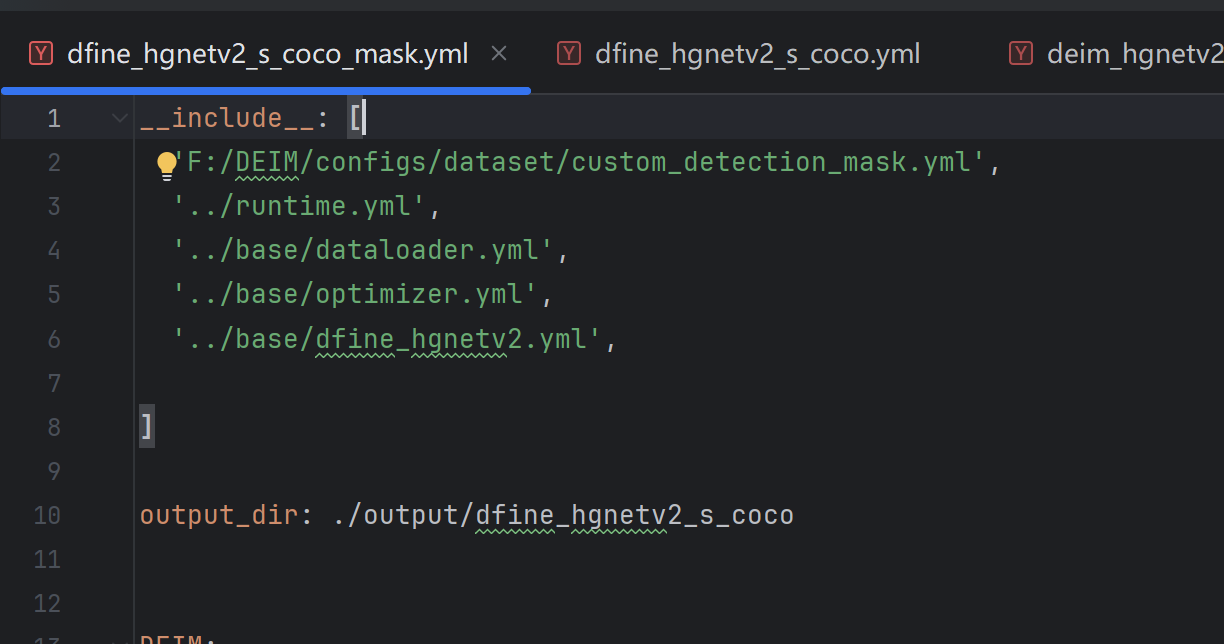
也是顺序,特别重要,卡bug卡这卡了半天!!!
step2:其他修改
修改建议:
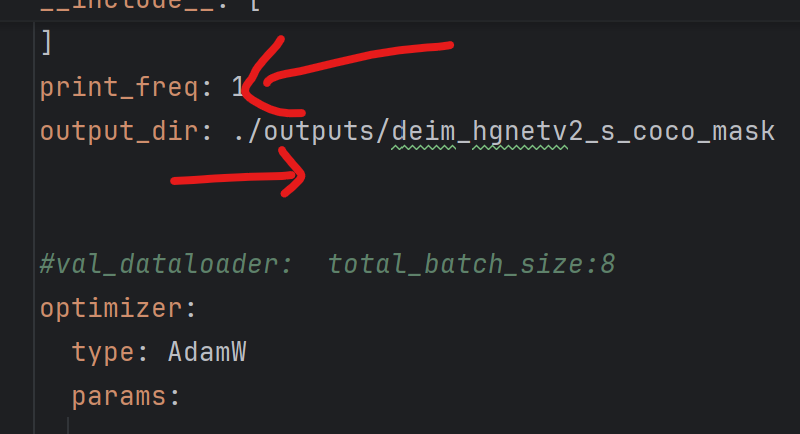
①添加打印信息print_freq:1
②更改输出文件的名称output
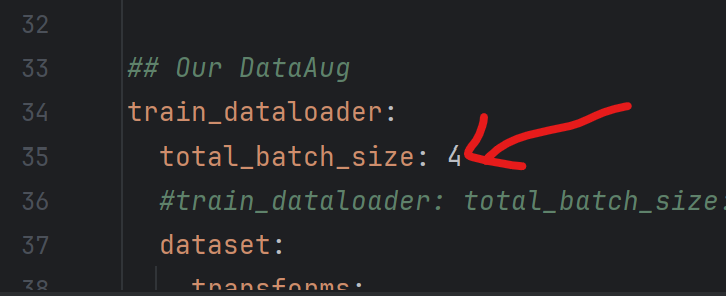
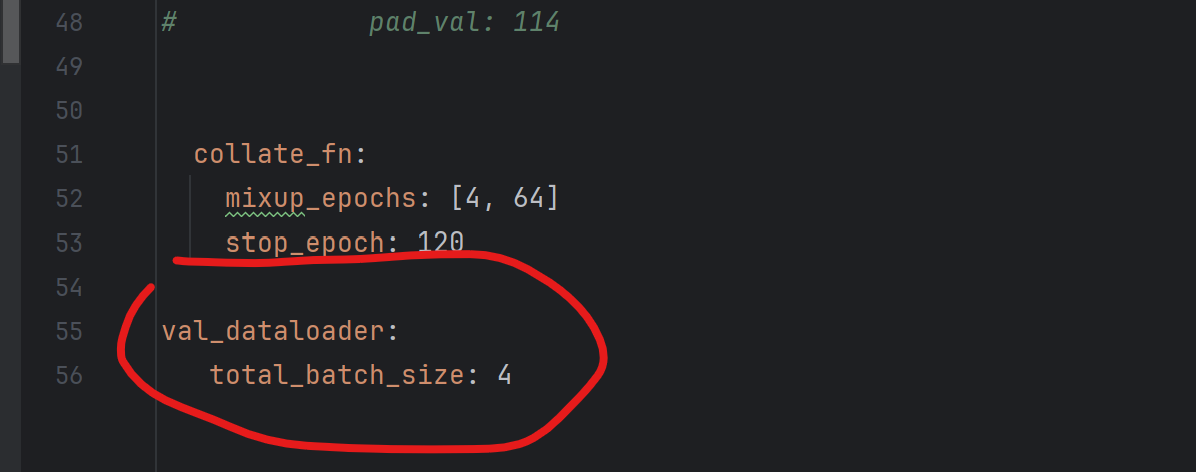
③更改train/val_dataloader的批处理数total_batch_size==8,因为源代码是多卡GPU,所以他的次数很大,我们需要把他覆盖掉。
注意:在添加yml文件中的代码时,一定要注意格式,缩进,不然代码无法识别读取
3.3 虚拟环境配置
建议重新建议一个虚拟环境
python
conda create -n deim python=3.11.9
conda activate deim
pip install -r requirements.txt
对于torch的安装,建议安装我这个版本
python
   pip install torch==2.1.0 torchvision==0.16.0 torchaudio==2.1.0 --index-url https://download.pytorch.org/whl/cu118 -i https://pypi.tuna.tsinghua.edu.cn/simple

#使用清华源更快
Step4:期间遇到的问题报错后添加的东西
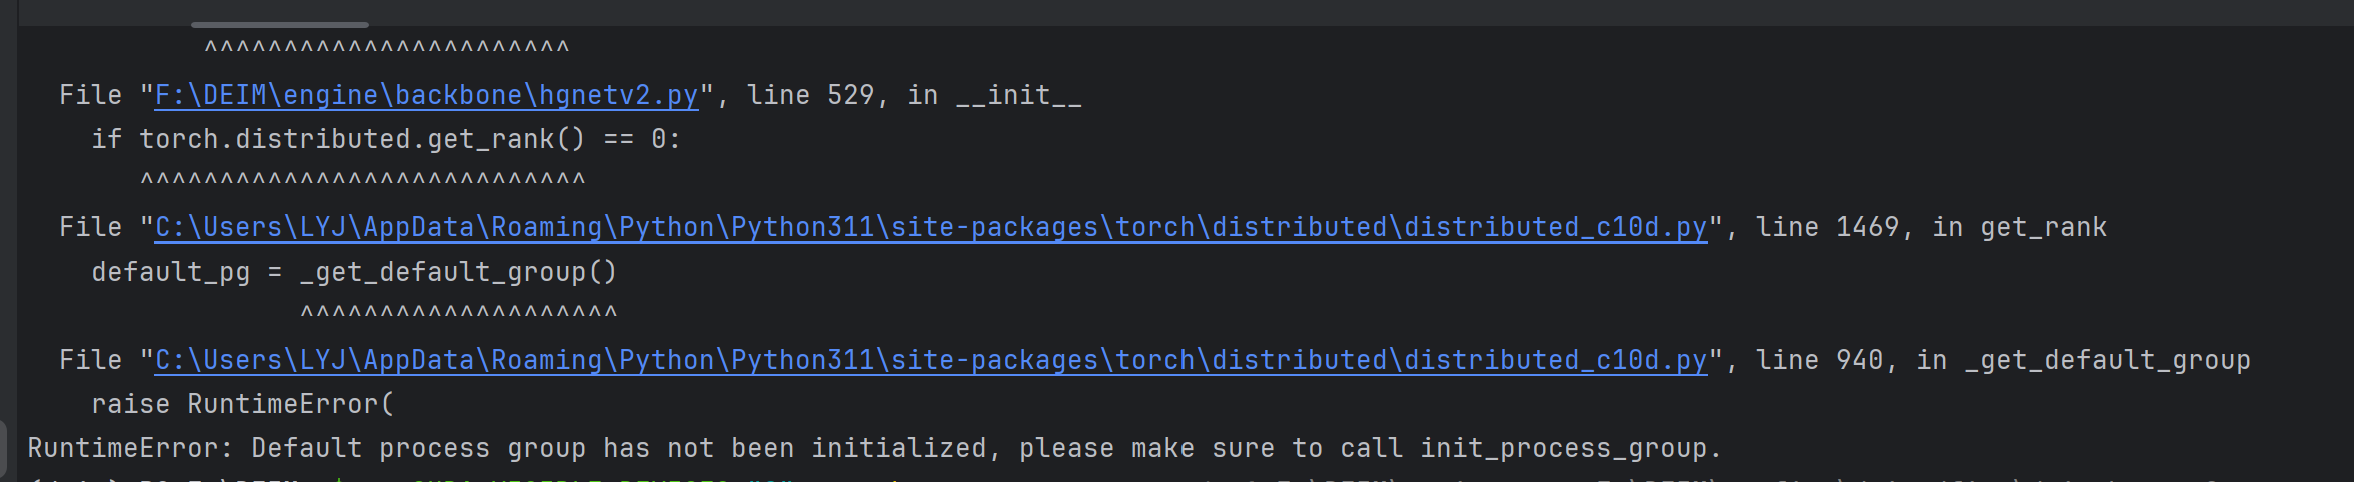
一:对engine/backbone/hgnetv2.py文件修改:
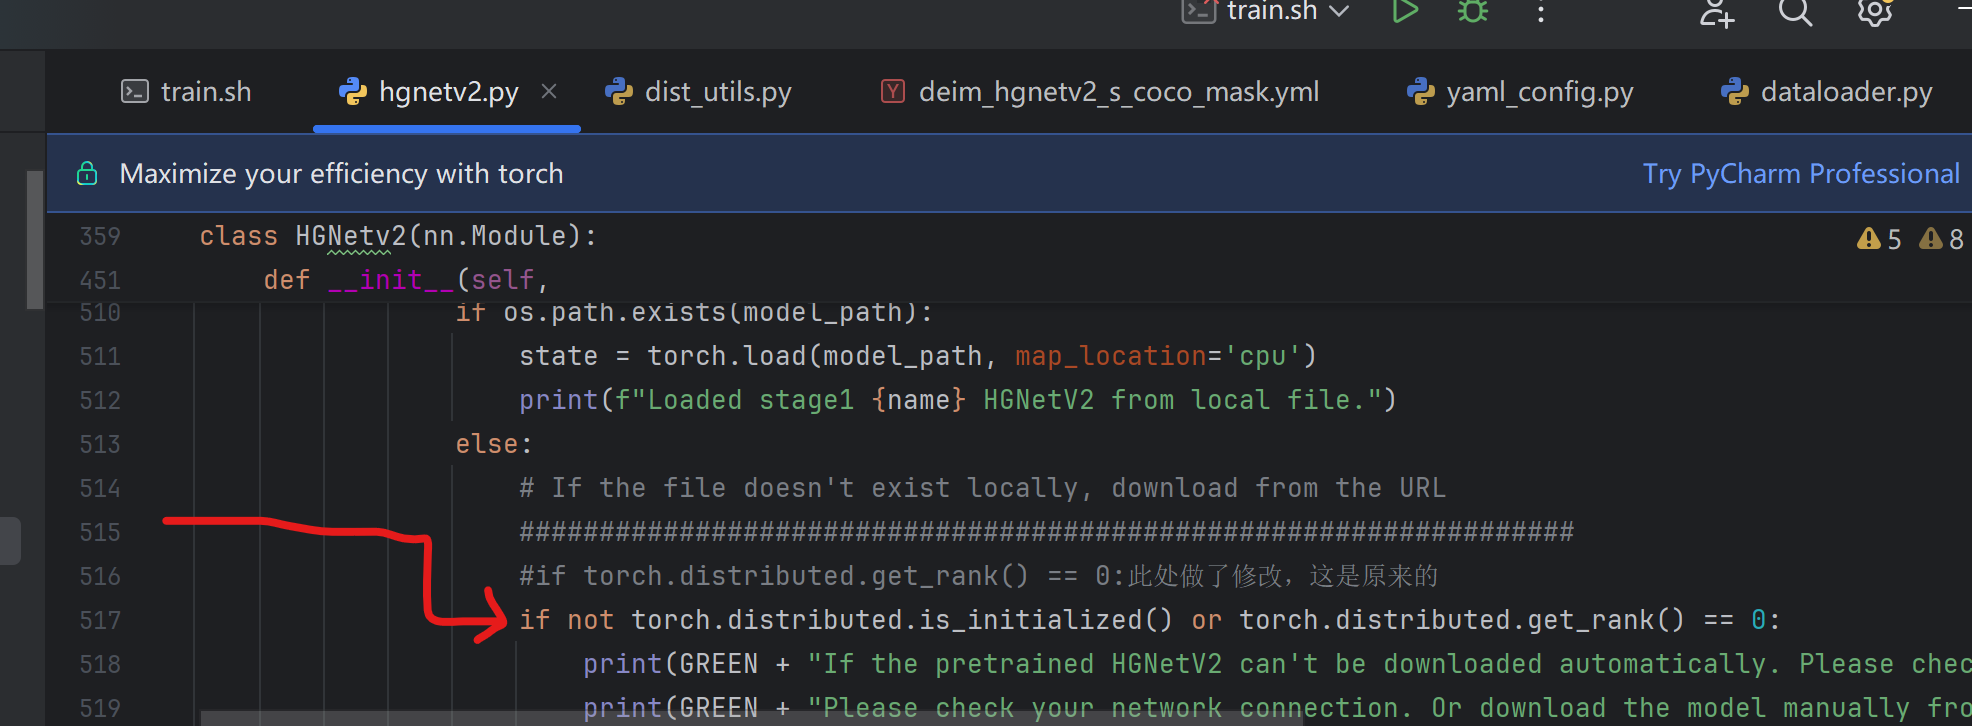
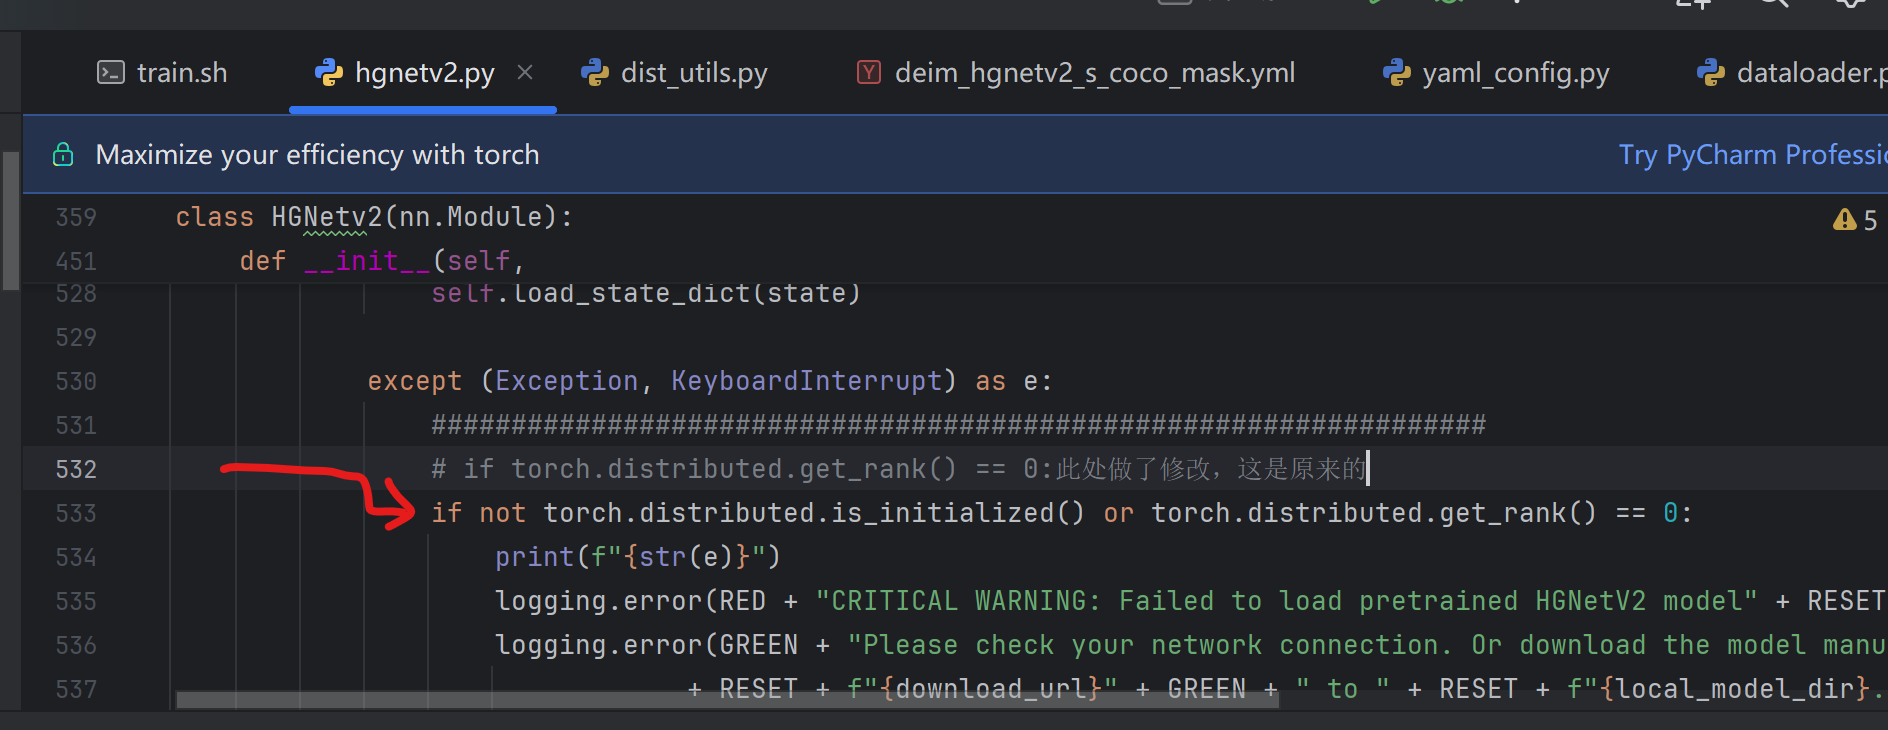
这个是解决以下报错:
二,对engine/misc/dist_utils.py文件的修改:
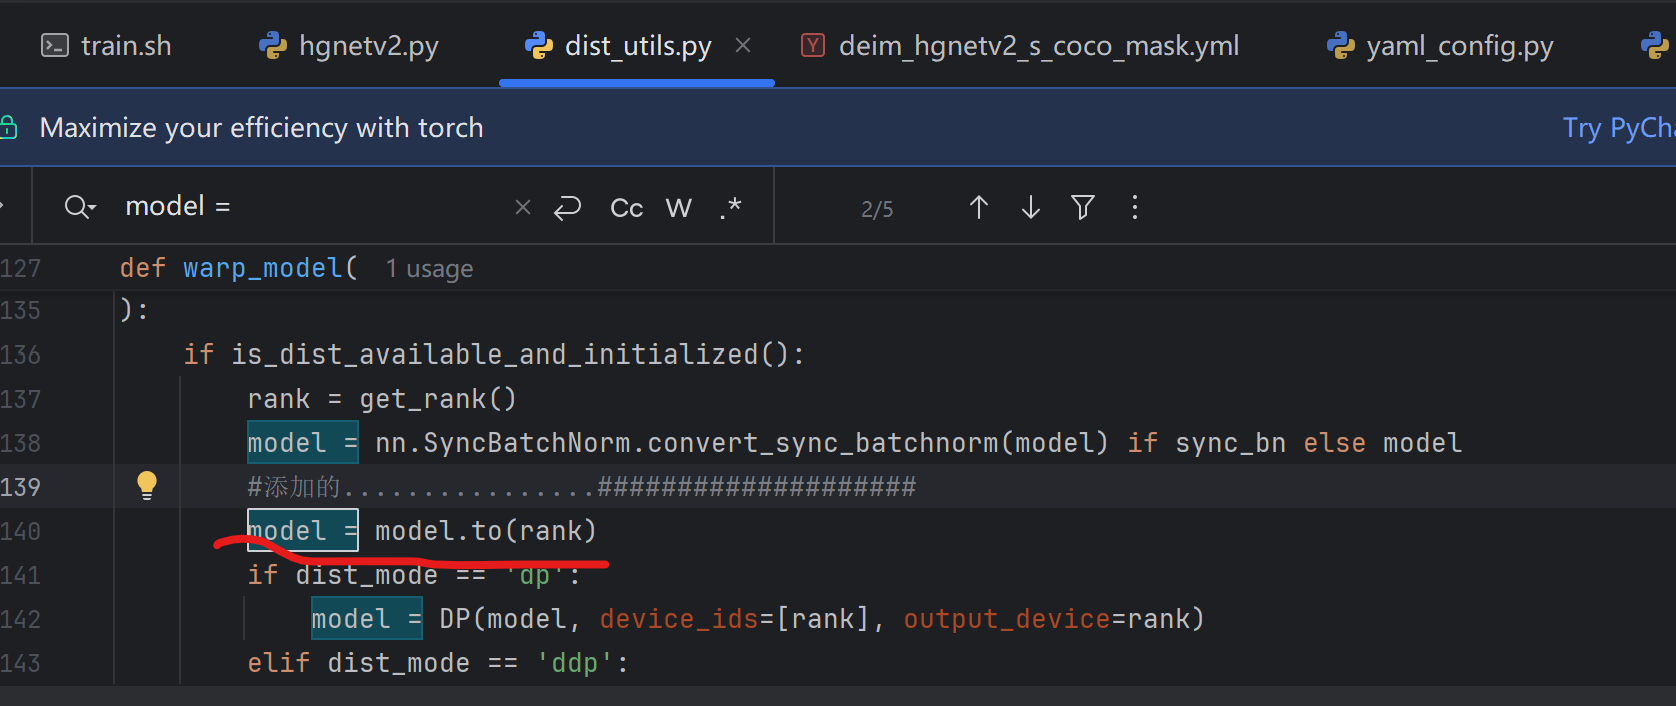
添加了代码:
python
model=model.to(rank)是为了解决以下报错:

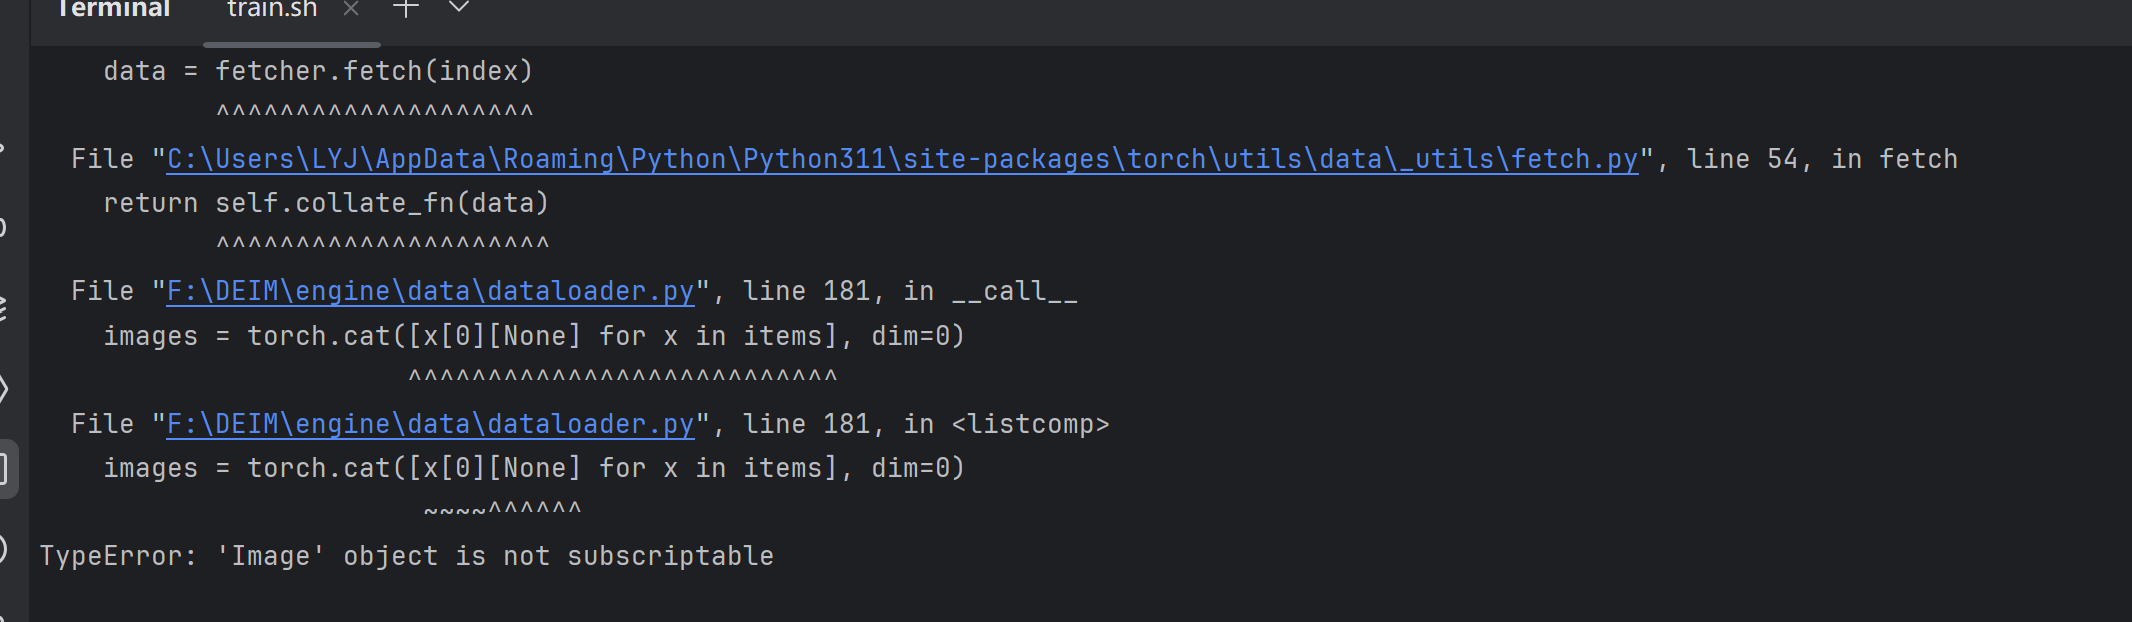
三,对engine/data/dataloader.py进行修改:
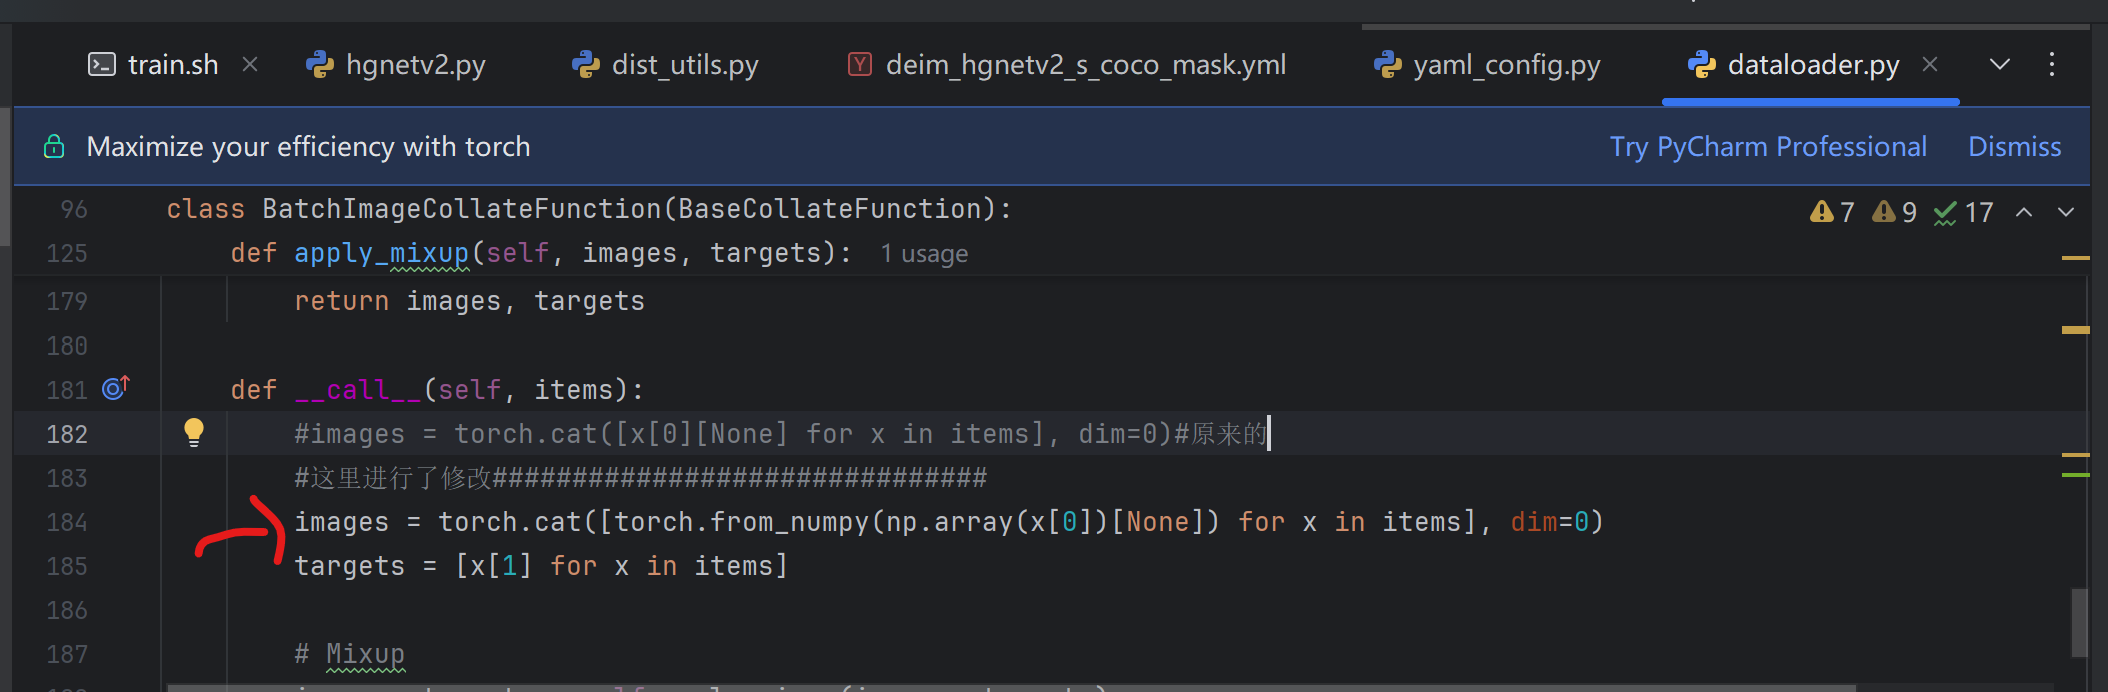
期间是因为这个报错:
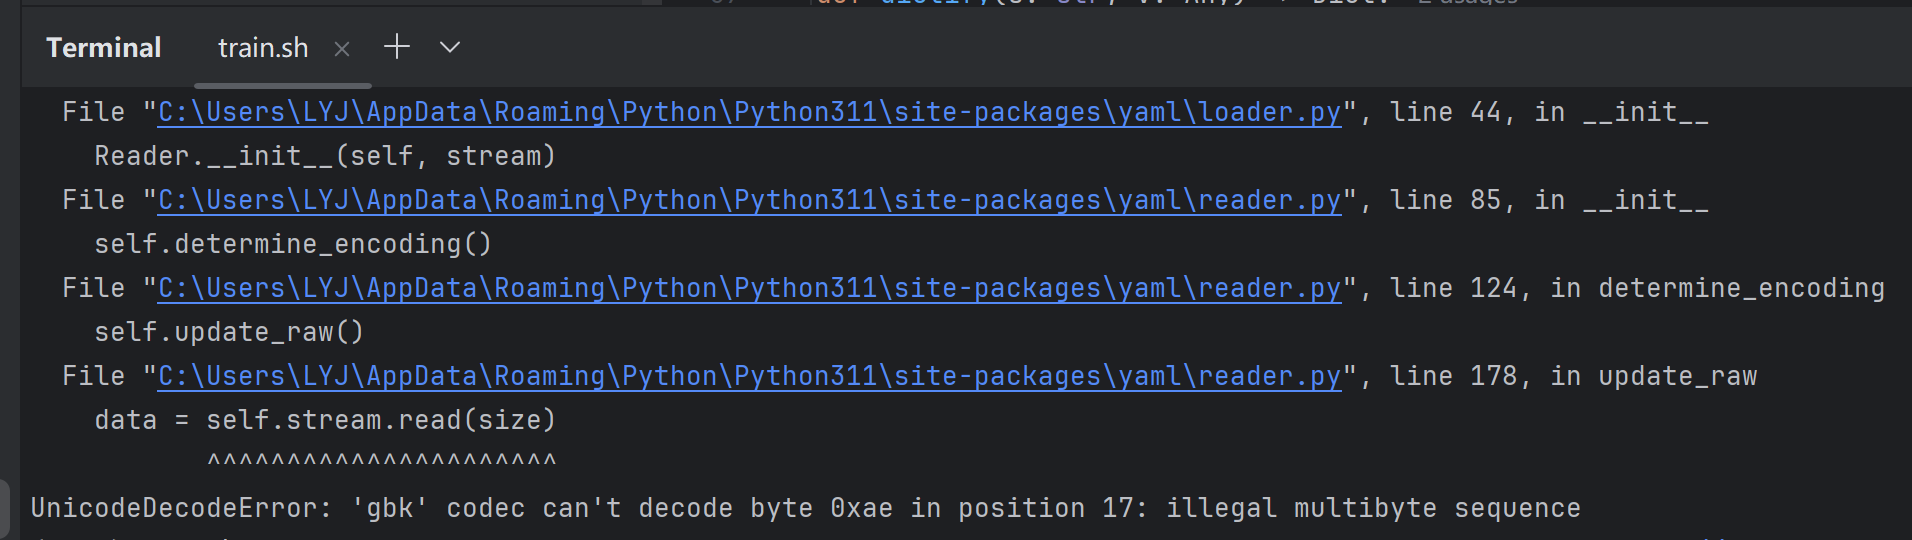
四,对engine/core/yaml_utils.py文件进行修改:
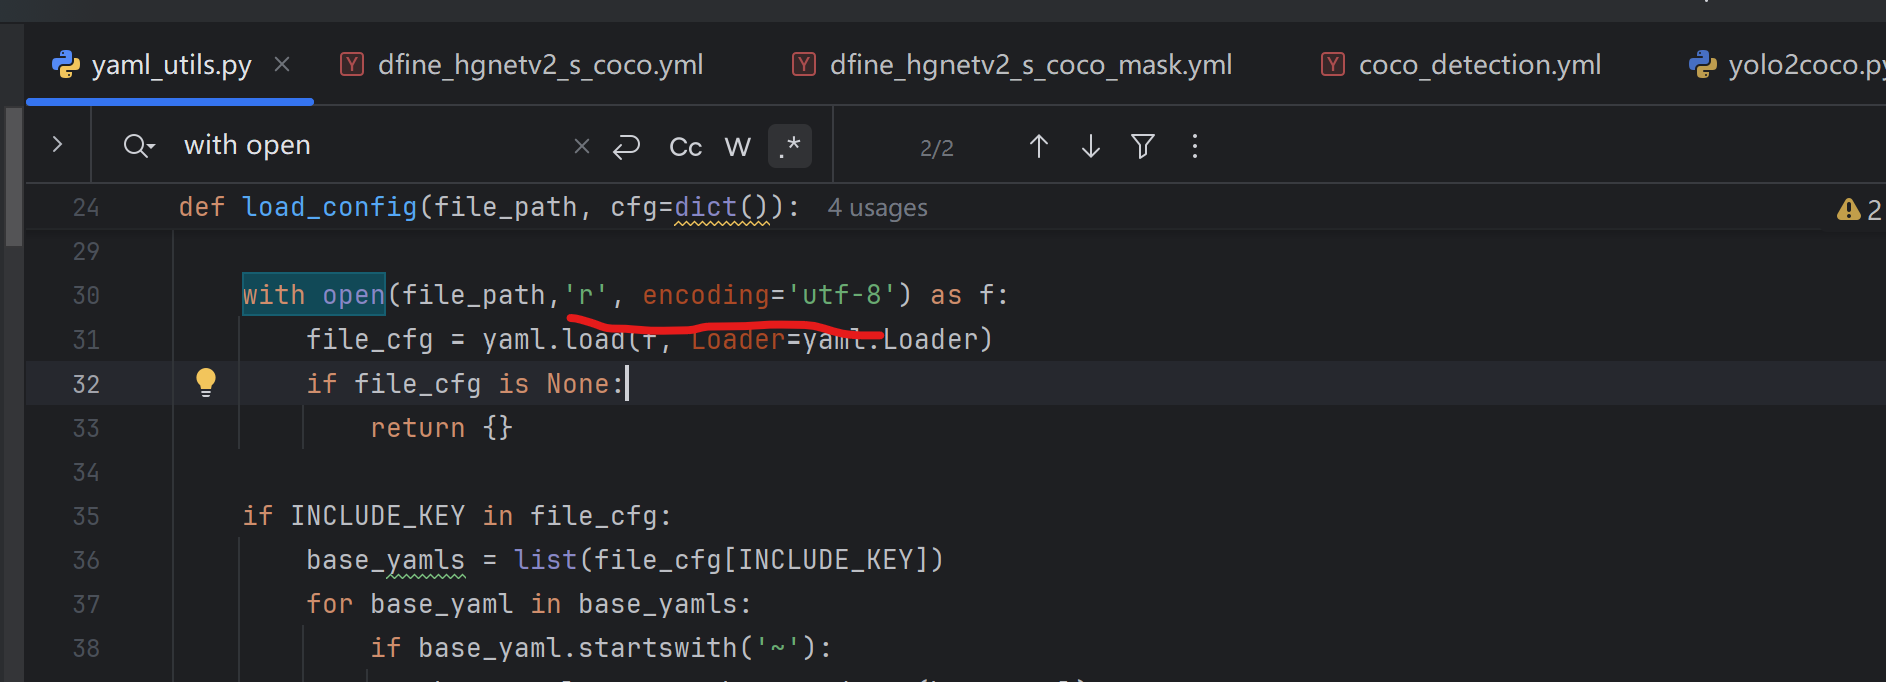
在第30行和第44行,分别添加了
python
'r', encoding='utf-8'是因为这个报错:
Step5:运行!!
接下来在终端输入:
python
$env:CUDA_VISIBLE_DEVICES="0"; python F:\DEIM\train.py -c F:\DEIM\configs\deim_dfine\deim_hgnetv2_s_coco_mask.yml --seed=0
#其中F:\DEIM\train.py是train.py的绝对路径,#F:\DEIM\configs\deim_dfine\deim_hgnetv2_s_coco_mask.yml这个路径也要替换成你的
我用的是这个命令,和github上的不太一样,下面是github上的
python
CUDA_VISIBLE_DEVICES=0,1,2,3 torchrun --master_port=7777 --nproc_per_node=4 train.py -c configs/deim_dfine/deim_hgnetv2_${model}_coco.yml --use-amp --seed=0
#这里他是用分布式训练torchrun命令的,我报错了,由于我是单卡GPU的,而作者时候多卡,也就是0,1,2,3,#并且--nproc_per_node=4 这里我们需要设置为--nproc_per_node=4。
#至于为啥会报错还没有细究,因为感觉也买不起多卡哈哈哈哈
然后我们就成功啦
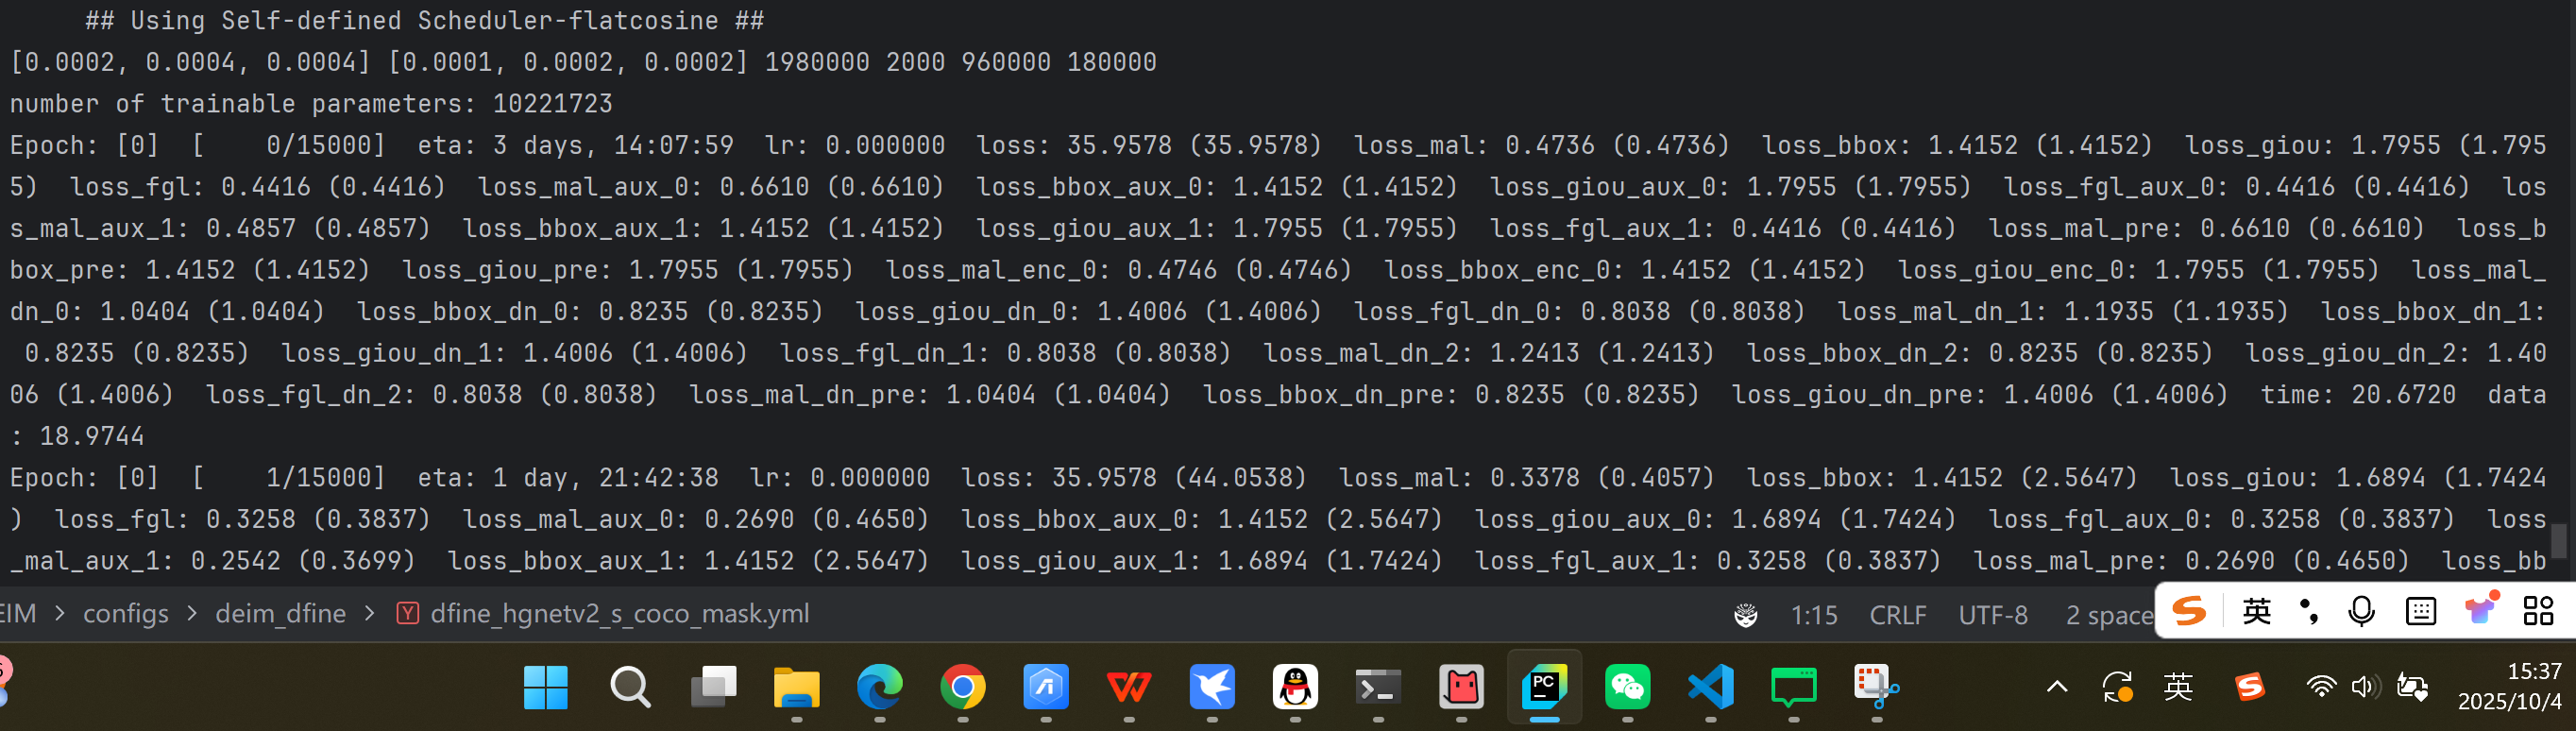
很久没有跑过实验了,不像以前是小白,慌慌张张的,更加从容了,希望我们都能不断进步!