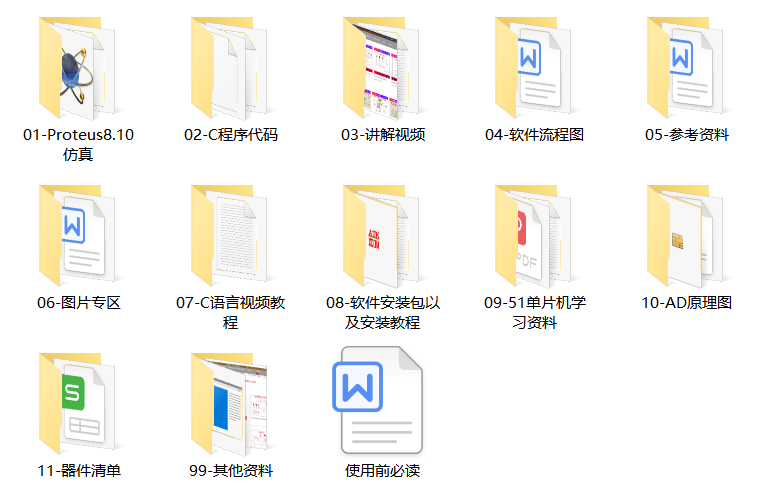
++全套资料包含:Proteus仿真源文件+keil C语言源程序+AD原理图+流程图+元器件清单+说明书等++
资料下载:
通过网盘分享的文件:资料分享
链接: 百度网盘 请输入提取码 提取码: tgnu
目录
[四、Keil c语言程序源代码](#四、Keil c语言程序源代码)
项目功能:
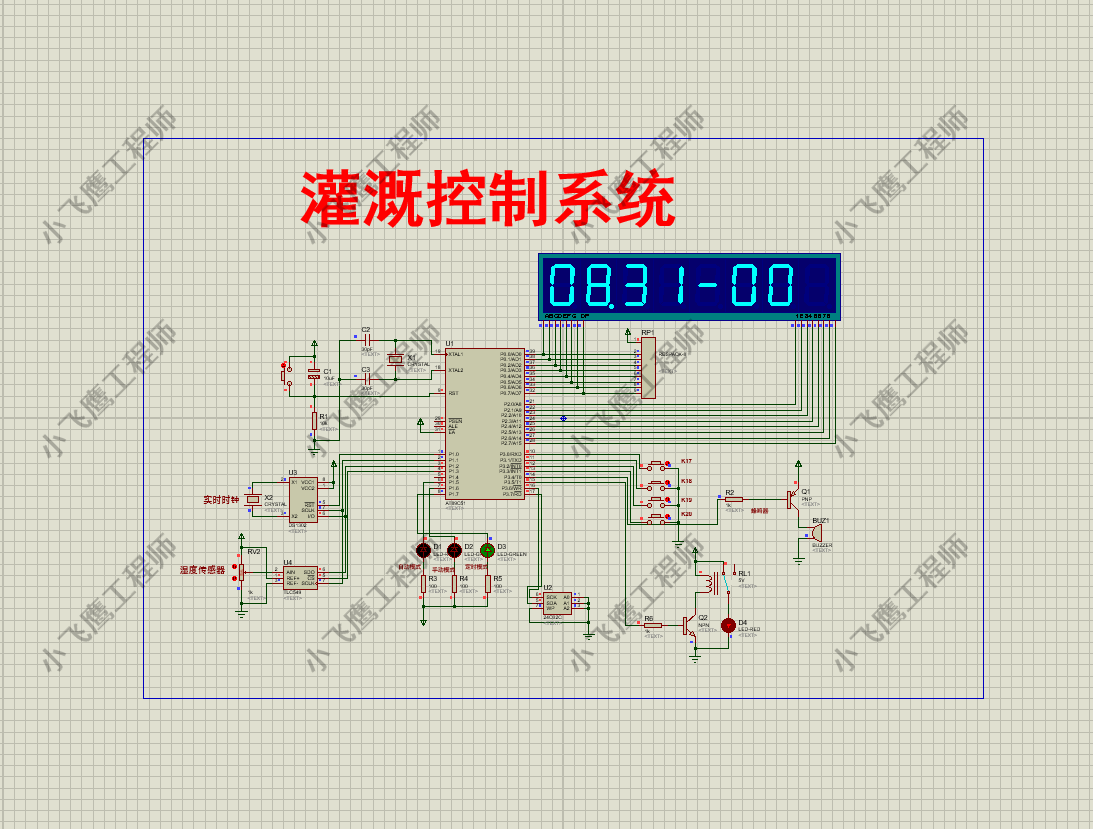
模拟自动灌溉系统
1、系统工作与初始化
(1)自动工作状态,根据湿度数据自动控制打开或关闭灌溉设备,以L1点亮指示;
(2)手动状态,通过按键控制打开或关闭灌溉设备,以L2点亮指示;
(3)定时工作状态,根据设定时间自动控制打开或关闭灌溉设备,以L3点亮指示;
(4)系统上电后处于自动工作状态,系统初始湿度阀值为EEPROM中的保存值,此时若湿度低于设定阀值,灌溉设备自动打开,达到设定值后自动关闭。
(5)灌溉设备打开或关闭通过继电器工作状态模拟。
2、数码管显示单元
当前时间及湿度数据显示格式:08.30-05(时间+湿度%)。
3、报警输出单元
系统工作于手动状态时,若当前湿度低于湿度阀值,蜂鸣器响,并可通过按下K19关闭提醒。
4、按键功能
(1)按键K20设定为系统工作模式切换按钮;具体如下:手动模式、自动模式、定时灌溉模式(设定灌溉装置启动/停止时间)、阀值设定界面、试试显示界面(时间、温度)。
(2)手动模式下按钮功能
K19------关闭蜂鸣器提示,再次按下K19打开蜂鸣器提示功能,如此循环;
K18------打开灌溉系统
K17------关闭灌溉系统
(3)自动模式按钮功能
K19------湿度阀值调整
K18------阀值加
K17------阀值减
(4)定时模式按键功能
K19------设置开启时间、关闭时间、确认设置三种功能
K18,K17调整时间
项目文件:
一、Proteus仿真源文件
二、AD原理图文件

二、报告说明书
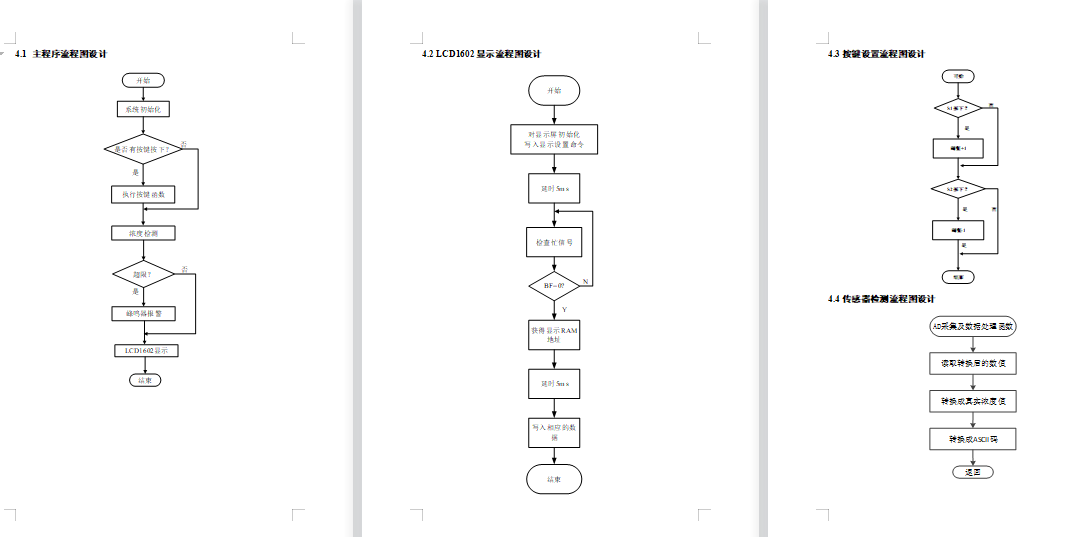
三、系统流程图
四、器件清单
|------------------------|-------------|----------|
| Designator | Footprint | LibRef |
| 7805 | D2PAK_N | Volt Reg |
| BT1 | BAT-2 | Battery |
| C1, C4, C6 | RB7.6-15 | Cap Pol1 |
| C2, C3, C5, C7 | RAD-0.3 | Cap |
| D1, D2, D3 | 3.5X2.8X1.9 | LED3 |
| DS1 | | 数码管8 |
| K1 | MODULE5B | Relay |
| LS1 | PIN2 | Speaker |
| P1 | HDR1X2 | Header 2 |
| Q1 | TO-226-AA | NPN |
| Q2 | SOT-23B_N | PNP |
| R1, R2, R3, R4, R6, R7 | AXIAL-0.4 | Res2 |
| R5 | VR5 | RPot |
| RP1 | | RESP |
| S1, S2, S3, S4, S5 | SPST-2 | SW-PB |
| U1 | | 8051 |
| U2 | | DS1302 |
| U3 | | TLC549 |
| U4 | | 24C02C |
| Y1, Y2 | R38 | XTAL |
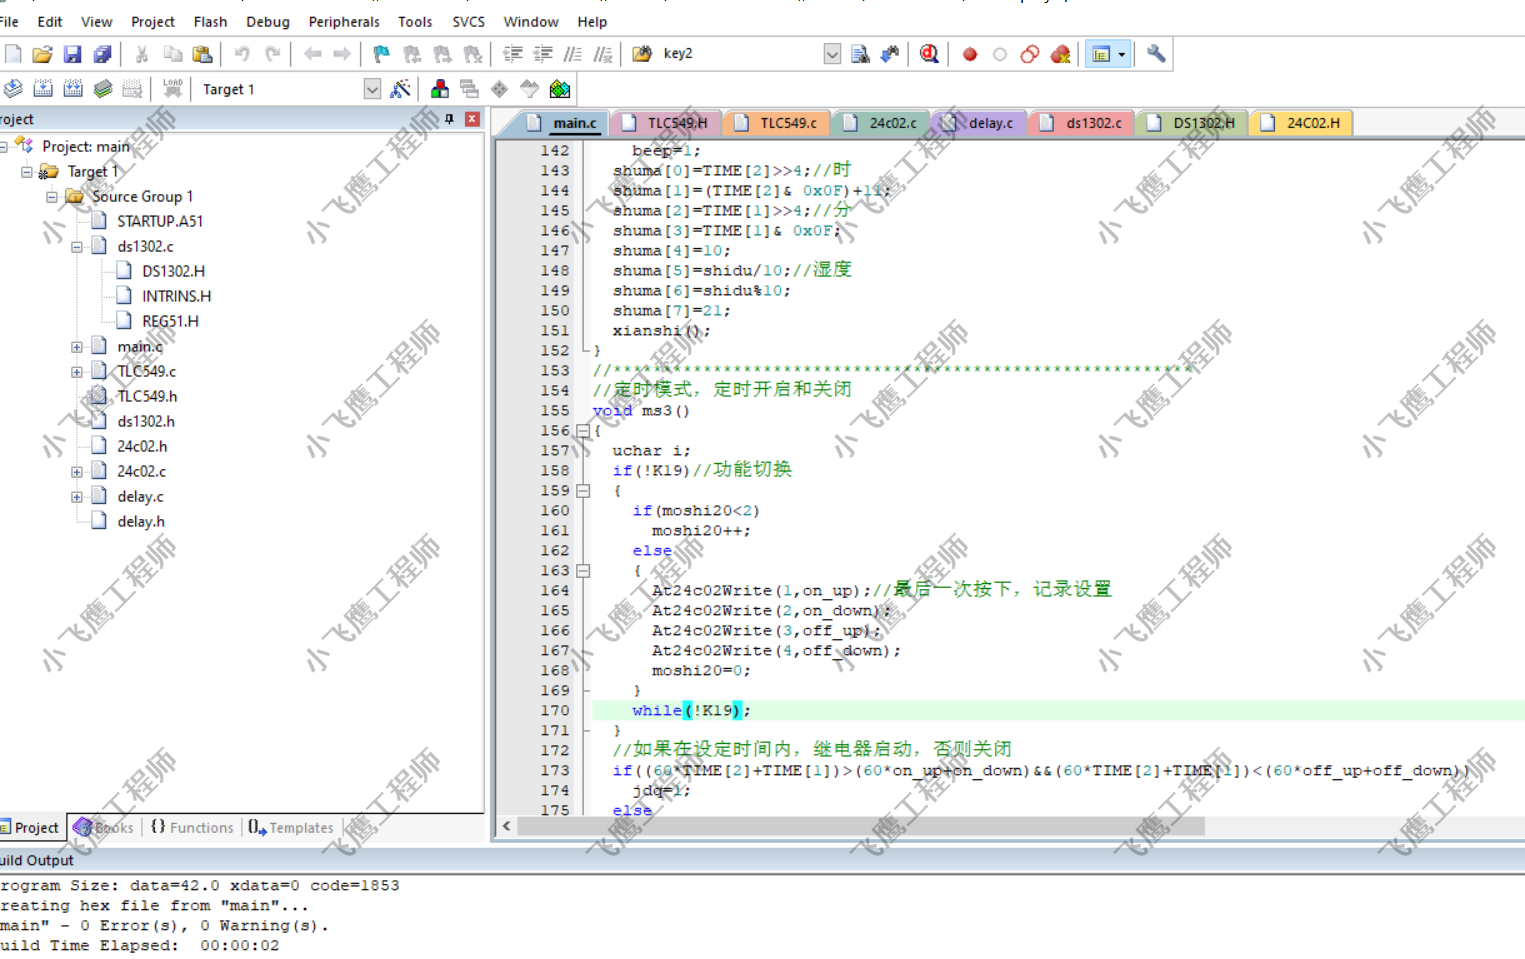
五、Keil c语言程序源代码(部分)
#include "reg51.h"
#include "TLC549.h"
#include "ds1302.h"
#include "24c02.h"
#include "delay.h"

#define uchar unsigned char
#define uint unsigned int
//显示无小数点0~9,'-'和有小数点0~9+空格
uchar code bianma[]={0x3f,0x06,0x5b,0x4f,0x66,0x6d,0x7d,0x07,0x7f,0x6f,0x40,0xbf,0x86,0xdb,0xcf,0xe6,0xed,0xfd,0x87,0xff,0xef,0x00};

//按钮引脚定义
sbit K17=P3^0;
sbit K18=P3^1;
sbit K19=P3^2;
sbit K20=P3^3;
//led引脚定义
sbit L1=P1^5;
sbit L2=P1^6;
sbit L3=P1^7;
//继电器驱动引脚定义
sbit jdq=P3^5;
//蜂鸣器驱动引脚定义
sbit beep=P3^4;
//模式:0自动,1手动,2定时
uchar mode=0;
//计数器,记20次为1s
uchar count=0;
//数码管显示内存
uchar shuma[8];
//湿度缓存
uchar shidu=0;
//湿度阀值
uchar shidu_lim=50;
//开启时间、关闭时间
uchar on_up=0x06,on_down=0x00,off_up=0x12,off_down=0x00;
//模式0切换内部功能
uchar moshi0=0;
//模式1切换内部功能
uchar moshi1=0;
//模式2切换内部功能
uchar moshi20=0,moshi21=0;
//*********************************************************
//显示函数,将显示内存里的数据显示到数码管
void xianshi()
{
	uchar i;
	i=8;
	while(i--)
	{
			P0=~bianma[shuma[i]];
			P2=1<<i;
			delay(20);
			P2=0;
	}
}
//**********************************************************
//自动模式执行函数,设置阀值
void ms1()
{
	if(!K19)//切换工作状态,正常显示和设置功能
	{
		if(moshi0==0)
			moshi0=1;
		else
		{
			moshi0=0;
			At24c02Write(0,shidu_lim);//记录阀值
		}
		while(!K19);//等待按钮松开
	}
	//设置湿度阀值,K18、K17
	if(moshi0==1)
	{
		if(!K18)//如果K18按下,+1
		{
			if(shidu_lim<99)
				shidu_lim++;
			while(!K18);
		}
		if(!K17)//如果K17按下,-1
		{
			if(shidu_lim>0)
				shidu_lim--;
			while(!K17);
		}
	}
	//如果湿度过低,启动继电器
	if(shidu<shidu_lim)
		jdq=1;
	else
		jdq=0;
	//如果工作状态为0,正常显示,如果工作状态为1,只显示湿度
	switch(moshi0)
	{
		case 0:
				shuma[0]=TIME[2]>>4;//正常显示
				shuma[1]=(TIME[2]& 0x0F)+11;//时
				shuma[2]=TIME[1]>>4;
				shuma[3]=TIME[1]& 0x0F;//分
				shuma[4]=10;
				shuma[5]=shidu/10;//湿度
				shuma[6]=shidu%10;
				shuma[7]=21;
				xianshi();
			break;
		case 1:
				shuma[0]=21;//显示湿度
				shuma[1]=21;
				shuma[2]=21;
				shuma[3]=21;
				shuma[4]=21;
				shuma[5]=shidu_lim/10;//湿度
				shuma[6]=shidu_lim%10;
				xianshi();
					}
}
//**********************************************************
//手动模式执行函数,手动控制继电器
void ms2()
{
	if(!K19)//开关警报功能
	{
		moshi1=!moshi1;
		while(!K19);
	}
	if(!K18)//如果K18按下,启动继电器
	{
		jdq=1;
		while(!K18);
	}
	if(!K17)//如果K17按下,关闭继电器
	{
		jdq=0;
		while(!K17);
	}
	if(!moshi1 && (shidu<shidu_lim))//如果湿度过低,蜂鸣器响
	{
		beep=0;
	}
	else
		beep=1;
	shuma[0]=TIME[2]>>4;//时
	shuma[1]=(TIME[2]& 0x0F)+11;
	shuma[2]=TIME[1]>>4;//分
	shuma[3]=TIME[1]& 0x0F;
	shuma[4]=10;
	shuma[5]=shidu/10;//湿度
	shuma[6]=shidu%10;
	shuma[7]=21;
	xianshi();
}
//**********************************************************
//定时模式,定时开启和关闭
void ms3()
{
	uchar i;
	if(!K19)//功能切换
	{
		if(moshi20<2)
			moshi20++;
		else
		{
			At24c02Write(1,on_up);//最后一次按下,记录设置
			At24c02Write(2,on_down);
			At24c02Write(3,off_up);
			At24c02Write(4,off_down);
			moshi20=0;
		}
		while(!K19);
	}
	//如果在设定时间内,继电器启动,否则关闭
	if((60*TIME[2]+TIME[1])>(60*on_up+on_down)&&(60*TIME[2]+TIME[1])<(60*off_up+off_down))
		jdq=1;
	else
		jdq=0;

	switch(moshi20)
	{
		case 0://正常显示模式,K19未按下
			shuma[0]=TIME[2]>>4;
			shuma[1]=(TIME[2]& 0x0F)+11;
			shuma[2]=TIME[1]>>4;
			shuma[3]=TIME[1]& 0x0F;
			shuma[4]=10;
			shuma[5]=shidu/10;
			shuma[6]=shidu%10;
			shuma[7]=21;
			xianshi();
			break;
		case 1://K19第一次按下,进入设置画面
			if(!K18)//设置开启时间,时+1
			{
				if(on_up<0x23)
				{
					i=on_up &0x0F;
					if(i==9)
					{
					on_up=(on_up &0xF0)+0x10;
					}
					else
						on_up++;
				}
				else
					on_up=0;
				while(!K18);
			}
				if(!K17)//分+1
			{
				if(on_down<59)
				{
					i=on_down &0x0F;
					if(i==9)
					{
					on_down=(on_down &0xF0)+0x10;
					}
					else
						on_down++;
				}
				else
					on_down=0;
				while(!K17);
			}
			if(count<11)//没0.5s显示一次
			{
				shuma[0]=on_up>>4;
				shuma[1]=(on_up &0x0F)+11;
				shuma[2]=on_down>>4;
				shuma[3]=(on_down &0x0F)+11;
				shuma[4]=off_up>>4;
				shuma[5]=(off_up &0x0F)+11;
				shuma[6]=off_down>>4;
				shuma[7]=off_down &0x0F;
				xianshi();
			}
			else
			{
				shuma[0]=21;
				shuma[1]=21;
				shuma[2]=21;
				shuma[3]=21;
				shuma[4]=off_up>>4;
				shuma[5]=(off_up &0x0F)+11;
				shuma[6]=off_down>>4;
				shuma[7]=(off_down &0x0F);
				xianshi();
				}
			break;
		case 2://K19第二次按下,设置关闭时间
			if(!K18)//设置关闭时间
			{
					if(off_up<0x23)
				{
					i=off_up &0x0F;
					if(i==9)
					{
						off_up=(off_up &0xF0)+0x10;
					}
					else
						off_up++;
				}
				else
					off_up=0;
				while(!K18);
			}
			if(!K17)//分+1
				{
				if(off_down<59)
				{
					i=off_down &0x0F;
					if(i==9)
					{
					off_down=(off_down &0xF0)+0x10;
					}
					else
						off_down++;
				}
				else
					off_down=0;
				while(!K17);
			}
			if(count<11)//0.5s显示一次
			{
				shuma[0]=on_up>>4;
				shuma[1]=(on_up &0x0F)+11;
				shuma[2]=on_down>>4;
				shuma[3]=(on_down &0x0F)+11;
				shuma[4]=off_up>>4;
				shuma[5]=(off_up &0x0F)+11;
				shuma[6]=off_down>>4;
				shuma[7]=off_down &0x0F;
				xianshi();
			}
			else
			{
				shuma[0]=on_up>>4;
				shuma[1]=(on_up &0x0F)+11;
				shuma[2]=on_down>>4;
				shuma[3]=(on_down &0x0F)+11;
				shuma[4]=21;
				shuma[5]=21;
				shuma[6]=21;
				shuma[7]=21;
				xianshi();
			}
	}
}

//主函数
void main()
{
	uchar i;
	TMOD|=0X01;//选择为定时器0模式,工作方式1,仅用TR0打开启动。
	TH0=0x3C;	//给定时器赋初值,定时50ms
	TL0=0xB0;
	ET0=1;
	EA=1;
	TR0=1;
	//时钟模块初始化
	Ds1302ReadTime();
	TIME[2]=0x08;//设置初始时间
	TIME[1]=0x30;
	Ds1302Init();
	//引脚初始化
	clock=0;
	jdq=0;
	//变量初始化
	i=At24c02Read(0x00);//读取阀值
	if(i!=0xFF)
		shidu_lim=i;
	delay(100);
	i=At24c02Read(0x01);//读取开启时间
	if(i!=0xFF)
		on_up=i;
	delay(100);
	i=At24c02Read(0x02);
	if(i!=0xFF)
		on_down=i;
	delay(100);
	i=At24c02Read(0x03);//读取关闭时间
	if(i!=0xFF)
		off_up=i;
	delay(100);
	i=At24c02Read(0x04);
	if(i!=0xFF)
		off_down=i;
while(1)
	{
		if(!K20)//模式切换
		{
			if(mode<2)
				mode++;
			else
				mode=0;
			while(!K20);
		}

		switch(mode)//点亮led
		{
			case 0:L1=0;L2=1;L3=1;
					break;
			case 1:L1=1;L2=0;L3=1;
					break;
			case 2:L1=1;L2=1;L3=0;
		}

		switch(mode)//执行
		{
			case 0:
					ms1();
					break;
			case 1://手动模式
					ms2();
					break;
			case 2://定时器模式
					ms3();
		}
	}

}
//******************************************
//定时器0中断函数
void Timer0() interrupt 1
{
	TH0=0x3C;	//重新赋值定时50ms
	TL0=0xB0;
	if(count<20)
		count++;
	else
		count=0;
//读取湿度、当前时间
		if(count==20)
		{
			Ds1302ReadTime();//读取日期
			shidu=shuchu_549()/2;//读取湿度
		}
}
六、全套资料包含
七:项目资源获取
需要完整的资料可以点击下面的名片关注,回复"资料"!
↓↓↓↓↓↓↓↓↓↓↓↓↓↓ ↓↓↓↓↓↓↓↓↓↓↓↓ ↓↓↓↓↓↓↓↓↓↓↓↓ ↓↓↓↓↓↓↓↓↓↓↓↓ ↓↓↓↓↓↓↓↓↓↓↓↓ ↓↓↓↓↓↓↓↓↓↓↓↓ ↓↓↓↓↓↓↓↓↓↓↓↓↓↓↓↓↓↓↓↓↓↓↓↓↓↓↓ ↓↓↓↓↓↓↓↓↓↓↓↓↓↓↓↓↓↓