背景
阿里云k8s大块分为两部分:镜像仓库+容器服务
之前我们是通过反向的操作:
阿里云k8s关联gitlab代码库的main分支,main分支有更新后,阿里云k8s会自动构建镜像,等镜像构建完成后,我们手动去容器服务中更新服务,使用最新的镜像版本。
现在我们想通过gitlab的cicd来完成这一套流程,流程如下:

执行
我们需要做的是:
1/ 构建镜像
构建镜像就需要dockerfile,这里需要根据自己的服务创建一个dockerfile,让构建后的镜像的包体尽可能的小。
2/ 推送镜像到仓库
这里需要通过鉴权后,推送到阿里云的镜像仓库。这里需要注意,尽量不要用明文的用户名和密码,可以放到gitlab的variables里。

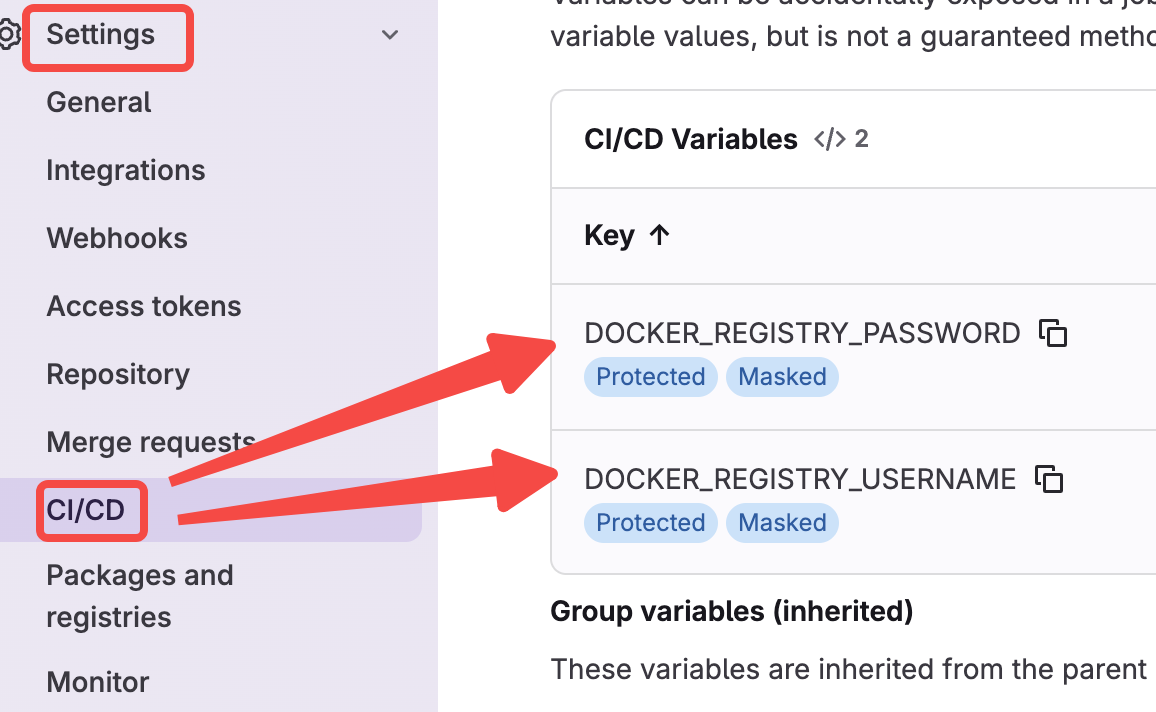
在varibales里设置好账号密码后,可以在镜像构建阶段按下面的方式使用:

这段script的主要逻辑:
i: docker login到镜像仓库,这里就用到了在variables里设置的DOCKER_REGISTRY_USERNAME和DOCKER_REGISTRY_PASSWORD。
ii: docker build镜像。$CI_PIPELINE_ID是流水线自带的变量,可以引用。
此时正常来说已经在本地构建好了一个镜像,可以在gitlab-runner所在的实例上通过docker images命令进行查看
iii: docker tag,给镜像打tag
iiii: docker push,把镜像push到阿里云的镜像仓库。这里可以参考:
https://cr.console.aliyun.com/repository/
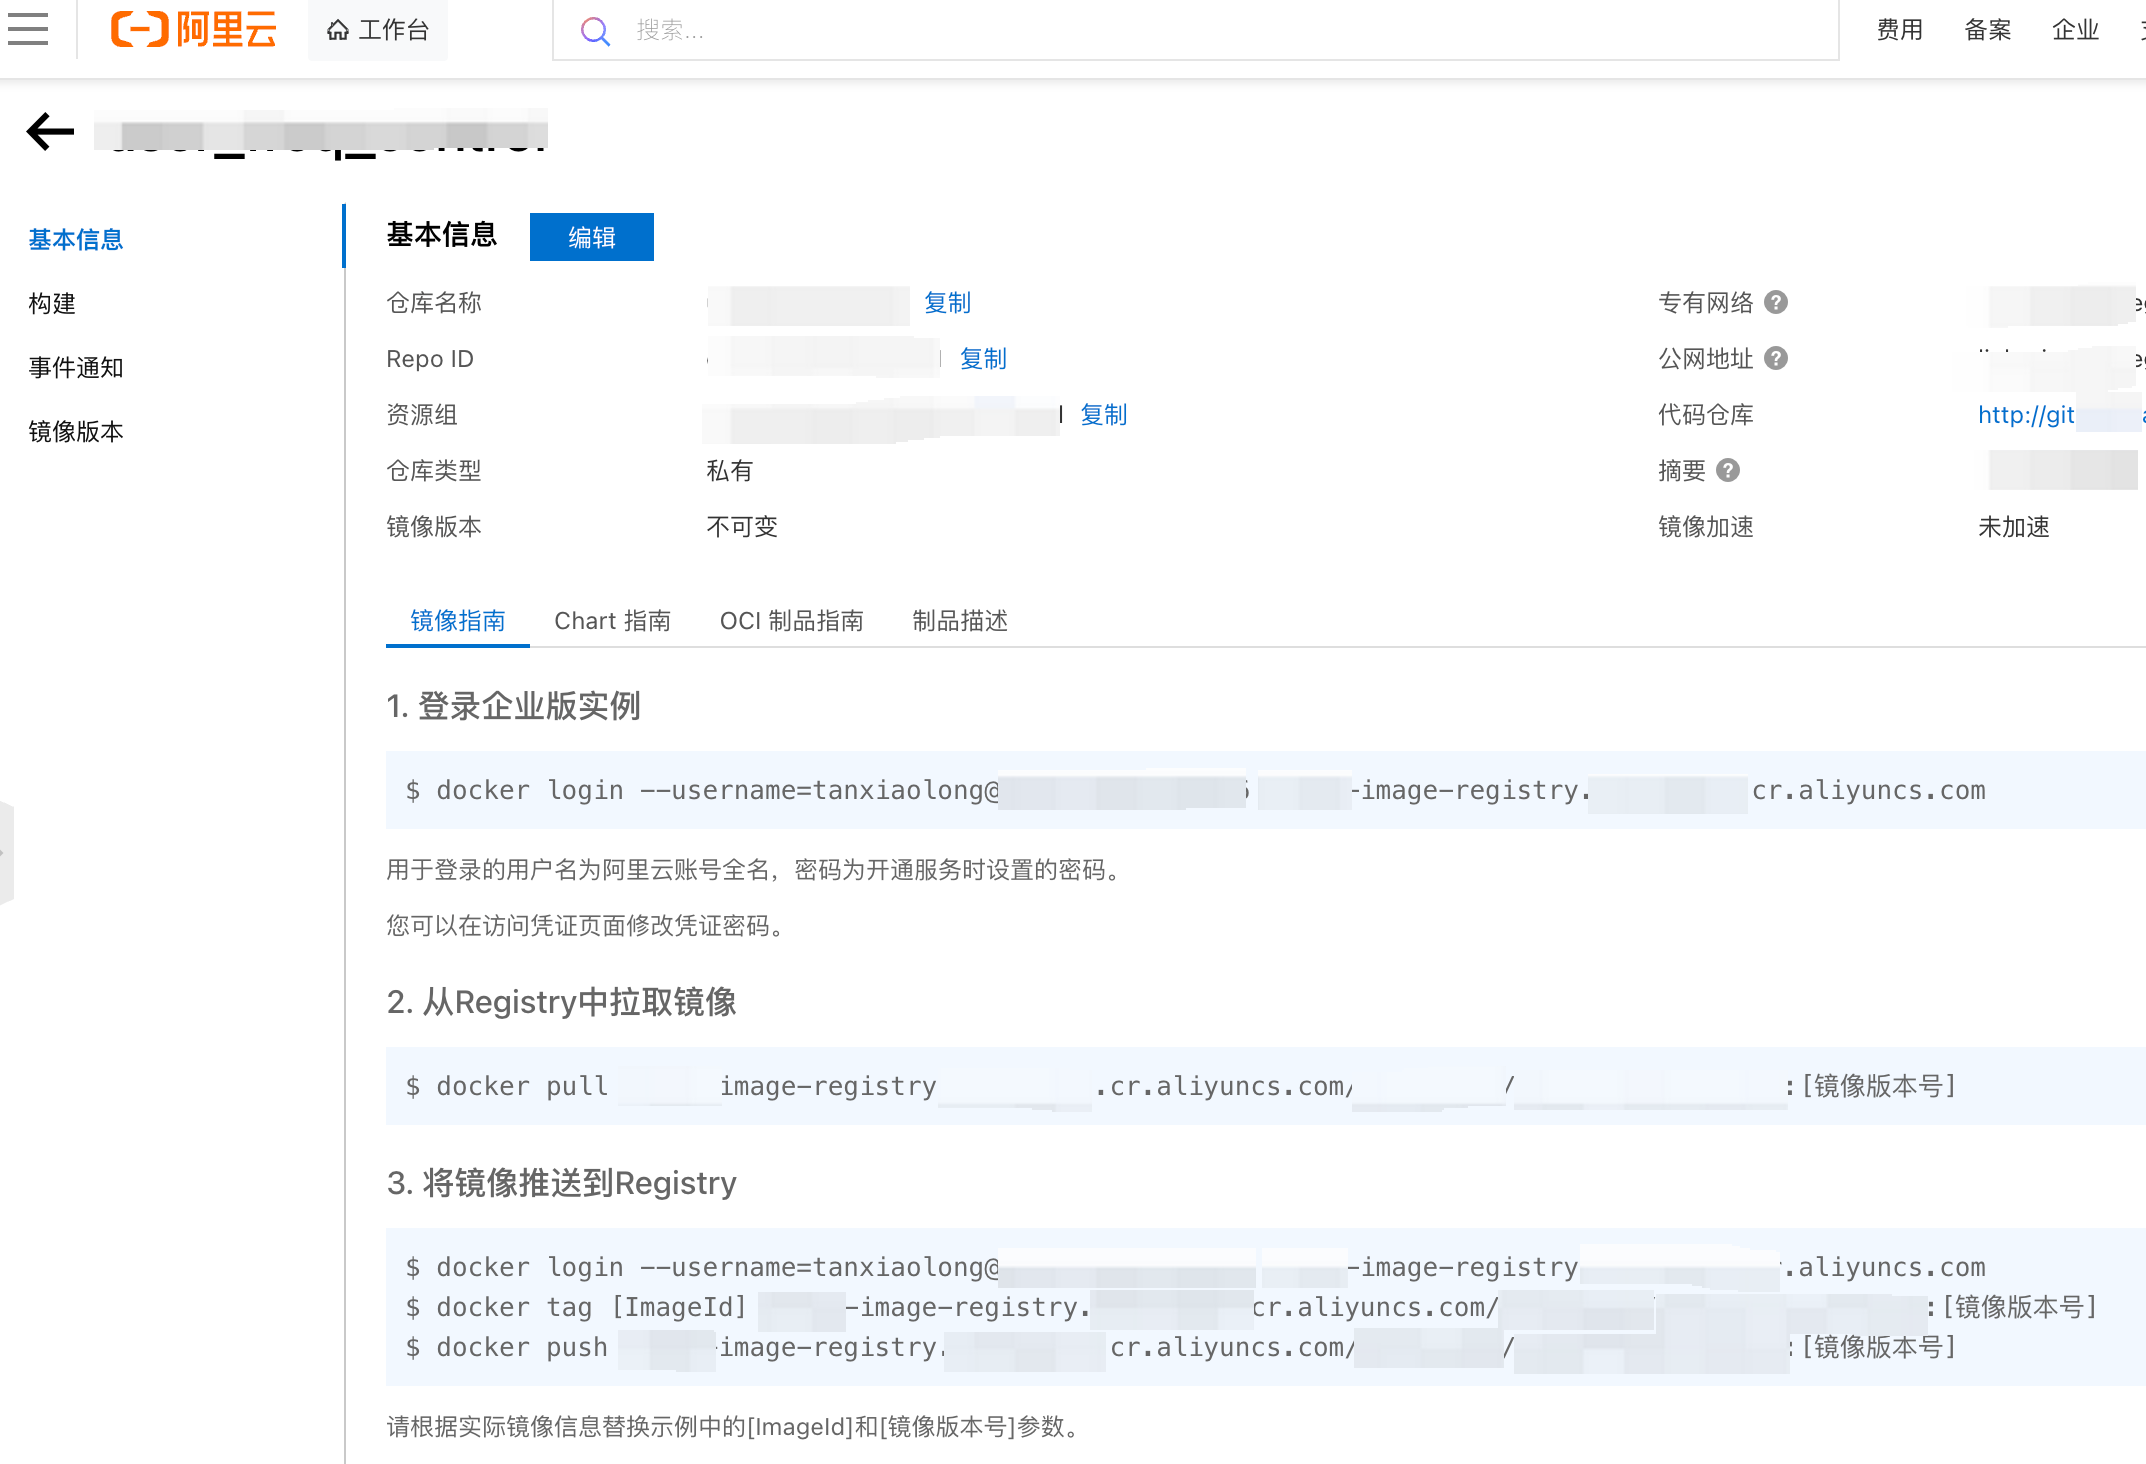
此时正常来说已经在阿里云的镜像仓库里构建好了一个镜像,可以在阿里云的镜像仓库里查看

2/ 部署新镜像
i: 部署的时候依赖deployment.yaml,如果代码仓库里没有的话,需要新建一个。让豆包deepseek生成一个最简版本的deployment.yaml,先用着。
ii: 需要配置$kube_config
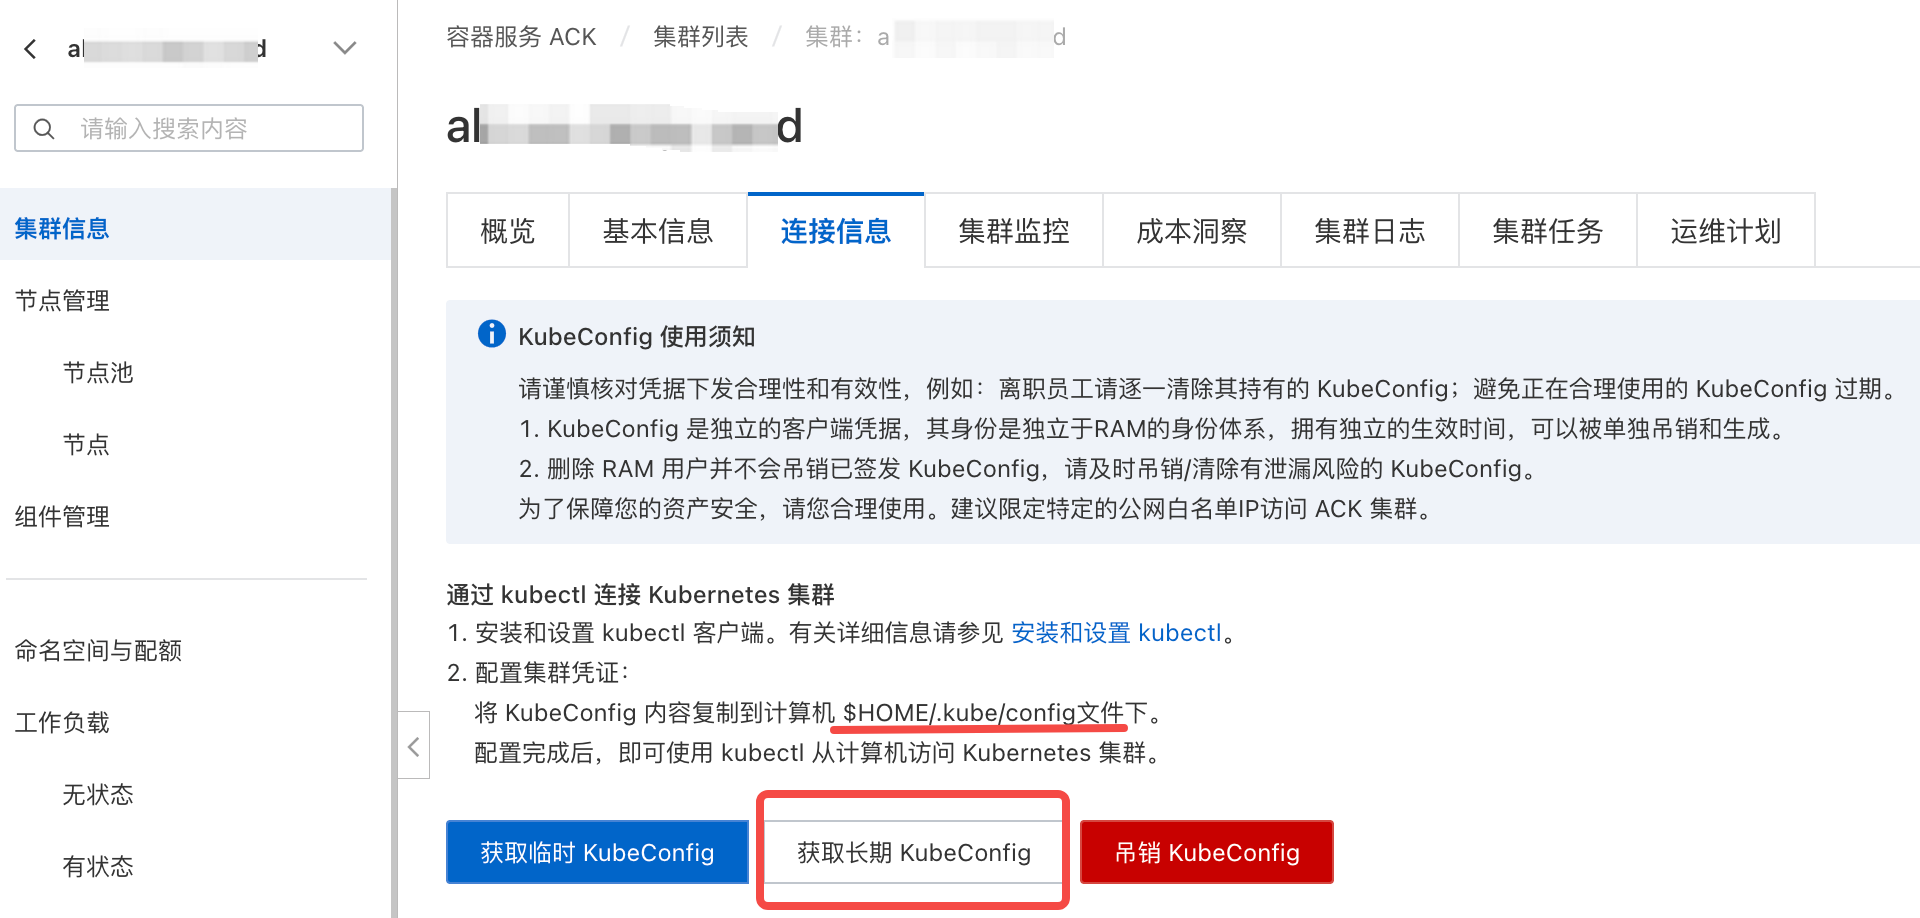
根据指示,需要在gitlab-runner所在的机器上,配置.kube/config
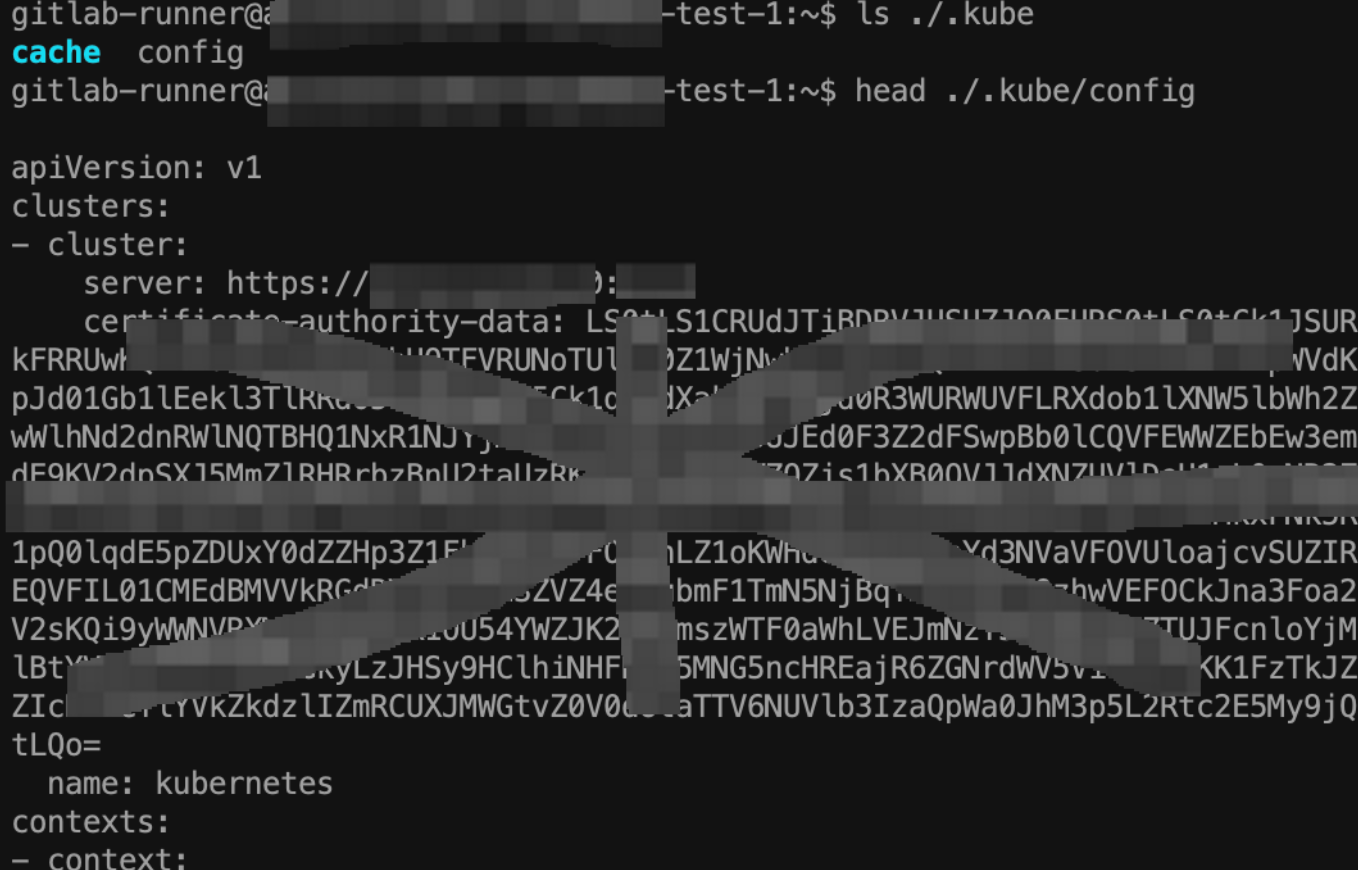
配好.kube/config之后就可以部署我们的镜像了。
iii: kube apply -f deployment.yaml
.gitlab-ci.yaml
# This file is a template, and might need editing before it works on your project.
# This is a sample GitLab CI/CD configuration file that should run without any modifications.
# It demonstrates a basic 3 stage CI/CD pipeline. Instead of real tests or scripts,
# it uses echo commands to simulate the pipeline execution.
#
# A pipeline is composed of independent jobs that run scripts, grouped into stages.
# Stages run in sequential order, but jobs within stages run in parallel.
#
# For more information, see: https://docs.gitlab.com/ee/ci/yaml/index.html#stages
#
# You can copy and paste this template into a new `.gitlab-ci.yml` file.
# You should not add this template to an existing `.gitlab-ci.yml` file by using the `include:` keyword.
#
# To contribute improvements to CI/CD templates, please follow the Development guide at:
# https://docs.gitlab.com/ee/development/cicd/templates.html
# This specific template is located at:
# https://gitlab.com/gitlab-org/gitlab/-/blob/master/lib/gitlab/ci/templates/Getting-Started.gitlab-ci.yml

stages:          # List of stages for jobs, and their order of execution
  - build
  - test
  - docker_build
  - notify
  - deploy


# 执行代码静态检查
build-job:
  stage: build
  tags:
    - rd
  script:
    - make regenerate-stub # 自己写的makefile
    - make bar_server
    - echo "build succ."

unit-test-job:   # This job runs in the test stage.
  stage: test    # It only starts when the job in the build stage completes successfully.
  tags:
    - rd
  script:
    - make regenerate-stub # 生成桩代码
    - go test -race -coverprofile cover.out -coverpkg=./... ./...
    - total=$(go tool cover -func=cover.out | tail -1)
    - echo ${total}
    - coverage=$(echo ${total} | grep -P '\d+\.\d+(?=\%)' -o)
    # 如果测试覆盖率低于2%,认为ut执行失败
    - (( $(awk 'BEGIN {print ("'${coverage}'" >= "'2'")}') )) || (echo "单测覆盖率低于2%"; exit 1)

lint-test-job:   # This job also runs in the test stage.
  stage: test    # It can run at the same time as unit-test-job (in parallel).
  tags:
    - rd
  script:
    - echo "Linting code... This will take about 10 seconds."
    - sleep 10
    - make regenerate-stub # 自己写的makefile
    - golangci-lint run

docker-build-job:
  stage: docker_build
  tags:
    - rd
  script:
    # 这俩变量是在setting/cicd/varibales里配置的
    - echo "$DOCKER_REGISTRY_PASSWORD" | docker login xxxxxx.cr.aliyuncs.com --username "$DOCKER_REGISTRY_USERNAME" --password-stdin
    - docker build -f ./Dockerfile --build-arg BUILD_ENV=prod -t bar_server:$CI_PIPELINE_ID .
    - docker tag bar:$CI_PIPELINE_ID xxxxxx.cr.aliyuncs.com/foo/bar_server:$CI_PIPELINE_ID
    - docker push xxxxxx.cr.aliyuncs.com/foo/bar_server:$CI_PIPELINE_ID

# 飞书通知(提醒手动触发部署)
notify-job:
  stage: notify
  tags:
    - rd
  script:
    - |
      # 构造飞书通知内容(含流水线链接)
      PIPELINE_URL="$CI_PROJECT_URL/-/pipelines/$CI_PIPELINE_ID"
      MESSAGE="【bar_server】镜像已构建完成,请手动触发部署!\n流水线链接:$PIPELINE_URL"

      # 替换为你的飞书机器人Webhook(从飞书群机器人获取)
      FEISHU_WEBHOOK="https://open.feishu.cn/open-apis/bot/v2/hook/abcdefg"

      # 发送飞书通知
      curl -X POST $FEISHU_WEBHOOK \
        -H "Content-Type: application/json" \
        -d '{
          "msg_type": "text",
          "content": {
            "text": "'"$MESSAGE"'"
          }
        }'
  when: on_success  # 仅当前面阶段成功时发送
  # before_script:
    # - apt-get update && apt-get install -y jq
    # - git fetch origin $MAIN_BRANCH

deploy-job:      # This job runs in the deploy stage.
  stage: deploy  # It only runs when *both* jobs in the test stage complete successfully.
  tags:
    - rd
  environment: production
  script:
    - echo $kube_config   # 配置连接Kubernetes集群的config文件
    - sed -i "s/{{IMAGE_TAG}}/$CI_PIPELINE_ID/g" deployment.yaml  # 动态替换部署文件中的镜像tag
    - kubectl apply -f deployment.yaml
  when: manual  # 关键:必须加这一行,强制手动触发
  allow_failure: false
在deploy-job阶段有这么一句:
- sed -i "s/{{IMAGE_TAG}}/$CI_PIPELINE_ID/g" deployment.yaml # 动态替换部署文件中的镜像tag
例如我的deployment.yaml里有这么个占位符

这个sed替换的就是{{IMAGE_TAG}},用pipeline的id当作image_tag。
结束
至此就可以进行运行和体验了。

参考
https://help.aliyun.com/zh/ack/use-gitlab-ci-to-run-a-gitlab-runner-and-run-a-pipeline-on-kubernetes