MongoDB 与 Elasticsearch 数据同步方案整理
- 一、同步方案对比
- [二、方案一:MongoDB Connector(官方推荐)](#二、方案一:MongoDB Connector(官方推荐))
-
- [2.1 概述](#2.1 概述)
- [2.2 安装步骤](#2.2 安装步骤)
- [2.3 安装 MongoDB Connector](#2.3 安装 MongoDB Connector)
- [2.4 配置 MongoDB Connector](#2.4 配置 MongoDB Connector)
- [2.5 创建 systemd 服务](#2.5 创建 systemd 服务)
- [2.6 创建专用用户和目录](#2.6 创建专用用户和目录)
- [2.7 启动和测试](#2.7 启动和测试)
- [三、方案二:使用 Logstash](#三、方案二:使用 Logstash)
-
- [3.1 安装 Logstash](#3.1 安装 Logstash)
- [3.2 配置 Logstash 管道](#3.2 配置 Logstash 管道)
- [3.3 创建服务配置文件](#3.3 创建服务配置文件)
- [3.4 启动和测试 Logstash](#3.4 启动和测试 Logstash)
- [四、方案三:使用 MongoDB 变更流自定义脚本](#四、方案三:使用 MongoDB 变更流自定义脚本)
-
- [4.1 Python 实现](#4.1 Python 实现)
- [4.2 运行 Python 脚本](#4.2 运行 Python 脚本)
- 五、高级配置和优化
-
- [5.1 数据映射和转换](#5.1 数据映射和转换)
- [5.2 错误处理和重试机制](#5.2 错误处理和重试机制)
- [5.3 监控和告警](#5.3 监控和告警)
- 六、性能优化建议
-
- [6.1 MongoDB 优化](#6.1 MongoDB 优化)
- [6.2 Elasticsearch 优化](#6.2 Elasticsearch 优化)
- [6.3 网络和硬件优化](#6.3 网络和硬件优化)
- 七、故障排查
-
- [7.1 常见问题及解决](#7.1 常见问题及解决)

一、同步方案对比
| 方案 | 实时性 | 复杂性 | 资源消耗 | 适用场景 |
|---|---|---|---|---|
| MongoDB Connector | 实时 | 中等 | 中 | 生产环境实时同步 |
| Logstash | 准实时 | 简单 | 中 | 批量/定时同步 |
| 变更流脚本 | 实时 | 中等 | 低 | 自定义同步需求 |
二、方案一:MongoDB Connector(官方推荐)
2.1 概述
MongoDB Connector for Elasticsearch 是官方提供的实时同步工具,通过读取 MongoDB 的 oplog 实现数据同步。
2.2 安装步骤
bash
# 1. 确保 MongoDB 是副本集模式(oplog 必需)
# 连接到 MongoDB shell
mongo

# 如果是单机模式,转换为副本集
# 停止 MongoDB 服务
sudo systemctl stop mongod

# 修改 MongoDB 配置文件
sudo vi /etc/mongod.conf
添加/修改配置:
bash
replication:
  replSetName: "rs0"
bash
# 重启 MongoDB
sudo systemctl start mongod

# 进入 MongoDB shell 初始化副本集
mongo
> rs.initiate()
> rs.status()  # 验证副本集状态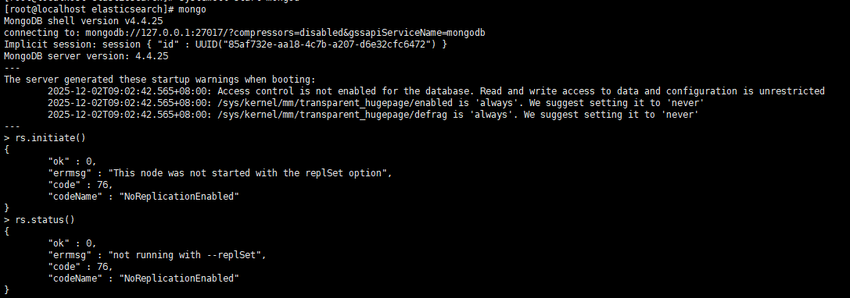
2.3 安装 MongoDB Connector
bash
# 1. 安装 Python 3 和 pip
sudo yum install python3 python3-pip -y

# 2. 安装 MongoDB Connector 和相关组件
sudo pip3 install mongo-connector==3.1.1
sudo pip3 install elasticsearch==7.17.3
sudo pip3 install elastic2-doc-manager==0.3.0  # Elasticsearch 7.x 专用

# 3. 创建配置目录
sudo mkdir -p /etc/mongo-connector
2.4 配置 MongoDB Connector
bash
# 创建主配置文件
sudo vi /etc/mongo-connector/config.json
bash
配置文件内容:
{
  "mainAddress": "mongodb://localhost:27017",
  "oplogFile": "/var/log/mongo-connector/oplog.timestamp",
  "noDump": false,
  "batchSize": -1,
  "verbosity": 2,
  "continueOnError": true,

  "namespaces": {
    "include": [
      "mydb.*",  # 同步指定数据库的所有集合
      "test.products"  # 或指定具体集合
    ],
    "exclude": [
      "admin.*",
      "local.*",
      "config.*"
    ],
    "mapping": {
      "mydb.users": "users_index",  # MongoDB 集合 -> Elasticsearch 索引映射
      "mydb.products": "products_index"
    }
  },

  "docManagers": [
    {
      "docManager": "elastic2_doc_manager",
      "targetURL": "localhost:9200",
      "args": {
        "clientOptions": {
          "timeout": 60,
          "maxRetries": 3,
          "retryOnTimeout": true
        },
        "bulkSize": 1000,
        "autoCommitInterval": 0,
        "useSSL": false,
        "replicaSet": false,
        "type": "_doc",
        "versionType": "external",
        "metaTimestampKey": "_ts",
        "metaIdKey": "_id"
      }
    }
  ]
}
2.5 创建 systemd 服务
bash
# 创建服务文件
sudo vi /etc/systemd/system/mongo-connector.service
bash
服务文件内容:
[Unit]
Description=MongoDB Connector for Elasticsearch
After=network.target mongod.service elasticsearch.service
Wants=elasticsearch.service

[Service]
Type=simple
User=mongo-connector
Group=mongo-connector
WorkingDirectory=/opt/mongo-connector
Environment="PYTHONPATH=/usr/local/lib/python3.6/site-packages"

# 创建数据目录
PermissionsStartOnly=true
ExecStartPre=/bin/mkdir -p /var/log/mongo-connector
ExecStartPre=/bin/chown -R mongo-connector:mongo-connector /var/log/mongo-connector
ExecStartPre=/bin/chown -R mongo-connector:mongo-connector /opt/mongo-connector

# 主命令
ExecStart=/usr/local/bin/mongo-connector -c /etc/mongo-connector/config.json --logfile /var/log/mongo-connector/mongo-connector.log

Restart=always
RestartSec=10
StandardOutput=syslog
StandardError=syslog
SyslogIdentifier=mongo-connector

[Install]
WantedBy=multi-user.target
2.6 创建专用用户和目录
bash
# 创建用户和组
sudo groupadd mongo-connector
sudo useradd -r -g mongo-connector -s /bin/false mongo-connector

# 创建目录
sudo mkdir -p /opt/mongo-connector
sudo mkdir -p /var/log/mongo-connector

# 设置权限
sudo chown -R mongo-connector:mongo-connector /opt/mongo-connector
sudo chown -R mongo-connector:mongo-connector /var/log/mongo-connector
sudo chown -R mongo-connector:mongo-connector /etc/mongo-connector
2.7 启动和测试
bash
# 启用并启动服务
sudo systemctl daemon-reload
sudo systemctl enable mongo-connector
sudo systemctl start mongo-connector

# 查看状态
sudo systemctl status mongo-connector

# 查看日志
sudo tail -f /var/log/mongo-connector/mongo-connector.log

# 测试同步
mongo
> use mydb
> db.products.insertOne({
    name: "测试产品",
    price: 99.99,
    description: "这是一个测试产品描述",
    tags: ["电子", "测试"],
    created_at: new Date()
  })

# 在 Elasticsearch 中查询
curl -X GET "localhost:9200/products_index/_search?pretty"
三、方案二:使用 Logstash
3.1 安装 Logstash
bash
# 1. 安装 Logstash(与 Elasticsearch 版本一致)
sudo rpm --import https://artifacts.elastic.co/GPG-KEY-elasticsearch

# 创建仓库文件
sudo vi /etc/yum.repos.d/logstash.repo
添加内容:
bash
[logstash-7.x]
name=Elastic repository for 7.x packages
baseurl=https://artifacts.elastic.co/packages/7.x/yum
gpgcheck=1
gpgkey=https://artifacts.elastic.co/GPG-KEY-elasticsearch
enabled=1
autorefresh=1
type=rpm-md
bash
# 安装 Logstash
sudo yum install logstash -y

# 安装 MongoDB 输入插件
cd /usr/share/logstash
sudo bin/logstash-plugin install logstash-input-mongodb
3.2 配置 Logstash 管道
bash
# 创建配置文件
sudo vi /etc/logstash/conf.d/mongo-to-es.conf
配置内容:
bash
input {
  mongodb {
    # MongoDB 连接配置
    uri => 'mongodb://localhost:27017/mydb'

    # 要监控的集合
    collection => 'products'

    # 默认使用 ObjectId 的 _id 字段作为跟踪字段
    placeholder_db_dir => '/var/log/logstash/mongodb_sync'
    placeholder_db_name => 'logstash_sync.placeholder'

    # 增量同步设置
    batch_size => 5000
    generateId => true

    # 查询条件(可选)
    # filter => '{"created_at": {"$gte": ISODate("2023-01-01T00:00:00Z")}}'

    # 定时执行(cron 表达式)
    schedule => '*/5 * * * *'  # 每5分钟同步一次
  }

  # 可以添加多个 MongoDB 输入
  mongodb {
    uri => 'mongodb://localhost:27017/mydb'
    collection => 'users'
    placeholder_db_dir => '/var/log/logstash/mongodb_sync'
    placeholder_db_name => 'logstash_sync_users.placeholder'
    batch_size => 5000
    schedule => '*/10 * * * *'
  }
}

filter {
  # 处理 ObjectId
  if [_id] {
    mutate {
      replace => { "[_id][$oid]" => "%{[_id][$oid]}" }
    }
    mutate {
      rename => { "[_id][$oid]" => "_id" }
    }
  }

  # 处理日期字段
  if [created_at] {
    date {
      match => [ "[created_at][$date]", "ISO8601" ]
      target => "created_at"
    }
    mutate {
      remove_field => ["[created_at][$date]"]
    }
  }

  # 添加 Elasticsearch 索引字段
  mutate {
    add_field => {
      "[@metadata][_index]" => "products-%{+YYYY.MM.dd}"
      "[@metadata][_type]" => "_doc"
      "[@metadata][_id]" => "%{_id}"
    }
  }

  # 删除不必要的字段
  mutate {
    remove_field => ["@version", "@timestamp"]
  }
}

output {
  elasticsearch {
    hosts => ["localhost:9200"]

    # 使用 metadata 中的索引和 ID
    index => "%{[@metadata][_index]}"
    document_type => "%{[@metadata][_type]}"
    document_id => "%{[@metadata][_id]}"

    # 认证(如果启用)
    # user => "elastic"
    # password => "your_password"

    # 批量设置
    flush_size => 500
    idle_flush_time => 5
  }

  # 调试输出(可选)
  stdout {
    codec => rubydebug
  }
}
3.3 创建服务配置文件
bash
# 创建管道配置文件
sudo vi /etc/logstash/pipelines.yml
bash
- pipeline.id: mongo-to-es
  path.config: "/etc/logstash/conf.d/mongo-to-es.conf"
  pipeline.workers: 2
  pipeline.batch.size: 125
  queue.type: persisted
  queue.max_bytes: 1gb
3.4 启动和测试 Logstash
bash
# 测试配置文件
sudo /usr/share/logstash/bin/logstash --config.test_and_exit -f /etc/logstash/conf.d/mongo-to-es.conf

# 创建数据目录
sudo mkdir -p /var/log/logstash/mongodb_sync
sudo chown -R logstash:logstash /var/log/logstash

# 启动服务
sudo systemctl enable logstash
sudo systemctl start logstash

# 查看状态
sudo systemctl status logstash

# 查看日志
sudo tail -f /var/log/logstash/logstash-plain.log
四、方案三:使用 MongoDB 变更流自定义脚本
4.1 Python 实现
bash
# 安装依赖
sudo pip3 install pymongo elasticsearch
bash
# mongodb_change_stream.py
from pymongo import MongoClient
from elasticsearch import Elasticsearch, helpers
import time
import json
from datetime import datetime
import threading
import signal
import sys

class MongoToElasticSync:
    def __init__(self, mongo_uri, es_hosts, db_name):
        # 连接 MongoDB
        self.mongo_client = MongoClient(mongo_uri)
        self.db = self.mongo_client[db_name]

        # 连接 Elasticsearch
        self.es = Elasticsearch(es_hosts)

        # 批量处理配置
        self.batch_size = 100
        self.batch_buffer = []
        self.batch_lock = threading.Lock()
        self.running = True

        # 索引映射配置
        self.index_mappings = {
            'products': {
                'settings': {
                    'number_of_shards': 3,
                    'number_of_replicas': 1,
                    'analysis': {
                        'analyzer': {
                            'ik_analyzer': {
                                'type': 'custom',
                                'tokenizer': 'ik_max_word'
                            }
                        }
                    }
                },
                'mappings': {
                    'properties': {
                        'name': {'type': 'text', 'analyzer': 'ik_analyzer'},
                        'description': {'type': 'text', 'analyzer': 'ik_analyzer'},
                        'price': {'type': 'float'},
                        'category': {'type': 'keyword'},
                        'tags': {'type': 'keyword'},
                        'created_at': {'type': 'date'},
                        'updated_at': {'type': 'date'}
                    }
                }
            }
        }

    def create_index_if_not_exists(self, collection_name):
        """创建 Elasticsearch 索引"""
        index_name = f"{collection_name}_index"

        if not self.es.indices.exists(index=index_name):
            mapping = self.index_mappings.get(collection_name, {})
            self.es.indices.create(index=index_name, body=mapping)
            print(f"Created index: {index_name}")

        return index_name

    def transform_document(self, doc, collection_name):
        """转换 MongoDB 文档为 Elasticsearch 文档"""
        # 处理 ObjectId
        if '_id' in doc:
            doc['_id'] = str(doc['_id'])

        # 添加时间戳
        if 'created_at' not in doc:
            doc['created_at'] = datetime.utcnow().isoformat()

        doc['updated_at'] = datetime.utcnow().isoformat()

        # 删除不需要的字段
        doc.pop('__v', None)

        return doc

    def batch_sync_existing_data(self, collection_name):
        """批量同步现有数据"""
        collection = self.db[collection_name]
        index_name = self.create_index_if_not_exists(collection_name)

        print(f"Starting batch sync for {collection_name}...")

        # 使用游标分批读取
        batch = []
        cursor = collection.find({}, batch_size=self.batch_size)

        for doc in cursor:
            # 转换文档
            transformed = self.transform_document(doc, collection_name)

            # 构建 Elasticsearch 操作
            es_action = {
                '_index': index_name,
                '_id': transformed['_id'],
                '_source': transformed
            }
            batch.append(es_action)

            # 批量提交
            if len(batch) >= self.batch_size:
                try:
                    helpers.bulk(self.es, batch)
                    print(f"Synced {len(batch)} documents to {index_name}")
                    batch.clear()
                except Exception as e:
                    print(f"Batch sync error: {e}")

        # 提交剩余文档
        if batch:
            try:
                helpers.bulk(self.es, batch)
                print(f"Synced remaining {len(batch)} documents")
            except Exception as e:
                print(f"Final batch error: {e}")

        print(f"Batch sync completed for {collection_name}")

    def watch_collection(self, collection_name):
        """监控集合变更"""
        collection = self.db[collection_name]
        index_name = self.create_index_if_not_exists(collection_name)

        print(f"Starting change stream for {collection_name}...")

        # 恢复点(从上次停止的地方继续)
        resume_token = self.load_resume_token(collection_name)

        # 创建变更流
        pipeline = [{'$match': {'operationType': {'$in': ['insert', 'update', 'replace', 'delete']}}}]

        with collection.watch(
            pipeline=pipeline,
            full_document='updateLookup',
            resume_after=resume_token
        ) as stream:
            for change in stream:
                try:
                    self.process_change(change, collection_name, index_name)
                    self.save_resume_token(collection_name, stream.resume_token)
                except Exception as e:
                    print(f"Error processing change: {e}")

    def process_change(self, change, collection_name, index_name):
        """处理单个变更事件"""
        operation = change['operationType']
        document_id = str(change['documentKey']['_id'])

        if operation in ['insert', 'update', 'replace']:
            # 获取完整文档
            full_document = change.get('fullDocument')
            if not full_document:
                # 如果是更新操作但没有完整文档,从数据库查询
                collection = self.db[collection_name]
                full_document = collection.find_one({'_id': change['documentKey']['_id']})

            if full_document:
                # 转换文档
                transformed = self.transform_document(full_document, collection_name)

                # 索引到 Elasticsearch
                self.es.index(
                    index=index_name,
                    id=document_id,
                    body=transformed
                )
                print(f"{operation.capitalize()}d document: {document_id}")

        elif operation == 'delete':
            # 从 Elasticsearch 删除
            try:
                self.es.delete(index=index_name, id=document_id)
                print(f"Deleted document: {document_id}")
            except Exception as e:
                if "not_found" not in str(e):
                    print(f"Delete error: {e}")

    def load_resume_token(self, collection_name):
        """加载恢复令牌"""
        try:
            with open(f'/tmp/{collection_name}_resume_token.json', 'r') as f:
                return json.load(f)
        except FileNotFoundError:
            return None

    def save_resume_token(self, collection_name, token):
        """保存恢复令牌"""
        try:
            with open(f'/tmp/{collection_name}_resume_token.json', 'w') as f:
                json.dump(token, f)
        except Exception as e:
            print(f"Error saving resume token: {e}")

    def start_sync(self, collections):
        """启动同步"""
        # 先执行全量同步
        for collection in collections:
            self.batch_sync_existing_data(collection)

        # 然后启动变更监听(每个集合一个线程)
        threads = []
        for collection in collections:
            thread = threading.Thread(
                target=self.watch_collection,
                args=(collection,),
                daemon=True
            )
            thread.start()
            threads.append(thread)

        print("Sync service started. Press Ctrl+C to stop.")

        # 等待信号
        signal.signal(signal.SIGINT, self.shutdown)
        signal.signal(signal.SIGTERM, self.shutdown)

        # 保持主线程运行
        while self.running:
            time.sleep(1)

        # 等待所有线程结束
        for thread in threads:
            thread.join(timeout=5)

    def shutdown(self, signum, frame):
        """优雅关闭"""
        print("\nShutting down sync service...")
        self.running = False
        self.mongo_client.close()
        sys.exit(0)

if __name__ == "__main__":
    # 配置
    MONGO_URI = "mongodb://localhost:27017"
    ES_HOSTS = ["http://localhost:9200"]
    DB_NAME = "mydb"
    COLLECTIONS = ["products", "users"]

    # 启动同步服务
    sync_service = MongoToElasticSync(MONGO_URI, ES_HOSTS, DB_NAME)
    sync_service.start_sync(COLLECTIONS)
4.2 运行 Python 脚本
bash
# 创建 systemd 服务
sudo vi /etc/systemd/system/mongo-es-sync.service
bash
[Unit]
Description=MongoDB to Elasticsearch Sync Service
After=mongod.service elasticsearch.service
Wants=elasticsearch.service

[Service]
Type=simple
User=root
WorkingDirectory=/opt/mongo-es-sync
ExecStart=/usr/bin/python3 /opt/mongo-es-sync/mongodb_change_stream.py
Restart=always
RestartSec=10
StandardOutput=syslog
StandardError=syslog
SyslogIdentifier=mongo-es-sync

[Install]
WantedBy=multi-user.target
bash
# 创建目录和复制脚本
sudo mkdir -p /opt/mongo-es-sync
sudo cp mongodb_change_stream.py /opt/mongo-es-sync/
sudo chmod +x /opt/mongo-es-sync/mongodb_change_stream.py

# 安装 Python 依赖
sudo pip3 install pymongo elasticsearch

# 启动服务
sudo systemctl daemon-reload
sudo systemctl enable mongo-es-sync
sudo systemctl start mongo-es-sync
五、高级配置和优化
5.1 数据映射和转换
bash
// 示例:复杂字段映射
{
  "transformations": {
    "products": {
      // 重命名字段
      "field_mapping": {
        "product_name": "name",
        "product_price": "price",
        "desc": "description"
      },

      // 合并字段
      "combined_fields": {
        "full_text": ["name", "description", "category"]
      },

      // 类型转换
      "type_conversions": {
        "price": "float",
        "stock": "integer",
        "is_active": "boolean"
      },

      // 计算字段
      "calculated_fields": {
        "price_with_tax": "doc.price * 1.1"
      }
    }
  }
}
5.2 错误处理和重试机制
bash
# 重试装饰器
import time
from functools import wraps
from elasticsearch.exceptions import ConnectionError, TransportError

def retry_on_failure(max_retries=3, delay=1):
    def decorator(func):
        @wraps(func)
        def wrapper(*args, **kwargs):
            for attempt in range(max_retries):
                try:
                    return func(*args, **kwargs)
                except (ConnectionError, TransportError) as e:
                    if attempt == max_retries - 1:
                        raise e
                    print(f"Attempt {attempt + 1} failed: {e}. Retrying in {delay} seconds...")
                    time.sleep(delay * (attempt + 1))
            return func(*args, **kwargs)
        return wrapper
    return decorator

# 使用重试
@retry_on_failure(max_retries=5, delay=2)
def sync_document_to_es(doc, index_name):
    es.index(index=index_name, id=doc['_id'], body=doc)
5.3 监控和告警
bash
# 监控脚本
#!/bin/bash
# monitor_sync.sh

MONGO_CONNECTOR_PID=$(systemctl status mongo-connector | grep "Main PID" | awk '{print $3}')
LOG_FILE="/var/log/mongo-connector/mongo-connector.log"
ALERT_EMAIL="admin@example.com"

# 检查服务状态
check_service() {
    service=$1
    if ! systemctl is-active --quiet $service; then
        echo "Service $service is down!" | mail -s "Sync Alert" $ALERT_EMAIL
        systemctl restart $service
    fi
}

# 检查日志错误
check_errors() {
    error_count=$(tail -100 $LOG_FILE | grep -c "ERROR")
    if [ $error_count -gt 10 ]; then
        echo "Found $error_count errors in sync log" | mail -s "Sync Error Alert" $ALERT_EMAIL
    fi
}

# 检查同步延迟
check_lag() {
    # 获取 MongoDB oplog 最新时间
    mongo_time=$(mongo --quiet --eval "db.oplog.rs.find().sort({ts:-1}).limit(1).forEach(function(d){print(d.ts.getTime())})")

    # 获取同步器处理的最后时间
    sync_time=$(tail -100 $LOG_FILE | grep "processed timestamp" | tail -1 | awk -F'=' '{print $2}')

    if [ -n "$mongo_time" ] && [ -n "$sync_time" ]; then
        lag=$(( (mongo_time - sync_time) / 1000 ))
        if [ $lag -gt 300 ]; then  # 5分钟延迟
            echo "Sync lag is $lag seconds" | mail -s "Sync Lag Alert" $ALERT_EMAIL
        fi
    fi
}

# 执行检查
check_service mongo-connector
check_service elasticsearch
check_errors
check_lag
bash
# 添加到 crontab
crontab -e
# 每5分钟检查一次
*/5 * * * * /opt/scripts/monitor_sync.sh
六、性能优化建议
6.1 MongoDB 优化
bash
// 创建索引加速查询
db.products.createIndex({ "last_modified": -1 })
db.products.createIndex({ "status": 1, "last_modified": -1 })

// 优化查询
db.products.find({
  status: "active",
  last_modified: { $gte: new Date("2023-01-01") }
}).sort({ last_modified: -1 }).limit(1000)
6.2 Elasticsearch 优化
bash
# 优化索引设置
curl -X PUT "localhost:9200/products_index/_settings" -H 'Content-Type: application/json' -d'
{
  "index": {
    "refresh_interval": "30s",
    "number_of_replicas": 1,
    "translog": {
      "sync_interval": "5s",
      "durability": "async"
    }
  }
}'

# 使用 bulk API 提高性能
curl -X POST "localhost:9200/_bulk" -H 'Content-Type: application/json' -d'
{ "index" : { "_index" : "products", "_id" : "1" } }
{ "name": "Product 1", "price": 100 }
{ "index" : { "_index" : "products", "_id" : "2" } }
{ "name": "Product 2", "price": 200 }
'
6.3 网络和硬件优化
bash
# 调整网络参数
sudo sysctl -w net.core.somaxconn=65535
sudo sysctl -w net.ipv4.tcp_max_syn_backlog=65535

# 使用 SSD 存储
# 确保 MongoDB 和 Elasticsearch 数据目录在 SSD 上
七、故障排查
7.1 常见问题及解决
- 连接失败
bash
# 检查 MongoDB 连接
mongo --host localhost --port 27017 --eval "db.adminCommand('ping')"

# 检查 Elasticsearch 连接
curl -X GET "localhost:9200/_cluster/health"

# 检查防火墙
sudo firewall-cmd --list-all
sudo firewall-cmd --add-port=27017/tcp --permanent
sudo firewall-cmd --add-port=9200/tcp --permanent
sudo firewall-cmd --reload- 同步延迟
bash
# 查看 MongoDB oplog 大小
mongo --eval "db.oplog.rs.stats()"

# 增加 oplog 大小(如果需要)
mongo --eval "db.adminCommand({replSetResizeOplog: 1, size: 10240})"

# 查看同步器状态
tail -f /var/log/mongo-connector/mongo-connector.log | grep "lag"- 内存不足
bash
# 查看内存使用
free -h
top -p $(pgrep -f mongo-connector)

# 调整 JVM 设置
# 编辑 /etc/mongo-connector/jvm.options
-Xms512m
-Xmx1024m