1、下载
使用git加速:https://gh-proxy.com/
bash
# 下载
git clone https://github.com/PX4/PX4-Autopilot.git

# 切换分支到v1.14.0
git checkout v1.14.0

# 校验:是否是1.14
git describe --tags --exact-match HEAD
2、替换链接
bash
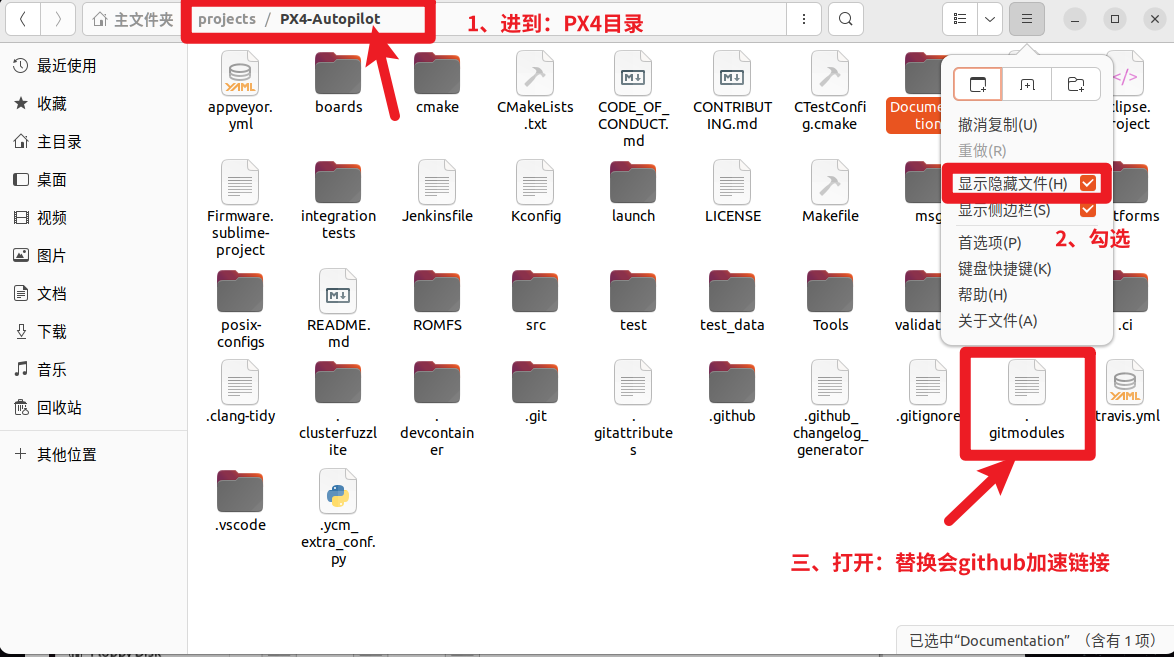
# 将所有 github.com 替换为 gh-proxy.org
git config --global url."https://gh-proxy.org/https://github.com/".insteadOf "https://github.com/"

# 然后更新子模块
git submodule sync --recursive
git submodule update --init --recursive- 也可以:手动自己去替换,建议用上面的命令,替换比较彻底。
3、设置 python 清华镜像
python
pip config set global.index-url https://pypi.tuna.tsinghua.edu.cn/simple

pip config set global.trusted-host pypi.tuna.tsinghua.edu.cn

pip config list
4、执行
bash
# 执行 px4 脚本
./Tools/setup/ubuntu.sh
5、执行过程中,卡在:下载
手动去下载:gcc-arm-none-eabi-9-2020-q2-update-x86_64-linux.tar.bz2
替换:ubuntu.sh 中的链接
- 移动下载好的文件:
bash
mv gcc-arm-none-eabi-9-2020-q2-update-x86_64-linux.tar.bz2 \
   gcc-arm-none-eabi-9-2020-q2-update-linux.tar.bz2
修改 ubuntu.sh 脚本, 找到
bash
else
    echo "Installing arm-none-eabi-gcc-${NUTTX_GCC_VERSION}";
    wget -O /tmp/gcc-arm-none-eabi-${NUTTX_GCC_VERSION}-linux.tar.bz2 https://armkeil.blob.core.windows.net/developer/Files/downloads/gnu-rm/${NUTTX_GCC_VERSION_SHORT}/gcc-arm-none-eabi-${NUTTX_GCC_VERSION}-${INSTALL_ARCH}-linux.tar.bz2 && \
sudo tar -jxf /tmp/gcc-arm-none-eabi-${NUTTX_GCC_VERSION}-linux.tar.bz2 -C /opt/;- 替换为(注释掉 wget,改用本地文件):
bash
else
    echo "Installing arm-none-eabi-gcc-${NUTTX_GCC_VERSION} from local file";
    LOCAL_TARBALL="${DIR}/gcc-arm-none-eabi-${NUTTX_GCC_VERSION}-linux.tar.bz2"
    if [ ! -f "$LOCAL_TARBALL" ]; then
        echo "ERROR: Local toolchain tarball not found at $LOCAL_TARBALL"
        echo "Please place the file in the same directory as ubuntu.sh"
        exit 1
    fi
    sudo tar -jxf "$LOCAL_TARBALL" -C /opt/
6、再次执行
bash
./Tools/setup/ubuntu.sh8、运行 jmavsim
bash
xcd ~/projects/PX4-Autopilotmake px4_sitl jmavsimbash- 进入px4命令行窗口后:可以执行如下测试命令
bash
# 解锁(让电机可以转动)
commander unlock
# 上锁(停止电机)
commander lock
# 切换到位置控制模式(需 GPS 有效,在 jmavsim 中默认有 GPS)
# 自动起飞(如果已解锁且处于 position 模式)
commander takeoff
# 触发自动降落
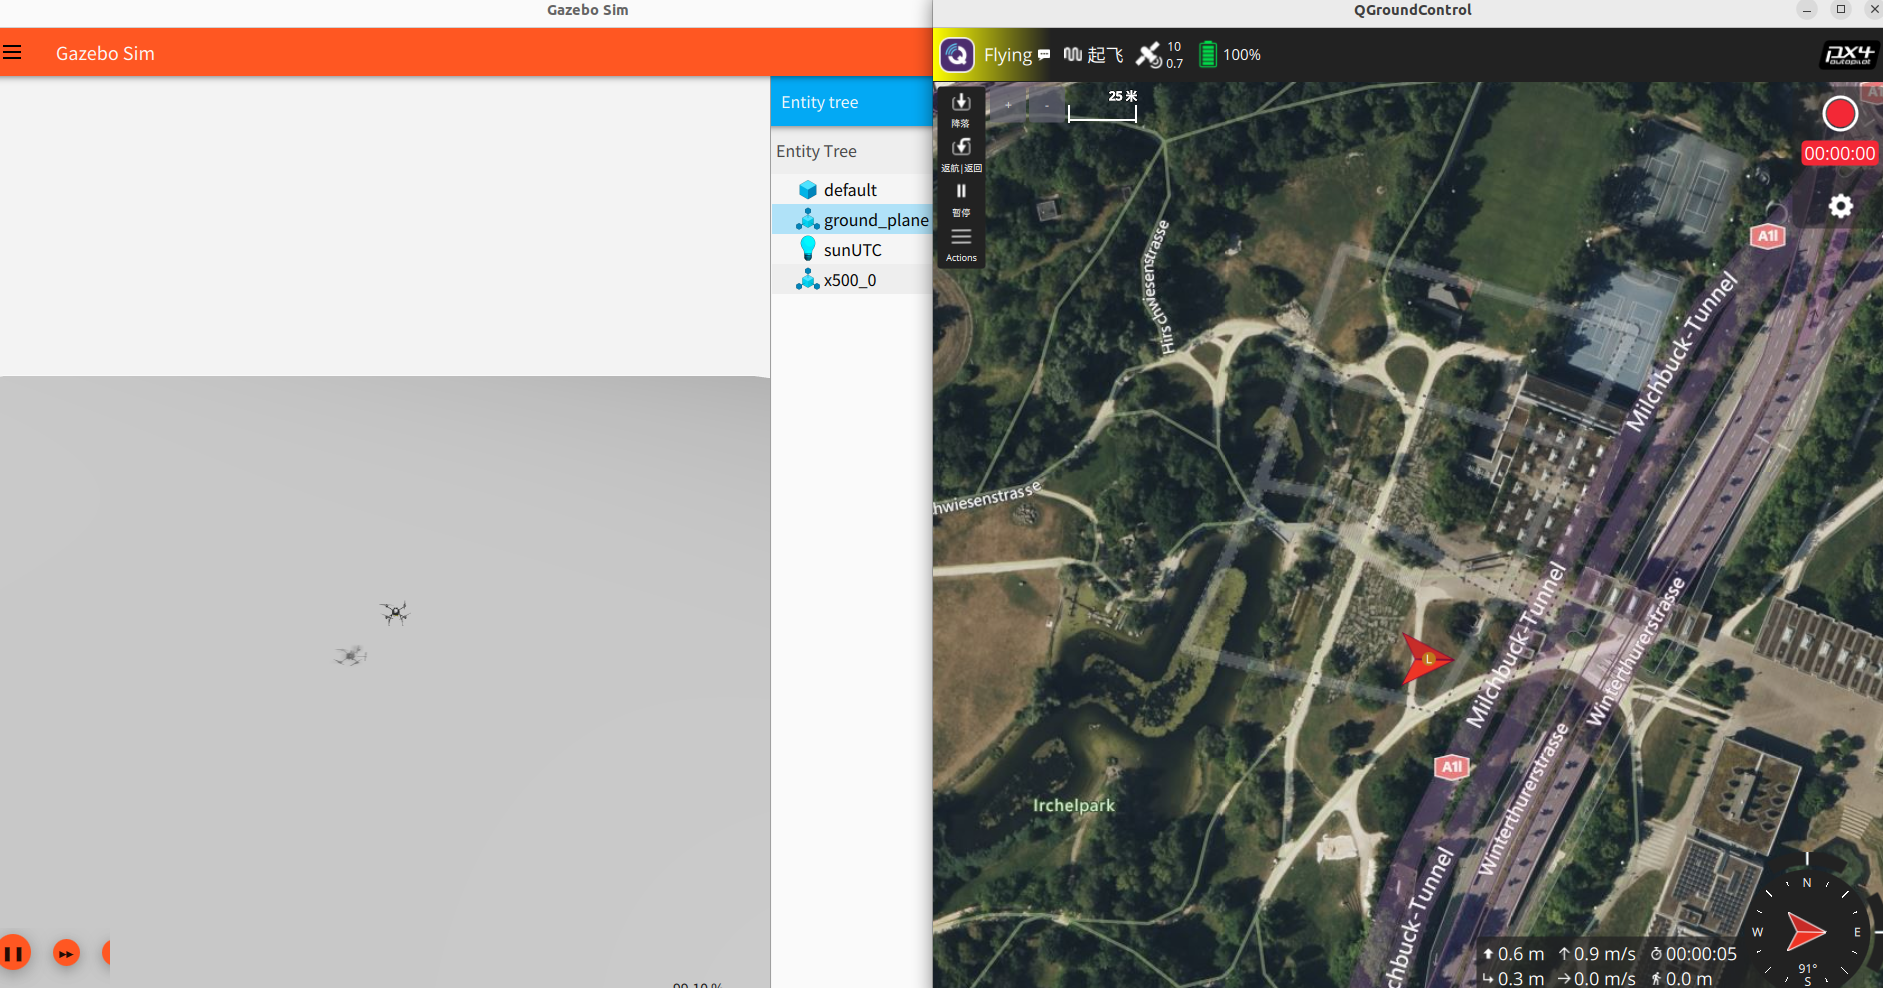
commander land 9、运行gazebo
bash
cd ~/projects/PX4-Autopilot

make px4_sitl gz_x500
10、安装QGC
游览器安装:https://d176tv9ibo4jno.cloudfront.net/latest/QGroundControl-x86_64.AppImage
bash
# 授权
chmod +x QGroundControl-x86_64.AppImage

# 执行
./QGroundControl-x86_64.AppImage