前言:
书接上回,我们在上一章详细讲解了视觉学习中的数据预处理以及其相应的label的格式类型互转的特性,之后又进一步对数据增强的方法进行进一步的总结,接下来这一章是延续上一章节的数据增强方法进行拓展。
1.像素变换类数据增强锦集
⭐1.BGR<->RGB/BGR->灰度图
核心逻辑:
BGR -> RGB->灰度图
python
import cv2
import os
import numpy as np

# ====================== 核心函数:BGR转灰度图 ======================
def bgr2gray(img_bgr: np.ndarray, to_3ch: bool = True) -> np.ndarray:
    """
    极简核心:BGR转灰度图(可选转为3通道适配模型输入)
    :param img_bgr: OpenCV读取的BGR格式图像(H,W,C)
    :param to_3ch: 是否转为3通道(True=模型兼容,False=单通道)
    :return: 灰度图(单/3通道)
    """
    img_gray = cv2.cvtColor(img_bgr, cv2.COLOR_BGR2GRAY)
    # 3通道转换(重复单通道数据)
    if to_3ch:
        return cv2.cvtColor(img_gray, cv2.COLOR_GRAY2BGR)
    return img_gray

# ====================== 核心调用示例 ======================
if __name__ == "__main__":
    # 1. 配置路径(仅改这里)
    IMG_PATH = r"C:\Users\Excub\workspace\Pytorch\12.08_cv\perspective_data\ok.jpg"
    SAVE_DIR = r"C:\Users\Excub\workspace\Pytorch\12.08_cv\perspective_data\pixel_aug_results"

    # 2. 加载原图(极简版)
    img_bgr = cv2.imread(IMG_PATH)
    if img_bgr is None:
        raise FileNotFoundError(f"无法读取图片:{IMG_PATH}")

    # 3. 核心调用:转灰度图(3通道,适配模型)
    img_gray_3ch = bgr2gray(img_bgr, to_3ch=True)
    # 可选:转单通道灰度图
    # img_gray_1ch = bgr2gray(img_bgr, to_3ch=False)

    # 4. 保存结果(仅保留核心保存)
    os.makedirs(SAVE_DIR, exist_ok=True)
    img_basename = os.path.splitext(os.path.basename(IMG_PATH))[0]
    cv2.imwrite(f"{SAVE_DIR}/{img_basename}_gray_3ch.jpg", img_gray_3ch)
    # cv2.imwrite(f"{SAVE_DIR}/{img_basename}_gray_1ch.jpg", img_gray_1ch)  # 单通道保存

    print(f"转灰度图完成!保存路径:{SAVE_DIR}/{img_basename}_gray_3ch.jpg")
    print("核心要点:")
    print("1. to_3ch=True:灰度图转为3通道,可直接输入要求3通道的模型;")
    print("2. to_3ch=False:输出单通道灰度图,仅保留亮度信息;")
    print("3. 无色彩失真:灰度转换仅丢失色度信息,亮度特征完整保留。")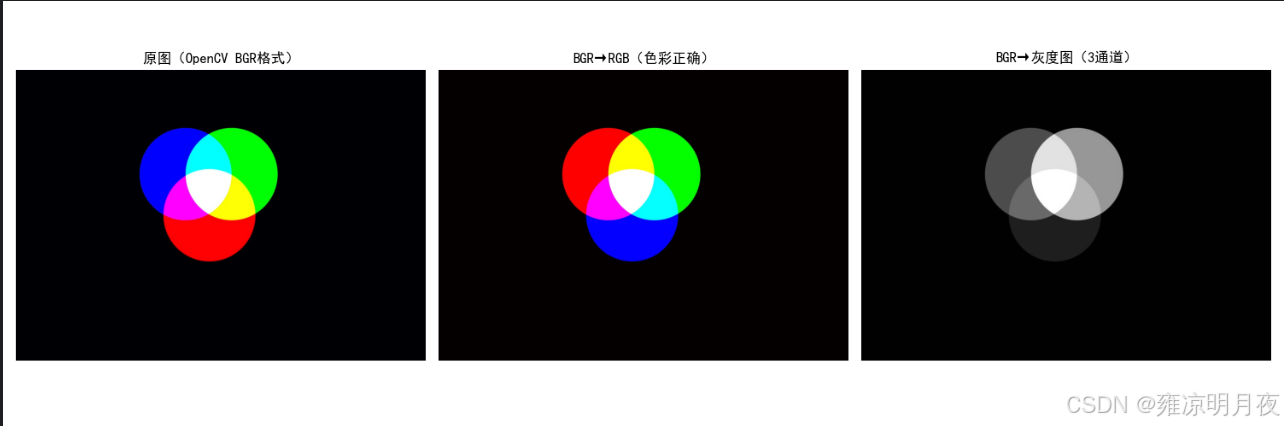
2.全局直方图均衡化
python
cv2.equalizeHist(gray_img) # 仅支持单通道(灰度/Y通道)核心代码:
python
def global_histogram_equalization(img_bgr: np.ndarray) -> tuple[np.ndarray, np.ndarray]:
    """
    全局直方图均衡化(工业级实现:区分灰度/彩色图)
    Args:
        img_bgr: BGR格式原图
    Returns:
        img_gray_eq: 灰度图均衡化结果(3通道)
        img_color_eq: 彩色图均衡化结果(仅均衡化亮度通道,保留色彩)
    """
    # ========== 1. 灰度图直方图均衡化 ==========
    img_gray = cv2.cvtColor(img_bgr, cv2.COLOR_BGR2GRAY)
    img_gray_eq = cv2.equalizeHist(img_gray)  # 核心API:全局直方图均衡化
    img_gray_eq_3ch = cv2.cvtColor(img_gray_eq, cv2.COLOR_GRAY2BGR)  # 转3通道
    print("完成灰度图全局直方图均衡化(提升整体对比度)")

    # ========== 2. 彩色图直方图均衡化(关键:仅处理亮度通道) ==========
    # 彩色图不能直接均衡化BGR通道(会色彩失真),需转YCrCb空间(Y=亮度,Cr/Cb=色彩)
    img_ycrcb = cv2.cvtColor(img_bgr, cv2.COLOR_BGR2YCrCb)
    # 仅对亮度通道(Y)做均衡化
    img_ycrcb[:, :, 0] = cv2.equalizeHist(img_ycrcb[:, :, 0])
    # 转回BGR空间
    img_color_eq = cv2.cvtColor(img_ycrcb, cv2.COLOR_YCrCb2BGR)
    print("完成彩色图全局直方图均衡化(仅均衡化亮度通道,无色彩失真)")

    return img_gray_eq_3ch, img_color_eq
3.自适应均衡化
cv2.createCLAHE()(区别于全局均衡化的cv2.equalizeHist())
python
import cv2
import numpy as np

def adaptive_histogram_equalization(img_bgr: np.ndarray) -> tuple[np.ndarray, np.ndarray]:
    """
    自适应区域直方图均衡化(核心方法)
    关键参数:
    - clipLimit=2.0:限制对比度,避免过度增强放大噪声
    - tileGridSize=(8,8):分块大小,将图像分为8×8的小区域分别均衡化
    """
    # ========== 1. 灰度图自适应均衡化 ==========
    img_gray = cv2.cvtColor(img_bgr, cv2.COLOR_BGR2GRAY)
    # 创建CLAHE对象(核心API)
    clahe = cv2.createCLAHE(clipLimit=2.0, tileGridSize=(8, 8))
    img_gray_clahe = clahe.apply(img_gray)  # 应用自适应均衡化
    img_gray_clahe_3ch = cv2.cvtColor(img_gray_clahe, cv2.COLOR_GRAY2BGR)

    # ========== 2. 彩色图自适应均衡化(仅亮度通道) ==========
    img_ycrcb = cv2.cvtColor(img_bgr, cv2.COLOR_BGR2YCrCb)
    img_ycrcb[:, :, 0] = clahe.apply(img_ycrcb[:, :, 0])  # 仅处理亮度通道
    img_color_clahe = cv2.cvtColor(img_ycrcb, cv2.COLOR_YCrCb2BGR)

    return img_gray_clahe_3ch, img_color_clahe

# ------------------- 核心调用示例 -------------------
if __name__ == "__main__":
    # 1. 加载原图
    IMG_PATH = r"C:\Users\Excub\workspace\Pytorch\12.08_cv\perspective_data\ok.jpg"
    img_origin = cv2.imread(IMG_PATH, cv2.IMREAD_COLOR)

    # 2. 核心调用:自适应直方图均衡化
    img_gray_clahe, img_color_clahe = adaptive_histogram_equalization(img_origin)

    # 3. 保存结果(可选,用于对比)
    SAVE_DIR = r"C:\Users\Excub\workspace\Pytorch\12.08_cv\perspective_data\pixel_aug_results"
    cv2.imwrite(f"{SAVE_DIR}/ok_gray_adaptive_hist_eq.jpg", img_gray_clahe)
    cv2.imwrite(f"{SAVE_DIR}/ok_color_adaptive_hist_eq.jpg", img_color_clahe)

    print("自适应直方图均衡化完成!")
    print("关键差异:")
    print("1. 对比全局均衡化:局部明暗不均区域(如部分逆光)会更自然,无过曝/噪声放大;")
    print("2. clipLimit越大:对比度增强越明显,但易放大噪声;建议2.0(工业常用);")
    print("3. tileGridSize越小:分块越细,局部适配越好,但计算量略增;8×8为最优平衡。")
4.随机调节亮度
random_brightness(随机调整亮度)
python
import cv2
import numpy as np
import random

def random_brightness(img_bgr: np.ndarray, brightness_range=(0.5, 1.5)) -> np.ndarray:
    """
    随机调整亮度(核心方法)
    关键约束:
    - 亮度因子限制在 0.5~1.5(避免过暗/过曝)
    - 像素值强制 clip 到 0~255,防止异常值
    """
    # 随机生成亮度因子(0.5~1.5 倍)
    brightness = random.uniform(*brightness_range)
    # 转为 float 计算(避免 uint8 溢出)
    img_float = img_bgr.astype(np.float32)
    # 调整亮度(所有通道同比例调整,保留色彩)
    img_bright = img_float * brightness
    # 限制像素值在 0~255 之间(核心约束)
    img_bright = np.clip(img_bright, 0, 255).astype(np.uint8)
    return img_bright

# ------------------- 核心调用示例 -------------------
if __name__ == "__main__":
    # 1. 加载原图
    IMG_PATH = r"C:\Users\Excub\workspace\Pytorch\12.08_cv\perspective_data\ok.jpg"
    img_origin = cv2.imread(IMG_PATH, cv2.IMREAD_COLOR)

    # 2. 核心调用:随机调整亮度(0.5~1.5 倍)
    img_bright = random_brightness(img_origin, brightness_range=(0.5, 1.5))

    # 3. 保存结果(用于对比)
    SAVE_DIR = r"C:\Users\Excub\workspace\Pytorch\12.08_cv\perspective_data\pixel_aug_results"
    cv2.imwrite(f"{SAVE_DIR}/ok_random_brightness.jpg", img_bright)

    print("随机亮度调整完成!")
    print("关键要点:")
    print("1. 亮度因子建议 0.5~1.5:<0.3 过暗丢失细节,>1.8 过曝;")
    print("2. 所有通道同比例调整:避免色彩偏移(如仅调R通道导致偏色);")
    print("3. 必须 clip 像素值:uint8 范围 0~255,溢出会出现伪色/黑块;")
    print("4. 适用场景:模拟强光/弱光下的工业目标(如车间灯光明暗变化)。")
5.图像像素取反
核心调用方式:
python# 仅执行像素取反(直接使用) img_bgr = cv2.imread(IMG_PATH) img_inverted = img_bitwise_not(img_bgr) cv2.imwrite("ok_bitwise_not.jpg", img_inverted)
python
import cv2
import os
import numpy as np

# ====================== 核心函数:图像像素取反(反色) ======================
def img_bitwise_not(img_bgr: np.ndarray) -> np.ndarray:
    """
    极简核心:OpenCV BGR图像像素取反(反色)
    :param img_bgr: OpenCV读取的BGR格式图像(H,W,C)
    :return: 反色后的BGR图像
    """
    # 核心API:cv2.bitwise_not 直接对像素取反(uint8范围0~255,等价于 255 - 像素值)
    img_inverted = cv2.bitwise_not(img_bgr)
    return img_inverted

# ====================== 极简加载/保存标签(取反无需修改标签,仅拷贝) ======================
def copy_yolo_label(src_label_path: str, dst_label_path: str):
    """复制原标签(取反不改变目标框,无需修正)"""
    if os.path.exists(src_label_path):
        import shutil
        shutil.copy(src_label_path, dst_label_path)
        print(f"标签已拷贝:{dst_label_path}")

# ====================== 核心调用示例 ======================
if __name__ == "__main__":
    # 1. 配置路径(仅改这里)
    IMG_PATH = r"C:\Users\Excub\workspace\Pytorch\12.08_cv\perspective_data\ok.jpg"
    LABEL_PATH = r"C:\Users\Excub\workspace\Pytorch\12.08_cv\perspective_data\ok.txt"  # 可选:原YOLO标签
    SAVE_DIR = r"C:\Users\Excub\workspace\Pytorch\12.08_cv\perspective_data\pixel_aug_results"

    # 2. 加载原图(极简版)
    img_bgr = cv2.imread(IMG_PATH)
    if img_bgr is None:
        raise FileNotFoundError(f"无法读取图片:{IMG_PATH}")

    # 3. 核心调用:像素取反
    img_inverted = img_bitwise_not(img_bgr)

    # 4. 保存结果
    os.makedirs(SAVE_DIR, exist_ok=True)
    img_basename = os.path.splitext(os.path.basename(IMG_PATH))[0]
    cv2.imwrite(f"{SAVE_DIR}/{img_basename}_bitwise_not.jpg", img_inverted)

    # 5. 拷贝标签(取反不改变目标框,直接复用原标签)
    if os.path.exists(LABEL_PATH):
        copy_yolo_label(LABEL_PATH, f"{SAVE_DIR}/{img_basename}_bitwise_not.txt")

    print(f"像素取反完成!保存路径:{SAVE_DIR}/{img_basename}_bitwise_not.jpg")
    print("核心要点:")
    print("1. 核心效果:像素值取反(如黑色→白色、红色→青色),增强目标与背景对比度;")
    print("2. 标签处理:无需修正YOLO框(仅像素值变化,目标位置/大小不变);")
    print("3. 适用场景:深色背景下的浅色目标、黑白对比强烈的工业场景(如印刷字符);")
    print("4. 无参数调整:纯像素值反转,无超参需调优。")
6.减去像素均值(subtract_mean)
核心调用:
python# 自动计算全局均值并减去 img_bgr = cv2.imread(IMG_PATH) img_sub_mean = subtract_mean(img_bgr, mean=None) cv2.imwrite("ok_sub_mean.jpg", img_sub_mean)作用:像素级归一化操作
1. 消除全局光照偏移的影响
2. 降低数据分布差异,提升模型泛化性
场景:
1. 光照不稳定的工业 / 户外视觉场景(核心场景)
- 工业检测:车间零件 / 包装盒拍摄(灯光明暗、角度导致光照不均);
- 户外视觉:交通摄像头、无人机图像(早晚 / 阴天 / 晴天光照差异大);
- 安防监控:夜间 / 白天的行人 / 车辆检测(全局亮度波动大)。
2. 基于预训练模型的迁移学习(必用场景)
只要你在分类、检测、分割任务中复用「ImageNet 预训练权重」,必须将输入图像减去预训练时的固定均值(如 ImageNet 均值),否则模型的底层特征提取(如边缘、纹理)会完全偏离预期。例:用 ResNet50 做工业零件缺陷分类,第一步预处理就是
subtract_mean(img, mean=[103.939, 116.779, 123.68])
使用必须要做的事情:
- 必须做
clip约束 :减去均值后可能出现负数像素(如暗区像素值 5,均值 10,结果 - 5),需用np.clip(img_sub_mean, 0, 255)限制到 0~255,否则图像会出现伪色、黑块等异常;- 均值选择要匹配场景 :
- 迁移学习:用预训练模型的固定均值(如 ImageNet);
- 自有数据集训练:计算数据集的全局均值(所有图片的通道均值),而非单张图片均值(代码中
np.mean(img_float, axis=(0,1))是单张均值,批量训练需先算全量均值);- 仅像素值变化,标签无需修改:和像素取反、亮度调整一样,减去均值不改变目标的位置 / 大小,YOLO 标签直接拷贝即可。
python
#!/usr/bin/env python
# -*- coding: utf-8 -*-
"""
@Project :Pytorch
@File :subtract_mean.py
@IDE :PyCharm
@Author :wjj
@Date :2025/12/14 18:56
@Description:
"""
import cv2
import os
import numpy as np


# ====================== 核心函数:减去像素均值 ======================
def subtract_mean(img_bgr: np.ndarray, mean: list = None) -> np.ndarray:
    """
    极简核心:图像减去像素均值(全局/自定义),clip避免像素值异常
    :param img_bgr: OpenCV读取的BGR图像(H,W,C)
    :param mean: 自定义均值 [B, G, R],None则计算图像全局均值
    :return: 减去均值后的BGR图像(uint8)
    """
    # 转为float计算,避免uint8溢出(负数/超界)
    img_float = img_bgr.astype(np.float32)

    # 计算/使用均值
    if mean is None:
        mean = np.mean(img_float, axis=(0, 1))  # 按通道计算全局均值
        print(f"自动计算图像全局均值(B/G/R):{mean.round(2)}")
    else:
        mean = np.array(mean, dtype=np.float32)

    # 核心操作:减去均值 + 约束像素值到0~255
    img_sub_mean = img_float - mean
    img_sub_mean = np.clip(img_sub_mean, 0, 255)  # 避免负数/超255导致图像异常

    # 转回uint8(符合OpenCV保存/模型输入要求)
    return img_sub_mean.astype(np.uint8)


# ====================== 极简标签处理(直接拷贝) ======================
def copy_yolo_label(src_label_path: str, dst_label_path: str):
    """拷贝原标签(均值减法不改变目标框)"""
    if os.path.exists(src_label_path):
        import shutil
        shutil.copy(src_label_path, dst_label_path)


# ====================== 核心调用示例 ======================
if __name__ == "__main__":
    # 1. 配置路径
    IMG_PATH = r"C:\Users\Excub\workspace\Pytorch\12.08_cv\perspective_data\ok.jpg"
    LABEL_PATH = r"C:\Users\Excub\workspace\Pytorch\12.08_cv\perspective_data\ok.txt"  # 可选
    SAVE_DIR = r"C:\Users\Excub\workspace\Pytorch\12.08_cv\perspective_data\pixel_aug_results"

    # 2. 加载原图
    img_bgr = cv2.imread(IMG_PATH)
    if img_bgr is None:
        raise FileNotFoundError(f"无法读取图片:{IMG_PATH}")

    # 3. 核心调用(两种方式可选)
    # 方式1:自动计算全局均值
    img_sub_global_mean = subtract_mean(img_bgr, mean=None)
    # 方式2:使用自定义均值(如ImageNet均值 [103.939, 116.779, 123.68],适配预训练模型)
    # img_sub_custom_mean = subtract_mean(img_bgr, mean=[103.939, 116.779, 123.68])

    # 4. 保存结果
    os.makedirs(SAVE_DIR, exist_ok=True)
    img_basename = os.path.splitext(os.path.basename(IMG_PATH))[0]
    cv2.imwrite(f"{SAVE_DIR}/{img_basename}_sub_global_mean.jpg", img_sub_global_mean)
    # cv2.imwrite(f"{SAVE_DIR}/{img_basename}_sub_custom_mean.jpg", img_sub_custom_mean)

    # 5. 拷贝标签(无需修正)
    if os.path.exists(LABEL_PATH):
        copy_yolo_label(LABEL_PATH, f"{SAVE_DIR}/{img_basename}_sub_global_mean.txt")

    print(f"减去均值完成!保存路径:{SAVE_DIR}/{img_basename}_sub_global_mean.jpg")
    print("核心要点:")
    print("1. 核心作用:降低光照全局偏移影响,提升模型泛化性;")
    print("2. 关键约束:必须clip到0~255,否则负数像素会导致图像偏色/异常;")
    print("3. 均值选择:自定义均值(如ImageNet)适配预训练模型,全局均值适配自有数据;")
    print("4. 标签处理:仅像素值偏移,目标框不变,直接拷贝原标签。")
7.图像锐化增强(拉普拉斯 / 高斯 / 均值)
核心调用:
python# 仅执行高斯锐化(最常用,效果柔和) img_bgr = cv2.imread(IMG_PATH) img_sharpen = image_sharpen(img_bgr, sharpen_type="gaussian", alpha=0.5) cv2.imwrite("ok_gaussian_sharpen.jpg", img_sharpen)其本质作用为:利用 "模糊 / 边缘提取" 的结果反向增强细节。其与去噪的三种模糊效果完全相反。
可以把图像想象成 "一张有纹理的纸":
- 模糊(均值 / 高斯):用手把纸揉平,纹理(细节)变浅(弱化);
- 锐化(均值 / 高斯):把揉平的纸和原纸对比,找出 "变浅的纹理差",再用笔把这些纹理描深(强化);
- 拉普拉斯锐化:直接找到纸的 "轮廓线"(边缘),用笔把轮廓线描粗(强强化)。
场景需求 选模糊(均值 / 高斯) 选锐化(均值 / 高斯 / 拉普拉斯) 图像有颗粒噪声,需降噪 ✅ 均值模糊 ❌ 锐化会放大噪声 低分辨率图,需平滑轮廓 ✅ 高斯模糊 ❌ 锐化会放大像素块 模糊的零件划痕,需清晰 ❌ 模糊会更糊 ✅ 拉普拉斯锐化(强边缘) 印刷字边缘模糊,需柔和增强 ❌ 模糊会更糊 ✅ 高斯锐化(自然无伪影) 纹理对比度低,需强化 ❌ 模糊会降低对比度 ✅ 均值锐化(提升纹理对比)
python
import cv2
import os
import numpy as np


# ====================== 核心函数:多类型图像锐化 ======================
def image_sharpen(img_bgr: np.ndarray, sharpen_type: str = "laplacian", alpha: float = 0.5) -> np.ndarray:
    """
    极简核心:拉普拉斯/高斯/均值锐化(增强边缘/纹理)
    :param img_bgr: OpenCV读取的BGR图像(H,W,C)
    :param sharpen_type: 锐化类型 - laplacian/gaussian/mean
    :param alpha: 锐化强度(0.3~0.7为宜,过强产生伪影)
    :return: 锐化后的BGR图像(uint8)
    """
    # 转为float计算,避免uint8溢出
    img_float = img_bgr.astype(np.float32)

    # 1. 生成模糊/边缘图(不同锐化类型的核心差异)
    if sharpen_type == "laplacian":
        # 拉普拉斯锐化:提取边缘后叠加到原图
        laplacian = cv2.Laplacian(img_float, cv2.CV_32F, ksize=3)  # 3×3核提取边缘
        img_sharpen = img_float + alpha * laplacian
    elif sharpen_type == "gaussian":
        # 高斯锐化:原图 - 高斯模糊图 → 增强细节
        img_blur = cv2.GaussianBlur(img_float, (3, 3), 1.0)  # 3×3高斯核,sigma=1
        img_sharpen = img_float + alpha * (img_float - img_blur)
    elif sharpen_type == "mean":
        # 均值锐化:原图 - 均值模糊图 → 增强对比度
        img_blur = cv2.blur(img_float, (3, 3))  # 3×3均值核
        img_sharpen = img_float + alpha * (img_float - img_blur)
    else:
        raise ValueError(f"无效锐化类型:{sharpen_type},可选laplacian/gaussian/mean")

    # 2. 约束像素值到0~255,避免伪影/溢出
    img_sharpen = np.clip(img_sharpen, 0, 255).astype(np.uint8)
    return img_sharpen


# ====================== 极简标签处理(直接拷贝) ======================
def copy_yolo_label(src_label_path: str, dst_label_path: str):
    """拷贝原标签(锐化不改变目标框)"""
    if os.path.exists(src_label_path):
        import shutil
        shutil.copy(src_label_path, dst_label_path)


# ====================== 核心调用示例 ======================
if __name__ == "__main__":
    # 1. 配置路径
    IMG_PATH = r"C:\Users\Excub\workspace\Pytorch\12.08_cv\jjy.jpg"
    LABEL_PATH = r"C:\Users\Excub\workspace\Pytorch\12.08_cv\perspective_data\ok.txt"  # 可选
    SAVE_DIR = r"C:\Users\Excub\workspace\Pytorch\12.08_cv\out"

    # 2. 加载原图
    img_bgr = cv2.imread(IMG_PATH)
    if img_bgr is None:
        raise FileNotFoundError(f"无法读取图片:{IMG_PATH}")

    # 3. 核心调用:三种锐化(按需选一种)
    img_laplacian = image_sharpen(img_bgr, sharpen_type="laplacian", alpha=0.5)  # 拉普拉斯(边缘最强)
    img_gaussian = image_sharpen(img_bgr, sharpen_type="gaussian", alpha=0.5)  # 高斯(最柔和)
    img_mean = image_sharpen(img_bgr, sharpen_type="mean", alpha=0.5)  # 均值(对比度增强)

    # 4. 保存结果
    os.makedirs(SAVE_DIR, exist_ok=True)
    img_basename = os.path.splitext(os.path.basename(IMG_PATH))[0]
    cv2.imwrite(f"{SAVE_DIR}/{img_basename}_laplacian_sharpen.jpg", img_laplacian)
    cv2.imwrite(f"{SAVE_DIR}/{img_basename}_gaussian_sharpen.jpg", img_gaussian)
    cv2.imwrite(f"{SAVE_DIR}/{img_basename}_mean_sharpen.jpg", img_mean)

    # 5. 拷贝标签(无需修正)
    if os.path.exists(LABEL_PATH):
        copy_yolo_label(LABEL_PATH, f"{SAVE_DIR}/{img_basename}_laplacian_sharpen.txt")

    print("三种锐化完成!保存路径:", SAVE_DIR)
    print("核心要点:")
    print("1. 锐化强度alpha:0.3~0.7为宜,>0.8易产生锯齿/伪影,<0.2效果不明显;")
    print("2. 类型选择:")
    print("   - laplacian:边缘增强最强(适合模糊的目标边缘,如远距离小目标);")
    print("   - gaussian:锐化最柔和(适合低分辨率/运动模糊图像,无明显伪影);")
    print("   - mean:对比度增强(适合纹理模糊的目标,如印刷字符/零件纹理);")
    print("3. 适用场景:低分辨率、运动模糊、边缘模糊的工业目标(如包装盒文字、零件划痕);")
    print("4. 标签处理:仅增强纹理,目标框不变,直接拷贝原标签。")
8.Sobel 边缘融合增强
本质:
Sobel 边缘提取 + 边缘融合到原图核心逻辑(强化目标边缘特征)
python# 仅执行双方向Sobel边缘融合(最常用) img_bgr = cv2.imread(IMG_PATH) img_sobel = sobel_edge_to_image(img_bgr, edge_dir="both", alpha=0.5) cv2.imwrite("ok_sobel_both.jpg", img_sobel)
- Sobel 算子是 "边缘提取刀",高斯算子是 "降噪洗菜盆",二者都是底层工具;
- Sobel 边缘融合增强是 "用刀 + 盆(可选)做一道边缘更清晰的菜",是上层应用流程;
python
#!/usr/bin/env python
# -*- coding: utf-8 -*-
"""
@Project :Pytorch
@File :sobel_.py
@IDE :PyCharm
@Author :wjj
@Date :2025/12/14 19:23
@Description:
"""
import cv2
import os
import numpy as np


# ====================== 核心函数:Sobel边缘提取+融合到原图 ======================
def sobel_edge_to_image(img_bgr: np.ndarray, edge_dir: str = "both", alpha: float = 0.5) -> np.ndarray:
    """
    极简核心:Sobel边缘提取 + 边缘图融合到原图(强化边缘特征)
    :param img_bgr: OpenCV读取的BGR图像(H,W,C)
    :param edge_dir: 边缘检测方向 - x(垂直)/y(水平)/both(双方向)
    :param alpha: 边缘融合强度(0.3~0.8为宜,过强掩盖原图细节)
    :return: 融合边缘后的BGR图像(uint8)
    """
    # 1. 转为灰度图(Sobel仅支持单通道)
    img_gray = cv2.cvtColor(img_bgr, cv2.COLOR_BGR2GRAY).astype(np.float32)

    # 2. Sobel边缘提取(核心API:cv2.Sobel,一阶导数边缘检测)
    if edge_dir == "x":
        # x方向:检测垂直边缘(如文字竖线、零件竖边)
        sobel_edge = cv2.Sobel(img_gray, cv2.CV_32F, dx=1, dy=0, ksize=3)
    elif edge_dir == "y":
        # y方向:检测水平边缘(如文字横线、零件横边)
        sobel_edge = cv2.Sobel(img_gray, cv2.CV_32F, dx=0, dy=1, ksize=3)
    elif edge_dir == "both":
        # 双方向:合并x/y边缘(最常用,完整边缘)
        sobel_x = cv2.Sobel(img_gray, cv2.CV_32F, dx=1, dy=0, ksize=3)
        sobel_y = cv2.Sobel(img_gray, cv2.CV_32F, dx=0, dy=1, ksize=3)
        sobel_edge = cv2.addWeighted(sobel_x, 0.5, sobel_y, 0.5, 0)
    else:
        raise ValueError(f"无效边缘方向:{edge_dir},可选x/y/both")

    # 3. 边缘图归一化(0~255)+ 转为3通道(匹配原图)
    sobel_edge = np.clip(cv2.normalize(sobel_edge, None, 0, 255, cv2.NORM_MINMAX), 0, 255)
    sobel_edge_3ch = cv2.cvtColor(sobel_edge.astype(np.uint8), cv2.COLOR_GRAY2BGR)

    # 4. 边缘图融合到原图(核心:原图为主,边缘图为辅)
    img_float = img_bgr.astype(np.float32)
    edge_float = sobel_edge_3ch.astype(np.float32)
    img_fused = (1 - alpha) * img_float + alpha * edge_float  # 加权融合
    img_fused = np.clip(img_fused, 0, 255).astype(np.uint8)

    return img_fused


# ====================== 极简标签处理(直接拷贝) ======================
def copy_yolo_label(src_label_path: str, dst_label_path: str):
    """拷贝原标签(边缘融合不改变目标框)"""
    if os.path.exists(src_label_path):
        import shutil
        shutil.copy(src_label_path, dst_label_path)


# ====================== 核心调用示例 ======================
if __name__ == "__main__":
    # 1. 配置路径
    IMG_PATH = r"C:\Users\Excub\workspace\Pytorch\12.08_cv\jjy.jpg"
    LABEL_PATH = r"C:\Users\Excub\workspace\Pytorch\12.08_cv\perspective_data\ok.txt"  # 可选
    SAVE_DIR = r"C:\Users\Excub\workspace\Pytorch\12.08_cv\out\sobel"

    # 2. 加载原图
    img_bgr = cv2.imread(IMG_PATH)
    if img_bgr is None:
        raise FileNotFoundError(f"无法读取图片:{IMG_PATH}")

    # 3. 核心调用(按需选方向)
    img_sobel_x = sobel_edge_to_image(img_bgr, edge_dir="x", alpha=0.5)  # 垂直边缘
    img_sobel_y = sobel_edge_to_image(img_bgr, edge_dir="y", alpha=0.5)  # 水平边缘
    img_sobel_both = sobel_edge_to_image(img_bgr, edge_dir="both", alpha=0.5)  # 双方向(最常用)

    # 4. 保存结果
    os.makedirs(SAVE_DIR, exist_ok=True)
    img_basename = os.path.splitext(os.path.basename(IMG_PATH))[0]
    cv2.imwrite(f"{SAVE_DIR}/{img_basename}_sobel_x.jpg", img_sobel_x)
    cv2.imwrite(f"{SAVE_DIR}/{img_basename}_sobel_y.jpg", img_sobel_y)
    cv2.imwrite(f"{SAVE_DIR}/{img_basename}_sobel_both.jpg", img_sobel_both)

    # 5. 拷贝标签(无需修正)
    if os.path.exists(LABEL_PATH):
        copy_yolo_label(LABEL_PATH, f"{SAVE_DIR}/{img_basename}_sobel_both.txt")

    print("Sobel边缘融合完成!保存路径:", SAVE_DIR)
    print("核心要点:")
    print("1. 边缘方向选择:")
    print("   - x方向:强化垂直边缘(如包装盒竖边、文字竖线);")
    print("   - y方向:强化水平边缘(如包装盒横边、文字横线);")
    print("   - both:完整强化所有边缘(工业场景首选);")
    print("2. 强度alpha:0.3~0.8为宜,>0.8会掩盖原图纹理,<0.3边缘增强不明显;")
    print("3. 适用场景:边缘模糊的工业目标(如低分辨率零件边缘、印刷字符轮廓);")
    print("4. 核心差异:Sobel是一阶导数边缘(柔和),拉普拉斯是二阶(锐利),Sobel更适合工业模糊图。")
2.图像融合 / 拼接类数据增强锦集
1.MixUp 数据增强
核心:将两张图按照一定的权重进行融合为一张图
核心代码:
python# 仅执行MixUp融合(λ=0.5) img1 = cv2.imread(IMG1_PATH) img2 = cv2.imread(IMG2_PATH) bboxes1 = load_yolo_bboxes(LABEL1_PATH) bboxes2 = load_yolo_bboxes(LABEL2_PATH) img_mix, bboxes_mix = mix_up_images(img1, img2, bboxes1, bboxes2, lambda_=0.5)
python
#!/usr/bin/env python
# -*- coding: utf-8 -*-
"""
@Project :Pytorch
@File :mixup.py
@IDE :PyCharm
@Author :wjj
@Date :2025/12/14 19:41
@Description:mixup(新增带Box可视化功能)
"""
import cv2
import os
import numpy as np
import random


# ====================== 核心函数:MixUp图像+标签融合 ======================
def mix_up_images(img1: np.ndarray, img2: np.ndarray, bboxes1: np.ndarray, bboxes2: np.ndarray,
                  lambda_: float = None) -> tuple[np.ndarray, np.ndarray]:
    """
    极简核心:两张图像MixUp融合 + YOLO标签合并(检测场景)
    :param img1: 第一张BGR图像(H,W,C)
    :param img2: 第二张BGR图像(需和img1同尺寸)
    :param bboxes1: 第一张图YOLO归一化框 [x,y,w,h],shape=(n,4)
    :param bboxes2: 第二张图YOLO归一化框 [x,y,w,h],shape=(m,4)
    :param lambda_: 融合系数(0~1),None则随机生成(0.3~0.7)
    :return: mix_up后的图像、合并后的YOLO框(n+m,4)
    """
    # 1. 确保两张图尺寸一致(MixUp前提)
    if img1.shape != img2.shape:
        img2 = cv2.resize(img2, (img1.shape[1], img1.shape[0]))

    # 2. 随机生成融合系数λ(0.3~0.7避免某张图占比过高)
    if lambda_ is None:
        lambda_ = random.uniform(0.3, 0.7)

    # 3. 图像加权融合(核心:img1*λ + img2*(1-λ))
    img1_float = img1.astype(np.float32)
    img2_float = img2.astype(np.float32)
    img_mix = lambda_ * img1_float + (1 - lambda_) * img2_float
    img_mix = np.clip(img_mix, 0, 255).astype(np.uint8)

    # 4. 标签合并(检测任务:保留两张图的所有框,无需加权)
    # 分类任务需加权类别概率,检测任务直接合并框即可
    bboxes_mix = np.vstack([bboxes1, bboxes2]) if len(bboxes1) > 0 and len(bboxes2) > 0 else (
        bboxes1 if len(bboxes1) > 0 else bboxes2)

    return img_mix, bboxes_mix


# ====================== 新增:可视化MixUp结果(带Box) ======================
def visualize_mix_up(img_mix: np.ndarray, bboxes_mix: np.ndarray, class_ids: list, save_path: str):
    """
    将合并后的YOLO框绘制到MixUp图像上,保存带框的可视化结果
    :param img_mix: MixUp融合后的BGR图像
    :param bboxes_mix: 合并后的YOLO归一化框 [x,y,w,h]
    :param class_ids: 框对应的类别ID列表
    :param save_path: 可视化结果保存路径
    """
    img_vis = img_mix.copy()
    h, w = img_vis.shape[:2]

    # 定义不同类别的框颜色(区分img1和img2的框)
    class_colors = {0: (0, 255, 0), 1: (0, 0, 255)}  # class0绿色,class1红色

    # 遍历所有框,绘制到图像上
    for cls, box in zip(class_ids, bboxes_mix):
        # YOLO归一化框 → 像素坐标
        x_center, y_center, box_w, box_h = box
        x_center_pix = x_center * w
        y_center_pix = y_center * h
        box_w_pix = box_w * w
        box_h_pix = box_h * h

        # 计算框的左上角/右下角坐标
        x1 = int(x_center_pix - box_w_pix / 2)
        y1 = int(y_center_pix - box_h_pix / 2)
        x2 = int(x_center_pix + box_w_pix / 2)
        y2 = int(y_center_pix + box_h_pix / 2)

        # 绘制矩形框 + 类别标签
        color = class_colors.get(cls, (255, 0, 0))  # 默认蓝色
        cv2.rectangle(img_vis, (x1, y1), (x2, y2), color, 2)
        cv2.putText(img_vis, f"cls{cls}", (x1, y1 - 5), cv2.FONT_HERSHEY_SIMPLEX, 0.5, color, 2)

    # 保存可视化结果
    cv2.imwrite(save_path, img_vis)
    print(f"带Box的MixUp可视化结果已保存:{save_path}")


# ====================== 极简加载/保存YOLO标签 ======================
def load_yolo_bboxes(label_path: str) -> np.ndarray:
    """仅加载YOLO归一化框"""
    bboxes = []
    if os.path.exists(label_path):
        with open(label_path) as f:
            for line in f:
                parts = line.strip().split()
                if len(parts) >= 5: bboxes.append([float(x) for x in parts[1:5]])
    return np.array(bboxes, dtype=np.float32)


def save_yolo_bboxes(label_path: str, class_ids: list, bboxes: np.ndarray):
    """保存MixUp后的YOLO标签(合并两张图的类别+框)"""
    # class_ids需和bboxes长度匹配(如img1的框对应class0,img2的框对应class1)
    with open(label_path, "w") as f:
        for cls, box in zip(class_ids, bboxes):
            f.write(f"{cls} {box[0]:.6f} {box[1]:.6f} {box[2]:.6f} {box[3]:.6f}\n")


# ====================== 核心调用示例 ======================
if __name__ == "__main__":
    # 1. 配置两张图/标签路径(MixUp需至少两张图)
    IMG1_PATH = r"C:\Users\Excub\workspace\Pytorch\12.08_cv\jjy.jpg"
    LABEL1_PATH = r"C:\Users\Excub\workspace\Pytorch\12.08_cv\out\jjy\jjy.txt"  # class 0
    IMG2_PATH = r"C:\Users\Excub\workspace\Pytorch\12.08_cv\jjy1.jpg"
    LABEL2_PATH = r"C:\Users\Excub\workspace\Pytorch\12.08_cv\out\jjy\jjy1.txt"  # class 1
    SAVE_DIR = r"C:\Users\Excub\workspace\Pytorch\12.08_cv\out"

    # 2. 加载两张图+标签
    img1 = cv2.imread(IMG1_PATH)
    img2 = cv2.imread(IMG2_PATH)
    bboxes1 = load_yolo_bboxes(LABEL1_PATH)
    bboxes2 = load_yolo_bboxes(LABEL2_PATH)

    # 3. 核心调用:MixUp融合
    img_mix, bboxes_mix = mix_up_images(img1, img2, bboxes1, bboxes2, lambda_=0.5)

    # 4. 准备合并后的类别ID(img1的框→class0,img2的框→class1)
    class_ids = [0] * len(bboxes1) + [1] * len(bboxes2)

    # 5. 保存结果(原融合图 + 带Box的可视化图)
    os.makedirs(SAVE_DIR, exist_ok=True)
    # 保存纯融合图
    mix_img_path = f"{SAVE_DIR}/mix_up_result.jpg"
    cv2.imwrite(mix_img_path, img_mix)
    # 保存带Box的可视化图
    vis_img_path = f"{SAVE_DIR}/mix_up_result_with_box.jpg"
    visualize_mix_up(img_mix, bboxes_mix, class_ids, vis_img_path)

    # 6. 保存标签
    save_yolo_bboxes(f"{SAVE_DIR}/mix_up_result.txt", class_ids, bboxes_mix)

    print(f"\nMixUp完成!融合系数λ=0.5,合并后框数:{len(bboxes_mix)}")
    print("生成文件列表:")
    print(f"1. 纯融合图像:{mix_img_path}")
    print(f"2. 带Box可视化图像:{vis_img_path}")
    print(f"3. 合并后标签文件:{SAVE_DIR}/mix_up_result.txt")
    print("\n核心要点:")
    print("1. 核心作用:提升模型泛化性,缓解过拟合(尤其小样本工业场景);")
    print("2. 关键约束:两张图需同尺寸(自动resize适配),λ取0.3~0.7效果最优;")
    print("3. 标签处理:检测任务直接合并框,分类任务需加权类别概率;")
    print("4. 可视化说明:class0(img1)框为绿色,class1(img2)框为红色,便于区分来源;")
    print("5. 区别于普通融合:MixUp是随机λ加权,且标签需同步融合,非简单拼接。")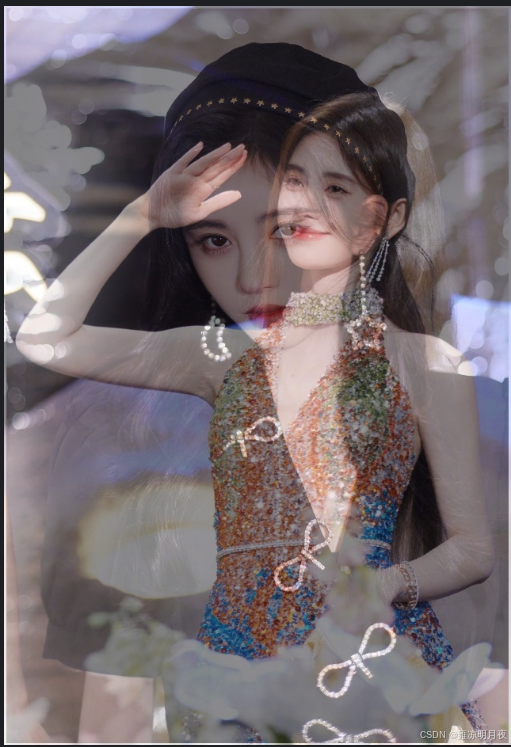

2.mosaic数据增强
本质:将四张图组合到一起,形成新的图,遵循"随机采样+策略约束",裁剪面积要求,保证有效的box留存率。本质就是在数据集中随机选4张图片再组合起来,形成新的图片增加box的密度。
python
#!/usr/bin/env python
# -*- coding: utf-8 -*-
"""
@Project :Pytorch
@File :mosaic.py
@IDE :PyCharm
@Author :wjj
@Date :2025/12/14 22:00
@Description:Mosaic增强:4图固定位置+保留所有Box(修复NameError)
"""
import cv2
import os
import numpy as np


# ====================== 单张图预处理:resize+Box坐标转换 ======================
def process_single_image(img_path, label_path, target_region_size):
    """
    处理单张图:
    1. resize到目标区域尺寸(最终图的1/4)
    2. 转换Box坐标为区域内像素坐标
    3. 返回:处理后的图、区域内Box像素坐标、类别ID
    """
    region_w, region_h = target_region_size
    # 加载图像并resize到区域尺寸
    img = cv2.imread(img_path)
    if img is None:
        img = np.ones((region_h, region_w, 3), dtype=np.uint8) * 128  # 灰色填充
    img = cv2.resize(img, (region_w, region_h))

    # 加载标签并转换为区域内像素坐标
    box_pix = []  # 区域内像素坐标:[x1, y1, x2, y2]
    class_ids = []
    if os.path.exists(label_path):
        with open(label_path, "r") as f:
            for line in f:
                line = line.strip()
                if not line:
                    continue
                parts = line.split()
                try:
                    if len(parts) >= 5:
                        cls_id = int(parts[0])
                        # 归一化坐标→区域内像素坐标
                        xc, yc, bw, bh = [float(p) for p in parts[1:5]]
                        x1 = int((xc - bw / 2) * region_w)
                        y1 = int((yc - bh / 2) * region_h)
                        x2 = int((xc + bw / 2) * region_w)
                        y2 = int((yc + bh / 2) * region_h)
                        # 确保Box在区域内
                        x1 = max(0, x1)
                        y1 = max(0, y1)
                        x2 = min(region_w - 1, x2)
                        y2 = min(region_h - 1, y2)
                        box_pix.append([x1, y1, x2, y2])
                        class_ids.append(cls_id)
                except (ValueError, IndexError):
                    print(f"警告:标签文件{label_path}无效行:{line}")
                    continue
    return img, box_pix, class_ids


# ====================== 核心Mosaic拼接:固定4图位置+保留所有Box ======================
def fixed_position_mosaic(img_paths, label_paths, target_size=(640, 640)):
    """
    固定位置Mosaic:
    - 图0 → 左上区域(0~w/2, 0~h/2)
    - 图1 → 右上区域(w/2~w, 0~h/2)
    - 图2 → 左下区域(0~w/2, h/2~h)
    - 图3 → 右下区域(w/2~w, h/2~h)
    强制保留所有图的Box,转换为最终图的归一化坐标
    """
    assert len(img_paths) == 4 and len(label_paths) == 4, "必须传入4张图/标签"
    final_w, final_h = target_size
    region_w = final_w // 2
    region_h = final_h // 2

    # 步骤1:创建最终Mosaic大图
    mosaic_img = np.zeros((final_h, final_w, 3), dtype=np.uint8)

    # 步骤2:处理每张图并拼接,同时转换Box坐标到最终图
    all_final_boxes = []  # 最终图的归一化Box
    all_class_ids = []  # 最终图的类别ID
    box_counts_per_img = [0, 0, 0, 0]  # 记录每张图的Box数量

    # 图0 → 左上区域
    img0, boxes0, cls0 = process_single_image(img_paths[0], label_paths[0], (region_w, region_h))
    mosaic_img[0:region_h, 0:region_w] = img0
    box_counts_per_img[0] = len(boxes0)
    # 转换Box到最终图坐标
    for (x1, y1, x2, y2), cls in zip(boxes0, cls0):
        xc = (x1 + x2) / 2 / final_w
        yc = (y1 + y2) / 2 / final_h
        bw = (x2 - x1) / final_w
        bh = (y2 - y1) / final_h
        all_final_boxes.append([xc, yc, bw, bh])
        all_class_ids.append(cls)

    # 图1 → 右上区域
    img1, boxes1, cls1 = process_single_image(img_paths[1], label_paths[1], (region_w, region_h))
    mosaic_img[0:region_h, region_w:final_w] = img1
    box_counts_per_img[1] = len(boxes1)
    # 转换Box到最终图坐标(x坐标+region_w)
    for (x1, y1, x2, y2), cls in zip(boxes1, cls1):
        x1_final = x1 + region_w
        x2_final = x2 + region_w
        xc = (x1_final + x2_final) / 2 / final_w
        yc = (y1 + y2) / 2 / final_h
        bw = (x2_final - x1_final) / final_w
        bh = (y2 - y1) / final_h
        all_final_boxes.append([xc, yc, bw, bh])
        all_class_ids.append(cls)

    # 图2 → 左下区域
    img2, boxes2, cls2 = process_single_image(img_paths[2], label_paths[2], (region_w, region_h))
    mosaic_img[region_h:final_h, 0:region_w] = img2
    box_counts_per_img[2] = len(boxes2)
    # 转换Box到最终图坐标(y坐标+region_h)
    for (x1, y1, x2, y2), cls in zip(boxes2, cls2):
        y1_final = y1 + region_h
        y2_final = y2 + region_h
        xc = (x1 + x2) / 2 / final_w
        yc = (y1_final + y2_final) / 2 / final_h
        bw = (x2 - x1) / final_w
        bh = (y2_final - y1_final) / final_h
        all_final_boxes.append([xc, yc, bw, bh])
        all_class_ids.append(cls)

    # 图3 → 右下区域
    img3, boxes3, cls3 = process_single_image(img_paths[3], label_paths[3], (region_w, region_h))
    mosaic_img[region_h:final_h, region_w:final_w] = img3
    box_counts_per_img[3] = len(boxes3)
    # 转换Box到最终图坐标(x+region_w, y+region_h)
    for (x1, y1, x2, y2), cls in zip(boxes3, cls3):
        x1_final = x1 + region_w
        x2_final = x2 + region_w
        y1_final = y1 + region_h
        y2_final = y2 + region_h
        xc = (x1_final + x2_final) / 2 / final_w
        yc = (y1_final + y2_final) / 2 / final_h
        bw = (x2_final - x1_final) / final_w
        bh = (y2_final - y1_final) / final_h
        all_final_boxes.append([xc, yc, bw, bh])
        all_class_ids.append(cls)

    # 转换为numpy数组
    all_final_boxes = np.array(all_final_boxes, dtype=np.float32)
    return mosaic_img, all_final_boxes, all_class_ids, box_counts_per_img


# ====================== 可视化:绘制所有Box ======================
def visualize_mosaic_with_all_boxes(mosaic_img, boxes, class_ids, box_counts_per_img, save_path):
    """
    修复NameError,正确统计每张图的Box数量
    :param mosaic_img: 最终拼接图
    :param boxes: 所有Box的归一化坐标
    :param class_ids: 所有Box的类别ID
    :param box_counts_per_img: 每张图的Box数量列表 [img0, img1, img2, img3]
    :param save_path: 可视化图保存路径
    """
    img_vis = mosaic_img.copy()
    final_h, final_w = img_vis.shape[:2]
    # 不同图的Box用不同颜色区分
    colors = [
        (0, 255, 0),  # 图0(左上)→ 绿色
        (0, 0, 255),  # 图1(右上)→ 红色
        (255, 0, 0),  # 图2(左下)→ 蓝色
        (255, 255, 0)  # 图3(右下)→ 黄色
    ]

    # 按图的索引遍历Box
    box_idx = 0
    for img_idx in range(4):
        color = colors[img_idx]
        # 取当前图的Box数量
        curr_box_num = box_counts_per_img[img_idx]
        if curr_box_num == 0:
            continue
        # 遍历当前图的所有Box
        for _ in range(curr_box_num):
            if box_idx >= len(boxes):
                break
            box = boxes[box_idx]
            cls = class_ids[box_idx]
            # 转换为像素坐标
            xc, yc, bw, bh = box
            x1 = int((xc - bw / 2) * final_w)
            y1 = int((yc - bh / 2) * final_h)
            x2 = int((xc + bw / 2) * final_w)
            y2 = int((yc + bh / 2) * final_h)
            # 绘制Box和标注
            cv2.rectangle(img_vis, (x1, y1), (x2, y2), color, 2)
            cv2.putText(img_vis, f"img{img_idx}_cls{cls}", (x1, y1 - 5),
                        cv2.FONT_HERSHEY_SIMPLEX, 0.5, color, 2)
            box_idx += 1

    # 保存可视化图
    cv2.imwrite(save_path, img_vis)
    print(f"带所有Box的Mosaic图已保存:{save_path}")
    print(
        f"各图Box数量:img0={box_counts_per_img[0]}, img1={box_counts_per_img[1]}, img2={box_counts_per_img[2]}, img3={box_counts_per_img[3]}")


# ====================== 保存YOLO标签 ======================
def save_yolo_labels(label_path, class_ids, boxes):
    with open(label_path, "w") as f:
        for cls, box in zip(class_ids, boxes):
            xc, yc, bw, bh = box
            f.write(f"{cls} {xc:.6f} {yc:.6f} {bw:.6f} {bh:.6f}\n")
    print(f"包含所有Box的YOLO标签已保存:{label_path}")


# ====================== 主函数 ======================
if __name__ == "__main__":
    # 1. 配置4张图/标签路径(替换为你的实际路径)
    IMG_PATHS = [
        r"C:\Users\Excub\workspace\Pytorch\12.08_cv\jjy.jpg",
        r"C:\Users\Excub\workspace\Pytorch\12.08_cv\jjy1.jpg",
        r"C:\Users\Excub\workspace\Pytorch\12.08_cv\jjy2.jpg",
        r"C:\Users\Excub\workspace\Pytorch\12.08_cv\jjy3.jpg",
    ]
    LABEL_PATHS = [
        r"C:\Users\Excub\workspace\Pytorch\12.08_cv\out\jjy\jjy.txt",
        r"C:\Users\Excub\workspace\Pytorch\12.08_cv\out\jjy\jjy1.txt",
        r"C:\Users\Excub\workspace\Pytorch\12.08_cv\out\jjy\jjy2.txt",
        r"C:\Users\Excub\workspace\Pytorch\12.08_cv\out\jjy\jjy3.txt"
    ]
    SAVE_DIR = r"C:\Users\Excub\workspace\Pytorch\12.08_cv\out"
    FINAL_SIZE = (640, 640)  # 最终Mosaic图尺寸

    # 2. 创建保存目录
    os.makedirs(SAVE_DIR, exist_ok=True)

    # 3. 执行固定位置Mosaic(强制保留所有图和Box)
    mosaic_img, all_boxes, all_classes, box_counts = fixed_position_mosaic(IMG_PATHS, LABEL_PATHS, FINAL_SIZE)

    # 4. 保存纯Mosaic图
    mosaic_img_path = os.path.join(SAVE_DIR, "mosaic_fixed_position1.jpg")
    cv2.imwrite(mosaic_img_path, mosaic_img)
    print(f"纯Mosaic图已保存:{mosaic_img_path}")

    # 5. 保存带所有Box的可视化图(修复参数传递)
    vis_img_path = os.path.join(SAVE_DIR, "mosaic_with_all_boxes1.jpg")
    visualize_mosaic_with_all_boxes(mosaic_img, all_boxes, all_classes, box_counts, vis_img_path)

    # 6. 保存包含所有Box的YOLO标签
    label_path = os.path.join(SAVE_DIR, "mosaic_all_boxes1.txt")
    save_yolo_labels(label_path, all_classes, all_boxes)

    # 7. 最终统计
    print(f"\n=== 固定位置Mosaic增强完成 ===")
    print(f"最终图尺寸:{FINAL_SIZE}")
    print(f"总Box数量:{len(all_boxes)}(4张图的Box全部保留)")
    print(f"保存路径:{SAVE_DIR}")
    print(f"核心特性:")
    print(f"1. 图0→左上,图1→右上,图2→左下,图3→右下,位置固定;")
    print(f"2. 每张图的Box全部转换为最终图坐标,无遗漏;")
    print(f"3. 可视化图中不同图的Box用不同颜色区分,便于验证;")
    print(f"4. 标签文件包含所有Box,可直接用于YOLO训练。")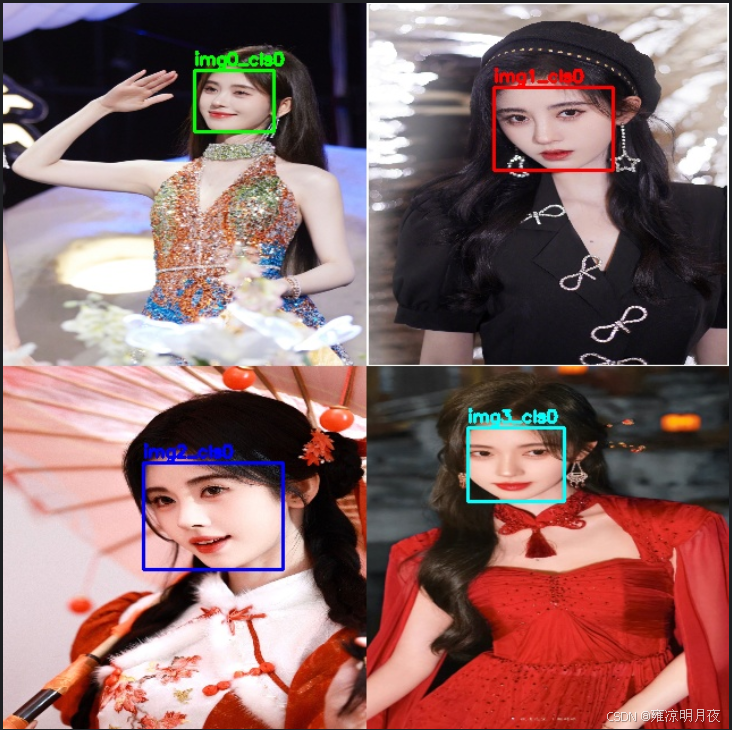
3.paste_img1box_to_img2数据增强
本质:把 img1 中某个 Box 对应的像素区域裁剪出来,粘贴到 img2 的指定位置,同时将该 Box 的坐标从 img1 的归一化坐标转换为 img2 的归一化坐标,生成新标签。
步骤 核心操作 公式 / 逻辑 1. Box 解析 归一化→像素坐标 x1 = (xc - bw/2)*w1,y1 = (yc - bh/2)*h12. 裁剪区域 从 img1 裁剪 Box 区域 crop_img = img1[y1:y2, x1:x2]3. 粘贴位置 避免越界 paste_x ∈ [0, w2-crop_w],paste_y ∈ [0, h2-crop_h]4. 图像粘贴 覆盖 img2 对应区域 img2[paste_y:paste_y+crop_h, paste_x:paste_x+crop_w] = crop_img5. 坐标转换 像素→归一化(img2) new_xc = (paste_x + paste_x+crop_w)/2 /w2
python
import cv2
import numpy as np

def paste_img1box_to_img2(
    img1_path: str,    # 源图(要裁剪Box的图)路径
    img2_path: str,    # 目标图(要粘贴的图)路径
    label1_path: str,  # 源图标签路径(包含Box信息)
    box_idx: int = 0,  # 选择源图的第几个Box(默认第0个)
    paste_pos: tuple = None,  # 粘贴位置 (x, y),None则随机位置
    save_path: str = "paste_result.jpg",  # 结果保存路径
    label_save_path: str = "paste_result.txt"  # 新标签保存路径
):
    """
    将img1的指定Box区域粘贴到img2,并生成新的标签(Box坐标转换为img2的归一化坐标)
    :return: 粘贴后的图像、新的归一化Box坐标、新标签
    """
    # ========== 步骤1:读取并预处理图像 ==========
    # 读取源图img1和目标图img2
    img1 = cv2.imread(img1_path)
    img2 = cv2.imread(img2_path)
    if img1 is None:
        raise ValueError(f"源图{img1_path}读取失败!")
    if img2 is None:
        raise ValueError(f"目标图{img2_path}读取失败!")
    h1, w1 = img1.shape[:2]  # 源图尺寸
    h2, w2 = img2.shape[:2]  # 目标图尺寸

    # ========== 步骤2:解析img1的Box(归一化→像素坐标) ==========
    box1_norm = None  # 源图Box的归一化坐标 [xc, yc, bw, bh]
    box1_pix = None   # 源图Box的像素坐标 [x1, y1, x2, y2]
    cls1 = None       # 源图Box的类别ID

    with open(label1_path, "r") as f:
        lines = [line.strip() for line in f if line.strip()]
        if box_idx >= len(lines):
            raise IndexError(f"源图标签仅{len(lines)}个Box,无法选择第{box_idx}个!")
        # 解析指定Box
        parts = lines[box_idx].split()
        if len(parts) < 5:
            raise ValueError(f"源图标签行格式错误:{lines[box_idx]}")
        cls1 = int(parts[0])
        xc, yc, bw, bh = [float(p) for p in parts[1:5]]
        # 归一化坐标→像素坐标(x1,y1=左上,x2,y2=右下)
        x1 = int((xc - bw/2) * w1)
        y1 = int((yc - bh/2) * h1)
        x2 = int((xc + bw/2) * w1)
        y2 = int((yc + bh/2) * h1)
        # 确保Box在img1范围内
        x1 = max(0, x1)
        y1 = max(0, y1)
        x2 = min(w1-1, x2)
        y2 = min(h1-1, y2)
        box1_norm = [xc, yc, bw, bh]
        box1_pix = [x1, y1, x2, y2]

    # ========== 步骤3:裁剪img1的Box区域 ==========
    crop_img = img1[y1:y2, x1:x2]  # 裁剪Box对应的像素区域
    crop_h, crop_w = crop_img.shape[:2]
    if crop_h == 0 or crop_w == 0:
        raise ValueError(f"源图Box裁剪区域为空!Box像素坐标:{box1_pix}")

    # ========== 步骤4:确定img2上的粘贴位置(避免越界) ==========
    if paste_pos is None:
        # 随机位置(确保裁剪区域完全在img2内)
        paste_x = np.random.randint(0, w2 - crop_w)
        paste_y = np.random.randint(0, h2 - crop_h)
    else:
        paste_x, paste_y = paste_pos
        # 强制修正越界位置
        paste_x = max(0, min(paste_x, w2 - crop_w))
        paste_y = max(0, min(paste_y, h2 - crop_h))

    # ========== 步骤5:将裁剪区域粘贴到img2 ==========
    img2_pasted = img2.copy()
    img2_pasted[paste_y:paste_y+crop_h, paste_x:paste_x+crop_w] = crop_img

    # ========== 步骤6:转换Box坐标为img2的归一化坐标 ==========
    # 粘贴后的Box像素坐标(img2上)
    new_x1 = paste_x
    new_y1 = paste_y
    new_x2 = paste_x + crop_w
    new_y2 = paste_y + crop_h
    # 像素坐标→归一化坐标
    new_xc = (new_x1 + new_x2) / 2 / w2
    new_yc = (new_y1 + new_y2) / 2 / h2
    new_bw = (new_x2 - new_x1) / w2
    new_bh = (new_y2 - new_y1) / h2
    new_box_norm = [new_xc, new_yc, new_bw, new_bh]

    # ========== 步骤7:保存结果 ==========
    # 保存粘贴后的图像
    cv2.imwrite(save_path, img2_pasted)
    print(f"粘贴后的图像已保存:{save_path}")
    # 保存新标签(格式:cls xc yc bw bh)
    with open(label_save_path, "w") as f:
        f.write(f"{cls1} {new_xc:.6f} {new_yc:.6f} {new_bw:.6f} {new_bh:.6f}\n")
    print(f"新标签已保存:{label_save_path}")

    return img2_pasted, new_box_norm, cls1

# ------------------- 调用示例 -------------------
if __name__ == "__main__":
    # 配置路径
    IMG1_PATH = r"C:\Users\Excub\workspace\Pytorch\12.08_cv\jjy2.jpg"    # 源图(要裁剪的图)
    IMG2_PATH = r"C:\Users\Excub\workspace\Pytorch\12.08_cv\jjy1.jpg"     # 目标图(要粘贴的背景图)
    LABEL1_PATH = r"C:\Users\Excub\workspace\Pytorch\12.08_cv\out\jjy\jjy2.txt"  # 源图标签
    SAVE_PATH = r"C:\Users\Excub\workspace\Pytorch\12.08_cv\out\paste_result.jpg"
    LABEL_SAVE_PATH = r"C:\Users\Excub\workspace\Pytorch\12.08_cv\out\paste_label.txt"

    # 执行粘贴操作:将img1的第0个Box粘贴到img2的(100, 100)位置
    try:
        pasted_img, new_box, cls = paste_img1box_to_img2(
            img1_path=IMG1_PATH,
            img2_path=IMG2_PATH,
            label1_path=LABEL1_PATH,
            box_idx=0,          # 选择img1的第0个Box
            paste_pos=(100, 100),  # 粘贴到img2的(100,100)位置
            save_path=SAVE_PATH,
            label_save_path=LABEL_SAVE_PATH
        )
        print(f"粘贴完成!")
        print(f"新Box归一化坐标:xc={new_box[0]:.6f}, yc={new_box[1]:.6f}, bw={new_box[2]:.6f}, bh={new_box[3]:.6f}")
        print(f"Box类别:{cls}")
    except Exception as e:
        print(f"执行失败:{e}")
3.局部增强/裁剪类数据增强锦集
1.sliding_crop
本质:从一张大图中按固定步长滑动裁剪出多个子图,同时将Box坐标转换到对应的子图中,是目标检测中扩充数据/处理大图的常用手段。
「按固定窗口 + 步长遍历大图→裁剪子图→转换原图 Box 到子图坐标」
python
#!/usr/bin/env python
# -*- coding: utf-8 -*-
"""
@Project :Pytorch
@File :sliding_crop.py
@IDE :PyCharm
@Author :wjj
@Date :2025/12/15 16:43
@Description: Sliding Crop (Fix encoding & window calculation)
"""
import cv2
import numpy as np
import os
from typing import List, Tuple, Dict


def sliding_crop(
        img_path: str,
        label_path: str,
        crop_size: Tuple[int, int] = (640, 640),  # Crop window size (w, h)
        stride: Tuple[int, int] = (320, 320),  # Sliding stride (x, y)
        save_dir: str = "sliding_crop_album",  # Album save dir
        keep_partial_box: bool = True,  # Keep box if center in window
        filter_empty: bool = True,  # Filter sub-img without box
        class_names: List[str] = None  # Class names (optional)
) -> List[Dict]:
    """
    Sliding crop large image to sub-images, convert box coords to sub-img normalized coords
    :return: Crop results list (sub-img path, label path, box num, etc.)
    """
    # ========== Initialization ==========
    os.makedirs(save_dir, exist_ok=True)
    crop_w, crop_h = crop_size
    stride_x, stride_y = stride
    result_list = []

    # ========== Read image & label ==========
    # Read large image
    img = cv2.imread(img_path)
    if img is None:
        raise ValueError(f"Failed to read image: {img_path}!")
    img_h, img_w = img.shape[:2]

    # Auto adjust oversize crop window
    if crop_w >= img_w or crop_h >= img_h:
        print(
            f"Warning: Crop window ({crop_w}x{crop_h}) ≥ image size ({img_w}x{img_h}), auto adjust to 1/2 of image size")
        crop_w = img_w // 2
        crop_h = img_h // 2
        stride_x = crop_w // 2
        stride_y = crop_h // 2
        print(f"Adjusted: Crop window ({crop_w}x{crop_h}), stride ({stride_x}x{stride_y})")

    # Parse label (normalized → pixel coords, GBK encoding for Windows)
    original_boxes = []
    try:
        with open(label_path, "r", encoding='gbk') as f:
            for line in f:
                line = line.strip()
                if not line:
                    continue
                parts = line.split()
                if len(parts) < 5:
                    print(f"Warning: Invalid label line {line}, skip")
                    continue
                try:
                    cls_id = int(parts[0])
                    xc, yc, bw, bh = [float(p) for p in parts[1:5]]
                    # Normalized → pixel coords
                    x1 = int((xc - bw / 2) * img_w)
                    y1 = int((yc - bh / 2) * img_h)
                    x2 = int((xc + bw / 2) * img_w)
                    y2 = int((yc + bh / 2) * img_h)
                    # Fix out-of-bounds
                    x1 = max(0, x1)
                    y1 = max(0, y1)
                    x2 = min(img_w - 1, x2)
                    y2 = min(img_h - 1, y2)
                    original_boxes.append((x1, y1, x2, y2, cls_id))
                except Exception as e:
                    print(f"Failed to parse label line {line}: {e}")
                    continue
    except FileNotFoundError:
        raise FileNotFoundError(f"Label file {label_path} not found!")

    # ========== Calculate sliding window positions ==========
    # X direction starts
    x_starts = []
    x = 0
    while x + crop_w <= img_w:
        x_starts.append(x)
        x += stride_x
    if x_starts and x_starts[-1] + crop_w < img_w:
        x_starts.append(img_w - crop_w)
    if not x_starts:
        x_starts = [0]

    # Y direction starts
    y_starts = []
    y = 0
    while y + crop_h <= img_h:
        y_starts.append(y)
        y += stride_y
    if y_starts and y_starts[-1] + crop_h < img_h:
        y_starts.append(img_h - crop_h)
    if not y_starts:
        y_starts = [0]

    # ========== Crop sub-images ==========
    crop_idx = 0
    for y_start in y_starts:
        for x_start in x_starts:
            x_end = x_start + crop_w
            y_end = y_start + crop_h

            # Crop sub-image
            sub_img = img[y_start:y_end, x_start:x_end]
            sub_img_h, sub_img_w = sub_img.shape[:2]
            if sub_img_h != crop_h or sub_img_w != crop_w:
                # Pad black border to keep size
                sub_img = cv2.copyMakeBorder(
                    sub_img, 0, crop_h - sub_img_h, 0, crop_w - sub_img_w,
                    cv2.BORDER_CONSTANT, value=(0, 0, 0)
                )

            # Filter boxes in current window
            sub_boxes = []
            for (bx1, by1, bx2, by2, cls_id) in original_boxes:
                box_cx = (bx1 + bx2) / 2
                box_cy = (by1 + by2) / 2
                if keep_partial_box:
                    in_window = (x_start <= box_cx <= x_end) and (y_start <= box_cy <= y_end)
                else:
                    in_window = (x_start <= bx1) and (bx2 <= x_end) and (y_start <= by1) and (by2 <= y_end)
                if not in_window:
                    continue

                # Convert to sub-image normalized coords
                sub_bx1 = bx1 - x_start
                sub_by1 = by1 - y_start
                sub_bx2 = bx2 - x_start
                sub_by2 = by2 - y_start
                # Fix out-of-bounds in sub-image
                sub_bx1 = max(0, sub_bx1)
                sub_by1 = max(0, sub_by1)
                sub_bx2 = min(crop_w - 1, sub_bx2)
                sub_by2 = min(crop_h - 1, sub_by2)
                # Pixel → normalized
                sub_xc = (sub_bx1 + sub_bx2) / 2 / crop_w
                sub_yc = (sub_by1 + sub_by2) / 2 / crop_h
                sub_bw = (sub_bx2 - sub_bx1) / crop_w
                sub_bh = (sub_by2 - sub_by1) / crop_h
                sub_boxes.append((sub_xc, sub_yc, sub_bw, sub_bh, cls_id))

            # Filter empty sub-images
            if filter_empty and len(sub_boxes) == 0:
                continue

            # Save sub-image and label
            sub_img_name = f"crop_{crop_idx:04d}_x{x_start}_y{y_start}.jpg"
            sub_label_name = f"crop_{crop_idx:04d}_x{x_start}_y{y_start}.txt"
            sub_img_path = os.path.join(save_dir, sub_img_name)
            sub_label_path = os.path.join(save_dir, sub_label_name)

            cv2.imwrite(sub_img_path, sub_img)
            # Save label with GBK encoding
            with open(sub_label_path, "w", encoding='gbk') as f:
                for (xc, yc, bw, bh, cls_id) in sub_boxes:
                    f.write(f"{cls_id} {xc:.6f} {yc:.6f} {bw:.6f} {bh:.6f}\n")

            # Record result
            result_info = {
                "crop_idx": crop_idx,
                "window_pos": (x_start, y_start, x_end, y_end),
                "sub_img_path": sub_img_path,
                "sub_label_path": sub_label_path,
                "box_num": len(sub_boxes)
            }
            result_list.append(result_info)
            print(f"Crop completed {sub_img_path} | Box count: {len(sub_boxes)}")
            crop_idx += 1

    # ========== Generate summary file (GBK encoding) ==========
    album_summary_path = os.path.join(save_dir, "sliding_crop_summary.txt")
    with open(album_summary_path, "w", encoding='gbk') as f:
        f.write("Sliding Crop Album Summary\n")
        f.write(f"Original image path: {img_path}\n")
        f.write(f"Original image size: {img_w}x{img_h}\n")
        f.write(f"Crop window size: {crop_w}x{crop_h}\n")
        f.write(f"Sliding stride: {stride_x}x{stride_y}\n")
        f.write(f"Generated sub-images: {len(result_list)}\n")
        f.write("-" * 50 + "\n")
        for info in result_list:
            f.write(
                f"Index {info['crop_idx']} | Window pos {info['window_pos']} | Sub-img {info['sub_img_path']} | Box count {info['box_num']}\n")

    print(f"\nSliding crop completed!")
    print(f"Album save directory: {save_dir}")
    print(f"Generated sub-images count: {len(result_list)}")
    print(f"Summary file: {album_summary_path}")

    return result_list


# ------------------- Test Example -------------------
if __name__ == "__main__":
    # Config
    IMG_PATH = r"C:\Users\Excub\workspace\Pytorch\12.08_cv\jjy1.jpg"
    LABEL_PATH = r"C:\Users\Excub\workspace\Pytorch\12.08_cv\out\jjy\jjy1.txt"
    SAVE_DIR = r"C:\Users\Excub\workspace\Pytorch\12.08_cv\out\sliding_crop_album"
    CROP_SIZE = (640, 640)  # Reasonable size for model input
    STRIDE = (320, 320)  # 50% overlap

    # Run sliding crop
    try:
        crop_results = sliding_crop(
            img_path=IMG_PATH,
            label_path=LABEL_PATH,
            crop_size=CROP_SIZE,
            stride=STRIDE,
            save_dir=SAVE_DIR,
            keep_partial_box=True,
            filter_empty=True
        )
    except Exception as e:
        print(f"Sliding crop failed: {e}")
实现效果1->4的核心对比:


裁剪后的子图能实现数据增强:
- 样本数量扩充:从 1 张原图→4 张子图,直接增加训练样本量,降低模型过拟合风险;
- 目标位置多样性:子图中目标的「相对位置」和原图不同(比如原图中目标在中间,子图中目标在左上角 / 右下角),模型能学习到「目标出现在图像任意位置」的特征,避免对目标位置过拟合;
- 目标聚焦增强:如果原图中目标占比小(比如小目标),裁剪后的子图会让目标在画面中占比更高,模型更容易捕捉目标的细节特征;
- 抗截断鲁棒性:50% 重叠的裁剪方式,会让跨窗口的目标在不同子图中被「部分保留」(比如目标一半在 A 子图、一半在 B 子图),模型能学习到「目标被截断时的特征」,提升检测的鲁棒性。
2.copy_paste
本质:在同一张图内复制指定类别目标,随机粘贴到空白区域
同图内复制指定类别目标→随机粘贴到空白区域
支持翻转 / 旋转 / 缩放增强,且通过掩码避免目标重叠。
python
#!/usr/bin/env python
# -*- coding: utf-8 -*-
"""
@Project :Pytorch
@File :copy_paste.py
@IDE :PyCharm
@Author :wjj
@Date :2025/12/15 17:12
@Description:
"""
import cv2
import numpy as np
import os
import random
from typing import List, Tuple


def copy_paste(
        img_path: str,
        label_path: str,
        target_cls: int,  # 要复制的目标类别ID(如0)
        paste_num: int = 3,  # 复制粘贴的数量(默认3个)
        save_path: str = "copy_paste_aug.jpg",
        new_label_path: str = "copy_paste_aug.txt",
        aug_prob: float = 0.5,  # 目标增强(翻转/旋转/缩放)的概率
        scale_range: Tuple = (0.8, 1.2),  # 缩放范围
        rotate_range: Tuple = (-15, 15)  # 旋转角度范围(±15°)
):
    """
    同图内复制指定类别目标,随机粘贴到空白区域(避免重叠),支持目标增强
    :param target_cls: 要增强的稀有目标类别ID
    :param paste_num: 复制粘贴的目标数量
    """
    # ========== 1. 读取图片和标签 ==========
    # 读取原图
    img = cv2.imread(img_path)
    if img is None:
        raise ValueError(f"读取图片失败: {img_path}")
    img_h, img_w = img.shape[:2]
    img_copy = img.copy()  # 用于粘贴的画布

    # 解析标签:分离目标类别 + 转换为像素坐标
    original_boxes = []  # 所有目标:[(x1,y1,x2,y2,cls_id), ...]
    target_boxes = []  # 指定类别的目标:[(x1,y1,x2,y2), ...]

    with open(label_path, "r", encoding='gbk') as f:
        for line in f:
            parts = line.strip().split()
            if len(parts) < 5:
                continue
            cls_id = int(parts[0])
            xc, yc, bw, bh = [float(p) for p in parts[1:5]]
            # 归一化→像素坐标
            x1 = int((xc - bw / 2) * img_w)
            y1 = int((yc - bh / 2) * img_h)
            x2 = int((xc + bw / 2) * img_w)
            y2 = int((yc + bh / 2) * img_h)
            original_boxes.append((x1, y1, x2, y2, cls_id))
            # 筛选指定类别的目标
            if cls_id == target_cls:
                target_boxes.append((x1, y1, x2, y2))

    # 校验:指定类别是否有目标
    if len(target_boxes) == 0:
        raise ValueError(f"图片中无类别ID为 {target_cls} 的目标!")

    # ========== 2. 生成空白区域掩码(避免粘贴重叠) ==========
    # 初始化掩码:0=空白,1=已有目标
    mask = np.zeros((img_h, img_w), dtype=np.uint8)
    for (x1, y1, x2, y2, _) in original_boxes:
        mask[y1:y2, x1:x2] = 1  # 已有目标区域标记为1

    # ========== 3. 复制指定类别目标并增强 ==========
    # 随机选一个指定类别目标作为复制模板(若有多个,随机选)
    src_x1, src_y1, src_x2, src_y2 = random.choice(target_boxes)
    src_crop = img[src_y1:src_y2, src_x1:src_x2]  # 复制的目标像素区域
    src_h, src_w = src_crop.shape[:2]

    # 存储粘贴后的新目标坐标(用于生成新标签)
    new_boxes = []

    # ========== 4. 随机粘贴到空白区域 ==========
    paste_count = 0
    max_attempts = paste_num * 10  # 最大尝试次数(避免死循环)
    attempts = 0

    while paste_count < paste_num and attempts < max_attempts:
        attempts += 1

        # -------- 4.1 对复制的目标做增强(翻转/旋转/缩放) --------
        aug_crop = src_crop.copy()
        # 随机水平翻转
        if random.random() < aug_prob:
            aug_crop = cv2.flip(aug_crop, 1)
        # 随机缩放
        scale = random.uniform(*scale_range)
        aug_w = int(src_w * scale)
        aug_h = int(src_h * scale)
        aug_crop = cv2.resize(aug_crop, (aug_w, aug_h))
        # 随机旋转(带黑边,避免裁剪)
        if random.random() < aug_prob:
            angle = random.uniform(*rotate_range)
            M = cv2.getRotationMatrix2D((aug_w / 2, aug_h / 2), angle, 1)
            aug_crop = cv2.warpAffine(aug_crop, M, (aug_w, aug_h), borderValue=(0, 0, 0))

        # -------- 4.2 随机选择空白粘贴位置 --------
        # 确保粘贴位置在图片内,且目标完整放下
        paste_x = random.randint(0, img_w - aug_w)
        paste_y = random.randint(0, img_h - aug_h)
        # 检查粘贴区域是否为空白(掩码全0)
        paste_mask = mask[paste_y:paste_y + aug_h, paste_x:paste_x + aug_w]
        if np.sum(paste_mask) == 0:  # 无重叠,可粘贴
            # 粘贴目标到画布
            img_copy[paste_y:paste_y + aug_h, paste_x:paste_x + aug_w] = aug_crop
            # 更新掩码(标记为已有目标)
            mask[paste_y:paste_y + aug_h, paste_x:paste_x + aug_w] = 1
            # 记录新目标坐标(像素→归一化)
            new_xc = (paste_x + aug_w / 2) / img_w
            new_yc = (paste_y + aug_h / 2) / img_h
            new_bw = aug_w / img_w
            new_bh = aug_h / img_h
            new_boxes.append((target_cls, new_xc, new_yc, new_bw, new_bh))
            paste_count += 1
            print(f"成功粘贴第 {paste_count} 个目标 → 位置: ({paste_x}, {paste_y})")

    if paste_count < paste_num:
        print(f"警告:仅成功粘贴 {paste_count} 个目标(剩余位置有重叠)")

    # ========== 5. 生成新标签(原目标 + 新粘贴目标) ==========
    with open(new_label_path, "w", encoding='gbk') as f:
        # 写入原目标
        for (x1, y1, x2, y2, cls_id) in original_boxes:
            xc = (x1 + x2) / 2 / img_w
            yc = (y1 + y2) / 2 / img_h
            bw = (x2 - x1) / img_w
            bh = (y2 - y1) / img_h
            f.write(f"{cls_id} {xc:.6f} {yc:.6f} {bw:.6f} {bh:.6f}\n")
        # 写入新粘贴的目标
        for (cls_id, xc, yc, bw, bh) in new_boxes:
            f.write(f"{cls_id} {xc:.6f} {yc:.6f} {bw:.6f} {bh:.6f}\n")

    # ========== 6. 保存增强后的图片 ==========
    cv2.imwrite(save_path, img_copy)
    print(f"\nCopy-Paste 增强完成!")
    print(f"增强后图片保存至: {save_path}")
    print(f"新标签保存至: {new_label_path}")
    print(f"原目标数量: {len(original_boxes)} | 新增目标数量: {len(new_boxes)}")

    return img_copy, new_boxes


# ------------------- 测试示例 -------------------
if __name__ == "__main__":
    # 配置参数(仅需修改以下5项)
    IMG_PATH = r"C:\Users\Excub\workspace\Pytorch\12.08_cv\jjy1.jpg"
    LABEL_PATH = r"C:\Users\Excub\workspace\Pytorch\12.08_cv\out\jjy\jjy1.txt"
    TARGET_CLS = 0  # 要增强的目标类别ID(根据你的标签修改)
    SAVE_PATH = r"C:\Users\Excub\workspace\Pytorch\12.08_cv\out\copy_paste_aug.jpg"
    NEW_LABEL_PATH = r"C:\Users\Excub\workspace\Pytorch\12.08_cv\out\copy_paste_aug.txt"

    # 核心调用
    try:
        copy_paste(
            img_path=IMG_PATH,
            label_path=LABEL_PATH,
            target_cls=TARGET_CLS,
            paste_num=3,  # 复制粘贴3个目标
            save_path=SAVE_PATH,
            new_label_path=NEW_LABEL_PATH
        )
    except Exception as e:
        print(f"执行失败: {e}")
修改前后对比:

| 模块 | 实现逻辑 |
|---|---|
| 目标筛选 | 解析标签后筛选指定target_cls的目标,仅复制该类别(解决稀有目标增强) |
| 重叠避免 | 生成掩码矩阵,标记已有目标区域,仅在掩码为 0 的空白区域粘贴 |
| 目标增强 | 复制的目标随机做:水平翻转(50% 概率)、缩放(0.8~1.2 倍)、小角度旋转 |
| 坐标转换 | 粘贴后自动将像素坐标转换为 YOLO 格式的归一化坐标,生成新标签 |
| 鲁棒性 | 限制最大尝试次数,避免因空白区域不足导致死循环,同时提示实际粘贴数量 |
3.pyr_up/pyr_down
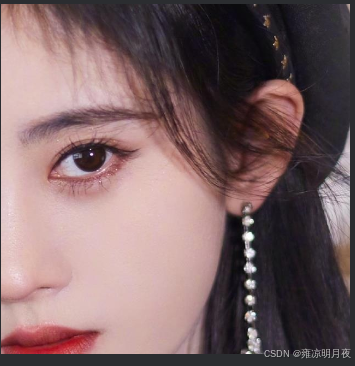
本质:很简单,就是我们常见的将原图放大或缩小达到增加数据样本的作用。
上采样(小目标增强):
- 建议仅用 1~2 次:1 次缩放后目标尺寸 ×2,小目标细节更清晰;2 次后可能模糊,需结合实际图像质量判断;
- 适用场景:原图中小目标占比 < 5%,检测模型难以捕捉的场景。
下采样(大目标适配):
- 无次数限制(建议 1~3 次):每次缩小为原来的 1/2,适配模型输入尺寸(如 640×640);
- 适用场景:原图中大目标占比 > 80%,超出模型检测范围的场景。
验证方法:
- 运行代码后,打开缩放后的图片,对比标注框是否与目标位置匹配;
- 检查新标签文件的归一化坐标,确保数值在 0~1 范围内(无越界)
python
import cv2
import numpy as np

def pyr_scale(
    img_path: str,
    label_path: str,
    scale_type: str = "up",  # "up"放大/"down"缩小
    scale_times: int = 1,    # 缩放次数(up建议1次)
    save_path: str = "pyr_scaled.jpg",
    new_label_path: str = "pyr_scaled.txt"
):
    # 1. 读取原图
    img = cv2.imread(img_path)
    orig_h, orig_w = img.shape[:2]
    scaled_img = img.copy()

    # 2. 解析原标签(归一化→像素坐标)
    orig_boxes = []
    with open(label_path, "r", encoding='gbk') as f:
        for line in f:
            parts = line.strip().split()
            if len(parts) < 5: continue
            cls_id = int(parts[0])
            xc, yc, bw, bh = [float(p) for p in parts[1:5]]
            x1 = int((xc - bw/2) * orig_w)
            y1 = int((yc - bh/2) * orig_h)
            x2 = int((xc + bw/2) * orig_w)
            y2 = int((yc + bh/2) * orig_h)
            orig_boxes.append((x1, y1, x2, y2, cls_id))

    # 3. 执行图像缩放(pyrUp/pyrDown)
    scale_factor = 1.0
    for _ in range(scale_times):
        if scale_type == "up":
            scaled_img = cv2.pyrUp(scaled_img)
            scale_factor *= 2
        else:
            scaled_img = cv2.pyrDown(scaled_img)
            scale_factor /= 2
    scaled_h, scaled_w = scaled_img.shape[:2]

    # 4. 缩放标注框并生成新标签
    with open(new_label_path, "w", encoding='gbk') as f:
        for (x1, y1, x2, y2, cls_id) in orig_boxes:
            # 像素坐标缩放 + 修正越界
            new_x1 = max(0, int(x1 * scale_factor))
            new_y1 = max(0, int(y1 * scale_factor))
            new_x2 = min(scaled_w-1, int(x2 * scale_factor))
            new_y2 = min(scaled_h-1, int(y2 * scale_factor))
            # 像素→归一化坐标
            new_xc = (new_x1 + new_x2)/2 / scaled_w
            new_yc = (new_y1 + new_y2)/2 / scaled_h
            new_bw = (new_x2 - new_x1)/scaled_w
            new_bh = (new_y2 - new_y1)/scaled_h
            f.write(f"{cls_id} {new_xc:.6f} {new_yc:.6f} {new_bw:.6f} {new_bh:.6f}\n")

    # 5. 保存结果
    cv2.imwrite(save_path, scaled_img)
    print(f"完成!原图尺寸:{orig_w}x{orig_h} → 缩放后:{scaled_w}x{scaled_h}")
    print(f"缩放后图片:{save_path} | 新标签:{new_label_path}")

# ------------------- 极简验证调用 -------------------
if __name__ == "__main__":
    # 仅需修改这6行路径/参数即可验证
    IMG_PATH = r"C:\Users\Excub\workspace\Pytorch\12.08_cv\jjy1.jpg"
    LABEL_PATH = r"C:\Users\Excub\workspace\Pytorch\12.08_cv\out\jjy\jjy1.txt"
    SCALE_TYPE = "up"  # 测试放大(改"down"测试缩小)
    SCALE_TIMES = 1    # 仅缩放1次(避免模糊)
    SAVE_PATH = r"C:\Users\Excub\workspace\Pytorch\12.08_cv\out\pyr_up.jpg"
    NEW_LABEL_PATH = r"C:\Users\Excub\workspace\Pytorch\12.08_cv\out\pyr_up.txt"

    pyr_scale(
        img_path=IMG_PATH,
        label_path=LABEL_PATH,
        scale_type=SCALE_TYPE,
        scale_times=SCALE_TIMES,
        save_path=SAVE_PATH,
        new_label_path=NEW_LABEL_PATH
    )
图片与原图一致,仅变大/变小罢了。
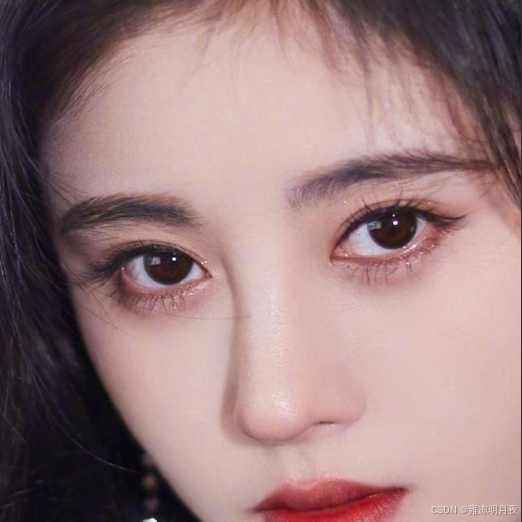
4.cut_box
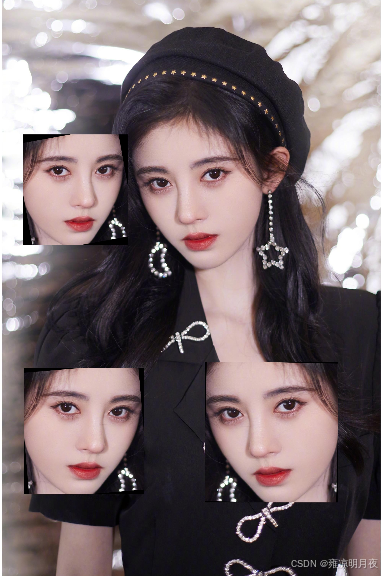
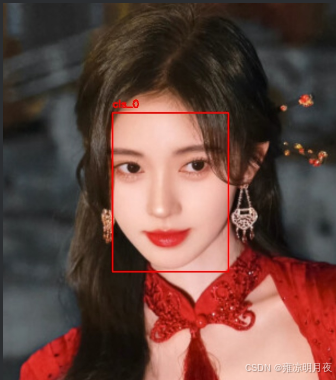
本质:
「裁剪小目标周边区域 + 放大」
图片变化:
- 原图 → 裁剪「目标 + 周边 100 像素」的局部区域 → 放大 2 倍,小目标特征被强化(更清晰);
- 对比
IMG_PATH(原图)和SAVE_PATH(裁剪放大图),能直观看到小目标从 "模糊小点" 变成 "清晰区域"。Label 变化:
- 原标签:目标坐标是「相对于整张原图」的归一化值;
- 新标签:目标坐标是「相对于裁剪放大后局部图」的归一化值,框的占比会显著变大(因为图片尺寸变小,目标占比提升)
python
import cv2
import numpy as np

def cut_box(
    img_path: str,
    label_path: str,
    target_cls: int = 0,      # 要增强的小目标类别ID
    expand_pixel: int = 100,  # 目标周边保留像素(默认100)
    scale_factor: int = 2,    # 放大倍数(强化小目标特征)
    save_path: str = "cut_box_aug.jpg",
    new_label_path: str = "cut_box_aug.txt"
):
    # 1. 读取原图
    img = cv2.imread(img_path)
    if img is None:
        raise ValueError(f"读取图片失败: {img_path}")
    img_h, img_w = img.shape[:2]

    # 2. 解析标签(归一化→像素坐标),筛选指定类别小目标
    target_box = None
    with open(label_path, "r", encoding='gbk') as f:
        for line in f:
            parts = line.strip().split()
            if len(parts) < 5: continue
            cls_id = int(parts[0])
            if cls_id != target_cls: continue  # 仅处理指定类别
            xc, yc, bw, bh = [float(p) for p in parts[1:5]]
            # 归一化→像素坐标
            x1 = int((xc - bw/2) * img_w)
            y1 = int((yc - bh/2) * img_h)
            x2 = int((xc + bw/2) * img_w)
            y2 = int((yc + bh/2) * img_h)
            target_box = (x1, y1, x2, y2)
            break  # 仅处理第一个指定类别目标(验证用)

    if target_box is None:
        raise ValueError(f"未找到类别ID为 {target_cls} 的目标!")
    x1, y1, x2, y2 = target_box

    # 3. 裁剪目标周边区域(保留expand_pixel像素)
    crop_x1 = max(0, x1 - expand_pixel)
    crop_y1 = max(0, y1 - expand_pixel)
    crop_x2 = min(img_w - 1, x2 + expand_pixel)
    crop_y2 = min(img_h - 1, y2 + expand_pixel)
    cut_img = img[crop_y1:crop_y2, crop_x1:crop_x2]  # 裁剪区域

    # 4. 放大裁剪区域(强化小目标特征)
    cut_h, cut_w = cut_img.shape[:2]
    scaled_cut = cv2.resize(cut_img, (cut_w * scale_factor, cut_h * scale_factor))
    scaled_h, scaled_w = scaled_cut.shape[:2]

    # 5. 重新计算目标框坐标(相对于放大后的裁剪图)
    rel_x1 = x1 - crop_x1
    rel_y1 = y1 - crop_y1
    rel_x2 = x2 - crop_x1
    rel_y2 = y2 - crop_y1
    # 放大后像素坐标(用于绘制框)
    new_x1 = int(rel_x1 * scale_factor)
    new_y1 = int(rel_y1 * scale_factor)
    new_x2 = int(rel_x2 * scale_factor)
    new_y2 = int(rel_y2 * scale_factor)
    # 归一化坐标(保存到标签)
    new_xc = (new_x1 + new_x2) / 2 / scaled_w
    new_yc = (new_y1 + new_y2) / 2 / scaled_h
    new_bw = (new_x2 - new_x1) / scaled_w
    new_bh = (new_y2 - new_y1) / scaled_h

    # ========== 新增:在放大后的图片上绘制label框 ==========
    # 绘制红色矩形框(线宽2,醒目)
    cv2.rectangle(scaled_cut, (new_x1, new_y1), (new_x2, new_y2), (0, 0, 255), 2)
    # 可选:添加类别文字标注
    cv2.putText(scaled_cut, f"cls_{target_cls}", (new_x1, new_y1-10),
                cv2.FONT_HERSHEY_SIMPLEX, 0.6, (0, 0, 255), 2)

    # 6. 保存结果(带框的图片+新标签)
    cv2.imwrite(save_path, scaled_cut)
    with open(new_label_path, "w", encoding='gbk') as f:
        f.write(f"{target_cls} {new_xc:.6f} {new_yc:.6f} {new_bw:.6f} {new_bh:.6f}\n")

    # 输出关键信息(对比用)
    print(f"裁剪区域:({crop_x1},{crop_y1})→({crop_x2},{crop_y2})")
    print(f"裁剪后尺寸:{cut_w}x{cut_h} → 放大后:{scaled_w}x{scaled_h}")
    print(f"绘制框坐标:({new_x1},{new_y1})→({new_x2},{new_y2})")
    print(f"完成!带框图片:{save_path} | 新标签:{new_label_path}")

# ------------------- 极简验证调用 -------------------
if __name__ == "__main__":
    # 仅需修改以下6行参数即可验证
    IMG_PATH = r"C:\Users\Excub\workspace\Pytorch\12.08_cv\jjy3.jpg"
    LABEL_PATH = r"C:\Users\Excub\workspace\Pytorch\12.08_cv\out\jjy\jjy3.txt"
    TARGET_CLS = 0  # 要增强的小目标类别ID
    EXPAND_PIXEL = 100  # 目标周边保留100像素
    SAVE_PATH = r"C:\Users\Excub\workspace\Pytorch\12.08_cv\out\cut_box_aug.jpg"
    NEW_LABEL_PATH = r"C:\Users\Excub\workspace\Pytorch\12.08_cv\out\cut_box_aug.txt"

    cut_box(
        img_path=IMG_PATH,
        label_path=LABEL_PATH,
        target_cls=TARGET_CLS,
        expand_pixel=EXPAND_PIXEL,
        save_path=SAVE_PATH,
        new_label_path=NEW_LABEL_PATH
    )
成品图片:


总结:
本章节承接上一份文章,继续总结了常见的数据增强的方法,并配上了相应的案例和实例仅供大家学习参考,如有不对的地方,欢迎大家指出!感谢!