前言
本节将学习第二种IPC方式LocalSocket,它基于CS架构,建立类似于TCP方式的本地连接,实现全双工字节流的持续读写交互。如果我们期望实现本地/本机的两个进程间的持续通信,我们可以使用LocalSocket。当然TCP也是可以的,但它会产生更多的网络开销,效率也不如LocalSocket。TCP更推荐的开始跨机器的局域网连接,本机还是使用LocalSocket更加推荐。
一、LocalSocket
在Qt中,提供QLocalServer和QLocalSocket两个核心类,用以实现本地的连接通信。他们的使用和QTcpServer和QClient几乎完全一样,也就是说Qt官方故意将两者封装成类似的接口,目的是降低学习成本。
但注意,它的底层实现和tcp有本质区别!
在Windows环境下,它的底层协议基于命名管道实现,而unix下则是Unix Domain Socket。它不走网络协议,因此无网络花销,通过内核直接传递数据,建立连接和传输数据的效率都要更快。而Tcp需要走TCP/IP协议栈,需要经历一系列校验和、缓冲、拥塞控制等环节。它使用时也无需像Tcp那样指定ip和端口,只需要指定特定识别的字符串名称,且无需建立所谓三次握手的连接校验。
总的来说,如果你只在本机通信,优先用 QLocalSocket;如果可能跨机器,才用 QTcpSocket。
另外,你可能有疑问,既然LocalSocket不是基于TCP/IP实现的,那它还算是socket通信的一种吗?
的确,如果从狭义理解出发,QLocalSocket不走网络协议栈,因此不属于网络socket。
但是,从广义理解考虑,socket是一种通用的进程间通信抽象概念,它包括:
1.网络 socket:AF_INET(IPv4)、AF_INET6(IPv6)
2.本地 socket:AF_UNIX(Unix Domain Socket)或 Windows 的 Named Pipe(命名管道)
在这个意义上,QLocalServer 就是基于"本地 socket"实现的,因此属于 socket 通信的一种。
二、代码示例
和之前一样,我们为QLocalSocket方式设计单独的测试窗口:
cpp
#ifndef LOCALSOCKETWINDOW_H
#define LOCALSOCKETWINDOW_H

#include <QWidget>
#include <QTextEdit>
#include <QLineEdit>
#include <QPushButton>
#include <QVBoxLayout>
#include <QHBoxLayout>
#include <QLocalServer>
#include <QLocalSocket>
#include <QProcess>
#include <QDateTime>

class LocalSocketWindow : public QWidget
{
    Q_OBJECT

public:
    explicit LocalSocketWindow(const QString &role, QWidget *parent = nullptr);

private slots:
    void onSendMessage();
    void onAcceptConnection();
    void onReadyRead();
    void onDisconnected();
    void onConnectClicked();

private:
    void appendLog(const QString &msg);
    void setupServer();
    void setupClient();

    QString m_role;
    QTextEdit *m_logView;
    QLineEdit *m_inputEdit;
    QPushButton *m_sendButton;
    QPushButton *m_connectButton;
    QLocalServer *m_server;
    QLocalSocket *m_socket;
    QString m_serverName;
};

#endif // LOCALSOCKETWINDOW_H
cpp
#include "localsocketwindow.h"
#include <QLabel>
LocalSocketWindow::LocalSocketWindow(const QString &role, QWidget *parent)
: QWidget(parent)
, m_role(role)
, m_server(nullptr)
, m_socket(nullptr)
, m_serverName("ipc_test_local")
{
setWindowTitle("Local Socket - " + role);
resize(600, 500);
m_logView = new QTextEdit();
m_logView->setReadOnly(true);
m_inputEdit = new QLineEdit();
m_inputEdit->setPlaceholderText("Enter message to send...");
m_sendButton = new QPushButton("Send Message");
m_sendButton->setEnabled(false);
m_connectButton = new QPushButton("Connect");
QVBoxLayout *mainLayout = new QVBoxLayout();
mainLayout->addWidget(m_logView);
mainLayout->addWidget(m_inputEdit);
mainLayout->addWidget(m_sendButton);
mainLayout->addWidget(m_connectButton);
setLayout(mainLayout);
connect(m_sendButton, &QPushButton::clicked, this, &LocalSocketWindow::onSendMessage);
connect(m_connectButton, &QPushButton::clicked, this, &LocalSocketWindow::onConnectClicked);
if (m_role == "Server") {
setupServer();
m_connectButton->hide();
} else {
setupClient();
}
appendLog("Local Socket " + m_role + " initialized with server name: " + m_serverName);
}
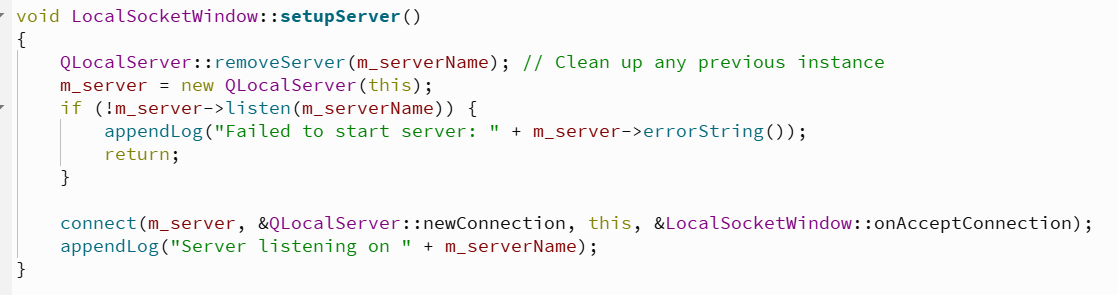
void LocalSocketWindow::setupServer()
{
QLocalServer::removeServer(m_serverName); // Clean up any previous instance
m_server = new QLocalServer(this);
if (!m_server->listen(m_serverName)) {
appendLog("Failed to start server: " + m_server->errorString());
return;
}
connect(m_server, &QLocalServer::newConnection, this, &LocalSocketWindow::onAcceptConnection);
appendLog("Server listening on " + m_serverName);
}
void LocalSocketWindow::setupClient()
{
m_socket = new QLocalSocket(this);
connect(m_socket, &QLocalSocket::connected, this, [this]() {
appendLog("Connected to server!");
m_sendButton->setEnabled(true);
m_inputEdit->setPlaceholderText("Enter message to send to server...");
});
connect(m_socket, &QLocalSocket::readyRead, this, &LocalSocketWindow::onReadyRead);
connect(m_socket, &QLocalSocket::disconnected, this, &LocalSocketWindow::onDisconnected);
}
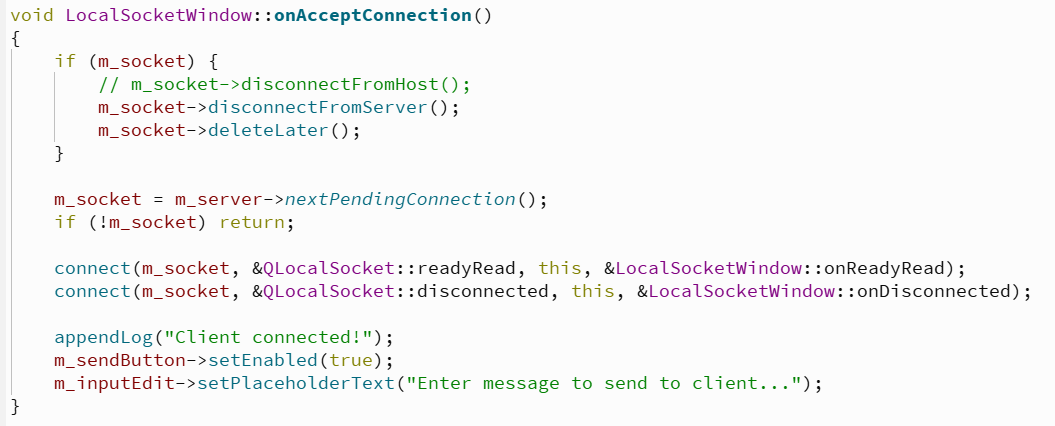
void LocalSocketWindow::onAcceptConnection()
{
if (m_socket) {
// m_socket->disconnectFromHost();
m_socket->disconnectFromServer();
m_socket->deleteLater();
}
m_socket = m_server->nextPendingConnection();
if (!m_socket) return;
connect(m_socket, &QLocalSocket::readyRead, this, &LocalSocketWindow::onReadyRead);
connect(m_socket, &QLocalSocket::disconnected, this, &LocalSocketWindow::onDisconnected);
appendLog("Client connected!");
m_sendButton->setEnabled(true);
m_inputEdit->setPlaceholderText("Enter message to send to client...");
}
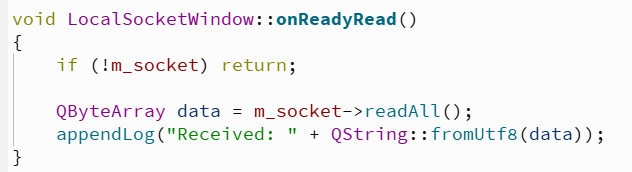
void LocalSocketWindow::onReadyRead()
{
if (!m_socket) return;
QByteArray data = m_socket->readAll();
appendLog("Received: " + QString::fromUtf8(data));
}
void LocalSocketWindow::onDisconnected()
{
appendLog("Disconnected from peer");
m_sendButton->setEnabled(false);
}
void LocalSocketWindow::onSendMessage()
{
if (!m_socket || m_socket->state() != QLocalSocket::ConnectedState) {
appendLog("Not connected!");
return;
}
QString msg = m_inputEdit->text();
if (msg.isEmpty()) return;
m_socket->write(msg.toUtf8());
m_socket->flush();
appendLog("Sent: " + msg);
m_inputEdit->clear();
}
void LocalSocketWindow::onConnectClicked()
{
if (!m_socket) return;
m_socket->connectToServer(m_serverName);
appendLog("Attempting to connect to " + m_serverName);
}
void LocalSocketWindow::appendLog(const QString &msg)
{
m_logView->append(QDateTime::currentDateTime().toString("hh:mm:ss") + " | " + msg);
}代码看似冗长,实则非常简单和简洁。它和tcp一样,分为服务端和客户端。
先说服务端,创建好对象后,我们只需要指定字符串名字进行监听:
接收到连接之后,就可以保存该客户端的socket对象,之后在sendMessage中往里面写入数据:
而客户端的话,先创建socket对象,然后进行服务器的连接:

连接成功,且服务端对它发送消息后,触发槽函数。
这一系列的步骤,几乎和Qt中的tcp连接一模一样。
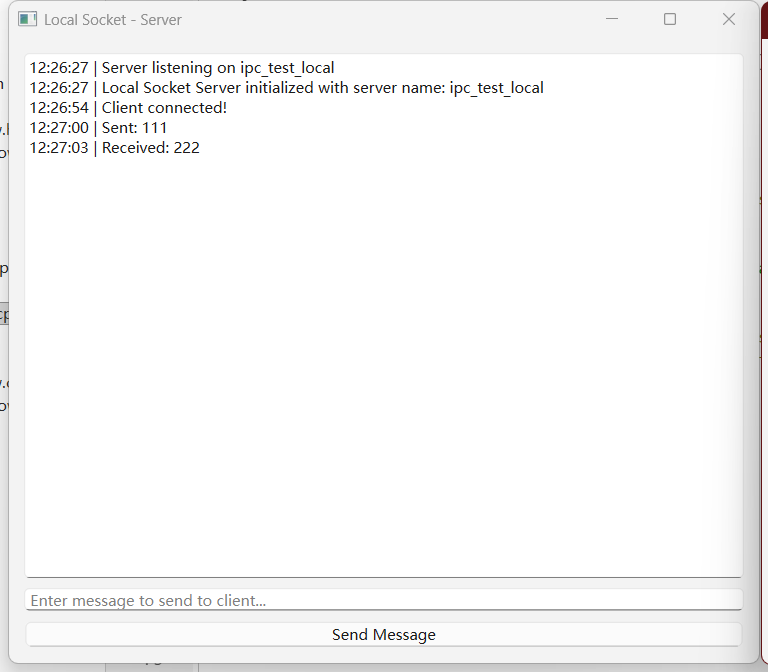
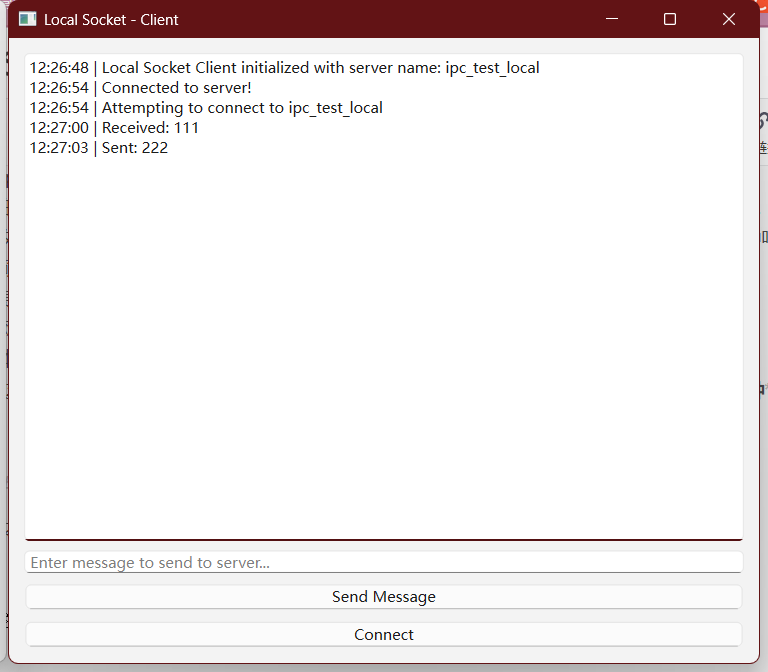
直接贴上运行效果图:
三、总结
进程间通信大致分为本机和跨机器两种使用场景,在本机的进程间交互中,如果双方程序都是用Qt编写的,那么使用LocalSocket无疑是更好的选择。而跨机器则应该考虑Tcp的方式。
但事实上,跨机器的通信方式有很多,只要是走网络协议的都可以,但如果扩展到那个层面上,需要学习的就太多了,而且从概念上更偏向于网络通信,而不是进程间通信了。
所以聚焦到本机的进程间通信上,我认为Tcp和Udp还是有使用价值的,下一节将学习记录一下。