先说GPU动画之前,我们得先了解人物骨骼
Mesh是人物的网格,通过这个网格来渲染人物
SkinnedMeshRenderer是人物蒙皮,有了这个才能看见人物的外观
Bones是人物骨骼,他只是一个Transform,用来表示这个骨骼在哪个位置用的
Avatar是这个人物的骨骼控制器,他负责绑定哪个Bones是手臂,哪个Bounes是腿部,并且会控制骨骼怎么移动
人物动画要播放,必须要有Avatar ,不然只有Animator,他不知道骨骼的对应关系,也就没法控制动画,会永远保持T-Pose形状
当我们需要烘焙动画,我们是先将这个人物用SampleAnimation固定到某一帧,得到这一帧的顶点信息。所以要烘焙时也必须要有Avatar,不然烘焙没效果
现在开始实现效果(只实现最最基础的功能,其他的不写)
1.C#部分
有2个类,代码如下
csharp
using System.Collections;
using System.Collections.Generic;
using UnityEditor;
using UnityEngine;

//窗口,目前只做一个烘焙按钮就行了
public class MyWindow : EditorWindow
{

    [MenuItem("My/BakeWindow")]
    private static void CreateW()
    {
        CreateWindow<MyWindow>();
    }

    private void OnGUI()
    {
        if(GUILayout.Button("Bake"))
        {
            GPUInstanceTest test = FindObjectOfType<GPUInstanceTest>();
            Texture2D d2 = test.BuildTexture();
            AssetDatabase.CreateAsset(d2, "Assets/Build/test.asset");
            AssetDatabase.SaveAssets();
            AssetDatabase.Refresh();
        }
    }
}
csharp
using System.Collections;
using System.Collections.Generic;
using UnityEngine;

public class GPUInstanceTest : MonoBehaviour
{
    public AnimationClip clip;
    public GameObject renderParent;
    public SkinnedMeshRenderer skinRender;

    public Texture2D BuildTexture()
    {
        int vertexCount = 0;
        if(skinRender != null)
        {
            vertexCount = skinRender.sharedMesh.vertexCount;
        }

        int totalFrame = (int)(clip.length * clip.frameRate);
        float perFrameTime = 1.0f / totalFrame; //每帧所花时间

        //注意这里的TextureFormat 必须是RGBAHalf!!用RGBA32贴图完全错乱
        Texture2D tex = new Texture2D(vertexCount, totalFrame, TextureFormat.RGBAHalf, false);

        for(int frameIndex = 0; frameIndex < totalFrame; frameIndex++)
        {
            //计算时应该避免用除法,除法有误差的情况会导致贴图错误
            float currentTime = frameIndex * perFrameTime;
            clip.SampleAnimation(renderParent, currentTime);

            Mesh mesh = new Mesh();
            if(skinRender != null)
            {
                skinRender.BakeMesh(mesh);
            }
            Vector3[] currentVerts = mesh.vertices;
            for (int vertIndex = 0; vertIndex < currentVerts.Length; vertIndex++)
            {
                Vector3 pos = currentVerts[vertIndex];
                Color col = new Color(pos.x, pos.y, pos.z, 1);
                tex.SetPixel(vertIndex, frameIndex, col);    //u是顶点索引,v是帧
            }
        }
        tex.Apply();
        return tex;
    }
}
注意这里的一些细节:
1.每一帧对renderParent采样,采样后得到当前帧顶点坐标
2.(重要!)Texture2D的构造函数中,一定是用RGBAHalf格式,用其他格式都会导致贴图错误
3.设置像素时,以顶点坐标作为uv的u索引,帧数作为v索引
4.保存贴图时,应当设置为.asset后缀的文件
接下来写shader
clike
Shader "My/GPUAnim"
{
    Properties
    {
        // 动画纹理
        _AnimTex ("Animation Texture", 2D) = "white" {}
        _CurTime ("Time", Float) = 0
        _AnimLen("AnimLen", Float) = 0
        _MainTex ("Albedo (RGB)", 2D) = "white" {}
    }

    SubShader
    {
        Tags { "RenderType"="Opaque" }
        Cull off
        LOD 100

        Pass
        {
            CGPROGRAM
            #pragma vertex vert
            #pragma fragment frag
            #include "UnityCG.cginc"

            struct appdata
            {
                float4 vertex : POSITION;
                float2 uv : TEXCOORD0;
            };

            struct v2f
            {
                float4 pos : SV_POSITION;
                float2 uv : TEXCOORD0;
            };

            sampler2D _AnimTex;
            float4 _AnimTex_ST;
            float4 _AnimTex_TexelSize;  //x = 1 / width
            float _CurTime;
            float _AnimLen;

            sampler2D _MainTex;
            float4 _MainTex_ST;

            v2f vert (appdata v, uint vertexID : SV_VertexID)
            {
                v2f o;

                float texU = (vertexID + 0.5) * _AnimTex_TexelSize; //0.5是纹理采样偏移,避免采样时的边缘问题
                float texV = _CurTime / _AnimLen;

                float4 animData = tex2Dlod(_AnimTex, float4(texU, texV, 0, 0));
                // 恢复原始位置
                float3 animatedPos = animData.xyz;
                o.pos = UnityObjectToClipPos(float4(animatedPos, 1.0));
                o.uv = TRANSFORM_TEX(v.uv, _MainTex);
                return o;
            }

            fixed4 frag (v2f i) : SV_Target
            {
                fixed4 col = tex2D(_MainTex, i.uv);
                return col;
            }
            ENDCG
        }
    }
}
这里也有几个注意事项必须要看的
1._AnimTex_TexelSize是float4,他的x分量,结果为1/width,意思是每个像素占多大位置
2.计算u坐标时,是(vertexID + 0.5) * _AnimTex_TexelSize;这个0.5表示的是纹理采样的偏移量,不能让u坐标刚好贴紧像素边缘,会导致贴图错误
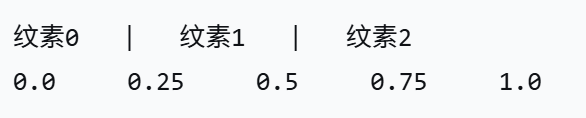
图1
举个例子如图1:比如第0个像素,范围是0.0到0.25,那么u坐标应该是(0.0+0.25)/2=0.125。所以+0.5就表示的是在中间位置
3.使用tex2Dlod采样
这样就可以开始烘焙了,人物如图2:
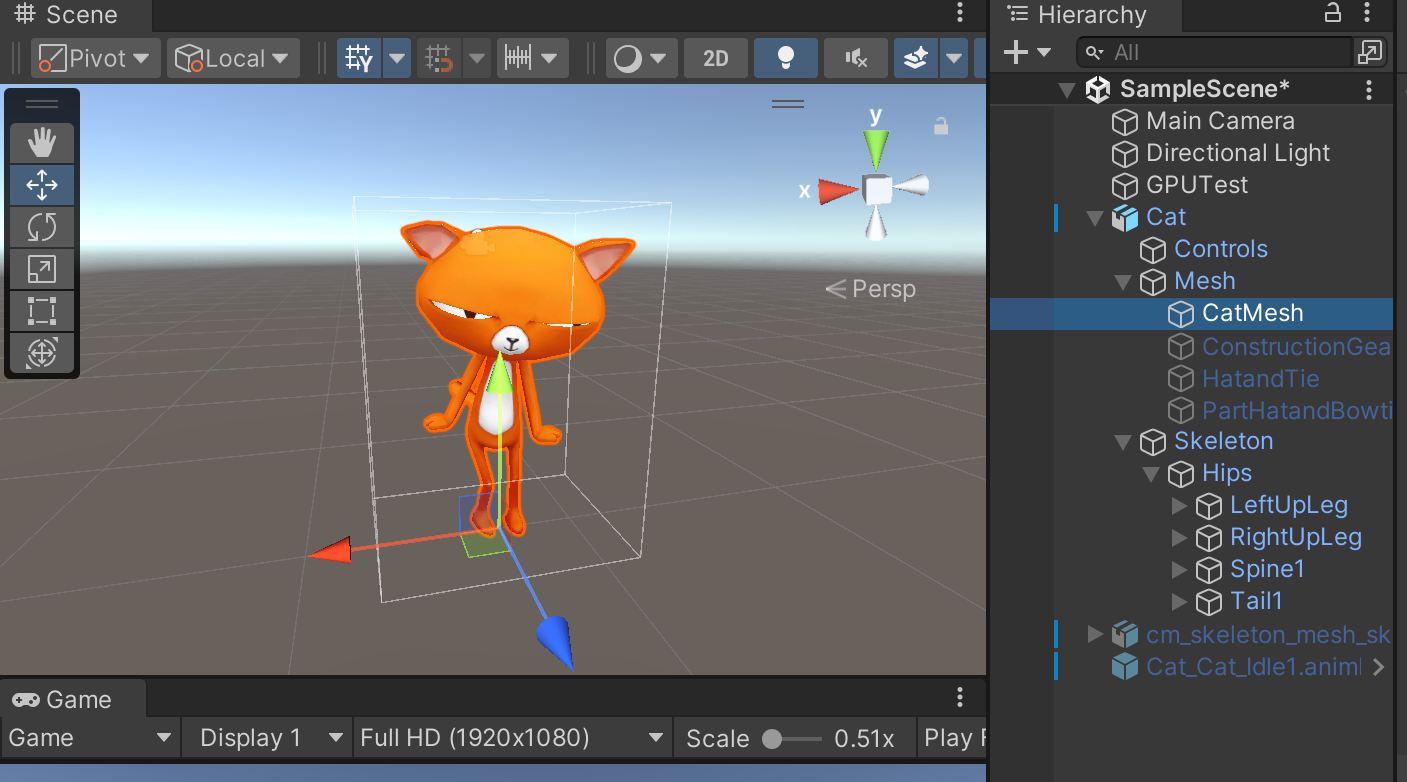
图2
这里有一只猫,CatMesh上挂着SkinnedMeshRenderer,准备好AnimationClip
创建一个GameObject叫做GPUTest,挂上GPUInstanceTest脚本,然后绑定如图3
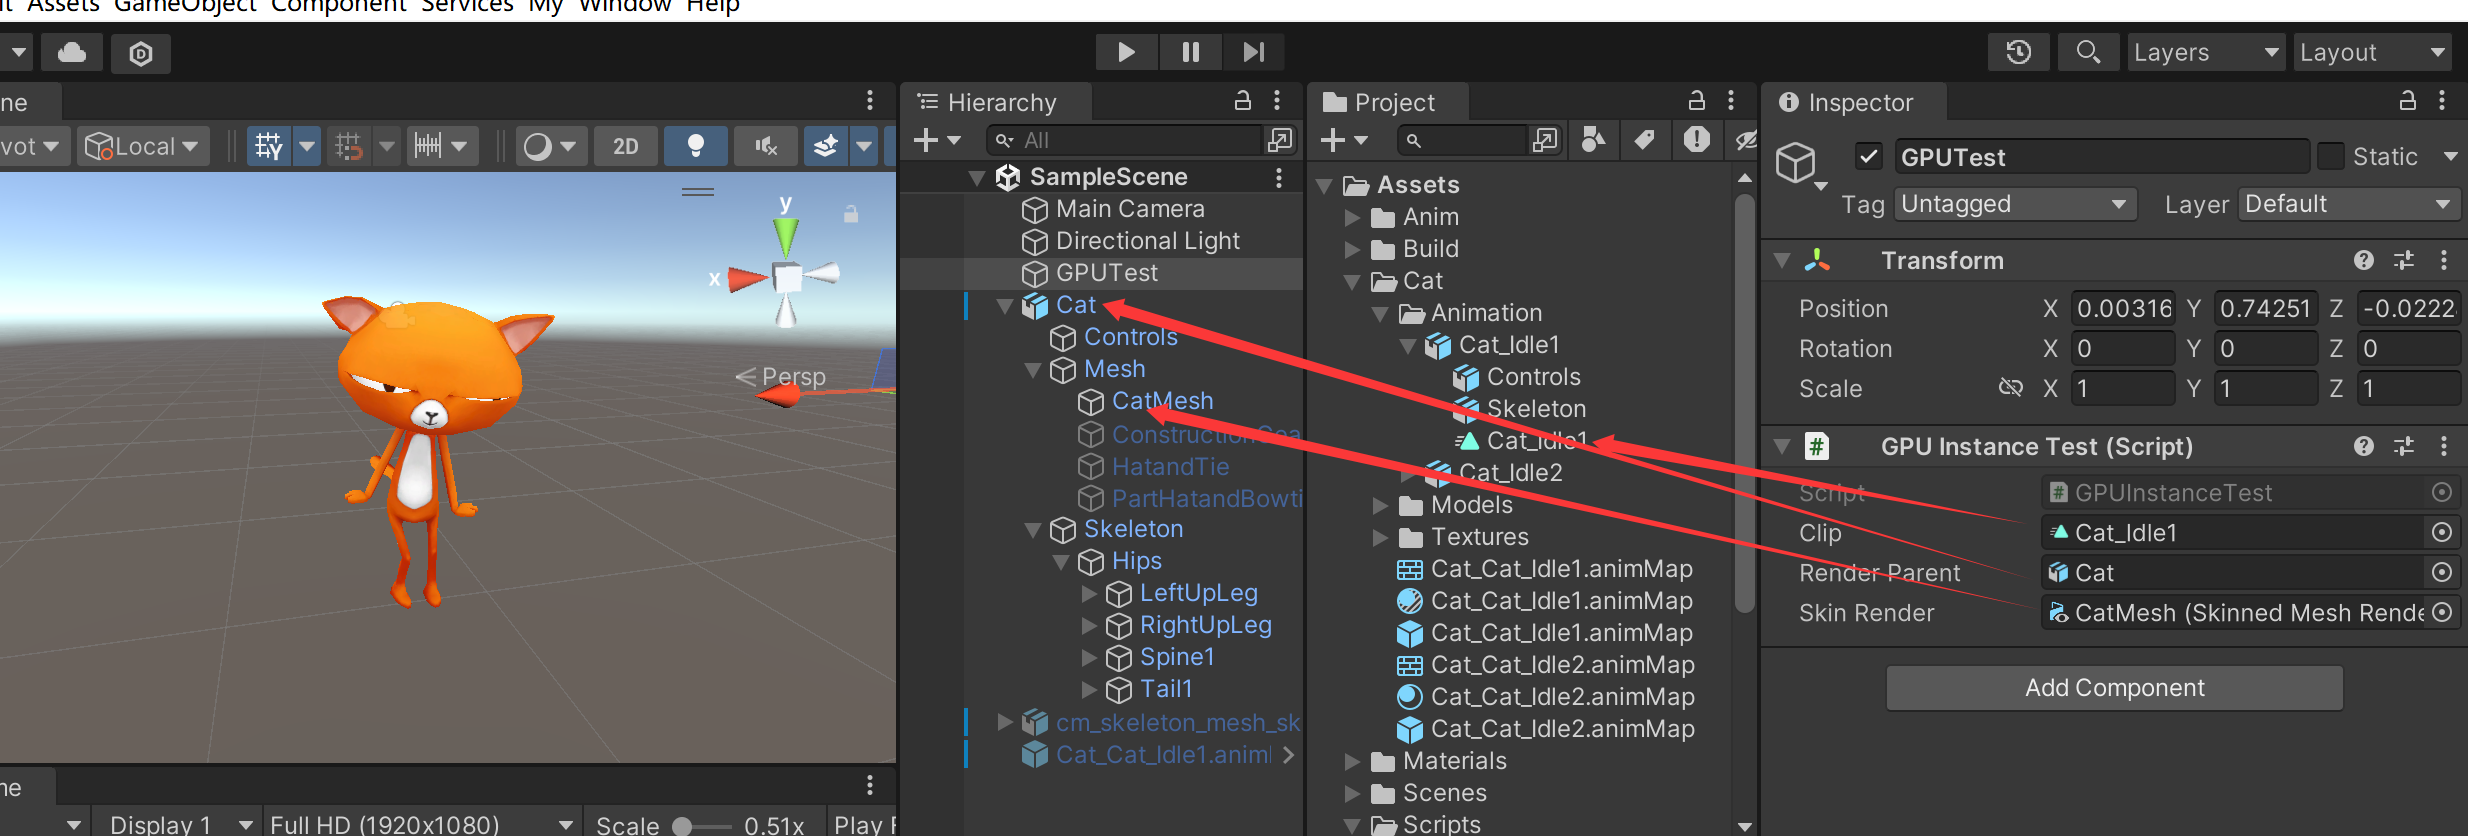
图3
这里的RenderParent,表示的就是可以播放Animation的那个父物体,因为我们要做SampleAnimation,必须要有能播AnimationClip的对象
SkinRender就是需要烘焙的网格了
设置好后,点击My/BakeWindow,就可以烘焙了,烘焙完成就可以把贴图挂到材质球上了,如图4
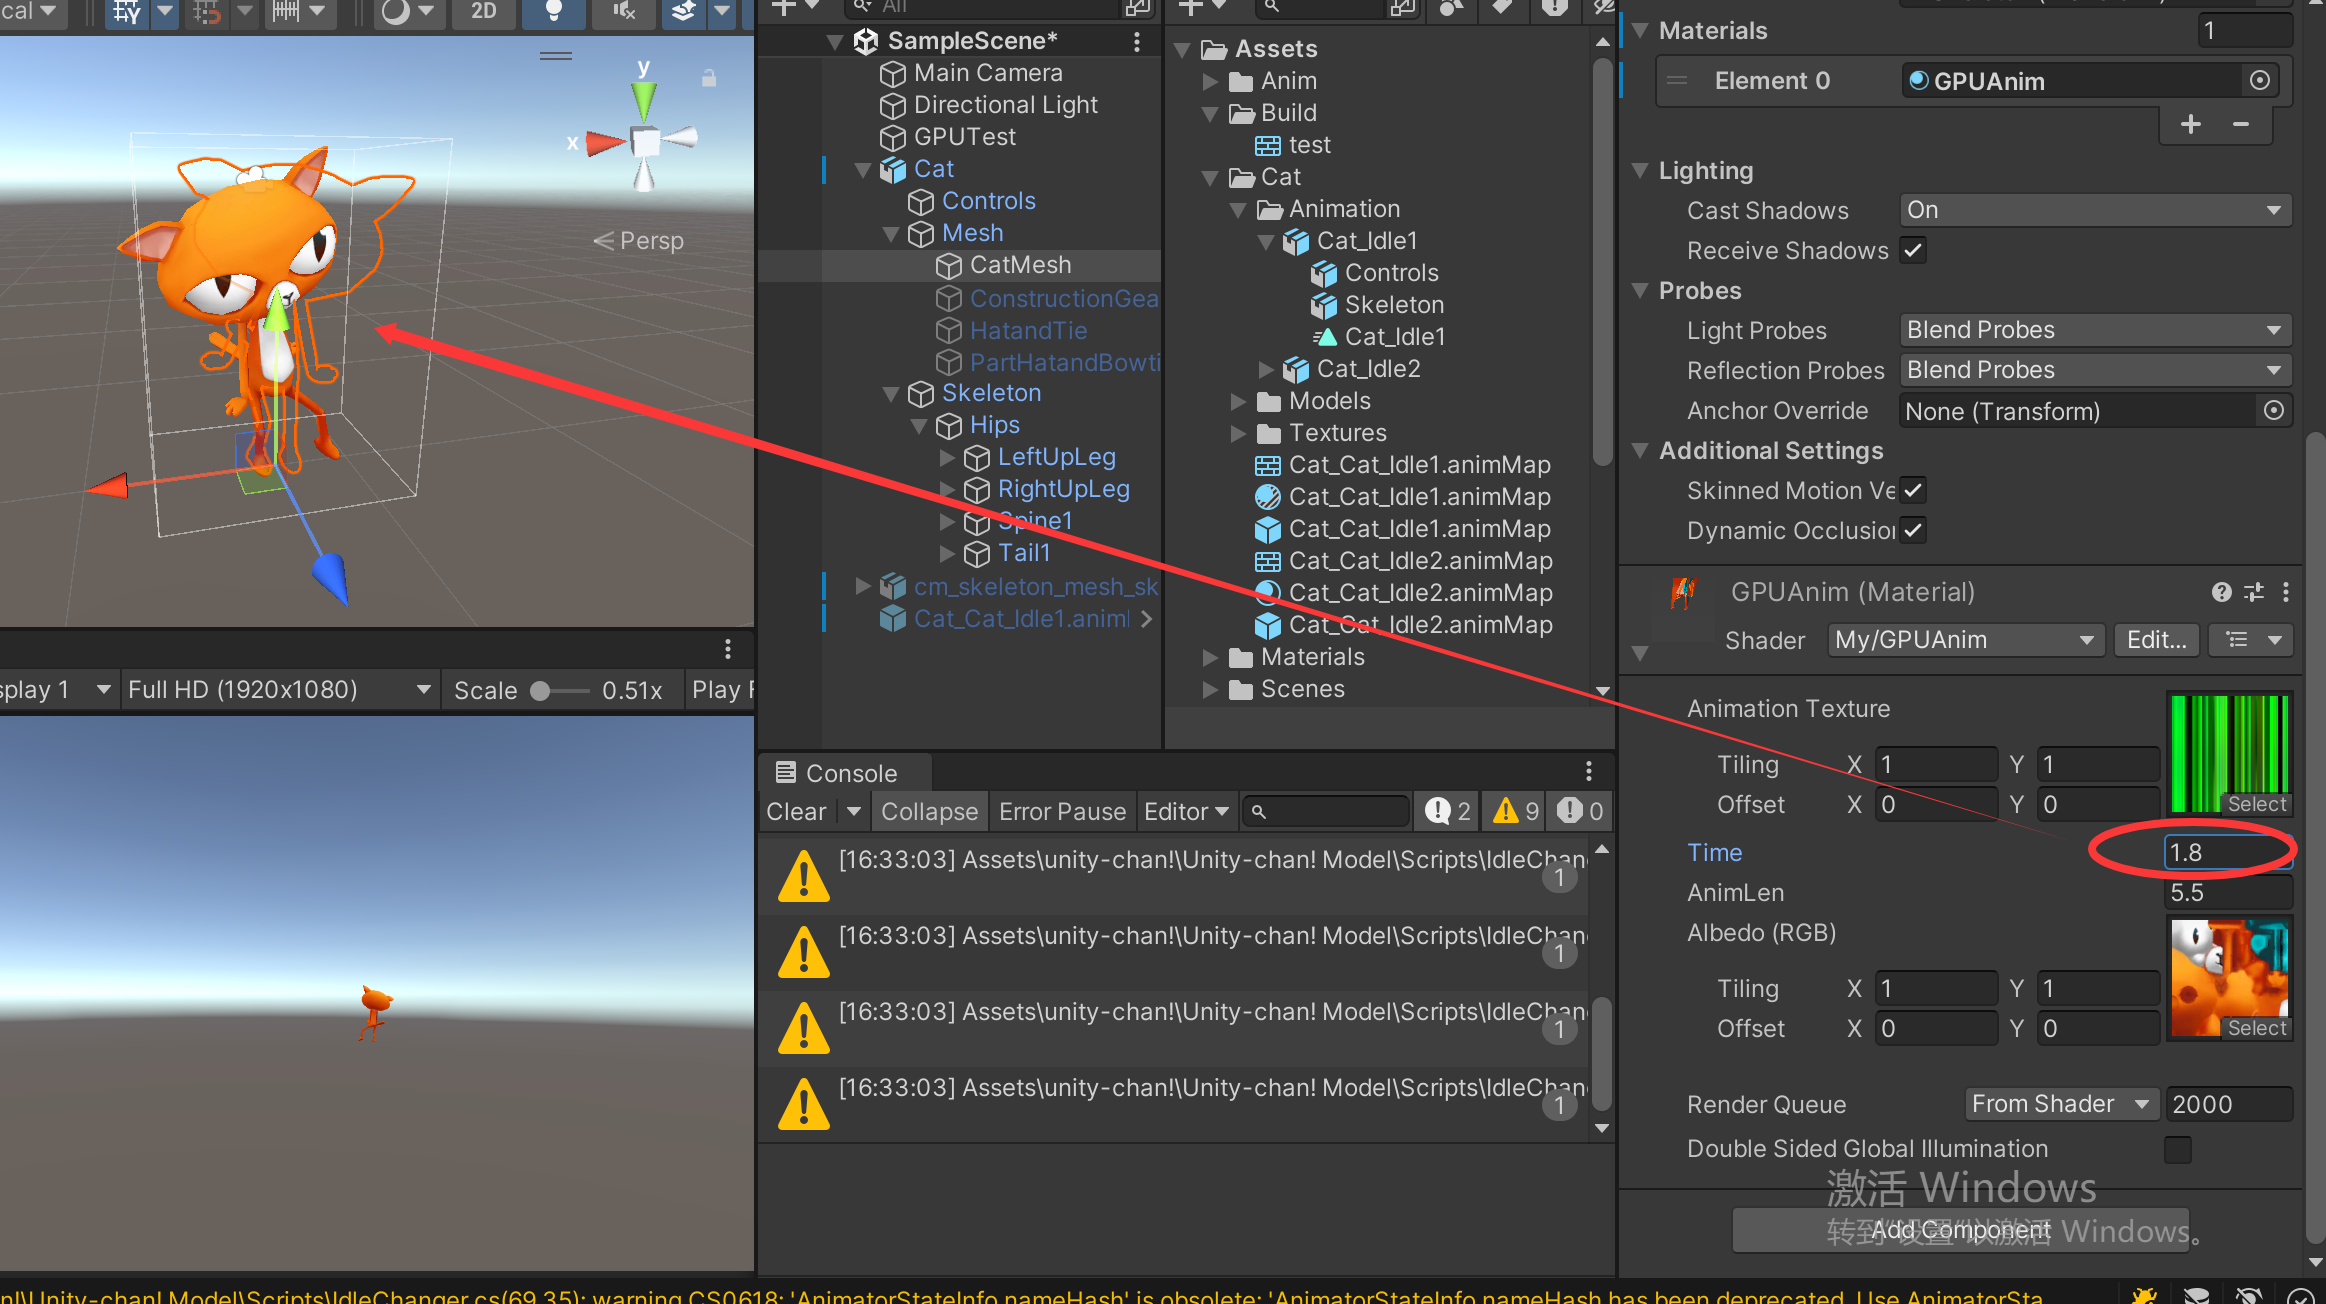
图4
调整材质球的Time值,顶点成功渲染!