import os

# 时间戳文件路径
TIMESTAMP_FILE = 'times_S01.txt'
# 图像子文件夹名
IMAGE_DIR = 'rgb'
# 输出文件名
OUTPUT_FILE = 'rgb.txt'
# -----------------------------------

try:
    with open(TIMESTAMP_FILE, 'r') as f:
        timestamps = [line.strip() for line in f if line.strip()]
except FileNotFoundError:
    print(f"错误:未找到文件 {TIMESTAMP_FILE},请检查路径。")
    exit()

num_images = len(timestamps)

with open(OUTPUT_FILE, 'w') as f:
    for i in range(num_images):
        # 000000.png, 000001.png 等文件名
        filename = f'{i:06d}.png'

        # 写入一行: 时间戳 文件路径/文件名
        timestamp = timestamps[i]
        line = f'{timestamp} {IMAGE_DIR}/{filename}\n'
        f.write(line)

print(f"成功生成 {num_images} 个关联,保存到 {OUTPUT_FILE}。")
c.运行指令,生成orb_timestamps.py文件
python复制代码
python3 orb_timestamps.py
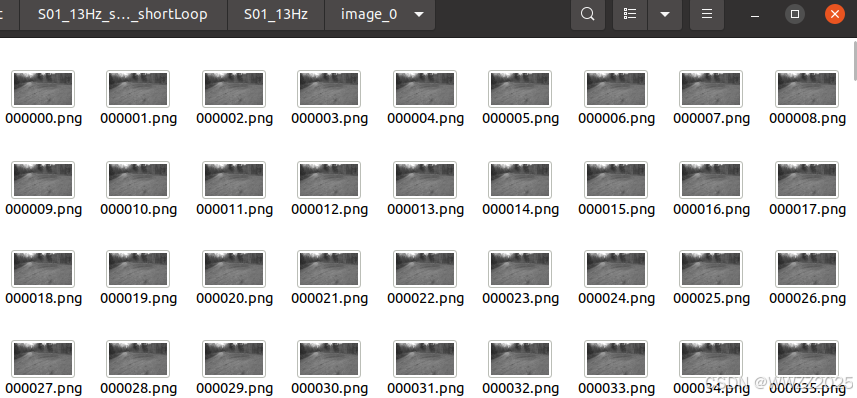
d.检查
e.时间戳路径:rgb.txt
2.2.3 相机参数yaml编写
参数需要根据实际采集的数据集拍摄相机进行修改,yaml配置文件名Finn_s01.yaml
python复制代码
%YAML:1.0

#--------------------------------------------------------------------------------------------
# Camera Parameters. Adjust them!
#--------------------------------------------------------------------------------------------

# Camera calibration and distortion parameters (OpenCV)
Camera.fx: 1056.6287421208997
Camera.fy: 1056.9497022783046
Camera.cx: 952.1135175072209
Camera.cy: 592.824593628865

Camera.k1: -0.12427059109969174
Camera.k2: 0.08183525905697533
Camera.p1: 0.0
Camera.p2: 0.0
Camera.k3: -0.020818847104251116

# Camera frames per second
Camera.fps: 13.0

# Color order of the images (0: BGR, 1: RGB. It is ignored if images are grayscale)
Camera.RGB: 1

#--------------------------------------------------------------------------------------------
# ORB Parameters
#--------------------------------------------------------------------------------------------

# ORB Extractor: Number of features per image
ORBextractor.nFeatures: 4000

# ORB Extractor: Scale factor between levels in the scale pyramid
ORBextractor.scaleFactor: 1.2

# ORB Extractor: Number of levels in the scale pyramid
ORBextractor.nLevels: 8

# ORB Extractor: Fast threshold
# Image is divided in a grid. At each cell FAST are extracted imposing a minimum response.
# Firstly we impose iniThFAST. If no corners are detected we impose a lower value minThFAST
# You can lower these values if your images have low contrast
ORBextractor.iniThFAST: 10
ORBextractor.minThFAST: 3

LoopClosing.minCovisible: 4
LoopClosing.maxDistance: 50

#--------------------------------------------------------------------------------------------
# Viewer Parameters
#--------------------------------------------------------------------------------------------
Viewer.KeyFrameSize: 0.05
Viewer.KeyFrameLineWidth: 1
Viewer.GraphLineWidth: 0.9
Viewer.PointSize:2
Viewer.CameraSize: 0.08
Viewer.CameraLineWidth: 3
Viewer.ViewpointX: 0
Viewer.ViewpointY: -0.7
Viewer.ViewpointZ: -1.8
Viewer.ViewpointF: 500
yaml路径:ORB_SLAM2/Examples/Monocular/Finn_s01.yaml
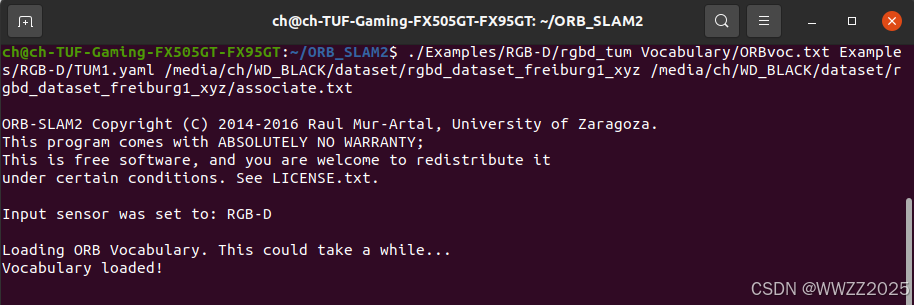
2.2.4 运行测试
python复制代码
cd ORB_SLAM2
./Examples/Monocular/mono_tum Vocabulary/ORBvoc.txt Examples/Monocular/Finn_s01.yaml /media/ch/WD_BLACK/dataset/S01_13Hz_summer_seq1_shortLoop/S01_13Hz/
%YAML:1.0

#--------------------------------------------------------------------------------------------
# Camera Parameters. Adjust them!
#--------------------------------------------------------------------------------------------

# Camera calibration and distortion parameters (OpenCV)
Camera.fx: 1056.6287421208997
Camera.fy: 1056.9497022783046
Camera.cx: 952.1135175072209
Camera.cy: 592.824593628865

Camera.k1: -0.12427059109969174
Camera.k2: 0.08183525905697533
Camera.p1: 0.0
Camera.p2: 0.0
Camera.k3: -0.020818847104251116

Camera.width: 2013
Camera.height: 1195

# Camera frames per second
Camera.fps: 13.0

# stereo baseline times fx
Camera.bf: 211.77668

# Color order of the images (0: BGR, 1: RGB. It is ignored if images are grayscale)
Camera.RGB: 1

# Close/Far threshold. Baseline times.
ThDepth: 35

#--------------------------------------------------------------------------------------------
# ORB Parameters
#--------------------------------------------------------------------------------------------

# ORB Extractor: Number of features per image
ORBextractor.nFeatures: 4000

# ORB Extractor: Scale factor between levels in the scale pyramid
ORBextractor.scaleFactor: 1.2

# ORB Extractor: Number of levels in the scale pyramid
ORBextractor.nLevels: 8

# ORB Extractor: Fast threshold
# Image is divided in a grid. At each cell FAST are extracted imposing a minimum response.
# Firstly we impose iniThFAST. If no corners are detected we impose a lower value minThFAST
# You can lower these values if your images have low contrast
ORBextractor.iniThFAST: 20
ORBextractor.minThFAST: 5

#--------------------------------------------------------------------------------------------
# Viewer Parameters
#--------------------------------------------------------------------------------------------
Viewer.KeyFrameSize: 0.6
Viewer.KeyFrameLineWidth: 2
Viewer.GraphLineWidth: 1
Viewer.PointSize:2
Viewer.CameraSize: 0.7
Viewer.CameraLineWidth: 3
Viewer.ViewpointX: 0
Viewer.ViewpointY: -100
Viewer.ViewpointZ: -0.1
Viewer.ViewpointF: 2000