九、零故障升级之Pod健康探测
为什么要对容器做探测?
在 Kubernetes 中 Pod 是最小的计算单元,而一个 Pod 又由多个容器组成,相当于每个容器就是一个应用,应用在运行期间,可能因为某些意外情况致使程序挂掉。那么如何监控这些容器状态稳定性,保证服务在运行期间不会发生问题,发生问题后进行重启等机制,就成为了重中之重的事情,考虑到这点 kubernetes 推出了活性探针机制。有了存活性探针能保证程序在运行中如果挂掉能够自动重启,但是还有个经常遇到的问题,比如说,在Kubernetes 中启动Pod,显示明明Pod已经启动成功,且能访问里面的端口,但是却返回错误信息。还有就是在执行滚动更新时候,总会出现一段时间,Pod对外提供网络访问,但是访问却发生404,这两个原因,都是因为Pod已经成功启动,但是 Pod 的的容器中应用程序还在启动中导致,考虑到这点Kubernetes推出了就绪性探针机制。
9.1 Kubernetes 提供了三种探针来实现容器探测
9.1.1 三种探针
-
startupProbe(启动探针):探测容器中的应用是否已经启动。
- 如果提供了启动探测(startup probe),则禁用所有其他探测,直到它成功为止。如果启动探测失败,kubelet 将杀死容器,容器服从其重启策略进行重启。如果容器没有提供启动探测,则默认状态为成功Success。
-
livenessProbe(存活探针):用指定的方式(exec、tcp、http)检测pod中的容器是否正常运行。
- 如果检测失败,则认为容器不健康,那么Kubelet将根据Pod中设置的 restartPolicy策略来判断Pod 是否要进行重启操作,如果容器配置中没有配置 livenessProbe,Kubelet 将认为存活探针探测一直为success(成功)状态。
-
readnessProbe(就绪探针):用于检测容器中的应用是否可以接受请求。
- 当探测成功后才使Pod对外提供网络访问,将容器标记为就绪状态,可以加到pod前端负载,如果探测失败,则将容器标记为未就绪状态,会把pod从前端负载移除。
可以自定义在 pod 启动时是否执行这些检测,如果不设置,则检测结果均默认为通过,如果设置,则顺序为
startupProbe > readinessProbe 和 livenessProbe
readinessProbe 和 livenessProbe 是并发关系
9.1.2 探测方式及结果值
9.1.2.1 探测方式
eXec:在容器中执行命令(如果执行成功返回0,即探测成功)tcpSocket:检测端口连通性(如果能够建立TCP连接,则表明容器健康)httpGet:检测指定路径的HTTP状态码(200 <= 状态码 < 400,即表明容器健康)
9.1.2.2 探针结果值
Success:通过探测Failure:未通过探测Unknown:探测没有正常进行
9.1.3 Pod 探针相关属性
9.1.3.1 可选字段
探针(Probe)有许多可选字段,可以用来更加精确的控制Liveness和Readiness两种探针的行为。
bash
  exec  <ExecAction>				# 探测方式1
  tcpSocket     <TCPSocketAction>	# 探测方式2
  httpGet       <HTTPGetAction>		# 探测方式3

  grpc  <GRPCAction>		# 检查 gRPC 服务健康状态

  initialDelaySeconds   <integer>
  # 容器启动后等待多久进行第一次探测,单位"秒",默认是 0s,最小值是 0s

  periodSeconds 		<integer>
  # 探测执行间隔,单位"秒",默认为 10s,最小值是 1s

  timeoutSeconds        <integer>
  # 超时响应时间,超过阀值将认为探测失败一次,单位"秒",默认为 1s。

  successThreshold      <integer>
  # 只要有x次探测成功就认为容器启动成功,默认为 1次,最小值为 1次

  failureThreshold      <integer>
  # 连续探测失败xx次,容器就会被重启,默认为 3次,最小值为 1次

  terminationGracePeriodSeconds <integer>	# 控制容器优雅终止的等待时间
9.1.3.2 两种探针区别
bash
ReadinessProbe 和 livenessProbe 可以使用相同探测方式;
	只是对 Pod 的处置方式不同:

	readinessProbe
		当检测失败后,将 Pod 的 IP:Port 从对应的 EndPoint 列表中删除。
	livenessProbe
		当检测失败后,将杀死容器并根据 Pod 的重启策略来决定作出对应的措施。
9.2 启动探针startupProbe
bash
]# kubectl explain pods.spec.containers.startupProbe9.2.1 exec模式
bash
]# kubectl explain pods.spec.containers.startupProbe.exec
  command       <[]string>
bash
[root@k8s-master1 pod-yaml]# vim start-up-exec.yaml
apiVersion: v1
kind: Pod
metadata:
  name: startupprobe-exec-demo
spec:
  containers:
  - name: test
    image: docker.io/library/tomcat:8.5-jre8-alpine
    imagePullPolicy: IfNotPresent
    ports:
    - containerPort: 8080
    startupProbe:
      exec:							# exec(此命令是否执行)
        command: ["/bin/sh","-c","xxx ps aux | grep tomcat"] # 这里的xxx 不存在,因此会失败(达到实验目的)
      initialDelaySeconds: 3
      periodSeconds: 2
      timeoutSeconds: 3
      successThreshold: 1
      failureThreshold: 3

]# kubectl apply -f start-up-exec.yaml
]# kubectl get pods -w		# 查看
9.2.2 tcpSocket模式
bash
]# kubectl explain pods.spec.containers.startupProbe.tcpSocket
  host  <string>
  port  <IntOrString> -required-
bash
[root@k8s-master1 pod-yaml]# vim start-up-tcp.yaml
apiVersion: v1
kind: Pod
metadata:
  name: startupprobe-tcpsocket-demo
spec:
  containers:
  - name: test
    image: docker.io/library/tomcat:8.5-jre8-alpine
    imagePullPolicy: IfNotPresent
    ports:
    - containerPort: 8080
    startupProbe:
      tcpSocket:			# tcpSocket(查看端口8080是否打开)
        port: 8080
      initialDelaySeconds: 3
      periodSeconds: 2
      timeoutSeconds: 3
      successThreshold: 1
      failureThreshold: 3

]# kubectl apply -f start-up-tcp.yaml
]# kubectl get pods -w		# 查看
9.2.3 httpGet模式
bash
]# kubectl explain pods.spec.containers.startupProbe.httpGet
  host  <string>
  httpHeaders   <[]HTTPHeader>
  path  <string>					# 请求的路径
  port  <IntOrString> -required-	# 请求的端口
  scheme        <string>

httpGet探测方式有如下可选的控制字段:
scheme: 用于连接host的协议,默认为HTTP。
host:要连接的主机名,默认为Pod IP,可以在http request head中设置host头部。
port:容器上要访问端口号或名称。
path:http服务器上的访问URI。
httpHeaders:自定义HTTP请求headers,HTTP允许重复headers。
bash
[root@k8s-master1 pod-yaml]# vim start-up-http.yaml
apiVersion: v1
kind: Pod
metadata:
  name: startupprobe-httpget-demo
spec:
  containers:
  - name: test
    image: docker.io/library/tomcat:8.5-jre8-alpine
    imagePullPolicy: IfNotPresent
    ports:
    - containerPort: 8080
    startupProbe:
      httpGet:
        path: /
        port: 8080					# 请求地址为:http://localhost:8080/
      initialDelaySeconds: 3
      periodSeconds: 2
      timeoutSeconds: 3
      successThreshold: 1
      failureThreshold: 3

]# kubectl apply -f start-up-http.yaml
]# kubectl get pods
]# curl xxx:8080/
9.3 存活探针livenessProbe
bash
]# kubectl explain pods.spec.containers.livenessProbe9.3.1 exec模式
bash
]# kubectl explain pods.spec.containers.livenessProbe.exec
  command       <[]string>
bash
[root@k8s-master1 pod-yaml]# vim liveness-exec.yaml
[root@k8s-master1 pod-yaml]# cat liveness-exec.yaml
apiVersion: v1
kind: Pod
metadata:
  name: demo-livenessprobe-exec
spec:
  containers:
  - name: test
    image: docker.io/library/busybox:latest
    imagePullpolicy: IfNotPresent
    command: ["/bin/sh","-c","touch /tmp/healthy;sleep 30;rm -rf /tmp/healthy;sleep 600"]
    livenessProbe:
      initialDelaySeconds: 10
      periodSeconds: 5
      exec:
        command: ["cat /tmp/healthy"]

]# kubectl apply -f liveness-exec.yaml
]# kubectl get pods

`/bin/sh -c "touch /tmp/healthy; sleep 30; rm -rf /tmp/healthy; sleep 600"`
容器在初始化后,首先创建一个 /tmp/healthy 文件,然后执行睡眠命令,睡眠 30 秒,到时间后执行删除 /tmp/healthy 文件命令。而设置的存活探针检检测方式为执行 shell 命令,用 cat 命令输出 healthy 文件的内容,如果能成功执行这条命令,存活探针就认为探测成功,否则探测失败。在前 30 秒内,由于文件存在,所以存活探针探测时执行 cat /tmp/healthy 命令成功执行。30 秒后 healthy 文件被删除,所以执行命令失败,Kubernetes 会根据 Pod 设置的重启策略来判断,是否重启 Pod。
9.3.2 httpGet模式
bash
]# kubectl explain pods.spec.containers.livenessProbe.httpGet
  host  <string>
  httpHeaders   <[]HTTPHeader>
  path  <string>
  port  <IntOrString> -required-
  scheme        <string>


httpGet探测方式有如下可选的控制字段:
scheme: 用于连接host的协议,默认为HTTP。
host:要连接的主机名,默认为Pod IP,可以在http request head中设置host头部。
port:容器上要访问端口号或名称。
path:http服务器上的访问URI。
httpHeaders:自定义HTTP请求headers,HTTP允许重复headers。
bash
[root@k8s-master1 pod-yaml]# vim liveness-http.yaml
apiVersion: v1
kind: Pod
metadata:
  name: demo-liveness-httpget
spec:
  containers:
  - name: test
    image: docker.io/mydlqclub/springboot-helloworld:0.0.1
    imagePullPolicy: IfNotPresent
    livenessProbe:
      httpGet:
        scheme: HTTP
        path: /actuator/health
        port: 8081
      initialDelaySeconds: 20
      periodSeconds: 5
      timeoutSeconds: 10

]# kubectl apply -f liveness-http.yaml
]# kubectl get pods -owide
]# curl 10.244.90.136:8081/actuator/health
{"status":"UP"}


上面 Pod 中启动的容器是一个 SpringBoot 应用,其中引用了 Actuator 组件,提供了 /actuator/health 健康检查地址,存活探针可以使用 HTTPGet 方式向服务发起请求,请求 8081 端口的 /actuator/health 路径来进行存活判断:

任何大于或等于200且小于400的代码表示探测成功。
任何其他代码表示失败。
如果探测失败,则会杀死 Pod 进行重启操作。9.3.3tcpSocket模式
bash
]# kubectl explain pods.spec.containers.livenessProbe.tcpSocket
  host  <string>
  port  <IntOrString> -required-
bash
[root@k8s-master1 pod-yaml]# vim liveness-tcp.yaml
apiVersion: v1
kind: Pod
metadata:
  name: demo-liveness-tcp
spec:
  containers:
  - name: test
    image: docker.io/library/nginx:latest
    imagePullPolicy: IfNotPresent
    livenessProbe:
      tcpSocket:
        port: 80
      initialDelaySeconds: 15
      periodSeconds: 20

]# kubectl apply -f liveness-tcp.yaml
]# kubectl exec -it demo-liveness-tcp -c test -- /bin/bash
root@demo-liveness-tcp:/# nginx -s stop

# 去观察pod的状态(由于我们模拟停止nginx服务,因此端口关闭,根据重启策略会进行重启)
]# kubectl get pods -w

TCP 检查方式和 HTTP 检查方式非常相似,在容器启动 initialDelaySeconds 参数设定的时间后,kubelet 将发送第一个 livenessProbe 探针,尝试连接容器的 80 端口,如果连接失败则将杀死 Pod 重启容器。
9.4 就绪探针readinessProbe
以下只进行了
httpGet探测方式的示例;也是支持三种:
livenessProbe和readinessProbe一个是用于探测应用的存活,一个是判断是否对外提供流量的条件。
这里用一个 Springboot 项目,设置 ReadinessProbe 探测 SpringBoot 项目的 8081 端口下的 /actuator/health 接口;
如果探测成功则代表内部程序以及启动,就开放对外提供接口访问,否则内部应用没有成功启动,暂不对外提供访问,直到就绪探针探测成功。
9.4.1 示例- service资源结合 httpGet模式
这里的service资源,还没有学;
可以先理解,不用担心。
bash
[root@k8s-master1 pod-yaml]# vim readiness-svc-http.yaml
apiVersion: v1
kind: Service
metadata:
  name: springboot
  labels:
    app: springboot
spec:
  type: NodePort
  ports:
  - name: server
    port: 8080
    targetPort: 8080
    nodePort: 31180
  - name: management
    port: 8081
    targetPort: 8081
    nodePort: 31181
  selector:
    app: springboot
---
apiVersion: v1
kind: Pod
metadata:
  name: springboot
  labels:
    app: springboot
spec:
  containers:
  - name: springboot
    image: docker.io/mydlqclub/springboot-helloworld:0.0.1
    imagePullPolicy: IfNotPresent
    ports:
      - name: server
        containerPort: 8080
      - name: management
        containerPort: 8081
    readinessProbe:
      httpGet:
        scheme: HTTP
        port: 8081
        path: /actuator/health

]# kubectl apply -f readiness-svc-http.yaml
]# kubectl get pods -w
...

# 这个yaml文件里面都是使用默认的;
# 模拟的是,容器启动虽然很快启动可以看到Runing(但是显示 0/1 READY),可以看出里面的服务还没有起来,如果服务起来的话,就是显示 1/1,此时也可以在svc资源里面捕捉到容器的ip了


]# kubectl describe svc springboot | grep Endpoints
Endpoints:                10.244.90.139:8080
Endpoints:                10.244.90.139:8081

]# kubectl get pods -owide
]# curl 10.244.90.139:8081/actuator/health
{"status":"UP"}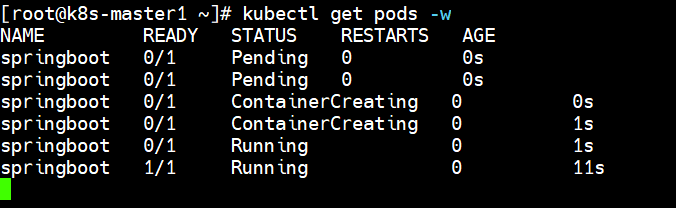
9.5 三探针合用示例
startupProbe + livenessProbe + readinessProbe
一般程序中需要设置三种探针结合使用,并且也要结合实际情况,来配置初始化检查时间和检测间隔,下面列一个简单的 SpringBoot 项目的例子。
bash
[root@k8s-master1 pod-yaml]# vim start-read-live.yaml
apiVersion: v1
kind: Service
metadata:
  name: springboot-live
  labels:
    app: springboot
spec:
  type: NodePort
  ports:
  - name: server
    port: 8080
    targetPort: 8080
    nodePort: 31180
  - name: management
    port: 8081
    targetPort: 8081
    nodePort: 31181
  selector:
    app: springboot
---
apiVersion: v1
kind: Pod
metadata:
  name: springboot-live
  labels:
    app: springboot
spec:
  containers:
  - name: springboot
    image: docker.io/mydlqclub/springboot-helloworld:0.0.1
    imagePullPolicy: IfNotPresent
    ports:
    - name: server
      containerPort: 8080
    - name: management
      containerPort: 8081
    readinessProbe:				# 就绪探针
      initialDelaySeconds: 20
      periodSeconds: 5
      timeoutSeconds: 10
      httpGet:
        scheme: HTTP
        port: 8081
        path: /actuator/health
    livenessProbe:				# 存活探针
      initialDelaySeconds: 20
      periodSeconds: 5
      timeoutSeconds: 10
      httpGet:
        scheme: HTTP
        port: 8081
        path: /actuator/health
    startupProbe:				# 启动探针(先执行,放置顺序无所谓)
      initialDelaySeconds: 20
      periodSeconds: 5
      timeoutSeconds: 10
      httpGet:
        scheme: HTTP
        port: 8081
        path: /actuator/health

[root@k8s-master1 ~]# kubectl get pods -w
NAME              READY   STATUS    RESTARTS   AGE
springboot-live   0/1     Pending   0          0s
springboot-live   0/1     Pending   0          0s
springboot-live   0/1     ContainerCreating   0          0s
springboot-live   0/1     ContainerCreating   0          1s
springboot-live   0/1     Running             0          1s
springboot-live   0/1     Running             0          21s
springboot-live   1/1     Running             0          21s

[root@k8s-master1 ~]# kubectl describe svc springboot | grep Endpoints
Endpoints:                10.244.90.140:8080
Endpoints:                10.244.90.140:8081

[root@k8s-master1 ~]# kubectl get pods -owide
springboot-live   1/1     Running   10.244.90.140

[root@k8s-master1 ~]# curl 10.244.90.140:8081/actuator/health
{"status":"UP"}