目录
一、前言
我在网上查阅了大量资料,始终没找到授权码模式前后端分离的实际落地案例,于是结合前后端做了本地测试,最终梳理出了该模式下前后端分离的可行解决方案。
二、实现效果
访问认证授权服务器的认证链接(http://localhost:9000/oauth2/authorize?client_id=test-client&response_type=code&redirect_uri=http://localhost:3000/&scope=read) -> 302重定向到前端登录页面
点击登录认证,成功后302返回callbackUri页,并返回对应的code

最终跨域通过code发送请求获取对应的token
三、方案概述
测试环境:
后端:SpringBoot 3.2.8 jdk 21 端口:9000
前端:Nextjs v16 端口:3000
实现原理:
Spring Security OAuth2.1 需配置默认的 login 地址,我们将该地址指定为前端自定义登录页的地址,同时把返回页地址也配置为前端自定义的返回页地址。
服务器上不会报跨域,本地测试需要解决端口不同的跨域问题。
四、后端部分
1、关键依赖
XML
         <dependency>
            <groupId>org.springframework.boot</groupId>
            <artifactId>spring-boot-starter-web</artifactId>
        </dependency>
        <dependency>
            <groupId>org.springframework.boot</groupId>
            <artifactId>spring-boot-starter-oauth2-authorization-server</artifactId>
        </dependency>
2、仅三个配置类
java
import org.springframework.context.annotation.Bean;
import org.springframework.context.annotation.Configuration;
import org.springframework.security.config.annotation.web.builders.HttpSecurity;
import org.springframework.security.oauth2.server.authorization.config.annotation.web.configuration.OAuth2AuthorizationServerConfiguration;
import org.springframework.security.web.SecurityFilterChain;
import org.springframework.security.web.authentication.LoginUrlAuthenticationEntryPoint;

@Configuration
public class OAuth2AuthorizationServerConfig {
    // OAuth2授权服务器核心配置(必加)
    @Bean
    public SecurityFilterChain authorizationServerSecurityFilterChain(HttpSecurity http) throws Exception {
        OAuth2AuthorizationServerConfiguration.applyDefaultSecurity(http);

        // 未登录时重定向到前端登录页
        http.exceptionHandling(ex -> ex
                .authenticationEntryPoint(new LoginUrlAuthenticationEntryPoint("http://localhost:3000/login"))
        );

        return http.build();
    }
}
java
import org.springframework.context.annotation.Bean;
import org.springframework.context.annotation.Configuration;
import org.springframework.security.oauth2.core.AuthorizationGrantType;
import org.springframework.security.oauth2.core.ClientAuthenticationMethod;
import org.springframework.security.oauth2.server.authorization.client.InMemoryRegisteredClientRepository;
import org.springframework.security.oauth2.server.authorization.client.RegisteredClient;
import org.springframework.security.oauth2.server.authorization.client.RegisteredClientRepository;
import org.springframework.security.oauth2.server.authorization.settings.ClientSettings;

import java.util.UUID;

@Configuration
public class OAuth2ClientConfig {

    // 核心:注册 RegisteredClientRepository Bean
    @Bean
    public RegisteredClientRepository registeredClientRepository() {
        RegisteredClient testClient = RegisteredClient.withId(UUID.randomUUID().toString())
                .clientId("test-client") // 前端请求的client_id必须匹配
                .clientSecret("{noop}test-secret") // 测试用不加密,生产换BCrypt
                .clientAuthenticationMethod(ClientAuthenticationMethod.CLIENT_SECRET_BASIC)
                .authorizationGrantType(AuthorizationGrantType.AUTHORIZATION_CODE) // 授权码模式
                .redirectUri("http://localhost:3000/") // 前端回调地址
                .scope("read")
                .clientSettings(ClientSettings.builder().requireAuthorizationConsent(false).build()) // 跳过授权确认
                .build();

        return new InMemoryRegisteredClientRepository(testClient);
    }
}
java
import org.springframework.context.annotation.Bean;
import org.springframework.context.annotation.Configuration;
import org.springframework.security.config.annotation.web.builders.HttpSecurity;
import org.springframework.security.config.annotation.web.configuration.EnableWebSecurity;
import org.springframework.security.config.annotation.web.configurers.AbstractHttpConfigurer;
import org.springframework.security.web.SecurityFilterChain;
import org.springframework.security.web.authentication.LoginUrlAuthenticationEntryPoint;
import org.springframework.web.cors.CorsConfiguration;
import org.springframework.web.cors.CorsConfigurationSource;
import org.springframework.web.cors.UrlBasedCorsConfigurationSource;

import java.util.Arrays;
import java.util.List;

@Configuration
@EnableWebSecurity
public class SecurityConfig {

    // 1. 全局跨域配置(覆盖所有接口,包括/oauth2/authorize)
    @Bean
    public CorsConfigurationSource corsConfigurationSource() {
        CorsConfiguration config = new CorsConfiguration();
        // 允许前端3000端口跨域
        config.setAllowedOrigins(List.of("http://localhost:3000"));
        // 允许所有请求方法(GET/POST/OPTIONS等)
        config.setAllowedMethods(Arrays.asList("GET", "POST", "PUT", "DELETE", "OPTIONS"));
        // 允许所有请求头
        config.setAllowedHeaders(List.of("*"));
        // 允许携带Cookie(关键!)
        config.setAllowCredentials(true);
        // 预检请求缓存时间(减少OPTIONS请求)
        config.setMaxAge(3600L);

        UrlBasedCorsConfigurationSource source = new UrlBasedCorsConfigurationSource();
        // 对所有路径生效(包括/oauth2/**)
        source.registerCorsConfiguration("/**", config);
        return source;
    }

    // 2. Security过滤链配置
    @Bean
    public SecurityFilterChain securityFilterChain(HttpSecurity http) throws Exception {
        http
                // 启用全局跨域配置(核心!)
                .cors(cors -> cors.configurationSource(corsConfigurationSource()))
                // 测试阶段关闭CSRF
                .csrf(AbstractHttpConfigurer::disable)
                // 授权规则
                .authorizeHttpRequests(auth -> auth
                        // 放行登录和授权相关接口
                        .requestMatchers("/login/**", "/oauth2/**").permitAll()
                        // 其他接口需要认证
                        .anyRequest().authenticated()
                )
                // 未认证时重定向到前端登录页
                .exceptionHandling(ex -> ex
                        .authenticationEntryPoint(new LoginUrlAuthenticationEntryPoint("http://localhost:3000/login"))
                )
                // 表单登录配置
                .formLogin(form -> form
                        .loginPage("http://localhost:3000/login")
                        .loginProcessingUrl("/login")
                        .permitAll()
                );

        return http.build();
    }
}
最后,外加一个你的启动类就行!
3、配置文件
java
server:
  port: 9000
logging:
  level:
    org.springframework.security: trace
spring:
  security:
    # 用户注册
    user:
      name: admin
      password: 1111
后端就这点!
启动后在,http://localhost:9000下。
五、前端部分
nextjs加一个/login页面
javascript
'use client';
import { useState } from 'react';

export default function Login() {
  // 仅保留账号密码状态
  const [formData, setFormData] = useState({ username: '', password: '' });

  // 输入框值变更
  const handleInputChange = (e: React.ChangeEvent<HTMLInputElement>) => {
    const { name, value } = e.target;
    setFormData(prev => ({ ...prev, [name]: value }));
  };

  // 核心修改:放弃fetch,直接提交表单到后端登录接口
  const handleSubmit = (e: React.FormEvent) => {
    e.preventDefault();
    // 直接拼接登录请求地址+授权参数,跳转提交(无CORS限制)
    const loginUrl = `/api/login?${window.location.search}`;
    // 用form的action直接提交(React原生写法,无DOM操作)
    (e.target as HTMLFormElement).action = loginUrl;
    (e.target as HTMLFormElement).method = 'POST';
    (e.target as HTMLFormElement).submit();
  };

  return (
    <div className="flex justify-center items-center bg-gray-50 px-4 min-h-screen">
      <div className="bg-white shadow-sm p-6 rounded-lg w-full max-w-md">
        <h2 className="mb-6 font-medium text-gray-800 text-xl text-center">系统登录</h2>
        {/* 关键:给form加hidden的参数,提交账号密码 */}
        <form onSubmit={handleSubmit} className="space-y-4">
          <div className="space-y-2">
            <label className="text-gray-600 text-sm">账号</label>
            <input
              type="text"
              name="username"
              value={formData.username}
              onChange={handleInputChange}
              className="px-3 py-2 border border-gray-300 focus:border-blue-500 rounded focus:outline-none focus:ring-1 focus:ring-blue-500 w-full"
              placeholder="请输入用户名"
              required
            />
          </div>
          <div className="space-y-2">
            <label className="text-gray-600 text-sm">密码</label>
            <input
              type="password"
              name="password"
              value={formData.password}
              onChange={handleInputChange}
              className="px-3 py-2 border border-gray-300 focus:border-blue-500 rounded focus:outline-none focus:ring-1 focus:ring-blue-500 w-full"
              placeholder="请输入密码"
              required
            />
          </div>
          <button
            type="submit"
            className="bg-blue-600 hover:bg-blue-700 py-2 rounded w-full text-white transition-colors">
            登录
          </button>
        </form>
      </div>
    </div>
  );
}
加入代理,否则本地端口不同会报跨域。
next.config.js配置加入这个
javascript
  async rewrites() {
    return [
      {
        source: '/api/:path*', // 匹配所有 /api 开头的请求(如 /api/login、/api/oauth2/authorize)
        destination: 'http://localhost:9000/:path*' // 转发到后端 9000 端口(保留后续路径)
      }
    ];
}六、测试部分
按照Authorization Server的官方步骤,我们应该访问这个链接,之后会重定向到配置好的登录页面:
bash
http://localhost:9000/oauth2/authorize?client_id=test-client&response_type=code&redirect_uri=http://localhost:3000/&scope=read注意:callbackUri一定要和你后端配置的保持一致,否则后续有问题!!!
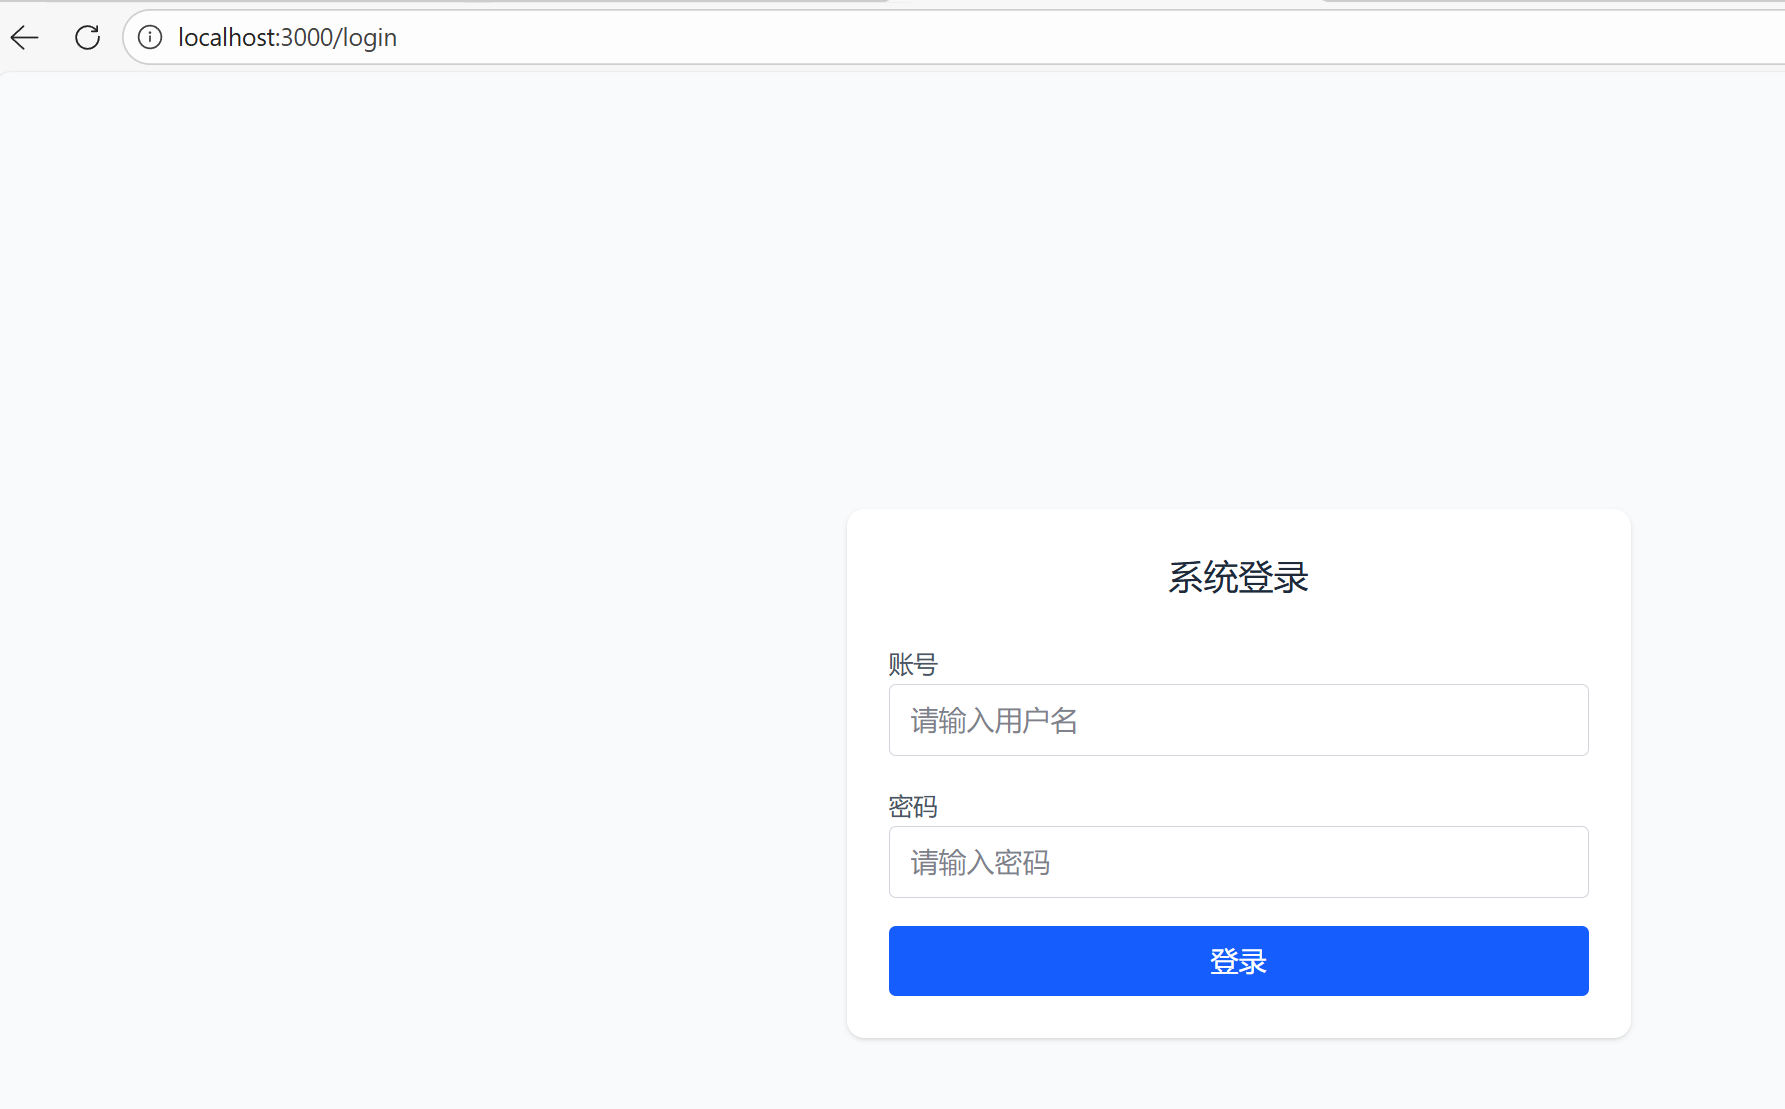
重定向到登录页后,我们输入配置好的参数 ,username: admin, password: 1111
点击登录,登录成功后重定向到后端配置好的callbackUri页面并在url中可以获取到code参数。

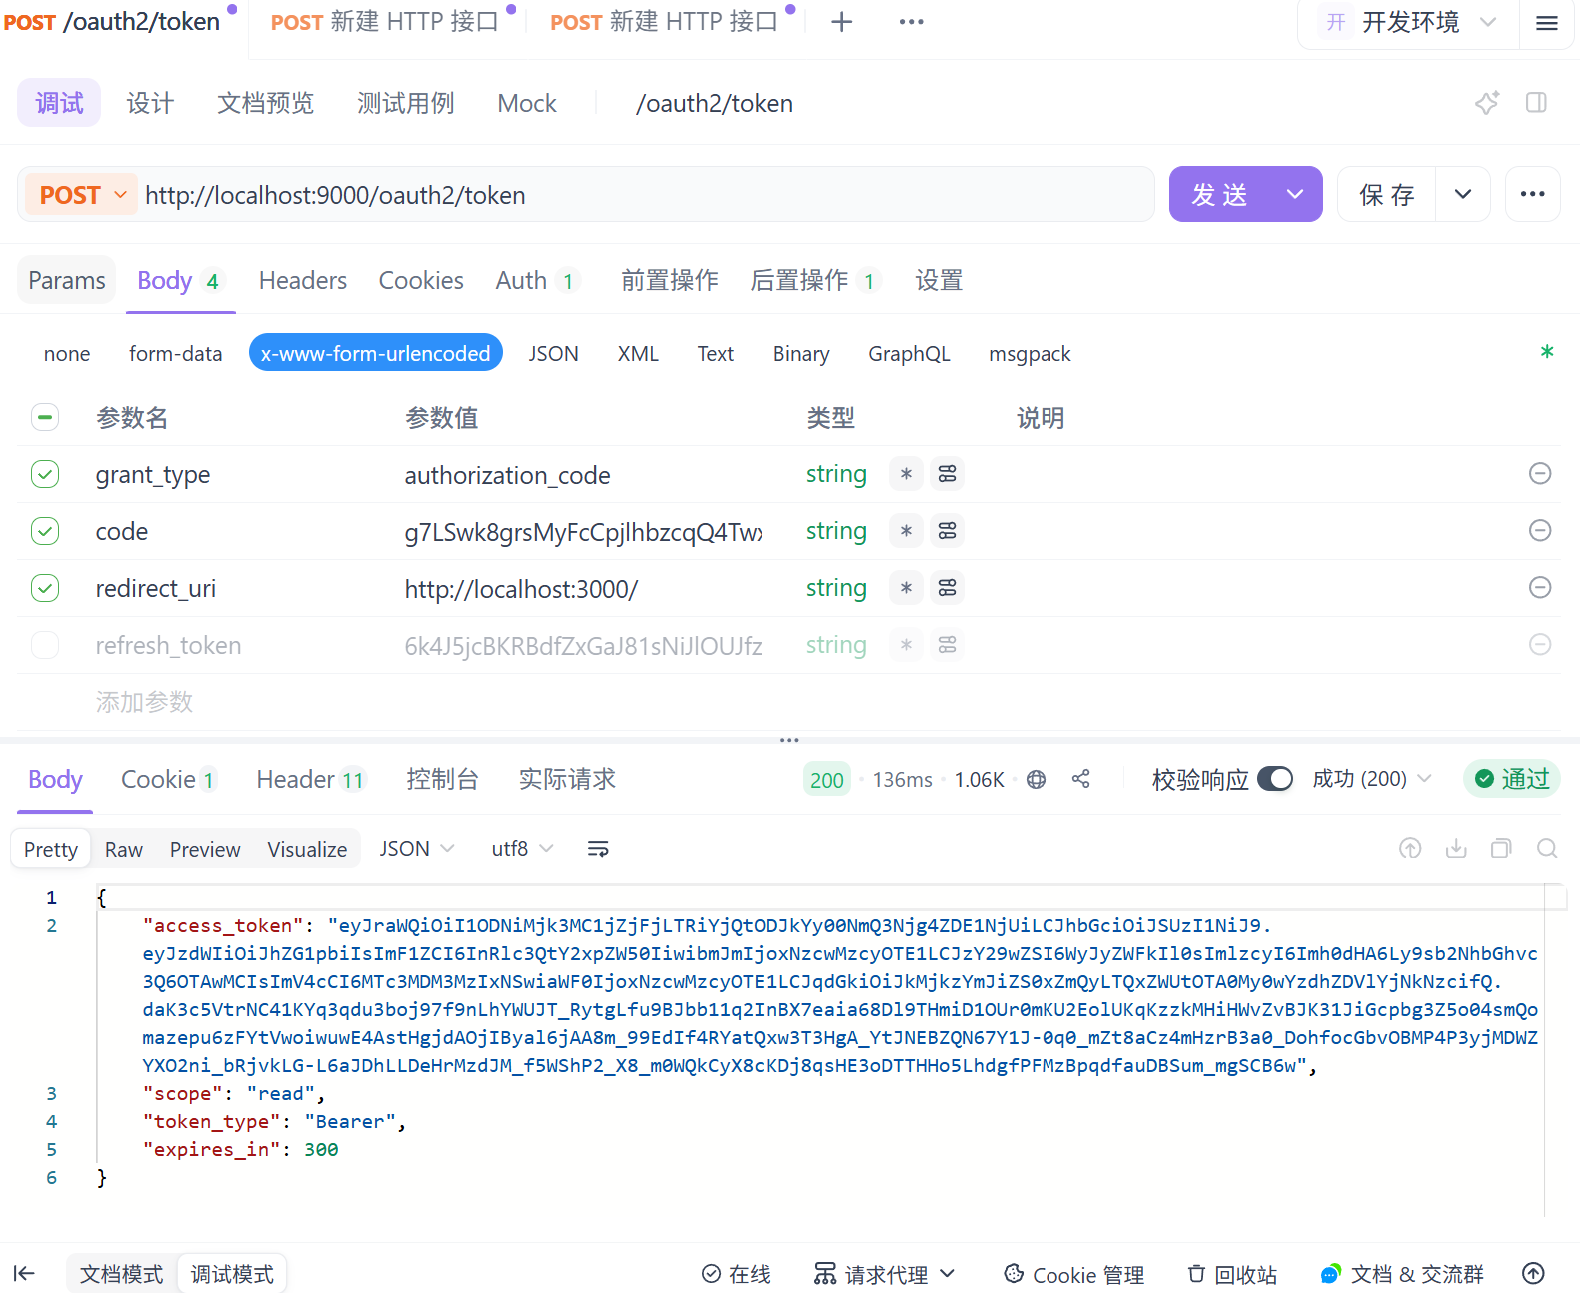
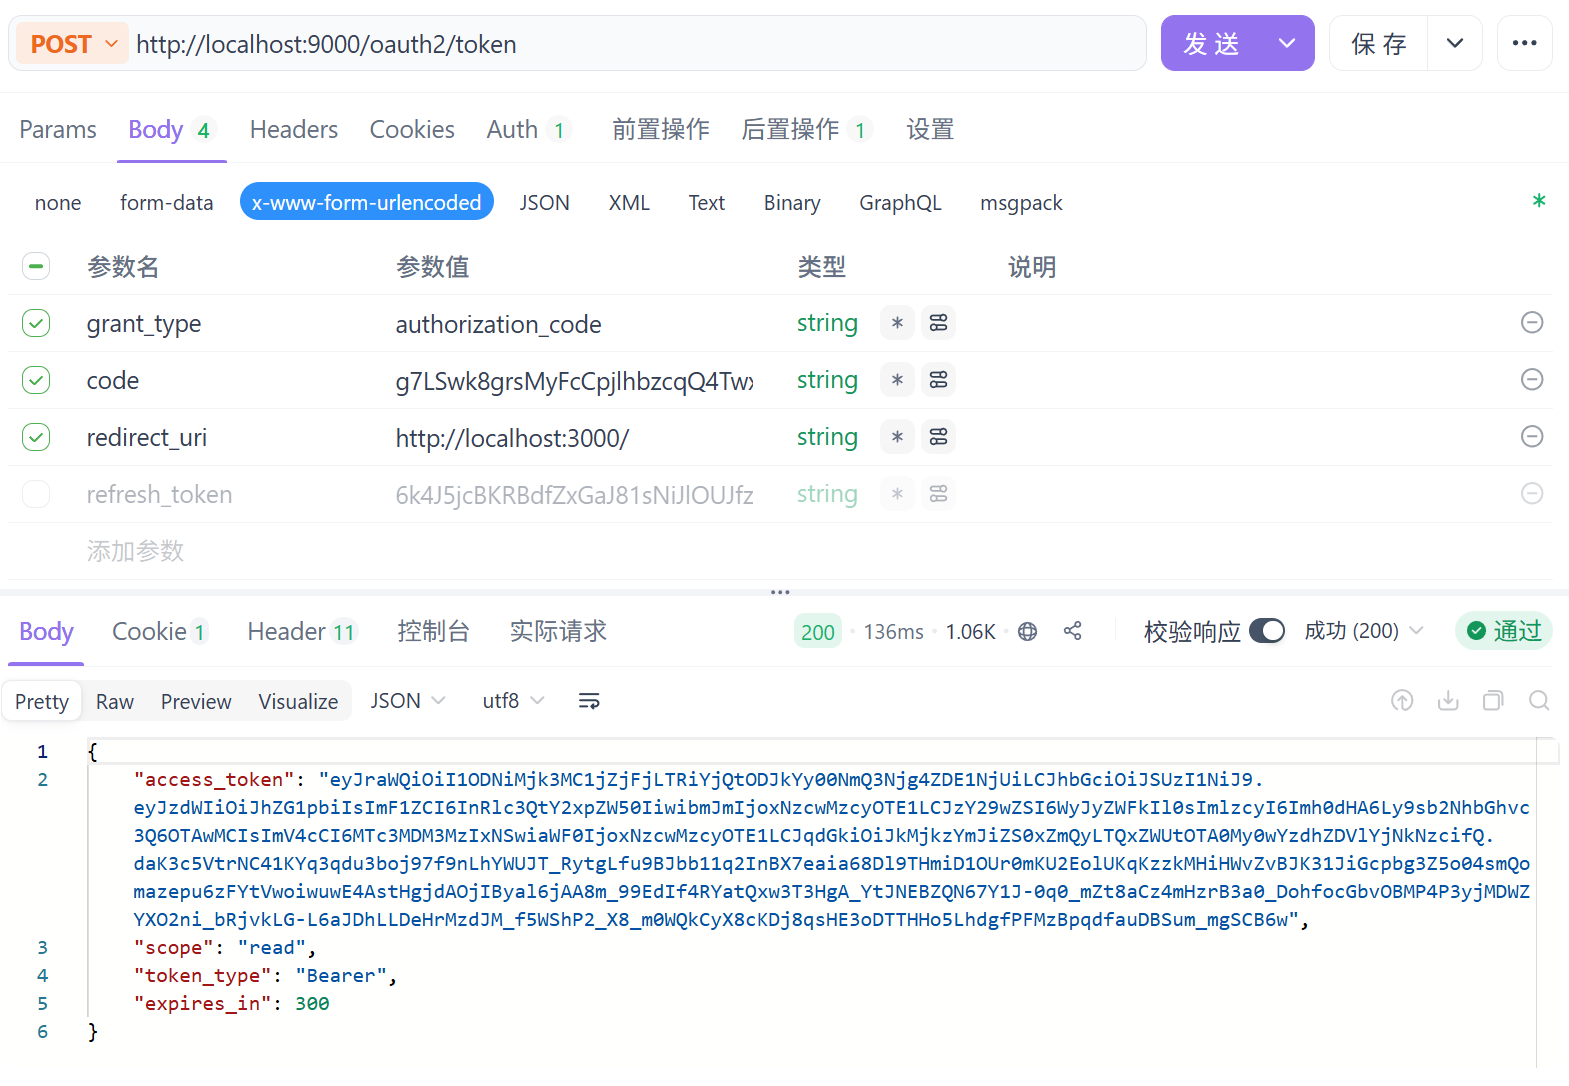
通过这个Code参数我们可以发送请求来获取对应的access_token,
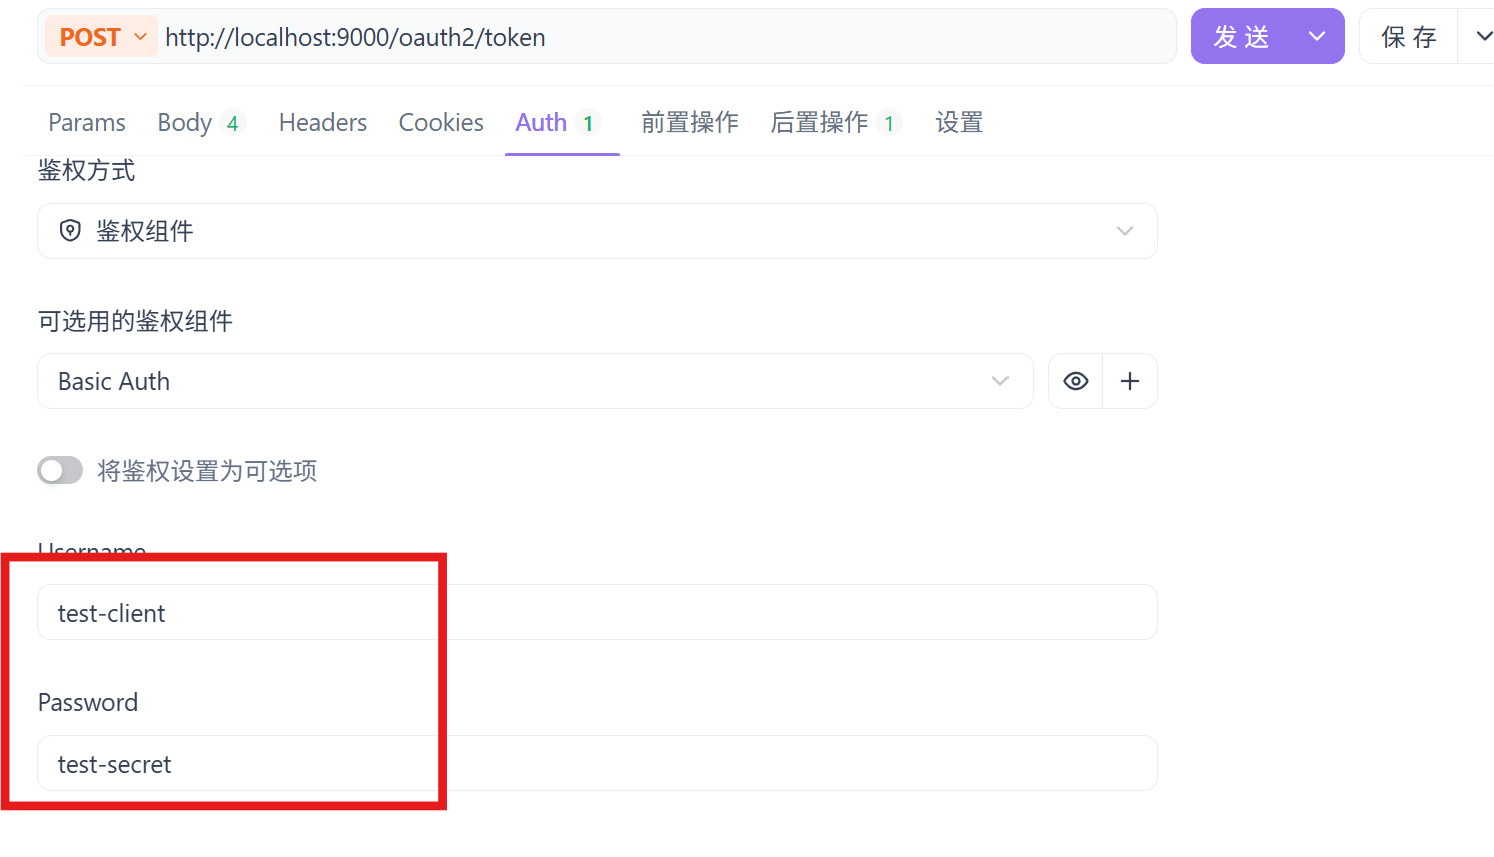
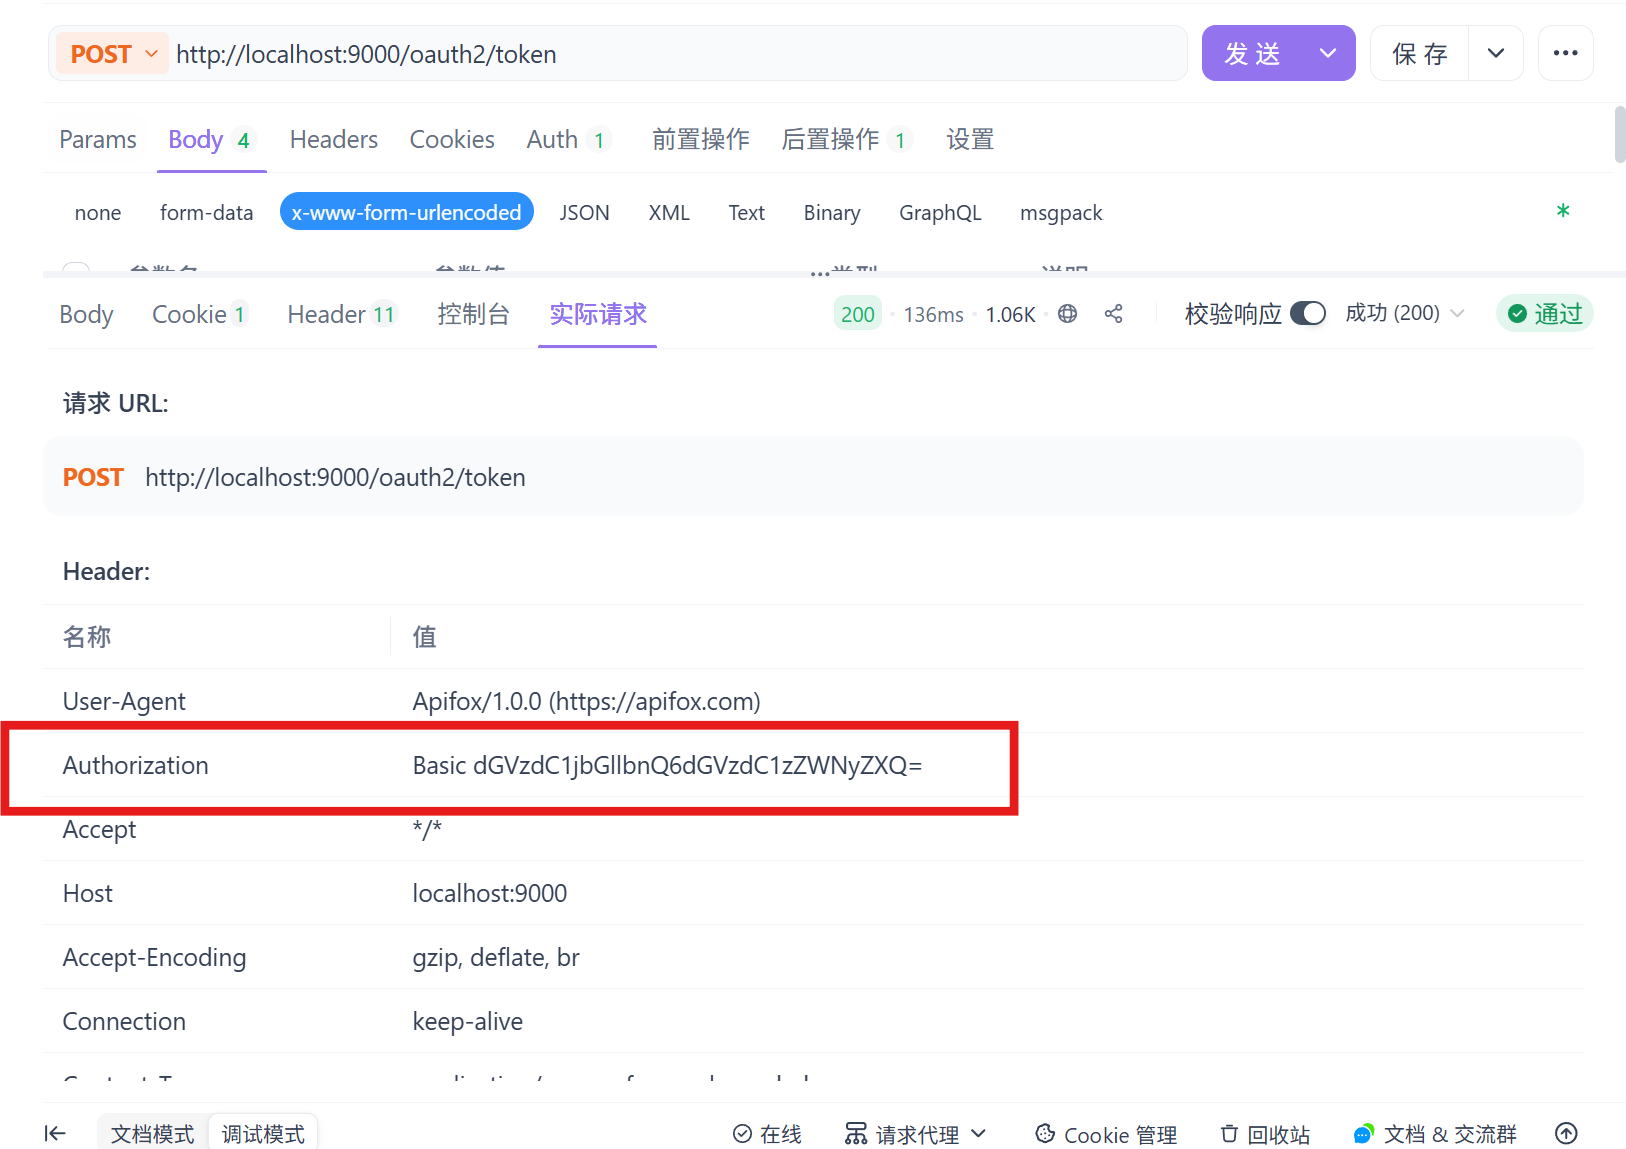
请求需配置Basic auth
请求成功:
请求成功后可以看到Basic Auth,下次请求直接放请求头里即可直接请求:
到此,前后端分离实现Oauth2.1的授权码认证流程跑通!!!
参考:https://nvidiadrive.csdn.net/69786f62437a6b40336b9752.html#devmenu5