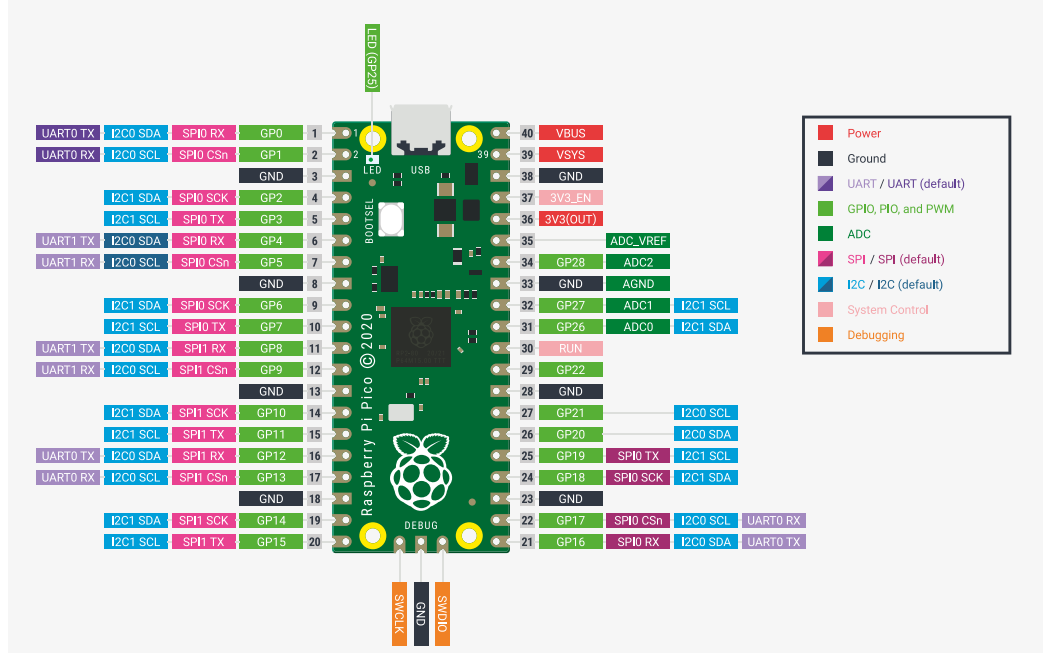
LED点亮
板子上自带的,GPIO 25
py
from machine import Pin
import time

led = Pin(25, Pin.OUT)

while True:
    led.toggle()
    time.sleep(0.5)
自己接的LED点亮,
接GP15,LED长脚接 GPIO15, 短脚接220Ω限流电阻,再接GND
py
from machine import Pin
import time

led = Pin(25, Pin.OUT)
led2 = Pin(15, Pin.OUT)

while True:
    led.toggle()
    led2.toggle()
    time.sleep(0.5)
DHT11 温湿度传感器实验
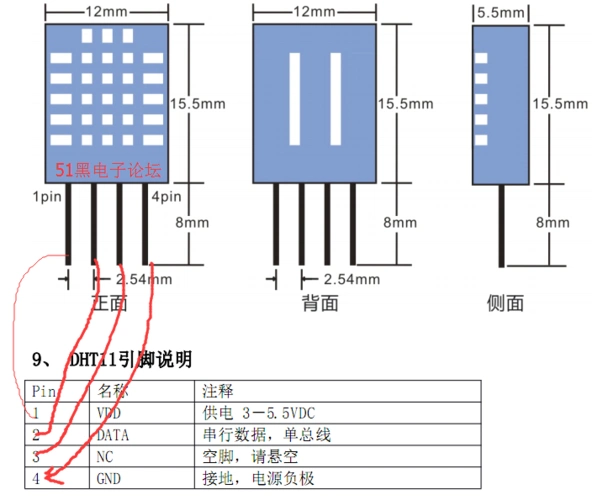
VCC接VCC,DATA接GP16,GND接GND,NC不用管它
py
# 导入必要的库
from machine import Pin
import dht
import time
# 初始化DHT11传感器
# 引脚设置为GPIO16,对应Pico的GP16引脚
dht_sensor = dht.DHT11(Pin(16))
# 循环读取温湿度数据
while True:
try:
# 触发传感器读取数据(必须调用这个方法)
dht_sensor.measure()
# 获取温度和湿度值
temperature = dht_sensor.temperature() # 温度(摄氏度)
humidity = dht_sensor.humidity() # 湿度(百分比)
# 打印数据,方便查看
print(f"温度: {temperature}°C, 湿度: {humidity}%")
# 每2秒读取一次(DHT11最快刷新频率是1秒,2秒更稳定)
time.sleep(2)
except OSError as e:
# 捕获读取失败的异常(比如接线错误、传感器没响应)
print("读取传感器数据失败,请检查接线或传感器!错误信息:", e)
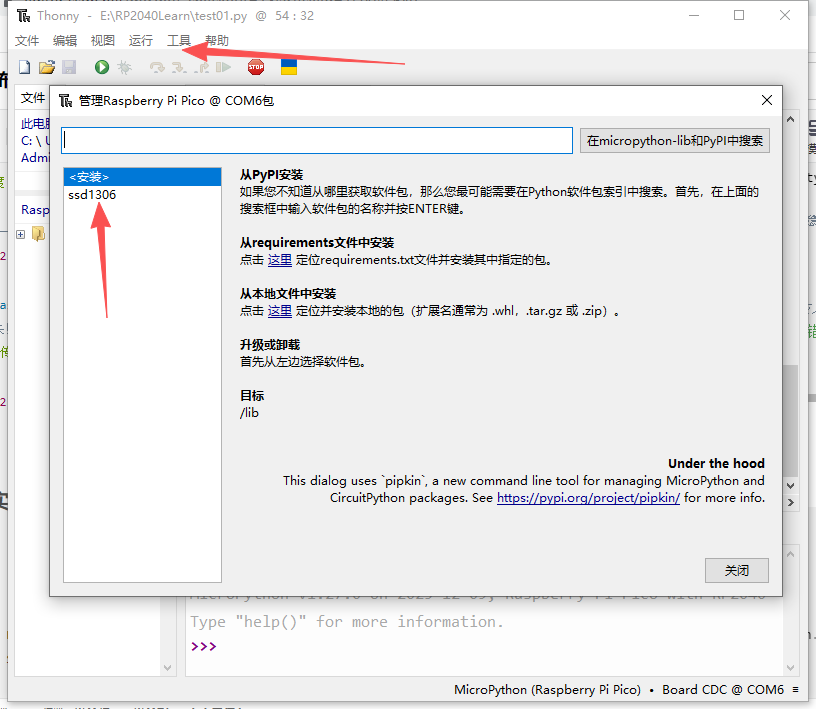
time.sleep(2)OLED显示实验
需要安装ssd1306库
py
from machine import Pin, I2C
from ssd1306 import SSD1306_I2C
import time

# 初始化I2C(地址已确认是0x3C,不用改)
i2c = I2C(0, scl=Pin(1, Pin.PULL_UP), sda=Pin(0, Pin.PULL_UP), freq=100000)

# 关键:按128x32初始化(不是64!)
oled = SSD1306_I2C(128, 32, i2c, addr=0x3C)

# 清屏+适配128x32的坐标(32高度只有4行,每行8像素)
oled.fill(0)  # 清空缓存
oled.text("Hello World!", 0, 0, 1)   # 第一行(0,0)
oled.text("128x32 OLED OK!", 0, 10, 1)  # 第二行(0,10)
oled.text("Addr:0x3C", 0, 20, 1)      # 第三行(0,20)

# 强制刷新到屏幕(核心步骤)
oled.show()
# 调最高对比度+常亮
oled.poweron()
oled.contrast(255)

print("✅ 128x32 OLED已显示!暗处看更清晰")