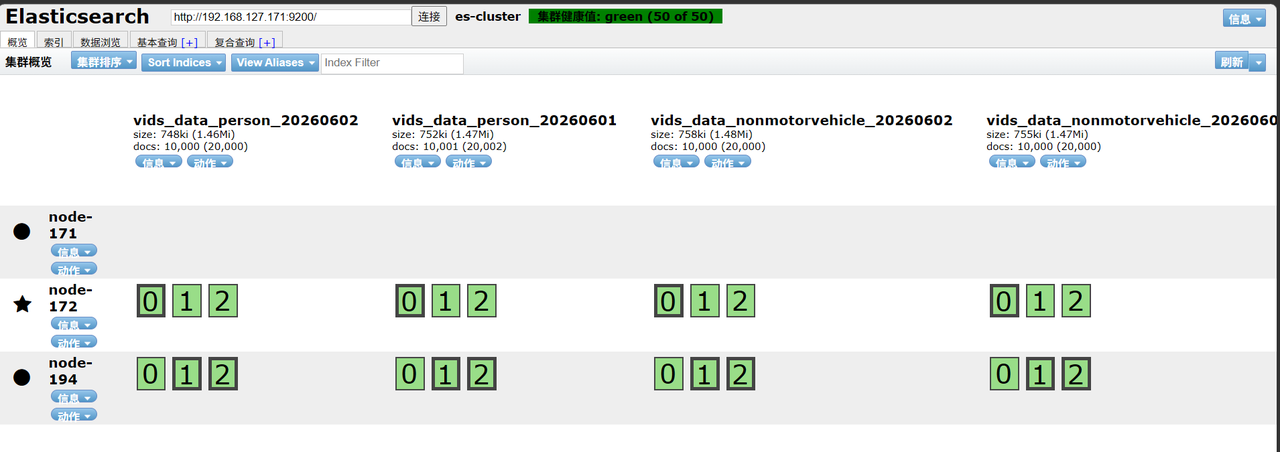
一、部署三节点es集群并使用es-head查看集群状态

二、新建测试索引并批量插入数据
1.新建测试索引:
##人脸
curl -XPUT http://192.168.127.171:9200/vids_data_face_20260601 -H "Content-Type:application/json" -d '{ "settings":{"number_of_shards":3,"number_of_replicas":1}, "mappings":{"properties":{"goods_id":{"type":"keyword"}}}}'
##机动车
curl -XPUT http://192.168.127.171:9200/vids_data_motorvehicle_20260601 -H "Content-Type:application/json" -d '{ "settings":{"number_of_shards":3,"number_of_replicas":1}, "mappings":{"properties":{"goods_id":{"type":"keyword"}}}}'
##非机动车
curl -XPUT http://192.168.127.171:9200/vids_data_nonmotorvehicle_20260601 -H "Content-Type:application/json" -d '{ "settings":{"number_of_shards":3,"number_of_replicas":1}, "mappings":{"properties":{"goods_id":{"type":"keyword"}}}}'
##人体
curl -XPUT http://192.168.127.171:9200/vids_data_person_20260601 -H "Content-Type:application/json" -d '{ "settings":{"number_of_shards":3,"number_of_replicas":1}, "mappings":{"properties":{"goods_id":{"type":"keyword"}}}}'
2.脚本批量插入数据
#!/bin/bash
# 清空旧文件
> bulk.json
# 循环生成10000条
for((i=1;i<=10000;i++))
do
cat >> bulk.json <<EOF
{"index":{}}
{"goods_id":"G2026$i","goods_name":"测试商品$i","price":$((10+i)).9}
EOF
done
# 导入ES
curl -XPOST http://192.168.127.171:9200/vids_data_person_20260601/_bulk \
-H "Content-Type:application/json" \
--data-binary @bulk.json
echo "导入完成"
三、es集群不中断实时数据更换硬盘操作前准备工作
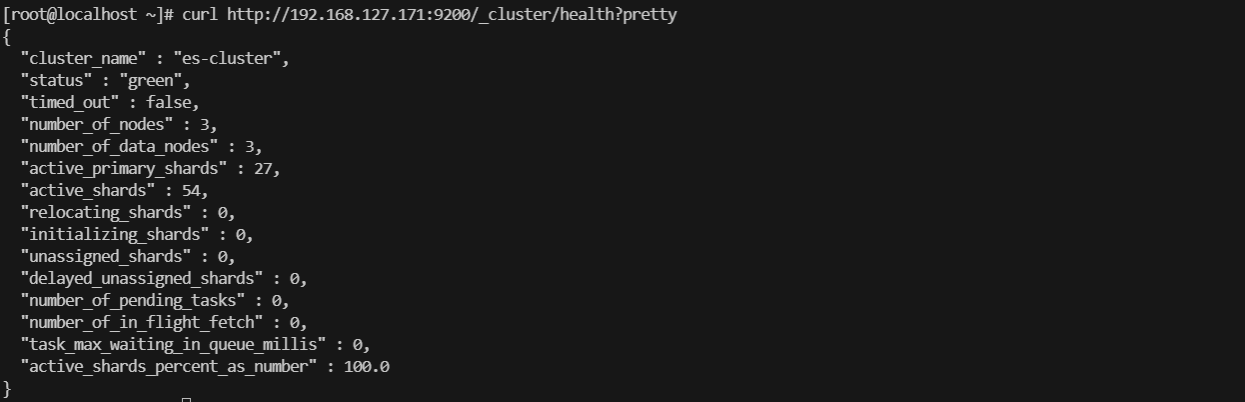
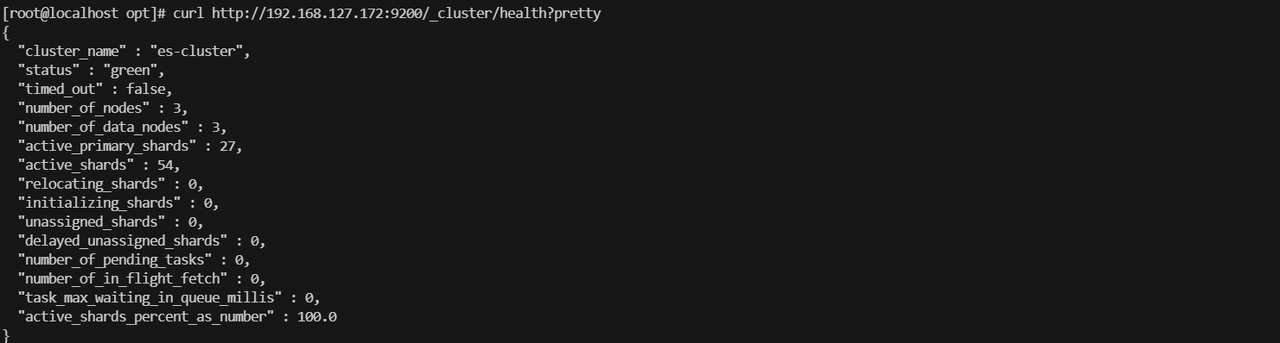
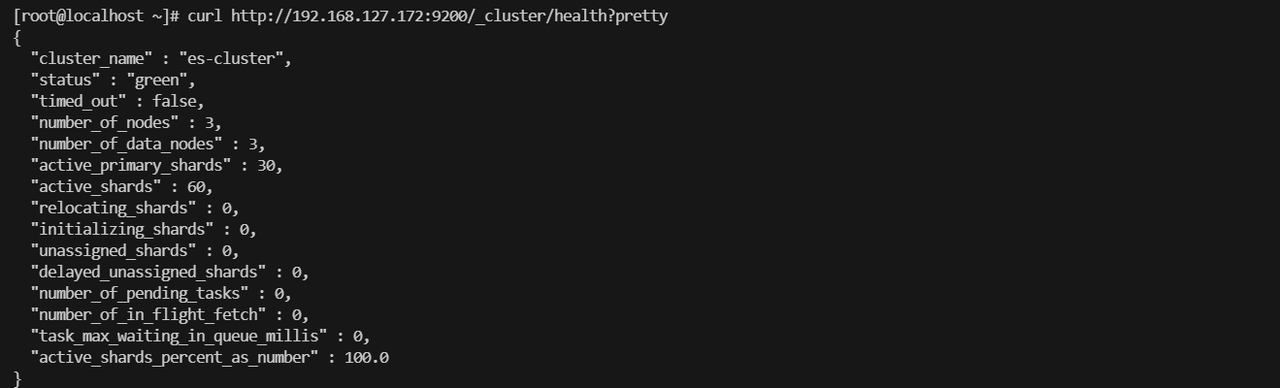
1.查询集群状态
##查询集群状态,green为正常可写入状态
curl http://192.168.127.171:9200/_cluster/health?pretty
2.查看目标节点分片情况
curl -X GET "http://192.168.127.171:9200/_cat/shards?h=index,shard,prirep,state,node&v" | grep "node-92"
curl -X GET "http://192.168.127.171:9200/_cat/shards?h=index,shard,prirep,state,node&v" | grep "node-92"|wc -l
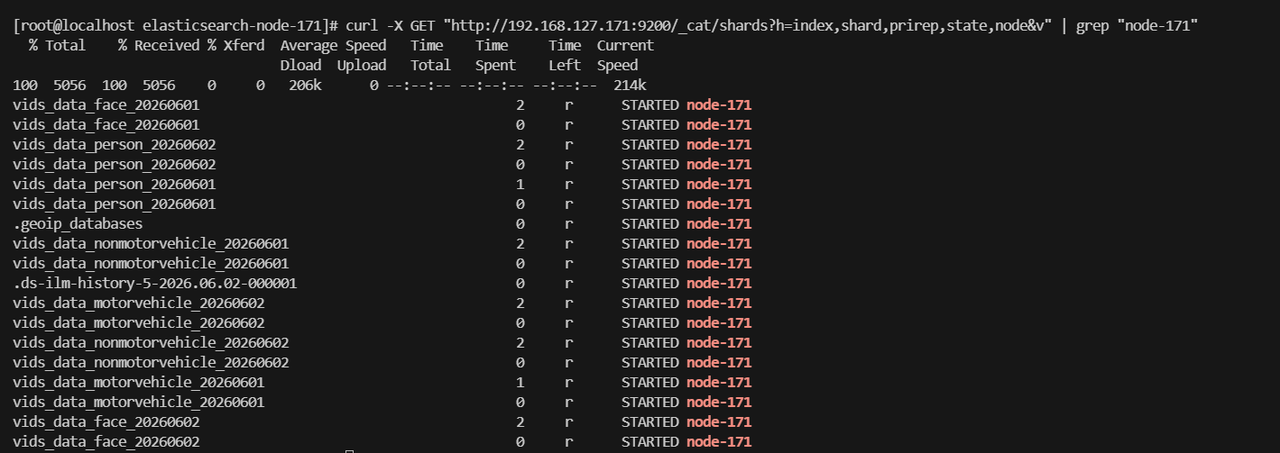
该节点有18个分片;

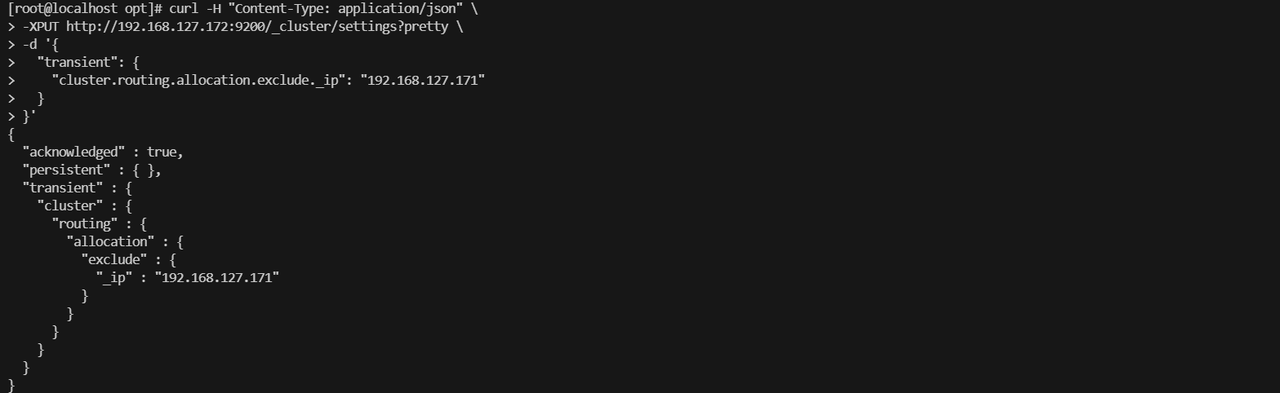
四、执行禁用分片分配到待下线节点
##exclude._ip为目标节点IP
curl -H "Content-Type: application/json" \ -XPUT http://192.168.127.172:9200/_cluster/settings?pretty \ -d '{ "transient": { "cluster.routing.allocation.exclude._ip": "192.168.127.171" } }'
五、查看分片迁移进度
1.查看等待迁移的分片,如果返回空数组则全部分片迁移完成

2.查看迁移进度,为0时,分片全部迁移完成
watch -n 5 "curl -s http://192.168.127.172:9200/_cat/shards | grep node-171 | wc -l"

3.确认要下线节点是否已清空,无输出为已清空可安全下线
curl -s "http://192.168.127.172:9200/_cat/shards" | grep "node-171"

4.确认集群状态是否正常
curl http://192.168.127.172:9200/_cluster/health?pretty
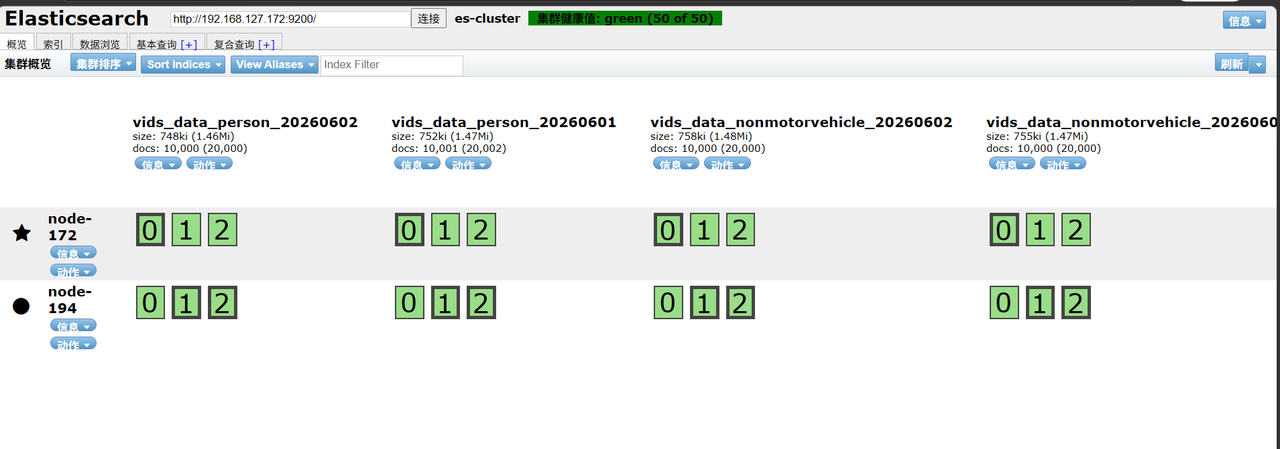
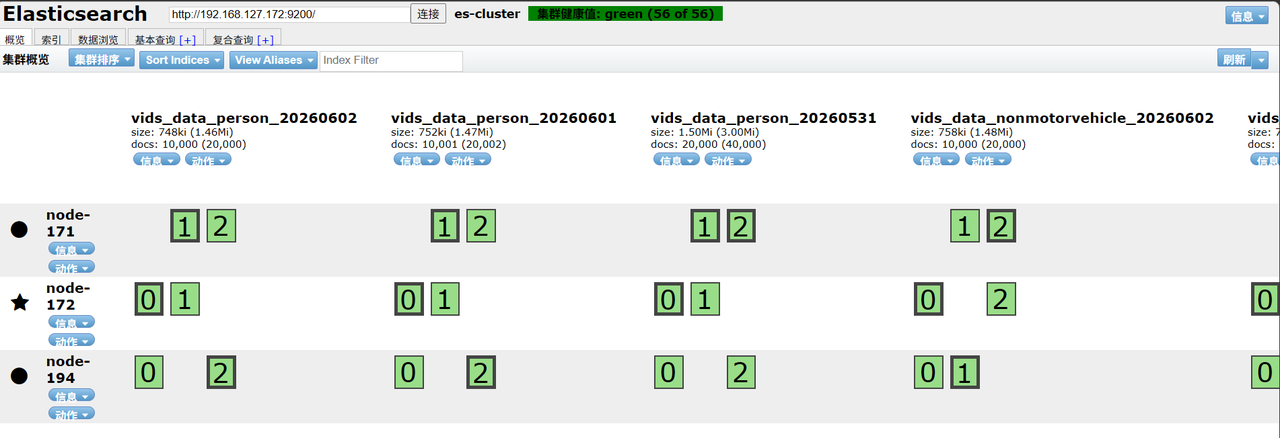
页面查看,成功迁移后要下线节点显示无分片分布
五、停止es服务,关闭该服务器进行硬盘更换
##停止es服务
docker-compose down 或者 docker stop elasticsearch-node-171

##停止服务器
poweroff
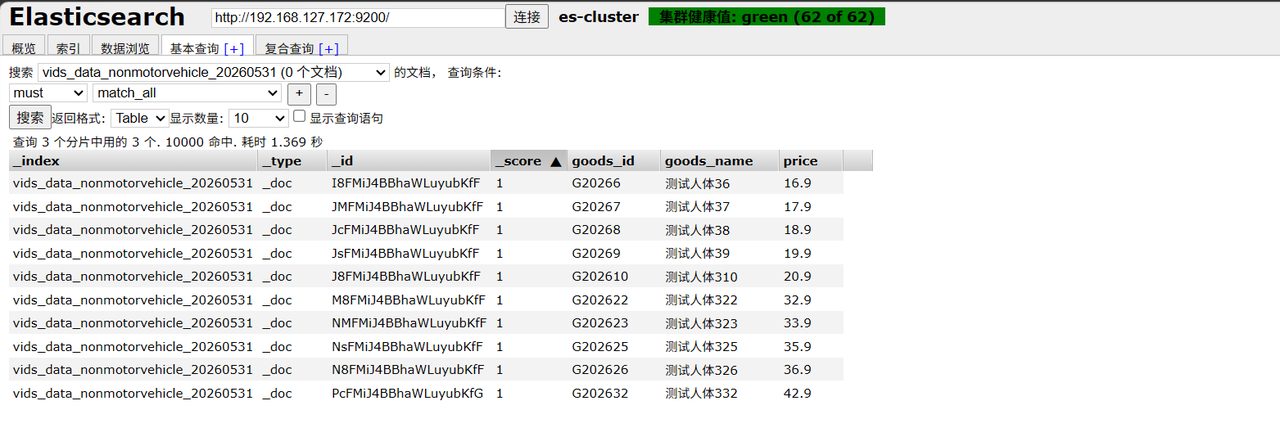
查看es-head连接节点状态
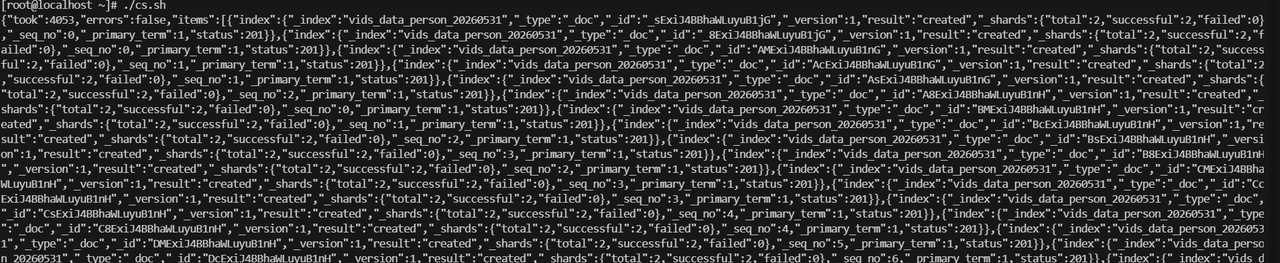
测试创建索引并写入数据
curl -XPUT http://192.168.127.172:9200/vids_data_person_20260531 -H "Content-Type:application/json" -d '{ "settings":{"number_of_shards":3,"number_of_replicas":1}, "mappings":{"properties":{"goods_id":{"type":"keyword"}}}}'

验证索引是否新建成功,数据是否成功插入

六、硬盘更换完成启用服务器、启用es服务
##启用服务
docker-compose up -d 或者 docker restart elasticsearch-node-171

七、解除节点排除,es集群自动恢复将该节点加入到集群中
curl -H "Content-Type: application/json" \ -XPUT http://192.168.127.172:9200/_cluster/settings?pretty \ -d '{ "transient": { "cluster.routing.allocation.exclude._ip": null } }'

结果返回:
1.acknowledged": true ✅:集群配置修改已成功确认生效;
2.transient: {}:临时配置项已清空,exclude._ip排除规则已被移除;
3.persistent: {}:持久化配置无改动
下面为返回内容:
{ "acknowledged" : true,
"persistent" : { },
"transient" : { }
}
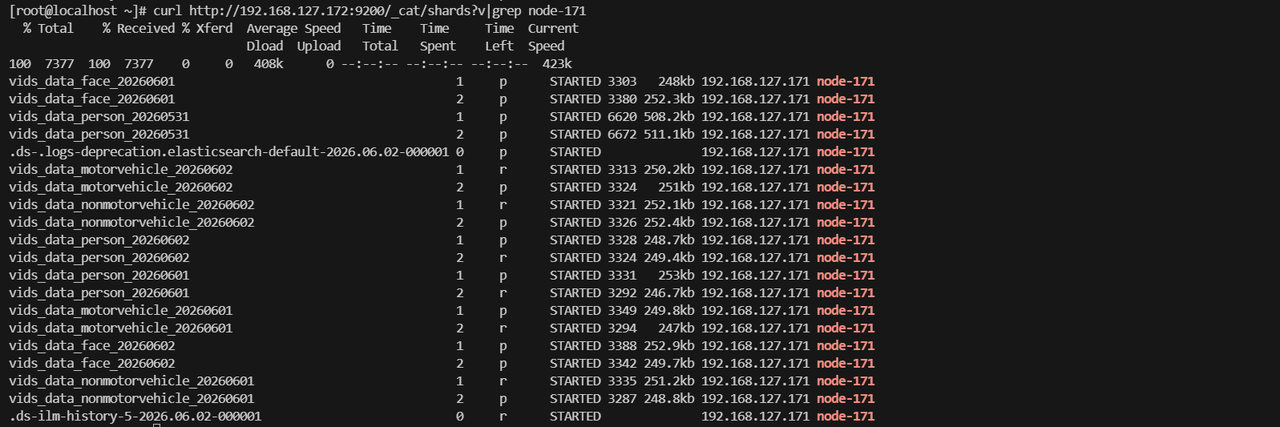
##观察之前被排除节点是否开始接收分片、分片从UNASSIGNED变为STARTED
curl http://192.168.127.172:9200/_cat/shards?v
curl http://192.168.127.172:9200/_cat/shards?v|grep node-171
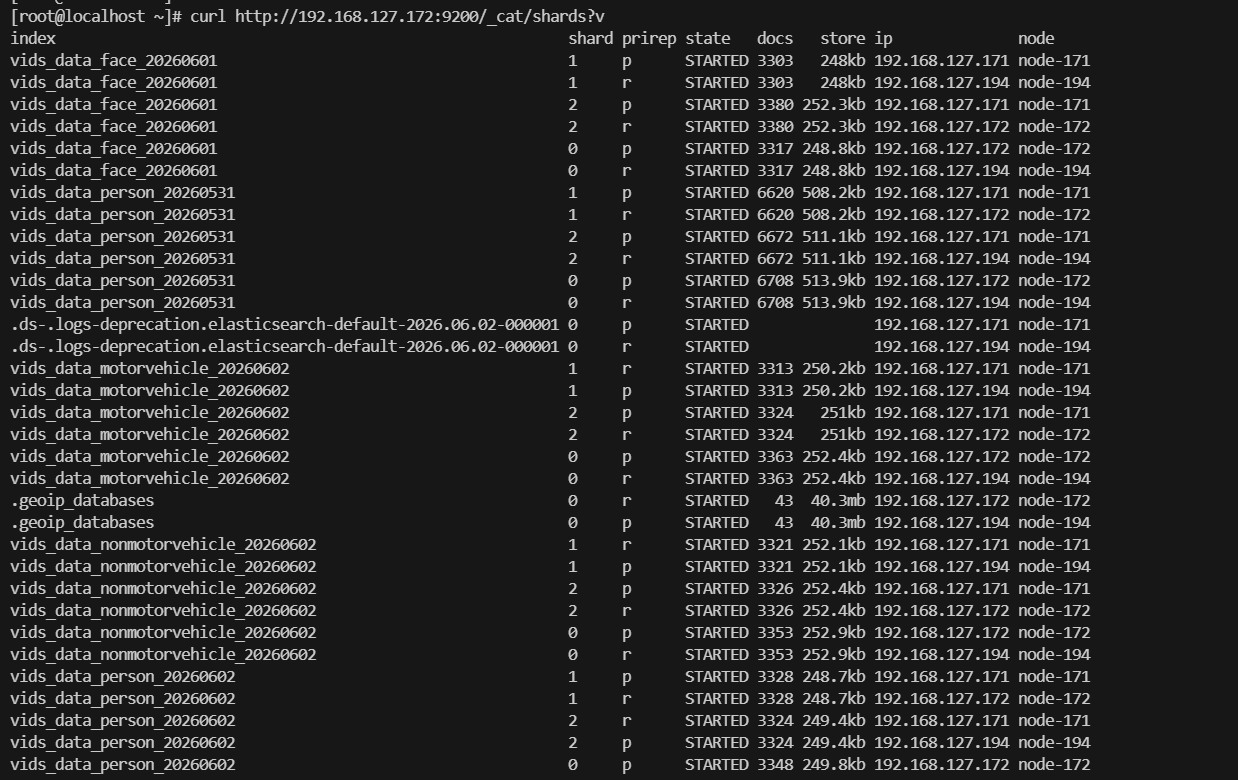
|----------|--------------------------------------------------------|
| 字段 | 含义 |
| 索引名 | vids_data_xxx_年月日:按日期分表的业务索引(人脸 / 人员 / 机动车 / 非机动车抓拍数据) |
| 分片序号 | 0/1/2:分片编号,0 = 主分片,1、2 为副本分片(业务索引默认 1 主 1 副) |
| p/r | p=primary主分片、r=replica副本分片 |
| 状态 | STARTED:分片正常启动挂载,读写可用 |
| 文档数 | 该分片存储的文档总量(如6620条) |
| 分片大小 | 单分片磁盘占用(如508.2kb) |
| IP & 节点 | 192.168.127.171 node-171:分片所在节点 |
八、分片数量验证
1.查看分片数量有无减少
curl http://192.168.127.172:9200/_cat/shards?v|grep node-171|wc -l

2.查看集群状态是否正常
curl http://192.168.127.172:9200/_cluster/health?pretty
3.验证查看分片是否都均匀分配
4.测试索引是否正常创建及数据是否正常写入
curl -XPUT http://192.168.127.171:9200/vids_data_nonmotorvehicle_20260531 -H "Content-Type:application/json" -d '{ "settings":{"number_of_shards":3,"number_of_replicas":1}, "mappings":{"properties":{"goods_id":{"type":"keyword"}}}}'