QQ音乐仿写总结
完成QQ音乐的仿写项目后学习到了很多东西,现对其中比较关键的地方做总结
首页
tableView嵌套CollectionView
- 这里是为了实现首页中能纵向滑动的同时可以横向滑动其中的歌单界面,主要原理是将collectionView放进自定义cell的tabelView的每个cell里面,再用collectionView展示出来结果
图片演示:
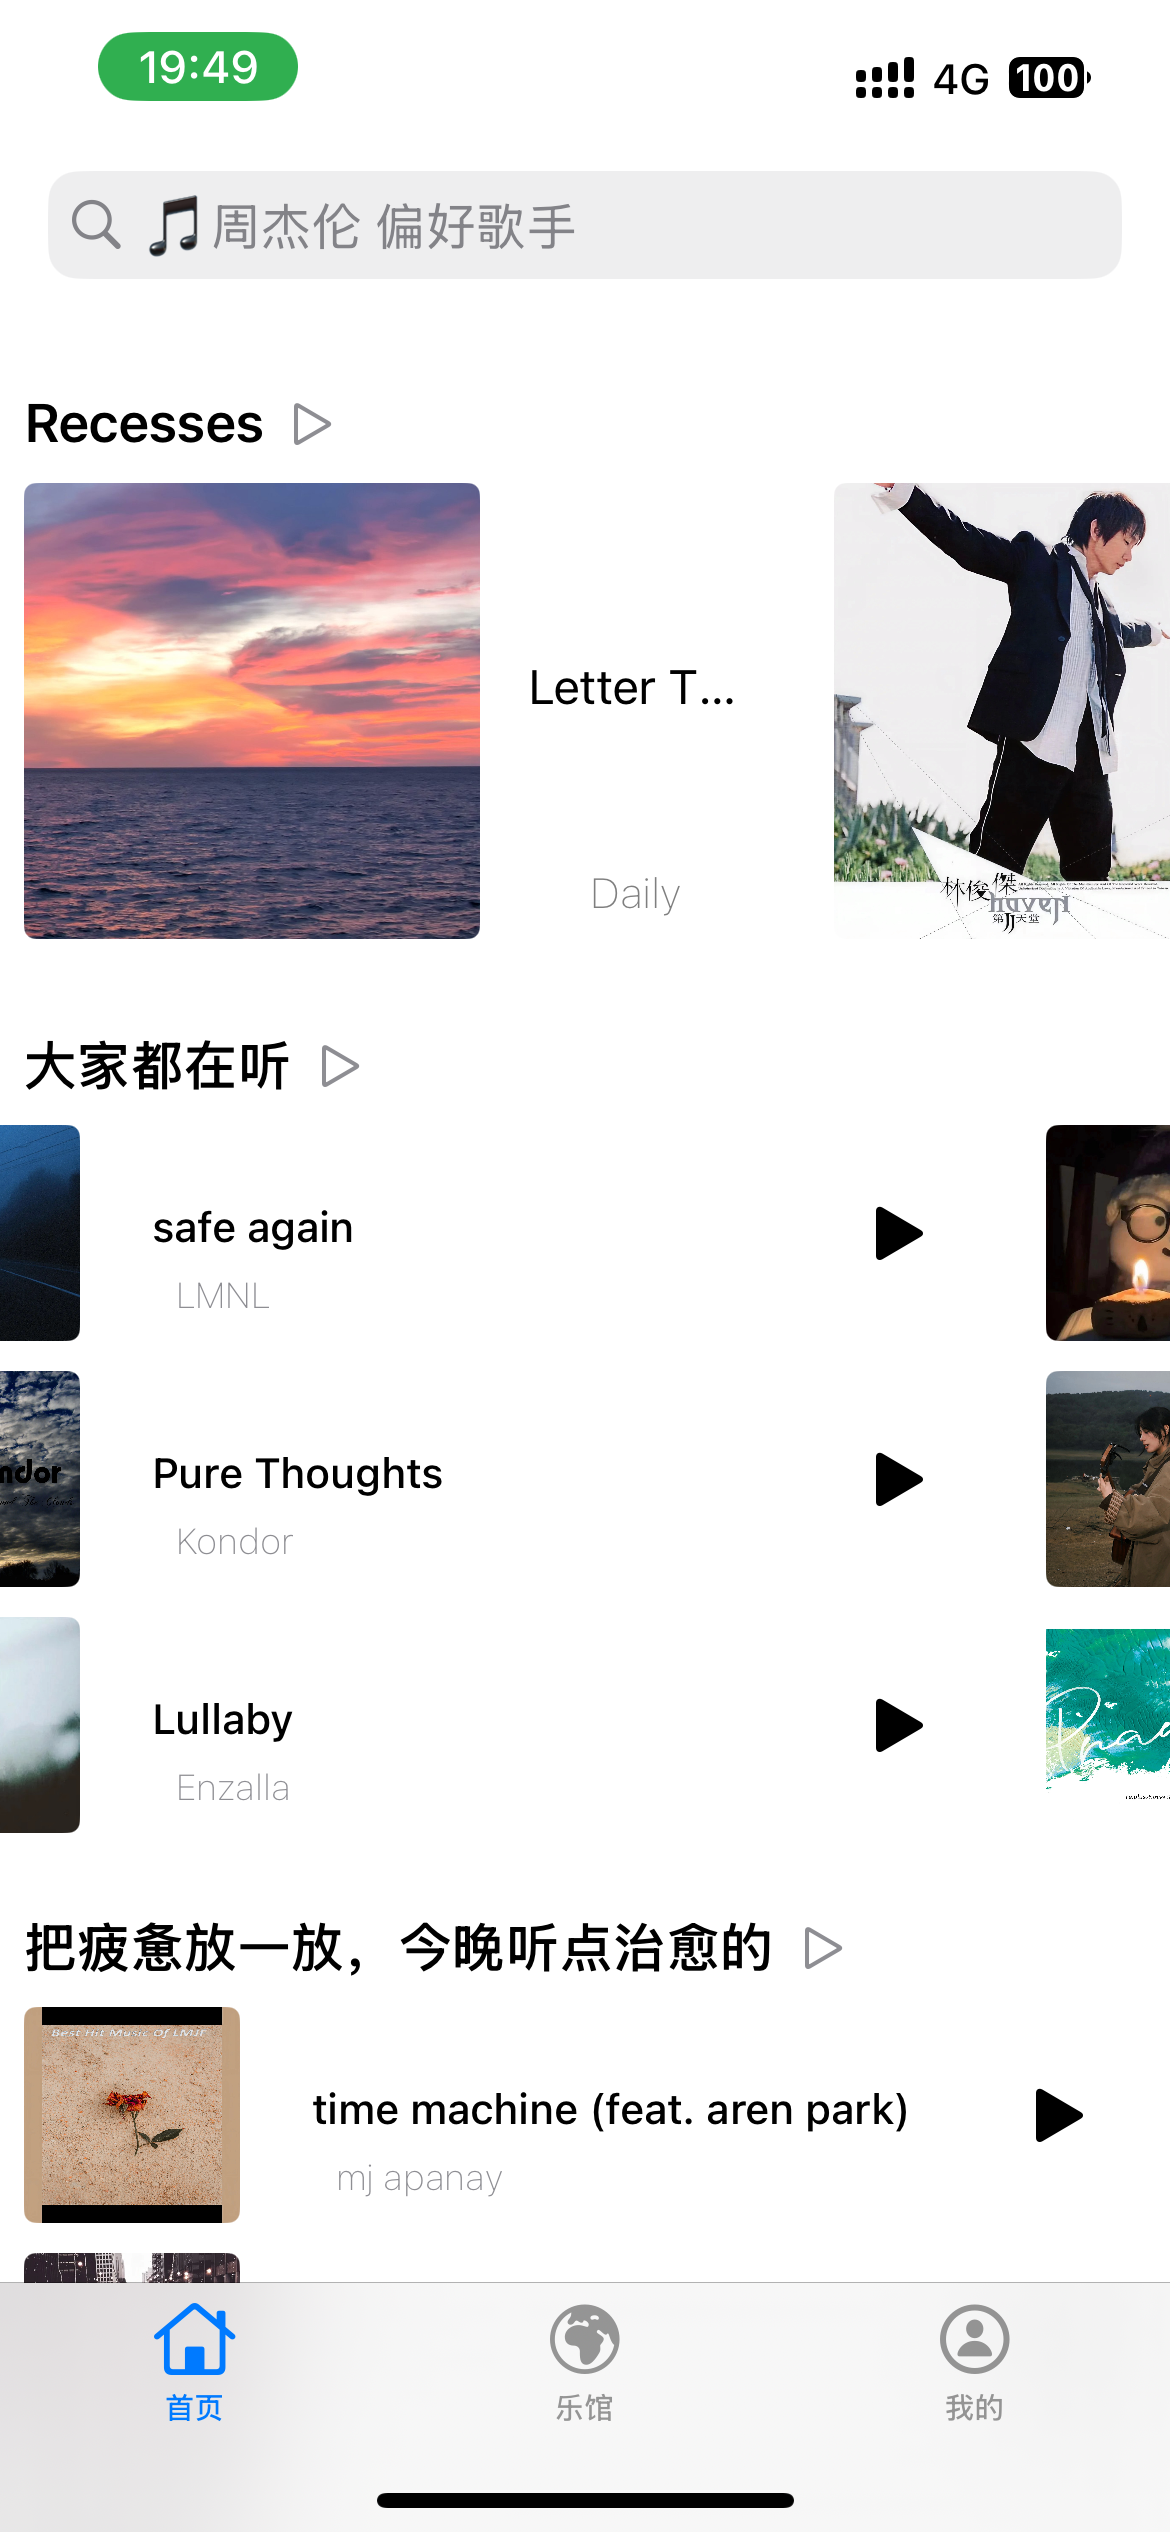
- 这里与正常的tableView创建大差不差,唯一需要注意的是cell复用以后,里面的collectionView不会自动更新,需要手动更新一下collectionView
- 代码展示如下
objc
//
//  ProfileSectionTableViewCell.m
//  网易云音乐imit
//
//  Created by 秋雨梧桐叶落莳 on 2026/5/17.
//

#import "ProfileSectionTableViewCell.h"//嵌套
#import "LastCollectionViewCell.h"
#import <Masonry/Masonry.h>

@interface ProfileSectionTableViewCell () <UICollectionViewDelegate, UICollectionViewDataSource>
@property (nonatomic, strong) NSArray *data;
@property (nonatomic, strong) UICollectionView *collectionView;
@end

@implementation ProfileSectionTableViewCell

- (instancetype)initWithStyle:(UITableViewCellStyle)style reuseIdentifier:(NSString *)reuseIdentifier {
    self = [super initWithStyle:style reuseIdentifier:reuseIdentifier];
    if (self) {
        [self setupUI];
    }
    return self;
}

- (void)setupUI {
    UICollectionViewFlowLayout *layout = [[UICollectionViewFlowLayout alloc] init];
    layout.minimumInteritemSpacing = 8;
    layout.itemSize = CGSizeMake(180, 180);
    layout.scrollDirection = UICollectionViewScrollDirectionHorizontal;
    self.collectionView = [[UICollectionView alloc] initWithFrame:CGRectZero collectionViewLayout:layout];
    self.collectionView.delegate = self;
    self.collectionView.dataSource = self;
    self.collectionView.showsHorizontalScrollIndicator = NO;
    [self.collectionView registerClass:[LastCollectionViewCell class] forCellWithReuseIdentifier:@"Last"];
    [self.contentView addSubview:self.collectionView];
    [self.collectionView mas_makeConstraints:^(MASConstraintMaker *make) {
        make.edges.equalTo(self.contentView);
    }];
}

- (NSInteger)collectionView:(UICollectionView *)collectionView numberOfItemsInSection:(NSInteger)section {
    return self.data.count;
}

- (__kindof UICollectionViewCell *)collectionView:(UICollectionView *)collectionView cellForItemAtIndexPath:(NSIndexPath *)indexPath {
    LastCollectionViewCell *cell = [collectionView dequeueReusableCellWithReuseIdentifier:@"Last" forIndexPath:indexPath];
    [cell configWithModel:self.data[indexPath.item]];
    return cell;
}

- (void)awakeFromNib {
    [super awakeFromNib];
}

- (void)setSelected:(BOOL)selected animated:(BOOL)animated {
    [super setSelected:selected animated:animated];
}

- (void)configWithModels:(NSArray *)data {
    self.data = data;
    [self.collectionView reloadData];////注意
}
@end
我的
照片墙
- 这里也是使用了collectionView对照片进行布局,使用一个私有属性持有当前选择的照片,点击确定以后,通过反向传值把图片传回去更新原视图
- 代码如下
objc
//  AvatorChangeViewController.m
//  网易云音乐imit
//
//  Created by 秋雨梧桐叶落莳 on 2026/5/19.
//
#import <Masonry/Masonry.h>
#import "AvatorChangeViewController.h"

@interface AvatorChangeViewController () <UICollectionViewDelegate, UICollectionViewDataSource>
@property (nonatomic, strong) UICollectionView *collectionView;
@property (nonatomic, strong) NSMutableArray *picture;
@property (nonatomic, strong) UIImageView *avator;
@end

@implementation AvatorChangeViewController

- (void)viewDidLoad {
    [super viewDidLoad];
    self.view.backgroundColor = [UIColor systemBackgroundColor];
    [self setupData];
    [self setupBar];
    [self setupUI];
}

- (void)setupBar {
    UIBarButtonItem *btn = [[UIBarButtonItem alloc] initWithTitle:@"确定" style:UIBarButtonItemStylePlain target:self action:@selector(tapped)];
    self.navigationItem.rightBarButtonItem = btn;
}

- (void)setupData {
    self.picture = [NSMutableArray array];
    NSArray *arr = @[
        @"HeadPicture",
        @"IMG_0154",
        @"IMG_0201",
        @"IMG_0621",
        @"IMG_2048",
        @"IMG_4693",
        @"IMG_4806",
        @"IMG_4813",
        @"IMG_0202",
        @"IMG_0204"
    ];
    [self.picture addObjectsFromArray:arr];
}

- (void)tapped {
    if ([self.delegate respondsToSelector:@selector(changePictureWithImage:)]) {
        [self.delegate changePictureWithImage:self.avator.image];
    }
    [self.navigationController popViewControllerAnimated:YES];
}

- (void)setupUI {
    self.avator = [[UIImageView alloc] initWithImage:self.avatorImage];
    self.avator.clipsToBounds = YES;
    self.avator.layer.cornerRadius = 50;
    [self.view addSubview:self.avator];
    [self.avator mas_makeConstraints:^(MASConstraintMaker *make) {
        make.top.equalTo(self.view.mas_safeAreaLayoutGuideTop);
        make.centerX.equalTo(self.view);
        make.height.width.mas_equalTo(100);
    }];

    UICollectionViewFlowLayout *layout = [[UICollectionViewFlowLayout alloc] init];
    layout.minimumLineSpacing = 20;
    layout.minimumInteritemSpacing = 20;
    layout.itemSize = CGSizeMake(100, 100);
    self.collectionView = [[UICollectionView alloc] initWithFrame:CGRectZero collectionViewLayout:layout];
    self.collectionView.delegate = self;
    self.collectionView.dataSource = self;
    [self.view addSubview:self.collectionView];
    [self.collectionView mas_makeConstraints:^(MASConstraintMaker *make) {
        make.left.right.bottom.equalTo(self.view);
        make.top.equalTo(self.avator.mas_bottom).offset(24);
    }];
    [self.collectionView registerClass:[UICollectionViewCell class] forCellWithReuseIdentifier:@"collection"];
}

- (NSInteger)collectionView:(UICollectionView *)collectionView numberOfItemsInSection:(NSInteger)section {
    return self.picture.count;
}

- (__kindof UICollectionViewCell *)collectionView:(UICollectionView *)collectionView cellForItemAtIndexPath:(NSIndexPath *)indexPath {
    UICollectionViewCell *cell = [collectionView dequeueReusableCellWithReuseIdentifier:@"collection" forIndexPath:indexPath];
    UIImageView *img = [[UIImageView alloc] initWithImage:[UIImage imageNamed:self.picture[indexPath.item]]];
    [cell.contentView addSubview:img];
    [img mas_makeConstraints:^(MASConstraintMaker *make) {
        make.edges.equalTo(cell.contentView);
    }];
    return cell;
}
- (void)collectionView:(UICollectionView *)collectionView didSelectItemAtIndexPath:(NSIndexPath *)indexPath {
    [collectionView deselectItemAtIndexPath:indexPath animated:YES];
    self.avator.image = [UIImage imageNamed:self.picture[indexPath.item]];
}
@end
segmentControl控制cell
这里原本的需求是通过一个segmentControl来切换展示的歌单,我想出了以下两种解决方案
- 在一个scrollView里面放两个tableView,通过segmentControl来控制在scrollView的偏移量
- 通过一个segmentControl来控制给一个tableView的数据源,再通过数据源切换给cell的显示,再添加左右滑手势
我最终选择了下面的写法,由于我把segmentControl放在了headerfooterview里面,所以需要把segmentControl的结果从里面传出来再更新,代码稍显繁琐
objc
@property (nonatomic, assign) NSInteger judge;//0自建1喜欢


- (UITableViewCell *)tableView:(UITableView *)tableView cellForRowAtIndexPath:(NSIndexPath *)indexPath {
    if (indexPath.section == 0) {
        ProfileSectionTableViewCell *cell = [tableView dequeueReusableCellWithIdentifier:@"ProfileSection" forIndexPath:indexPath];
        [cell configWithModels:self.section];
        return cell;
    }
    ProfileGroupSongTableViewCell *cell = [tableView dequeueReusableCellWithIdentifier:@"ProfileGroup" forIndexPath:indexPath];
    if (self.judge == 0) {
        [cell configWithModel:self.section[indexPath.row]];
    } else {
        [cell configWithModel:self.loveSection[indexPath.row]];
    }
    return cell;
}//刷新时响应model改动

- (UIView *)tableView:(UITableView *)tableView viewForHeaderInSection:(NSInteger)section {
    ProfileHeader *header = [tableView dequeueReusableHeaderFooterViewWithIdentifier:@"ProfileHeader"];
    if (section == 0) {
        [header configWithType:Last andIndex:self.judge];
    } else {
        [header configWithType:Myself andIndex:self.judge];
    }
    __weak typeof(self) weakSelf = self;
    header.changeSeg = ^(SectionType type) {
        if (type == Last) {
            weakSelf.judge = 0;
        } else {
            weakSelf.judge = 1;
        }
        NSIndexSet *set = [NSIndexSet indexSetWithIndex:1];
        [weakSelf.tableView reloadSections:set withRowAnimation:UITableViewRowAnimationFade];


    };
    return header;
}//block传值响应segmentControl的改动
抽屉视图
这部分在我另一篇博客亦有记载,感兴趣的读者可以看看
更多
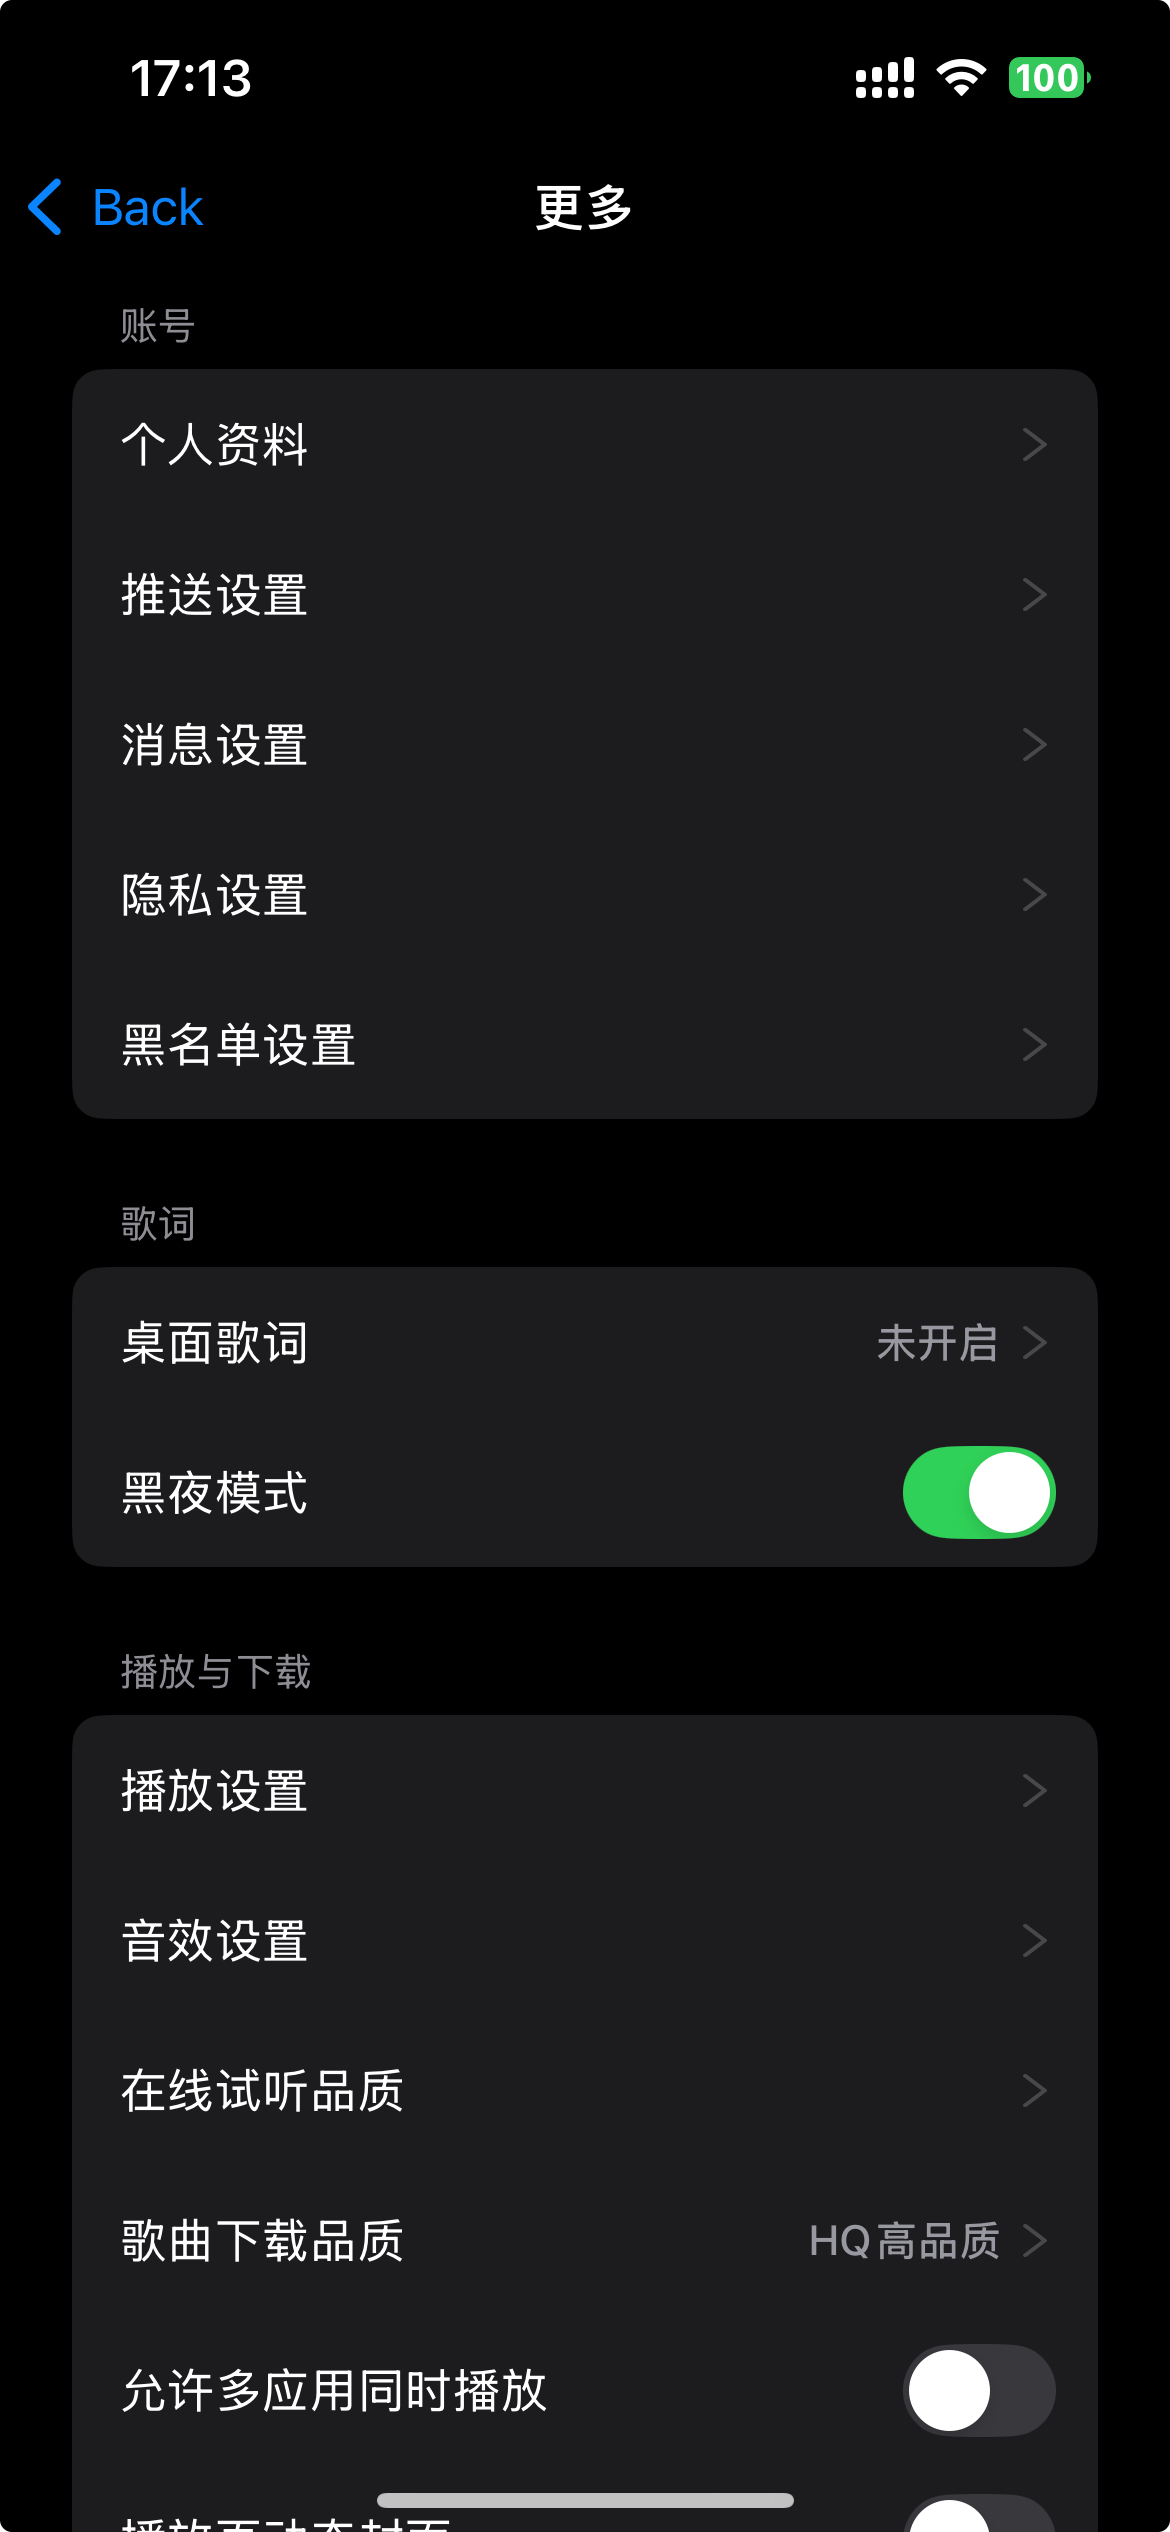
黑夜模式
关于黑夜模式,我使用的是window的一个属性,叫做overrideUserInterfaceStyle,这个属性可以被两个枚举值赋值,分别是UIUserInterfaceStyleDark和UIUserInterfaceStyleLight,分别对应暗色模式和亮色模式
-
由于在设置视图颜色的时候都设置为systemcolor以及文字使用labelcolor等会自动随黑夜模式更改而变色的颜色,所以更改亮暗色会自动更改,实现黑夜模式的更改
数据持久化
- 最后就是对黑夜模式更改的数据持久化,这里使用到了
NSUserDefaults,需要在sceneDelegate的\- (**void**)scene:(UIScene *)scene willConnectToSession:(UISceneSession *)session options:(UISceneConnectionOptions *)connectionOptions方法中,读取上一次存储的亮暗模式
objc
		BOOL isDark = [[NSUserDefaults standardUserDefaults] boolForKey:@"isDark"];
self.window.overrideUserInterfaceStyle = isDark ? UIUserInterfaceStyleDark : UIUserInterfaceStyleLight;- 至于存储,直接在更多界面切换控制亮暗模式的UISwitch的时候直接存储
objc
- (UITableViewCell *)tableView:(UITableView *)tableView cellForRowAtIndexPath:(NSIndexPath *)indexPath {
    SettingTableViewCell *cell = [tableView dequeueReusableCellWithIdentifier:@"cell"];
    SectionSettingModel *sectionModel = self.section[indexPath.section];
    CellModel *modelNow = sectionModel.cell[indexPath.row];
    [cell configWithModel:modelNow];
    __weak typeof(self) weakSelf = self;
    cell.switchLight = ^(CellModel * _Nonnull model, BOOL isOn) {
        modelNow.isOn = isOn;
        if ([model.title isEqualToString:@"黑夜模式"]) {
            if (isOn == YES) {
                weakSelf.view.window.overrideUserInterfaceStyle = UIUserInterfaceStyleDark;
            } else {
                weakSelf.view.window.overrideUserInterfaceStyle = UIUserInterfaceStyleLight;
            }
        }
        [[NSUserDefaults standardUserDefaults] setBool:isOn forKey:@"isDark"];
    };
    return cell;
}