本文包含关于如何配置ThingsBoard 平台和连接钡铼技术R40设备的说明。ThingsBoard平台是一个用于数据收集、处理、可视化和设备管理的开源物联网平台。它通过行业标准MQTT协议实现设备连接。ThingsBoard结合了可扩展性、容错性和性能,因此您永远不会丢失数据。
4G LTE Industrial Router and ThingsBoard Introduction
This article contains instructions on how to configure ThingsBoard PE platform and connect KERNEL devices. ThingsBoard PE platform is an open-source IoT platform for data collection, processing, visualization, and device management. It enables device connectivity via industry standard MQTT protocol. ThingsBoard combines scalability, fault-tolerance and performance so you will never lose your data.
Integration flow:
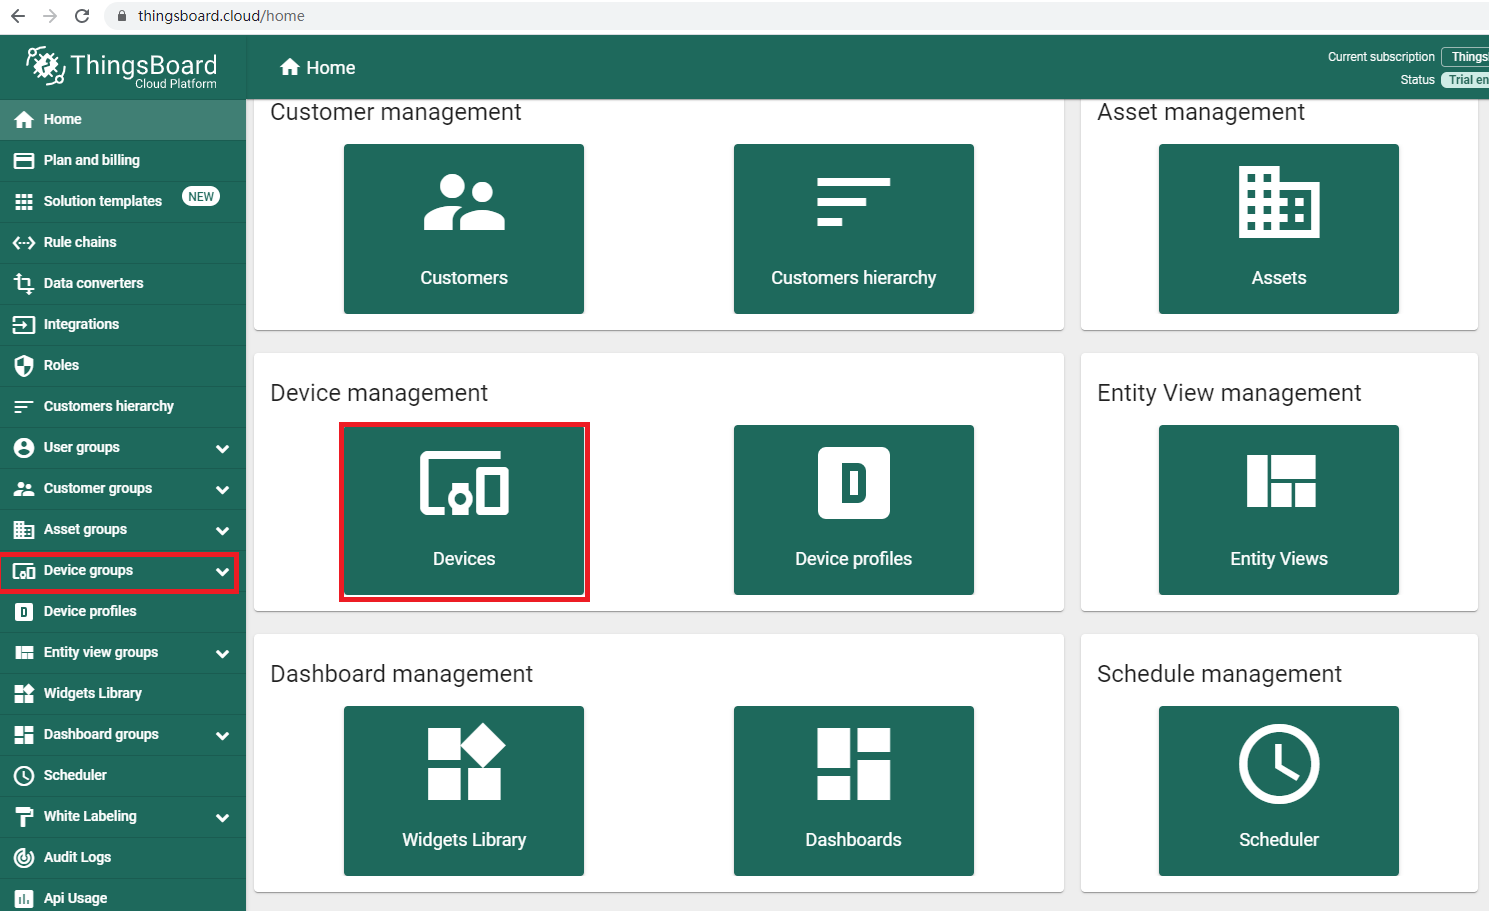
Step 1 ThingsBoard : Device configuration
Step 1.1 Login to your ThingsBoard instance, Open "Device Groups" page.
Step 1.2 Navigate to default Device group "All".
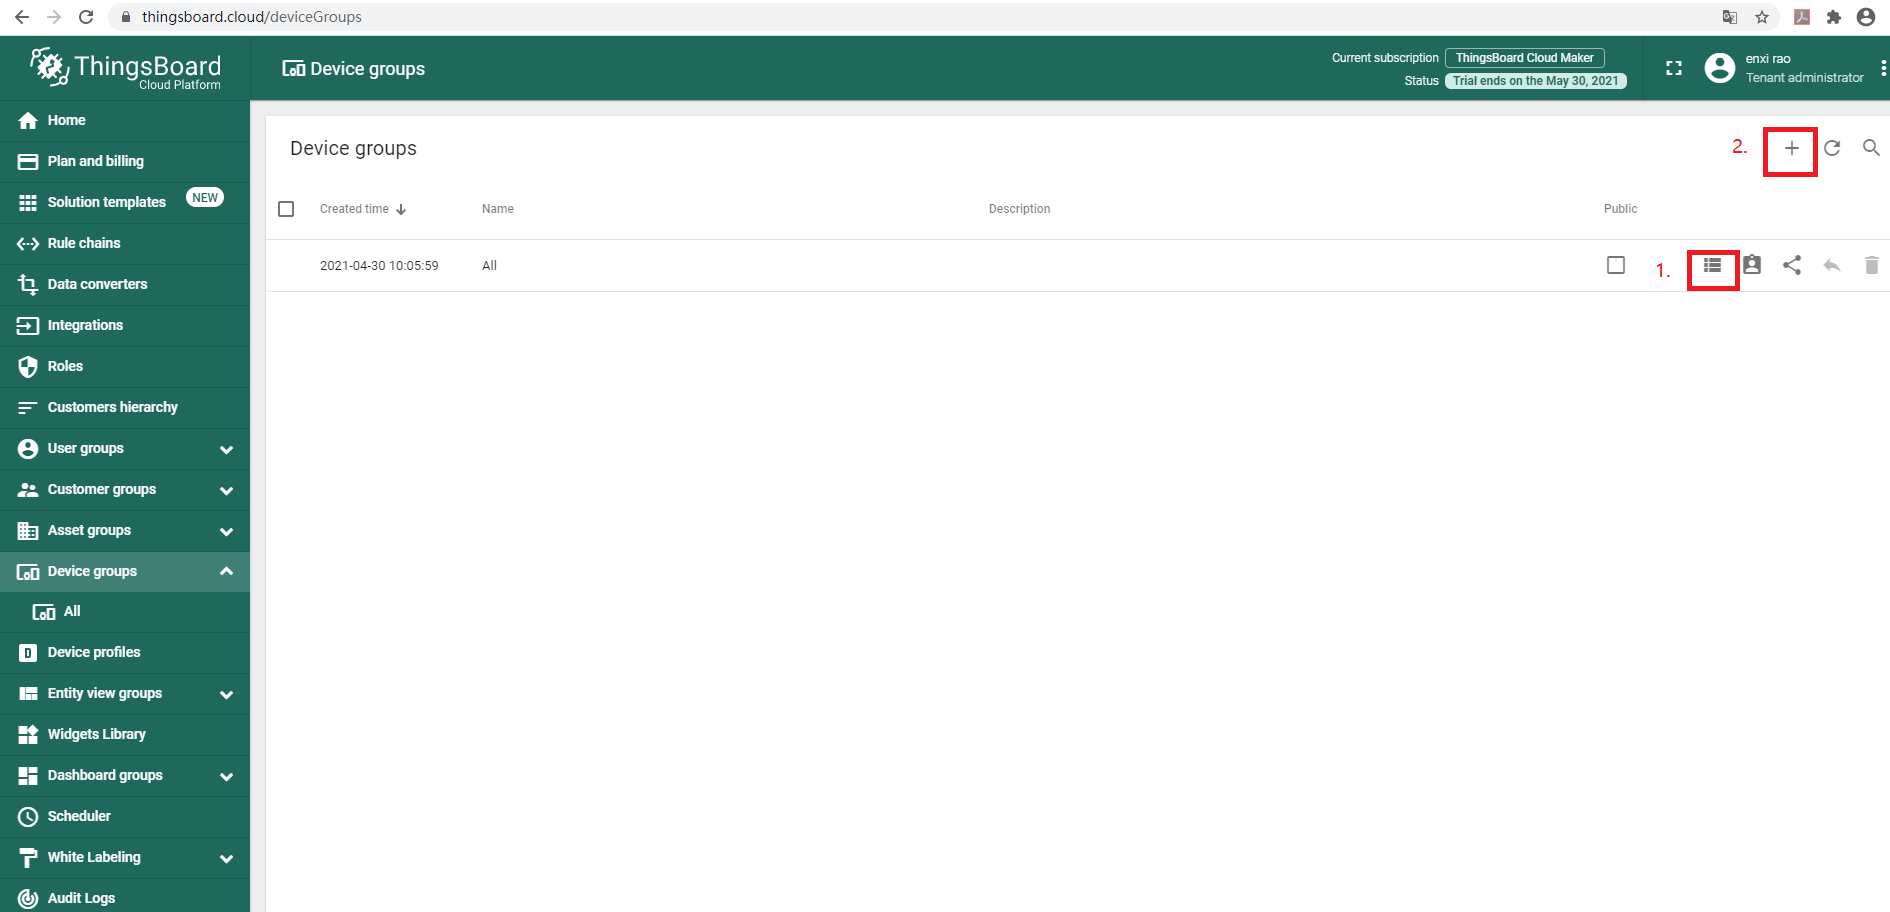
1.Click on one of the marked in red buttons in the Device groups overview page. In this page you can also add additional device groups in order to distinguish different devices with unique data flows.
2.Click marked "+" buttons to add new device to the group.
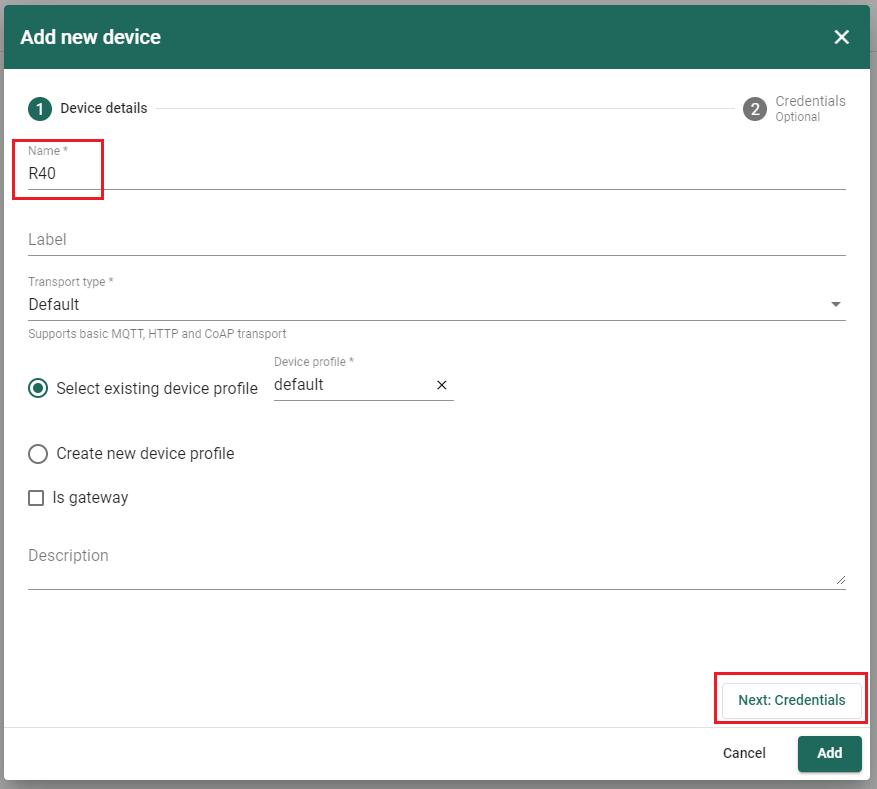
Step 1.3 Input device name, For example "R40". No other changes are required at this time. Click "Next:Credentials" to configure credentials.
Step 1.4 Credentials type: MQTT Basic
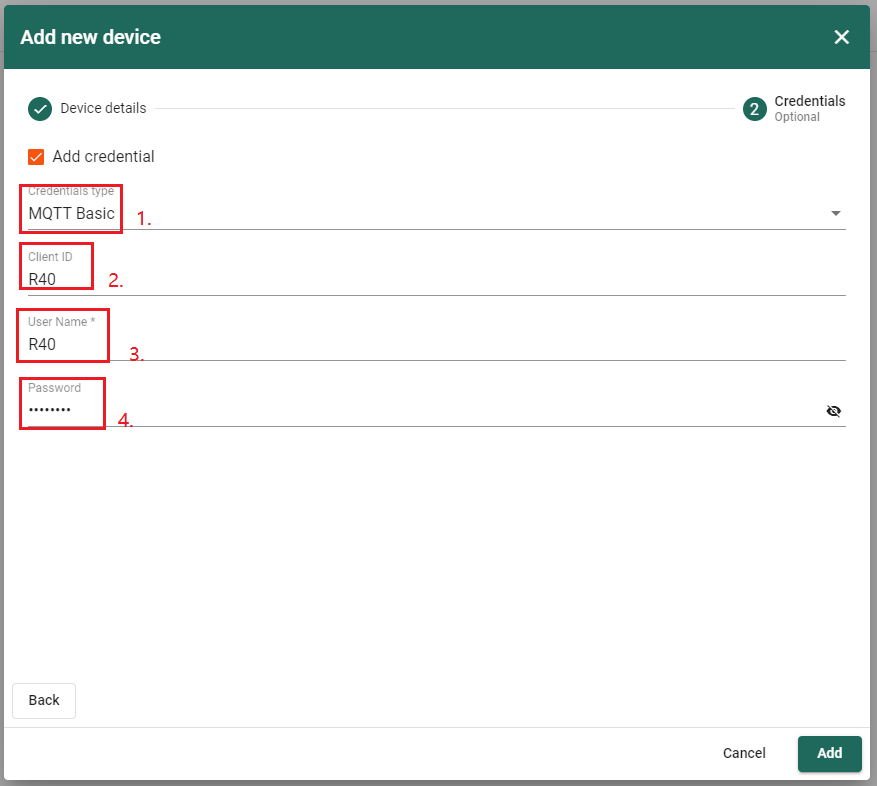
1.Choose credentials type:MQTT Basic.
2.Set Client ID, For example "R40".
3.Set username which will be used in MQTT authorization.
4.Set password which will be used in MQTT authorization.
Step 2 Industrial Router configuration
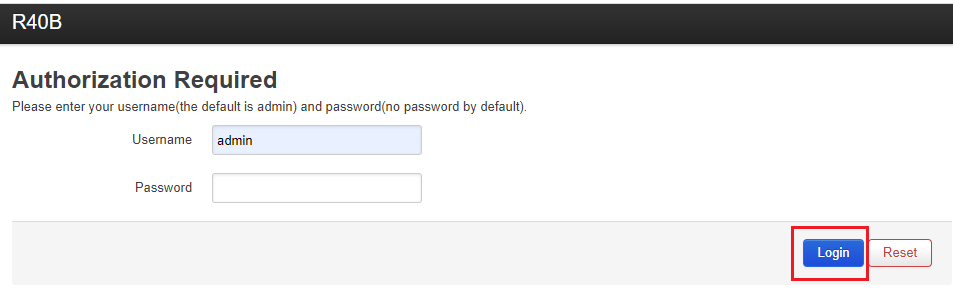
Step 2.1 Login to Router. The default username is "admin", and no password.
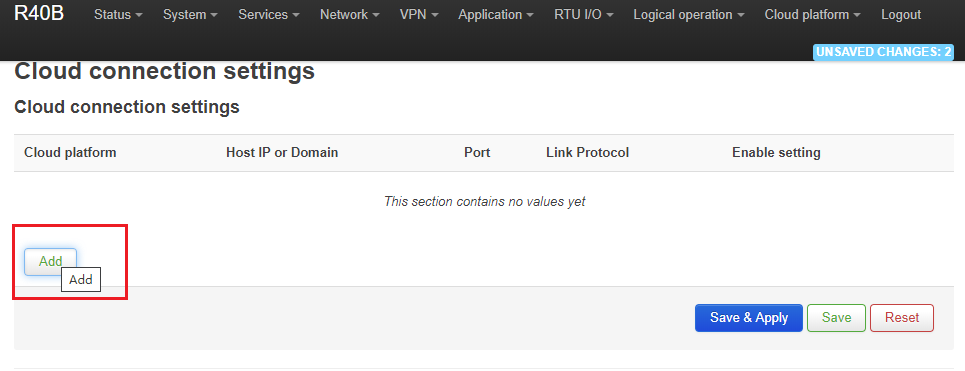
Step 2.2 Click Menu "Cloud platform", Choose "Custom cloud", Click "Add" to add a cloud configuration...
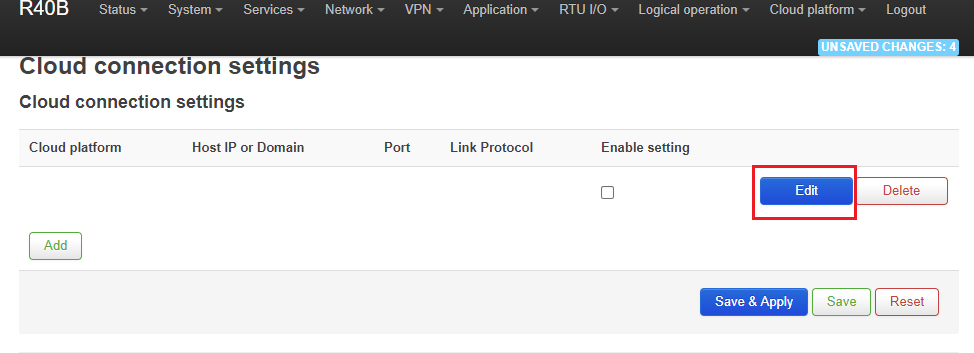
Step 2.3 Click "Edit" to edit configuration.
Step 2.4 Edit thingsboard configuration.
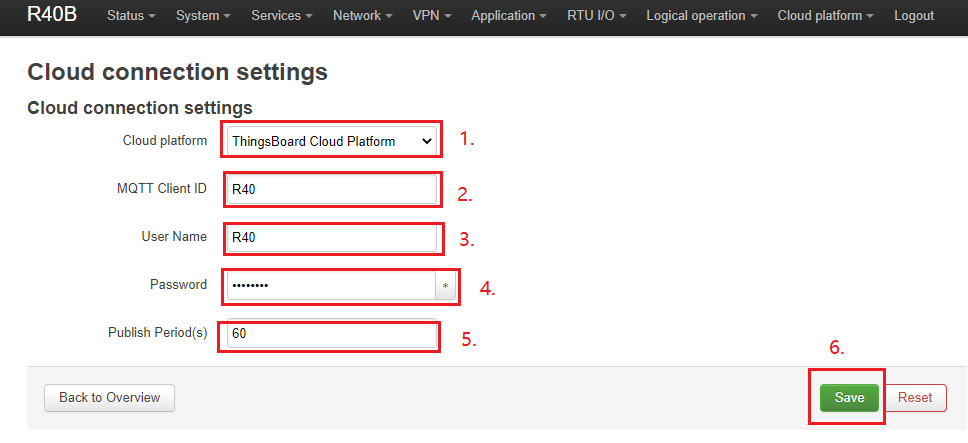
1.Choose ThingsBoard platform.
2.Set MQTT ID, See "Step 1.4".
3.Set username, See "Step 1.4".
4.Set password, See "Step 1.4".
5.Set publishing period.
6.Click "Save" to save configuration and "Back to Overview".
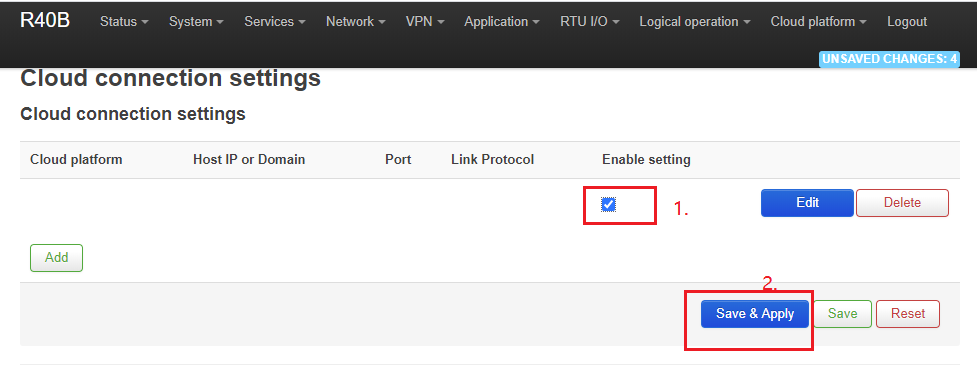
Step 2.5 Check "Enable setting", Click "Save&Apply" to apply configuration.
Step 3 Adding widget to the dashboard
Step 3.1 The collected data can be displayed using various a widgets. To create one you should be able to see gathered data in the Latest telemetry section.To access it you should follow these steps:
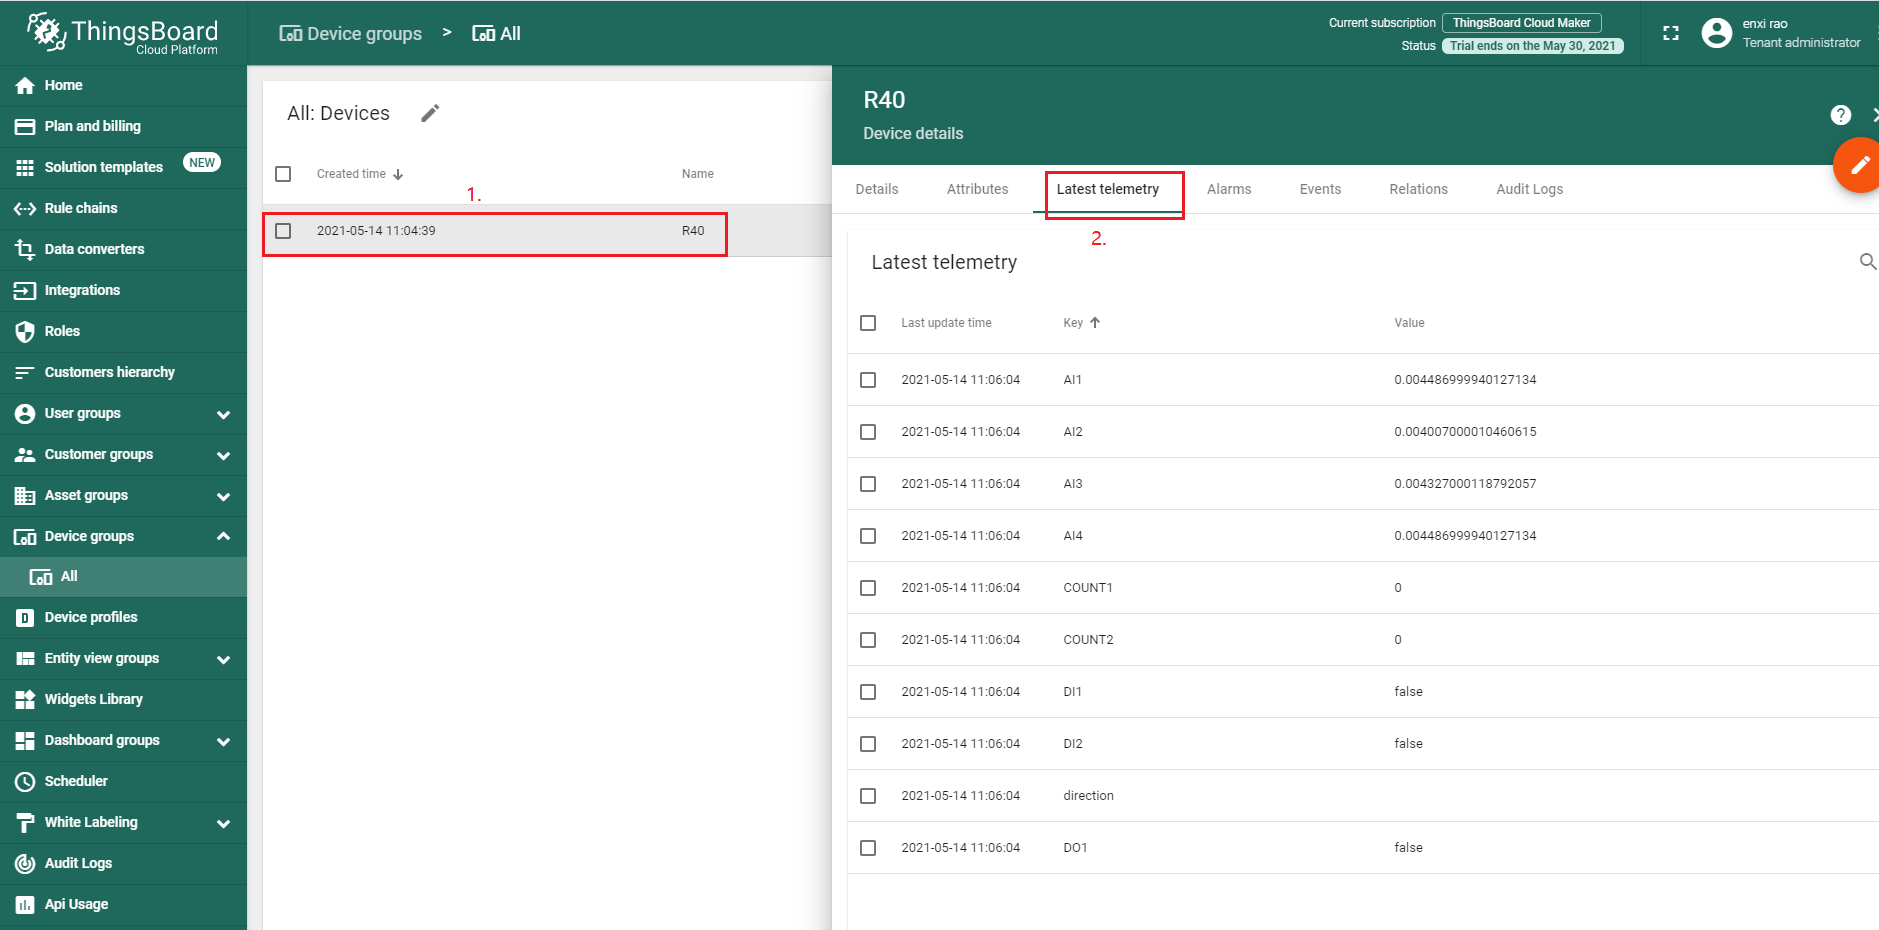
1.Click on the configured device.
2.From the pop-up menu select Latest telemetry option. There you should see collected data.
Step 3.2 In order to display data in the widget you should:
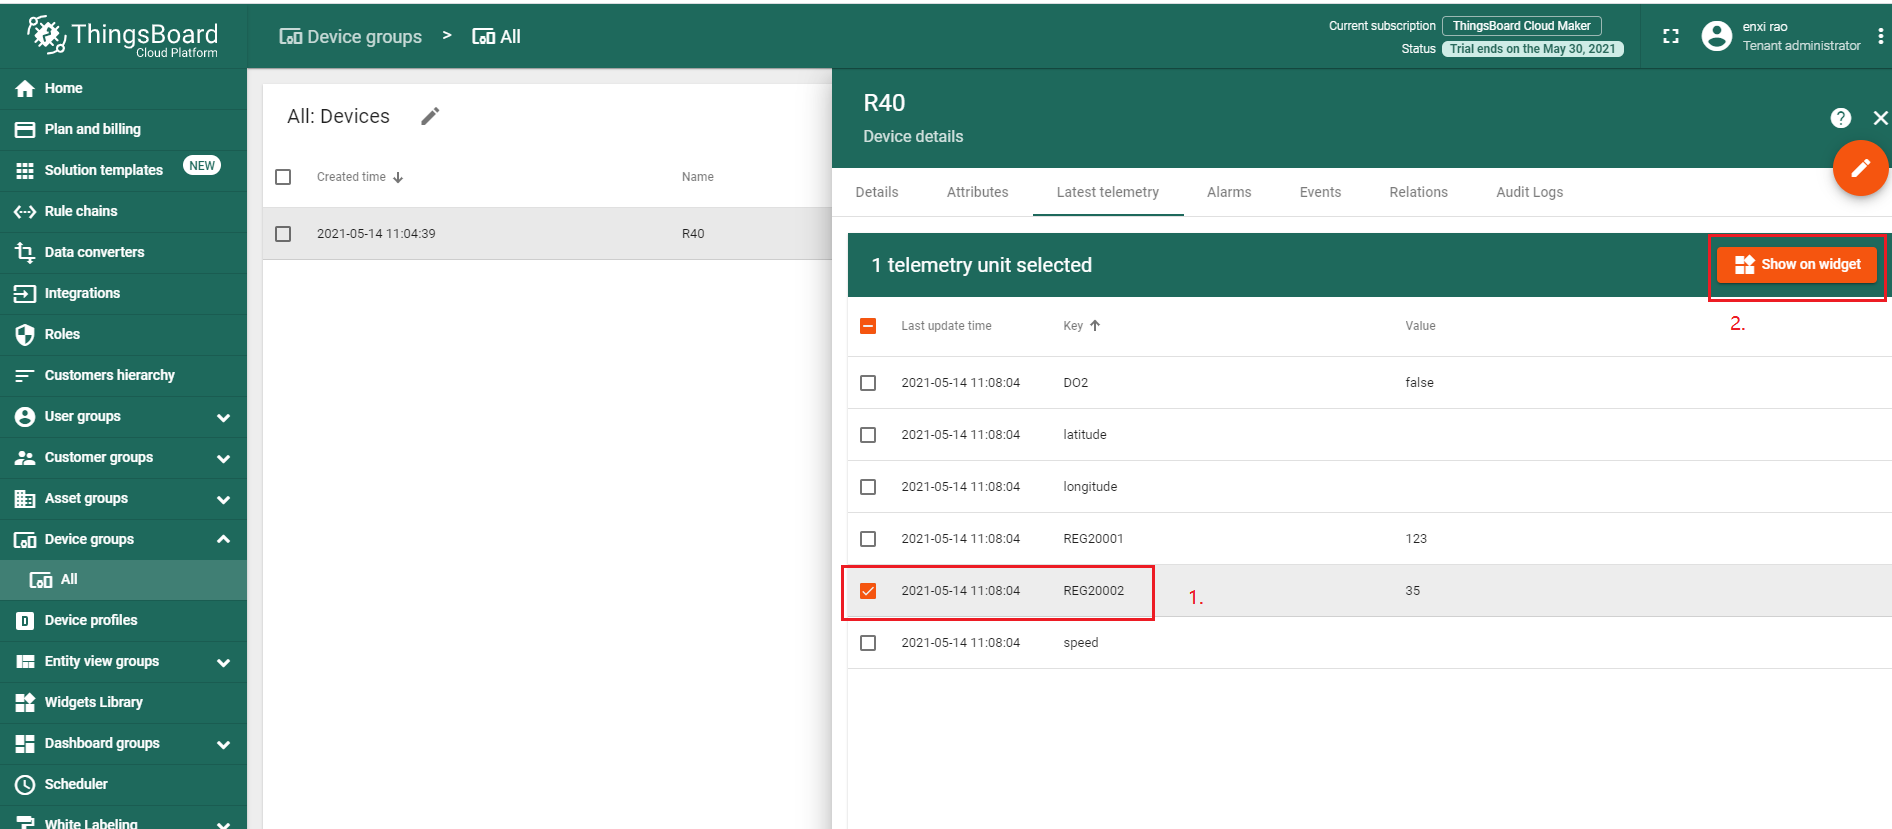
1.Click on the gathered data row.
2.Press Show on widget button.
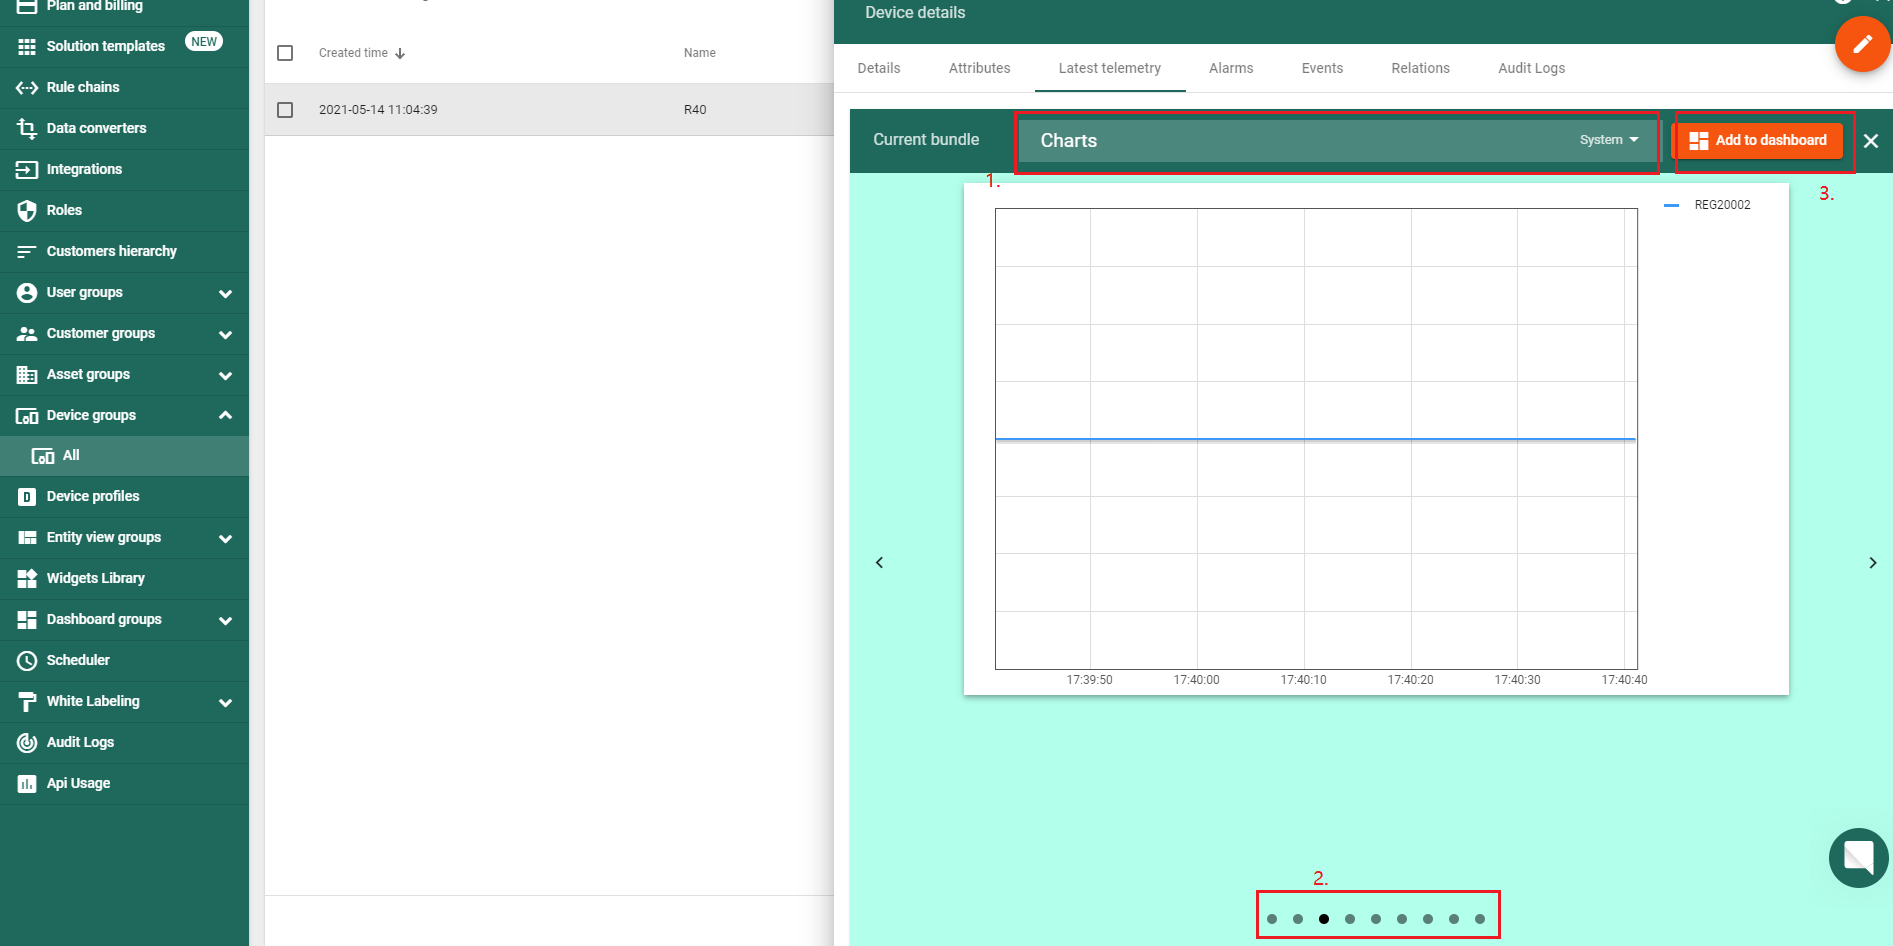
1.Choose bundle accordingly to your data.
2.Choose suitable chart for your data visualization.
3.Add widget to dashboard.
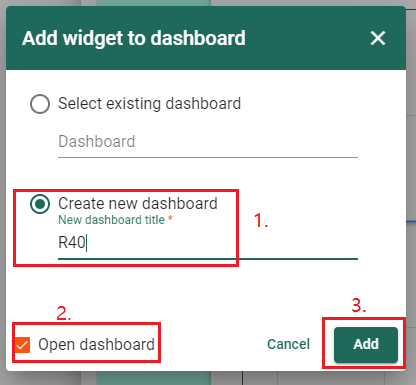
1.Create new dashboard.
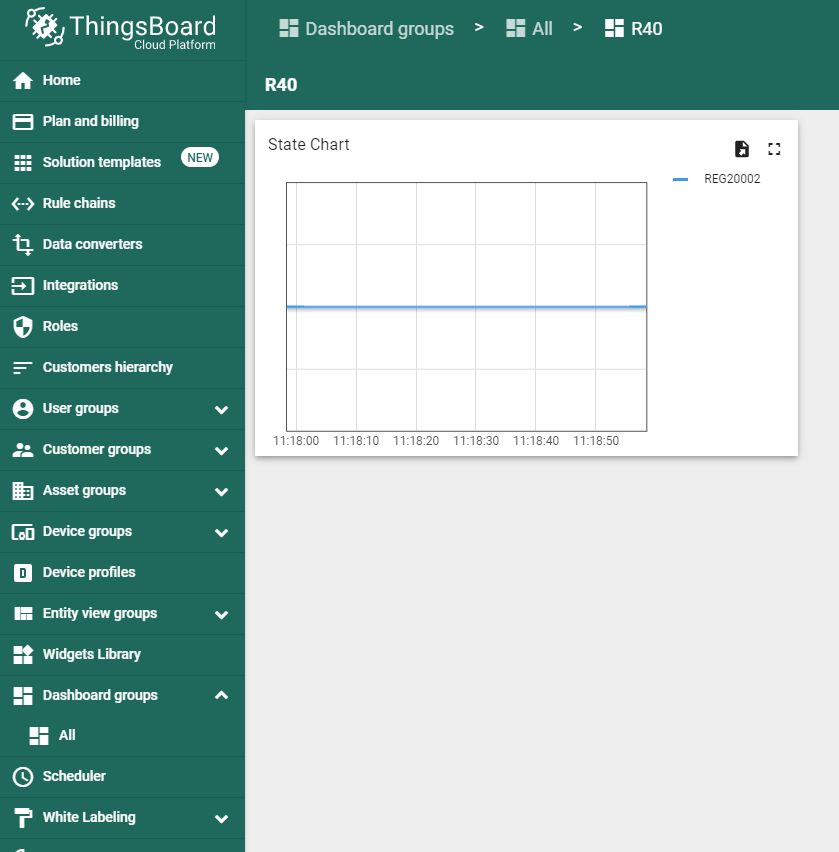
2.With this option enabled after addition you will be redirected to newly created dashboard
3.Adds widget to dashboard.
Explore guides related to main ThingsBoard features:
- Create Dashboard(http://www.ithingsboard.com/docs/getting-started-guides/helloworld/" \l "step-3-create-dashboard) - how to create a new dashboard.
- Working with IoT dashboards - how to work with dashboards.