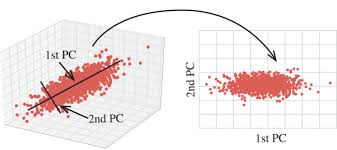
笔者在搞网络的时候碰到个问题,就是将特征维度从1024降维到268,那么可以通过哪些深度学习方法来实现呢?
文章目录
- [1. 卷积层降维](#1. 卷积层降维)
- [2. 全连接层降维](#2. 全连接层降维)
- [3. 使用注意力机制](#3. 使用注意力机制)
- [4. 使用自编码器](#4. 使用自编码器)
1. 卷积层降维
可以使用1x1卷积层(也叫pointwise卷积)来减少通道数。这种方法保留了特征图的空间维度(宽度和高度),同时减少了通道数。
py
import torch
import torch.nn as nn

class ReduceDim(nn.Module):
    def __init__(self, in_channels, out_channels):
        super(ReduceDim, self).__init__()
        self.conv1x1 = nn.Conv2d(in_channels, out_channels, kernel_size=1)

    def forward(self, x):
        return self.conv1x1(x)

# 假设输入的特征图为 (bs, 1024, 28, 28)
x = torch.randn(56, 1024, 28, 28)
model = ReduceDim(1024, 268)
output = model(x)
print(output.shape)  # 输出形状应为 (56, 268, 28, 28)
2. 全连接层降维
可以将特征图展平为一个向量,然后使用全连接层(线性层)来降维。这种方法适用于特征图的全局降维。
py
class ReduceDimFC(nn.Module):
    def __init__(self, in_channels, out_channels, width, height):
        super(ReduceDimFC, self).__init__()
        self.fc = nn.Linear(in_channels * width * height, out_channels * width * height)
        self.width = width
        self.height = height

    def forward(self, x):
        bs, c, w, h = x.shape
        x = x.view(bs, -1)
        x = self.fc(x)
        x = x.view(bs, out_channels, self.width, self.height)
        return x

# 假设输入的特征图为 (bs, 1024, 28, 28)
x = torch.randn(56, 1024, 28, 28)
model = ReduceDimFC(1024, 268, 28, 28)
output = model(x)
print(output.shape)  # 输出形状应为 (56, 268, 28, 28)
3. 使用注意力机制
可以使用基于注意力机制的方法来降维。例如,可以使用Transformer编码器或自注意力机制来实现降维。
py
import torch
import torch.nn as nn

class ReduceDimAttention(nn.Module):
    def __init__(self, in_channels, out_channels):
        super(ReduceDimAttention, self).__init__()
        self.attention = nn.MultiheadAttention(embed_dim=in_channels, num_heads=8)
        self.fc = nn.Linear(in_channels, out_channels)

    def forward(self, x):
        bs, c, w, h = x.shape
        x = x.view(bs, c, -1).permute(2, 0, 1)  # (w*h, bs, c)
        x, _ = self.attention(x, x, x)
        x = x.permute(1, 2, 0).view(bs, c, w, h)
        x = self.fc(x.permute(0, 2, 3, 1)).permute(0, 3, 1, 2)
        return x

# 假设输入的特征图为 (bs, 1024, 28, 28)
x = torch.randn(56, 1024, 28, 28)
model = ReduceDimAttention(1024, 268)
output = model(x)
print(output.shape)  # 输出形状应为 (56, 268, 28, 28)
4. 使用自编码器
可以训练一个自编码器网络来学习降维。自编码器由编码器和解码器组成,通过最小化重建误差来学习紧凑的表示。
py
class Encoder(nn.Module):
    def __init__(self, in_channels, out_channels):
        super(Encoder, self).__init__()
        self.conv1 = nn.Conv2d(in_channels, 512, kernel_size=3, padding=1)
        self.conv2 = nn.Conv2d(512, out_channels, kernel_size=3, padding=1)

    def forward(self, x):
        x = torch.relu(self.conv1(x))
        x = torch.relu(self.conv2(x))
        return x

class Decoder(nn.Module):
    def __init__(self, in_channels, out_channels):
        super(Decoder, self).__init__()
        self.conv1 = nn.Conv2d(in_channels, 512, kernel_size=3, padding=1)
        self.conv2 = nn.Conv2d(512, out_channels, kernel_size=3, padding=1)

    def forward(self, x):
        x = torch.relu(self.conv1(x))
        x = torch.relu(self.conv2(x))
        return x

class Autoencoder(nn.Module):
    def __init__(self, in_channels, bottleneck_channels, out_channels):
        super(Autoencoder, self).__init__()
        self.encoder = Encoder(in_channels, bottleneck_channels)
        self.decoder = Decoder(bottleneck_channels, out_channels)

    def forward(self, x):
        x = self.encoder(x)
        x = self.decoder(x)
        return x

# 假设输入的特征图为 (bs, 1024, 28, 28)
x = torch.randn(56, 1024, 28, 28)
model = Autoencoder(1024, 268, 1024)
encoded = model.encoder(x)
print(encoded.shape)  # 输出形状应为 (56, 268, 28, 28)
以上方法都是有效的深度学习降维技术,可以根据具体的需求和应用场景选择合适的方法。Enjoy~
∼ O n e p e r s o n g o f a s t e r , a g r o u p o f p e o p l e c a n g o f u r t h e r ∼ \sim_{One\ person\ go\ faster,\ a\ group\ of\ people\ can\ go\ further}\sim ∼One person go faster, a group of people can go further∼