文章目录
环境配置(必看)
Anaconda-创建虚拟环境的手把手教程相关环境配置看此篇文章,本专栏深度学习相关的版本和配置,均按照此篇文章进行安装。
头文件引用
python
from sklearn.datasets import load_iris, fetch_20newsgroups
from sklearn.model_selection import train_test_split, GridSearchCV
from sklearn.preprocessing import StandardScaler
from sklearn.neighbors import KNeighborsClassifier
from sklearn.tree import DecisionTreeClassifier, export_graphviz
from sklearn.feature_extraction.text import TfidfVectorizer
from sklearn.feature_extraction import DictVectorizer
from sklearn.naive_bayes import MultinomialNB
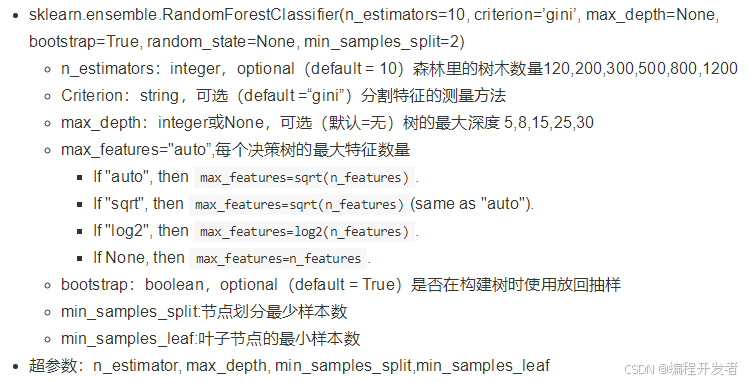
from sklearn.ensemble import RandomForestClassifier
from sklearn.tree import plot_tree
import matplotlib.pyplot as plt
import pandas as pd1.朴素贝叶斯算法
查看存放数据集的路径(手动下载数据集存放在这个路径下)
python
print(sklearn.datasets.get_data_home())参考这篇文章进行的数据集的适配--
sklearn的英文20新闻数据集fetch_20newsgroups在MAC电脑上的加载
我的电脑是win10,最终修改的路径为:
python
archive_path = 'C:/Users/asus/scikit_learn_data/20news_home/20news-bydate.tar.gz'代码
调参:
MultinomialNB()默认的alpha=1,但是准确率只有84%,设置为alpha=0.01,准确率有很大提高
python
def nb_news():
"""
用朴素贝叶斯算法对新闻进行分类
:return:
"""
# 1)获取数据
# subset参数 默认是获取训练集,如果训练集和目标集都要就是subset='all'
news = fetch_20newsgroups(subset='all')
# 2)划分数据集 random_state=10
x_train, x_test, y_train, y_test = train_test_split(news.data, news.target)
# 3)特征工程:文本特征抽取
transfer = TfidfVectorizer()
# 抽取训练集和测试集的特征值
x_train = transfer.fit_transform(x_train)
x_test = transfer.transform(x_test)
# 4)朴素贝叶斯算法算法预估器流程
estimator = MultinomialNB(alpha=0.01)
estimator.fit(x_train, y_train)
# 5.模型评估
# 方法1: 直接比对真实值和预测值
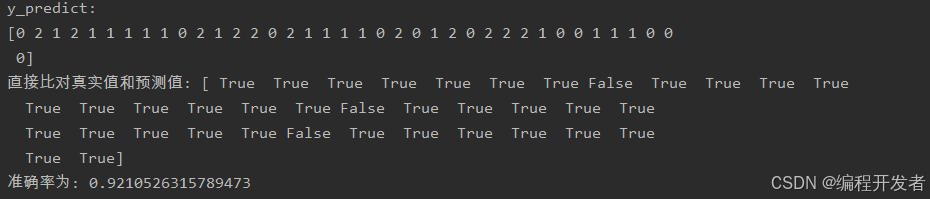
y_predict = estimator.predict(x_test)
print(f"y_predict:\n{y_predict}")
print(f"直接比对真实值和预测值: {y_test == y_predict}")
# 方法2: 计算准确率
score = estimator.score(x_test, y_test)
print(f"准确率为: {score}")运行结果

优缺点
python
优点:
    对缺失数据不太敏感,算法也比较简单,常用于文本分类。
    分类准确度高,速度快
缺点:
    由于使用了样本属性独立性的假设,所以如果特征属性有关联时其效果不好
2.决策树
代码
python
def decision_iris():
    """
    用决策树对鸢尾花进行分类
    :return:
    """
    # 1.获取数据集
    iris = load_iris()
    # 2.划分数据集
    x_train, x_test, y_train, y_test = train_test_split(iris.data, iris.target, random_state=22)
    # 3.决策树预估器
    estimator = DecisionTreeClassifier()
    estimator.fit(x_train, y_train)

    # 4.模型评估
    # 方法1: 直接比对真实值和预测值
    y_predict = estimator.predict(x_test)
    print(f"y_predict:\n{y_predict}")
    print(f"直接比对真实值和预测值: {y_test == y_predict}")
    # 方法2: 计算准确率
    score = estimator.score(x_test, y_test)
    print(f"准确率为: {score}")
    # 可视化决策树 feature_names=iris.feature_names 传输特征名字显示在结构图中
    plot_tree(estimator, feature_names=iris.feature_names)
    # 保存决策树可视化结构图片
    plt.savefig("tree_struct.png")
    # 显示图像
    plt.show()
运行结果
决策树可视化图片
petal_width(cm): 花瓣宽度
entropy: 信息增益
samples:样本 (第一个框:150*0.75≈112)
value:每个类别中有多少个符合条件的元素

优缺点
python
优点:
	简单的理解和解释,树木可视化。
缺点:
	决策树学习者可以创建不能很好地推广数据的过于复杂的树,容易发生过拟合。
改进:
	减枝cart算法
	随机森林(集成学习的一种)
注:企业重要决策,由于决策树很好的分析能力,在决策过程应用较多, 可以选择特征
3.随机森林
代码
python
def random_forest():
    """
    随机森林对泰坦尼克号乘客的生存进行预测
    :return:
    """
    # 1.获取数据集
    titanic = pd.read_csv("titanic.csv")
    # 筛选特征值和目标值
    x = titanic[["pclass", "age", "sex"]]
    y = titanic["survived"]
    # 2.数据处理
    # 1) 缺失值处理
    x["age"].fillna(x["age"].mean(), inplace=True)

    # 2) 转换成字典
    x = x.to_dict(orient="records")

    # 3.划分数据集 random_state=10
    x_train, x_test, y_train, y_test = train_test_split(x, y, random_state=22)

    # 4.字典特征抽取
    transfer = DictVectorizer()
    x_train = transfer.fit_transform(x_train)
    x_test = transfer.transform(x_test)

    # 5.算法预估器
    estimator = RandomForestClassifier()

    # 加入网格搜索和交叉验证
    # 参数准备  "max_depth" 最大深度
    param_dict = {"n_estimators": [120, 200, 300, 500, 800, 1200], "max_depth": [5, 8, 15, 25, 30]}  # 网格搜索
    # cv=10 代表10折运算(交叉验证)
    estimator = GridSearchCV(estimator, param_grid=param_dict, cv=3)
    estimator.fit(x_train, y_train)

    # 6.模型评估
    # 方法1: 直接比对真实值和预测值
    y_predict = estimator.predict(x_test)
    print(f"y_predict:\n{y_predict}")
    print(f"直接比对真实值和预测值: {y_test == y_predict}")
    # 方法2: 计算准确率
    score = estimator.score(x_test, y_test)
    print(f"准确率为: {score}")

    # 最佳参数:
    print("最佳参数: \n", estimator.best_params_)
    # 最佳结果:
    print("最佳结果: \n", estimator.best_score_)
    # 最佳参数:
    print("最佳估计器: \n", estimator.best_estimator_)
    # 交叉验证结果:
    print("交叉验证结果: \n", estimator.cv_results_)
RandomForestClassifier()
运行结果


总结
python
能够有效地运行在大数据集上,
处理具有高维特征的输入样本,而且不需要降维