引言
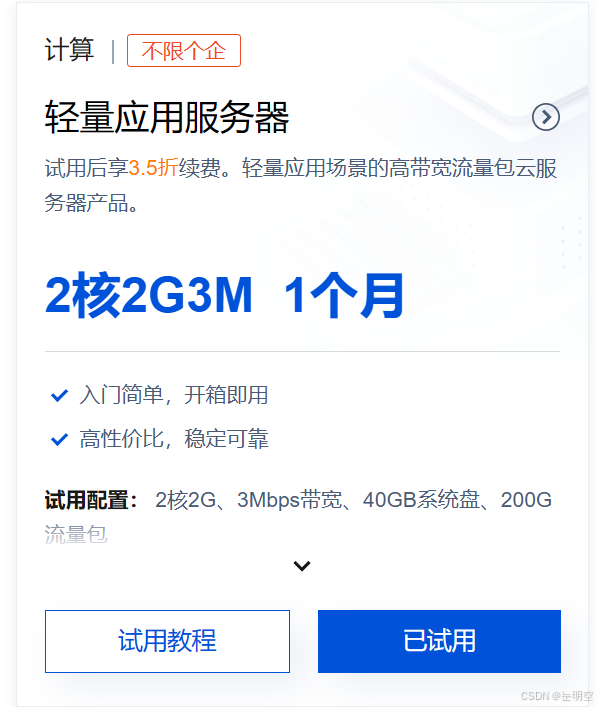
我们首先邮箱注册一个腾讯云账号(腾讯云 产业智变·云启未来 - 腾讯),注册后会有一个月试用期,我们今天讲解的是轻量应用服务器,点击使用,选择离你区域最近的服务区,然后还有一个镜像选择,我们这里用Linux系统。
本篇博客主要介绍CentOS 7下配置连接数据库
下载(主要介绍CentOS 7环境下)

一、Windows
如果已经默认选择使用,那我们下载的就是windows Server系统,若想要使用windows系统,可以直接登录,我们点击控制台跳转后找到这个图标------站内信(会发三条短信)

点击第一条短信,进入查看自己的初始账号密码


点击登录,输入初始账号密码即可(注意密码包含特殊字符一定要输入正确,不要遗忘某个标点)
二、 CentOS
如果我们修改系统,可以打开控制台,进入以下界面:


点击重装系统

这里选择CentOS系统,进行下载,下面自定义密码自我填写即可。

等待系统重装结束后,若未开机先点击开机,若已经开机,点击登录,手机验证输入自定义账号密码即可登录。

进入界面后就是一个非常典型的Linux终端界面。

配置数据库环境
一、下载安装
检查本机是否已经安装数据库
rpm -qa | grep mysql
倘若计算机显示权限不够在前面加sudo
sudo rpm -qa | grep mysql

若已经安装,就会像上图显示一样,可以删除(删除时要每条都删干净):
rpm -e --nodeps 已经安装的名称
举例:rpm -e --nodeps mysql80-community-release-el7-8.noarch
安装时我们使用wegt命令,一般系统是自带这个配置的,我们可以用以下命令查看wegt -V想了解更多细节详情可看帮助手册:wget --help


首先我们需要创建自己的文件夹
mkdir -p app/soft/mysql
进入mysql文件夹下面

mysql80-community-release-el7-8.noarch.rpm是一个 RPM 包,它用于在 CentOS 7 系统上配置 MySQL 8.0 Community Edition 的官方 Yum 仓库。我们在当前目录下下载:
wget http://dev.mysql.com/get/mysql80-community-release-el7-8.noarch.rpm
下载成功后如下图所示

ls指令可查看当前目录下内容

安装mysql源
yum localinstall -y mysql80-community-release-el7-8.noarch.rpm
[root@VM-20-7-centos mysql]# yum localinstall -y mysql80-community-release-el7-8.noarch.rpm
Loaded plugins: fastestmirror, langpacks
Examining mysql80-community-release-el7-8.noarch.rpm: mysql80-community-release-el7-8.noarch
Marking mysql80-community-release-el7-8.noarch.rpm to be installed
Resolving Dependencies
--> Running transaction check
---> Package mysql80-community-release.noarch 0:el7-8 will be installed
--> Finished Dependency Resolution

Dependencies Resolved

=====================================================================
 Package                       Arch       Version     Repository                                   Size
=====================================================================
Installing:
 mysql80-community-release     noarch     el7-8       /mysql80-community-release-el7-8.noarch      12 k
Transaction Summary
=====================================================================
Install  1 Package

Total size: 12 k
Installed size: 12 k
Downloading packages:
Running transaction check
# ...............部分省略
Installed:
  mysql80-community-release.noarch 0:el7-8
Complete!
再次检查是否安装成功
root@VM-20-7-centos mysql\]# rpm -qa \|grep mysql mysql80-community-release-el7-8.noarch 检查系统中 mysql 的软件仓库,确定 MySQL 的相关仓库是否已经正确添加并启用。 **yum repolist enabled \| grep mysql**

使用 yum 安装 mysql:
yum install -y mysql-community-server
[root@VM-20-7-centos mysql]# yum install -y mysql-community-server
Loaded plugins: fastestmirror, langpacks
Loading mirror speeds from cached hostfile
 * base: mirrors.aliyun.com
 * extras: mirrors.aliyun.com
 * updates: mirrors.aliyun.com
Resolving Dependencies
--> Running transaction check
---> Package mysql-community-server.x86_64 0:8.0.36-1.el7 will be installed
--> Processing Dependency: mysql-community-common(x86-64) = 8.0.36-1.el7 for package: mysql-community-server-8.0.36-1.el7.x86_64
--> Processing Dependency: mysql-community-icu-data-files = 8.0.36-1.el7 for package: mysql-community-server-8.0.36-1.el7.x86_64
--> Processing Dependency: mysql-community-client(x86-64) >= 8.0.11 for package: mysql-community-server-8.0.36-1.el7.x86_64
--> Running transaction check
---> Package mysql-community-client.x86_64 0:8.0.36-1.el7 will be installed
--> Processing Dependency: mysql-community-client-plugins = 8.0.36-1.el7 for package: mysql-community-client-8.0.36-1.el7.x86_64
--> Processing Dependency: mysql-community-libs(x86-64) >= 8.0.11 for package: mysql-community-client-8.0.36-1.el7.x86_64
---> Package mysql-community-common.x86_64 0:8.0.36-1.el7 will be installed
---> Package mysql-community-icu-data-files.x86_64 0:8.0.36-1.el7 will be installed
--> Running transaction check
---> Package mysql-community-client-plugins.x86_64 0:8.0.36-1.el7 will be installed
---> Package mysql-community-libs.x86_64 0:8.0.36-1.el7 will be installed
--> Finished Dependency Resolution

Dependencies Resolved

=======================================================================================
 Package                               Arch          Version             Repository                Size
========================================================================================
Installing:
 mysql-community-server                x86_64        8.0.36-1.el7        mysql80-community         64 M
Installing for dependencies:
 mysql-community-client                x86_64        8.0.36-1.el7        mysql80-community         16 M
 mysql-community-client-plugins        x86_64        8.0.36-1.el7        mysql80-community        3.5 M
 mysql-community-common                x86_64        8.0.36-1.el7        mysql80-community        665 k
 mysql-community-icu-data-files        x86_64        8.0.36-1.el7        mysql80-community        2.2 M
 mysql-community-libs                  x86_64        8.0.36-1.el7        mysql80-community        1.5 M

Transaction Summary
=======================================================================================
Install  1 Package (+5 Dependent packages)

Total download size: 88 M
Installed size: 415 M
Downloading packages:
warning: /var/cache/yum/x86_64/7/mysql80-community/packages/mysql-community-client-plugins-8.0.36-1.el7.x86_64.rpm: Header V4 RSA/SHA256 Signature, key ID a8d3785c: NOKEY
Public key for mysql-community-client-plugins-8.0.36-1.el7.x86_64.rpm is not installed
(1/6): mysql-community-client-plugins-8.0.36-1.el7.x86_64.rpm                    | 3.5 MB  00:00:16
(2/6): mysql-community-common-8.0.36-1.el7.x86_64.rpm                            | 665 kB  00:00:03
(3/6): mysql-community-icu-data-files-8.0.36-1.el7.x86_64.rpm                    | 2.2 MB  00:00:09
(4/6): mysql-community-libs-8.0.36-1.el7.x86_64.rpm                              | 1.5 MB  00:00:06
(5/6): mysql-community-client-8.0.36-1.el7.x86_64.rpm                            |  16 MB  00:01:16
(6/6): mysql-community-server-8.0.36-1.el7.x86_64.rpm                            |  64 MB  00:02:44
--------------------------------------------------------------------------------------
Total                                                                   450 kB/s |  88 MB  00:03:20
Retrieving key from file:///etc/pki/rpm-gpg/RPM-GPG-KEY-mysql-2022
Retrieving key from file:///etc/pki/rpm-gpg/RPM-GPG-KEY-mysql


The GPG keys listed for the "MySQL 8.0 Community Server" repository are already installed but they are not correct for this package.
Check that the correct key URLs are configured for this repository.


 Failing package is: mysql-community-client-8.0.36-1.el7.x86_64
 GPG Keys are configured as: file:///etc/pki/rpm-gpg/RPM-GPG-KEY-mysql-2022, file:///etc/pki/rpm-gpg/RPM-GPG-KEY-mysql
若安装失败,最后一步,提示错误 Failing package is:...
这个可能是由于由于GPG密钥验证问题引起的,需要禁掉GPG验证检查,指令如下:
yum -y install mysql-community-server --nogpgcheck
再次执行,即可下载成功
yum install -y mysql-community-server
最后再次检查是否安装成功rpm -qa |grep mysql

二、启动mysql
下载结束后,启动mysql
systemctl start mysqld
设置开机启动
systemctl enable mysqld
重新加载配置文件
systemctl daemon-reload

三、防火墙设置
建议停止防火墙或开放 3306 端口允许服务器外的请求访问
开启3306号端口
firewall-cmd --zone=public --add-port=3306/tcp --permanent
加载配置(博主这里直接关闭了防火墙所以加载配置显示防火墙没有运行)
firewall-cmd --reload

四、登录mysql
查看mysql密码
cat /var/log/mysqld.log | grep password

登录数据库,如下图片表示登录成功
mysql -uroot -p' 密码 ' (有密码登录)

修改密码
ALTER USER 'root'@'localhost' IDENTIFIED WITH mysql_native_password BY '密码';
注意:默认密码要求包含数字、大小写字母、特殊字符、长度至少8位
修改后可使用新密码登录
mysql -uroot -p' 新密码 '
本机远程连接
这里使用了远程连接软件MobaXterm。该软件具体下载暂时就不介绍了,大家可以自行查找下载教程。(putty 远程桌面连接都可以)

一、本机连接
双击打开软件,点击 Session 图标,如下:

点击SSH连接。

输入ip地址,请查看你申请的云服务器的公网 ip ,填入下面Remote host中(详细公网ip可以在控制台中查看,如下图画红圈处),勾选第二个输入主机名,最后点击OK。


创建成功后就可以看到主界面旁边的连接了。输入当时云服务器设定的密码,注意这里不会显示你输入的密码,此外大家也看到了我这里有两个连接账户,主要是为了演示一个错误,如果出现了和我一样的错误,可以往下纠正。
当我们输入密码显示错误 " Access denied ",也就是如下情况:

原因是因为主机名不匹配,选中连接用户右击选择 Conect as :

出现如下界面,输入正确远程连接主机名即可。我这里是root

成功连接!

如果我们写了正常的远程主机名,就不需要以上操作,直接输入密码就可以连接!
二、workbench连接mysql
数据库连接我们使用mysql官方自带可视化编程软件workbench来建立连接。(直接终端也可以)。

首先我们打开腾讯云控制台,点击云服务器。

可以在左侧找到安全组,我们点击安全组,添加安全规则。

点击新建,新建安全组,放通相关规则,一般默认即可。(若已经有实例,可不用新建)


创建好实例后,点击修改规则。


在入站规则中点击 添加规则 :我们选择MySQL3306,开放该服务即可

接下来就是云服务器中数据库的设置了。我们先创建一个用户,为该用户分配用户权限,%是指所有主机都可以连接,一定要确保你创建的 MySQL 用户允许来自任何主机连接(注意,mysql8的语句语法,它不能使用一整句即创建+分配)。
CREATE USER '用户名'@'%'  IDENTIFIED BY '密码';

GRANT ALL PRIVILEGES ON *.* TO '用户名'@'%' WITH GRANT OPTION;

FLUSH PRIVILEGES;
查看是否添加。(注意这里我之前连接好了所以直接在workbench里查了,大家在腾讯云服务器终端进入数据库查,或者远程连接查)(博主有点懒了hhh)
use mysql;

SELECT user,host,plugin from mysql.user;
如上root即为我创建的用户,接下来我们操作workbench,打开workbench,可以看到主界面,我们点击如下圈住部分。

填写相关信息,点击ok。

成功连接!且主页也会出现你创建的连接。


OK!到这里就结束啦,我们之后就能直接在本机对云服务器进行配置操作了。
(希望对大家有用)