目录
[1 Rancher介绍](#1 Rancher介绍)
[1.1 Rancher简介](#1.1 Rancher简介)
[1.2 Rancher和k8s的区别](#1.2 Rancher和k8s的区别)
[1.3 Rancher使用案例](#1.3 Rancher使用案例)
[2.1 初始化实验环境](#2.1 初始化实验环境)
[2.2 安装Rancher](#2.2 安装Rancher)
[2.3 登录Rancher平台](#2.3 登录Rancher平台)
[3 通过Rancher管理已存在的k8s集群](#3 通过Rancher管理已存在的k8s集群)
[4 通过Rancher仪表盘管理k8s集群:部署tomcat服务](#4 通过Rancher仪表盘管理k8s集群:部署tomcat服务)
文档中的YAML文件配置直接复制粘贴可能存在格式错误,故实验中所需要的YAML文件以及本地包均打包至网盘
链接:https://pan.baidu.com/s/1Fwv3UUbKrqFqgh5LSqpKdA
提取码:58zd
1 Rancher介绍
1.1 Rancher简介
Rancher是一个开源的企业级多集群Kubernetes管理平台,实现了Kubernetes集群在混合云+本地数据中心的集中部署与管理,以确保集群的安全性,加速企业数字化转型。
超过40,000家企业每天使用Rancher快速创新
Rancher官方文档:
1.2 Rancher和k8s的区别
Rancher和k8s都是用来作为容器的调度与编排系统。但是rancher不仅能够管理应用容器,更重要的一点是能够管理k8s集群。Rancher2.x底层基于k8s调度引擎,通过Rancher的封装,用户可以在不熟悉k8s概念的情况下轻松的通过Rancher来部署容器到k8s集群当中。
1.3 Rancher使用案例
1、中保银行
在使用Rancher平台之前,中银保险也尝试过使用原生的一些Kubernetes平台,但是这些平台学习使用成本高昂、运行维护特别复杂。尤其是当我公司使用多种混合云环境的时候,一个个Kubernetes集群就变成了一个个技术孤岛,反而加重了公司信息化转型的压力。Rancher平台的采用有效地解决了之前平台使用中所存在的问题,提升我公司测试业务平台的运行维护效率。
------ 付春涛 中银保险有限公司 信息科技部 技术负责人
2、蔚来汽车数字运营中国
Rancher友好的图形化管理界面和资源创建的易用性、多集群管理能力、AD认证和权限管理集成、应用商店功能等各种能力,帮助我们简化了容器化应用的部署,得以方便地进行多云Kubernetes管理和权限控制,提高了应用交付的效率。感谢Rancher团队,期待Rancher中国团队进一步优化功能,推进Rancher在国内的大量落地。
------ 赵鹏飞 蔚来汽车数字运营中国 运维开发工程师
3、上汽集团
Rancher 2.x是数据中心级别的管理平台,拥有多云管理的能力,符合未来企业上云的架构规划演进;Rancher的开源产品模式降低了技术人员的使用成本,在兼顾原生Kubernetes的同时,为开发人员提供了丰富的API与系统功能,提高了开发生产效率。同时,Rancher专业的容器产品团队,架起了开源产品与生产业务的桥梁,在微服务、应用容器化、DevOps、业务上云等技术领域为上汽集团提供了可靠的支持。
------ 龚瀚申 上汽集团 PaaS平台总监
2 安装rancher
2.1 初始化实验环境
安装rancher需要的实验环境如下:
环境说明(centos7.6):
IP 主机名 内存 cpu
192.168.40.138 xianchaorancher 6G 6vCPU
已经存在的K8s实验环境:
角色 ip 主机名
控制节点 192.168.40.180 xianchaomaster1
工作节点 192.168.40.181 xianchaonode1
配置主机名:
在192.168.40.138上执行如下:
hostnamectl set-hostname xianchaorancher
配置hosts文件:
#在xianchaomaster1、xianchaonode1、xianchaorancher上操作:
192.168.40.180 xianchaomaster1
192.168.40.181 xianchaonode1
192.168.40.138 xianchaorancher
配置rancher到k8s主机互信
生成ssh 密钥对
root@xianchaorancher \~# ssh-keygen #一路回车,不输入密码
把本地的ssh公钥文件安装到远程主机对应的账户
root@xianchaorancher \~# ssh-copy-id xianchaomaster1
root@xianchaorancher \~# ssh-copy-id xianchaorancher
root@xianchaorancher \~# ssh-copy-id xianchaonode1
关闭防火墙
root@xianchaorancher \~# systemctl stop firewalld ; systemctl disable firewalld
关闭selinux
root@xianchaorancher \~# setenforce 0
root@xianchaorancher \~# sed -i 's/SELINUX=enforcing/SELINUX=disabled/g' /etc/selinux/config
注意:修改selinux配置文件之后,重启机器,selinux才能永久生效
关闭swap分区。
root@xianchaorancher \~# swapoff -a
root@xianchaorancher \~# free -m #可以看到swap分区的大小,已经变为0
total used free shared buff/cache available
Mem: 4876 501 516 20 3858 4068
Swap: 0 0 0'
永久关闭:注释swap挂载

注:如果是克隆主机请删除网卡中的UUID并重启网络服务。
内核参数修改:br_netfilter模块用于将桥接流量转发至iptables链,br_netfilter内核参数需要开启转发。
root@xianchaorancher \~# modprobe br_netfilter
root@xianchaorancher \~# echo "modprobe br_netfilter" >> /etc/profile
root@xianchaorancher \~# cat > /etc/sysctl.d/k8s.conf <<EOF
net.bridge.bridge-nf-call-ip6tables = 1
net.bridge.bridge-nf-call-iptables = 1
net.ipv4.ip_forward = 1
EOF
root@xianchaorancher \~# sysctl -p /etc/sysctl.d/k8s.conf
在xianchaorancher上配置阿里云镜像源:
root@xianchaorancher \~# mv /etc/yum.repos.d/CentOS-Base.repo /etc/yum.repos.d/CentOS-Base.repo.backup
root@xianchaorancher \~# wget -O /etc/yum.repos.d/CentOS-Base.repo http://mirrors.aliyun.com/repo/Centos-7.repo
#配置国内阿里云docker的repo源
root@xianchaorancher \~# yum-config-manager --add-repo http://mirrors.aliyun.com/docker-ce/linux/centos/docker-ce.repo
在xianchaorancher上安装docker-ce。我们已经配置了docker本地源,直接安装docker-ce服务。
root@xianchaorancher \~# yum install -y yum-utils device-mapper-persistent-data lvm2 wget net-tools nfs-utils lrzsz gcc gcc-c++ make cmake libxml2-devel openssl-devel curl curl-devel unzip sudo ntp libaio-devel wget vim ncurses-devel autoconf automake zlib-devel python-devel epel-release openssh-server socat ipvsadm conntrack ntpdate
安装docker-ce
root@xianchaorancher \~# yum install docker-ce docker-ce-cli containerd.io -y
root@xianchaomaster1 \~# systemctl start docker && systemctl enable docker.service
修改docker配置文件,配置镜像加速器
root@xianchaorancher \~# tee /etc/docker/daemon.json << 'EOF'
{
"registry-mirrors":"https://rsbud4vc.mirror.aliyuncs.com","https://registry.docker-cn.com","https://docker.mirrors.ustc.edu.cn","https://dockerhub.azk8s.cn","http://hub-mirror.c.163.com","[http://qtid6917.mirror.aliyuncs.com](http://qtid6917.mirror.aliyuncs.com "http://qtid6917.mirror.aliyuncs.com")", "https://rncxm540.mirror.aliyuncs.com",
"exec-opts": "native.cgroupdriver=systemd"
}
EOF
root@xianchaorancher \~# systemctl daemon-reload
root@xianchaorancher \~# systemctl restart docker
root@xianchaorancher \~# systemctl status docker
显示如下,说明docker安装成功了
● docker.service - Docker Application Container Engine
Loaded: loaded (/usr/lib/systemd/system/docker.service; enabled; vendor preset: disabled)
Active: active (running) since Wed 2021-03-17 12:39:06 CST
2.2 安装Rancher
Rancher2.6.4支持导入已经存在的k8s1.23+集群,所以我们安装rancher2.6.4版本
注:rancher_2.6.4.tar.gz和rancher-agent_2.6.4.tar.gz压缩包在课件
在xianchaorancher上操作如下命令:
root@xianchaonode1 \~#docker load -i rancher-agent_2.6.4.tar.gz
root@xianchaomaster1 \~#docker load -i rancher-agent_2.6.4.tar.gz
root@xianchaorancher \~# docker load -i rancher_2.6.4.tar.gz
root@xianchaorancher \~# docker run -d --restart=unless-stopped -p 80:80 -p 443:443 --privileged rancher/rancher:v2.6.4
注:unless-stopped,在容器退出时总是重启容器,但是不考虑在Docker守护进程启动时就已经停止了的容器
验证rancher是否启动:
root@xianchaorancher \~# docker ps | grep rancher
显示如下,说明启动成功:
70b5916dd1bc rancher/rancher:v2.6.4 "entrypoint.sh" 45 seconds ago Up 36 seconds 0.0.0.0:80->80/tcp, :::80->80/tcp, 0.0.0.0:443->443/tcp, :::443->443/tcp recursing_hofstadter
2.3 登录Rancher平台
在浏览器访问xianchaorancher的ip地址:
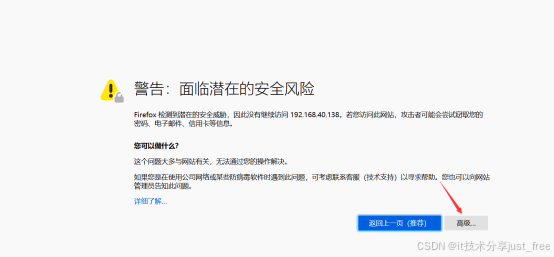
选择高级
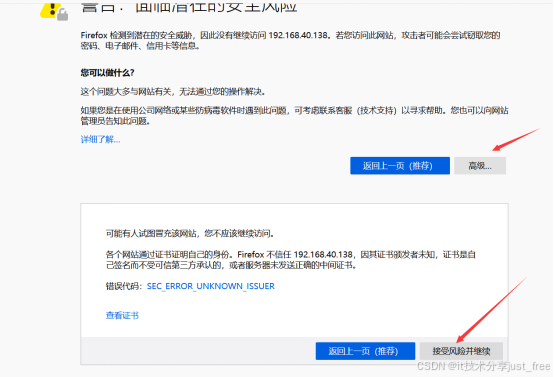
接受风险并继续
(1)获取密码:
在xianchao rancher 上,docker ps查看正在运行的容器,显示如下:
CONTAINER ID IMAGE COMMAND CREATED STATUS PORTS NAMES
70b5916dd1bc rancher/rancher:v2.6.4 "entrypoint.sh" 3 minutes ago Up 3 minutes 0.0.0.0:80->80/tcp, :::80->80/tcp, 0.0.0.0:443->443/tcp, :::443->443/tcp recursing_hofstadter
通过上面可以看到容器的id是70b5916dd1bc
root@xianchao** **rancher** **\~# docker logs 70b5916dd1bc 2>&1 | grep "Bootstrap Password:"
2022/04/16 02:29:29 INFO Bootstrap Password: sq5hsgp7n8585m4l85s6khdnz2q4f79fwtgh5w2l7k669hvknn26jw
通过上面可以看到获取到的密码是 :
sq5hsgp7n8585m4l85s6khdnz2q4f79fwtgh5w2l7k669hvknn26jw
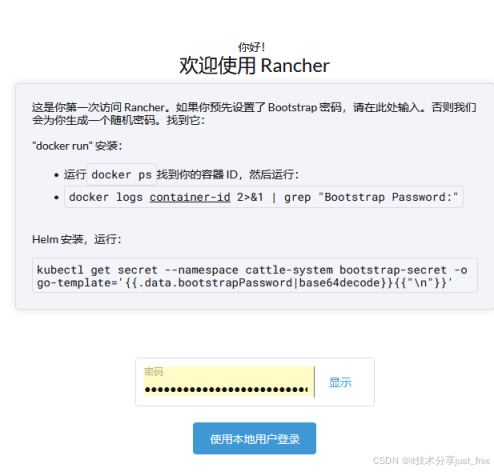
把获取到的密码 sq5hsgp7n8585m4l85s6khdnz2q4f79fwtgh5w2l7k669hvknn26jw复制到password位置:

使用本地用户登录,显示如下:
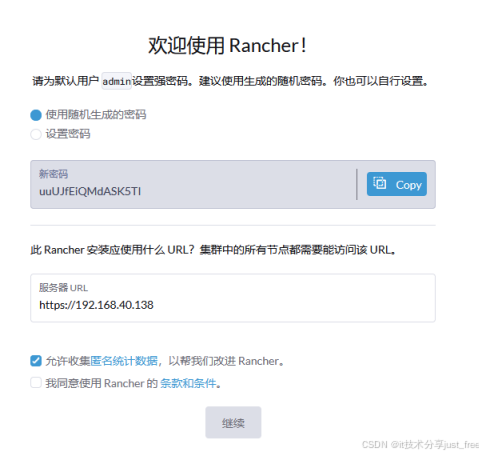
设置新的密码:
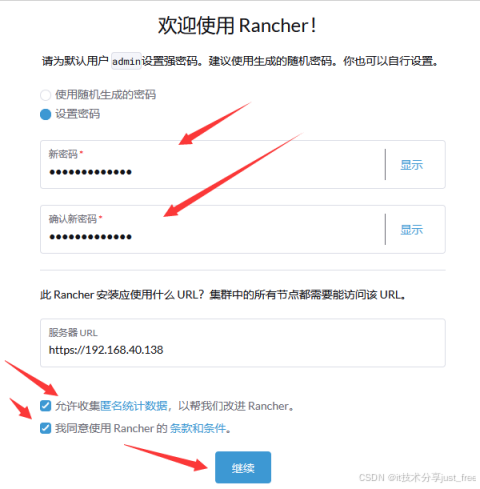
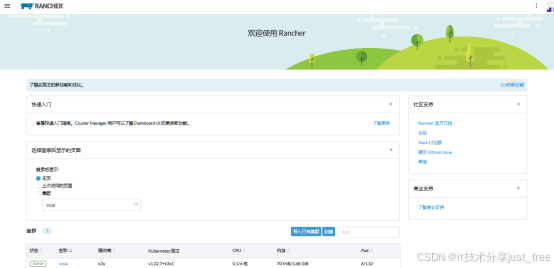
点击继续之后,显示如下:
3 通过Rancher管理已存在的k 8s 集群
#把已经存在的k8s集群导入到rancher了

选择导入已有的集群,出现下面界面
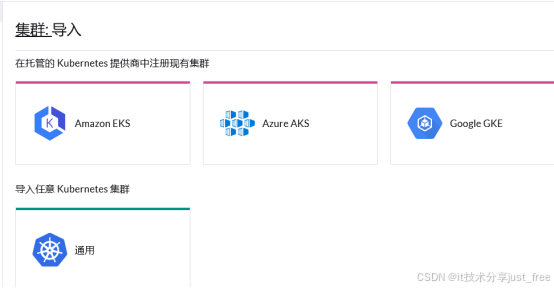
选择通用,出现如下界面:
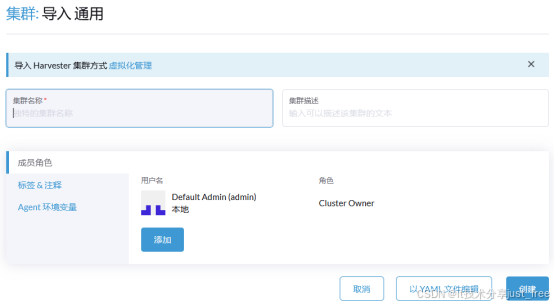
集群名称:xianchao,点击创建
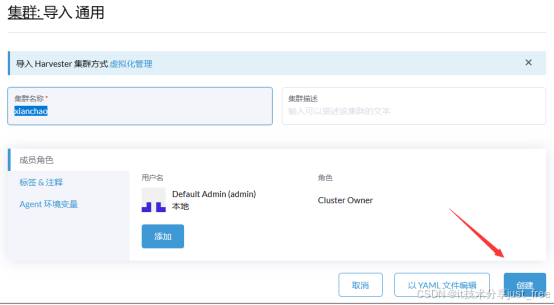
出现如下界面:
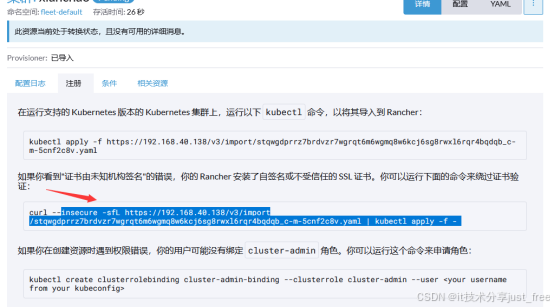
在k8s控制节点复制上图红色箭头标注的一串命令:
root@xianchaomaster1 \~# curl --insecure -sfL https://192.168.40.138/v3/import/stqwgdprrz7brdvzr7wgrqt6m6wgmq8w6kcj6sg8rwxl6rqr4bqdqb_c-m-5cnf2c8v.yaml | kubectl apply -f --
验证rancher-agent是否部署成功:
root@xianchaomaster1 \~# kubectl get pods -n cattle-system -o wide
NAME READY STATUS RESTARTS AGE IP NODE NOMINATED NODE READINESS GATES
cattle-cluster-agent-57c864c7f5-f7n28 1/1 Running 0 44s 10.244.121.7 xianchaonode1 <none> <none>
cattle-cluster-agent-57c864c7f5-rw9w2 1/1 Running 0 52s 10.244.123.66 xianchaomaster1 <none> <none>
看到cattle-cluster-agent这个pod时running,说明rancher-agent部署成功了,在rancher ui界面可以看到如下内容:https://192.168.40.138/dashboard/home

4 通过Rancher仪表盘管理k 8s 集群:部署tomcat服务
点击xianchao集群:

出现如下界面:

(1)创建名称空间:


名称空间的名字:xianchaotest
点击创建
(2)创建deployment

点击创建

名称空间:xianchaotest
名称: tomcattest
添加标签

容器配置
指定镜像:tomcat:8.5.34-jre8-alpine
root@xianchaonode1 \~# docker load -i tomcat_8.5.tar.gz

给pod打标签

配置完成最基本的deployment资源,点击创建

查看资源是否创建成功:

(3)创建service资源,把k8s集群的tomcat这个pod映射出来

选择左侧看到的服务,点击创建

选择节点端口

名称:tomcat-svc
定义选择器

定义服务端口

上面定义完成点击创建即可

通过上面图片可以看到tomcat-svc已经创建好了
访问k8s任何一个节点+端口 30 0 80,可以访问内部的tomcat了:
访问1 92.168.40.180:30080

(4)创建Ingress资源
注意:没有安装Ingress - controller的,需要安装Ingress - controller七层代理
root@** **xianchaonode** **1\~# docker load -i kube-webhook-certgen_1.1.1.tar.gz
root@** **xianchaonode** **1\~# docker load -i nginx-ingress-controller_v1.1.1.tar.gz
root@** **xianchao** **master1\~# mkdir ingress
root@** **xianchao** **master1\~# cd ingress/
root@** **xianchao** **master1ingress# kubectl apply -f deploy.yaml
root@** **xianchao** **master1ingress# kubectl create clusterrolebinding clusterrolebinding-user-3 --clusterrole=cluster-admin --user=system:serviceaccount:ingress-nginx:ingress-nginx
root@xianchaomaster1 ingress# kubectl get pods -n ingress-nginx
NAME READY STATUS RESTARTS AGE
ingress-nginx-admission-create-st6gt 0/1 Completed 0 30s
ingress-nginx-admission-patch-2gv57 0/1 Completed 1 30s
ingress-nginx-controller-56dc9c69b9-kdt67 1/1 Running 0 30s
创建ingress规则

点击Create

添加注解:
kubernetes.io/ingress.class : nginx

点击Create

添加本地hosts解析。
C:\Windows\System32\drivers\etc

添加行:
192.168.40.181 xianchao .lucky.com
浏览器访问:
++++http://xianchao.lucky.com++++
