- 操作系统:ubuntu22.04
- OpenCV版本:OpenCV4.9
- IDE:Visual Studio Code
- 编程语言:C++11
算法描述
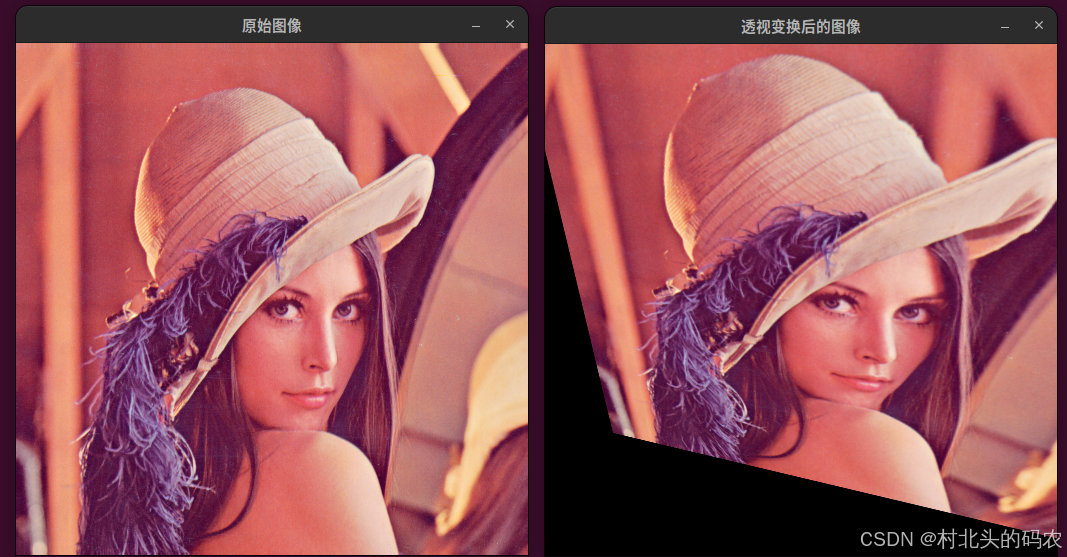
对图像应用透视变换。
函数 warpPerspective 使用指定的矩阵对源图像进行变换:
dst ( x , y ) = src ( M 11 x + M 12 y + M 13 M 31 x + M 32 y + M 33 , M 21 x + M 22 y + M 23 M 31 x + M 32 y + M 33 ) \texttt{dst} (x,y) = \texttt{src} \left ( \frac{M_{11} x + M_{12} y + M_{13}}{M_{31} x + M_{32} y + M_{33}} , \frac{M_{21} x + M_{22} y + M_{23}}{M_{31} x + M_{32} y + M_{33}} \right ) dst(x,y)=src(M31x+M32y+M33M11x+M12y+M13,M31x+M32y+M33M21x+M22y+M23)
否则,变换矩阵会先通过 invertAffineTransform 被求逆,然后才代入上面的公式中代替 M。
该函数不能在原地操作(in-place)。
函数原型
cpp
GMat cv::gapi::warpPerspective
(
 	const GMat &  	src,
	const Mat &  	M,
	const Size &  	dsize,
	int  	flags = cv::INTER_LINEAR,
	int  	borderMode = cv::BORDER_CONSTANT,
	const Scalar &  	borderValue = Scalar()
)
参数
- 参数 src:输入图像。
- 参数 M:3×3 的变换矩阵。
- 参数 dsize:输出图像的尺寸(宽度,高度)。
- 参数flags:
插值方法的组合(可选 INTER_LINEAR 或 INTER_NEAREST);
可选标志 WARP_INVERSE_MAP,表示矩阵 M 是一个"逆变换"(即从目标图像映射到源图像,dst → src)。 - 参数 borderMode:像素外推方法(支持 BORDER_CONSTANT 或 BORDER_REPLICATE)。
- 参数borderValue:当边界模式为常量填充时所使用的像素值;默认值为 0(黑色)。
代码示例
cpp
#include <opencv2/opencv.hpp>
#include <opencv2/gapi.hpp>
#include <opencv2/gapi/core.hpp>
#include <opencv2/gapi/imgproc.hpp>

using namespace cv;
using namespace cv::gapi;

int main() {
    // 加载输入图像
    Mat src = imread("/media/dingxin/data/study/OpenCV/sources/images/Lenna.png");
    if (src.empty()) {
        std::cerr << "无法加载图像!" << std::endl;
        return -1;
    }

    // 定义透视变换矩阵 M
    Point2f src_pts[] = {Point2f(50, 50), Point2f(200, 50), Point2f(50, 200), Point2f(200, 200)};
    Point2f dst_pts[] = {Point2f(30, 30), Point2f(200, 20), Point2f(60, 180), Point2f(210, 190)};
    Mat M = getPerspectiveTransform(src_pts, dst_pts);

    // 定义输出图像尺寸
    Size new_size(src.cols, src.rows);

    // 定义 G-API 图像处理图(graph)
    GMat in;  // 输入节点

    // 应用透视变换
    GMat out = gapi::warpPerspective(in, M, new_size, INTER_LINEAR, BORDER_CONSTANT, Scalar(0, 0, 0));

    // 构建 GComputation
    GComputation computation(in, out);

    // 执行计算
    Mat dst;
    computation.apply(src, dst);

    // 显示结果
    imshow("原始图像", src);
    imshow("透视变换后的图像", dst);
    waitKey();

    return 0;
}
运行结果