文章目录
前言
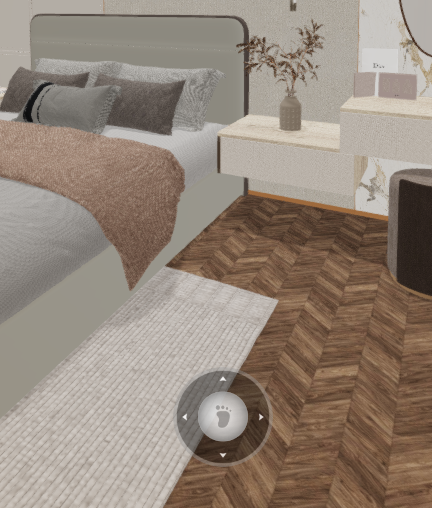
在 Babylon.js 中,经常需要使用摇杆 来控制相机的移动。
比如移动端,类似王者荣耀控制英雄移动的摇杆。
经过对比,我发现一种非常简洁、高效的实现方式。
实现方法
1、定义挂载DOM、摇杆样式
首先,定义摇杆的DOM挂载节点,以及摇杆的样式
这里直接使用Html、css实现,比较简单
定义摇杆的DOM挂载节点
javascript
<div id="joystick-container"></div>定义摇杆样式
css
:deep(#joystick-container) {
    width: 100%;
    div {
        width: 100%;
        .front {
            opacity: 0.8 !important;
            background-image: url("../../assets/images/step.png") !important;
            background-size: cover !important;
            user-select: none !important;
        }
        .back {
            opacity: 0.8 !important;
            background: none !important;
            background-image: url("../../assets/images/rocker.png") !important;
            background-size: cover !important;
            user-select: none !important;
        }
    }
}
2、引入插件"nipplejs"
使用nipplejs插件
javascript
import nipplejs from 'nipplejs'
import { onJoystickMove } from './index'

let lastpx
let lastpy
let xAddPos
let yAddPos
let touch_isDown = false
let translateTransform;

export const initNipplejs = (width) => {
  const joystickContainer = document.getElementById("joystick-container");
  const option = {
      zone: joystickContainer,
      mode: "static", // 静态模式,摇杆固定在屏幕上
      position: { top: "90%", left: "50%" }, // 摇杆的初始位置
      follow: false,
      size: width / 2
  }
  // 初始化虚拟摇杆
  const joystick = nipplejs.create(option);
  joystick.on("start", function (evt, data) {
      touch_isDown = true
      lastpx = data.position.x;
      lastpy = data.position.y;
      // 摇杆移动事件,可以加入其他逻辑代码
      onJoystickMove()
    })
    .on("move", function (evt, data) {
      // direction有不存在的情况
      if (data.direction && touch_isDown) {
        xAddPos = Math.round(lastpx - data.position.x)
        yAddPos = Math.round(lastpy - data.position.y)
      }
    })
    .on("end", function (evt, data) {
      touch_isDown = false
      xAddPos = 0
      yAddPos = 0
    });
    window.scene.registerBeforeRender(function() {
      if (!xAddPos || !yAddPos) return
      //移动速度调整
      window.camera.target.x += yAddPos * -1;
      window.camera.target.z += xAddPos * -1;
    })
    return joystick
}
在场景渲染完成后,添加摇杆
javascript
// baseWidth为摇杆尺寸,我这里以参数传递
scene.onAfterRenderObservable.addOnce(() => {
   rockerControl = initNipplejs(baseWidth);
})
总结
之所以使用这个插件,是因为我之前手写的摇杆有些问题:
当鼠标超出摇杆范围时,相机移动的方向就固定在鼠标移动出摇杆范围之前的方向了。
也就是当我向右操控摇杆,鼠标滑出摇杆范围时,再向其他拖动,相机依然向右移动。
遇到这个问题后,我发现要加的代码很多,不如直接使用nipplejs插件,完美解决问题
对你有帮助的话,还请不要吝啬赞 和收藏
这也是我写作的动力【抱拳】