学习如何使用 Ollama 在本地安装、设置和运行 GPT-OSS,并构建一个简单的 Streamlit 应用程序。

GPT-OSS 是 OpenAI 首个开放权重模型系列,你可以直接在自己的电脑上运行它。它专为强大的推理、智能任务和灵活的开发者使用场景而设计,因其可配置的推理力度和透明的思维链能力而脱颖而出。
在本教程中,我将带你一步步使用 Ollama 在本地设置 OpenAI 的 GPT-OSS 模型,并演示如何构建一个交互式演示,展示该模型独特的推理能力。我们将探索模型可配置的思维链功能,并构建一个可视化模型思考过程的 Streamlit 应用程序。
注 :在本章安装的 gpt-oss 可以应用于 Kibana 中的 connector 连接。详细连接步骤可参考文章 "Elasticsearch:在 Elastic 中玩转 DeepSeek R1 来实现 RAG 应用"。在以后的文章中,我讲使用这个模型在我们的 Kibana 中进行配置,并使用。
更多阅读:https://ollama.com/library/gpt-oss
什么是 OpenAI 的 GPT-OSS?
OpenAI 的 GPT-OSS 系列是自 GPT-2 以来首次开放权重的发布,允许在 Apache 2.0 许可证下访问高性能推理模型。这些最先进的语言模型以低成本提供强大的性能,并在推理任务上优于相似规模的开源模型。
它有两个变体:gpt-oss-120b 和 gpt-oss-20b。
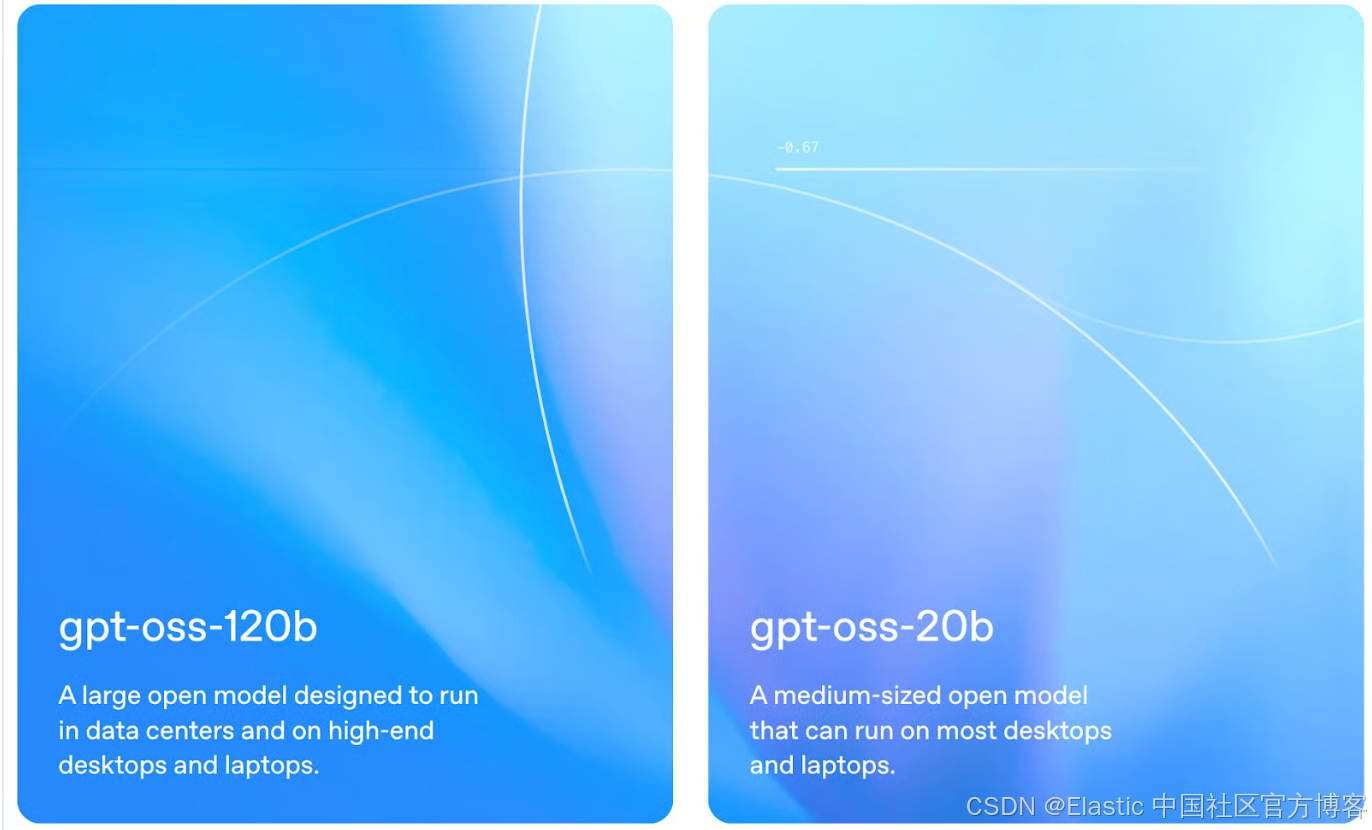 来源: OpenAI
gpt-oss-120b
gpt-oss-120b 是 OpenAI 的旗舰开放权重模型,其性能在艰难的推理基准测试中可与 o4-mini 等专有系统媲美。尽管拥有 1170 亿个参数,它仍经过优化,可在单个 80 GB GPU 上运行。这使它成为研究实验室和企业团队在本地部署强大语言模型的现实选择。
该模型旨在支持复杂的工作流,如工具使用、多步推理,以及对每个任务投入"思考"力度的精细控制。其开放权重特性和 Apache 2.0 许可证使其成为希望深入分析、定制或微调模型的团队的灵活选择。
gpt-oss-20b
gpt-oss-20b 以仅 210 亿参数的规模展现了令人惊讶的推理能力,适配消费级笔记本电脑。在一些基准测试中,它甚至优于 OpenAI 的 o3-mini,并能在具有 16 GB 内存的设备上高效运行。该模型经过量化处理,支持快速本地部署,并兼容 Ollama、vLLM 甚至 Apple 的 Metal 平台等工具。
该模型非常适合想要构建响应迅速、保护隐私且不依赖云端基础设施的开发者。与更大的版本类似,它支持可调的推理深度和清晰的中间步骤,非常适合用于实验、轻量级助手以及边缘设备应用。
为什么要在本地运行 GPT-OSS?
在本地运行 GPT-OSS 相比云端方案具有以下显著优势:
- 隐私与控制:所有推理都在本地硬件上进行,无外部依赖、宕机或 API 变更问题,并且你可以完全访问模型的内部推理过程,而不仅仅是最终答案。
- 性能:本地模型消除了网络延迟,能即时响应,无使用次数或 token 限制,且可确保 24/7 可用性。
- 成本节省:模型仅需一次下载和设置,无订阅费用,用户可利用现有计算资源运行,无需持续支付 API 成本。
- 透明推理:用户可在低、中、高"思考"模式间切换,以平衡速度与深度,并能查看完整的思维链。
- 可定制性与可扩展性:我们可以针对特定任务微调开放权重模型,调整采样参数,并无缝集成智能代理工具。
使用 Ollama 在本地 设置 GPT-OSS
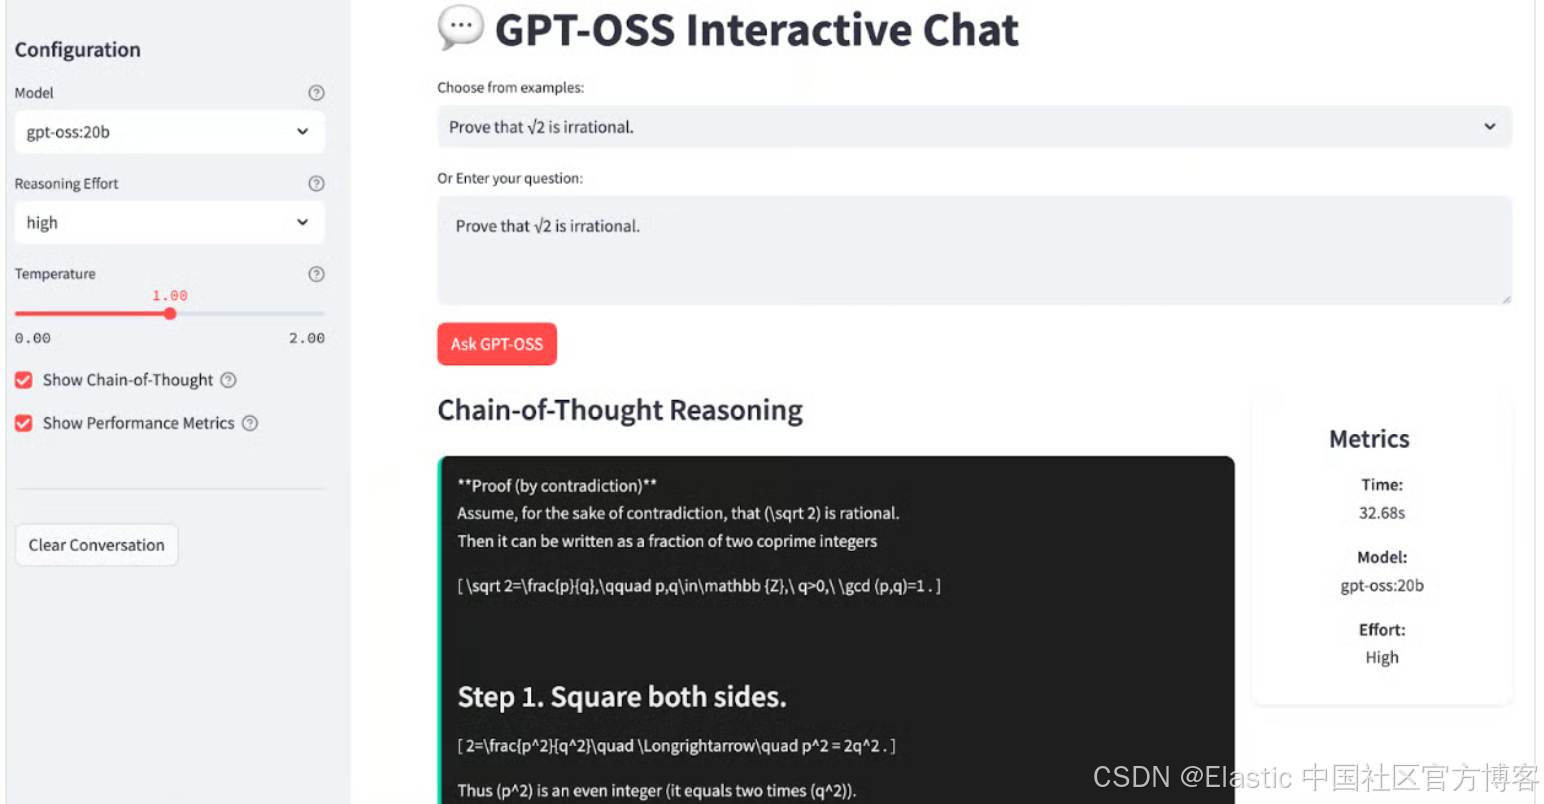
Ollama 通过处理 下载、量化 和 执行,使在本地 运行 大型 语言 模型 变得 非常 简单。我会逐步指导你在系统上 设置 GPT-OSS。最后,我们的 app 将 看起来 像 这样:
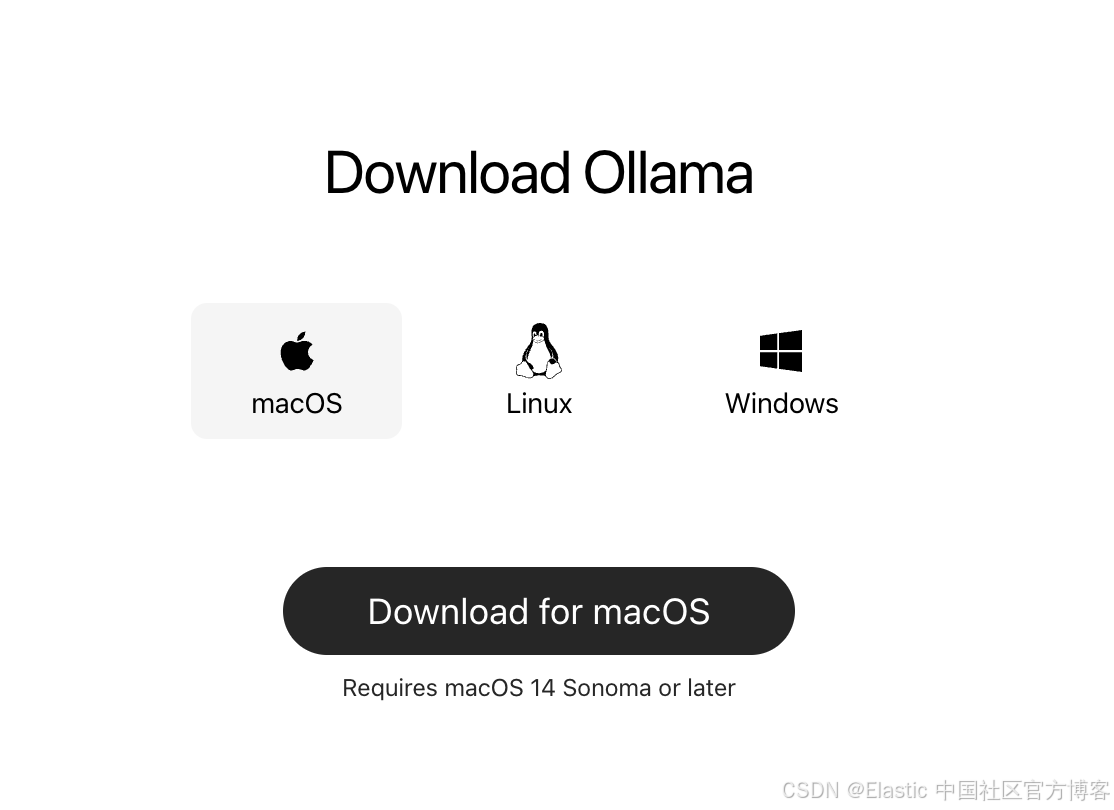
步骤一:按照 Ollama
首先,从 官方网站 下载并安装 Ollama。
安装完成后,你可以通过打开 terminal 并输入以下命令来验证安装:
ollama --version

$ ollama --version
Warning: could not connect to a running Ollama instance
Warning: client version is 0.12.9
这将返回你系统上安装的最新版本的 Ollama。
步骤 2:下载 GPT-OSS 模型
OpenAI 提供了两种针对不同使用场景优化的 GPT-OSS 变体,但为了本演示,我们将只下载 gpt-oss-20b 模型变体:
# For production and high reasoning tasks
ollama pull gpt-oss:120b
# For lower latency and local deployment
ollama pull gpt-oss:20b
20B 模型非常适合本地开发,可在具有 16GB+ 内存的系统上运行,而 120B 模型功能更强,但需要 80GB+ 内存。
步骤 3:测试安装
让我们验证一切是否正常工作:
ollama run gpt-oss:20b你应该会看到一个提示,可以直接与模型互动。试着问:"证明 √2 是无理数。"
$ ollama run gpt-oss:20b
pulling manifest
pulling e7b273f96360: 100% ▕████████████████████████████████████████████▏  13 GB
pulling fa6710a93d78: 100% ▕████████████████████████████████████████████▏ 7.2 KB
pulling f60356777647: 100% ▕████████████████████████████████████████████▏  11 KB
pulling d8ba2f9a17b3: 100% ▕████████████████████████████████████████████▏   18 B
pulling 776beb3adb23: 100% ▕████████████████████████████████████████████▏  489 B
verifying sha256 digest
writing manifest
success 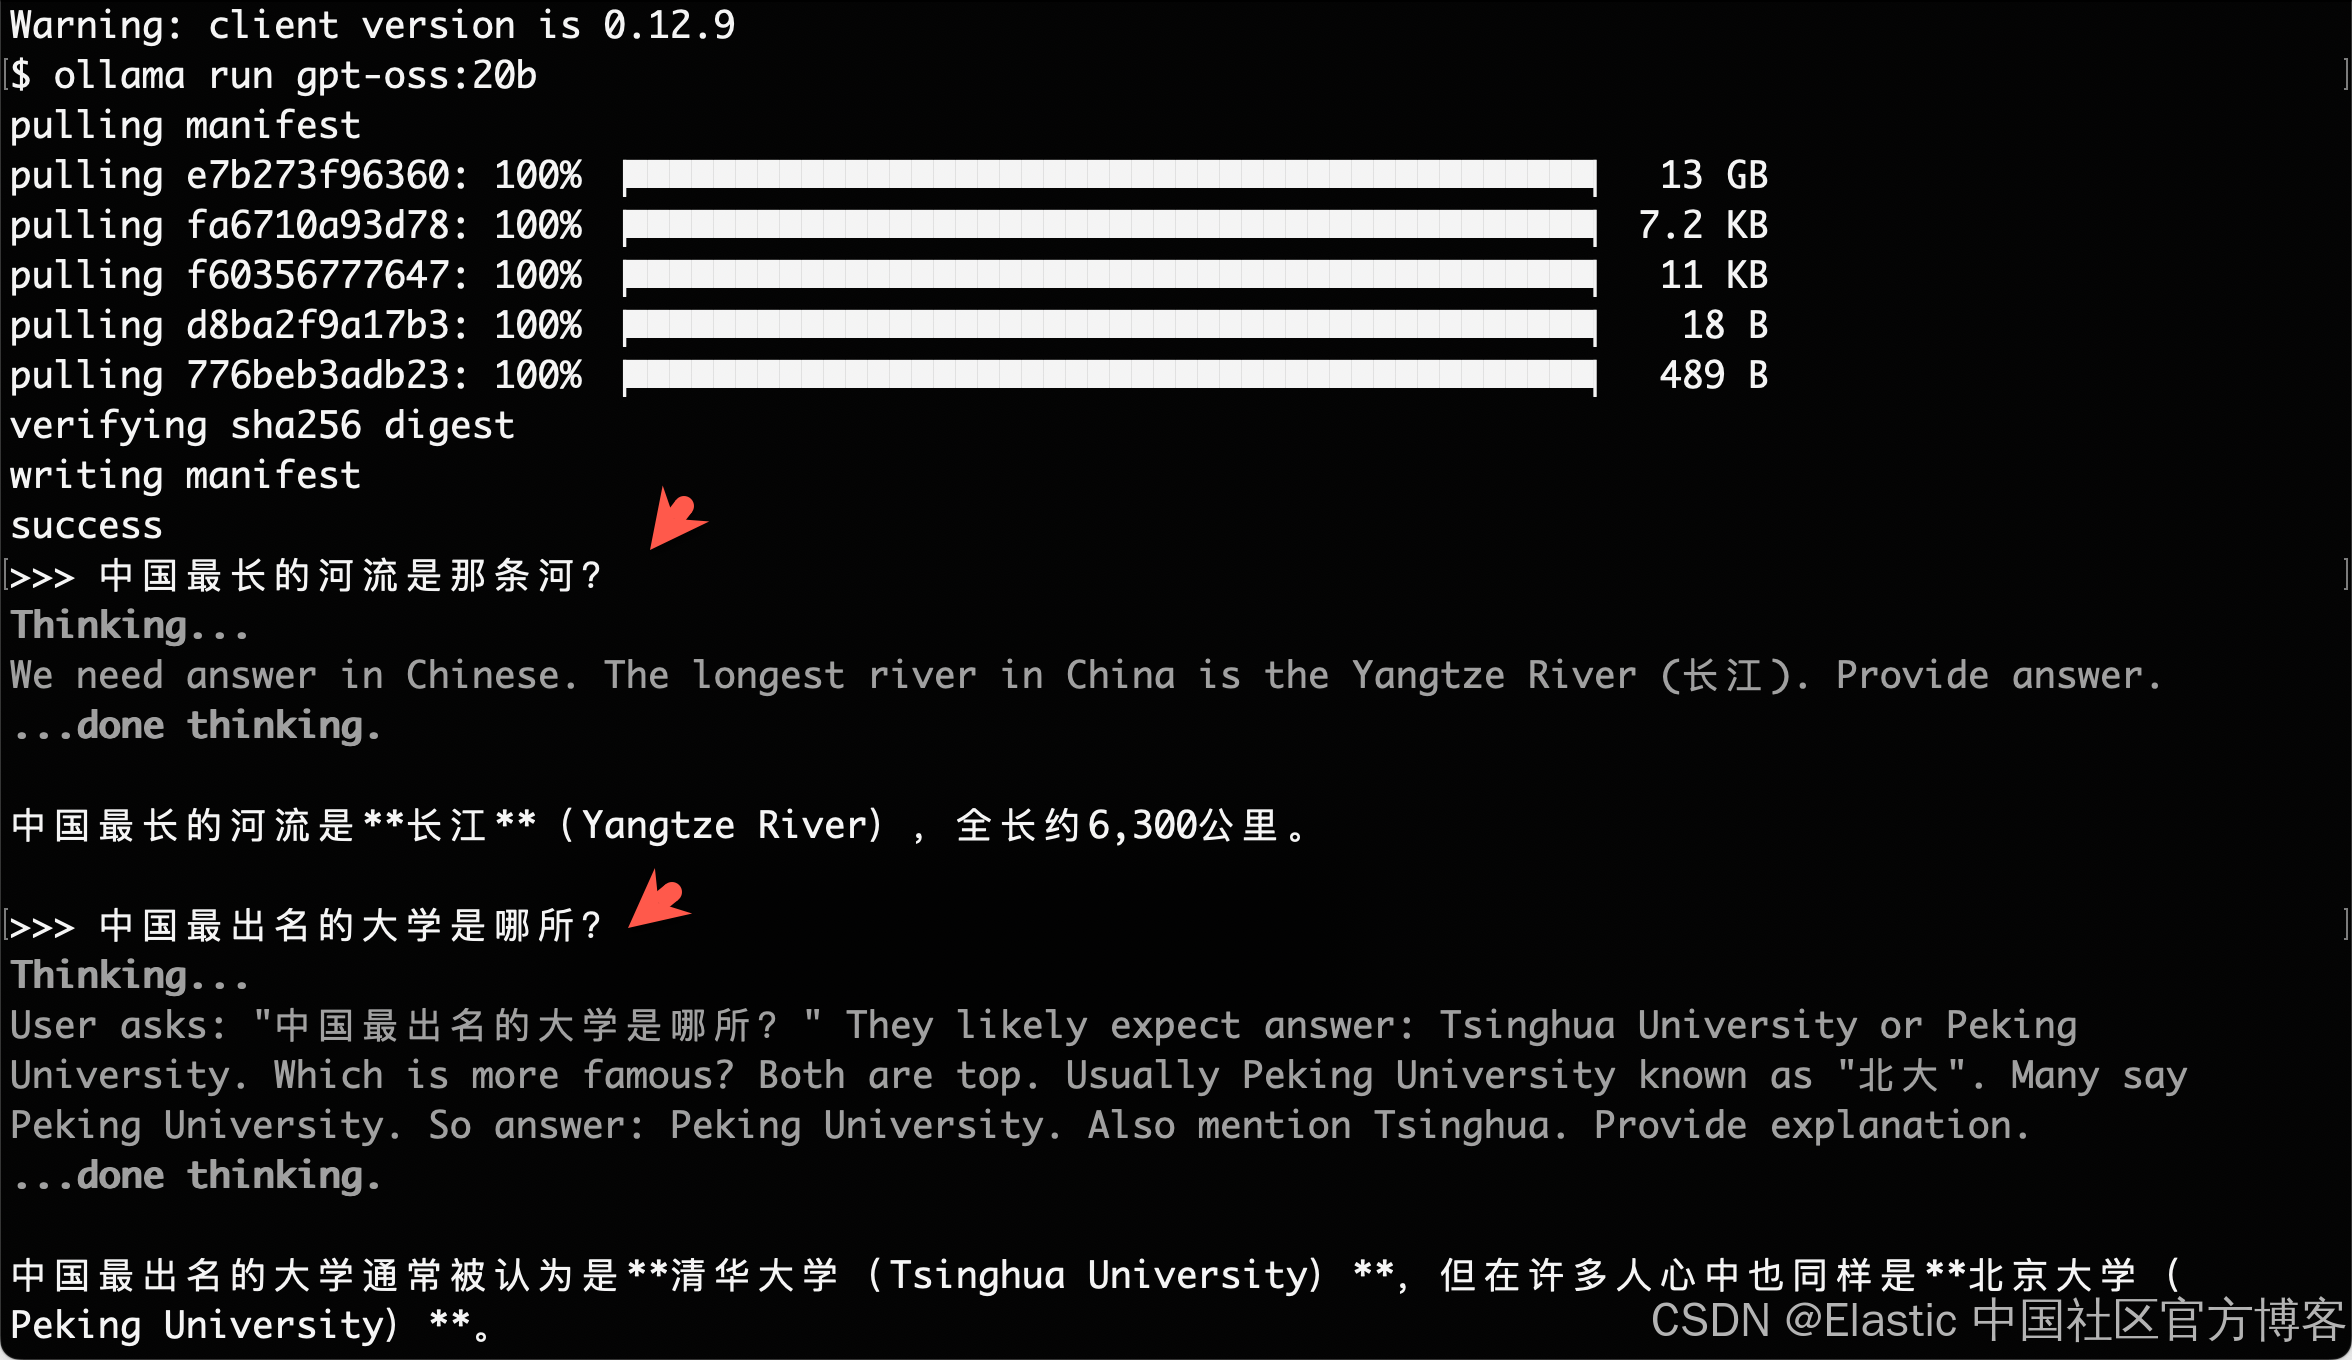

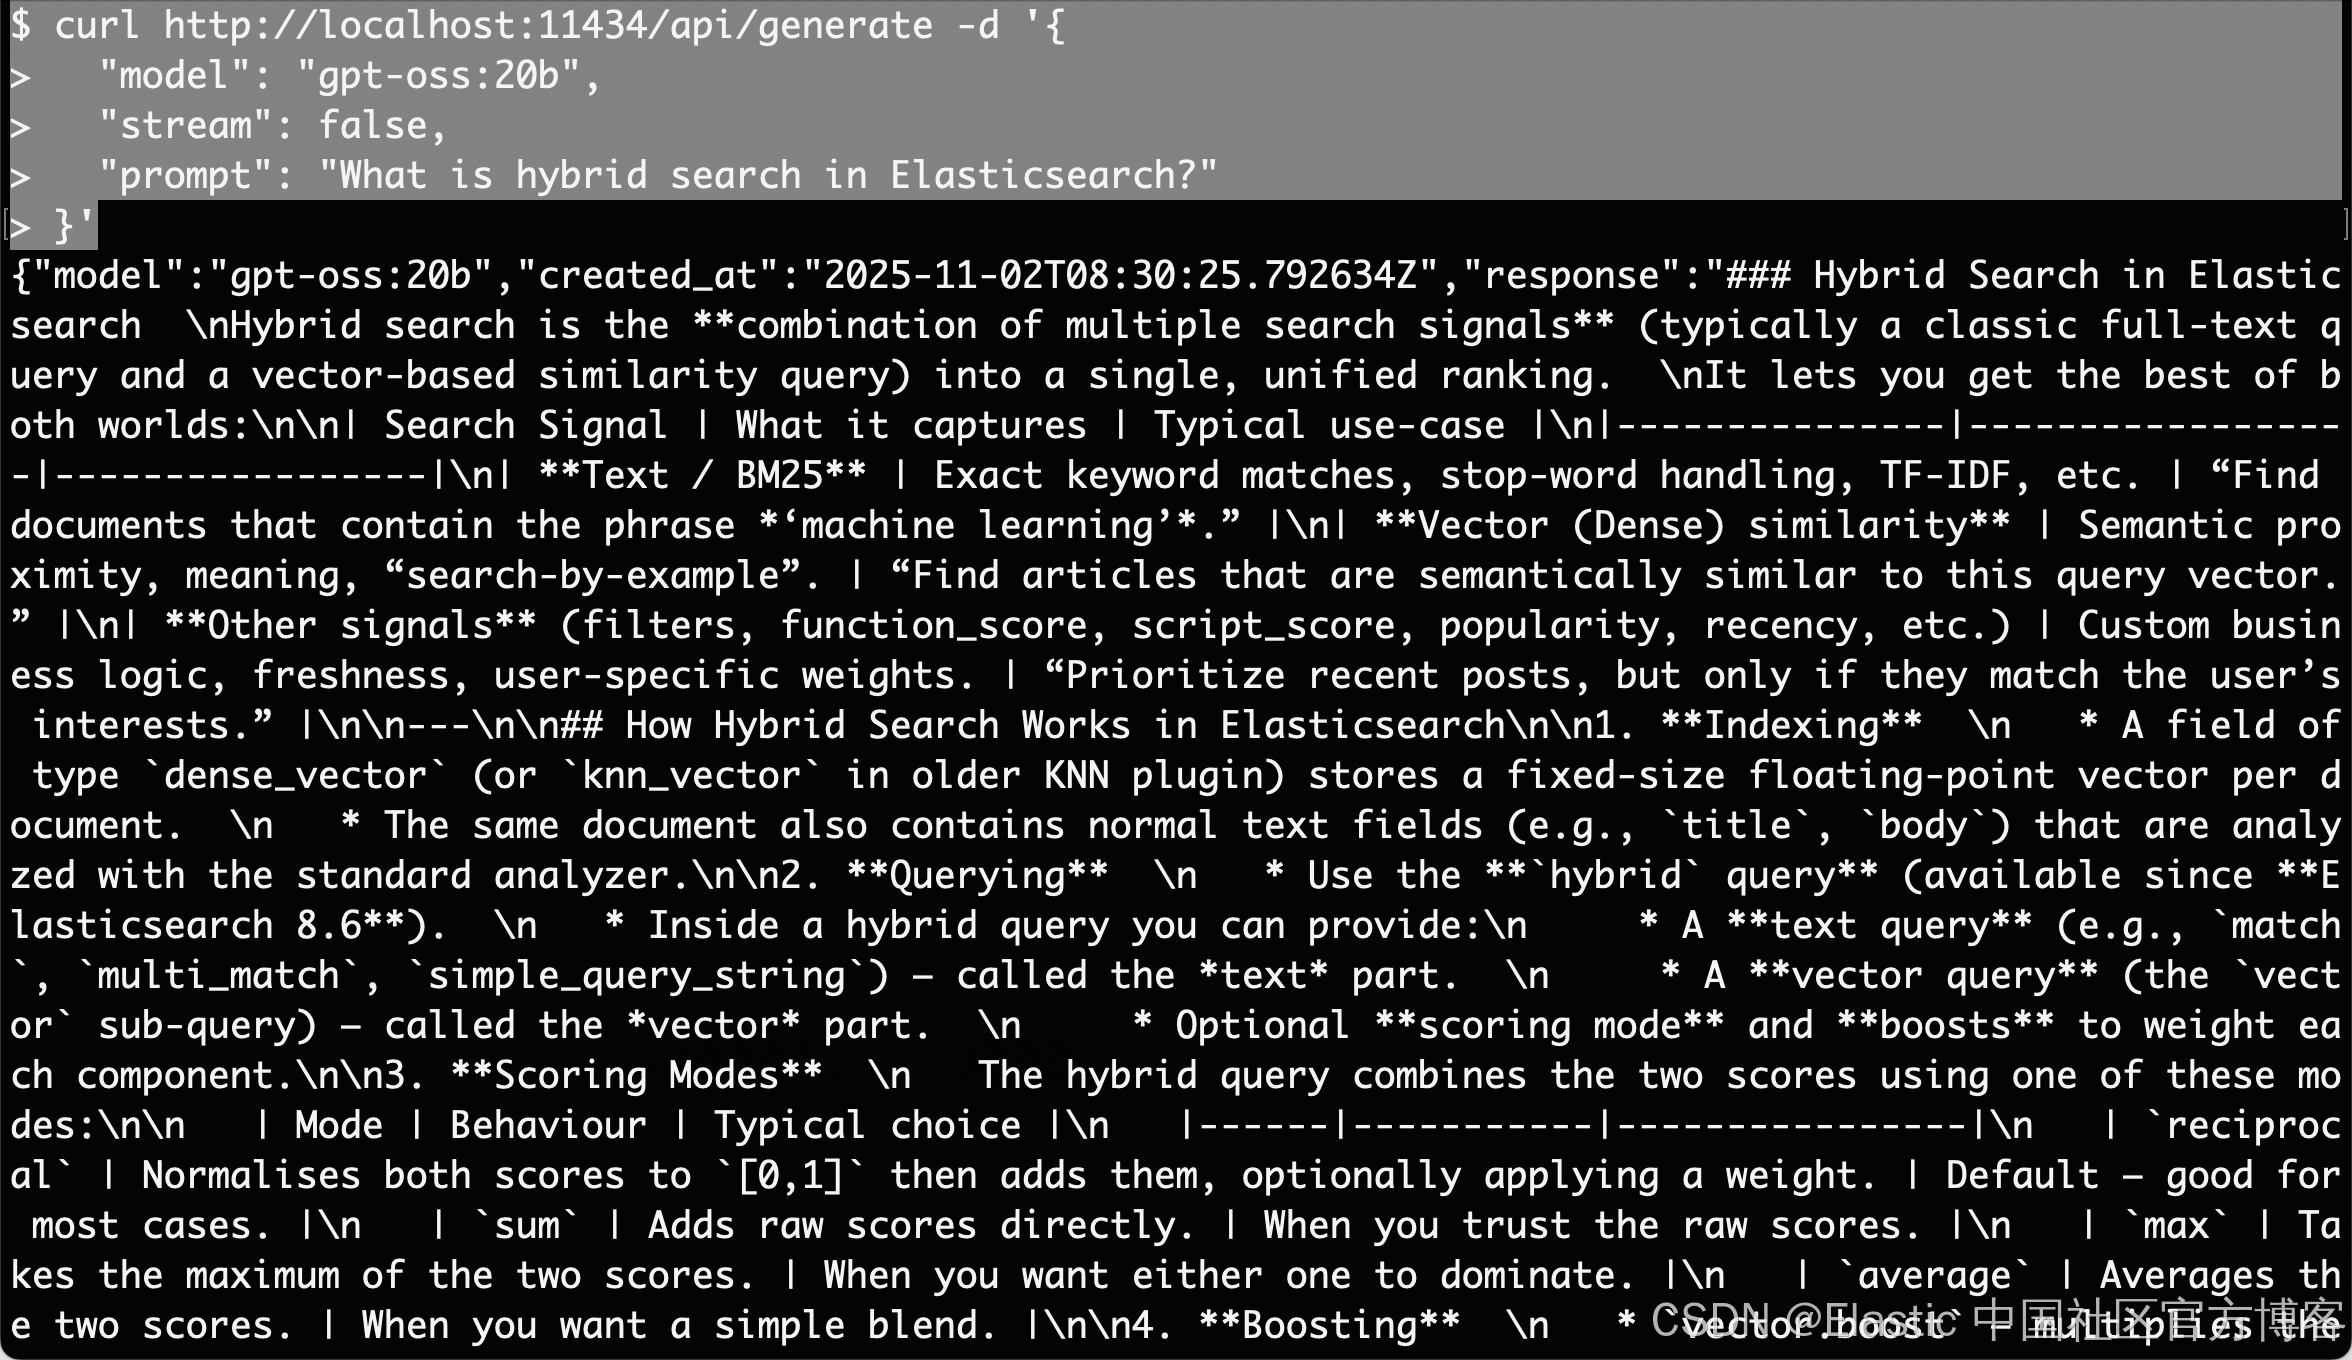
我们还可以做如下的测试:
curl http://localhost:11434/api/generate -d '{
  "model": "gpt-oss:20b",
  "stream": false,
  "prompt": "What is hybrid search in Elasticsearch?"
}'
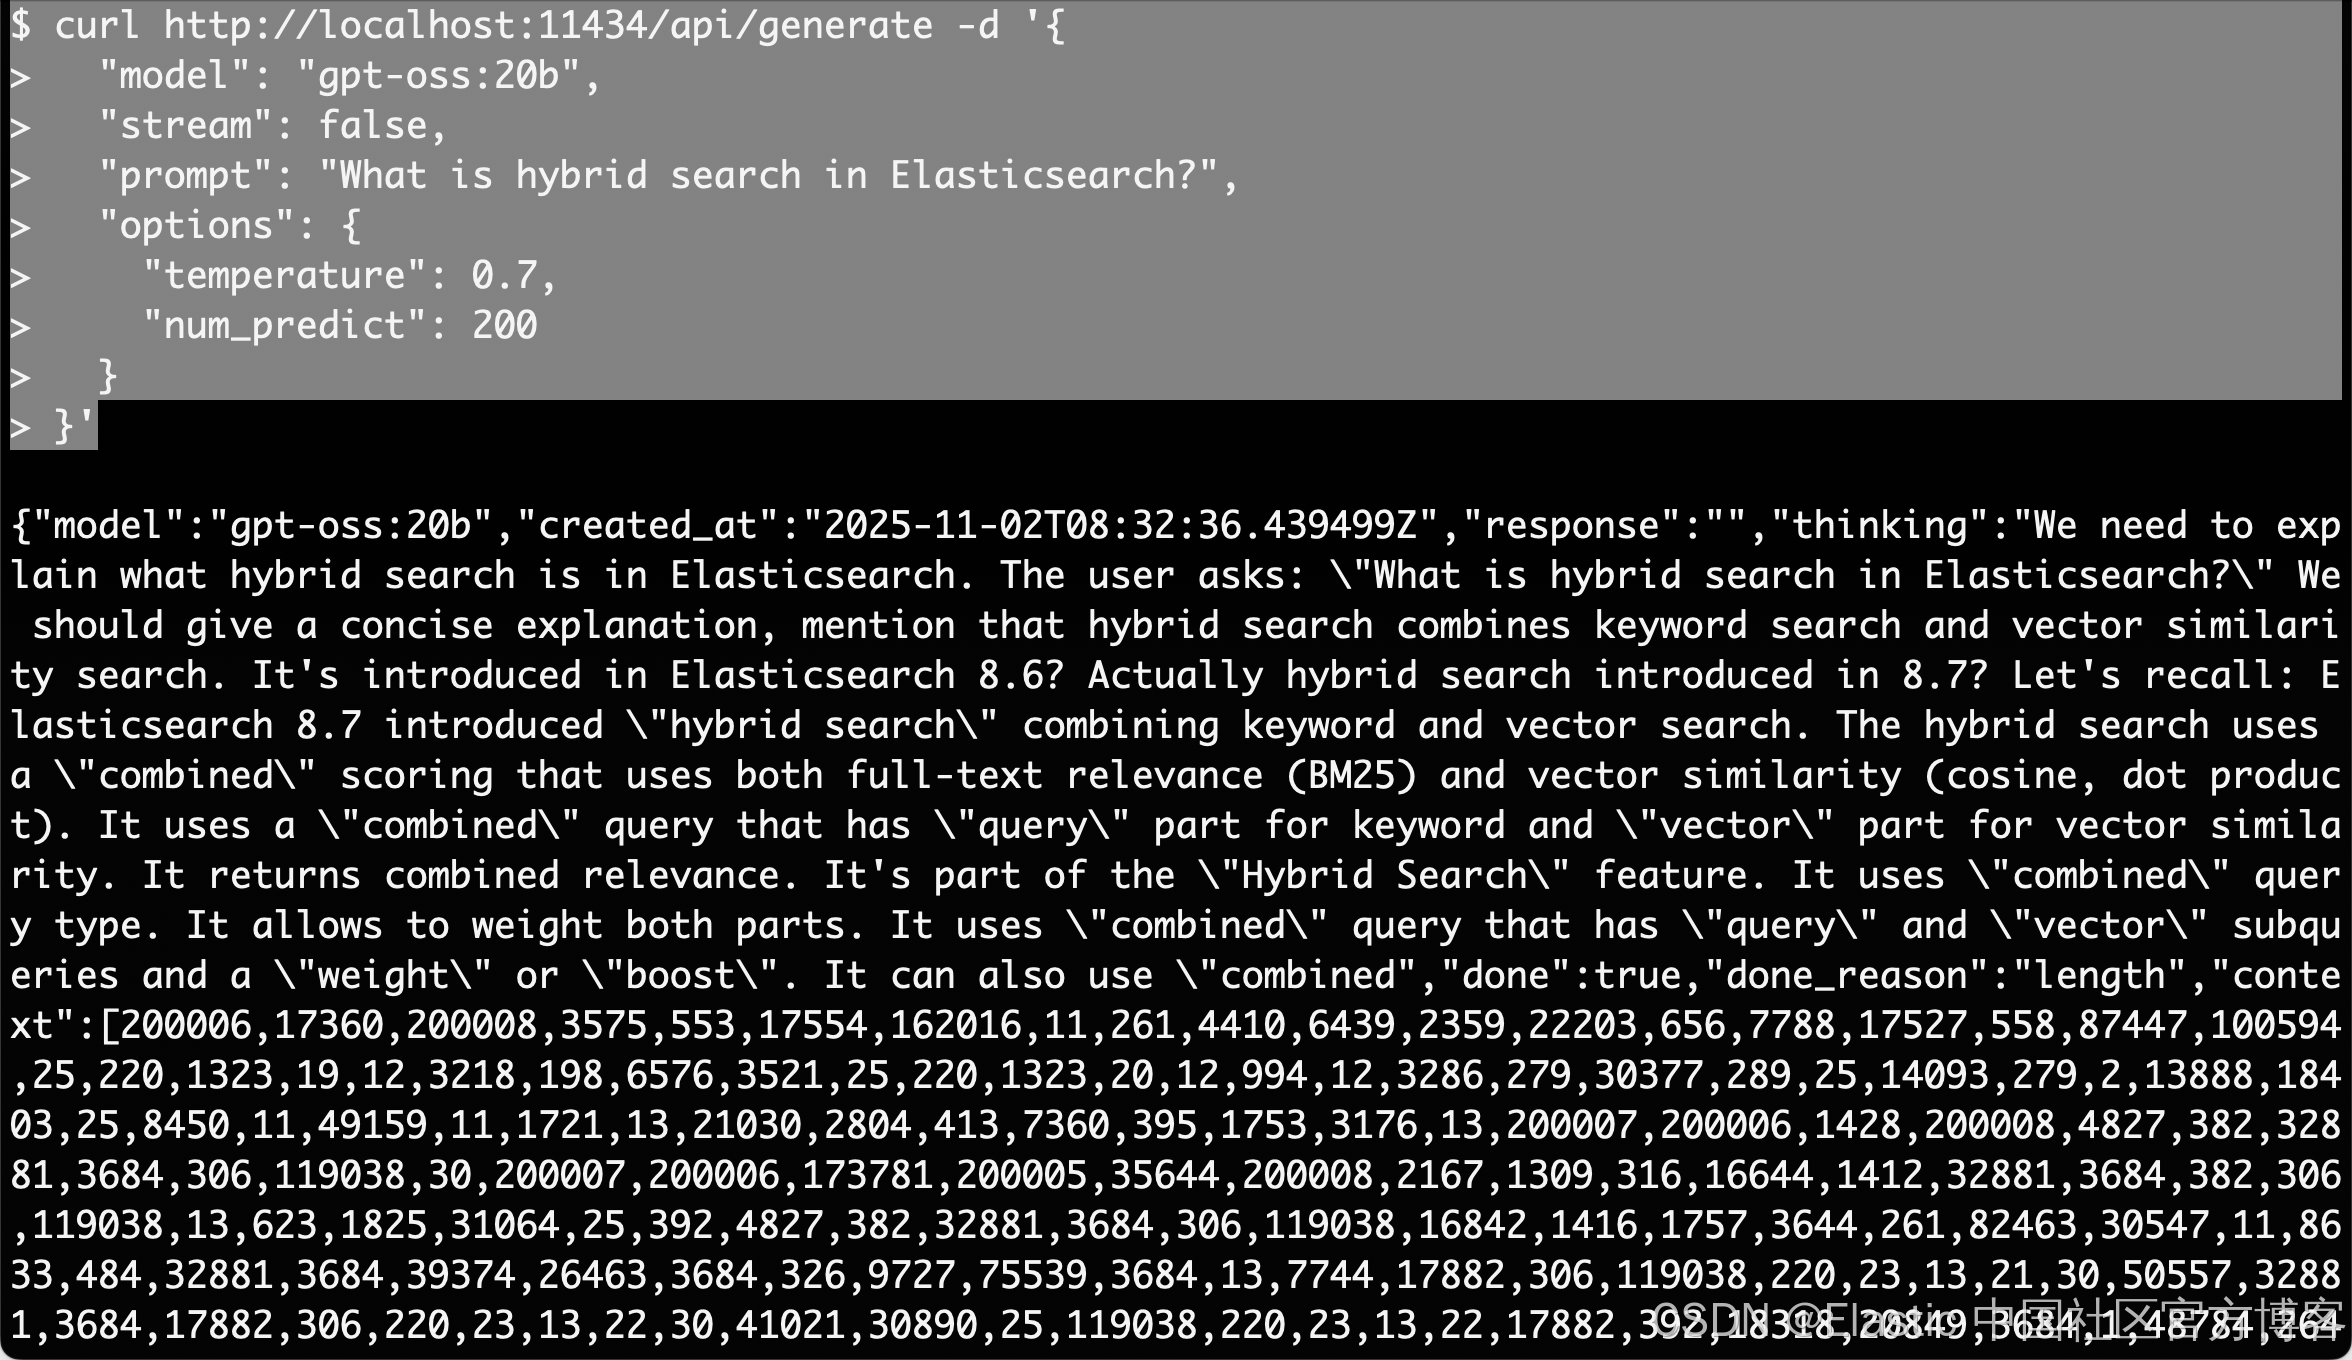
我们还可以添加一下参数使用如下的方法来进行测试:
curl http://localhost:11434/api/generate -d '{
  "model": "gpt-oss:20b",
  "stream": false,
  "prompt": "What is hybrid search in Elasticsearch?",
  "options": {
    "temperature": 0.7,
    "num_predict": 200
  }
}'
在本地使用 GPT-OSS:交互式 ChatBot
现在让我们快速构建一个展示 GPT-OSS 推理能力的简单 app。我们的应用将包含:
- 交互式推理控制
- 思维链可视化
- 性能监控
- 对话历史
步骤 1:安装依赖
运行以下命令来安装所需的依赖:
pip install streamlit ollama上面的代码片段安装了 Streamlit 用于构建网页界面,以及 Ollama Python client 用于本地与 GPT-OSS 模型交互。
步骤 2:导入库并设置页面
在进入核心聊天逻辑之前,我们需要引入所有工具并设置用户界面。
import streamlit as st
import json
import ollama
import time
from typing import Dict, Any, List
import re
from datetime import datetime

# Configure page
st.set_page_config(
    page_title="GPT-OSS Chat Demo",
    layout="wide",
    page_icon="💬"
)
# Custom CSS for UI
st.markdown("""
<style>
.reasoning-box {
    background-


    border-radius: 10px;
    border-left: 4px solid #00d4aa;

}
.answer-box {
    background-

    border-radius: 10px;
    border-left: 4px solid #007bff;

}
.metric-card {
    background-

    border-radius: 10px;
    box-shadow: 0 2px 4px rgba(0,0,0,0.1);
    text-align: center;

}
.chat-message {


    border-radius: 10px;
}
.user-message {
    background-
    border-left: 4px solid #2196f3;
}
.assistant-message {
    background-
    border-left: 4px solid #9c27b0;
}
</style>
""", unsafe_allow_html=True)
我们导入了一些核心包,如 Streamlit 用于网页界面,Ollama 用于调用本地 GPT-OSS 模型,以及 json、time、typing 和 re 等实用模块。然后使用 st.set_page_config() 设置页面标题、宽布局和图标,并注入轻量级 CSS,使推理步骤和答案显示在不同面板中。
步骤 3:核心模型集成
在 UI 框架搭建完成后,让我们构建核心模型集成的 call_model() 函数:
def call_model(messages: List[Dict], model_name: str = "gpt-oss:20b", temperature: float = 1.0) -> Dict[str, Any]:
    try:
        start_time = time.time()
        # Prepare options for Ollama
        options = {
            'temperature': temperature,
            'top_p': 1.0,
        }
        response = ollama.chat(
            model=model_name,
            messages=messages,
            options=options
        )
        end_time = time.time()
        if isinstance(response, dict) and 'message' in response:
            content = response['message'].get('content', '')
        elif hasattr(response, 'message'):
            content = getattr(response.message, 'content', '')
        else:
            content = str(response)
        return {
            'content': content,
            'response_time': end_time - start_time,
            'success': True
        }
    except Exception as e:
        return {
            'content': f"Error: {e}",
            'response_time': 0,
            'success': False
        }
上面的代码:
- 接受一个聊天消息列表(system + user),这样我们可以轻松维护多轮上下文。
- 然后在 ollama.chat() 调用前后记录 start_time 和 end_time,以向用户报告响应时间。
- 它还通过提取原始文本输出来标准化 Ollama client 的响应。
- 最后,call_model() 函数将整个调用包裹在 try/except 块中,以捕获错误。
步骤 4:思维链解析器
为了让我们的演示真正透明,我们需要将模型的"内心独白"与最终结论分开。parse_reasoning_response() 函数正是完成这个功能:
def parse_reasoning_response(content: str) -> Dict[str, str]:
    patterns = [
        r"<thinking>(.*?)</thinking>",
        r"Let me think.*?:(.*?)(?=\n\n|\nFinal|Answer:)",
        r"Reasoning:(.*?)(?=\n\n|\nAnswer:|\nConclusion:)",
    ]
    reasoning = ""
    answer = content
    for pat in patterns:
        m = re.search(pat, content, re.DOTALL | re.IGNORECASE)
        if m:
            reasoning = m.group(1).strip()
            answer = content.replace(m.group(0), "").strip()
            break
    if not reasoning and len(content.split('\n')) > 3:
        lines = content.split('\n')
        for i, l in enumerate(lines):
            if any(k in l.lower() for k in ['therefore', 'in conclusion', 'final answer', 'answer:']):
                reasoning = '\n'.join(lines[:i]).strip()
                answer = '\n'.join(lines[i:]).strip()
                break
    return {
        'reasoning': reasoning or "No explicit reasoning detected.",
        'answer': answer or content
    }
我们将模型隐藏的"思考"与最终结论分开,以便用户可以选择检查每一步推理。解析响应的方法如下:
- 寻找显式标记:首先,模型使用正则表达式查找 ... 标签或像 "Reasoning:" 和 "Let me think through" 这样的短语。
- 提取与清理:找到匹配后,该段内容作为推理,其余部分视为答案。
- 启发式回退:如果没有标签但输出跨多行,它会扫描结论关键词("therefore,"、"in conclusion,"、"final answer," 或 "Answer:")并在那里进行分割。
- 输出:无论格式如何,parse_reasoning_response() 函数始终返回答案。
步骤 5:完整 Streamlit 应用
现在我们已经构建了每个模块,接下来将它们组装成一个交互式聊天应用。
import streamlit as st
import json
import ollama
import time
from typing import Dict, Any, List
import re
from datetime import datetime

# Configure page
st.set_page_config(
    page_title="GPT-OSS Chat Demo",
    layout="wide",
    page_icon="💬"
)
# Custom CSS for UI
st.markdown("""
<style>
.reasoning-box {
    background-


    border-radius: 10px;
    border-left: 4px solid #00d4aa;

}
.answer-box {
    background-

    border-radius: 10px;
    border-left: 4px solid #007bff;

}
.metric-card {
    background-

    border-radius: 10px;
    box-shadow: 0 2px 4px rgba(0,0,0,0.1);
    text-align: center;

}
.chat-message {


    border-radius: 10px;
}
.user-message {
    background-
    border-left: 4px solid #2196f3;
}
.assistant-message {
    background-
    border-left: 4px solid #9c27b0;
}
</style>
""", unsafe_allow_html=True)


def call_model(messages: List[Dict], model_name: str = "gpt-oss:20b", temperature: float = 1.0) -> Dict[str, Any]:
    try:
        start_time = time.time()
        # Prepare options for Ollama
        options = {
            'temperature': temperature,
            'top_p': 1.0,
        }
        response = ollama.chat(
            model=model_name,
            messages=messages,
            options=options
        )
        end_time = time.time()
        if isinstance(response, dict) and 'message' in response:
            content = response['message'].get('content', '')
        elif hasattr(response, 'message'):
            content = getattr(response.message, 'content', '')
        else:
            content = str(response)
        return {
            'content': content,
            'response_time': end_time - start_time,
            'success': True
        }
    except Exception as e:
        return {
            'content': f"Error: {e}",
            'response_time': 0,
            'success': False
        }


def parse_reasoning_response(content: str) -> Dict[str, str]:
    patterns = [
        r"<thinking>(.*?)</thinking>",
        r"Let me think.*?:(.*?)(?=\n\n|\nFinal|Answer:)",
        r"Reasoning:(.*?)(?=\n\n|\nAnswer:|\nConclusion:)",
    ]
    reasoning = ""
    answer = content
    for pat in patterns:
        m = re.search(pat, content, re.DOTALL | re.IGNORECASE)
        if m:
            reasoning = m.group(1).strip()
            answer = content.replace(m.group(0), "").strip()
            break
    if not reasoning and len(content.split('\n')) > 3:
        lines = content.split('\n')
        for i, l in enumerate(lines):
            if any(k in l.lower() for k in ['therefore', 'in conclusion', 'final answer', 'answer:']):
                reasoning = '\n'.join(lines[:i]).strip()
                answer = '\n'.join(lines[i:]).strip()
                break
    return {
        'reasoning': reasoning or "No explicit reasoning detected.",
        'answer': answer or content
    }

# Initialize history
if 'history' not in st.session_state:
    st.session_state.history = []
# Sidebar for settings
with st.sidebar:
    st.header("Configuration")
    model_choice = st.selectbox(
        "Model",
        ["gpt-oss:20b", "gpt-oss:120b"],
        help="Choose between 20B (faster) or 120B (more capable)"
    )
    effort = st.selectbox(
        "Reasoning Effort",
        ["low", "medium", "high"],
        index=1,
        help="Controls depth of reasoning shown"
    )
    temperature = st.slider(
        "Temperature",
        0.0, 2.0, 1.0, 0.1,
        help="Controls response randomness"
    )
    show_reasoning = st.checkbox(
        "Show Chain-of-Thought",
        True,
        help="Display model's thinking process"
    )
    show_metrics = st.checkbox(
        "Show Performance Metrics",
        True,
        help="Display response time and model info"
    )
    st.markdown("---")
    if st.button("Clear Conversation"):
        st.session_state.history = []
        st.rerun()
# Main Chat Interface
st.title("💬 GPT-OSS Interactive Chat")
examples = [
    "",
    "中国最长的河流是哪条河?",
    "If a train travels 120km in 1.5 hours, then 80km in 45 minutes, what's its average speed?",
    "Prove that √2 is irrational.",
    "Write a function to find the longest palindromic substring.",
    "Explain quantum entanglement in simple terms.",
    "How would you design a recommendation system?",
]
selected_from_dropdown = st.selectbox("Choose from examples:", examples)
# Get the question text
question_value = ""
if hasattr(st.session_state, 'selected_example'):
    question_value = st.session_state.selected_example
    del st.session_state.selected_example
elif selected_from_dropdown:
    question_value = selected_from_dropdown
question = st.text_area(
    "Or Enter your question:",
    value=question_value,
    height=100,
    placeholder="Ask anything! Try different reasoning effort levels to see how the model's thinking changes..."
)
# Submit button
col1, col2 = st.columns([1, 4])
with col1:
    submit_button = st.button("Ask GPT-OSS", type="primary")
if submit_button and question.strip():
    # System prompts
    system_prompts = {
        'low': 'You are a helpful assistant. Provide concise, direct answers.',
        'medium': f'You are a helpful assistant. Show brief reasoning before your answer. Reasoning effort: {effort}',
        'high': f'You are a helpful assistant. Show complete chain-of-thought reasoning step by step. Think through the problem carefully before providing your final answer. Reasoning effort: {effort}'
    }
    # Message history
    msgs = [{'role': 'system', 'content': system_prompts[effort]}]
    msgs.extend(st.session_state.history[-6:])
    msgs.append({'role': 'user', 'content': question})
    with st.spinner(f"GPT-OSS thinking ({effort} effort)..."):
        res = call_model(msgs, model_choice, temperature)
    if res['success']:
        parsed = parse_reasoning_response(res['content'])
        st.session_state.history.append({'role': 'user', 'content': question})
        st.session_state.history.append({'role': 'assistant', 'content': res['content']})
        col1, col2 = st.columns([3, 1] if show_metrics else [1])
        with col1:
            if show_reasoning and parsed['reasoning'] != 'No explicit reasoning detected.':
                st.markdown("### Chain-of-Thought Reasoning")
                st.markdown(f"<div class='reasoning-box'>{parsed['reasoning']}</div>", unsafe_allow_html=True)
            st.markdown("### Answer")
            st.markdown(f"<div class='answer-box'>{parsed['answer']}</div>", unsafe_allow_html=True)
        if show_metrics:
            with col2:
                st.markdown(f"""
                <div class="metric-card">
                    <h4> Metrics</h4>
                    <p><strong>Time:</strong><br>{res['response_time']:.2f}s</p>
                    <p><strong>Model:</strong><br>{model_choice}</p>
                    <p><strong>Effort:</strong><br>{effort.title()}</p>
                </div>
                """, unsafe_allow_html=True)
    else:
        st.error(f"{res['content']}")
if st.session_state.history:
    st.markdown("---")
    st.subheader("Conversation History")
    recent_history = st.session_state.history[-8:]  # Last 8 messages (4 exchanges)
    for i, msg in enumerate(recent_history):
        if msg['role'] == 'user':
            st.markdown(f"""
            <div class="chat-message user-message">
                <strong>You:</strong> {msg['content']}
            </div>
            """, unsafe_allow_html=True)
        else:
            parsed_hist = parse_reasoning_response(msg['content'])
            with st.expander(f"GPT-OSS Response", expanded=False):
                if parsed_hist['reasoning'] != 'No explicit reasoning detected.':
                    st.markdown("**Reasoning Process:**")
                    st.code(parsed_hist['reasoning'], language='text')
                st.markdown("**Final Answer:**")
                st.markdown(parsed_hist['answer'])
# Footer
st.markdown("---")
st.markdown("""
<div style='text-align: center;'>
    <p><strong>Powered by GPT-OSS-20B via Ollama</strong></p>
</div>
""", unsafe_allow_html=True)
在最后一步,我们将应用的所有部分整合在一起,包括 session state、侧边栏控制、示例提示、消息组装、模型调用、解析和显示,形成一个循环:
-
Session state 初始化:我们使用 st.session_state.history 来记录每次用户--助手的交流,以便在重运行时保持上下文。
-
侧边栏配置:允许用户选择
-
模型:gpt-oss:20b 或 gpt-oss:120b
-
推理力度:low/medium/high
-
Temperature:0 到 2.0,控制模型的随机性
-
Chain-of-Thought 切换:显示或隐藏模型的内部推理
-
清除对话:清空历史并重启应用
-
-
示例提示和输入:下拉菜单提供初始问题帮助新用户上手,用户选择或输入的内容成为文本区中的查询。
-
构建请求:点击 Ask GPT-OSS 时,我们:
-
根据选择的推理力度创建 system prompt
-
附加历史中的最后六条消息以保持上下文
-
添加新的用户问题
-
-
模型调用:我们使用 call_model() 函数,它:
-
将组装好的消息发送给 Ollama
-
测量响应时间
-
返回标准化的内容字符串
-
-
解析与显示:使用 parse_reasoning_response() 函数,将模型输出拆分为思维链响应 "reasoning" 和清理后的答案 "answer"。
-
历史管理:每个问题和响应对都会追加到 st.session_state.history 列表中,以便下一次运行时保持上下文。
要自己试一试,将代码保存为 gpt_oss.py 并启动:
streamlit run gpt_oss.py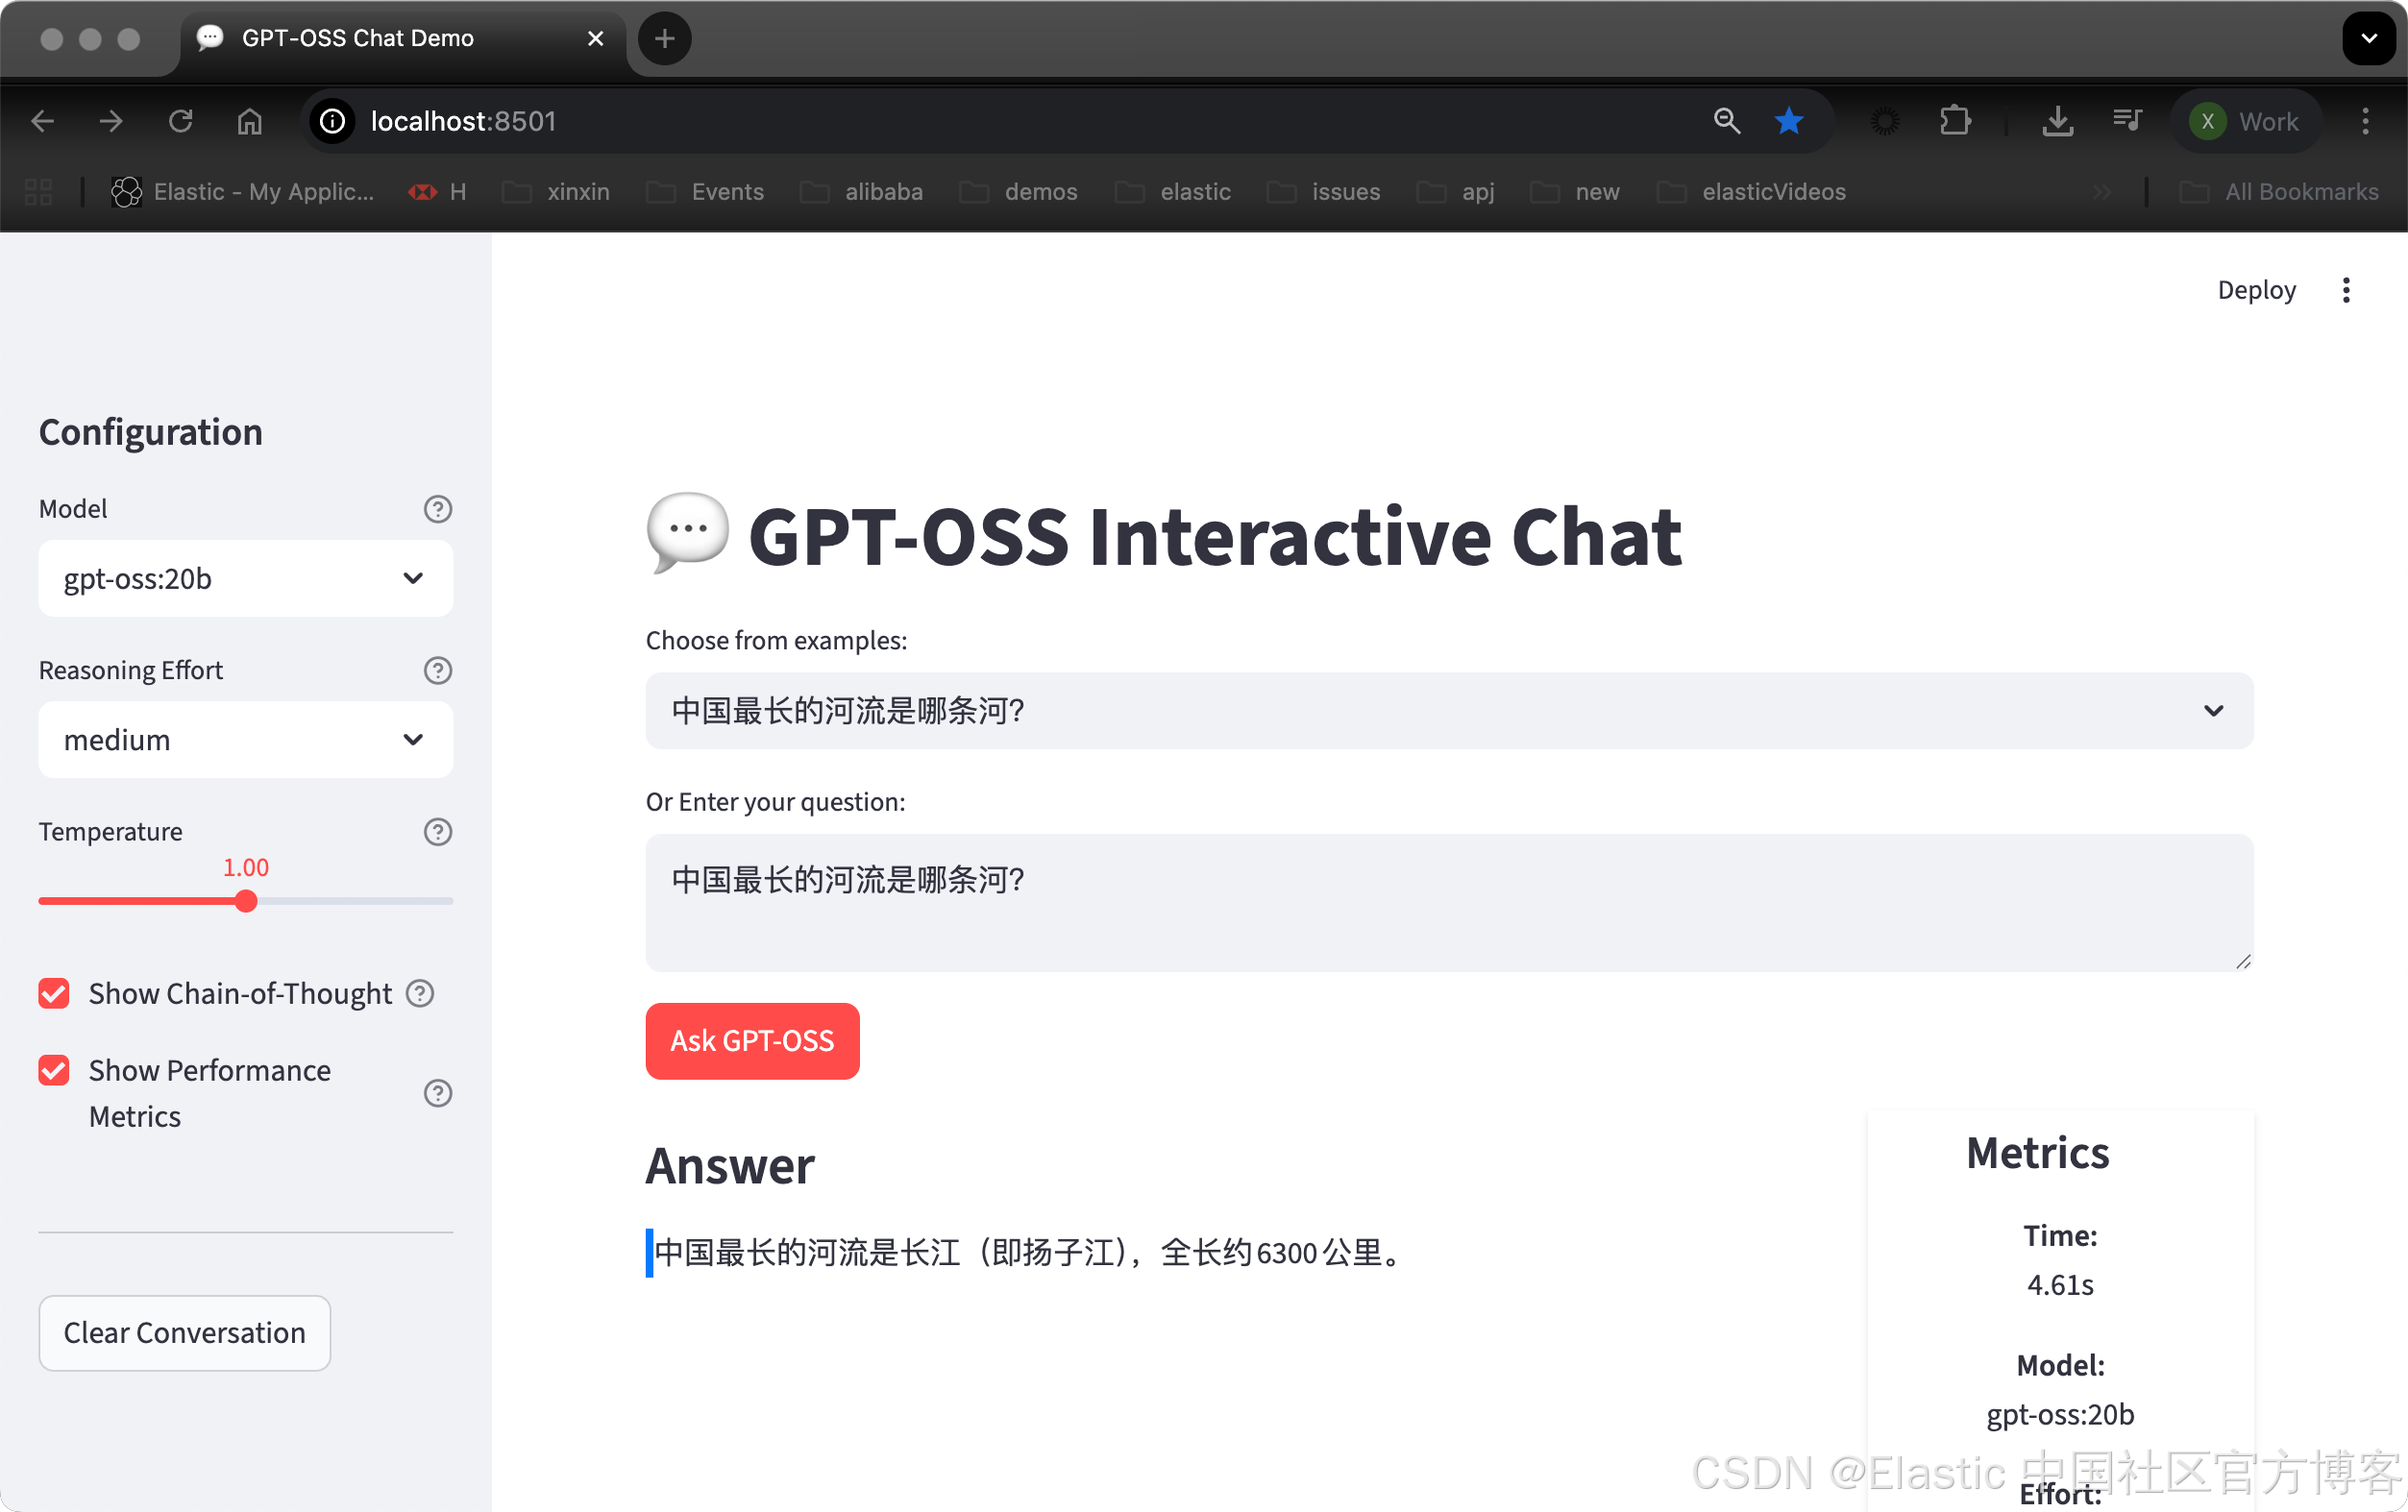
至此,我们的安装及测试完毕。
将 Ollama 连接到 Kibana
有关 Elasticsearch 及 Kibana 的安装,请参考文章 "Elasticsearch:在 Elastic 中玩转 DeepSeek R1 来实现 RAG 应用"。这里就不一一赘述。
我们按照如下的步骤来对 Kibana 进行配置:
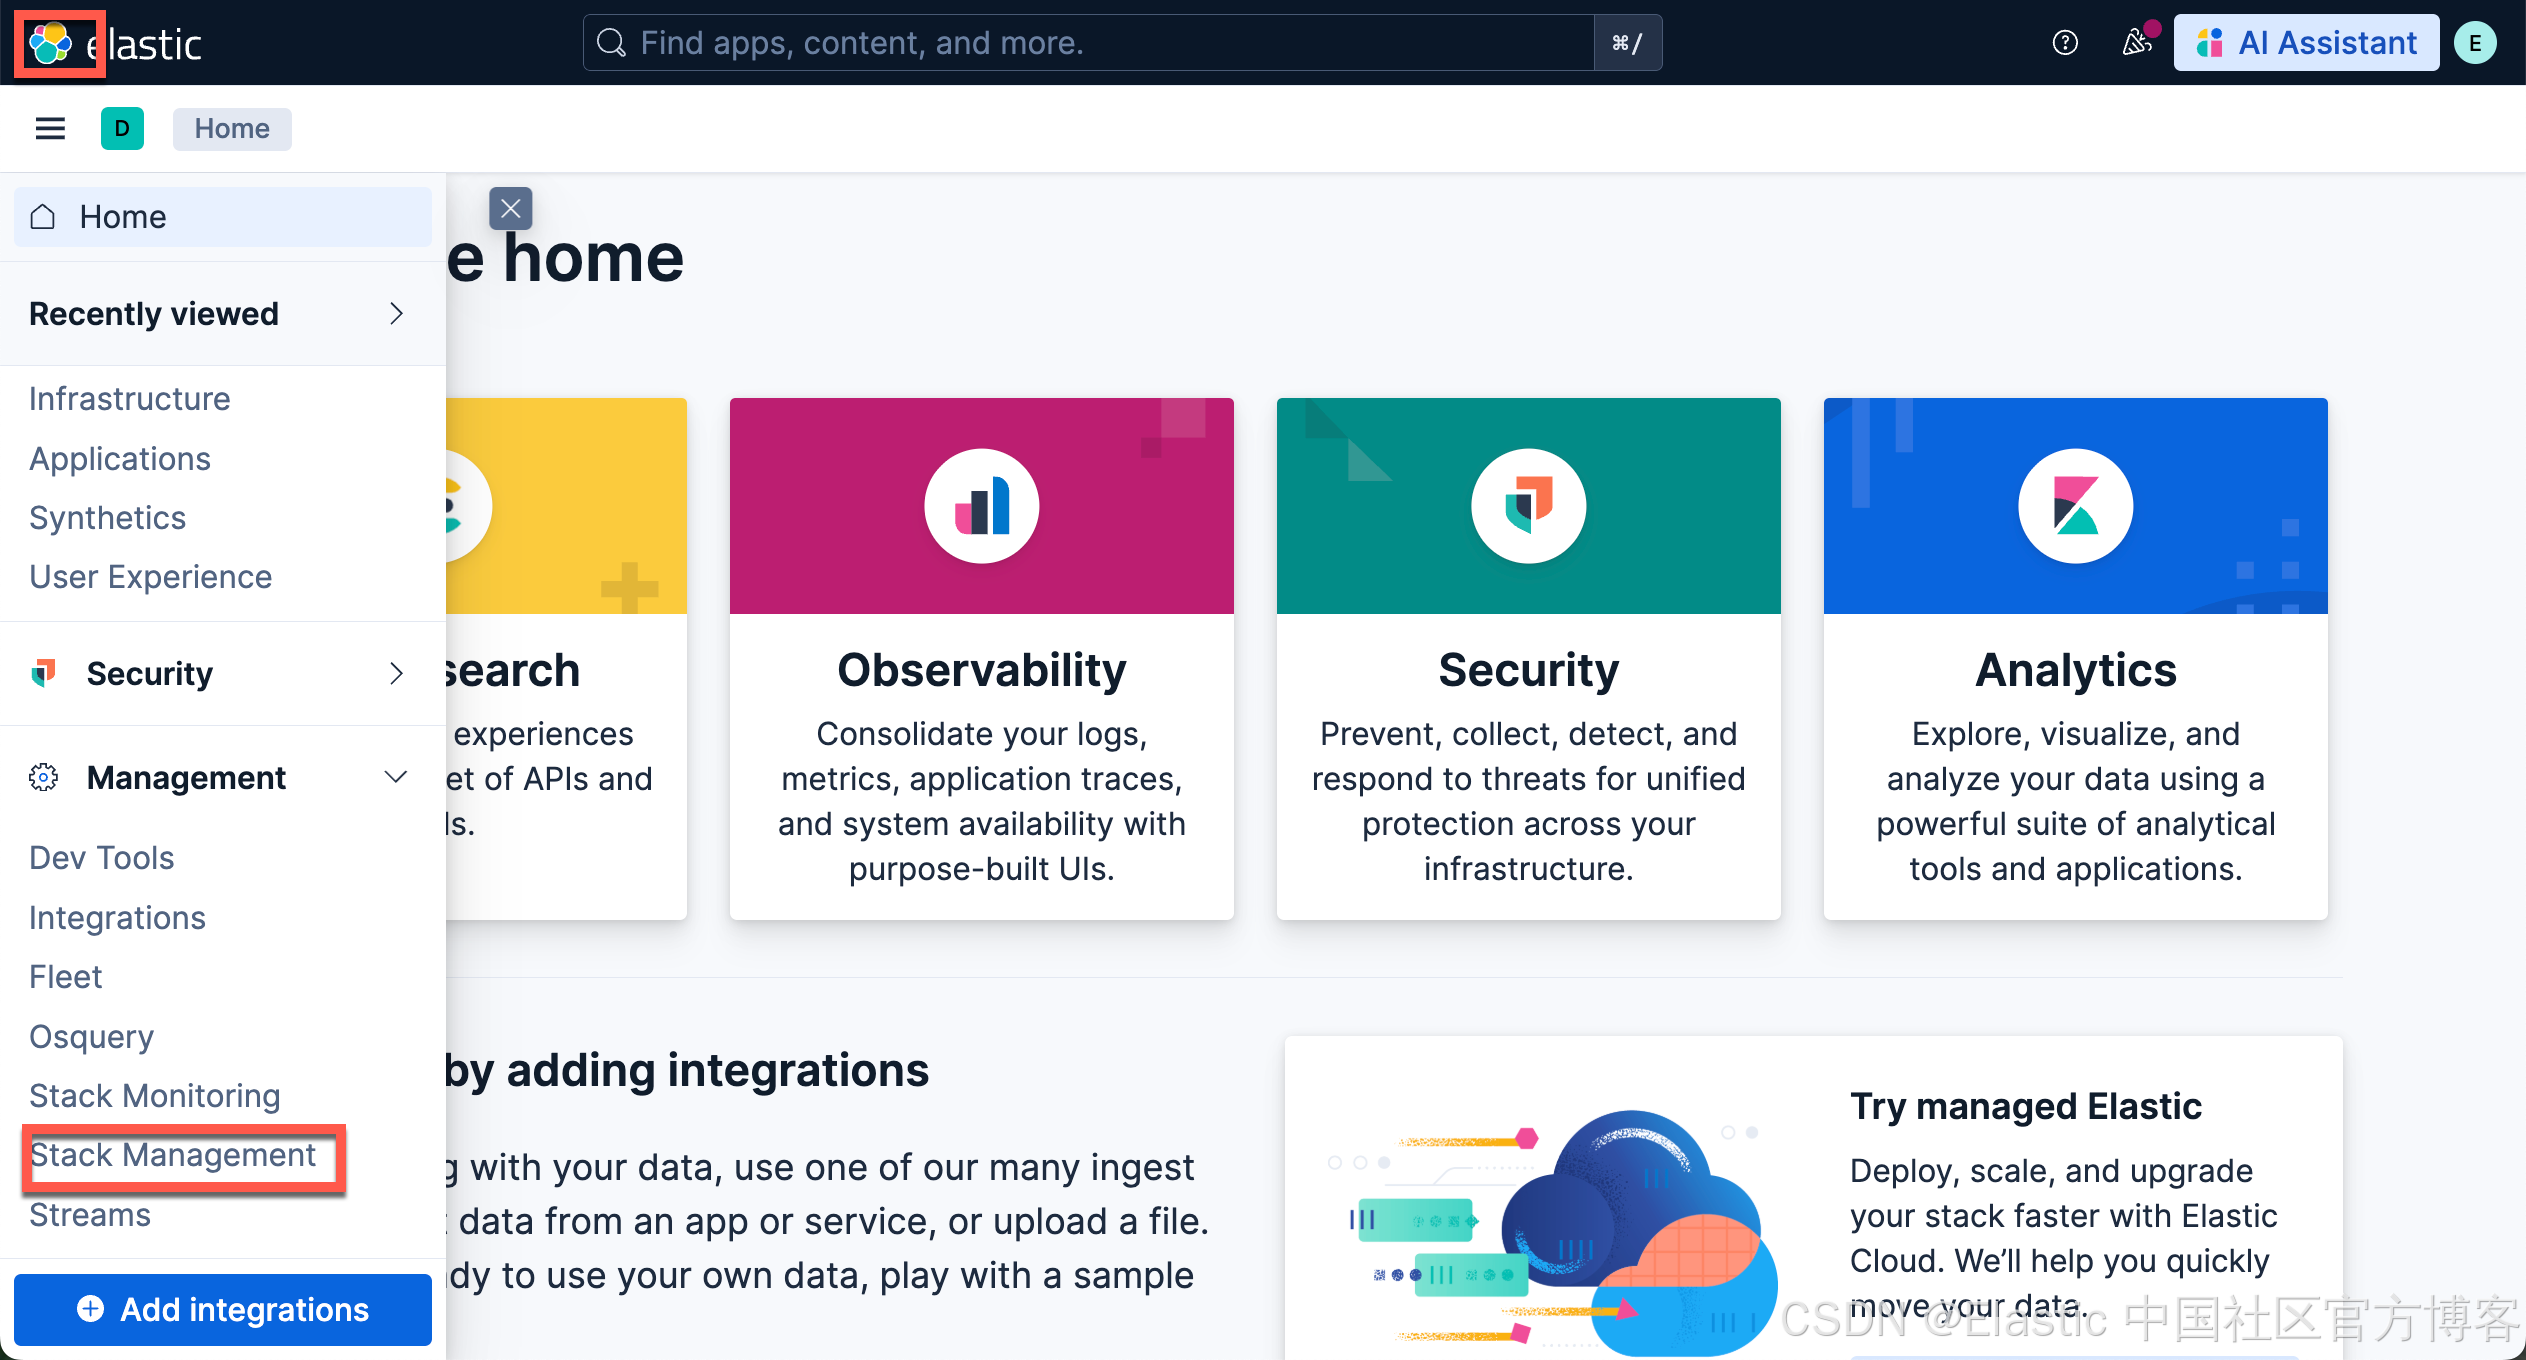
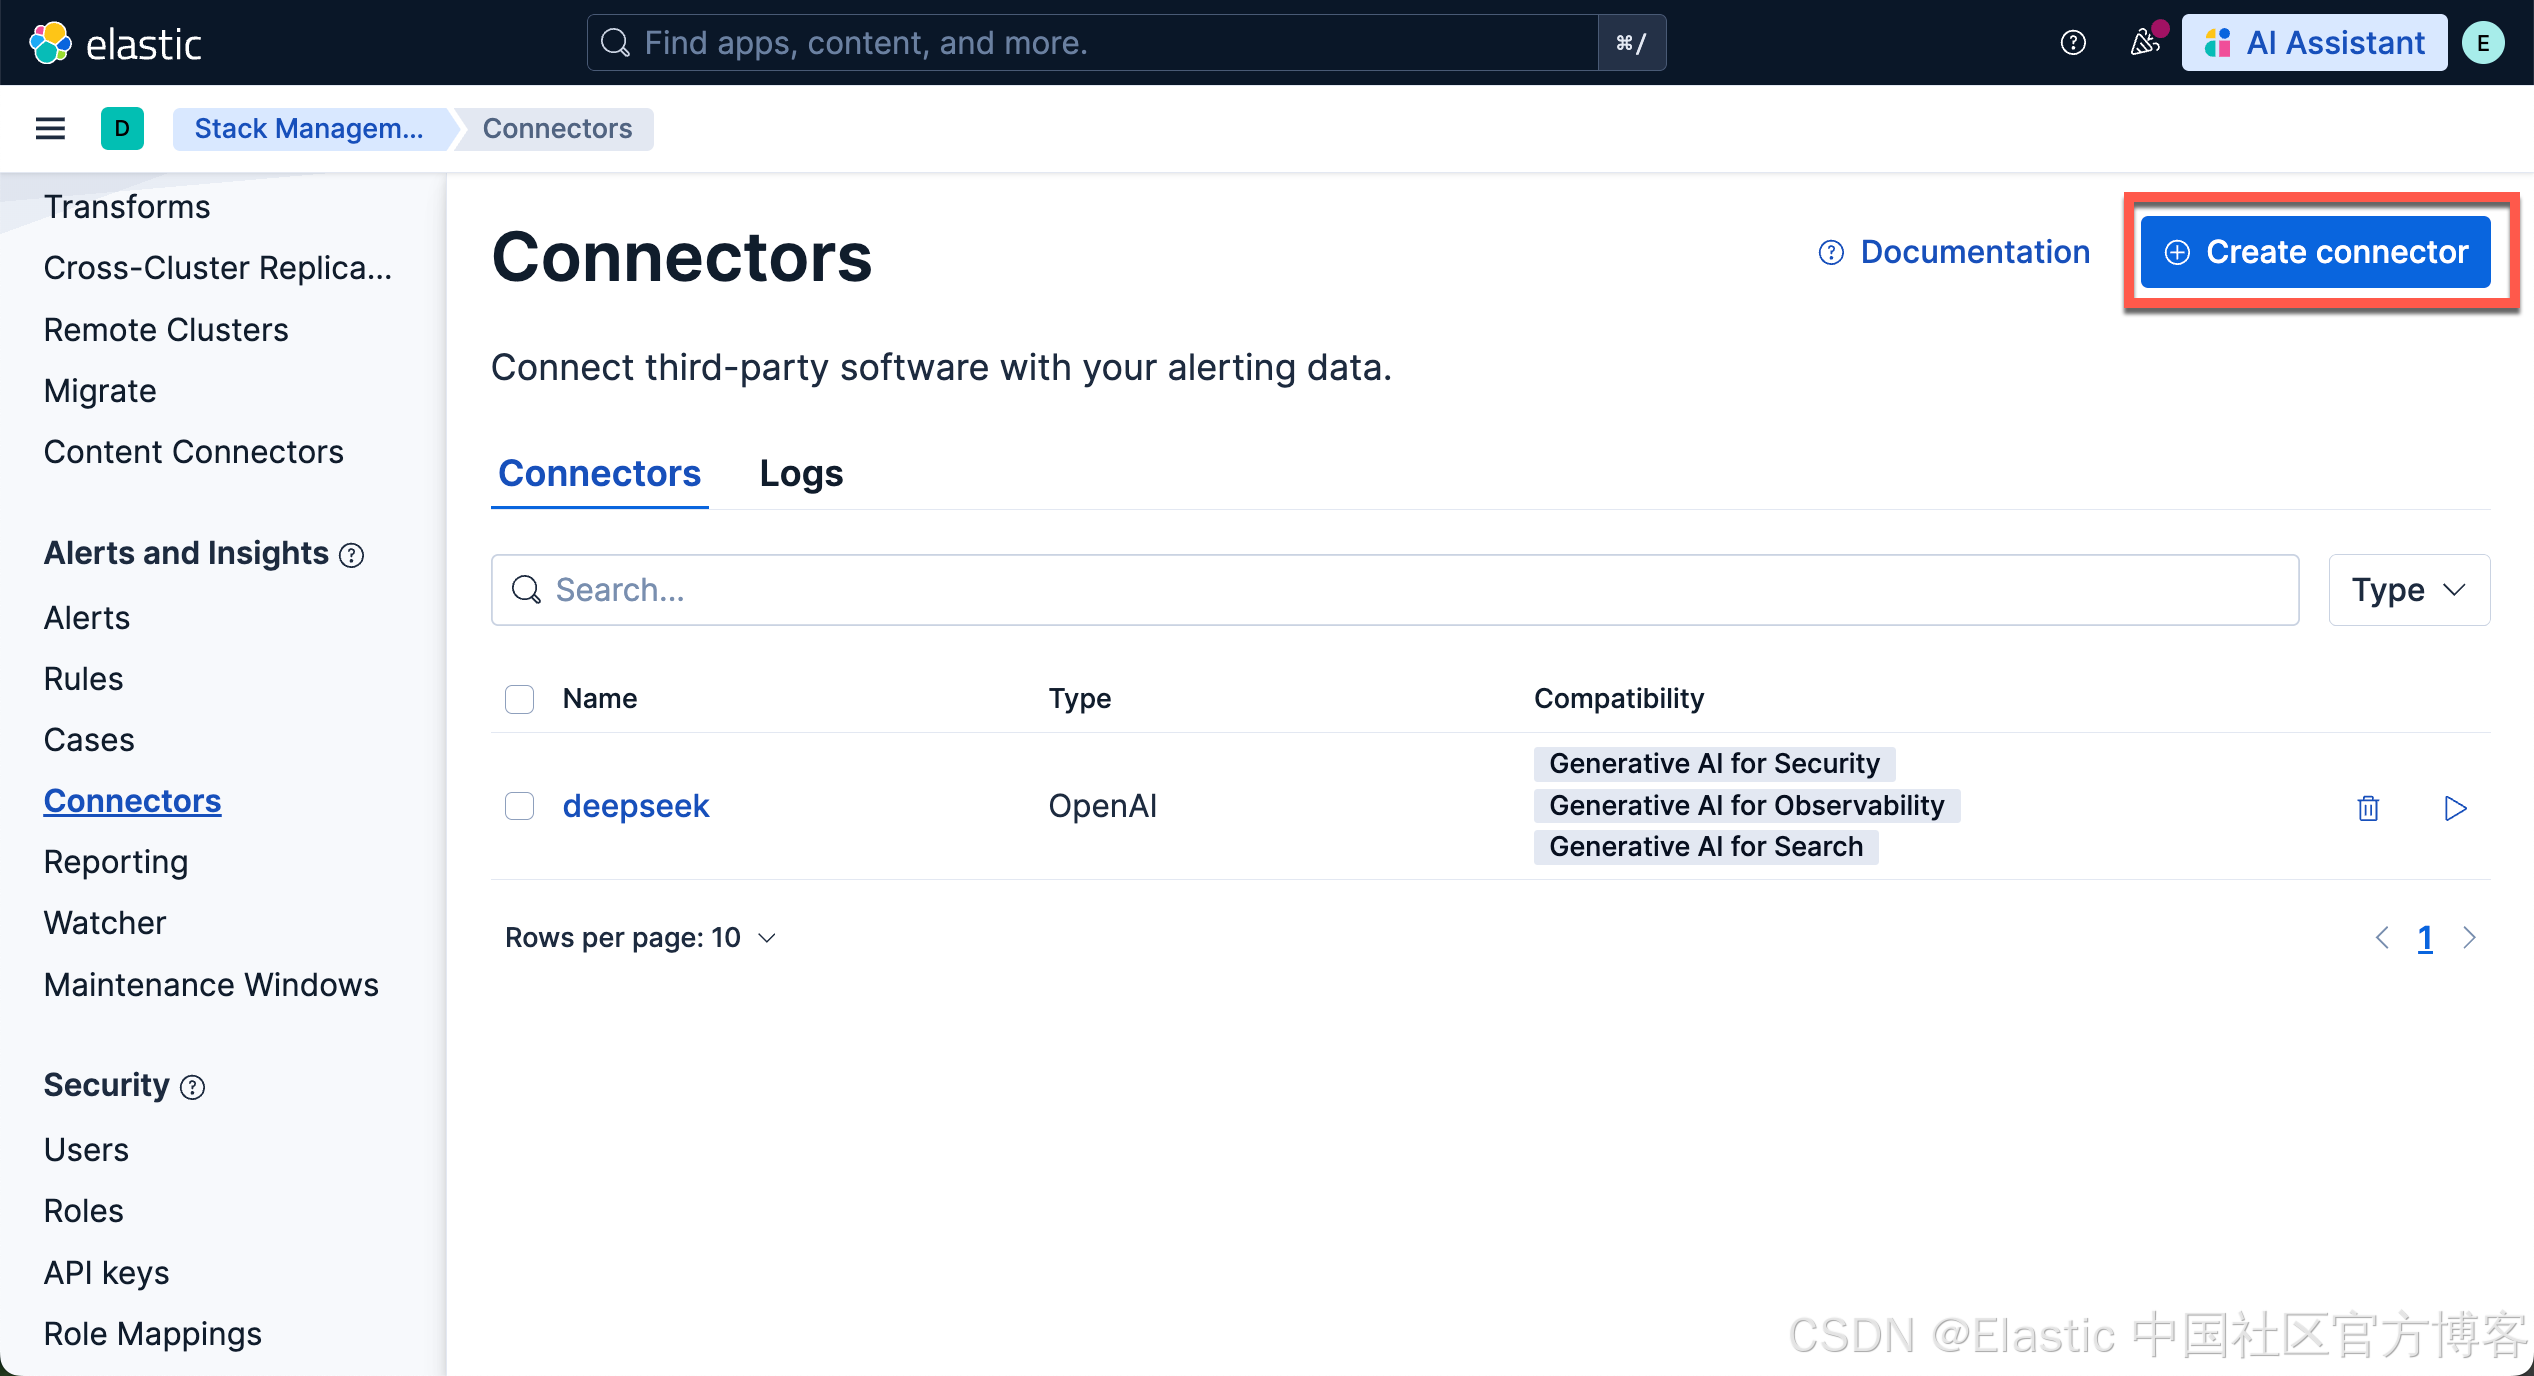

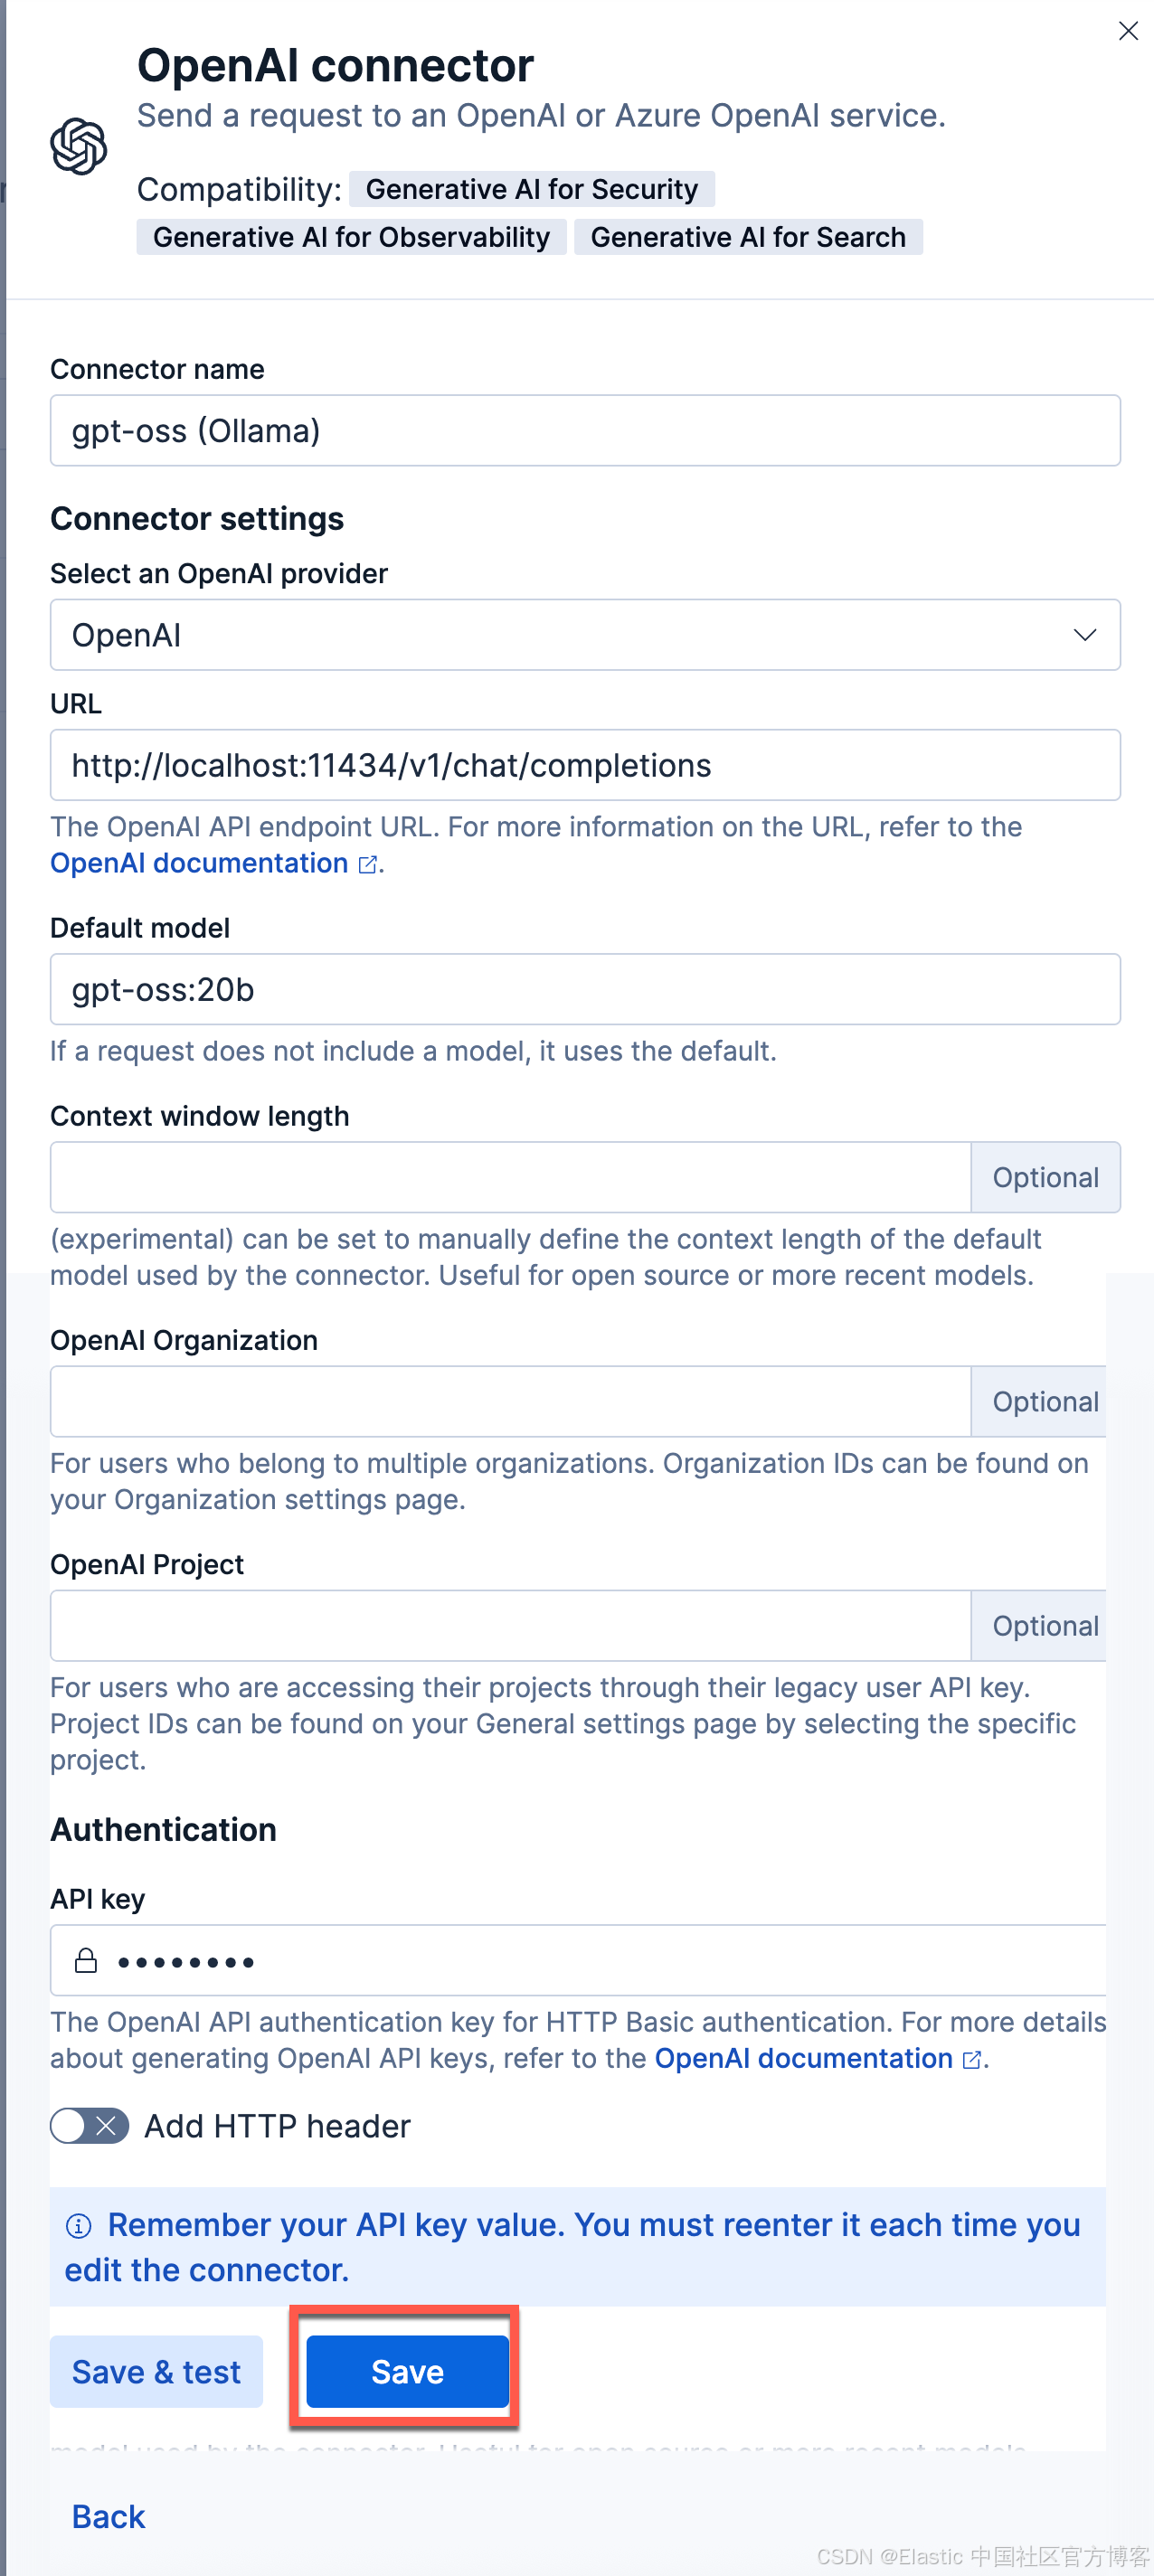
使用以下设置配置连接器
- Connector name:gpt-oss (Ollama)
- 选择 OpenAI provider:OpenAI
- URL:http://localhost:11434/v1/chat/completions
- 调整到你的 ollama 的正确路径。如果你从容器内调用,请记住替换 host.docker.internal 或等效项
- 默认模型:gpt-oss:20b
- API 密钥:编造一个,需要输入,但值无关紧要
我们的连接器如下所示:
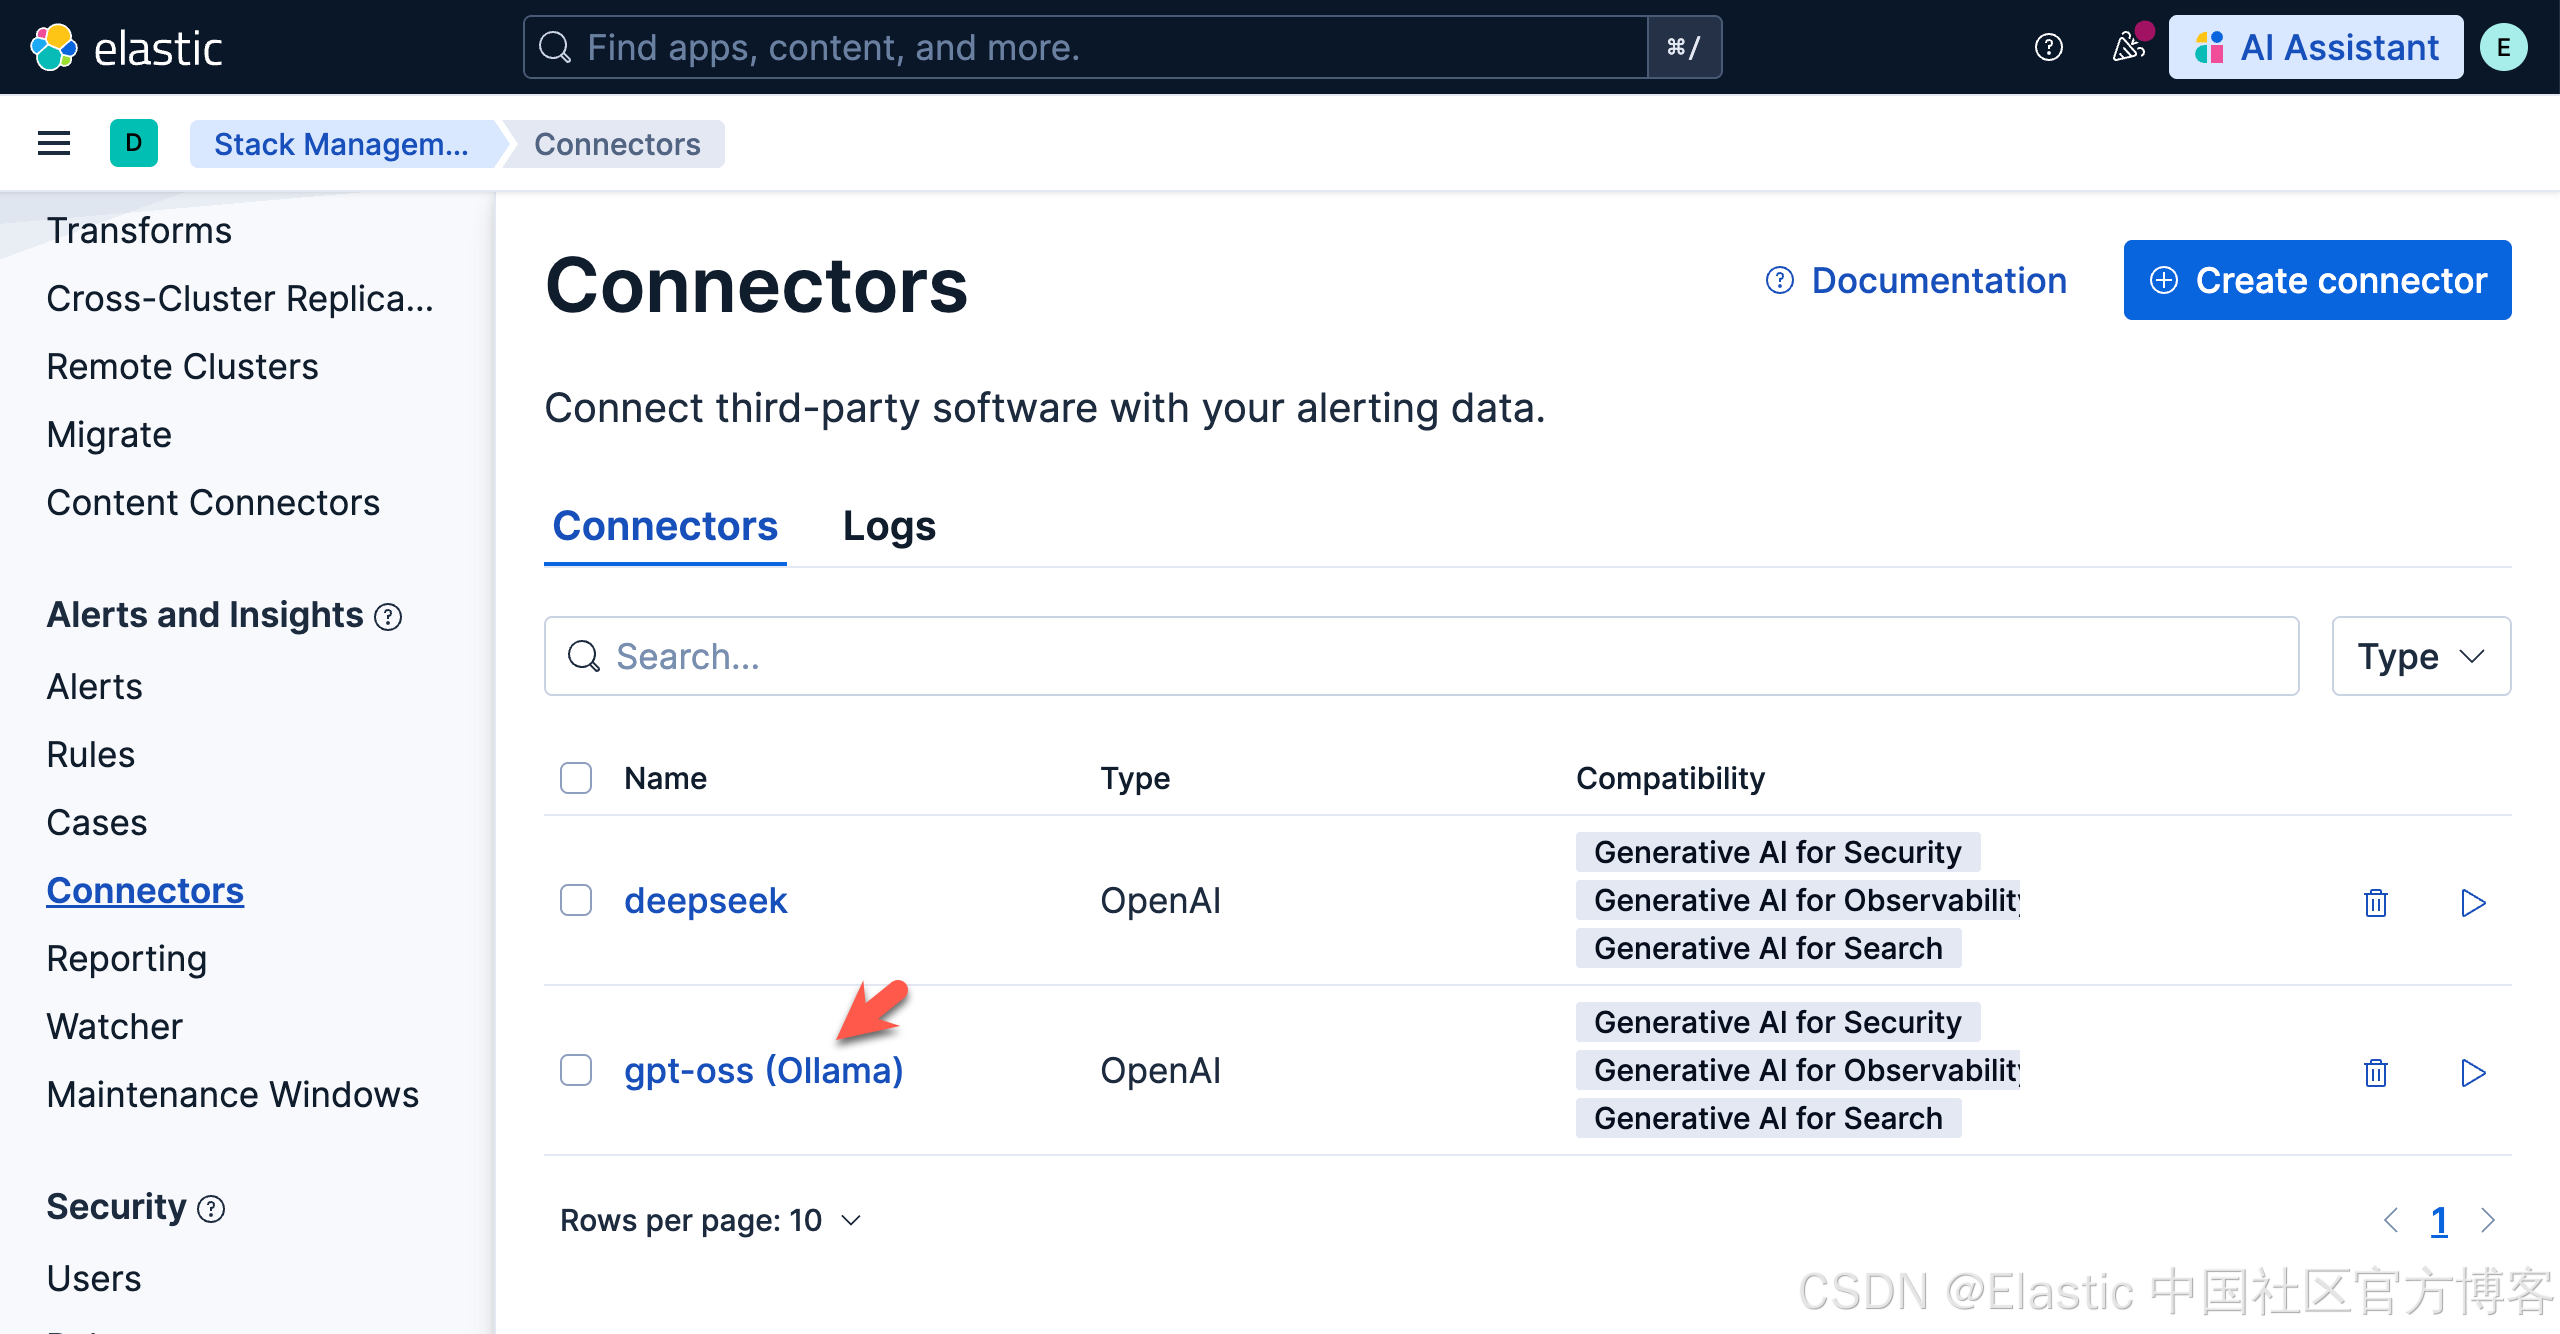
我们打开上面新创建的 gpt-oss (Ollama) 连接,并进行测试:
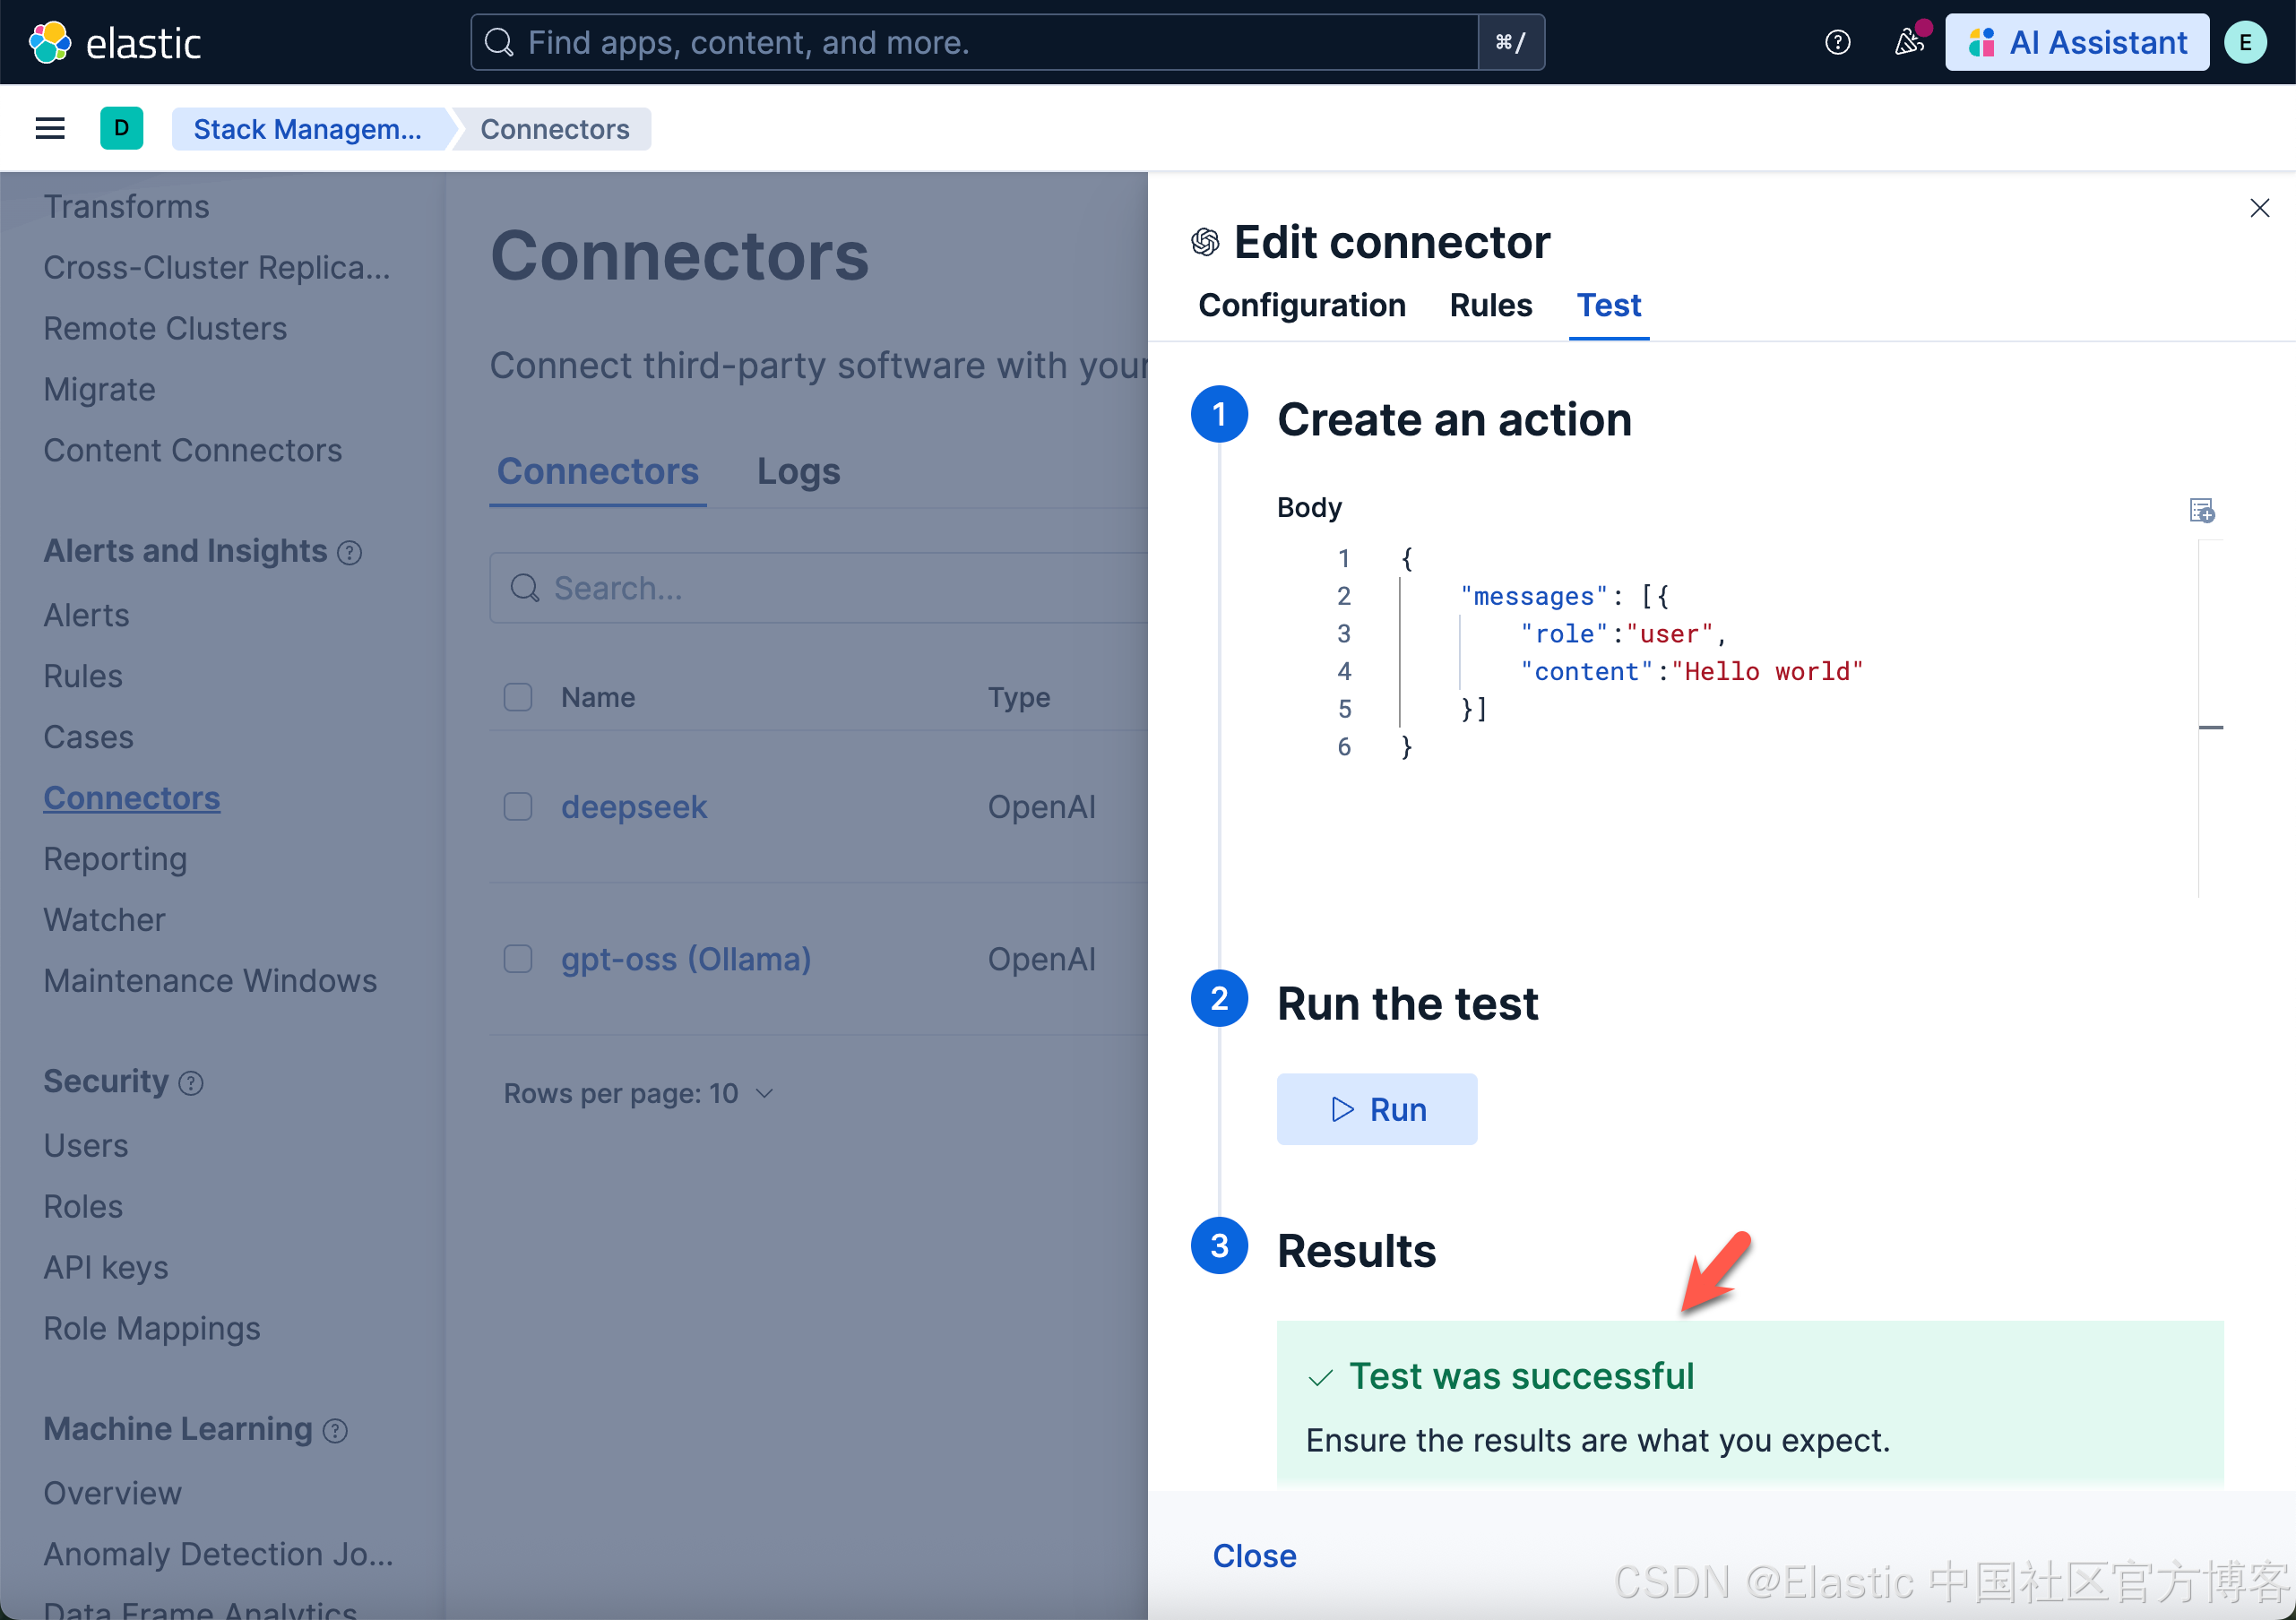
上面表面我们的测试是成功的。
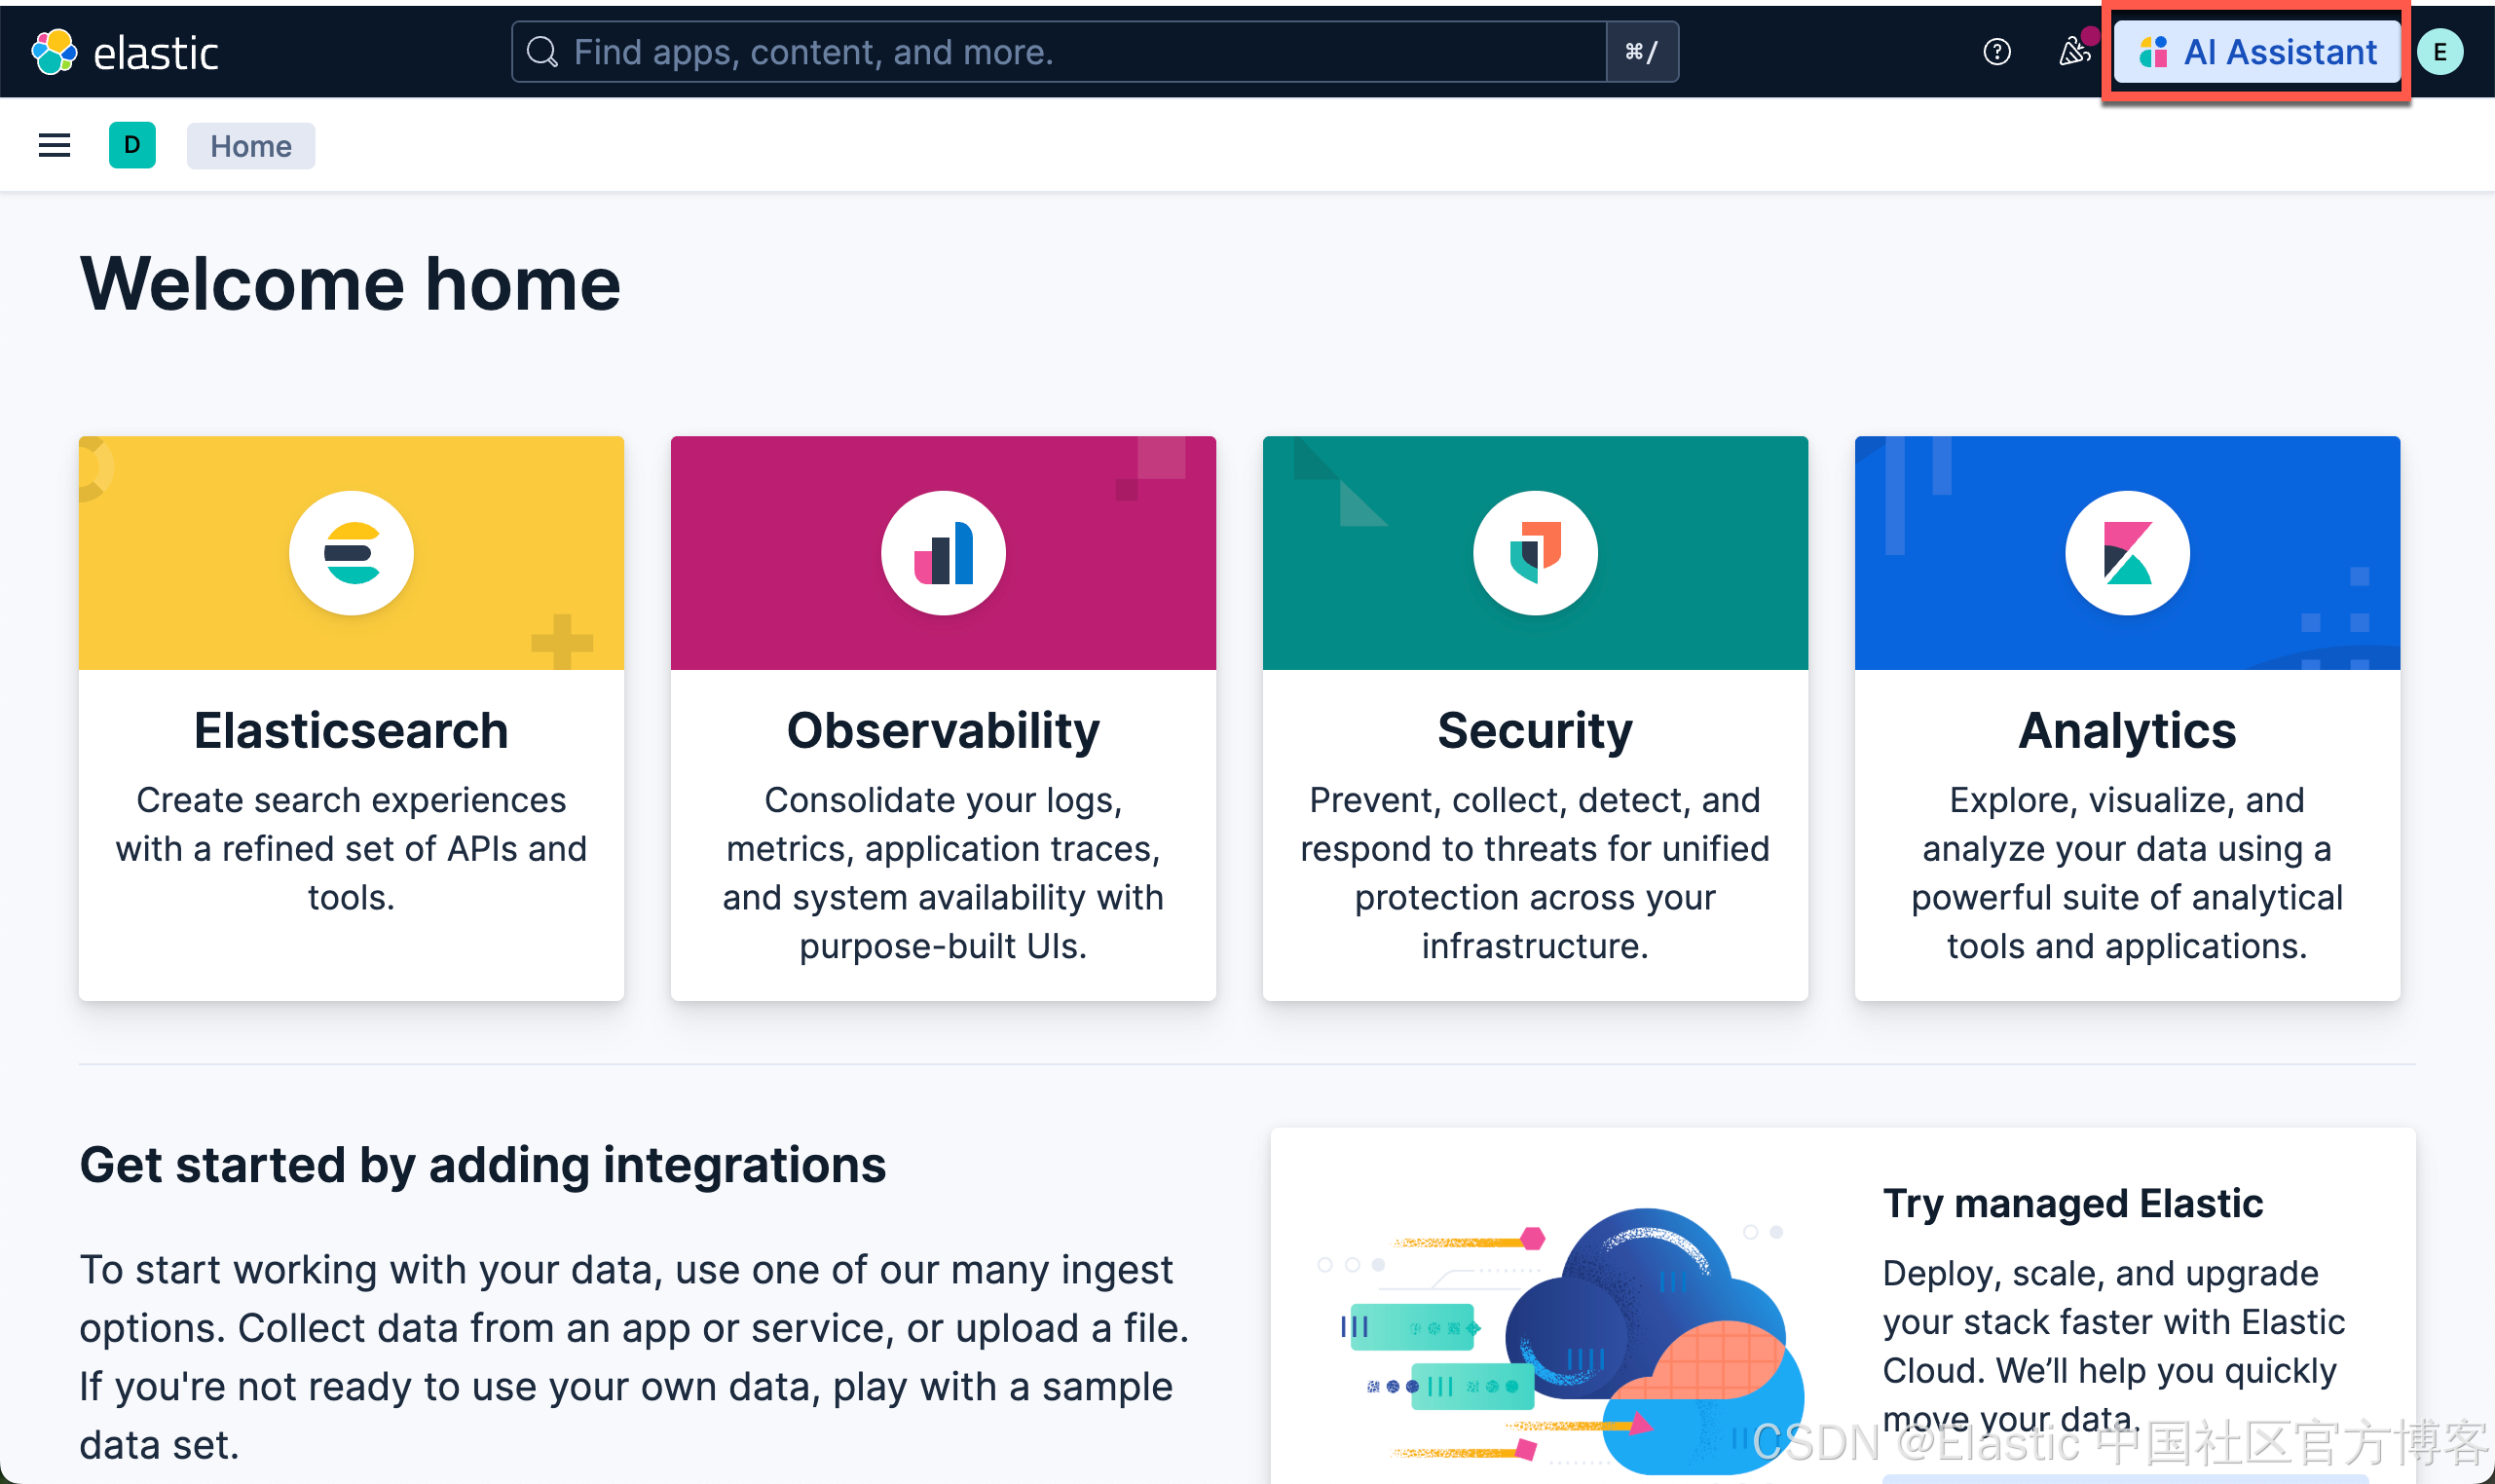
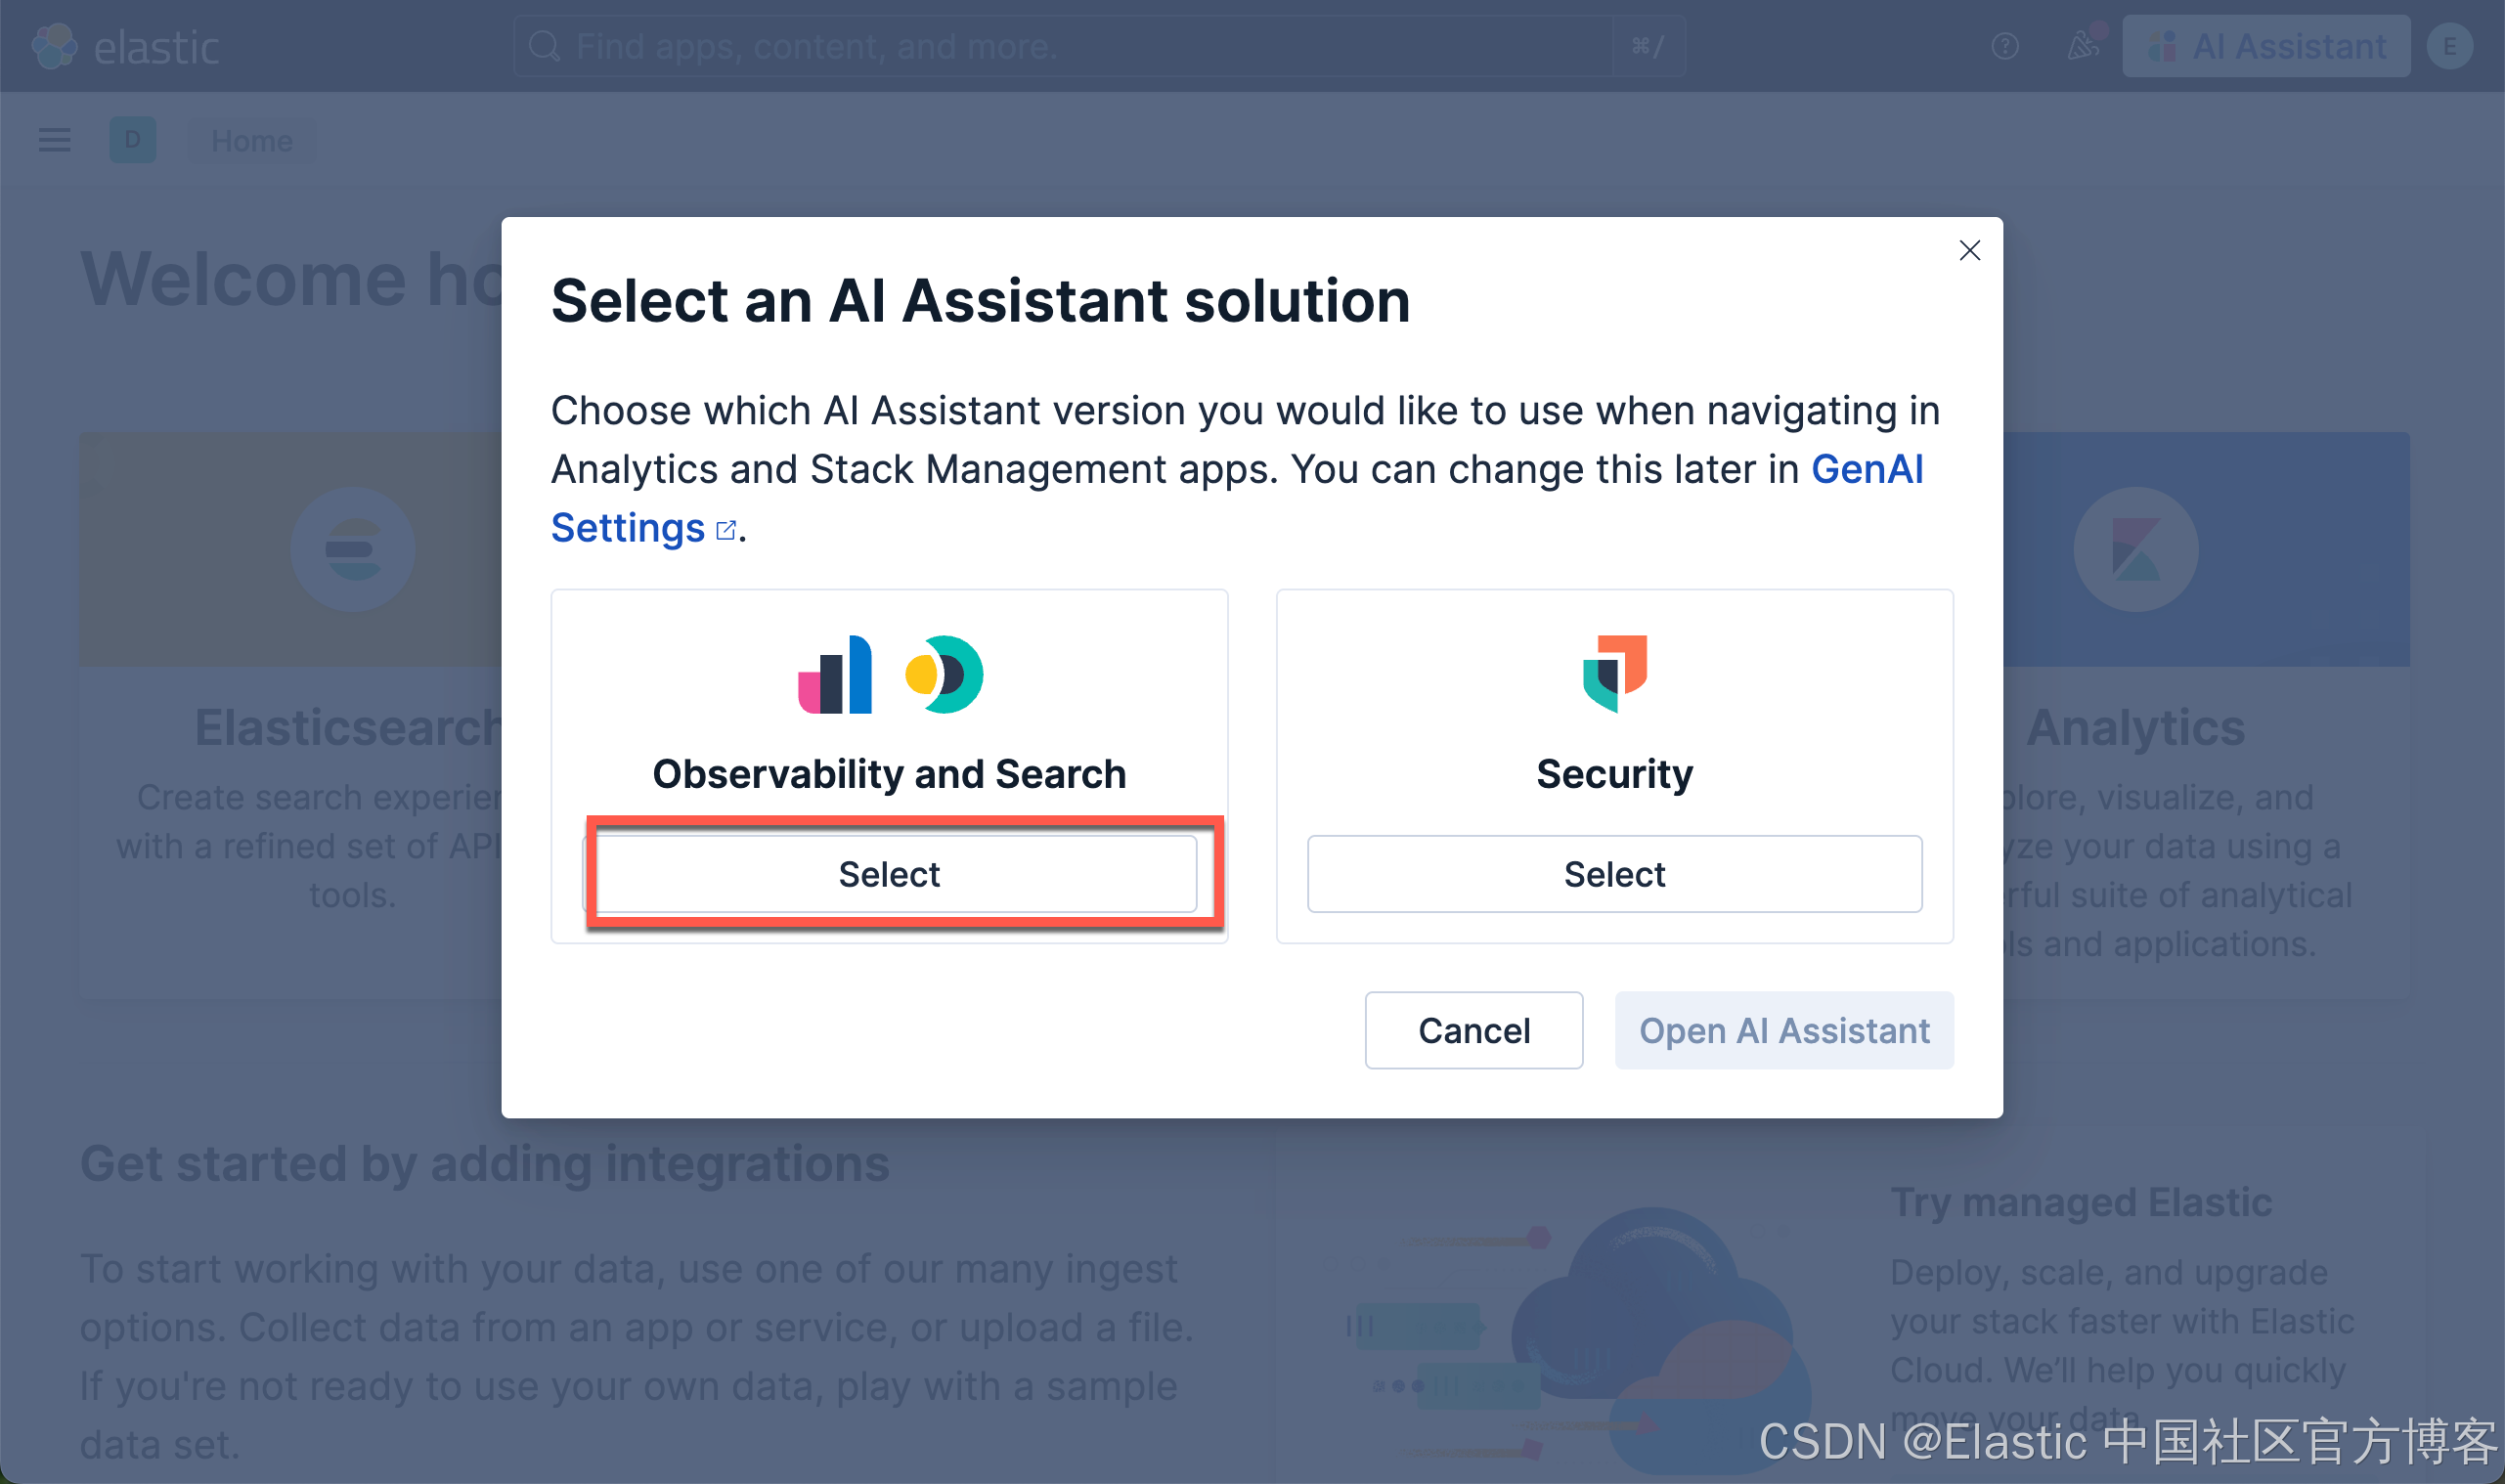
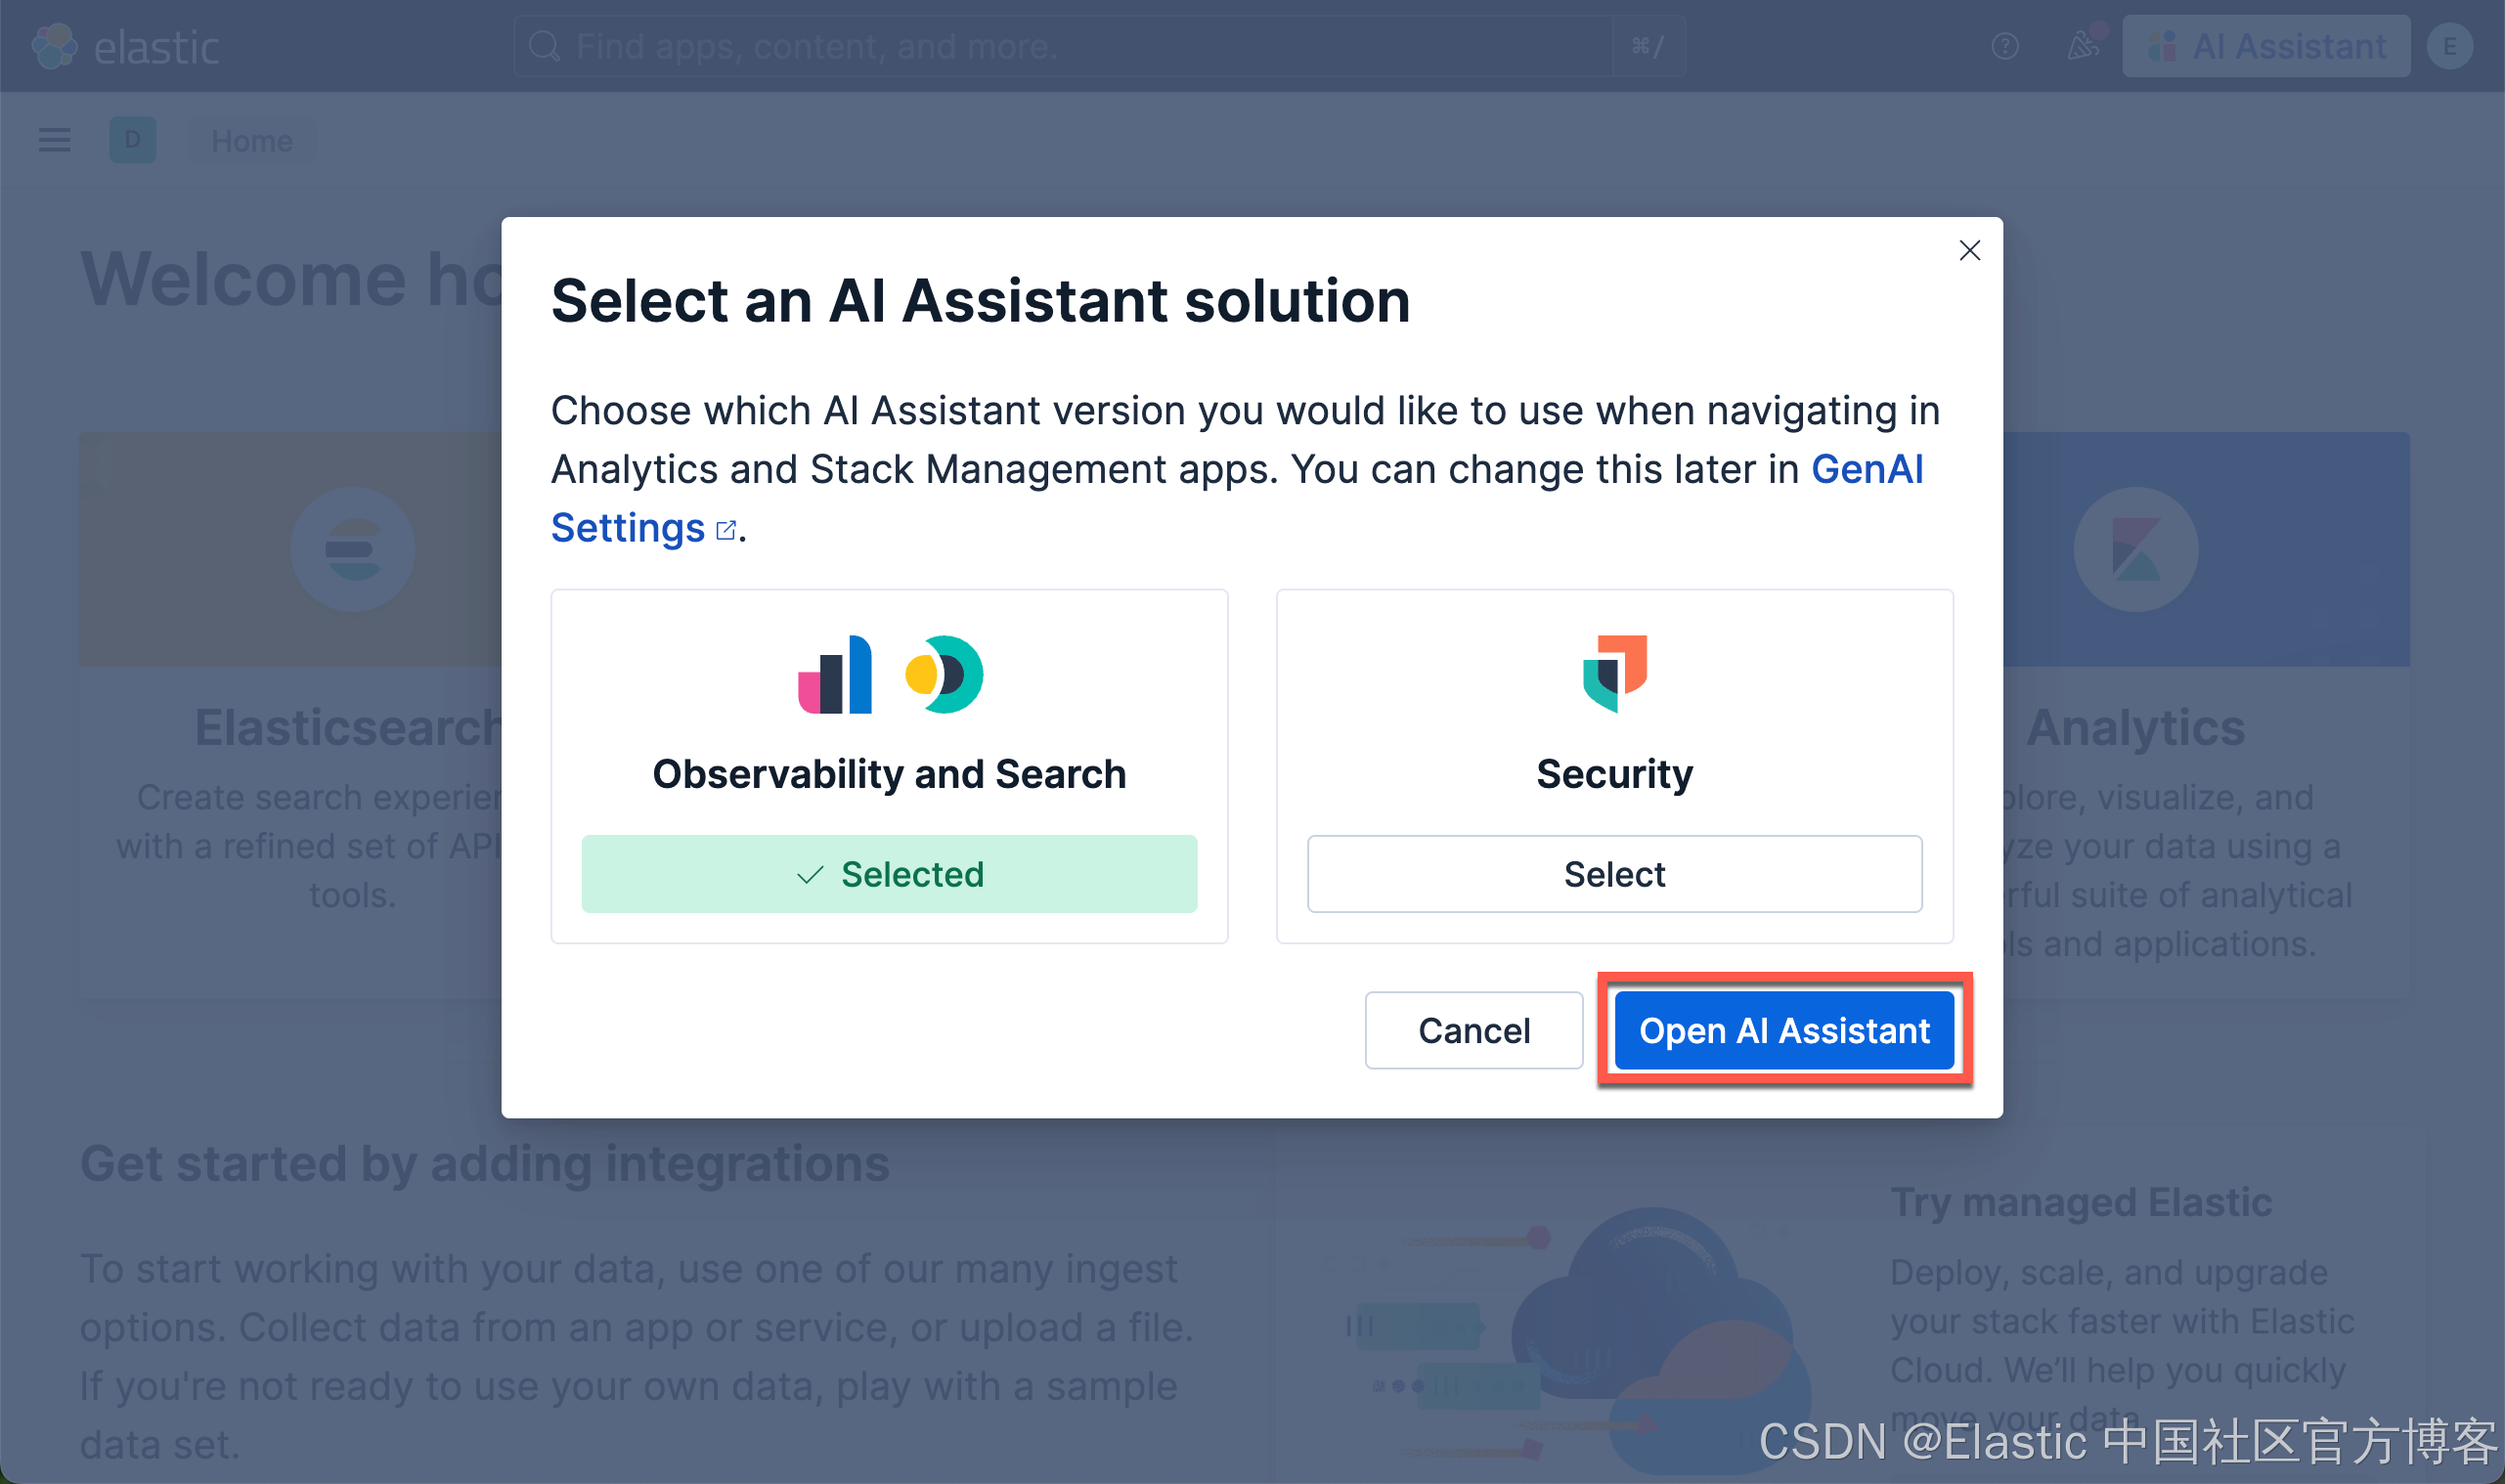
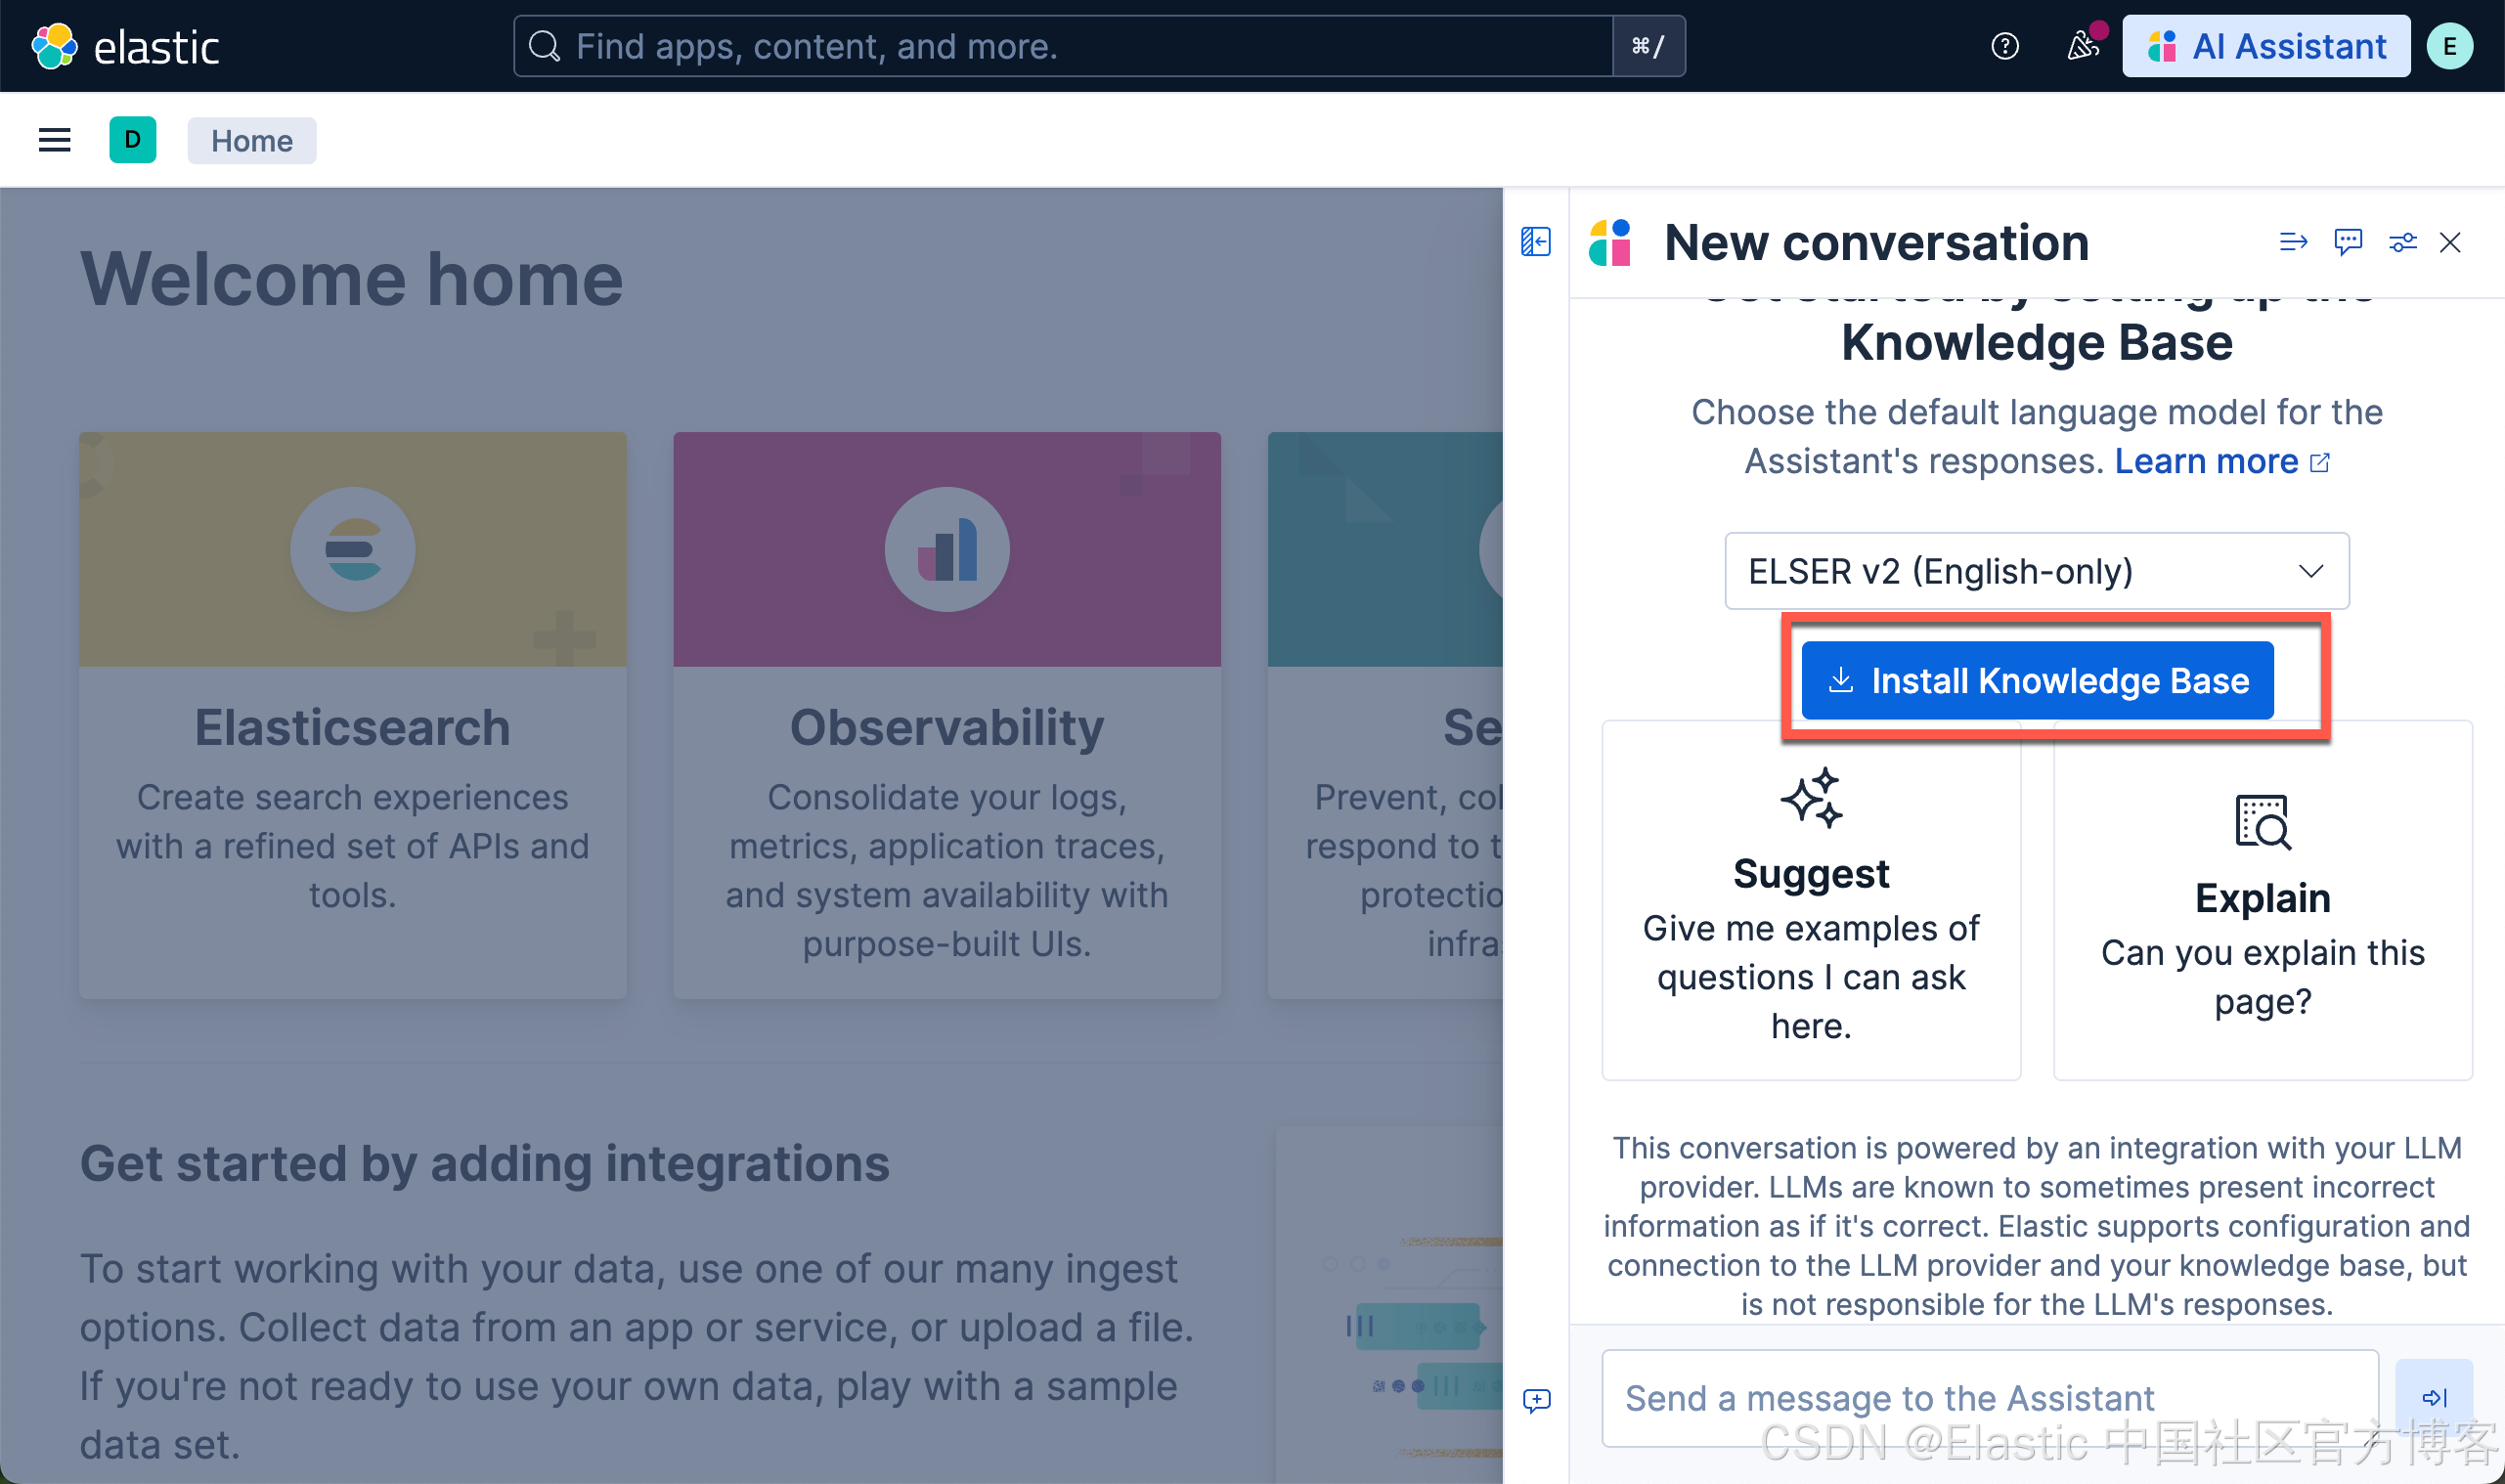
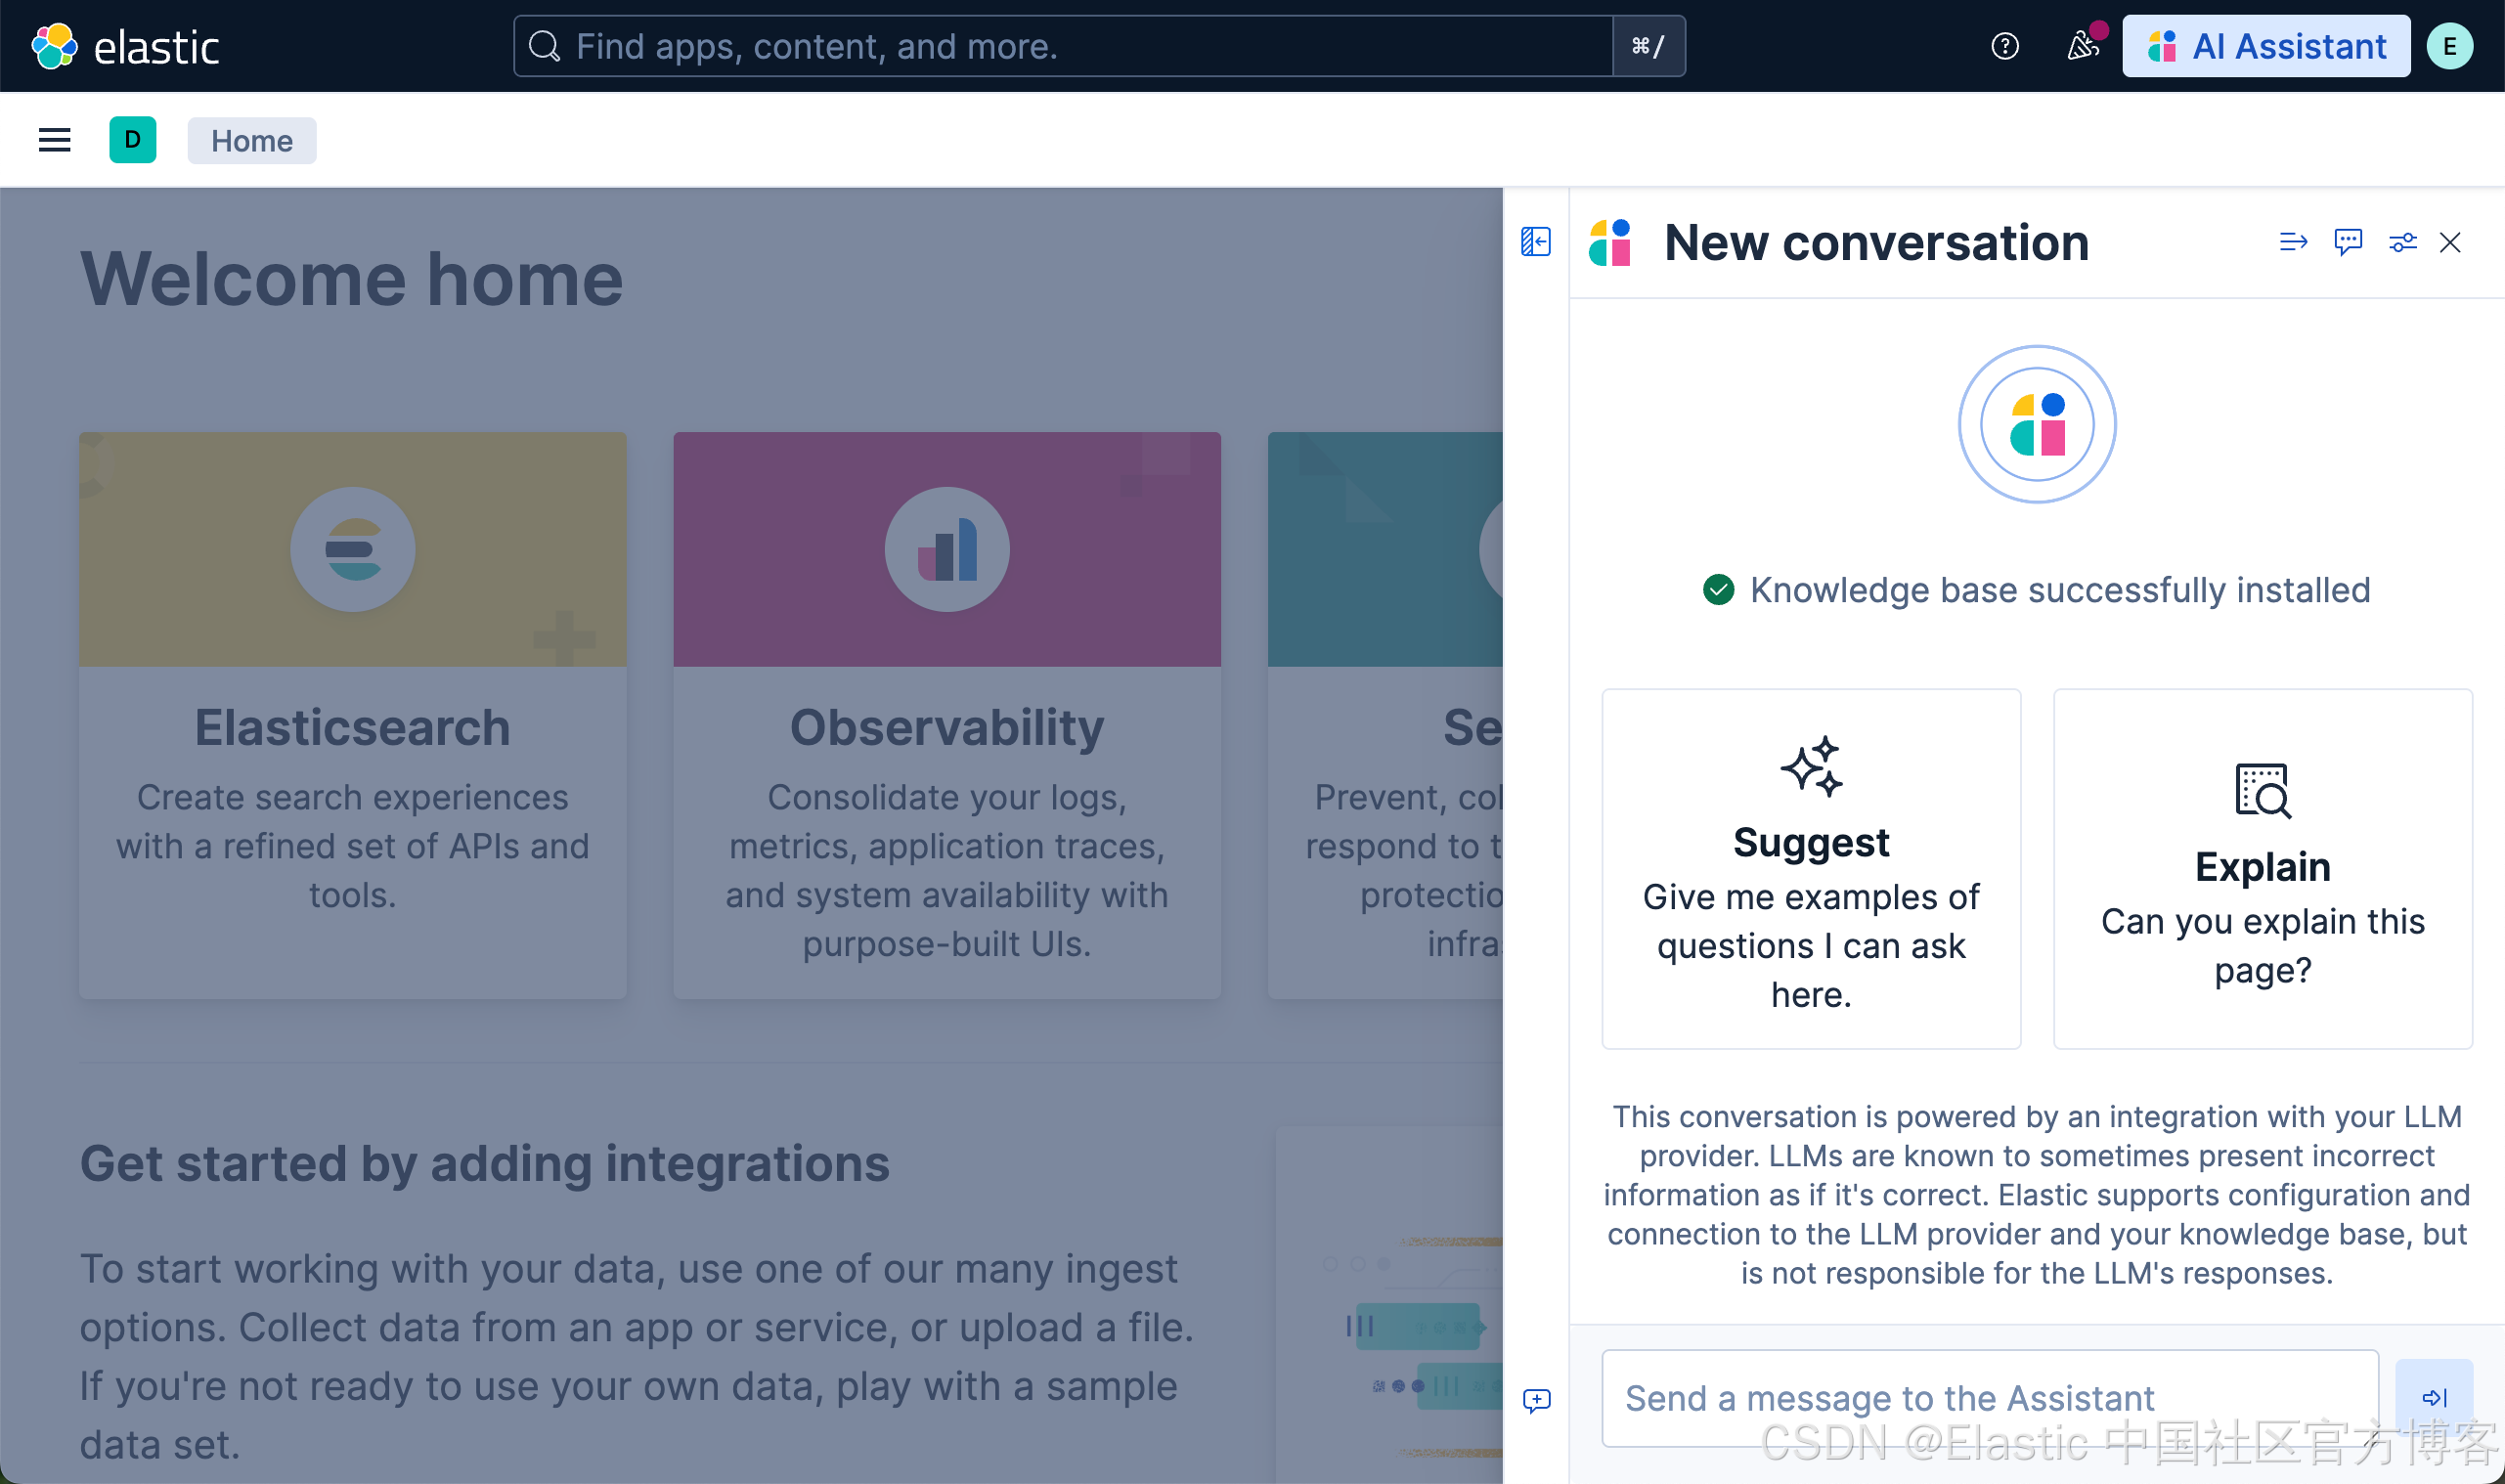
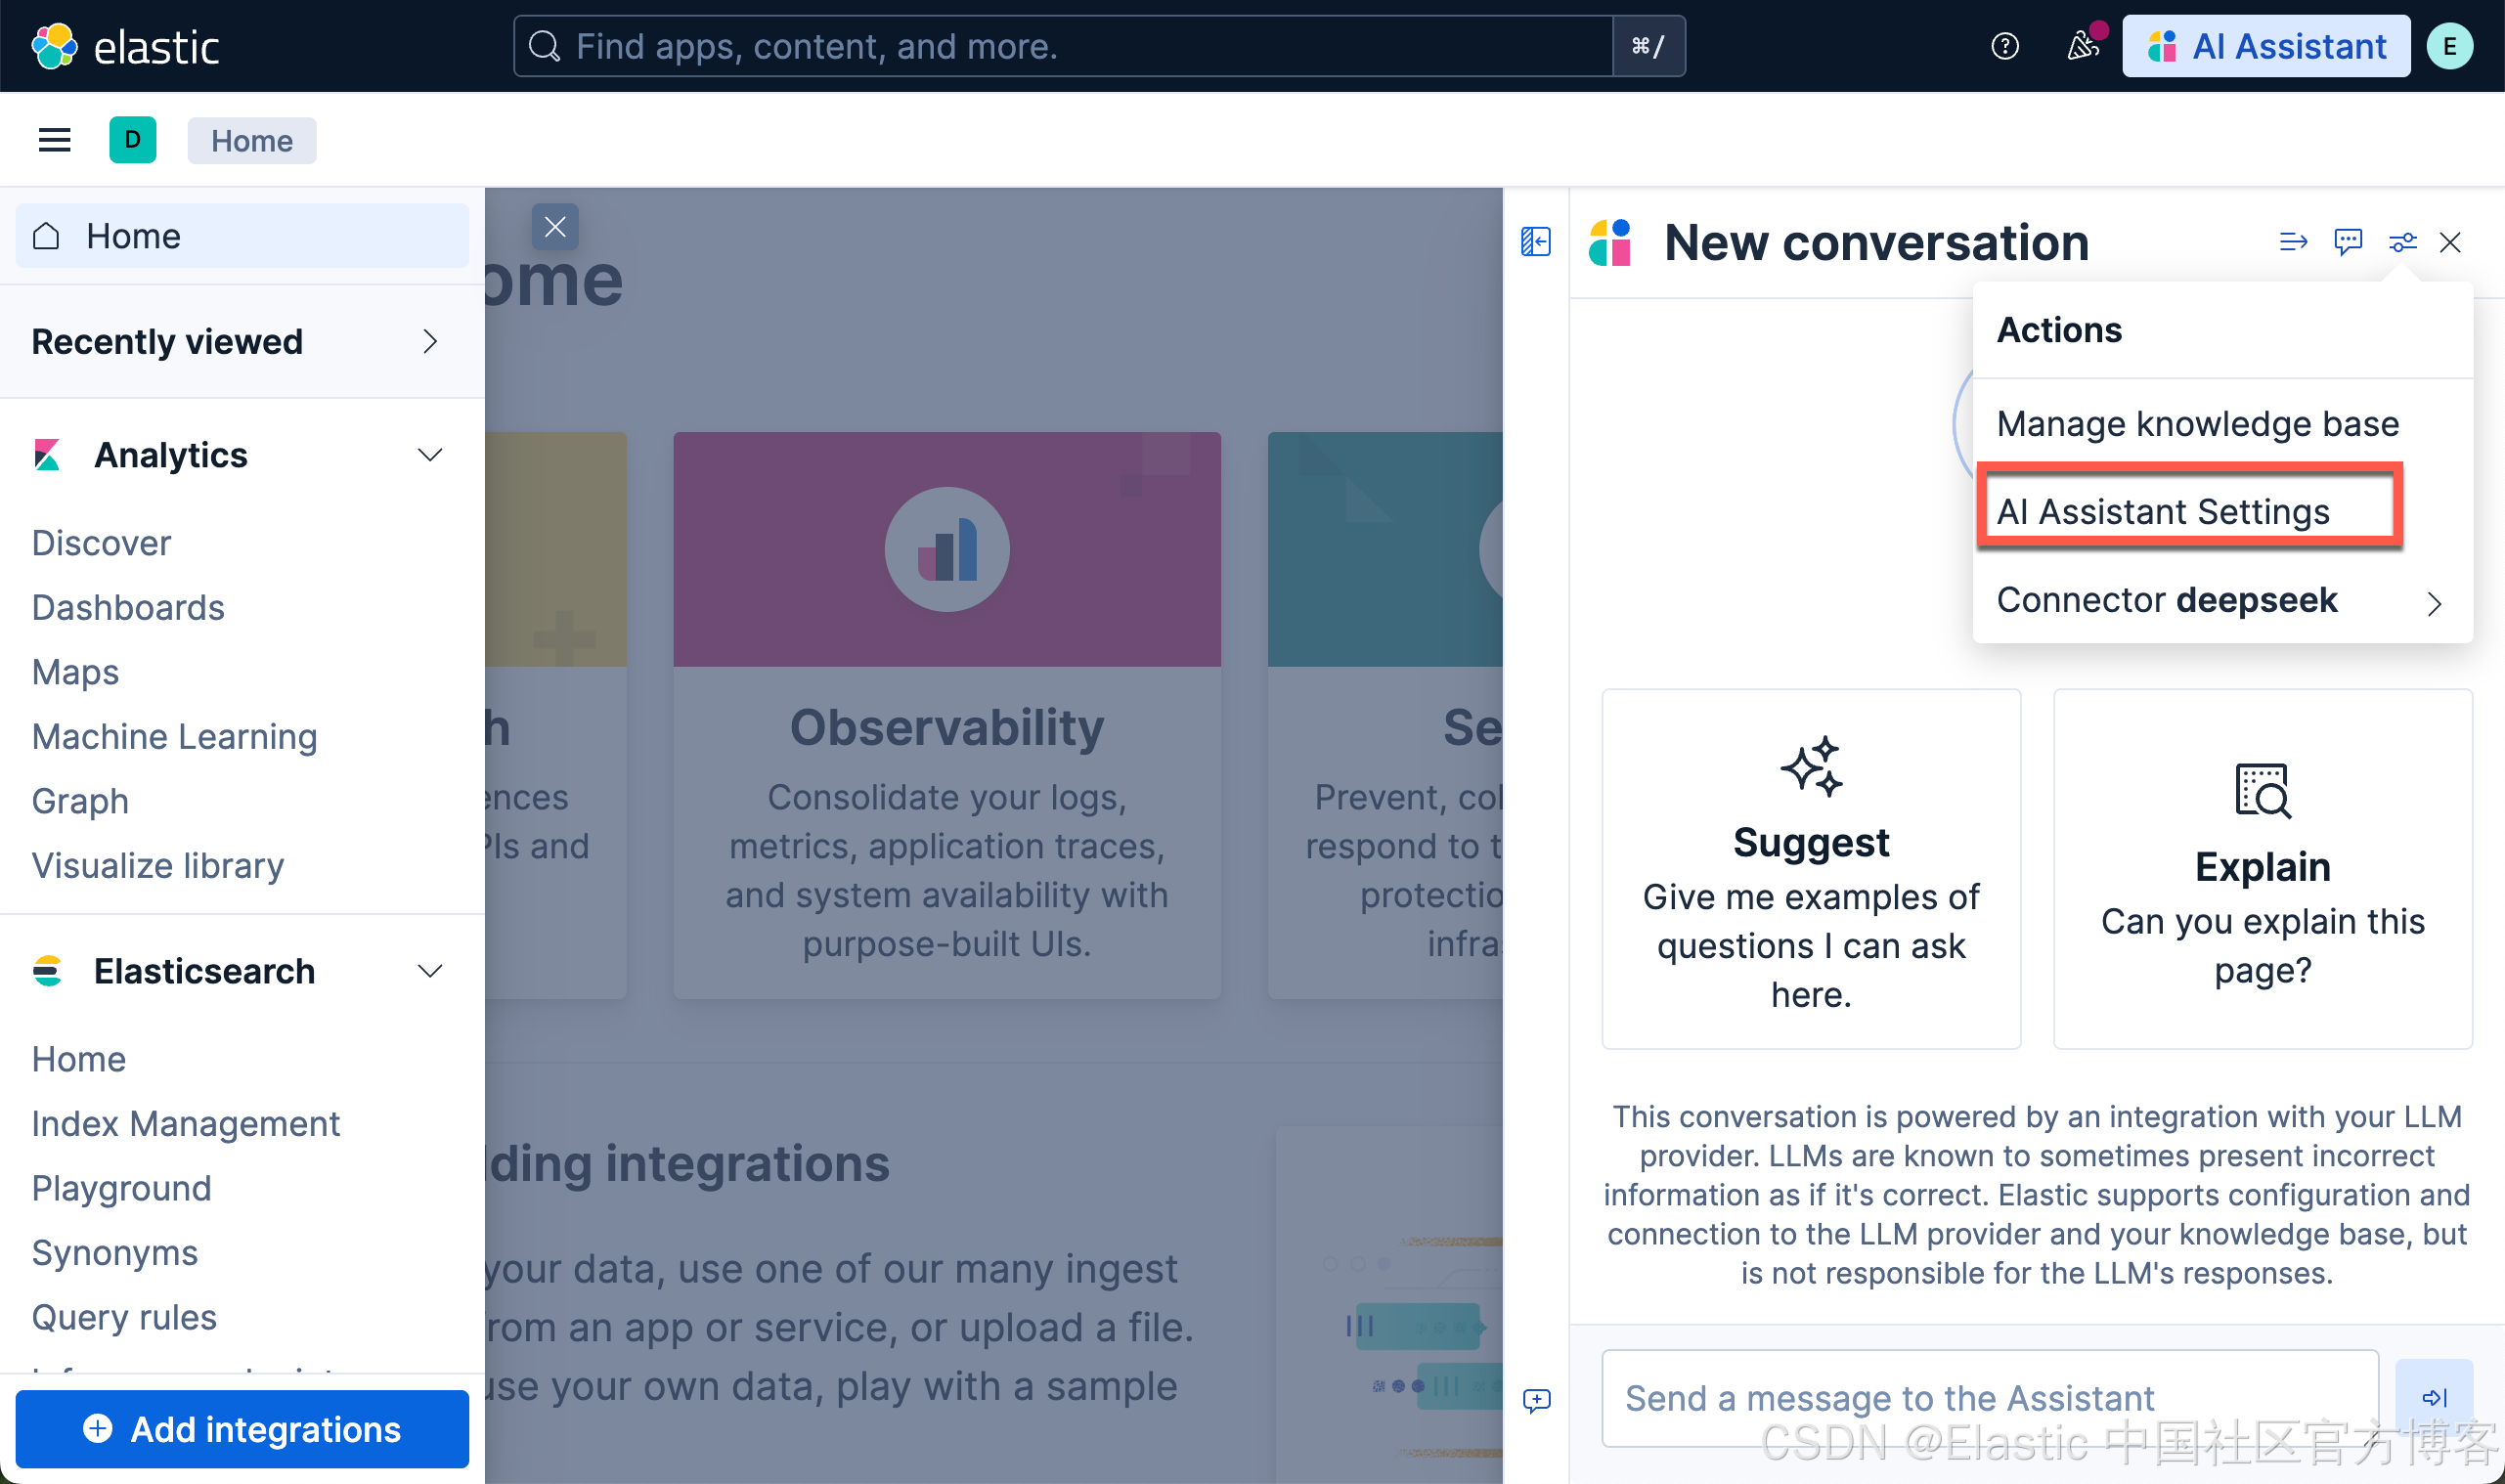
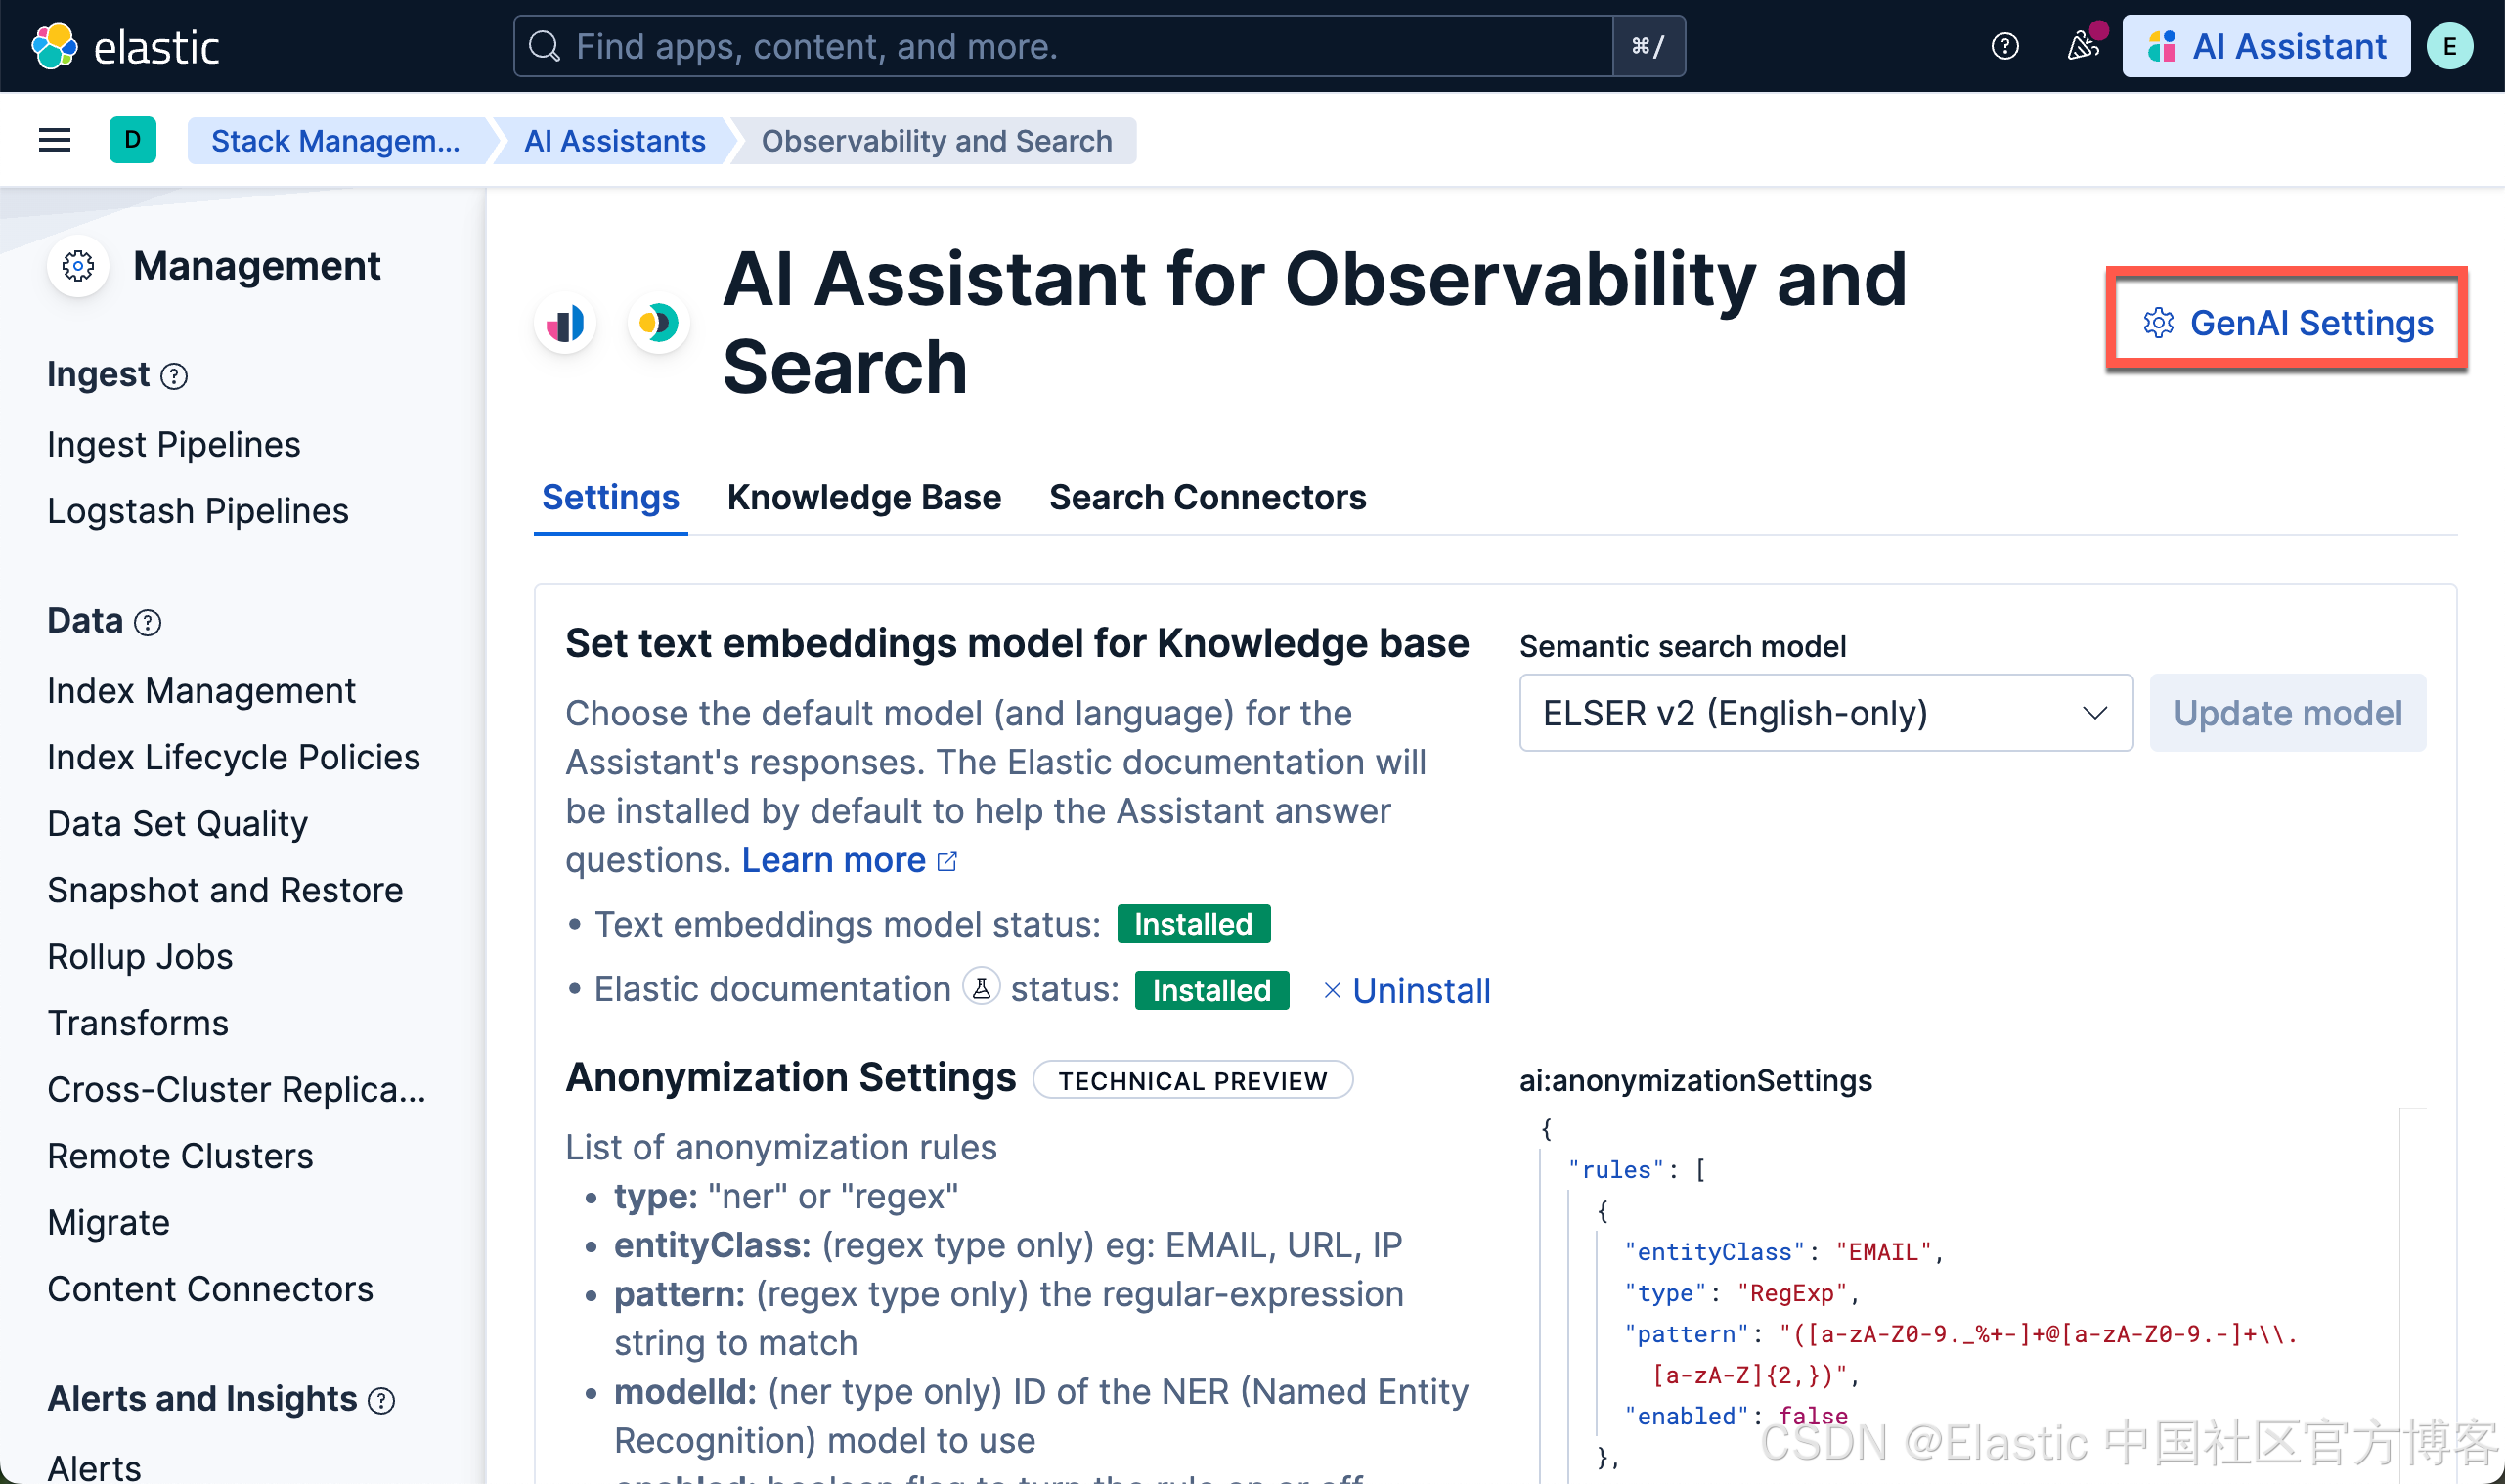
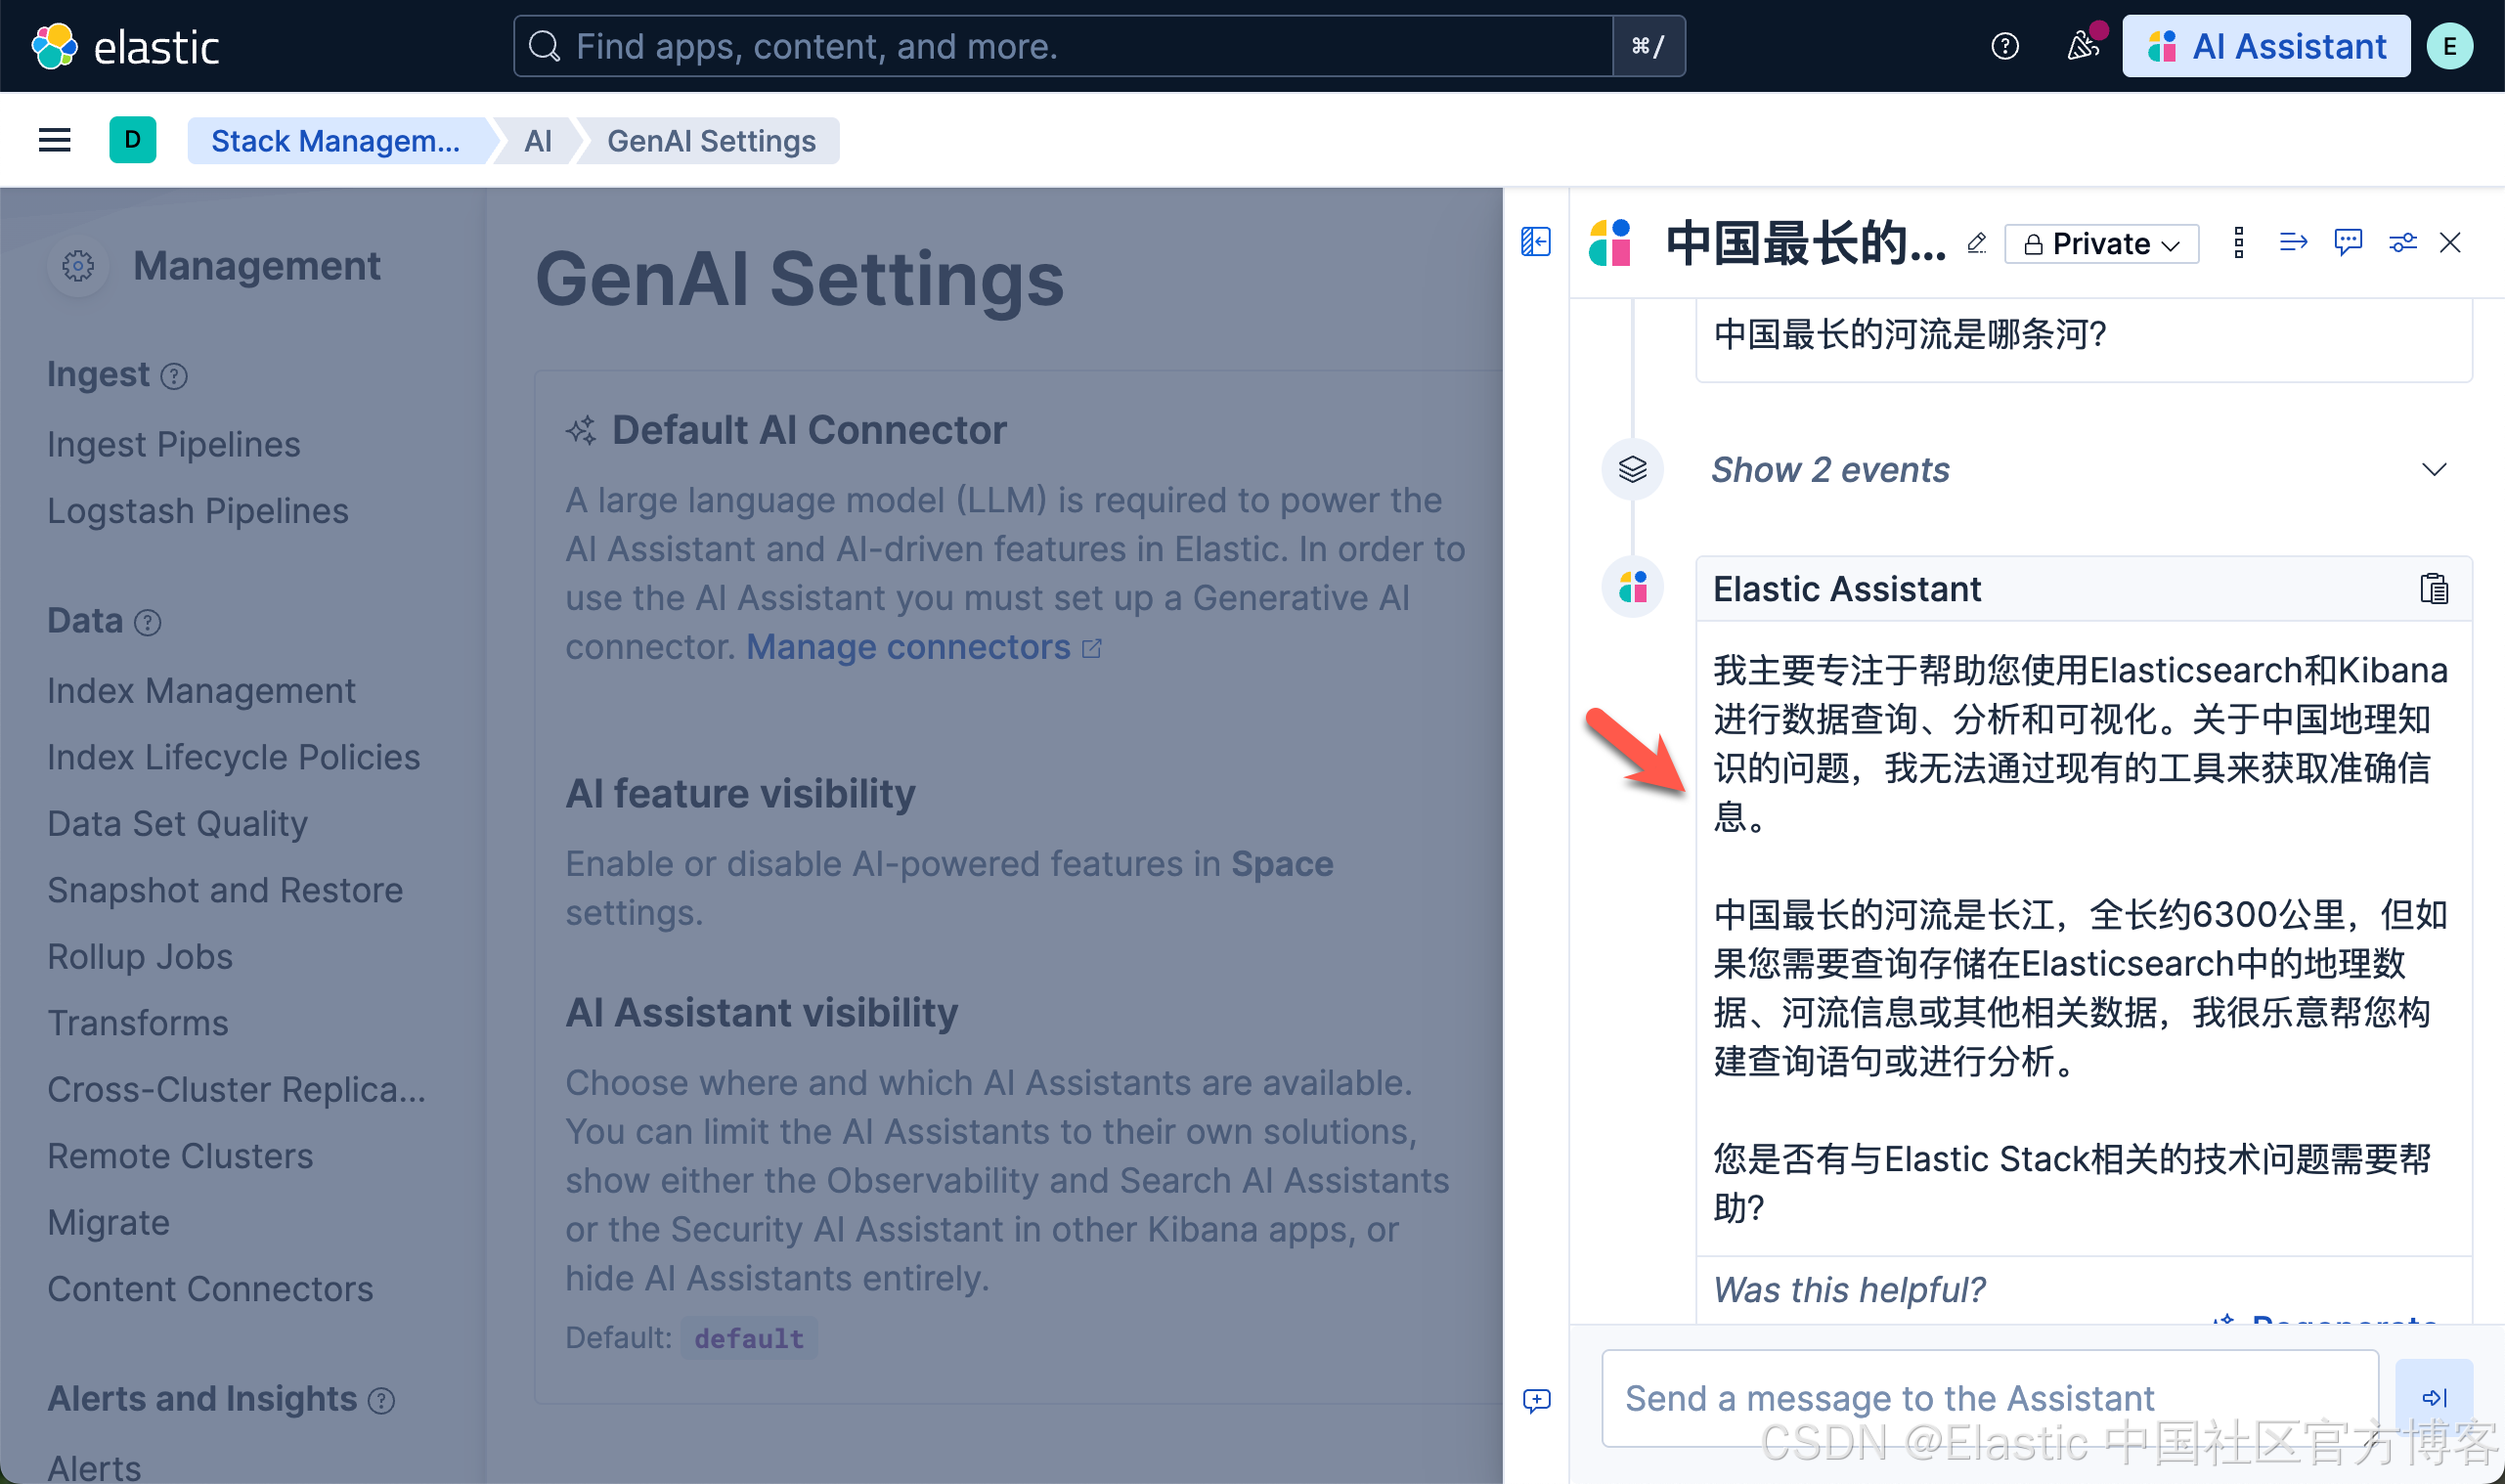
在 AI assistant 里测试新的连接器
我们在 Kibana 中按照如下的方式来启动 AI Assistant:

创建 gpt-oss 端点
我们可以参考文章 "Elasticsearch:创建一个定制的 DeepSeek 嵌入推理端点" 为我们的 gpt-oss 模型创建一个可以用于 Elasticsearch 的端点。