window部署
资源下载
下载docker-compose.yml文件部署
overleaf/docker-compose.yml at main · overleaf/overleaf · GitHub
2.
下载docker desktop软件
下载window版本

3.
安装dockerb desktop软件后下载镜像文件

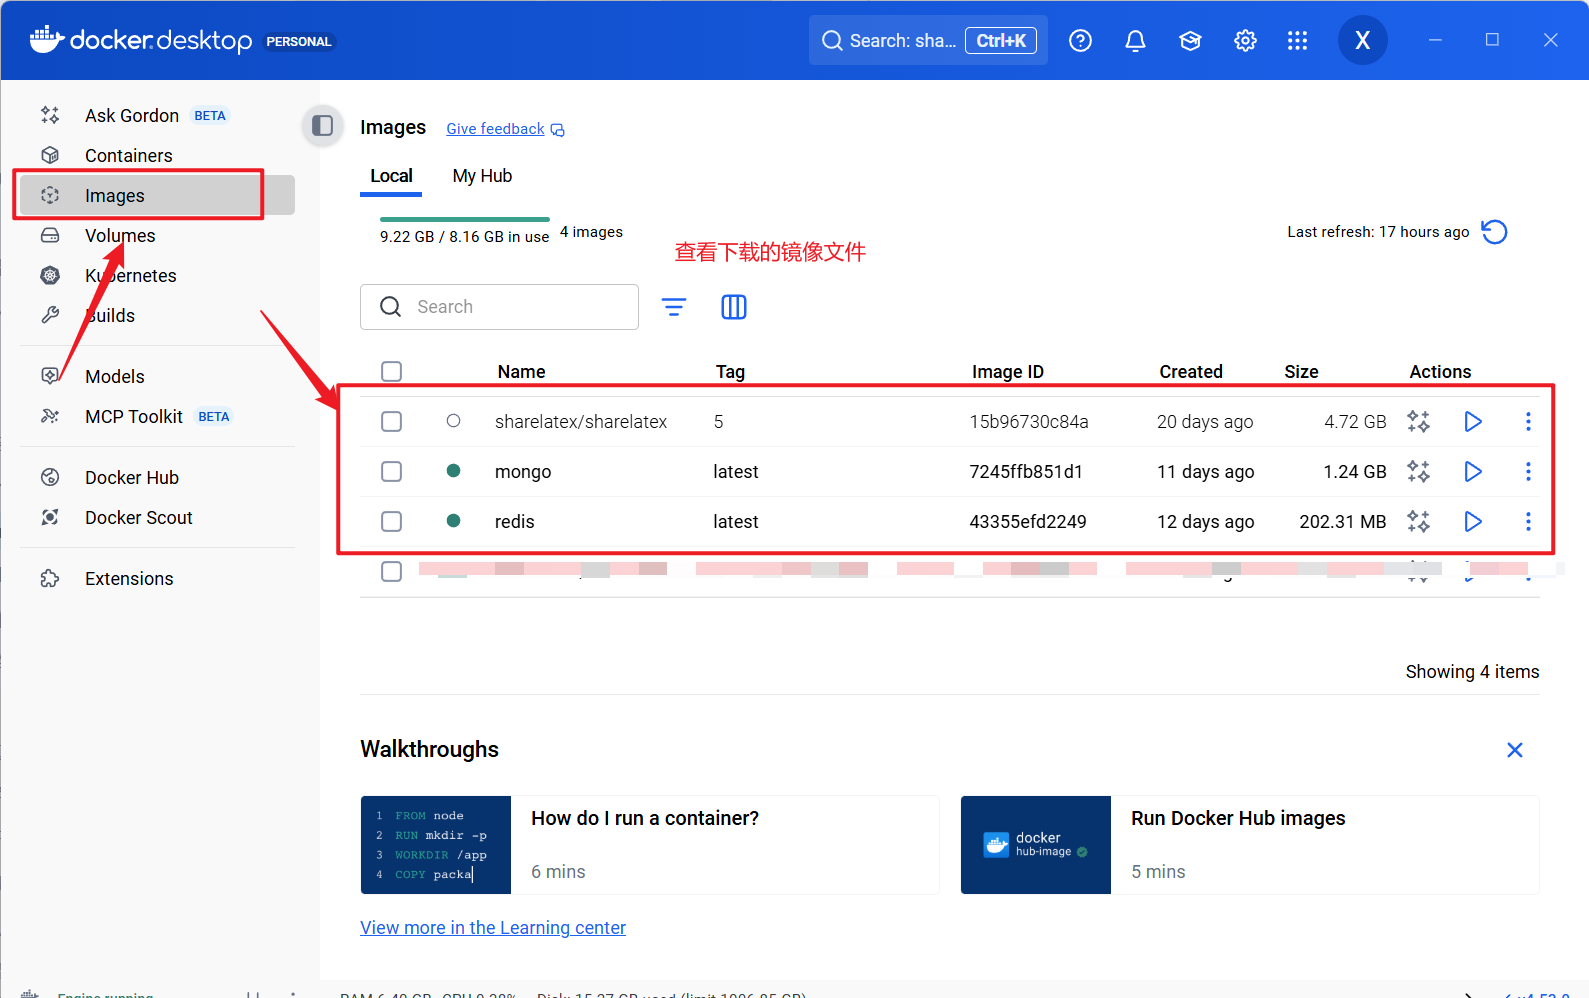
4.
查看下载的镜像文件
overleaf部署
注意:直接运行下载docker-compose.yml,会报version问题,把第一行的version注释即可
编写配置文件docker-compose.yml (总的)
yaml
services:

    # MongoDB 主节点(node1)
    mongo-node1:
        image: mongo:latest  # 版本按需改4.4
        container_name: mongo-node1
        ports:
            - "27017:27017"
        volumes:
            - D:/docker/volumes/mongo/data/node1:/data/db
            - D:/docker/volumes/mongo/logs/node1:/var/log/mongodb
        command: mongod --replSet rs_overleaf --bind_ip 0.0.0.0
        networks:
            - overleaf-network
        restart: always
        healthcheck:
            test: echo 'db.runCommand("ping").ok' | mongosh localhost:27017/test --quiet
            interval: 10s
            timeout: 10s
            retries: 5
            start_period: 30s

    # MongoDB 从节点(node2)
    mongo-node2:
        image: mongo:latest
        container_name: mongo-node2
        ports:
            - "27018:27017"
        volumes:
            - D:/docker/volumes/mongo/data/node2:/data/db
            - D:/docker/volumes/mongo/logs/node2:/var/log/mongodb
        command: mongod --replSet rs_overleaf --bind_ip 0.0.0.0
        networks:
            - overleaf-network
        restart: always
        depends_on:
            - mongo-node1
        healthcheck:
            test: echo 'db.runCommand("ping").ok' | mongosh localhost:27017/test --quiet
            interval: 10s
            timeout: 10s
            retries: 5
start_period: 30s redis:
restart: always
image: redis:latest
container_name: redis
expose:
- 6379
volumes:
- D:/docker/volumes/redis:/data
command: redis-server --appendonly yes
networks:
- overleaf-network
healthcheck:
test: ["CMD", "redis-cli", "ping"]
interval: 10s
timeout: 5s
retries: 5
overleaf:
restart: always
# Server Pro users:
# image: quay.io/overleaf/overleaf-pro
image: sharelatex/sharelatex:5.0-with-texlive-full
# image: sharelatex/sharelatex:5
container_name: overleaf
depends_on:
mongo-node1:
condition: service_healthy
mongo-node2:
condition: service_healthy
redis:
condition: service_started
ports:
- 9500:80
links:
- mongo-node1
- mongo-node2
- redis
volumes:
- D:/docker/volumes/overleaf:/var/lib/overleaf
########################################################################
#### Server Pro: Uncomment the following line to mount the docker ####
#### socket, required for Sibling Containers to work ####
########################################################################
# - /var/run/docker.sock:/var/run/docker.sock
environment:
OVERLEAF_APP_NAME: Overleaf Community Edition
#OVERLEAF_MONGO_URL: mongodb://mongo/overleaf?replicaSet=rs0
OVERLEAF_MONGO_URL: mongodb://mongo-node1:27017,mongo-node2:27017/overleaf?replicaSet=rs_overleaf&w=majority&readPreference=primary
# Same property, unfortunately with different names in
# different locations
OVERLEAF_REDIS_HOST: redis
REDIS_HOST: redis
ENABLED_LINKED_FILE_TYPES: 'url,project_file'
# Enables Thumbnail generation using ImageMagick
ENABLE_CONVERSIONS: 'true'
# Disables email confirmation requirement
EMAIL_CONFIRMATION_DISABLED: 'true'
# temporary fix for LuaLaTex compiles
# see https://github.com/overleaf/overleaf/issues/695
TEXMFVAR: /var/lib/overleaf/tmp/texmf-var
## Set for SSL via nginx-proxy
#VIRTUAL_HOST: 103.112.212.22
# OVERLEAF_SITE_URL: http://overleaf.mydomain.com
OVERLEAF_NAV_TITLE: Our OVERLEAF Instance
# OVERLEAF_HEADER_IMAGE_URL: http://somewhere.com/mylogo.png
OVERLEAF_ADMIN_EMAIL: cccc@qq.com
# OVERLEAF_LEFT_FOOTER: '[{"text": "Powered by <a href=\"https://www.overleaf.com\">Overleaf</a> 2016"},{"text": "Another page I want to link to can be found <a href=\"here\">here</a>"} ]'
# OVERLEAF_RIGHT_FOOTER: '[{"text": "Hello I am on the Right"} ]'
OVERLEAF_EMAIL_FROM_ADDRESS: "cccc@qq.com"
# OVERLEAF_EMAIL_AWS_SES_ACCESS_KEY_ID:
# OVERLEAF_EMAIL_AWS_SES_SECRET_KEY:
OVERLEAF_EMAIL_SMTP_HOST: smtp.qq.com
OVERLEAF_EMAIL_SMTP_PORT: 465
OVERLEAF_EMAIL_SMTP_SECURE: true
OVERLEAF_EMAIL_SMTP_USER: cccc@qq.com
OVERLEAF_EMAIL_SMTP_PASS: xxxxx
OVERLEAF_EMAIL_SMTP_TLS_REJECT_UNAUTH: true
OVERLEAF_EMAIL_SMTP_IGNORE_TLS: false
OVERLEAF_EMAIL_SMTP_NAME: 'My Overleaf 服务'
OVERLEAF_EMAIL_SMTP_LOGGER: true
OVERLEAF_CUSTOM_EMAIL_FOOTER: "This system is run by department 林星"
################
## Server Pro ##
################
# SANDBOXED_COMPILES: 'true'
# SANDBOXED_COMPILES_SIBLING_CONTAINERS: 'true'
# SANDBOXED_COMPILES_HOST_DIR: '/var/overleaf_data/data/compiles'
# SYNCTEX_BIN_HOST_PATH: '/var/overleaf_data/bin/synctex'
# DOCKER_RUNNER: 'false'
## Works with test LDAP server shown at bottom of docker compose
# OVERLEAF_LDAP_URL: 'ldap://ldap:389'
# OVERLEAF_LDAP_SEARCH_BASE: 'ou=people,dc=planetexpress,dc=com'
# OVERLEAF_LDAP_SEARCH_FILTER: '(uid={{username}})'
# OVERLEAF_LDAP_BIND_DN: 'cn=admin,dc=planetexpress,dc=com'
# OVERLEAF_LDAP_BIND_CREDENTIALS: 'GoodNewsEveryone'
# OVERLEAF_LDAP_EMAIL_ATT: 'mail'
# OVERLEAF_LDAP_NAME_ATT: 'cn'
# OVERLEAF_LDAP_LAST_NAME_ATT: 'sn'
# OVERLEAF_LDAP_UPDATE_USER_DETAILS_ON_LOGIN: 'true'
# OVERLEAF_TEMPLATES_USER_ID: "578773160210479700917ee5"
# OVERLEAF_NEW_PROJECT_TEMPLATE_LINKS: '[ {"name":"All Templates","url":"/templates/all"}]'
# OVERLEAF_PROXY_LEARN: "true"
networks:
- overleaf-network
# mongo:
# restart: always
# image: mongo:latest
# container_name: mongo
# expose:
# - 27017
# volumes:
# - D:/docker/volumes/mongo:/data/db
# healthcheck:
# test: echo 'db.stats().ok' | mongo localhost:27017/test --quiet
# interval: 10s
# timeout: 10s
# retries: 5
# command: >
# mongod
# --bind_ip_all
# --replSet rs0
# --keyFile /data/replica.key
# networks:
# - overleaf
# redis:
# restart: always
# image: redis:latest
# container_name: redis
# expose:
# - 6379
# volumes:
# - D:/docker/volumes/redis:/data
# command: redis-server --appendonly yes
# networks:
# - overleaf-network
# healthcheck:
# test: ["CMD", "redis-cli", "ping"]
# interval: 10s
# timeout: 5s
# retries: 5networks:
overleaf-network:
driver: bridge
    # ldap:
    #    restart: always
    #    image: rroemhild/test-openldap
    #    container_name: ldap
    #    expose:
    #        - 389

    # See https://github.com/jwilder/nginx-proxy for documentation on how to configure the nginx-proxy container,
    # and https://github.com/overleaf/overleaf/wiki/HTTPS-reverse-proxy-using-Nginx for an example of some recommended
    # settings. We recommend using a properly managed nginx instance outside of the Overleaf Server Pro setup,
    # but the example here can be used if you'd prefer to run everything with docker-compose

    # nginx-proxy:
    #     image: jwilder/nginx-proxy
    #     container_name: nginx-proxy
    #     ports:
    #       #- "80:80"
    #       - "443:443"
    #     volumes:
    #       - /var/run/docker.sock:/tmp/docker.sock:ro
# - /home/overleaf/tmp:/etc/nginx/certsmongodocker运行配置
  ```yaml
  # MongoDB 主节点(node1)
      mongo-node1:
          image: mongo:latest  # 版本按需改4.4
          container_name: mongo-node1
          ports:
              - "27017:27017"
          volumes:
              - D:/docker/volumes/mongo/data/node1:/data/db
              - D:/docker/volumes/mongo/logs/node1:/var/log/mongodb
          command: mongod --replSet rs_overleaf --bind_ip 0.0.0.0
          networks:
              - overleaf-network
          restart: always
          healthcheck:
              test: echo 'db.runCommand("ping").ok' | mongosh localhost:27017/test --quiet
              interval: 10s
              timeout: 10s
              retries: 5
              start_period: 30s

      # MongoDB 从节点(node2)
      mongo-node2:
          image: mongo:latest
          container_name: mongo-node2
          ports:
              - "27018:27017"
          volumes:
              - D:/docker/volumes/mongo/data/node2:/data/db
              - D:/docker/volumes/mongo/logs/node2:/var/log/mongodb
          command: mongod --replSet rs_overleaf --bind_ip 0.0.0.0
          networks:
              - overleaf-network
          restart: always
          depends_on:
              - mongo-node1
          healthcheck:
              test: echo 'db.runCommand("ping").ok' | mongosh localhost:27017/test --quiet
              interval: 10s
              timeout: 10s
              retries: 5
              start_period: 30s
```-
这里是配置两个mongo节点的副本集,默认两者是同样优先级,mongo-node2依赖于mongo-node1,因为后面要设置mongo-node1为主节点,mongo-node2为从节点
-
command: mongod --replSet rs_overleaf --bind_ip 0.0.0.0
- 这段命令是:在mongo容器创建后,执行此命令,设置副本集replSet rs_overleaf
- --bind_ip 0.0.0.0:允许所有ip访问此节点
-
networks:
- overleaf-network
- 这段代码是:配置节点到同一网络,不然的话会默认各个容器直接独立通信
redis运行配置
  ```yaml
  redis:
          restart: always
          image: redis:latest
          container_name: redis
          expose:
              - 6379
          volumes:
              - D:/docker/volumes/redis:/data
          command: redis-server --appendonly yes
          networks:
              - overleaf-network
          healthcheck:
              test: ["CMD", "redis-cli", "ping"]
              interval: 10s
              timeout: 5s
              retries: 5
```-
networks:
- overleaf-network
- 这段代码是:配置节点到同一网络,不然的话会默认各个容器直接独立通信
overleaf运行配置
  ```yaml
  overleaf:
          restart: always
          # Server Pro users:
          # image: quay.io/overleaf/overleaf-pro
          image: sharelatex/sharelatex:5.0-with-texlive-full
          # image: sharelatex/sharelatex:5
          container_name: overleaf
          depends_on:
              mongo-node1:
                  condition: service_healthy
              mongo-node2:
                  condition: service_healthy
              redis:
                  condition: service_started
          ports:
              - 9500:80
          links:
              - mongo-node1
              - mongo-node2
              - redis
          volumes:
              - D:/docker/volumes/overleaf:/var/lib/overleaf
              ########################################################################
              ####  Server Pro: Uncomment the following line to mount the docker  ####
              ####             socket, required for Sibling Containers to work    ####
              ########################################################################
              # - /var/run/docker.sock:/var/run/docker.sock
          environment:

              OVERLEAF_APP_NAME: Overleaf Community Edition

              #OVERLEAF_MONGO_URL: mongodb://mongo/overleaf?replicaSet=rs0
              OVERLEAF_MONGO_URL: mongodb://mongo-node1:27017,mongo-node2:27017/overleaf?replicaSet=rs_overleaf&w=majority&readPreference=primary

              # Same property, unfortunately with different names in
              # different locations
              OVERLEAF_REDIS_HOST: redis
              REDIS_HOST: redis

              ENABLED_LINKED_FILE_TYPES: 'url,project_file'

              # Enables Thumbnail generation using ImageMagick
              ENABLE_CONVERSIONS: 'true'

              # Disables email confirmation requirement
              EMAIL_CONFIRMATION_DISABLED: 'true'

              # temporary fix for LuaLaTex compiles
              # see https://github.com/overleaf/overleaf/issues/695
              TEXMFVAR: /var/lib/overleaf/tmp/texmf-var

              ## Set for SSL via nginx-proxy
              #VIRTUAL_HOST: 103.112.212.22

              # OVERLEAF_SITE_URL: http://overleaf.mydomain.com
              OVERLEAF_NAV_TITLE: Our OVERLEAF Instance
              # OVERLEAF_HEADER_IMAGE_URL: http://somewhere.com/mylogo.png
              OVERLEAF_ADMIN_EMAIL: ccccc@qq.com

              # OVERLEAF_LEFT_FOOTER: '[{"text": "Powered by <a href=\"https://www.overleaf.com\">Overleaf</a> 2016"},{"text": "Another page I want to link to can be found <a href=\"here\">here</a>"} ]'
              # OVERLEAF_RIGHT_FOOTER: '[{"text": "Hello I am on the Right"} ]'

  			# 需要和OVERLEAF_EMAIL_SMTP_USER保持一致才能发送邮件
              OVERLEAF_EMAIL_FROM_ADDRESS: "ccccc@qq.com"

              # OVERLEAF_EMAIL_AWS_SES_ACCESS_KEY_ID:
              # OVERLEAF_EMAIL_AWS_SES_SECRET_KEY:

              OVERLEAF_EMAIL_SMTP_HOST: smtp.qq.com
              OVERLEAF_EMAIL_SMTP_PORT: 465
              OVERLEAF_EMAIL_SMTP_SECURE: true
              OVERLEAF_EMAIL_SMTP_USER: ccccc@qq.com
              OVERLEAF_EMAIL_SMTP_PASS: xxxxxx
              OVERLEAF_EMAIL_SMTP_TLS_REJECT_UNAUTH: true
              OVERLEAF_EMAIL_SMTP_IGNORE_TLS: false
              OVERLEAF_EMAIL_SMTP_NAME: 'My Overleaf 服务'
              OVERLEAF_EMAIL_SMTP_LOGGER: true
              OVERLEAF_CUSTOM_EMAIL_FOOTER: "This system is run by department 林星"

              ################
              ## Server Pro ##
              ################

              # SANDBOXED_COMPILES: 'true'

              # SANDBOXED_COMPILES_SIBLING_CONTAINERS: 'true'
              # SANDBOXED_COMPILES_HOST_DIR: '/var/overleaf_data/data/compiles'
              # SYNCTEX_BIN_HOST_PATH: '/var/overleaf_data/bin/synctex'

              # DOCKER_RUNNER: 'false'

              ## Works with test LDAP server shown at bottom of docker compose
              # OVERLEAF_LDAP_URL: 'ldap://ldap:389'
              # OVERLEAF_LDAP_SEARCH_BASE: 'ou=people,dc=planetexpress,dc=com'
              # OVERLEAF_LDAP_SEARCH_FILTER: '(uid={{username}})'
              # OVERLEAF_LDAP_BIND_DN: 'cn=admin,dc=planetexpress,dc=com'
              # OVERLEAF_LDAP_BIND_CREDENTIALS: 'GoodNewsEveryone'
              # OVERLEAF_LDAP_EMAIL_ATT: 'mail'
              # OVERLEAF_LDAP_NAME_ATT: 'cn'
              # OVERLEAF_LDAP_LAST_NAME_ATT: 'sn'
              # OVERLEAF_LDAP_UPDATE_USER_DETAILS_ON_LOGIN: 'true'

              # OVERLEAF_TEMPLATES_USER_ID: "578773160210479700917ee5"
              # OVERLEAF_NEW_PROJECT_TEMPLATE_LINKS: '[ {"name":"All Templates","url":"/templates/all"}]'
  ```

                # OVERLEAF_PROXY_LEARN: "true"
            networks:
                - overleaf-network

  ```

```-
将所有的sharelatex,全部替换为overleaf,大小写和原来的sharelatex保持一致,(原因:sharelatex版权已经全部归overleaf,对应配置文件也全改成了overleaf,所以要替换)
-
mongodb的配置:OVERLEAF_MONGO_URL: mongodb://mongo-node1:27017,mongo-node2:27017/overleaf?replicaSet=rs_overleaf&w=majority&readPreference=primary
- 因为sharelatex要求副本集群部署,所以必须要至少配置两个节点,如果sharelatex是4.xx版本好像可以配置mongo为单副本集也可以用
- mongo-node1:27017,mongo-node2:27017,端口号一致,是因为docker容器内部访问,通过名称和默认端口号就可以访问,而mongo-node1:27017,mongo-node2:27018是对外访问端口(通过浏览器之类的应用访问)
-
邮箱配置
- OVERLEAF_EMAIL_SMTP_PORT: 465
OVERLEAF_EMAIL_SMTP_SECURE: true - 465端口号是SSL加密协议,OVERLEAF_EMAIL_SMTP_SECURE必须为true (比较旧的加密协议)
- 587端口号是TSL加密协议,OVERLEAF_EMAIL_SMTP_SECURE必须为false (比较新的协议)
- 本人尝试了587端口号,发送邮件后不能被接受,故选择了更通用的465端口号
- OVERLEAF_EMAIL_SMTP_PORT: 465
-
networks:
- overleaf-network
- 这段代码是:配置节点到同一网络,不然的话会默认各个容器直接独立通信
网络设置
  ```yaml
  networks:
      overleaf-network:
          driver: bridge

```- 配置服务的公共网络,不然无法进行内容通信连接
overleaf运行
运行docker-compose.yml文件,启动mongo,redis,overleaf文件
  ```bash
  # 指定项目名为 overleaf-production,不在当前目录,则docker-compose.yml替换为:自己的路径/docker-compose.yml
  docker-compose -p overleaf-production -f docker-compose.yml up -d

  # 简化写法(如果就在当前目录)
  docker-compose -p overleaf-production up -d
```-
这个命令会启动以上docker-compose.yml文件中配置的3个文件
-
暂停,关闭,删除可以通过docker desktop软件管理
进入mongo容器中检查mongo是否成功
-
-
mongosh:进入数据库shell
-
show dbs:查看数据库
-
配置mongo两个节点为主副关系(若主副节点已经选择则跳过)
-
(一般是节点比较多自动会选择主副节点,但是实际可能会选择失败)进入的mongo节点(任意一个节点)的exec中,执行下面命令可以配置主副节点
bashmongosh --eval " cfg = rs.conf(); cfg.members[0].priority = 2; # 节点1优先级更高 cfg.members[1].priority = 1; # 节点2优先级较低 rs.reconfig(cfg); "-
执行成功会返回如下结果
bash{ ok: 1, '$clusterTime': { clusterTime: Timestamp({ t: 1764561551, i: 1 }), signature: { hash: Binary.createFromBase64('AAAAAAAAAAAAAAAAAAAAAAAAAAA=', 0), keyId: Long('0') } }, operationTime: Timestamp({ t: 1764561551, i: 1 }) } -
分别在不同的节点中验证是否正确
bashmongosh --eval " db.isMaster().ismaster ? '✓ 我是主节点 (PRIMARY)' : '✗ 我是从节点 (SECONDARY)' "
-
overleaf启动连接mongo问题(MongoTransactionError: Read preference in a transaction must be primary, not: primaryPreferred)
-
-
primaryPreferred: 优先从主节点读取,但允许从从节点读取 - 事务要求: MongoDB 事务必须在主节点上执行
- 冲突: 事务中不能使用非主节点的读取偏好
主要修改:
- 从连接字符串中移除
&readPreference=primaryPreferred - 或者改为
&readPreference=primary - 重启 Overleaf 服务
-
重启overleaf
-
在docker desktop中,删除所以的容器
-
重新运行脚本(c重复第一步骤)
bash# 指定项目名为 overleaf-production,不在当前目录,则docker-compose.yml替换为:自己的路径/docker-compose.yml docker-compose -p overleaf-production -f docker-compose.yml up -d # 简化写法(如果就在当前目录) docker-compose -p overleaf-production up -d
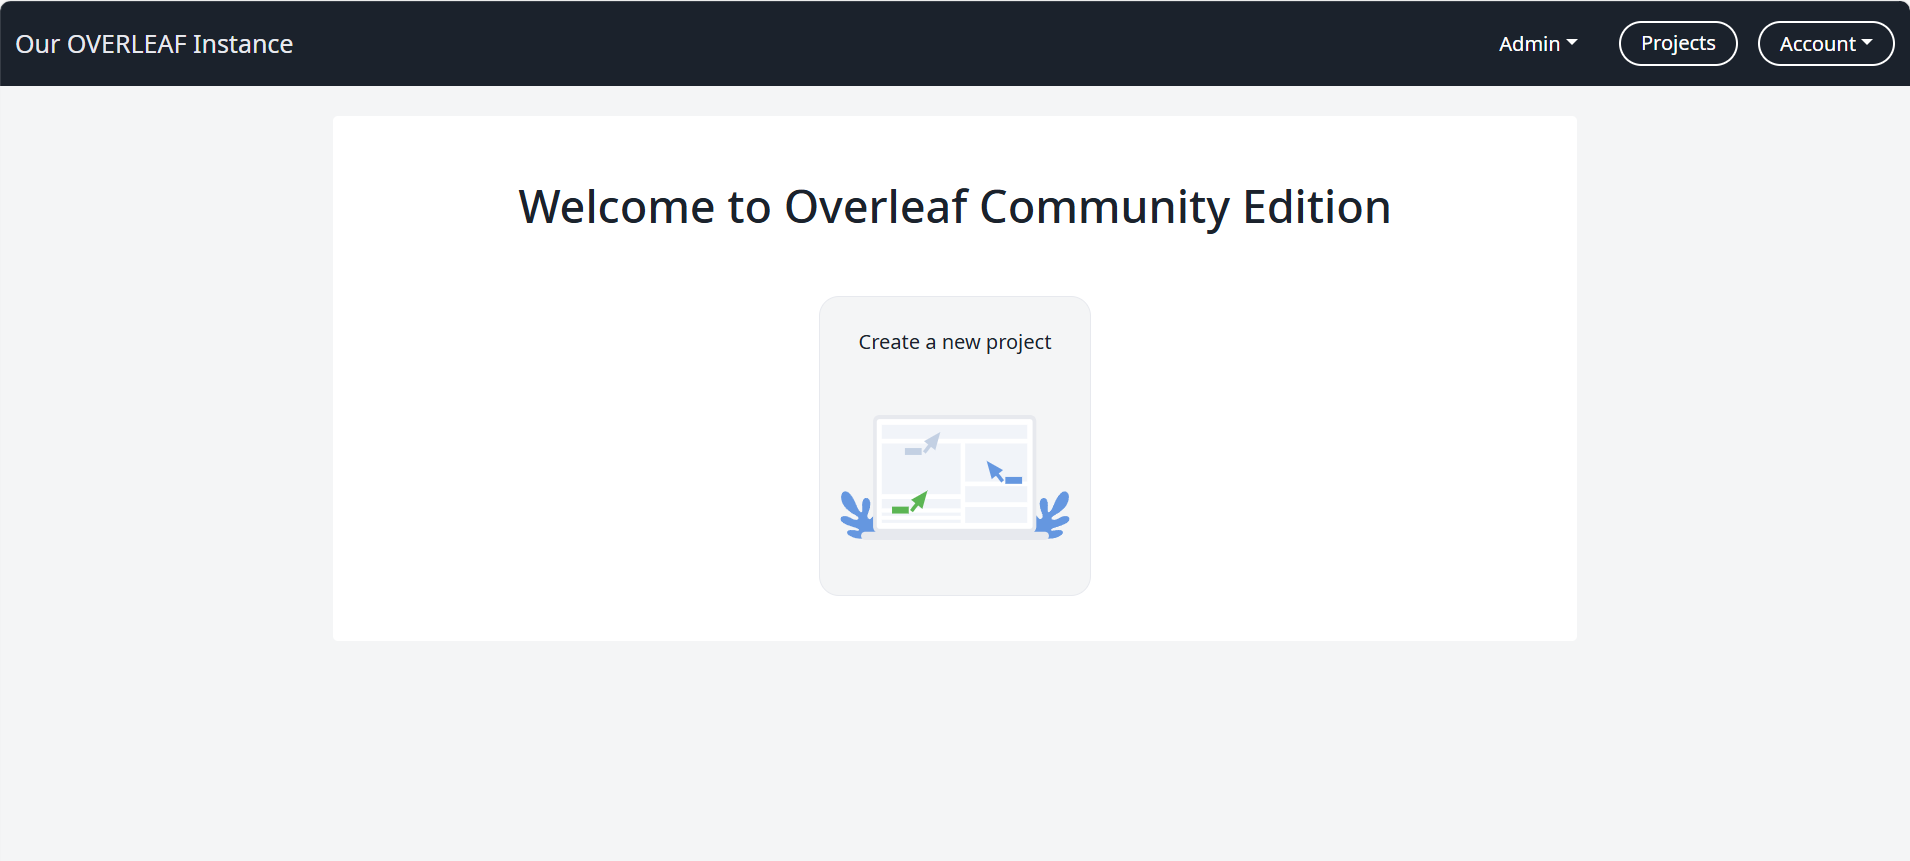
访问验证&管理员账号
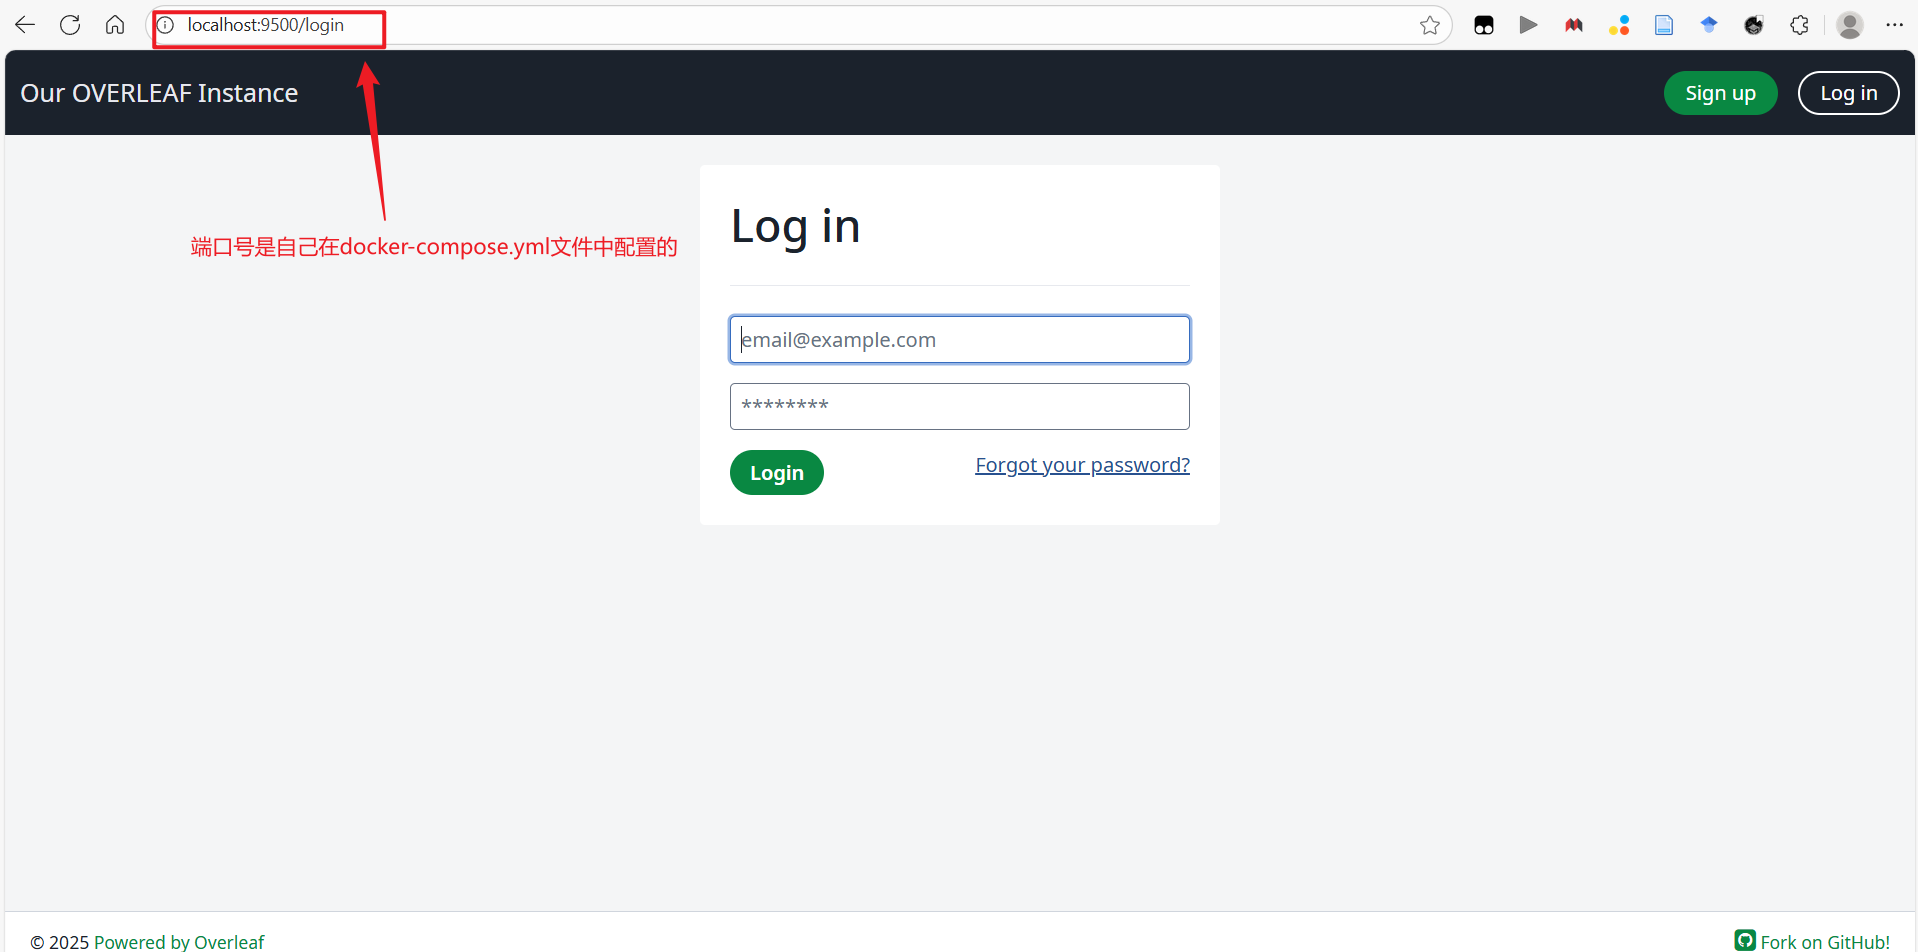
-
在浏览器输入:ip:端口号,回车访问
-
初始化管理员账号
-
进入overleaf的容器(sharelatex镜像启动的容器)
-
执行下面命令创建管理员账号
bashgrunt user:create-admin --email="admin@example.com" --password="Admin@123456"
-
-
浏览器输入邮箱密码,即可登录
overleaf更新texlive
官网链接:toolkit/doc/ce-upgrading-texlive.md at master · overleaf/toolkit · GitHub
检查tlmgr&更新
bash
# tlmgr --version
tlmgr revision 59291 (2021-05-21 05:14:40 +0200)
tlmgr using installation: /usr/local/texlive/2021
TeX Live (https://tug.org/texlive) version 2021

// 更新tlmgr命令
# tlmgr update --self
下载全量texlive
bash
# tlmgr install scheme-full查看tlmgr命令帮助
bash
# tlmgr help注意: tlmgr为texlive的命令,没有的话,需要按照texlive才能用