文章目录
一、节点说明
| IP | 主机名 | 软件 |
|---|---|---|
| 192.168.10.102 | node02 | jdk,clickhouse |
| 192.168.10.103 | node03 | jdk,clickhouse |
| 192.168.10.104 | node04 | jdk,clickhouse |
jdk安装在此不做介绍,参考我的此篇文章:Linux软件安装 ------ JDK安装
二、软件下载
本文使用:
clickhouse-client-24.12.1.1614 --- ClickHouse 命令行客户端工具;
clickhouse-common-static-24.12.1.1614 --- ClickHouse 核心共享库和二进制文件;
clickhouse-common-static-dbg-24.12.1.1614 --- 调试符号包;
clickhouse-server-24.12.1.1614 --- ClickHouse 服务器主程序。
1、tar安装包下载
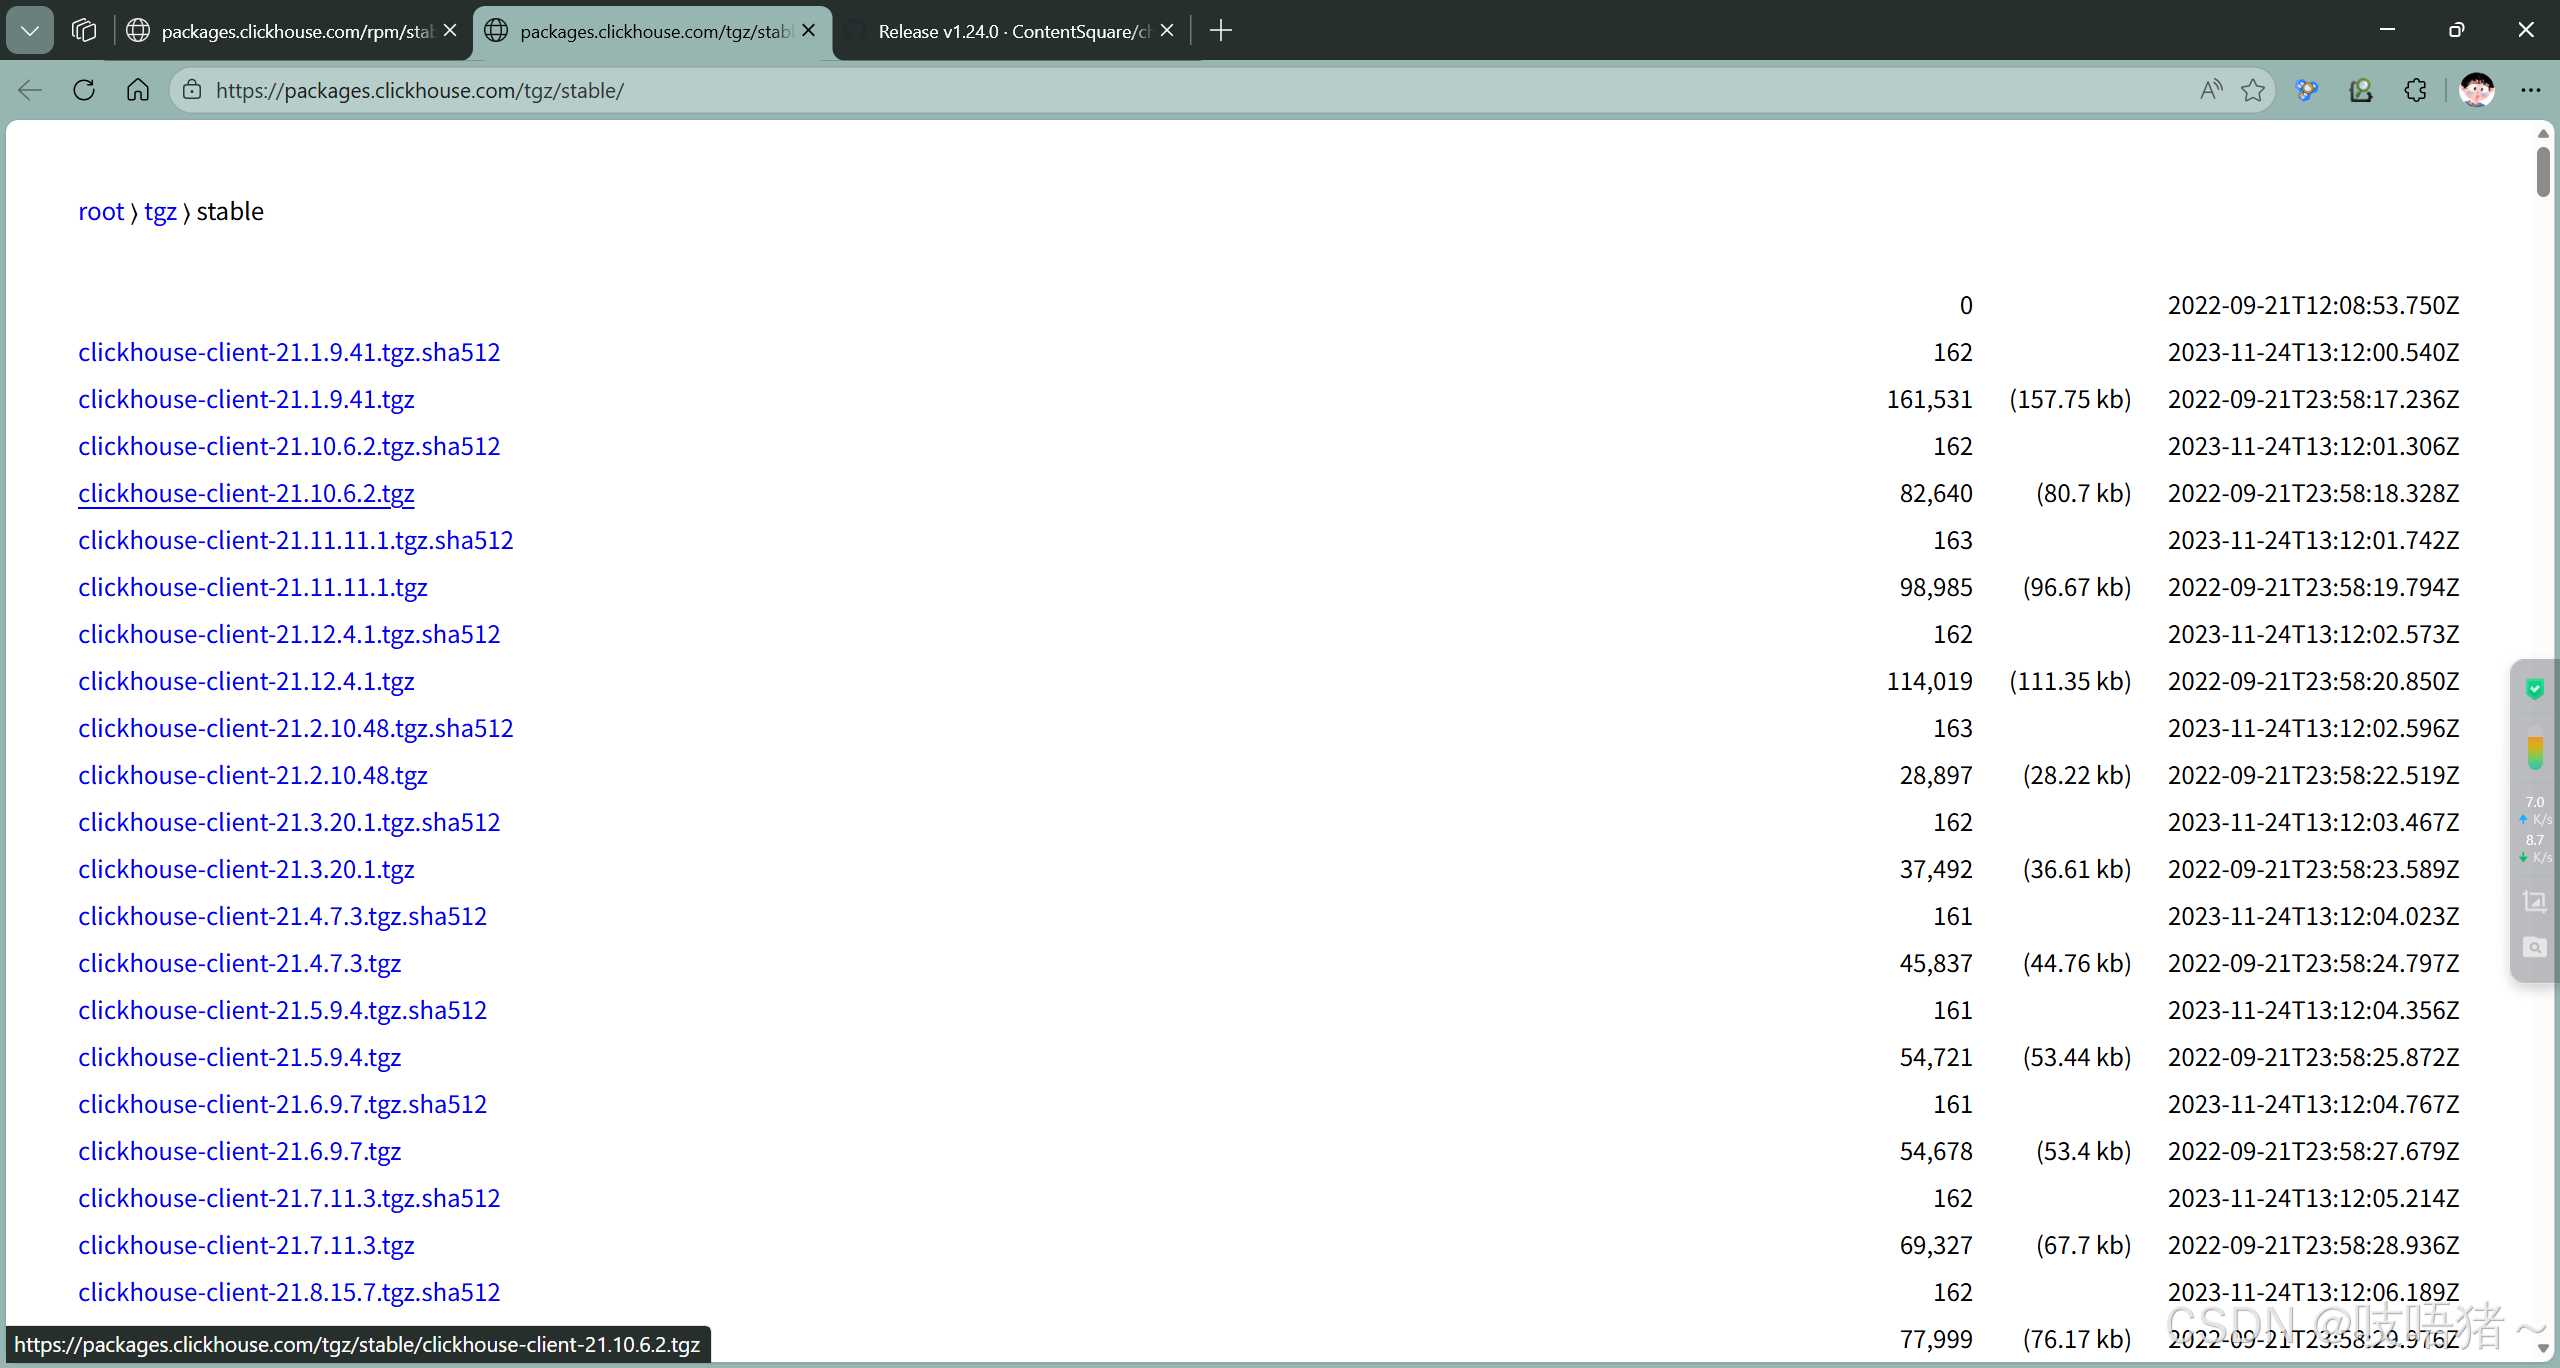
下载地址:https://packages.clickhouse.com/tgz/stable/
2、rpm安装包下载
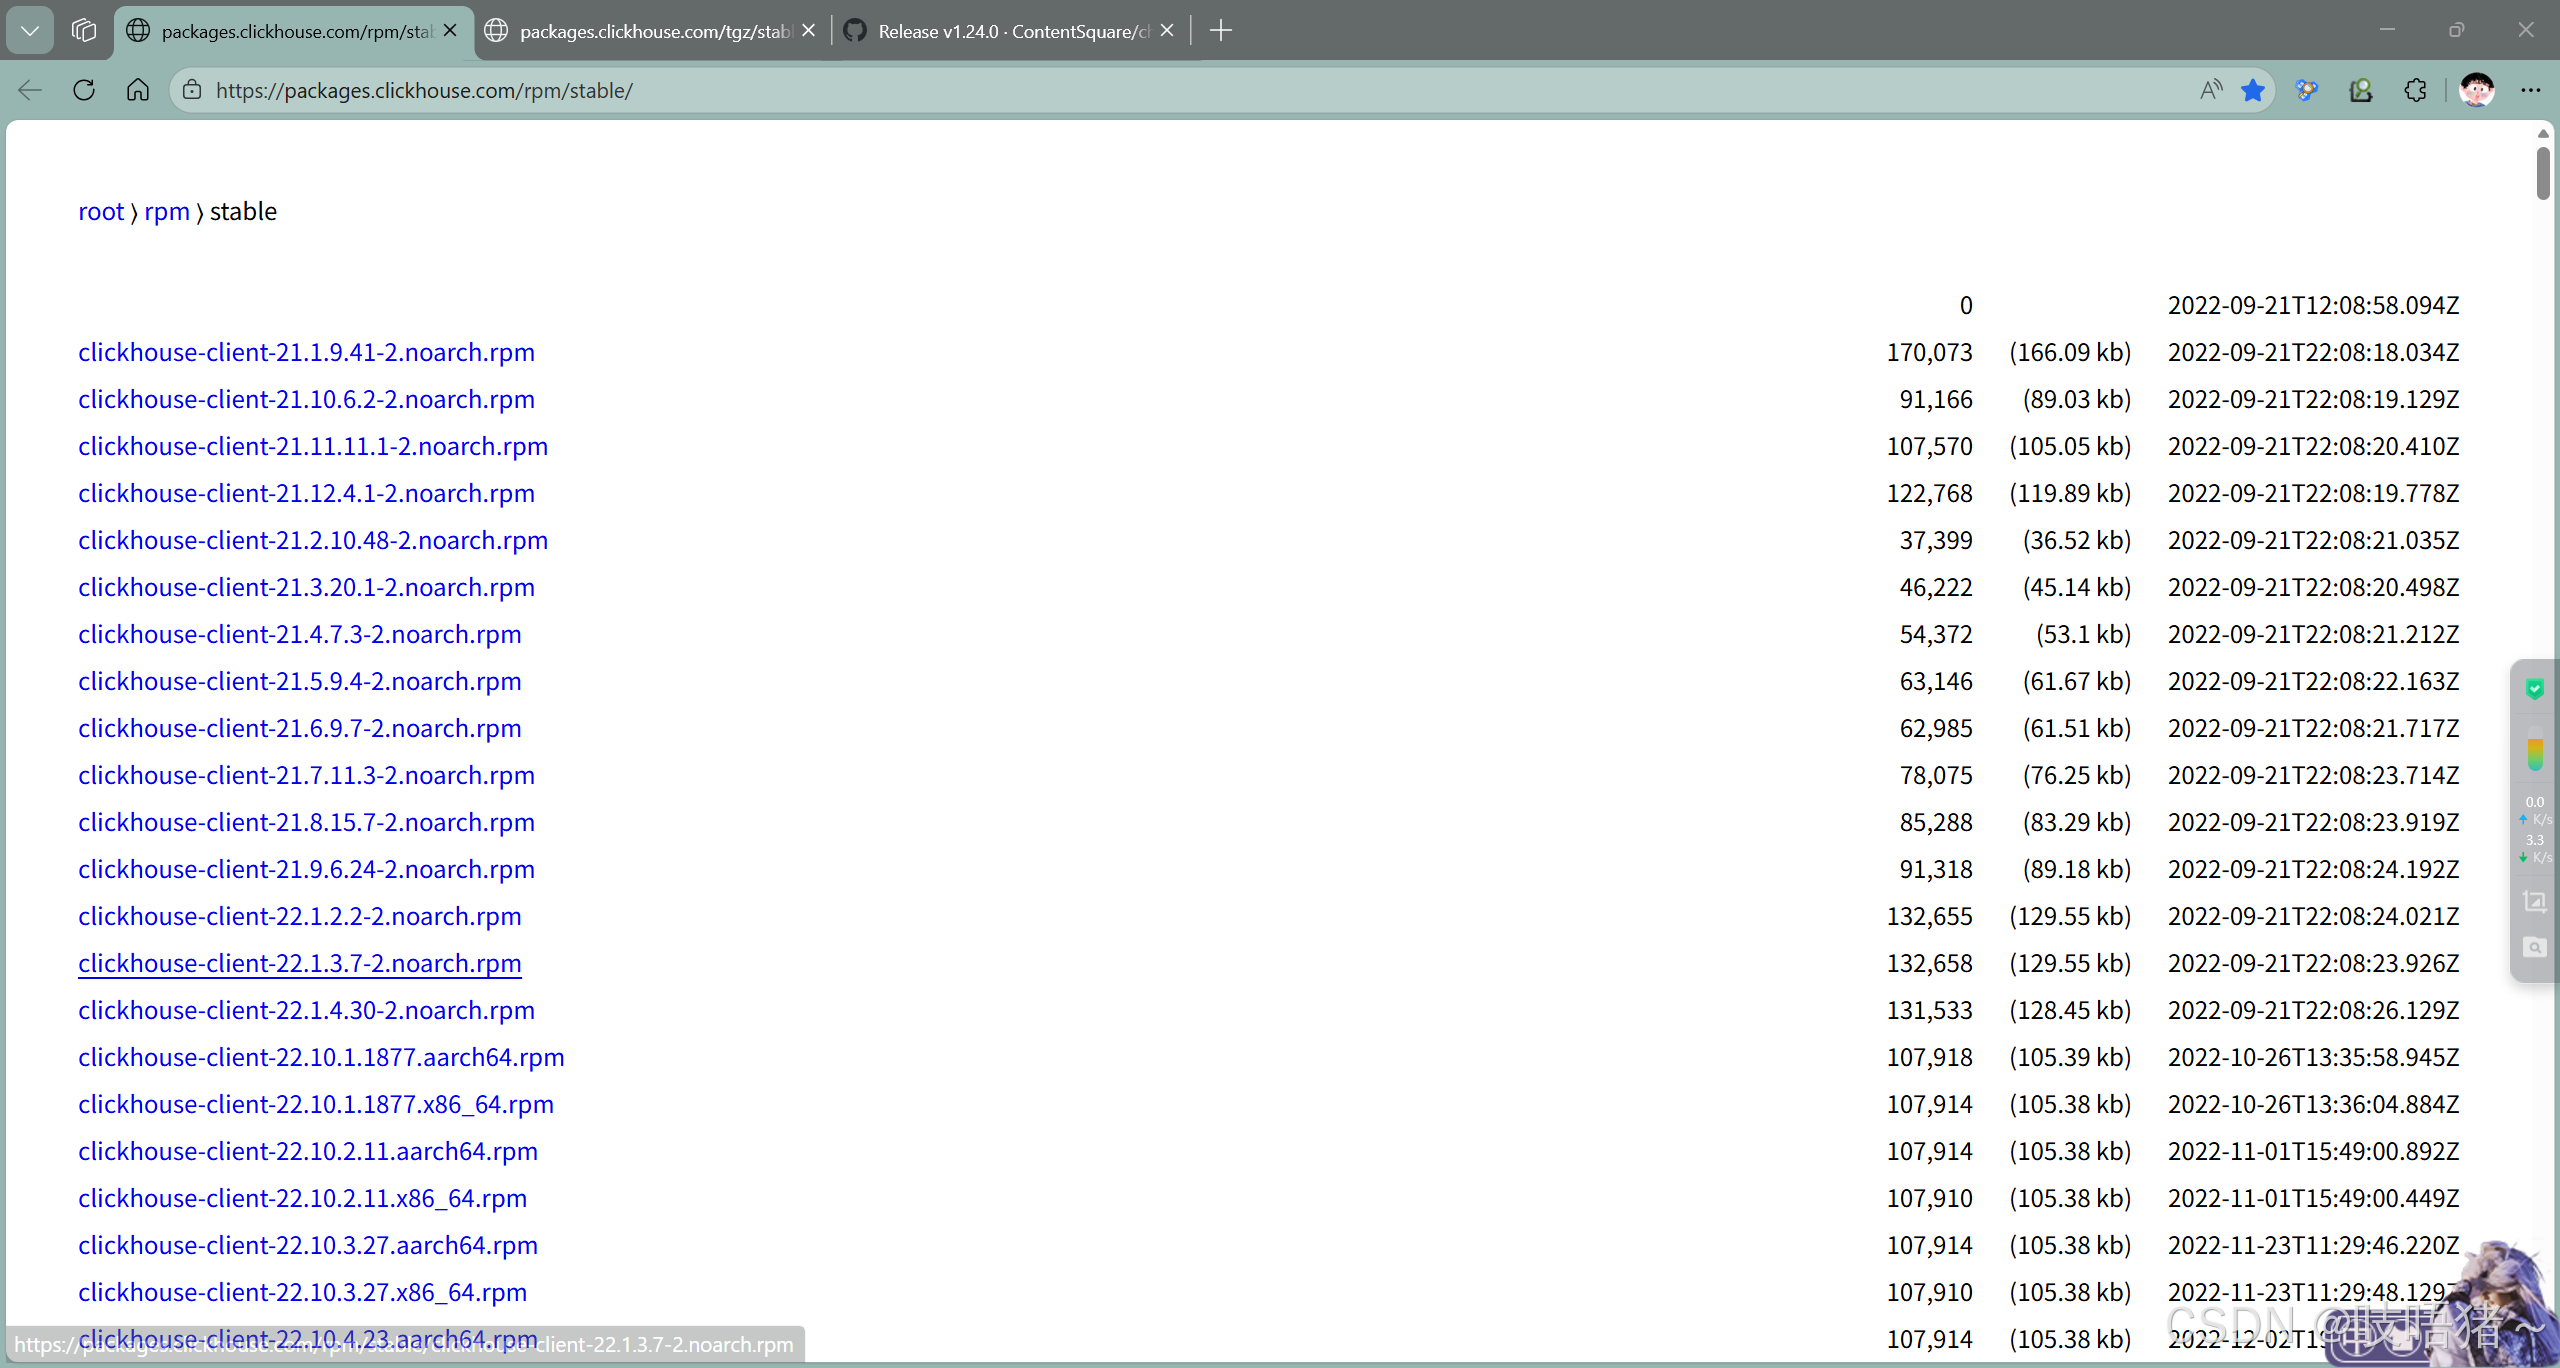
下载地址:https://packages.clickhouse.com/rpm/stable/
三、前置准备
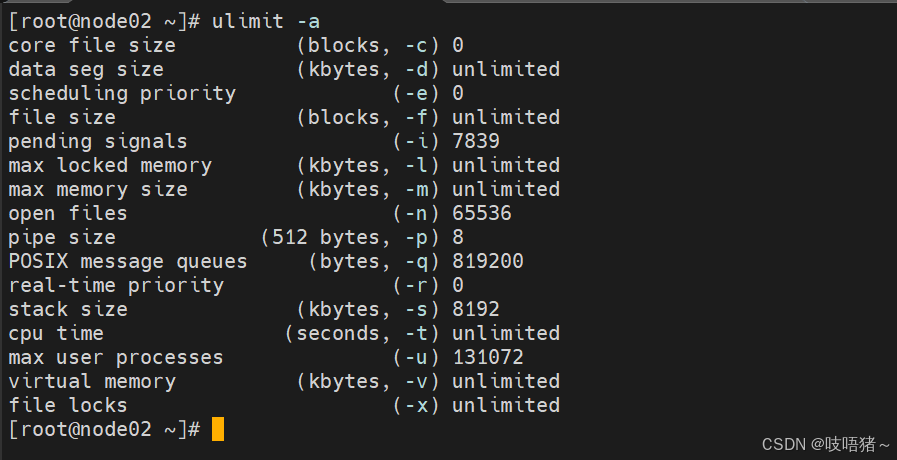
1、CentOS取消打开文件数限制
shell
# 查看限制
ulimit -a

vim /etc/security/limits.conf
# 添加以下内容
* soft nofile 65536
* hard nofile 65536
* soft nproc  131072
* hard nproc  131072

vim /etc/security/limits.d/20-nproc.conf
# 添加以下内容
* soft nofile 65536
* hard nofile 65536
* soft nproc  131072
* hard nproc  131072

# 重新登录用户再次查看
ulimit -a
第一列:用户; *表示所有用户,正常格式:用户@组,如mysql@mysql;
第二列:soft:软限制; hard:硬限制;
第三列:nofile:打开文件数; nproc:打开进程数;
修改用户配置,退出用户重新登录即可生效
2、CentOS取消SELINUX
SELinux(Security-Enhanced Linux) 是美国国家安全局(NSA)对于强制访问控制的实现
shell
# 查看是否开启
getenforce

# 临时禁用
setenforce 0

# 永久禁用
vim /etc/selinux/config
SELINUX=disabled
注意:内核级别的配置需要重启虚拟机才能生效,但生产环境一般不支持可设置临时配置,本次有效,下次重启时,配置文件生效


四、安装
1、tar安装
请按下面顺序安装:
clickhouse-common-static
clickhouse-common-static-dbg
clickhouse-server:需要设置密码,最好从文本粘贴进去,也可以直接回车不设密码
clickhouse-client
shell
tar -zxvf clickhouse-common-static-24.12.1.1614-amd64.tgz
./clickhouse-common-static-24.12.1.1614/install/doinst.sh

tar -zxvf clickhouse-common-static-dbg-24.12.1.1614-amd64.tgz
./clickhouse-common-static-dbg-24.12.1.1614/install/doinst.sh

tar -zxvf clickhouse-server-24.12.1.1614-amd64.tgz
./clickhouse-server-24.12.1.1614/install/doinst.sh
# 需要设密码的话最好从文本粘贴,不需要就直接回车

tar -zxvf clickhouse-client-24.12.1.1614-amd64.tgz
./clickhouse-client-24.12.1.1614/install/doinst.sh
2、rpm安装
准备好安装包,放入一个空的文件夹,确保文件夹里只有这四个安装包

shell
# 只需执行这个命令,就会自动安装这个文件夹下的rpm包
rpm -ivh *.rpm --nodeps --force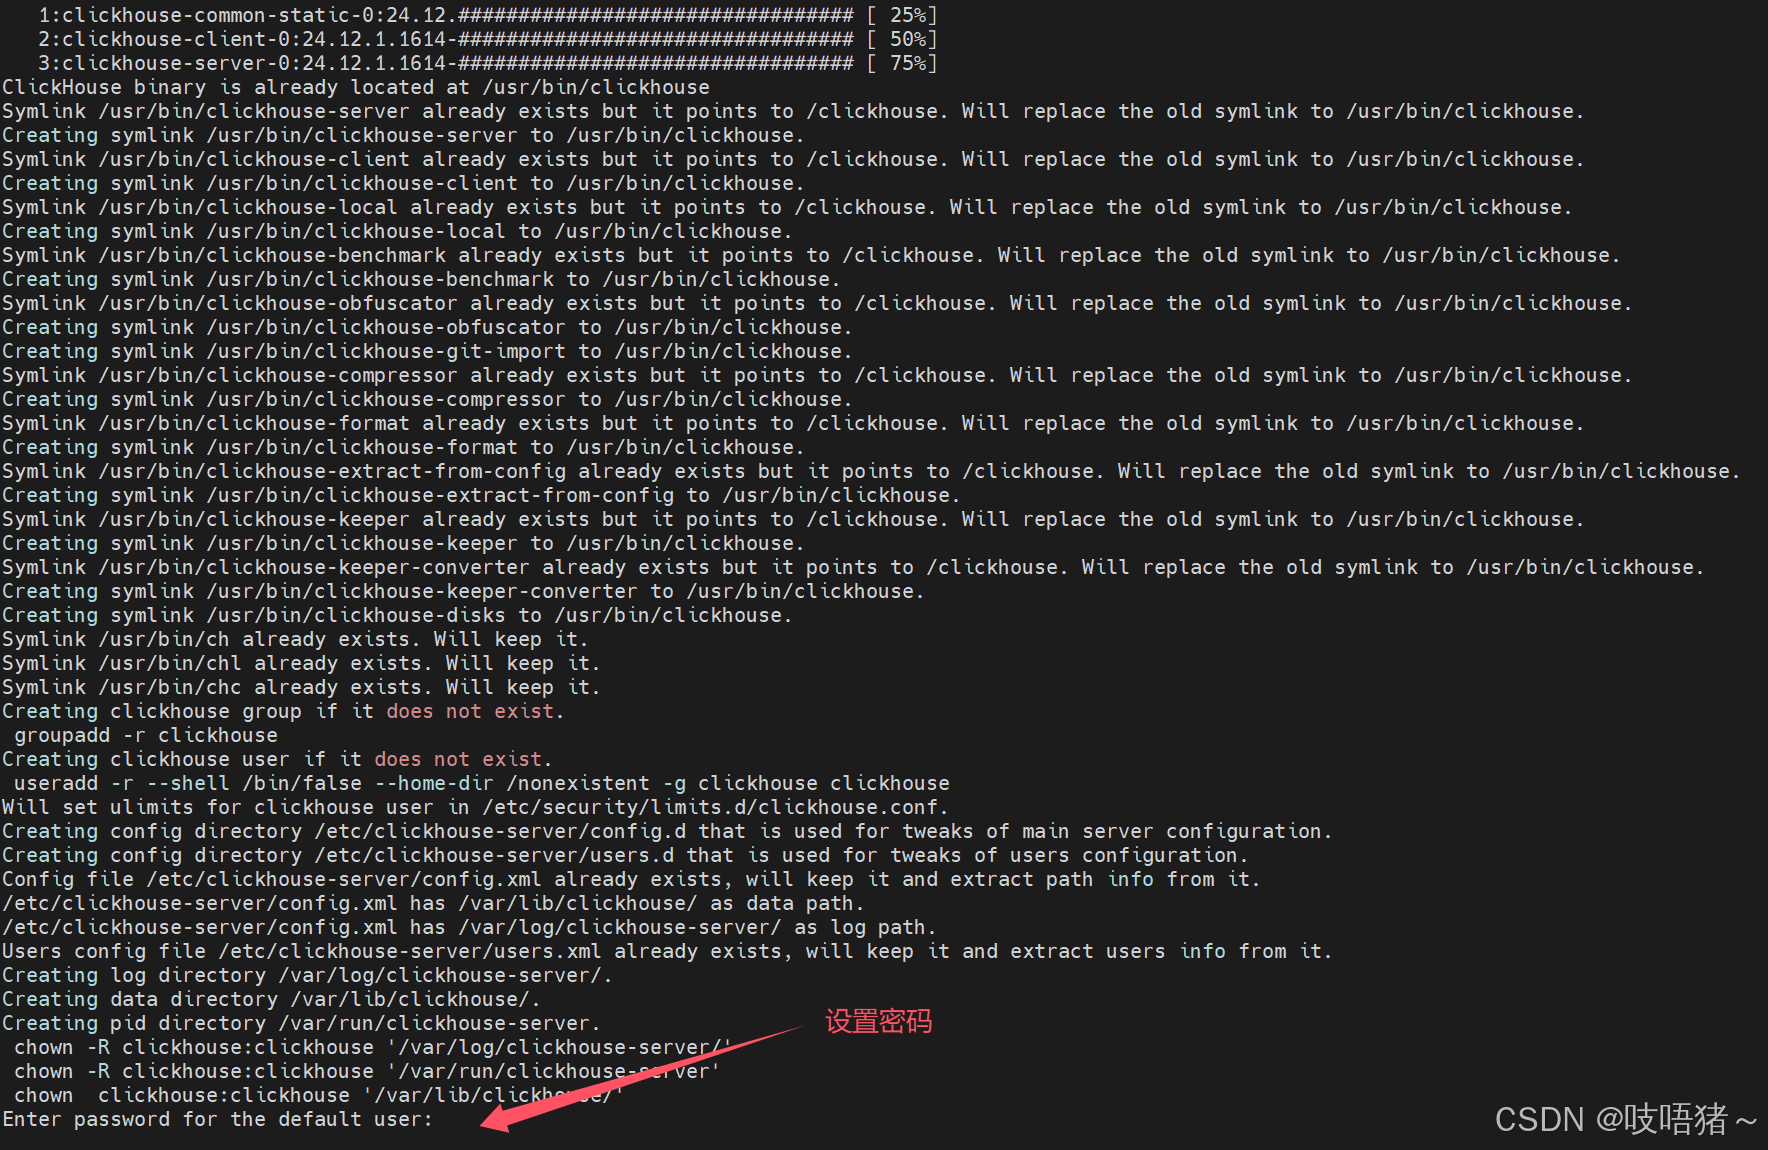
五、配置clickhouse
shell
# 创建clickhouse数据,日志目录
mkdir -p /opt/module/clickhouse/data
mkdir -p /opt/module/clickhouse/logs

# 需要clickhouse用户
chown -R clickhouse:clickhouse /opt/module/clickhouse/
xml
vim /etc/clickhouse-server/config.xml

<!-- 日志级别: trace, debug, information, warning, error -->
<level>information</level>
<log>/opt/module/clickhouse/logs/clickhouse-server.log</log>
<errorlog>/opt/module/clickhouse/logs/clickhouse-server.err.log</errorlog>
<!-- 日志文件大小,达到后会轮转 -->
<size>50M</size>

<listen_host>::</listen_host>

<!-- 数据存储路径,修改为自定义目录 -->
<path>/opt/module/clickhouse/data/</path>
<!-- 临时文件路径 -->
<tmp_path>/opt/module/clickhouse/data/tmp/</tmp_path>

<!-- 时区设置 -->
<timezone>Asia/Shanghai</timezone>
六、启动clickhouse
shell
# 启动服务
systemctl start clickhouse-server
# 查看状态
systemctl status clickhouse-server
# 停止服务
systemctl stop clickhouse-server
# 关闭开机自启动
systemctl disable clickhouse-server
# 进入客户端
clickhouse-client [-m]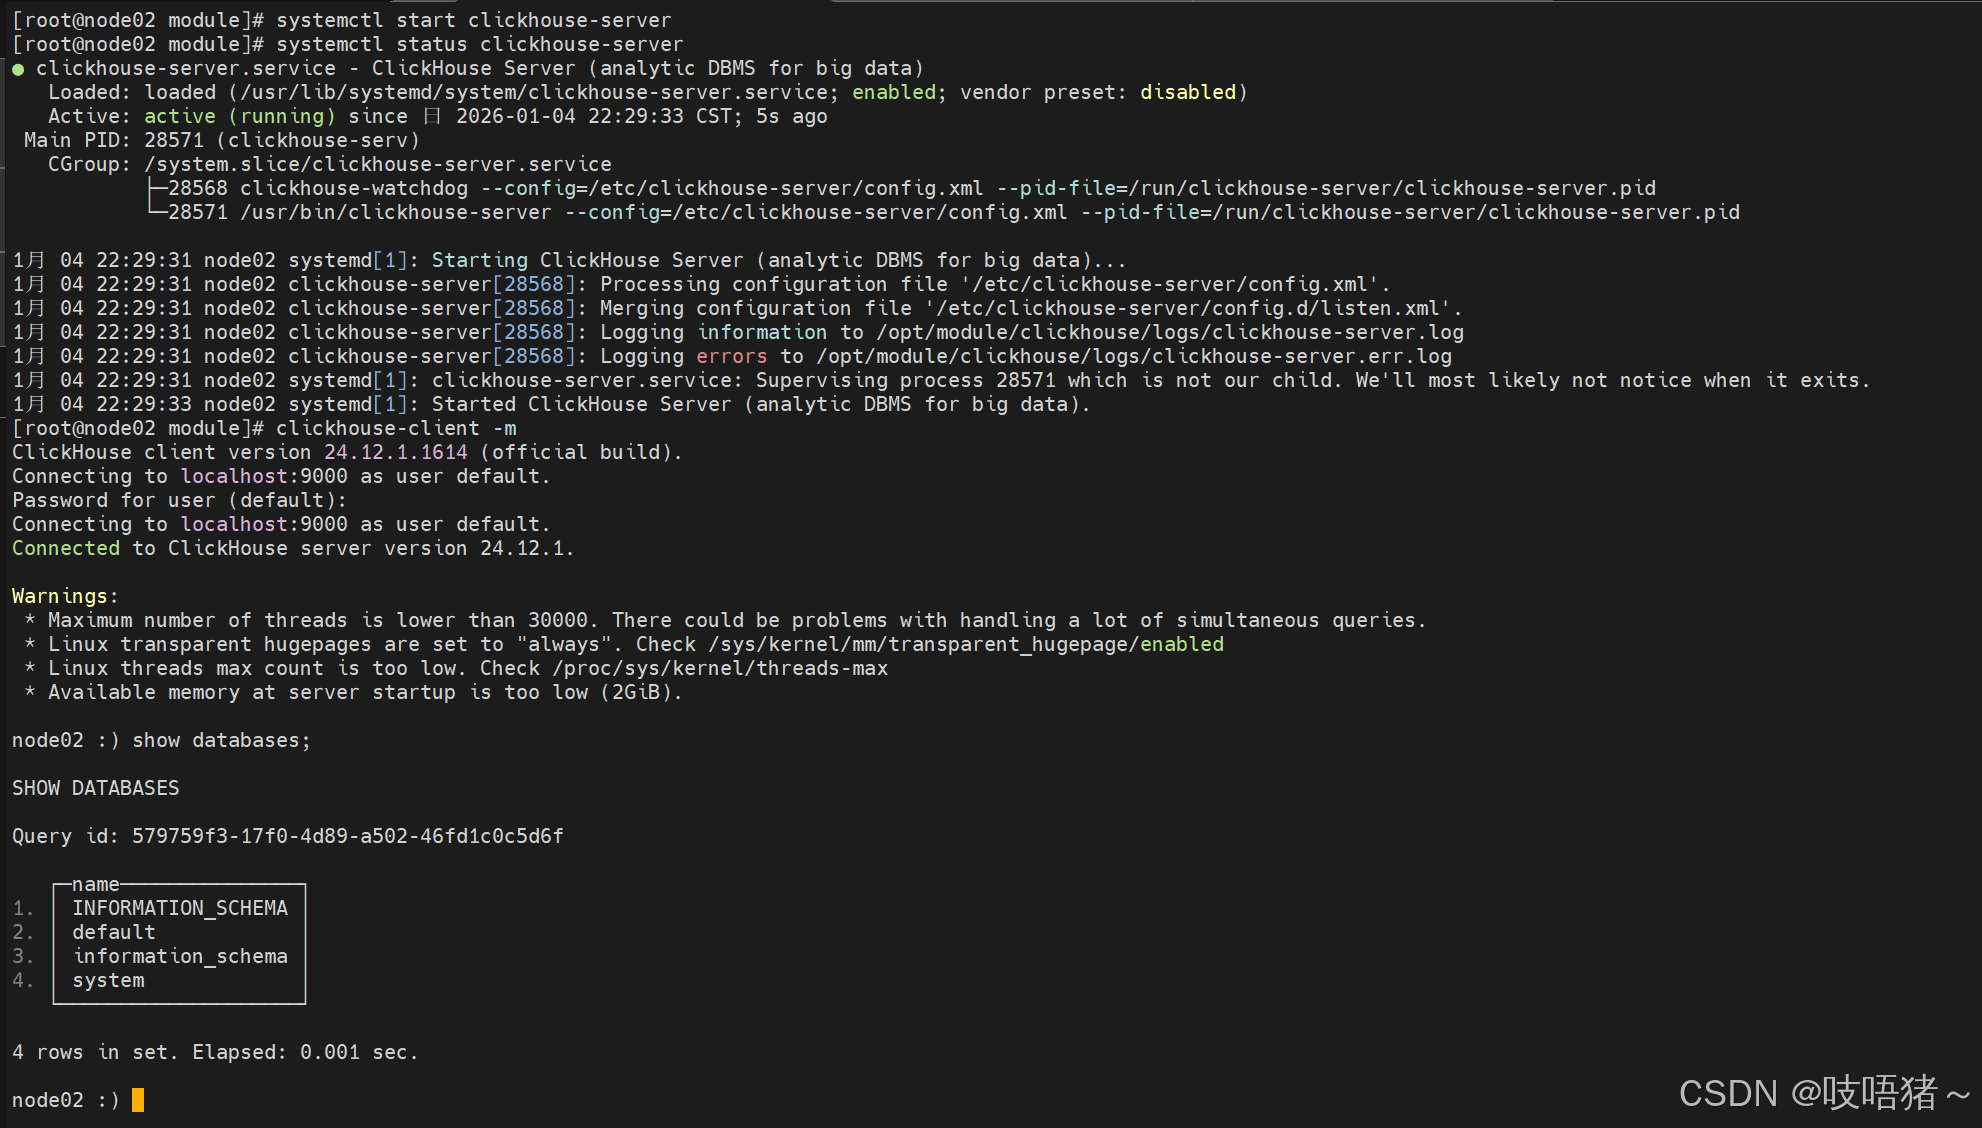
七、密码配置
1、default用户密码设置
在default用户的"密码本"存在/etc/clickhouse-server/users.d路径下为sha256_hex,修改密码的时候只需要把密码生成sha256_hex译码替换再重启clickhouse即可
shell
echo -n "default_123456" | sha256sum | tr -d '-'

2、新建用户
(1)使用文本方式
① 新建用户
xml
# click用户配置
vim /etc/clickhouse-server/users.xml

# 在现有配置不变的情况下,模仿default配置,在<users></users>标签下添加新用户
<admin01>
    <!-- 此处不写,配置在单独密码配置中 -->
    <password></password>
    <networks>
        <ip>::/0</ip>
    </networks>
    <profile>default</profile>
    <quota>default</quota>
    <!-- 允许访问管理 -->
    <access_management>1</access_management>
    <!-- 允许管理命名集合 -->
    <named_collection_control>1</named_collection_control>
    <!-- 可以查看命名集合的列表和配置 -->
    <show_named_collections>1</show_named_collections>
    <!-- 可以查看命名集合中的 敏感信息(如密码、密钥)-->
    <show_named_collections_secrets>1</show_named_collections_secrets>
    <!-- 授予所有权限,此项与上面四个权限相冲突,要么使用上述指定权限,要么只留下面所有权限 -->
    <!-- <grants>
        <query>GRANT ALL ON *.* TO admin01 WITH GRANT OPTION</query>
    </grants> -->
</admin01>
② 创建密码文件
xml
# 编译密码
echo -n "admin01_123456" | sha256sum | tr -d '-'

# 创建密码文件
vim /etc/clickhouse-server/users.d/admin01-password.xml
<clickhouse>
    <users>
        <admin01>
            <password remove='1' />
            <password_sha256_hex>3bf185266a5bad05d3f518dc74453151a864275b56c99e7855ab475f087a308c</password_sha256_hex>
        </admin01>
    </users>
</clickhouse>

# 修改用户组
chown clickhouse:clickhouse admin01-password.xml
③ 重启clickhouse并验证
shell
# 重启clickhouse
systemctl restart clickhouse-server

# 查看状态
systemctl status clickhouse-server

# 使用admin01用户登录
clickhouse-client -m -u admin01

# 查看用户
SELECT
	name, id, storage, auth_type, host_ip, host_names, default_roles_all
FROM system.users;

# 查看权限
SELECT
	user_name, access_type, database, `table`, column, is_partial_revoke
FROM system.grants
ORDER BY user_name, access_type;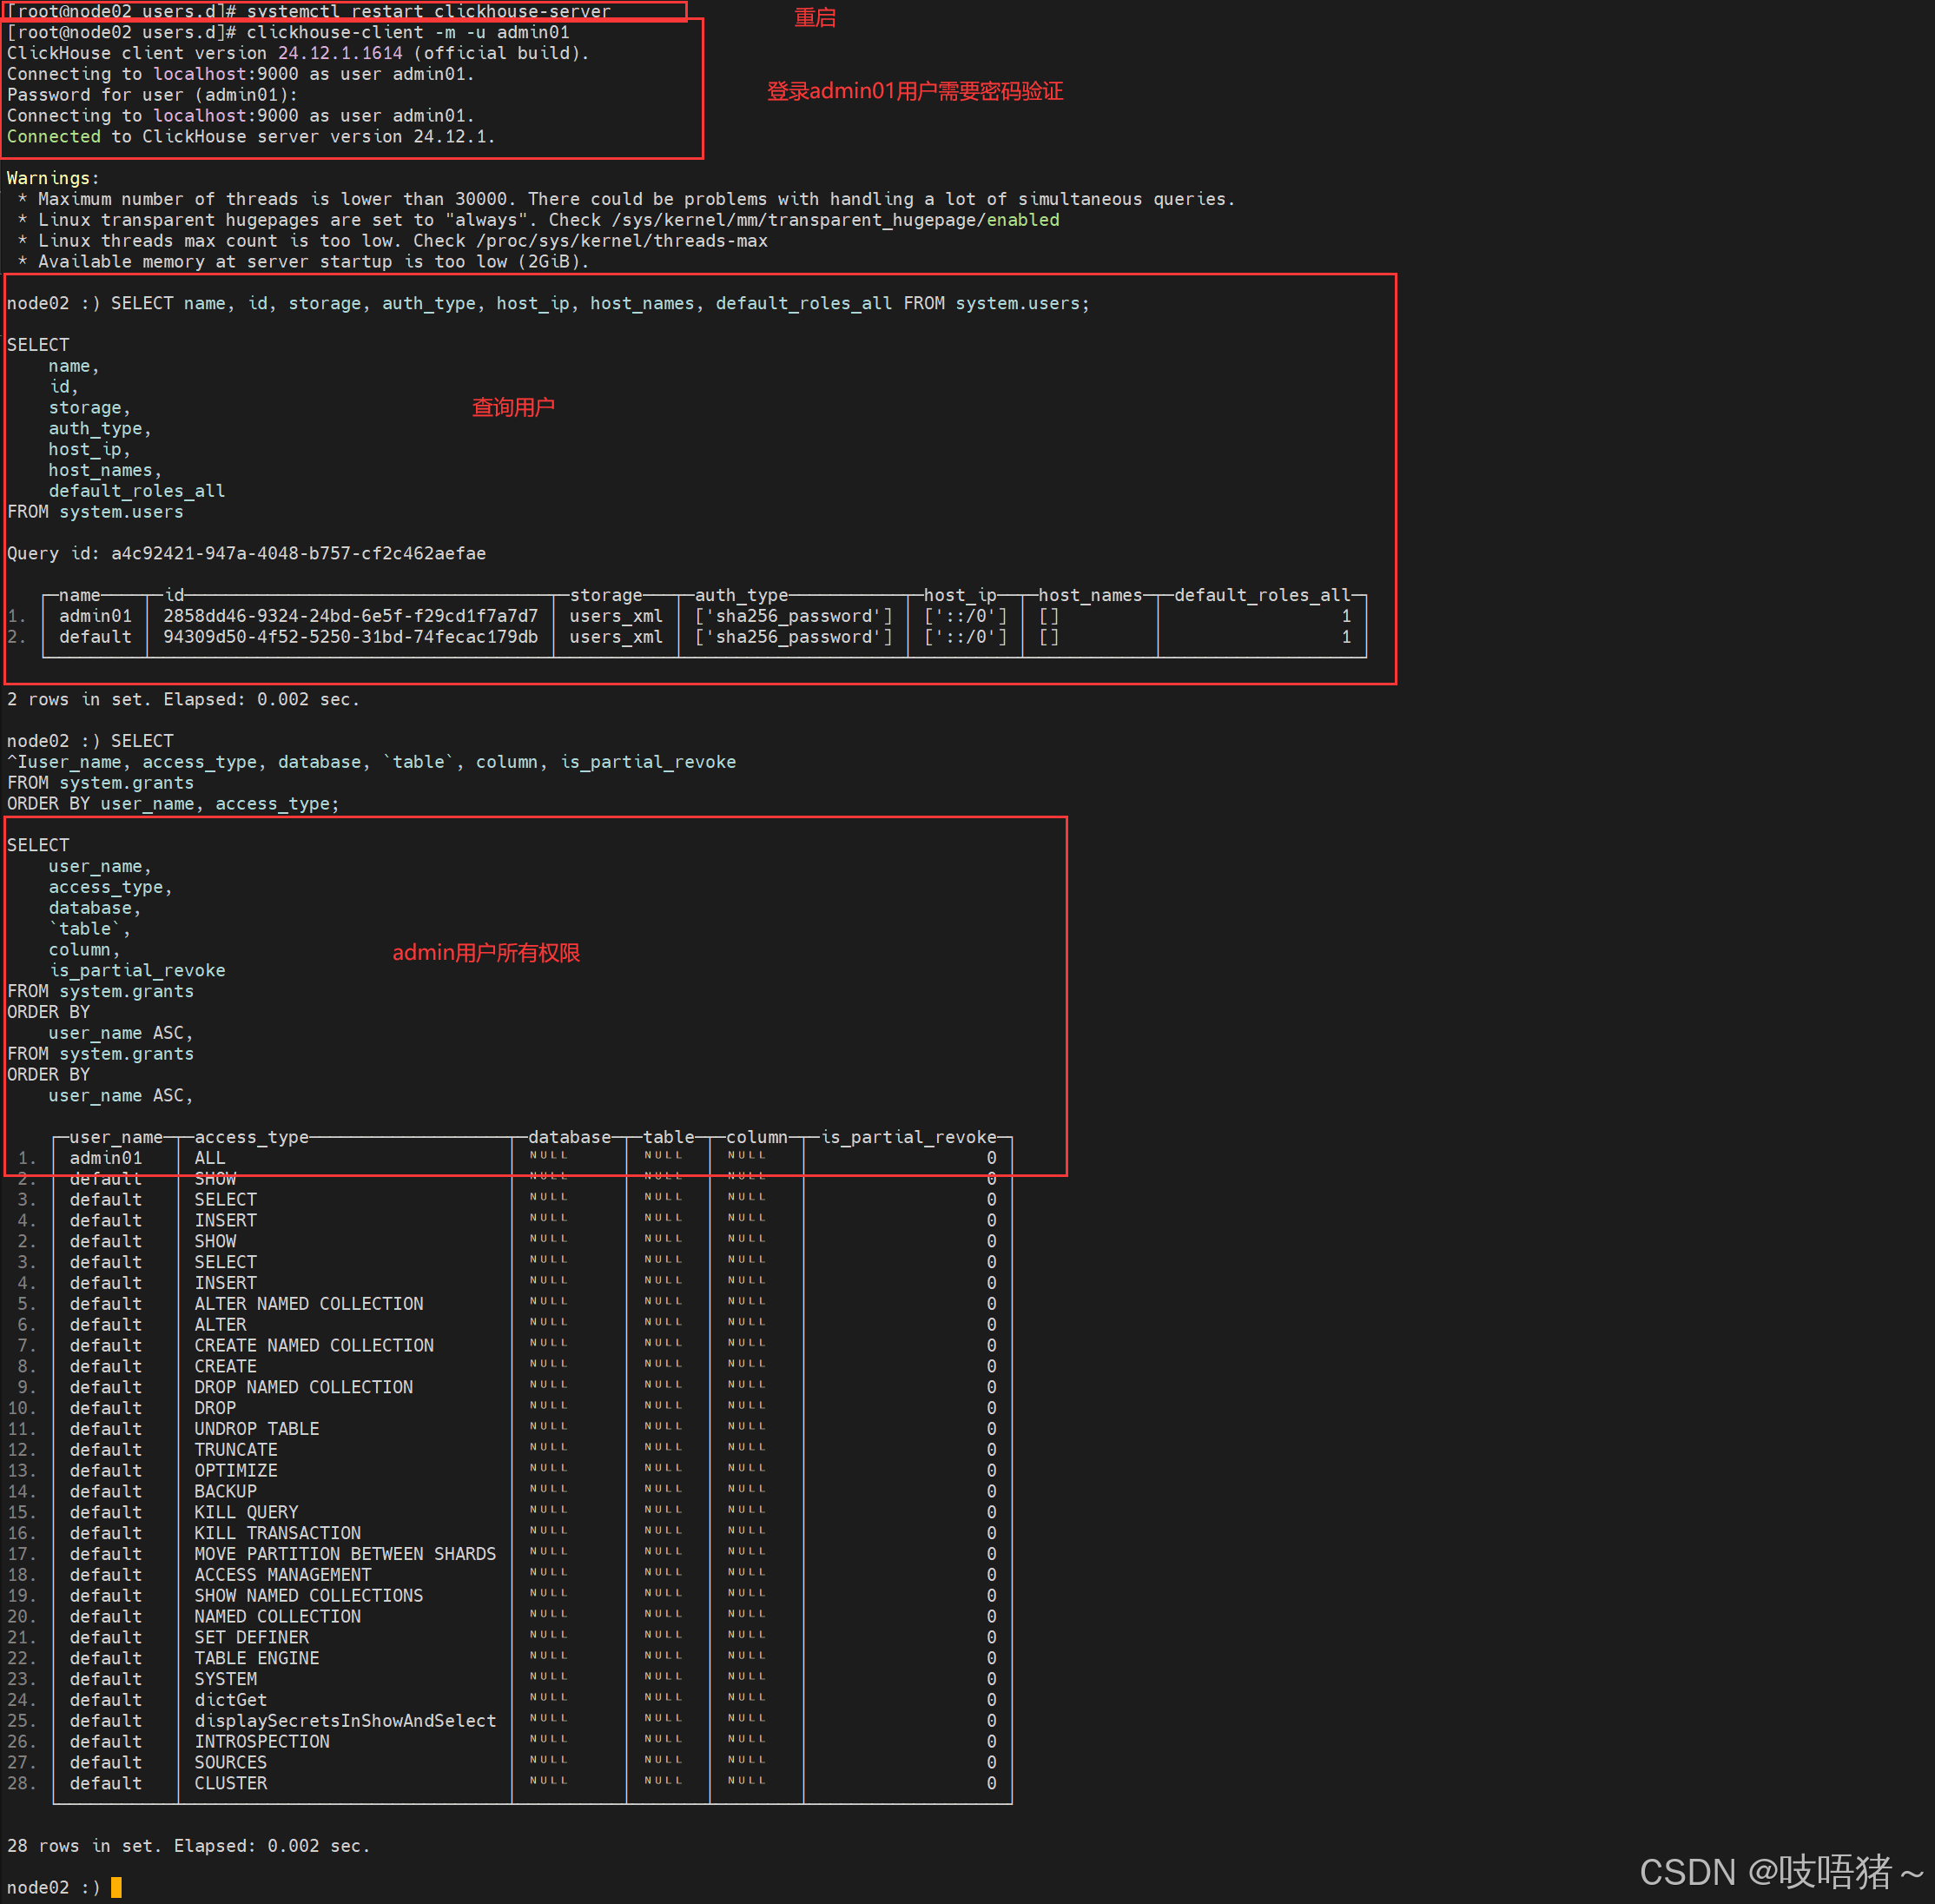
(2)使用SQL命令(官方推荐)
SQL
# 删除用户
DROP USER IF EXISTS 'admin02';

# 创建用户,使用sha256_password加密
CREATE USER 'admin02' IDENTIFIED WITH sha256_password BY 'admin02_123456' HOST ANY;

# 赋予权限
GRANT ALL ON *.* TO 'admin02' WITH GRANT OPTION;

# 查看用户
SELECT
	name, id, storage, auth_type, host_ip, host_names, default_roles_all
FROM system.users;

# 查看权限
SELECT
	user_name, access_type, database, `table`, column, is_partial_revoke
FROM system.grants
ORDER BY user_name, access_type;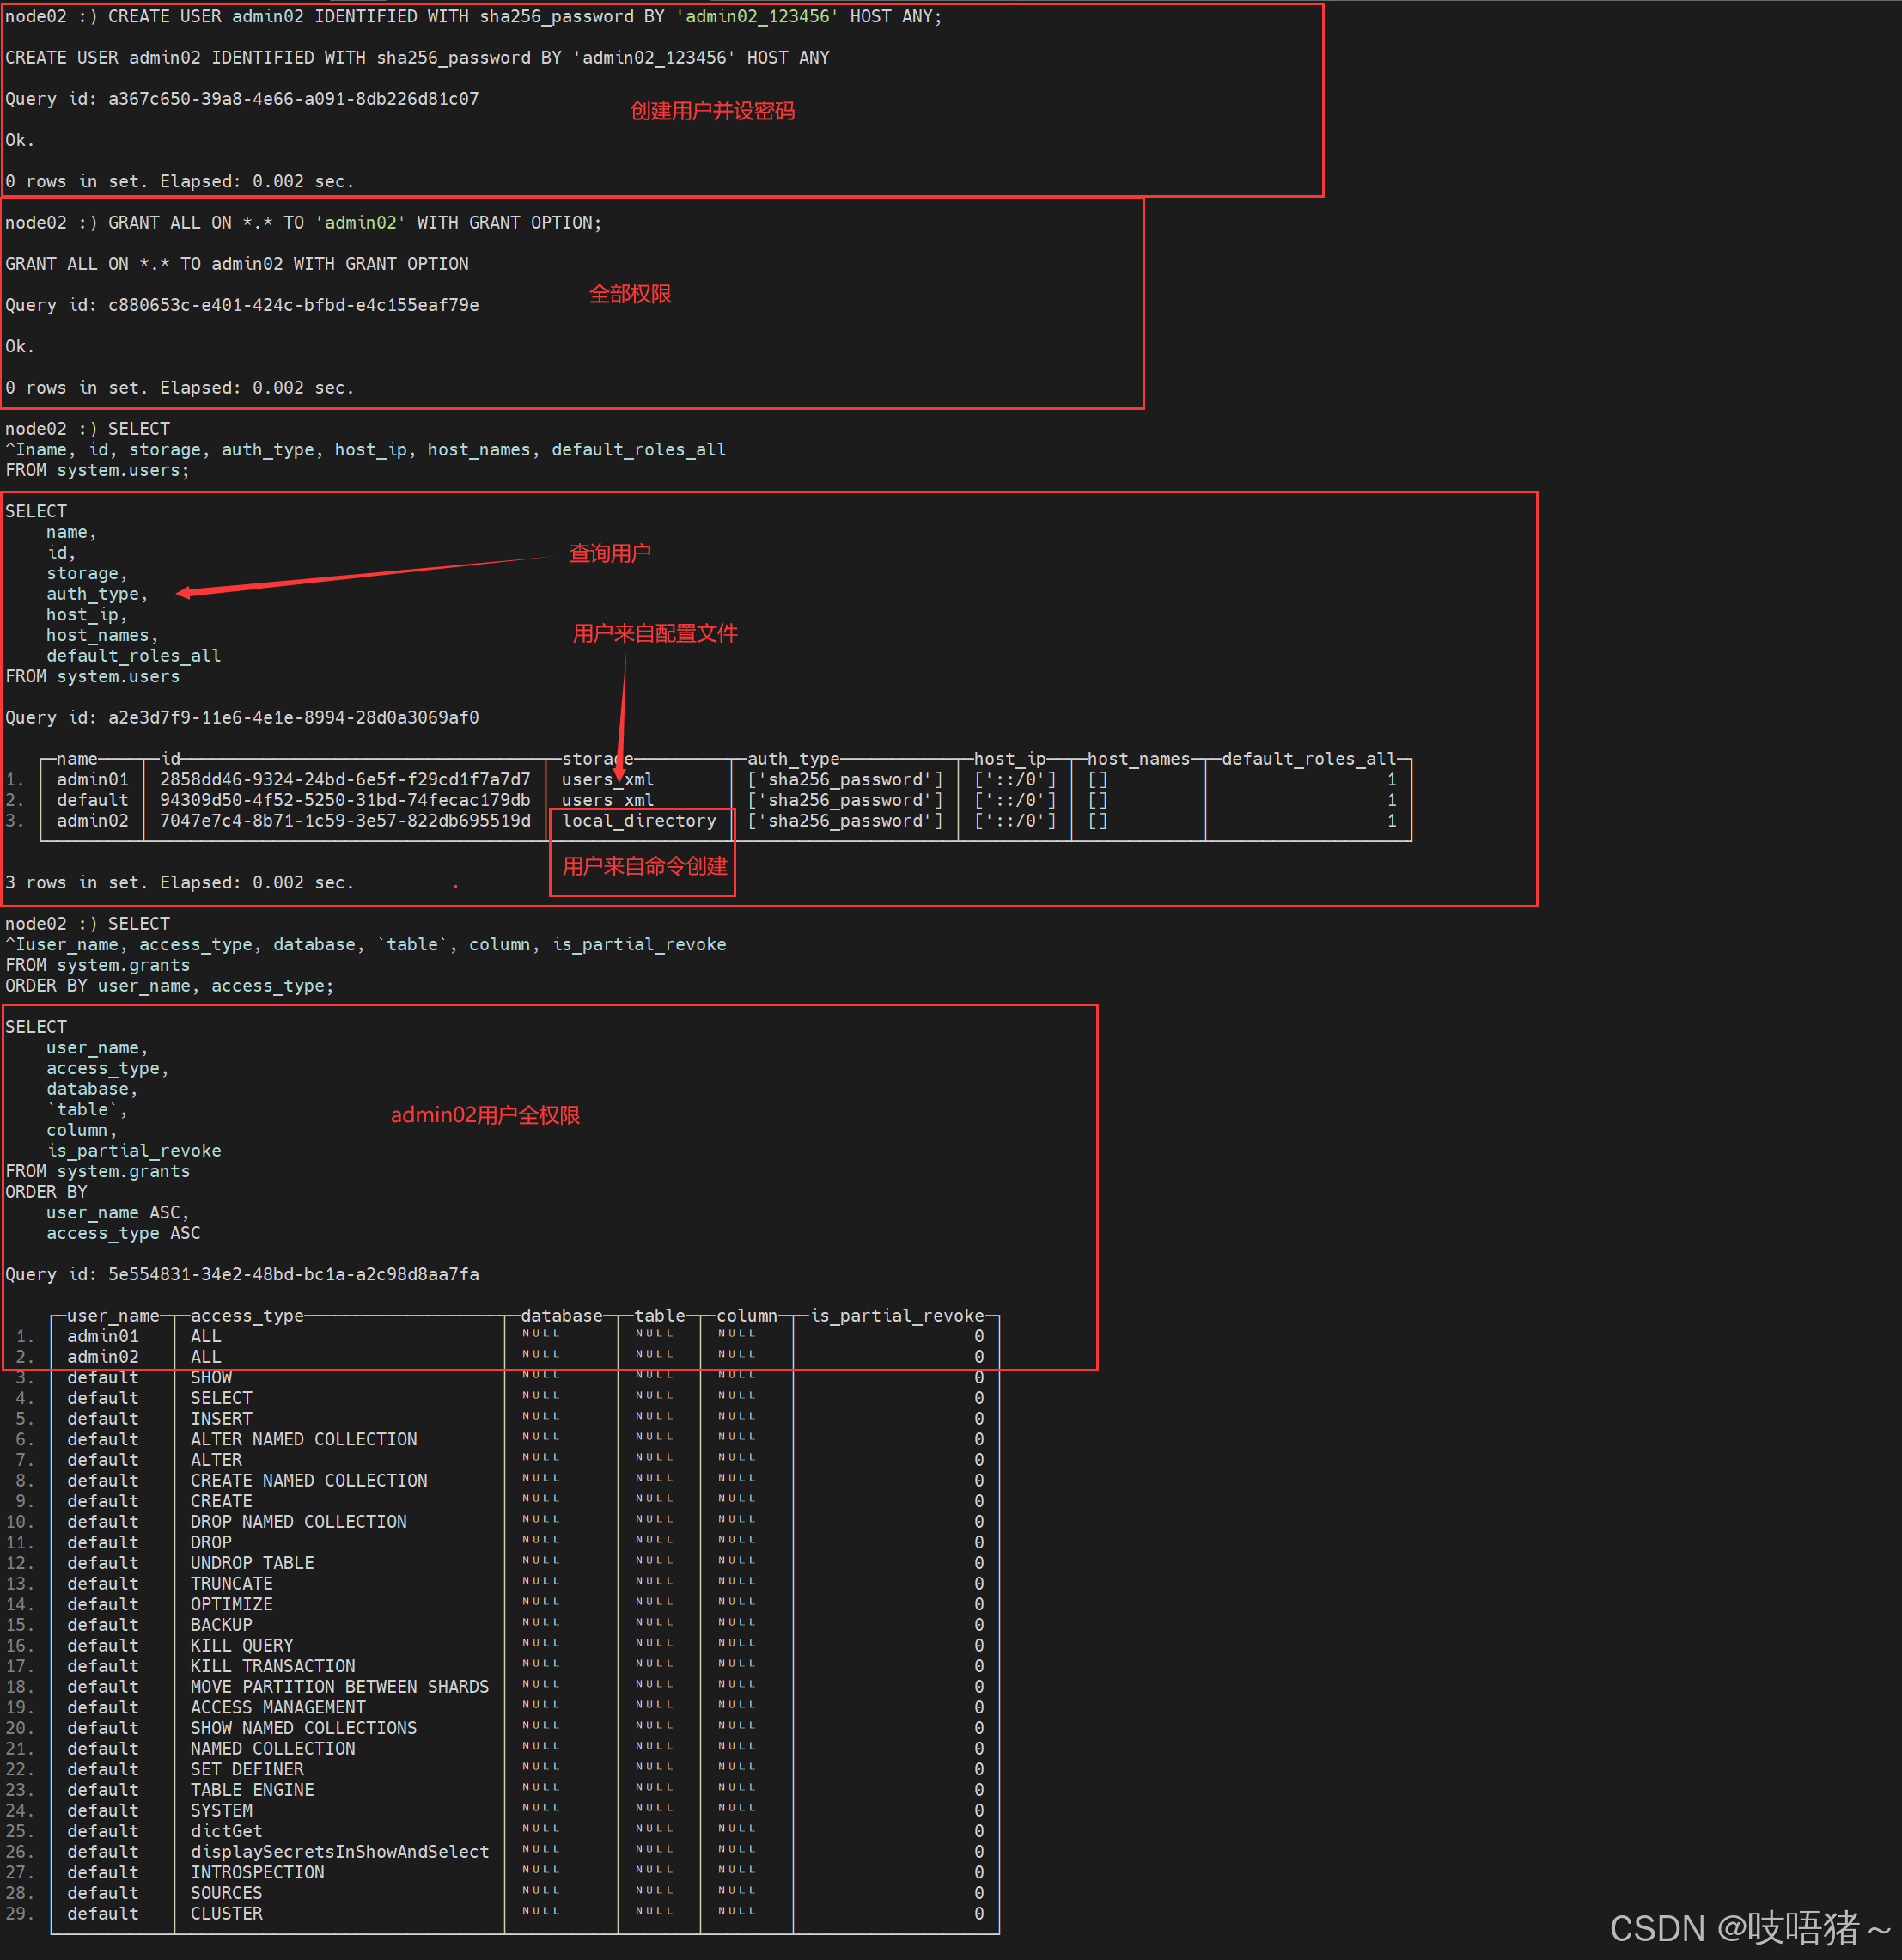
八、ClickHouse集群安装
有需求的小伙伴可以参考本人下篇文章:
Linux软件安装 ------ ClickHouse集群安装(集成Zookeeper)+ chproxy负载均衡