文章目录
一、节点说明
用三节点搭建redis三主三从
| IP | 主机名 | 端口 |
|---|---|---|
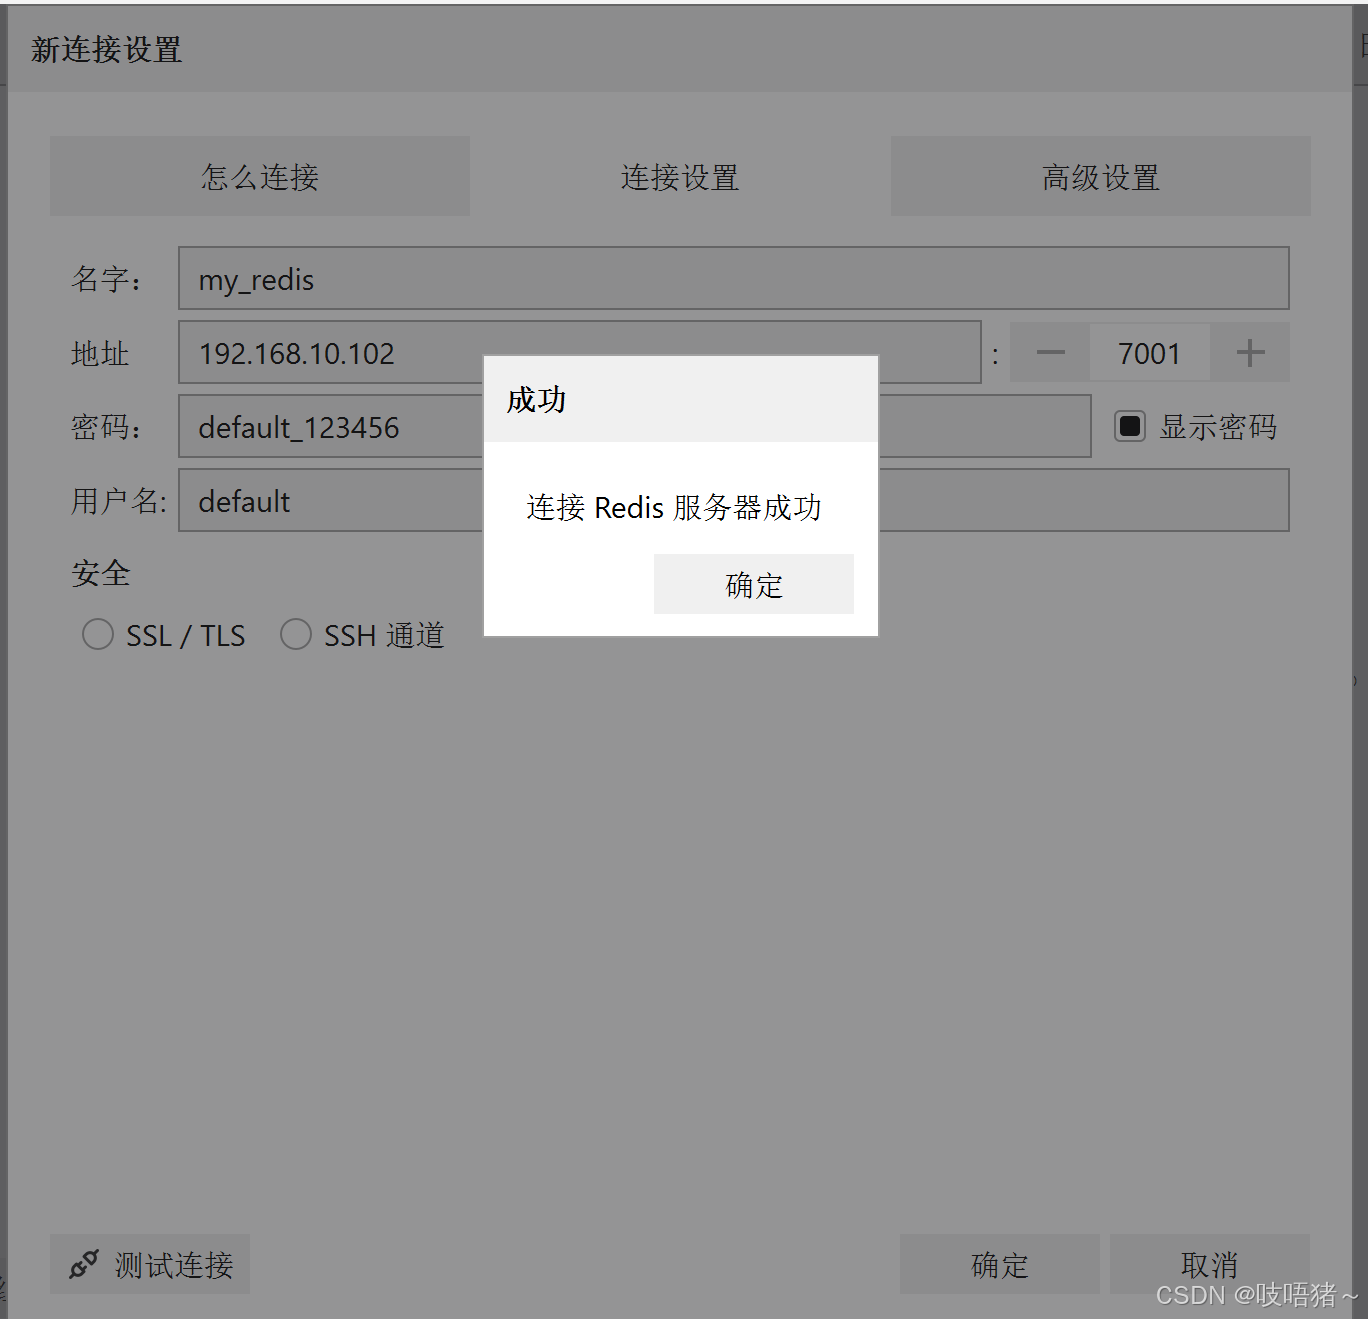
| 192.168.10.102 | node02 | 7001(主) |
| 192.168.10.102 | node02 | 7002(从) |
| 192.168.10.103 | node03 | 7001(主) |
| 192.168.10.103 | node03 | 7002(从) |
| 192.168.10.104 | node04 | 7001(主) |
| 192.168.10.104 | node04 | 7002(从) |
二、软件下载
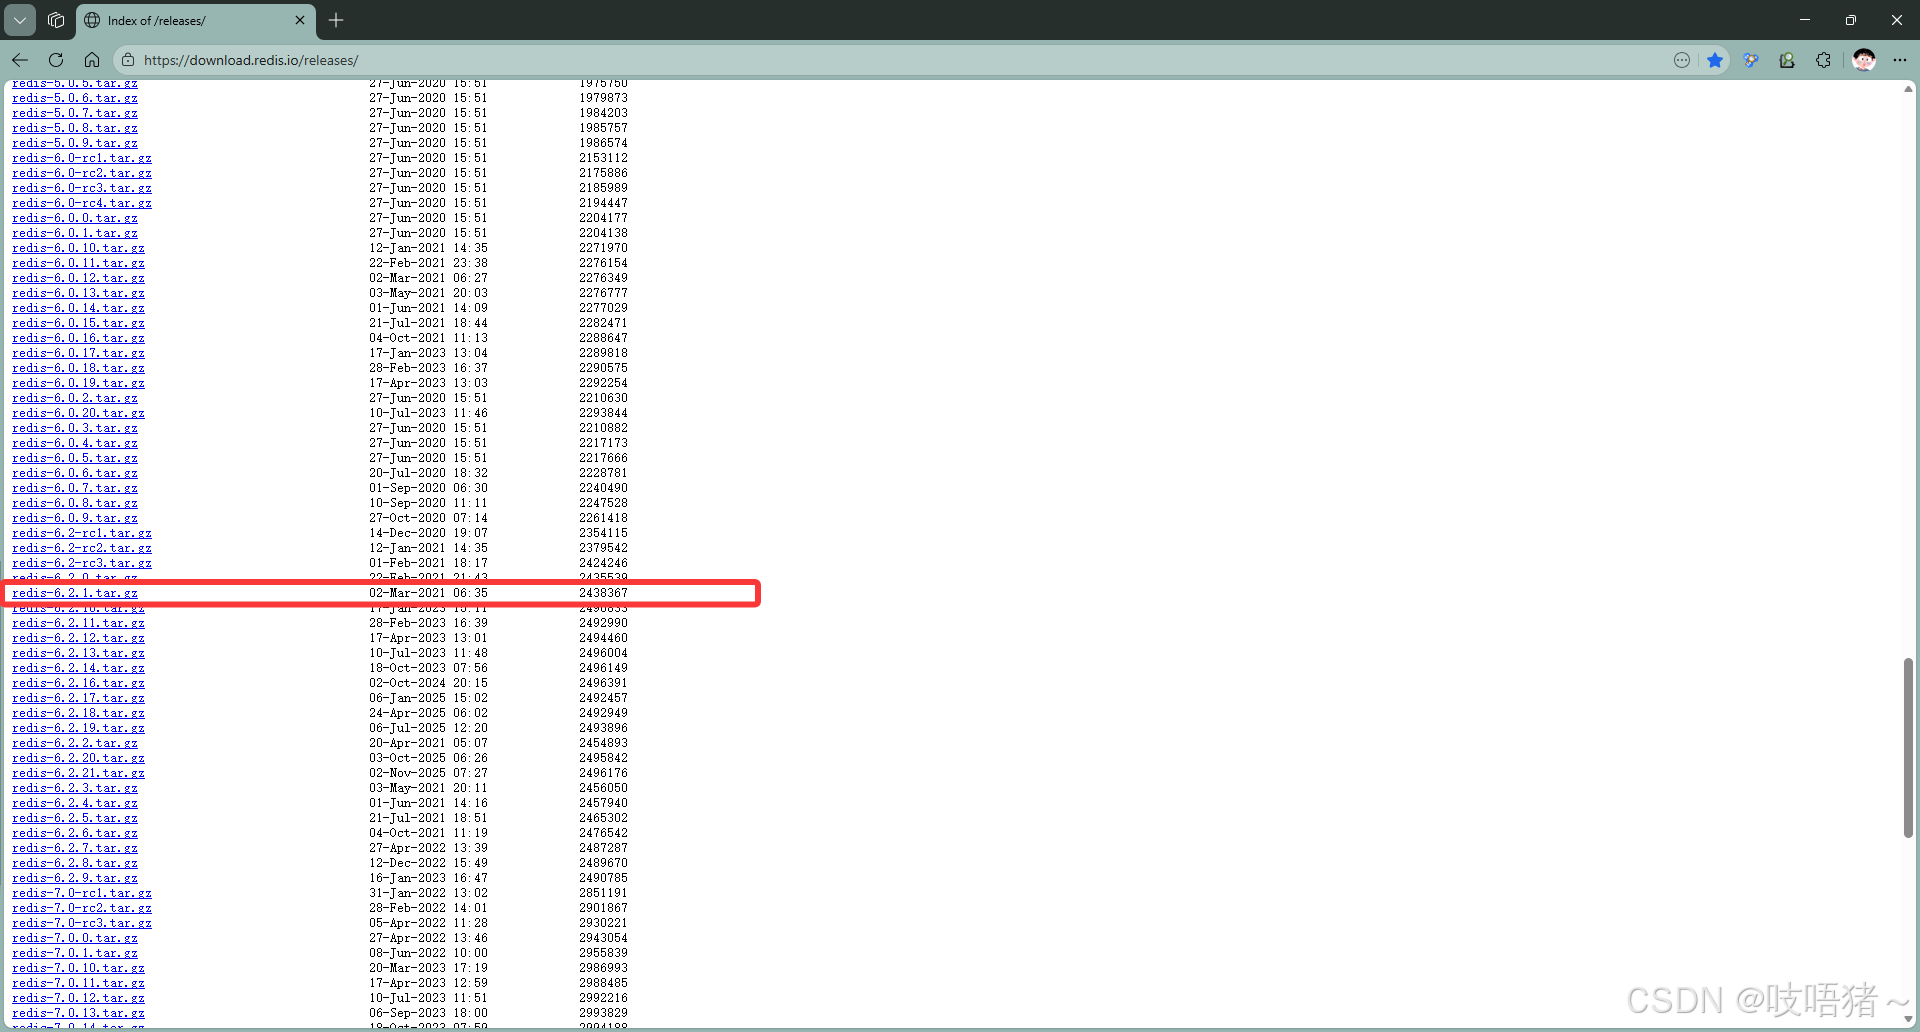
下载地址:https://download.redis.io/releases/
本文使用:redis-6.2.1.tar.gz
三、编译安装
shell
# 解压
tar -zxvf redis-6.2.1.tar.gz
cd redis-6.2.1
# 下载编依赖
yum install jemalloc-devel gcc gcc-c++ make libicu-devel readline-devel zlib-devel openssl-devel
# 编译
make && make install
# 创建redis数据目录,日志目录
mkdir -p /opt/module/redis/data/
mkdir -p /opt/module/redis/logs/四、修改配置文件
1、准备配置文件
shell
# 创建配置文件目录
mkdir -p /etc/redis/config

# 复制redis.conf
cd /opt/software/redis/redis-6.2.1
cp redis.conf /etc/redis/config/redis_7001.conf
cp redis.conf /etc/redis/config/redis_7002.conf

# 修改权限
chmod 755 /etc/redis/config/redis_7001.conf
chmod 755 /etc/redis/config/redis_7002.conf
2、修改主节点配置文件
bash
vim /etc/redis/config/redis_7001.conf
# 修改以下配置
bind 0.0.0.0
port 7001
daemonize yes
pidfile /var/run/redis_7001.pid
logfile /opt/module/redis/logs/redis_7001.log
dbfilename redis_7001.rdb
dir /opt/module/redis/data
masterauth replica # 主从复制密码
masteruser replica # 主从复制账号
repl-backlog-size 1mb
aclfile /etc/redis/config/users_7001.acl
requirepass default_123456 # 客户端default用户密码
maxclients 10000
maxmemory 3GB
maxmemory-policy noeviction
replica-ignore-maxmemory yes
io-threads 2
appendonly yes
appendfilename appendonly_7001.aof
# 集群配置
cluster-enabled yes
cluster-config-file /etc/redis/config/nodes_7001.conf
cluster-node-timeout 15000
cluster-require-full-coverage yes
cluster-replica-no-failover no
cluster-allow-reads-when-down no
cluster-announce-ip node02 # 根据虚拟机name修改
cluster-announce-port 7001
cluster-announce-bus-port 17001
activedefrag no
ignore-warnings ARM64-COW-BUG
3、修改从节点配置文件
bash
bind 0.0.0.0
protected-mode yes
port 7002
daemonize yes
pidfile /var/run/redis_7002.pid
logfile /opt/module/redis/logs/redis_7002.log
dbfilename redis_7002.rdb
dir /opt/module/redis/data
masterauth replica # 主从复制密码
masteruser replica # 主从复制账号
repl-backlog-size 1mb
aclfile /etc/redis/config/users_7002.acl
requirepass default_123456 # 客户端default用户密码
maxclients 10000
maxmemory 2GB
maxmemory-policy noeviction
replica-ignore-maxmemory yes
io-threads 1
appendonly yes
appendfilename appendonly_7002.aof
# 集群配置
cluster-enabled yes
cluster-config-file /etc/redis/config/nodes_7002.conf
cluster-node-timeout 15000
cluster-require-full-coverage yes
cluster-replica-no-failover no
cluster-allow-reads-when-down no
cluster-announce-ip node02  # 根据虚拟机name修改
cluster-announce-port 7002
cluster-announce-bus-port 17002
activedefrag no
ignore-warnings ARM64-COW-BUG
4、配置ACL访问列表
bash
vim users_7001.acl
vim users_7001.acl
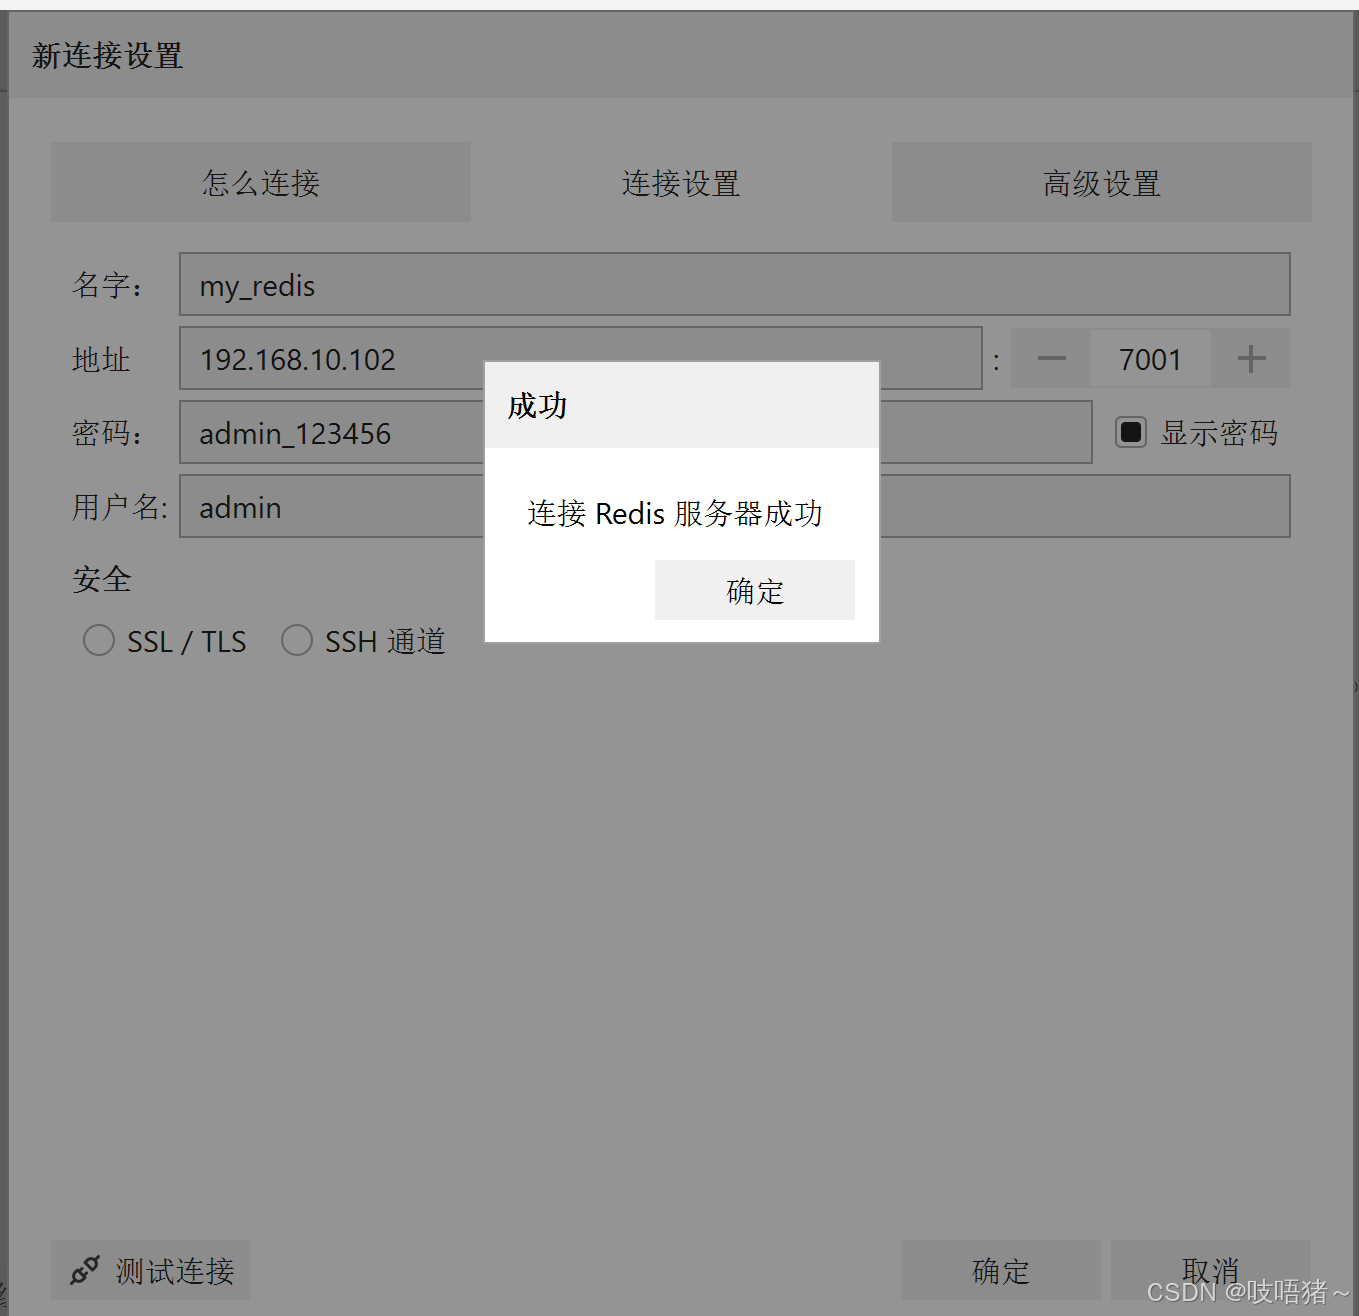
user admin on #6848d6405bf34bf9b2d82ed8822c756807632d3eaefedec90ac33cb32ac83671 ~* &* +@all
user default on #3c695cc0737876dd1717da381479daab48bdcb3b7ffeb02a5d3026ef1686dbbf ~* &* +@all
chmod 755 users_7001.acl
chmod 755 users_7002.acl各部分含义:
user default- 这是默认用户的用户名on- 用户状态为"启用"(on表示启用,off表示禁用)#d741fda4c6befb945b77c8d2059cccb239b49ab600370fbd041b6bbb7284102d- 这是密码的SHA256哈希值- 使用
echo -n default_123456 | openssl dgst -sha256命令生成
- 使用
~\*- 权限范围(可以访问的键模式)~*表示可以访问所有键(*通配符)
&\*- 可以访问的Pub/Sub频道模式&*表示可以订阅/发布所有频道
+@all- 命令权限+表示允许@all表示所有命令(相当于超级用户权限)
五、启动集群
powershell
# 三节点执行
redis-server /etc/redis/config/redis_7001.conf
redis-server /etc/redis/config/redis_7002.conf

# 查看进程
ps -ef |grep redis

# 停止命令
redis-cli -a default_123456 -p 7001 shutdown
redis-cli -a default_123456 -p 7002 shutdown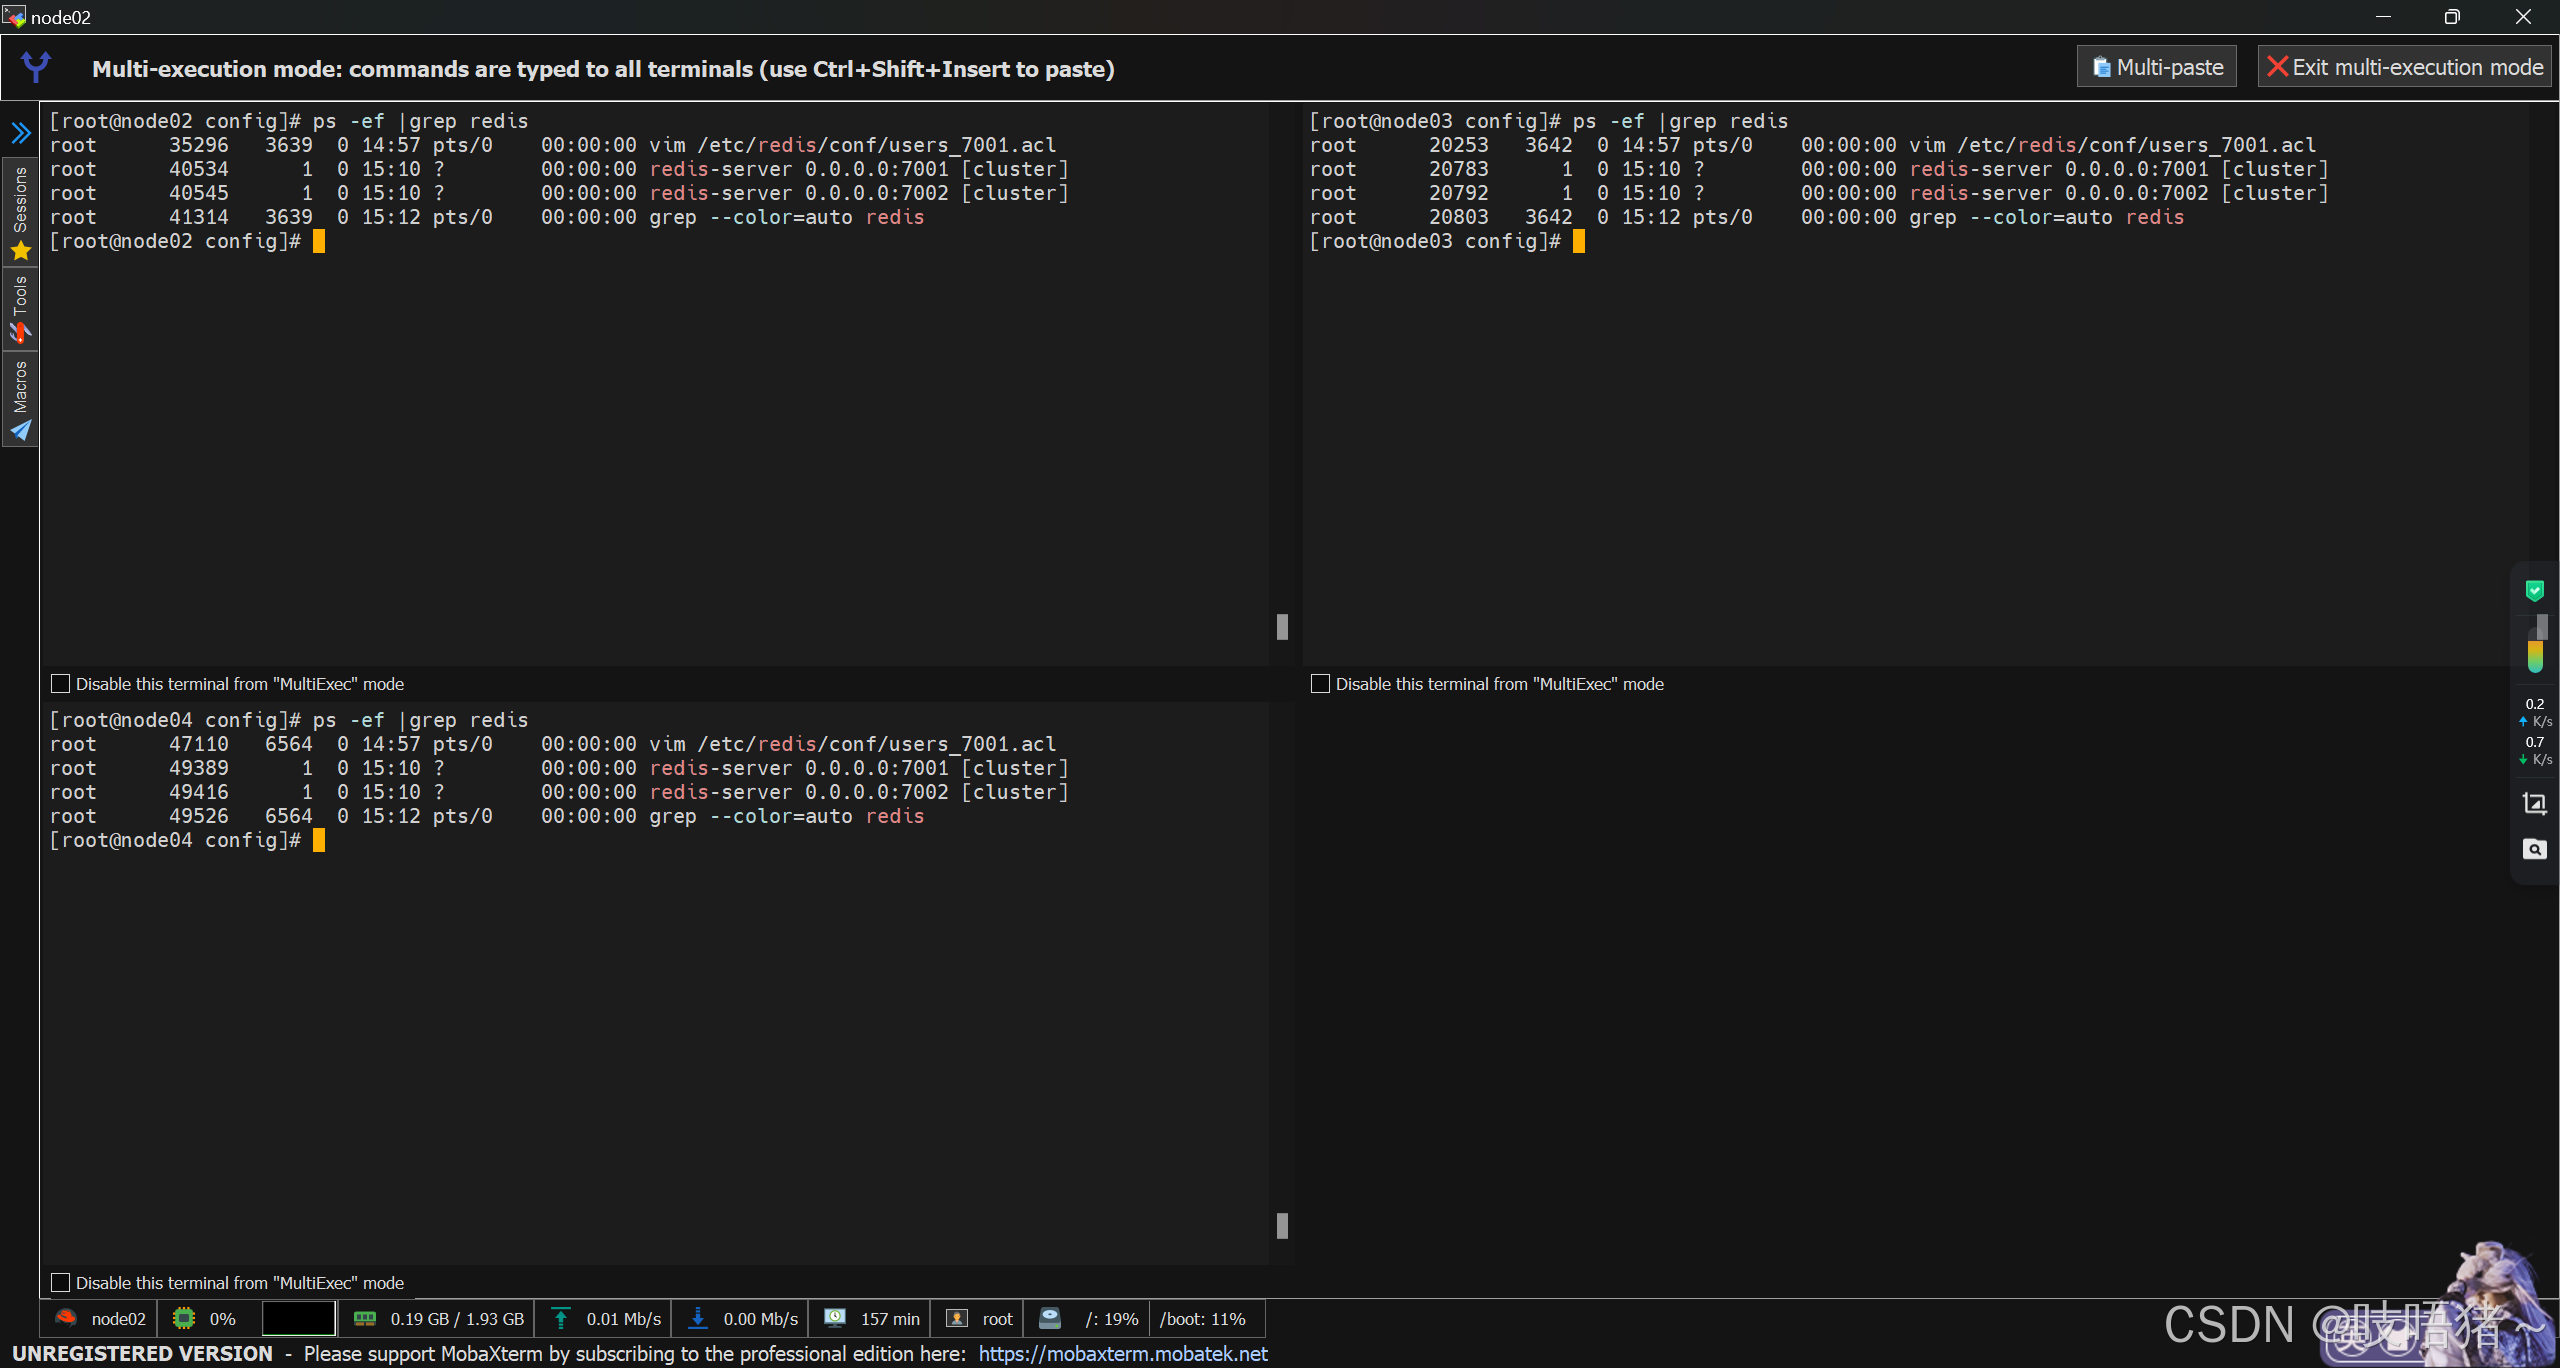
六、组装集群
上述步骤完毕后,六台redis实例只是相当于六台单节点
1、查看集群状态
shell
redis-cli -a default_123456 -p 7001 cluster nodes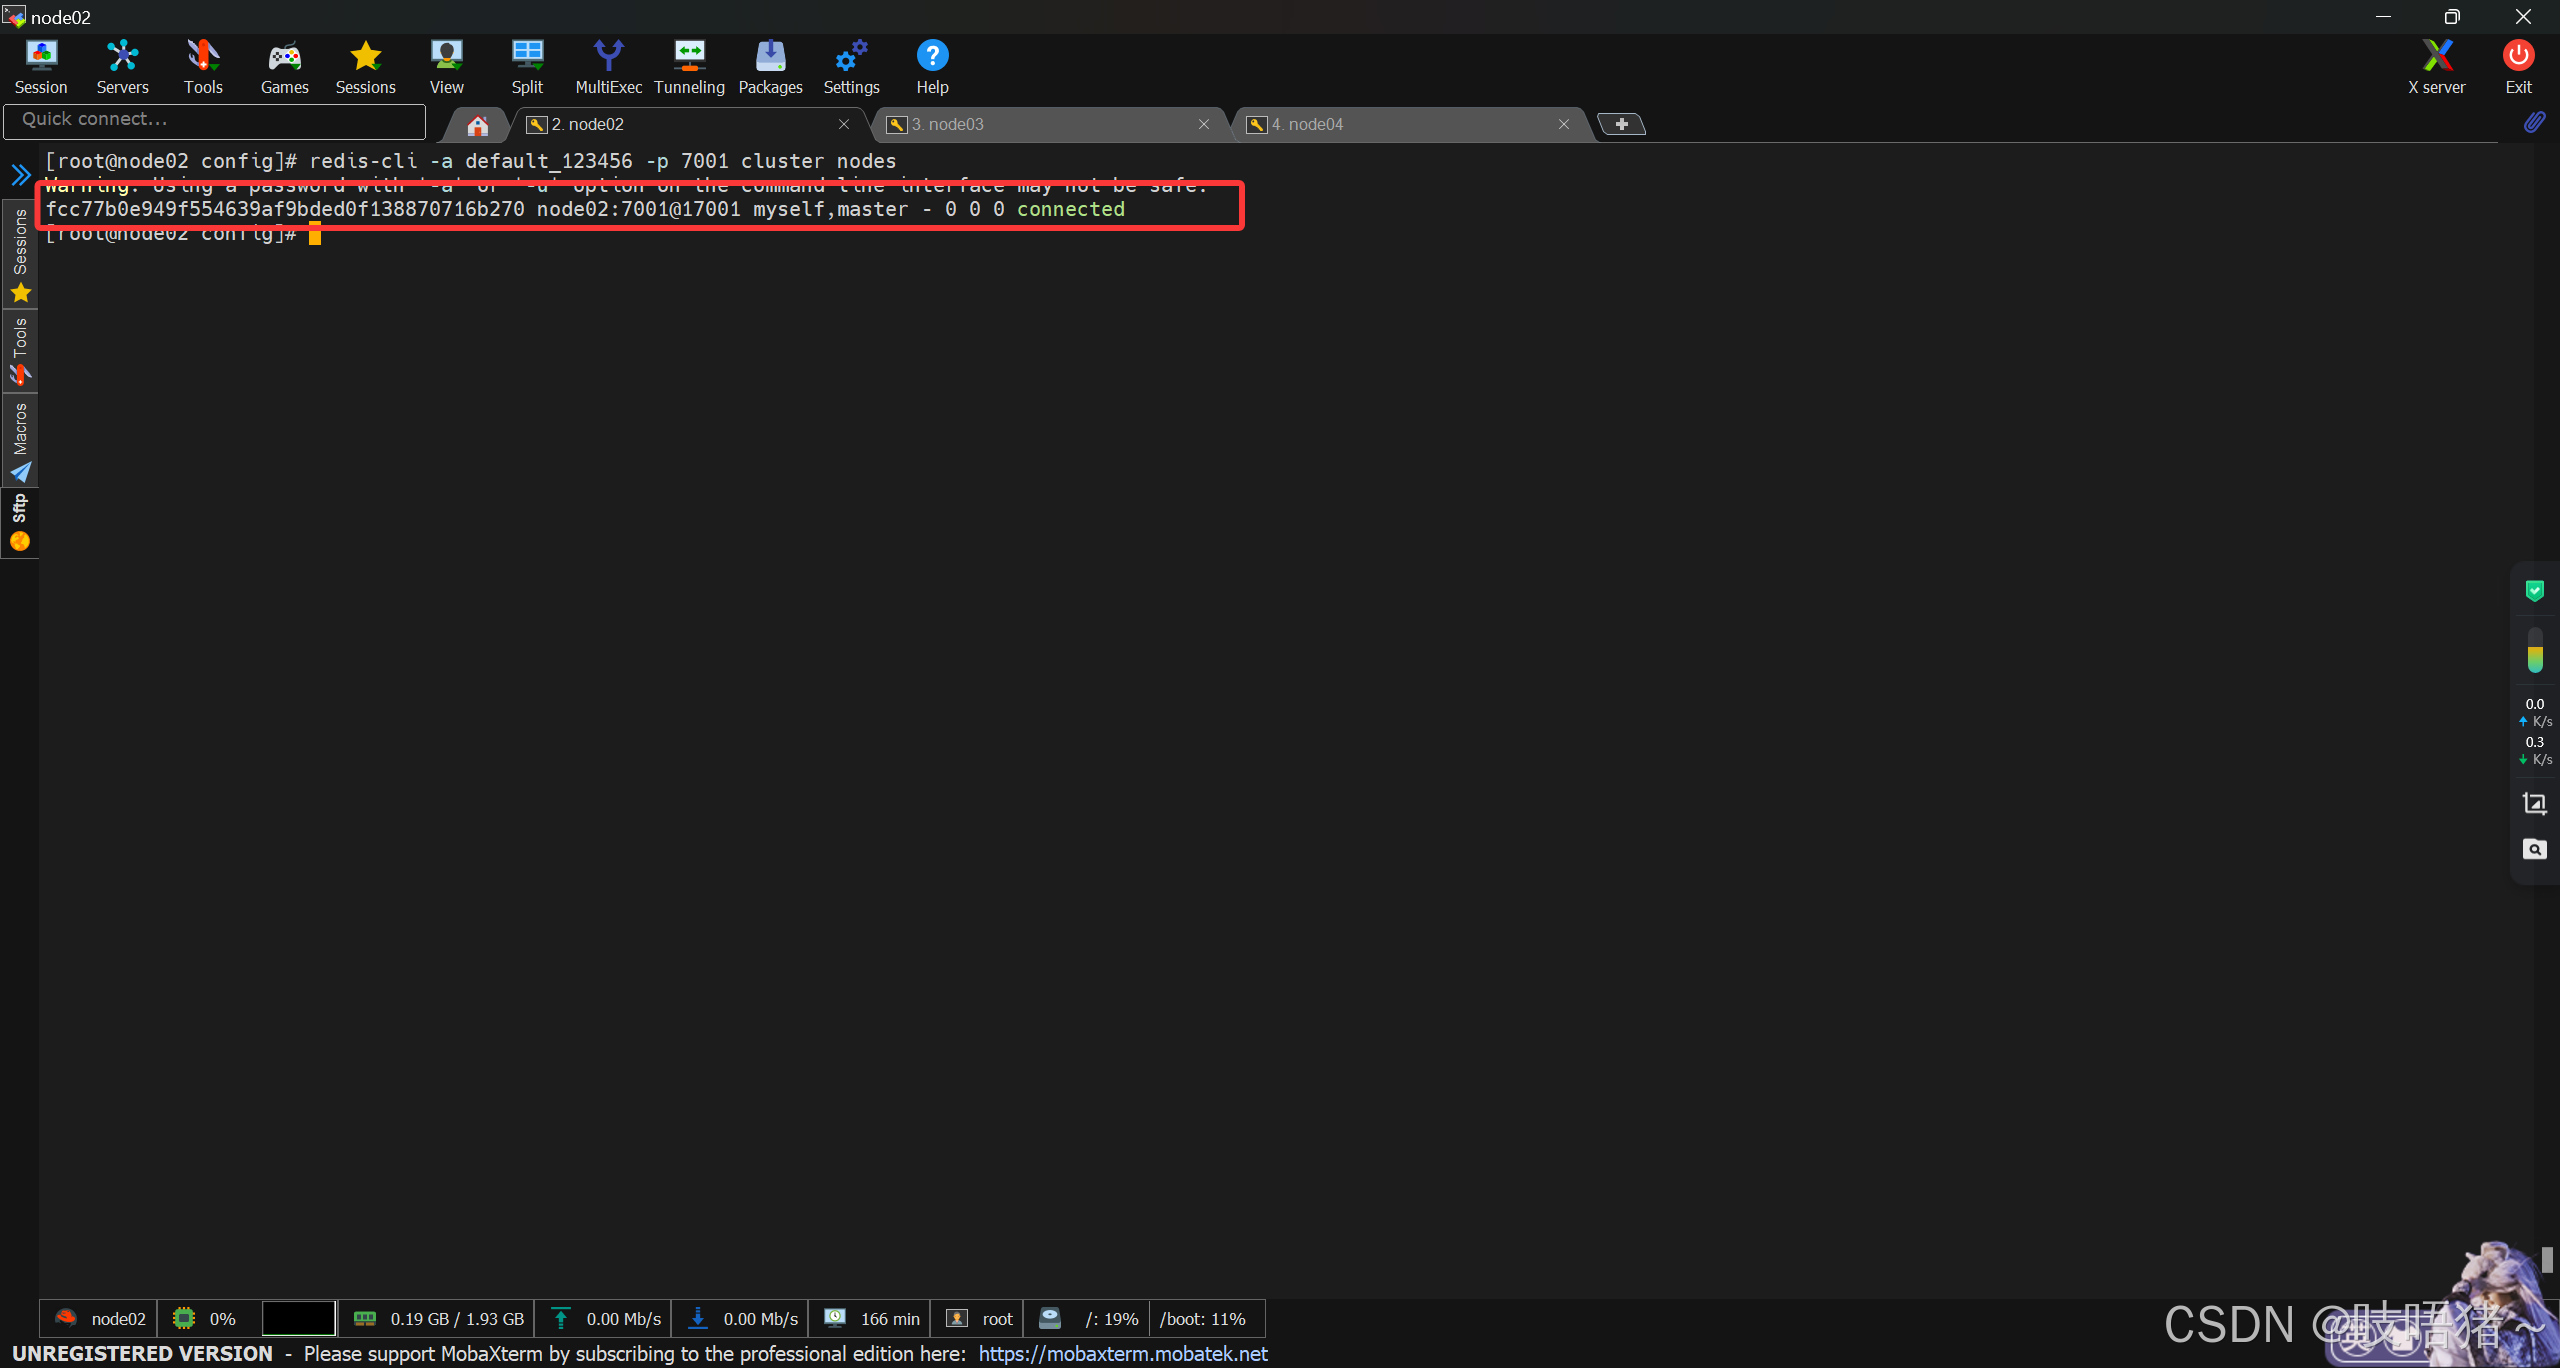
2、注册主节点
此处主节点均为各虚拟机的7001服务
shell
redis-cli -a default_123456 --cluster create \
  192.168.10.102:7001 \
  192.168.10.103:7001 \
  192.168.10.104:7001 \
  --cluster-replicas 0

# 查看集群状态(此时只有三台主节点7001)
redis-cli -a default_123456 -p 7001 cluster nodes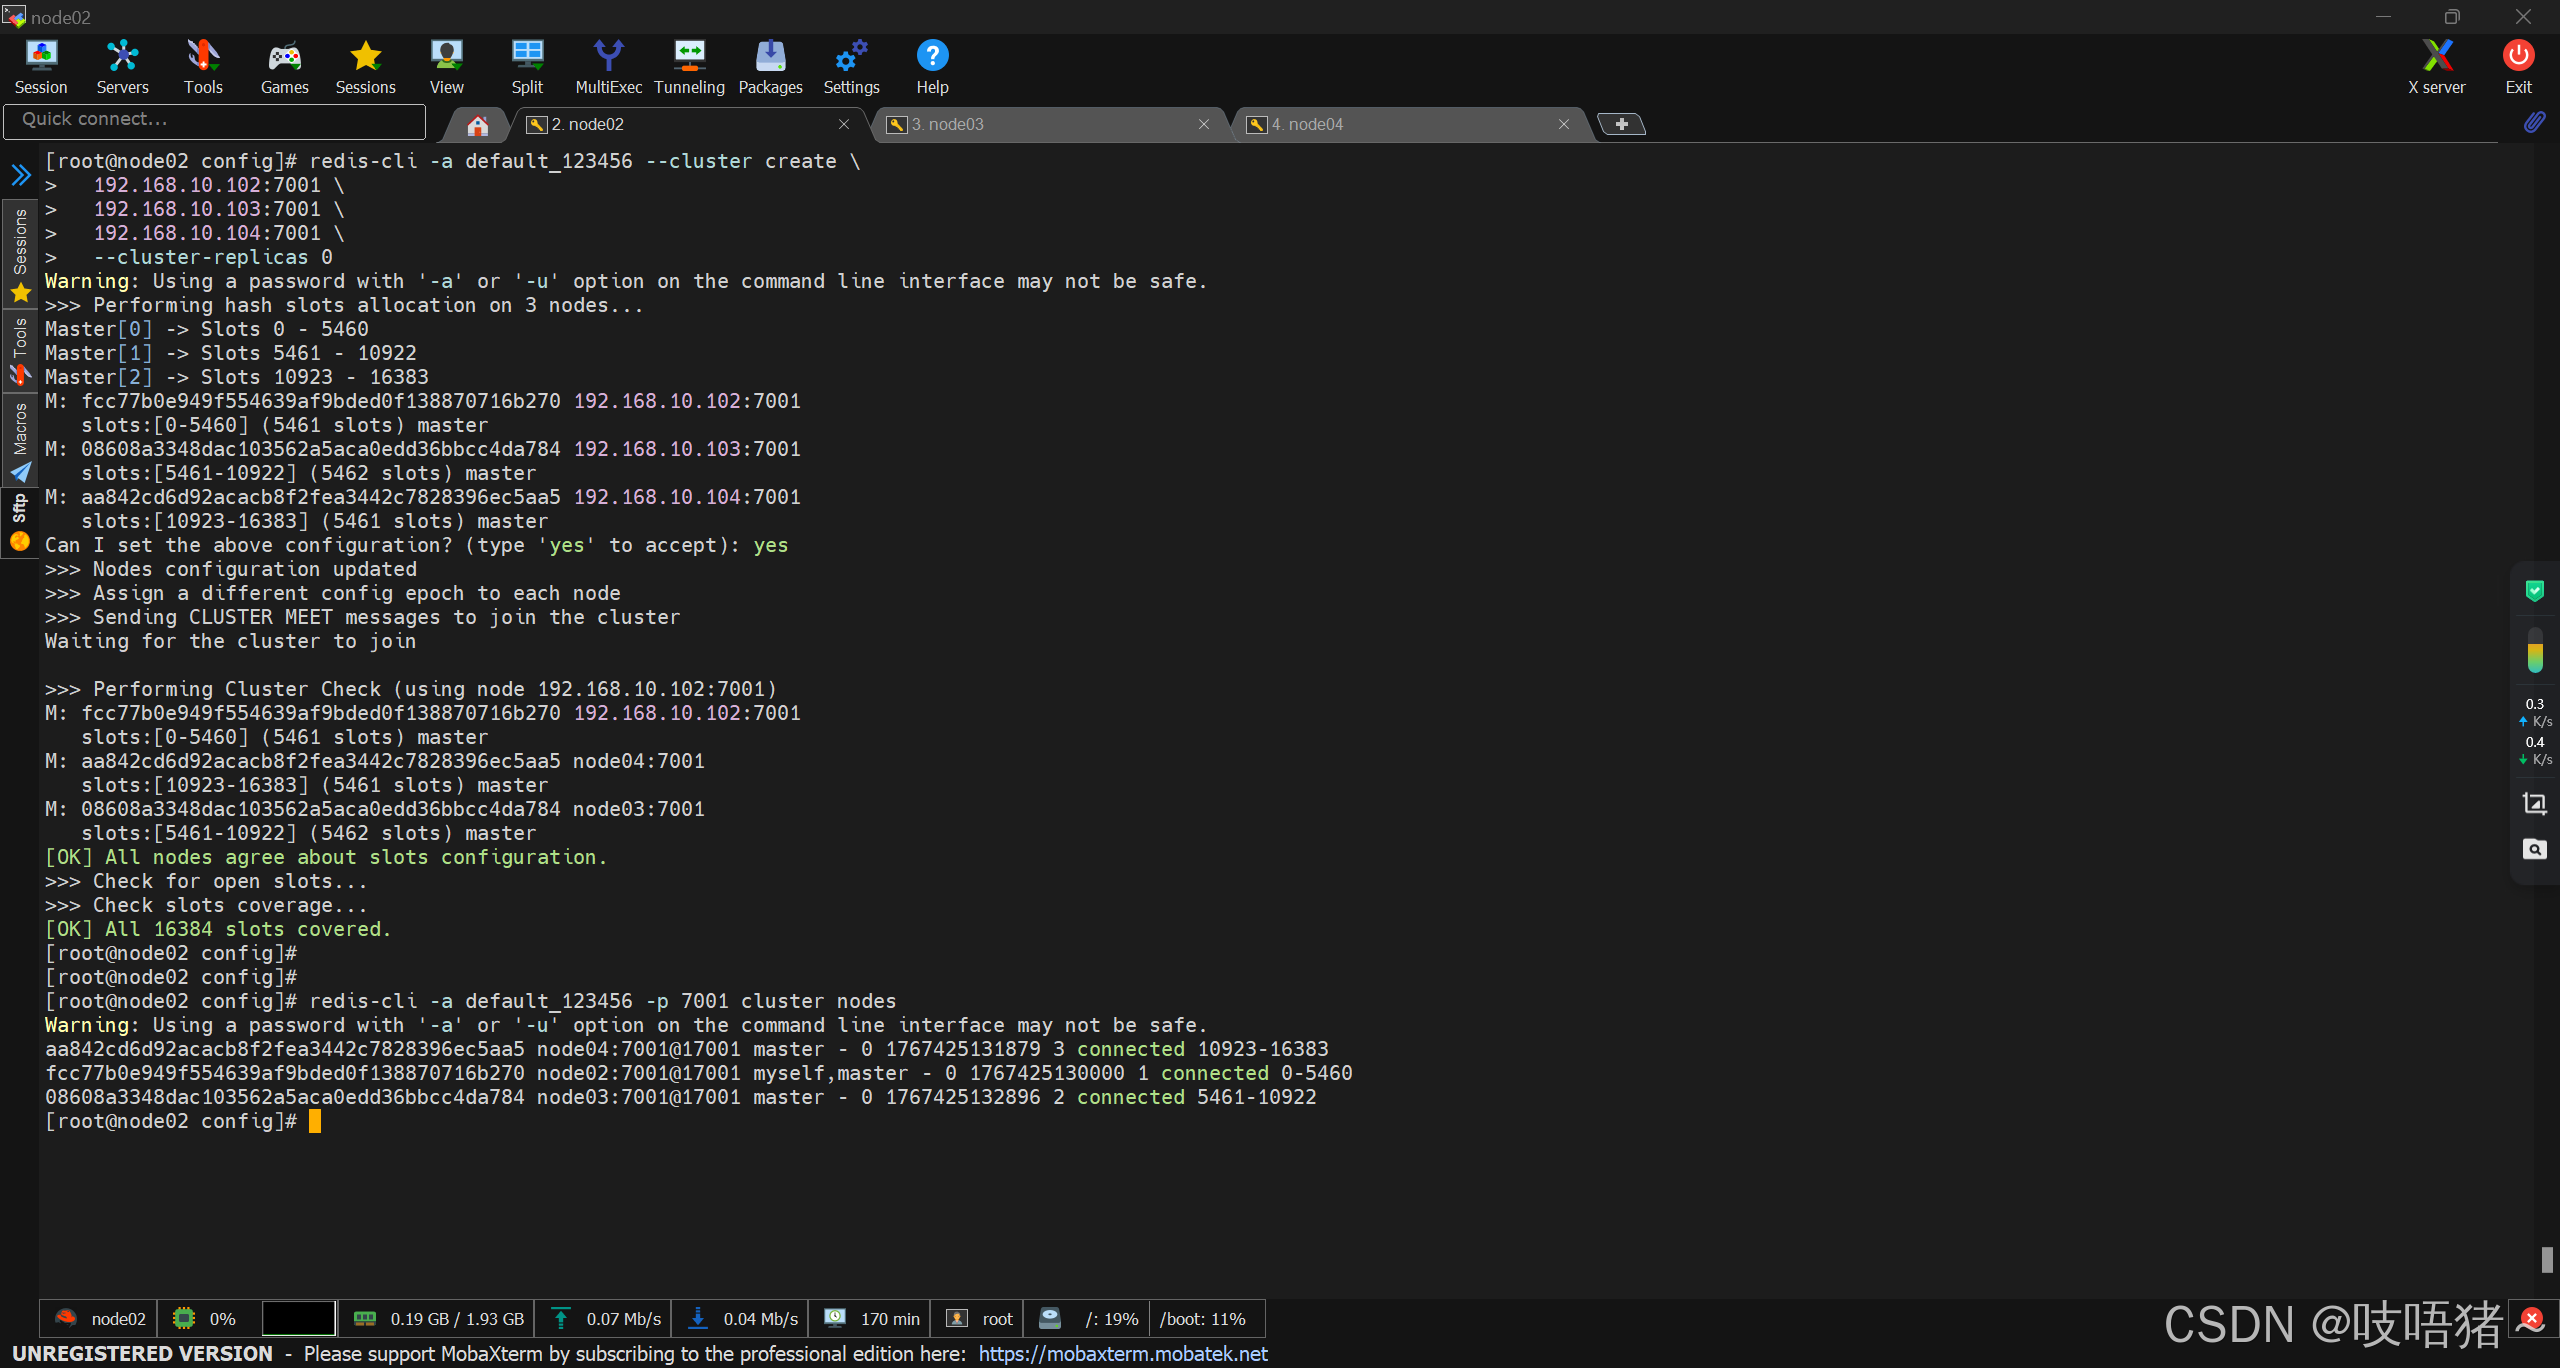
3、注册从节点
此处采用交叉主从方式:
- node03:7002为node02:7001的从节点
- node04:7002为node03:7001的从节点
- node02:7002为node04:7001的从节点
shell
redis-cli -a default_123456 -h 192.168.10.103 -p 7002 CLUSTER MEET 192.168.10.102 7001
redis-cli -a default_123456 -h 192.168.10.103 -p 7002 CLUSTER REPLICATE fcc77b0e949f554639af9bded0f138870716b270 # 192.168.10.102:7001在集群中的ID

redis-cli -a default_123456 -h 192.168.10.104 -p 7002 CLUSTER MEET 192.168.10.103 7001
redis-cli -a default_123456 -h 192.168.10.104 -p 7002 CLUSTER REPLICATE 08608a3348dac103562a5aca0edd36bbcc4da784 # 192.168.10.103:7001在集群中的ID

redis-cli -a default_123456 -h 192.168.10.102 -p 7002 CLUSTER MEET 192.168.10.104 7001
redis-cli -a default_123456 -h 192.168.10.102 -p 7002 CLUSTER REPLICATE aa842cd6d92acacb8f2fea3442c7828396ec5aa5 # 192.168.10.104:7001在集群中的ID

# 查看集群状态
redis-cli -a default_123456 -p 7001 cluster nodes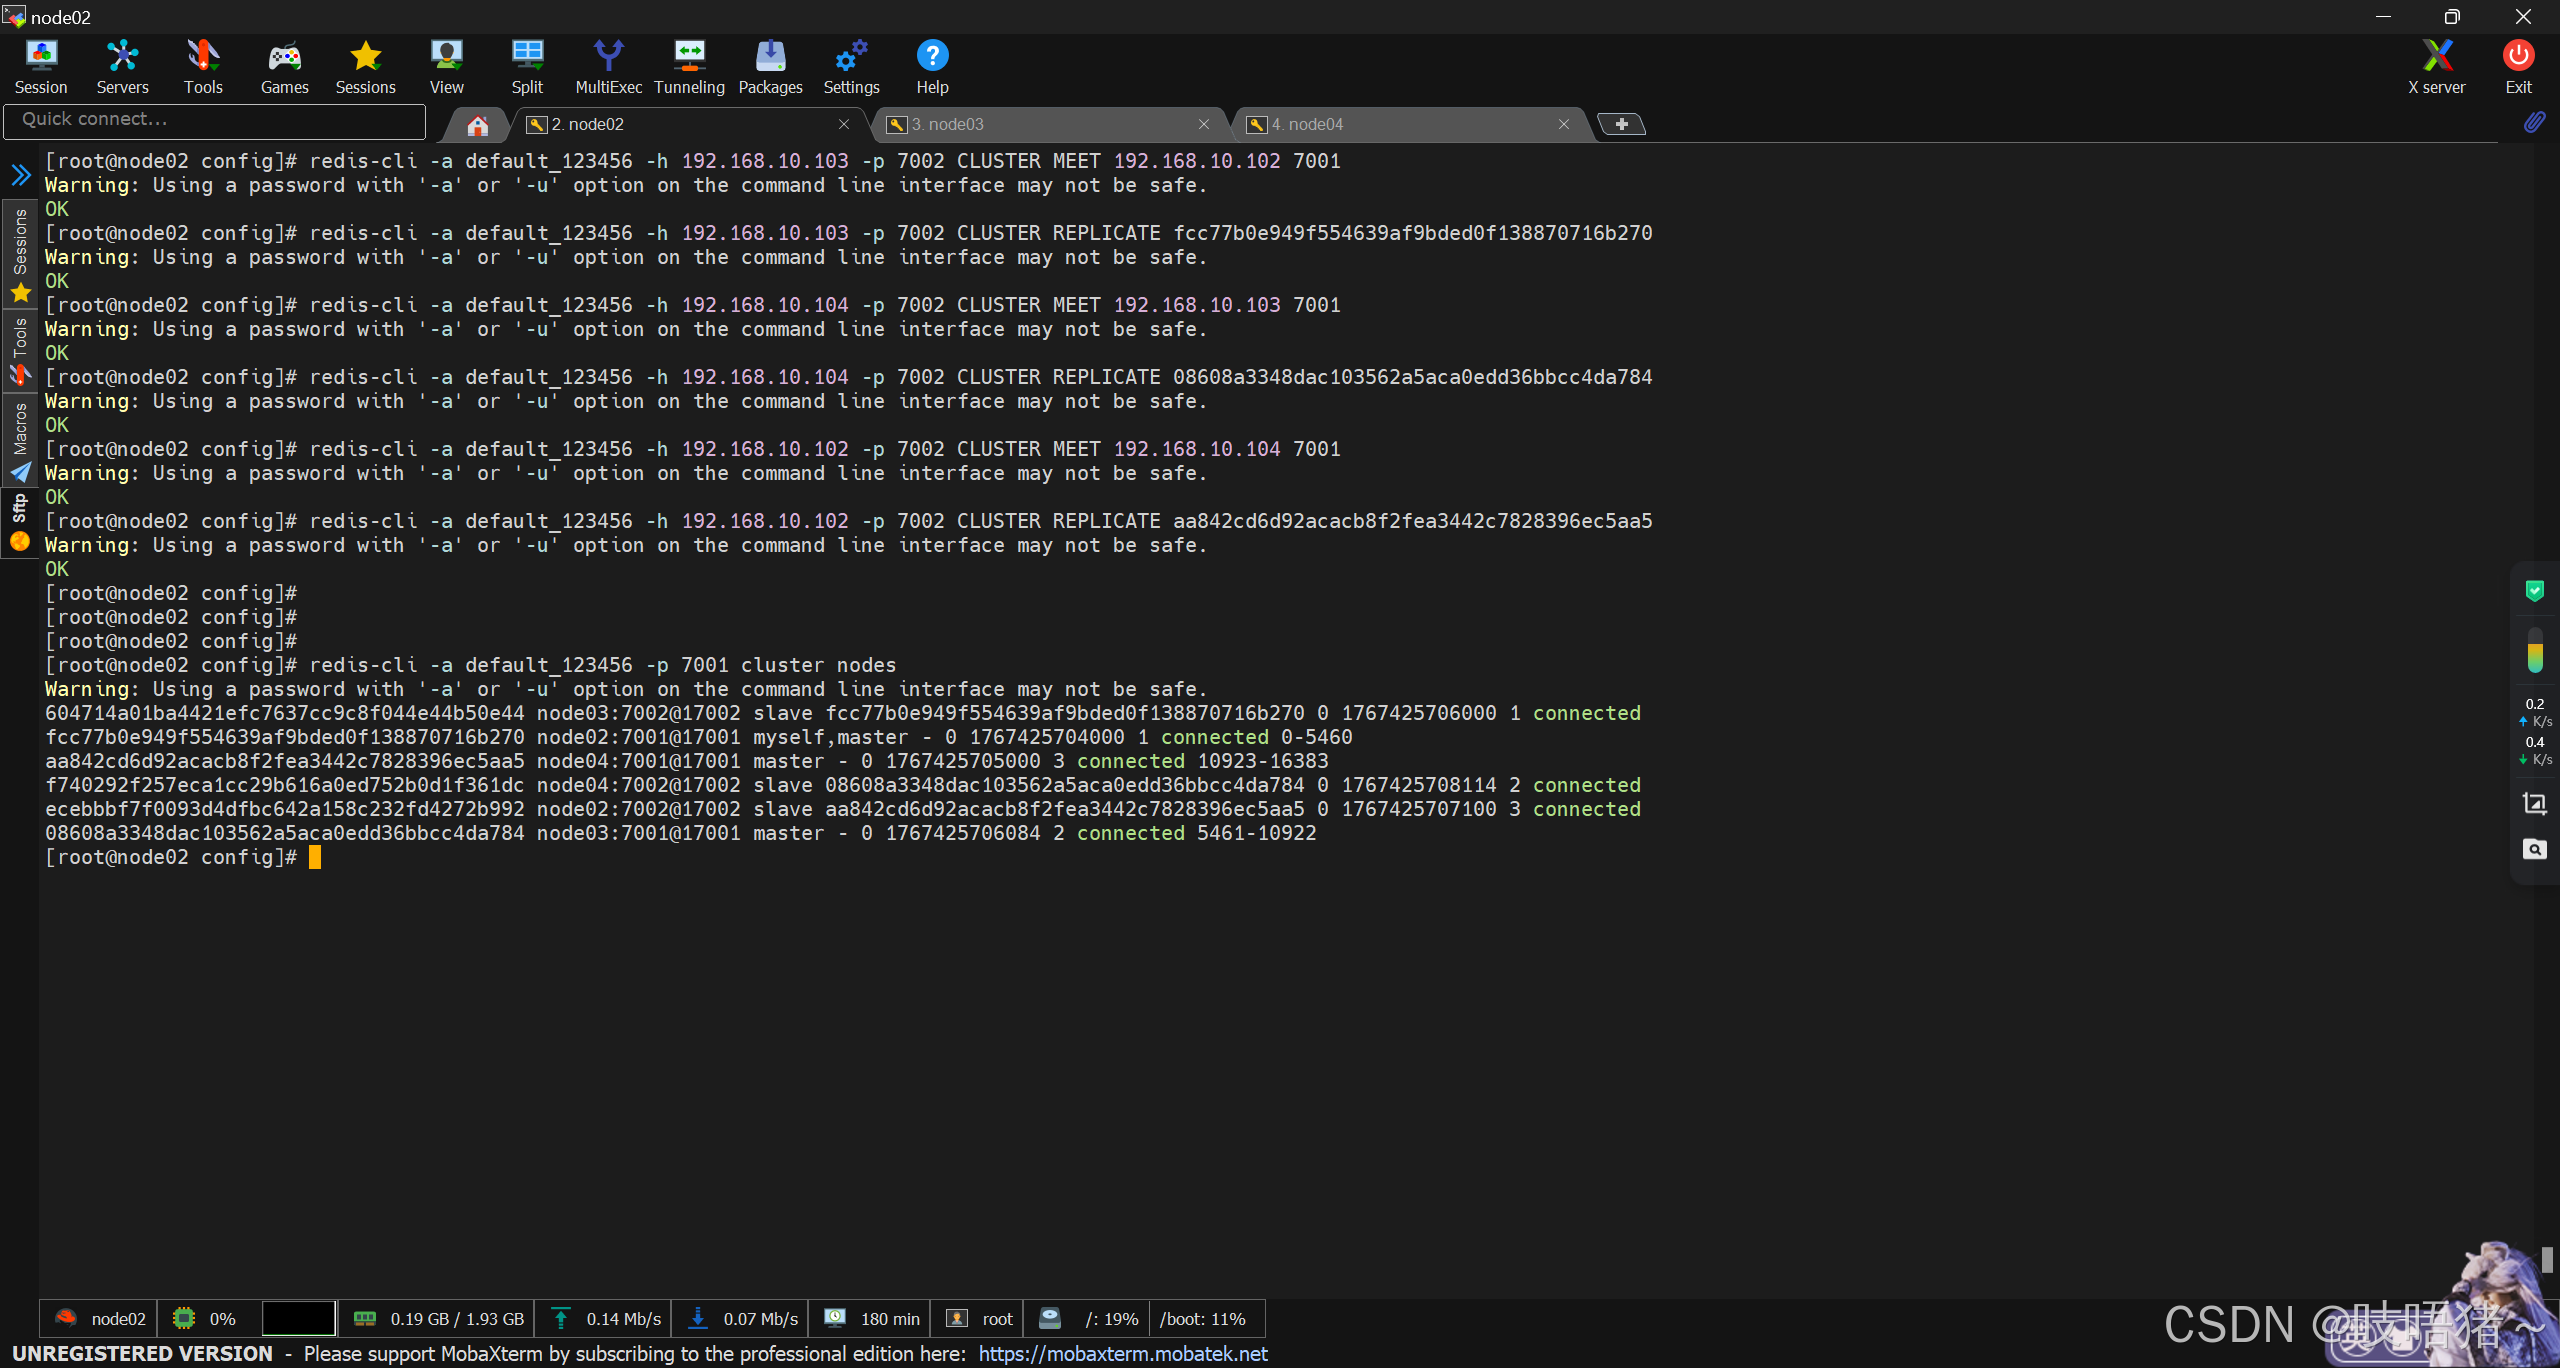
七、远程连接
集群采用RESP连接