文章目录
一、节点说明
| IP | 主机名 |
|---|---|
| 192.168.10.102 | node02 |
| 192.168.10.103 | node03 |
| 192.168.10.104 | node04 |
二、JDK安装
参考本人此篇文章:Linux软件安装 ------ JDK安装
三、Elasticsearch安装
1、软件下载
官网地址:https://www.elastic.co/cn/downloads/past-releases?product=elasticsearch
本文使用:elasticsearch-7.10.0-linux-x86_64.tar.gz

2、基础环境准备(三节点)
(1)修改系统文件
shell
# 修改limits.conf
vim /etc/security/limits.conf
* soft nofile 65536
* hard nofile 65536
* soft memlock unlimited
* hard memlock unlimited

# 修改sysctl.conf
vim /etc/sysctl.conf
vm.max_map_count=262144

sysctl -p
(2)上传并解压
shell
# 解压
tar -zxvf elasticsearch-7.10.0-linux-x86_64.tar.gz -C /opt/module/
# 重命名
mv elasticsearch-7.10.0/ elasticsearch
(3)创建elastic用户
shell
# 创建用户
useradd elastic

# 修改密码
passwd elastic

# 修改所属者
chown -R elastic:elastic elasticsearch

# 切换elastic用户
su - elastic
3、修改配置
(1)node02
shell
vim elasticsearch.yml

# cluster
cluster.name: my_elastic
cluster.routing.allocation.cluster_concurrent_rebalance: 16
cluster.routing.allocation.node_concurrent_recoveries: 16
cluster.routing.allocation.node_initial_primaries_recoveries: 16

# node
node.name: node02
node.master: true
node.data: true

# Paths
path.data: /opt/module/elasticsearch/data
path.logs: /opt/module/elasticsearch/logs

# Network
network.host: 0.0.0.0
network.publish_host: node02
http.port: 9200
transport.port: 9300
network.tcp.keep_alive: true
network.tcp.no_delay: true
transport.tcp.compress: true
###### 允许es-head连接 ######
http.cors.allow-origin: "*"
http.cors.enabled: true
http.max_content_length: 200mb

# Discovery
discovery.seed_hosts: ["node02:9300","node03:9300","node04:9300"]
cluster.initial_master_nodes: ["node02","node03","node04"]

# gateway
gateway.recover_after_nodes: 2

#################### xpack密码配置 ####################
xpack.security.enabled: true
xpack.security.transport.ssl.enabled: true
xpack.security.transport.ssl.verification_mode: certificate
xpack.security.transport.ssl.keystore.path: elastic-certificates.p12
xpack.security.transport.ssl.truststore.path: elastic-certificates.p12
(2)node03
shell
# node03在node02的基础上修改以下内容
node.name: node03
network.publish_host: node03
(3)node04
shell
# node04在node02的基础上修改以下内容
node.name: node03
network.publish_host: node03
(4)修改JVM资源
shell
vim jvm.options
-Xms8g
-Xmx8g
基本原则
不超过物理内存的50%:为操作系统和文件系统缓存预留空间
最大不超过32GB:避免使用压缩指针带来的性能损失
最小和最大设置为相同值:避免堆大小调整的开销
(5)生成TLS和身份验证
shell
# 同一个集群身份验证信息得一样
/opt/module/elasticsearch
# 给个初始空密码,一会儿修改
bin/elasticsearch-certutil cert -out config/elastic-certificates.p12 -pass ""

# 将生成的认证信息分发到其他节点
scp config/elastic-certificates.p12 elastic@node03:/opt/module/elasticsearch/config/
scp config/elastic-certificates.p12 elastic@node04:/opt/module/elasticsearch/config/
4、启动集群
(1)启动
shell
# 三节点执行
bin/elasticsearch -d

# 验证集群状态
curl -X GET "node02:9200/_cluster/health?pretty"
# 出现报错是正常现象,因为还没设密码,说明集群启动成功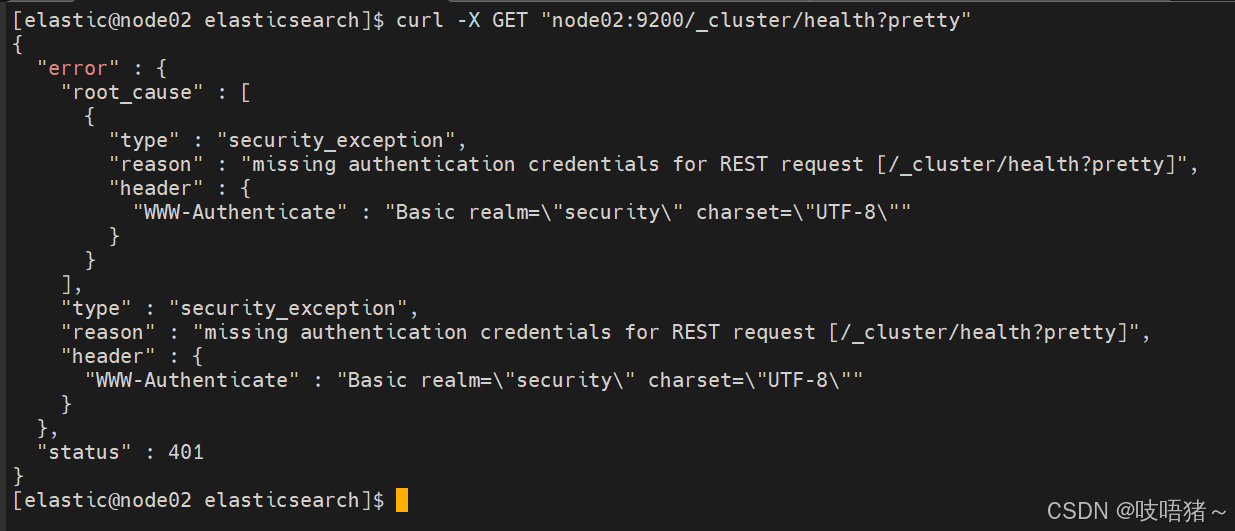
5、修改密码
shell
# 单节点执行
bin/elasticsearch-setup-passwords interactive
# 需要设置elastic,apm_system,kibana_system,logstash_system,beats_system,remote_monitoring_user等账号密码,自行设置复杂密码,本文统一设置elastic
elastic:elastic
apm_system:elastic
kibana_system:elastic
logstash_system:elastic
beats_system:elastic
remote_monitoring_user:elastic
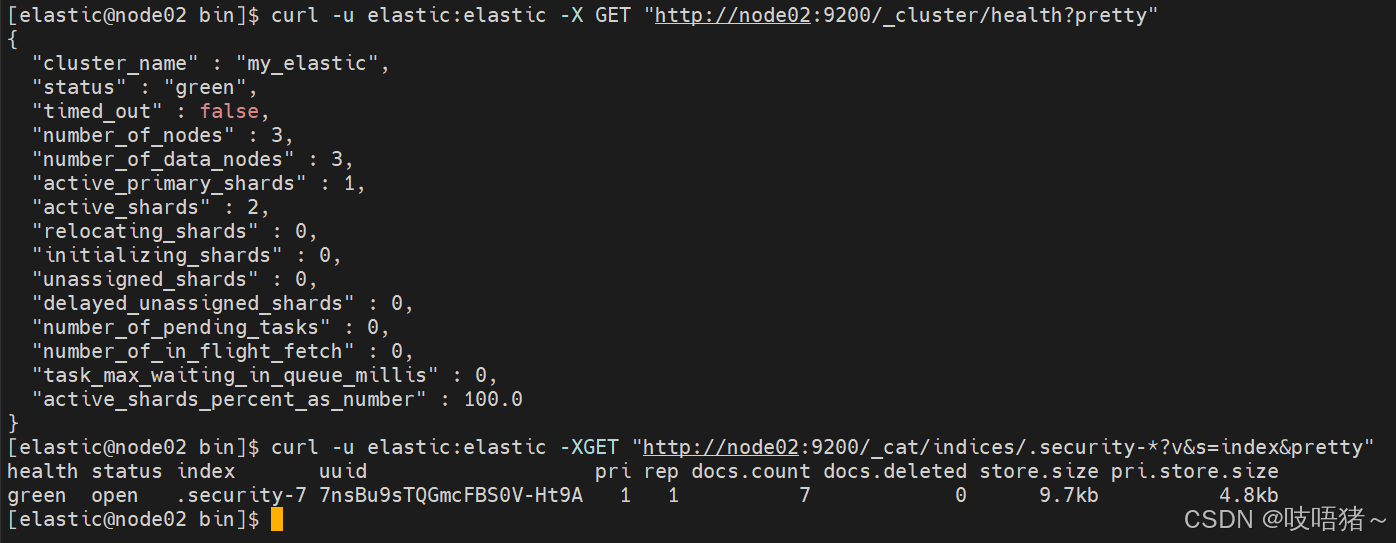
# 验证集群状态
curl -u elastic:elastic -X GET "http://node02:9200/_cluster/health?pretty"
curl -u elastic:elastic -XGET "http://node02:9200/_cat/indices/.security-*?v&s=index&pretty"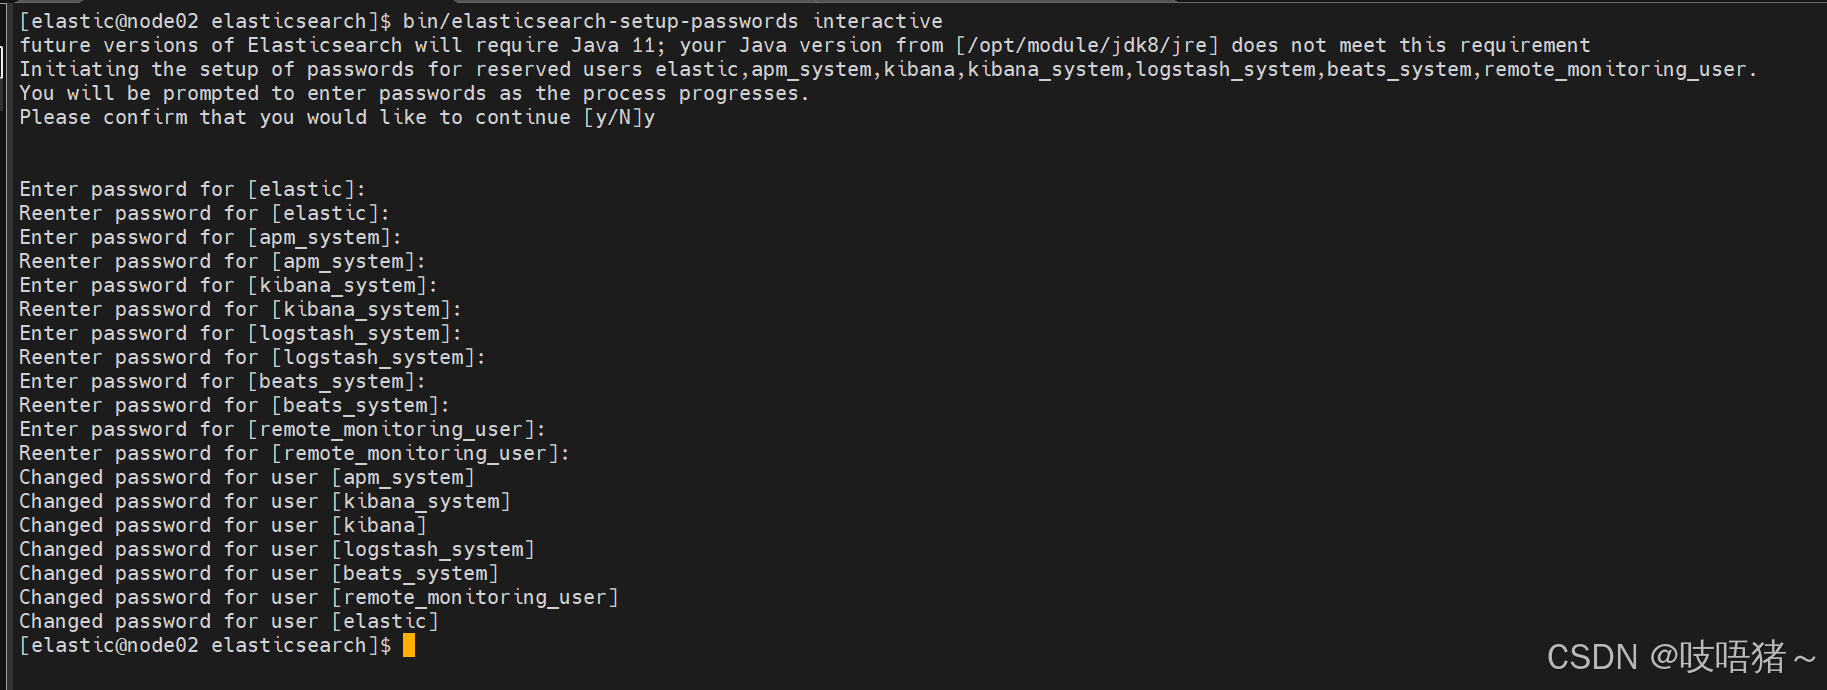
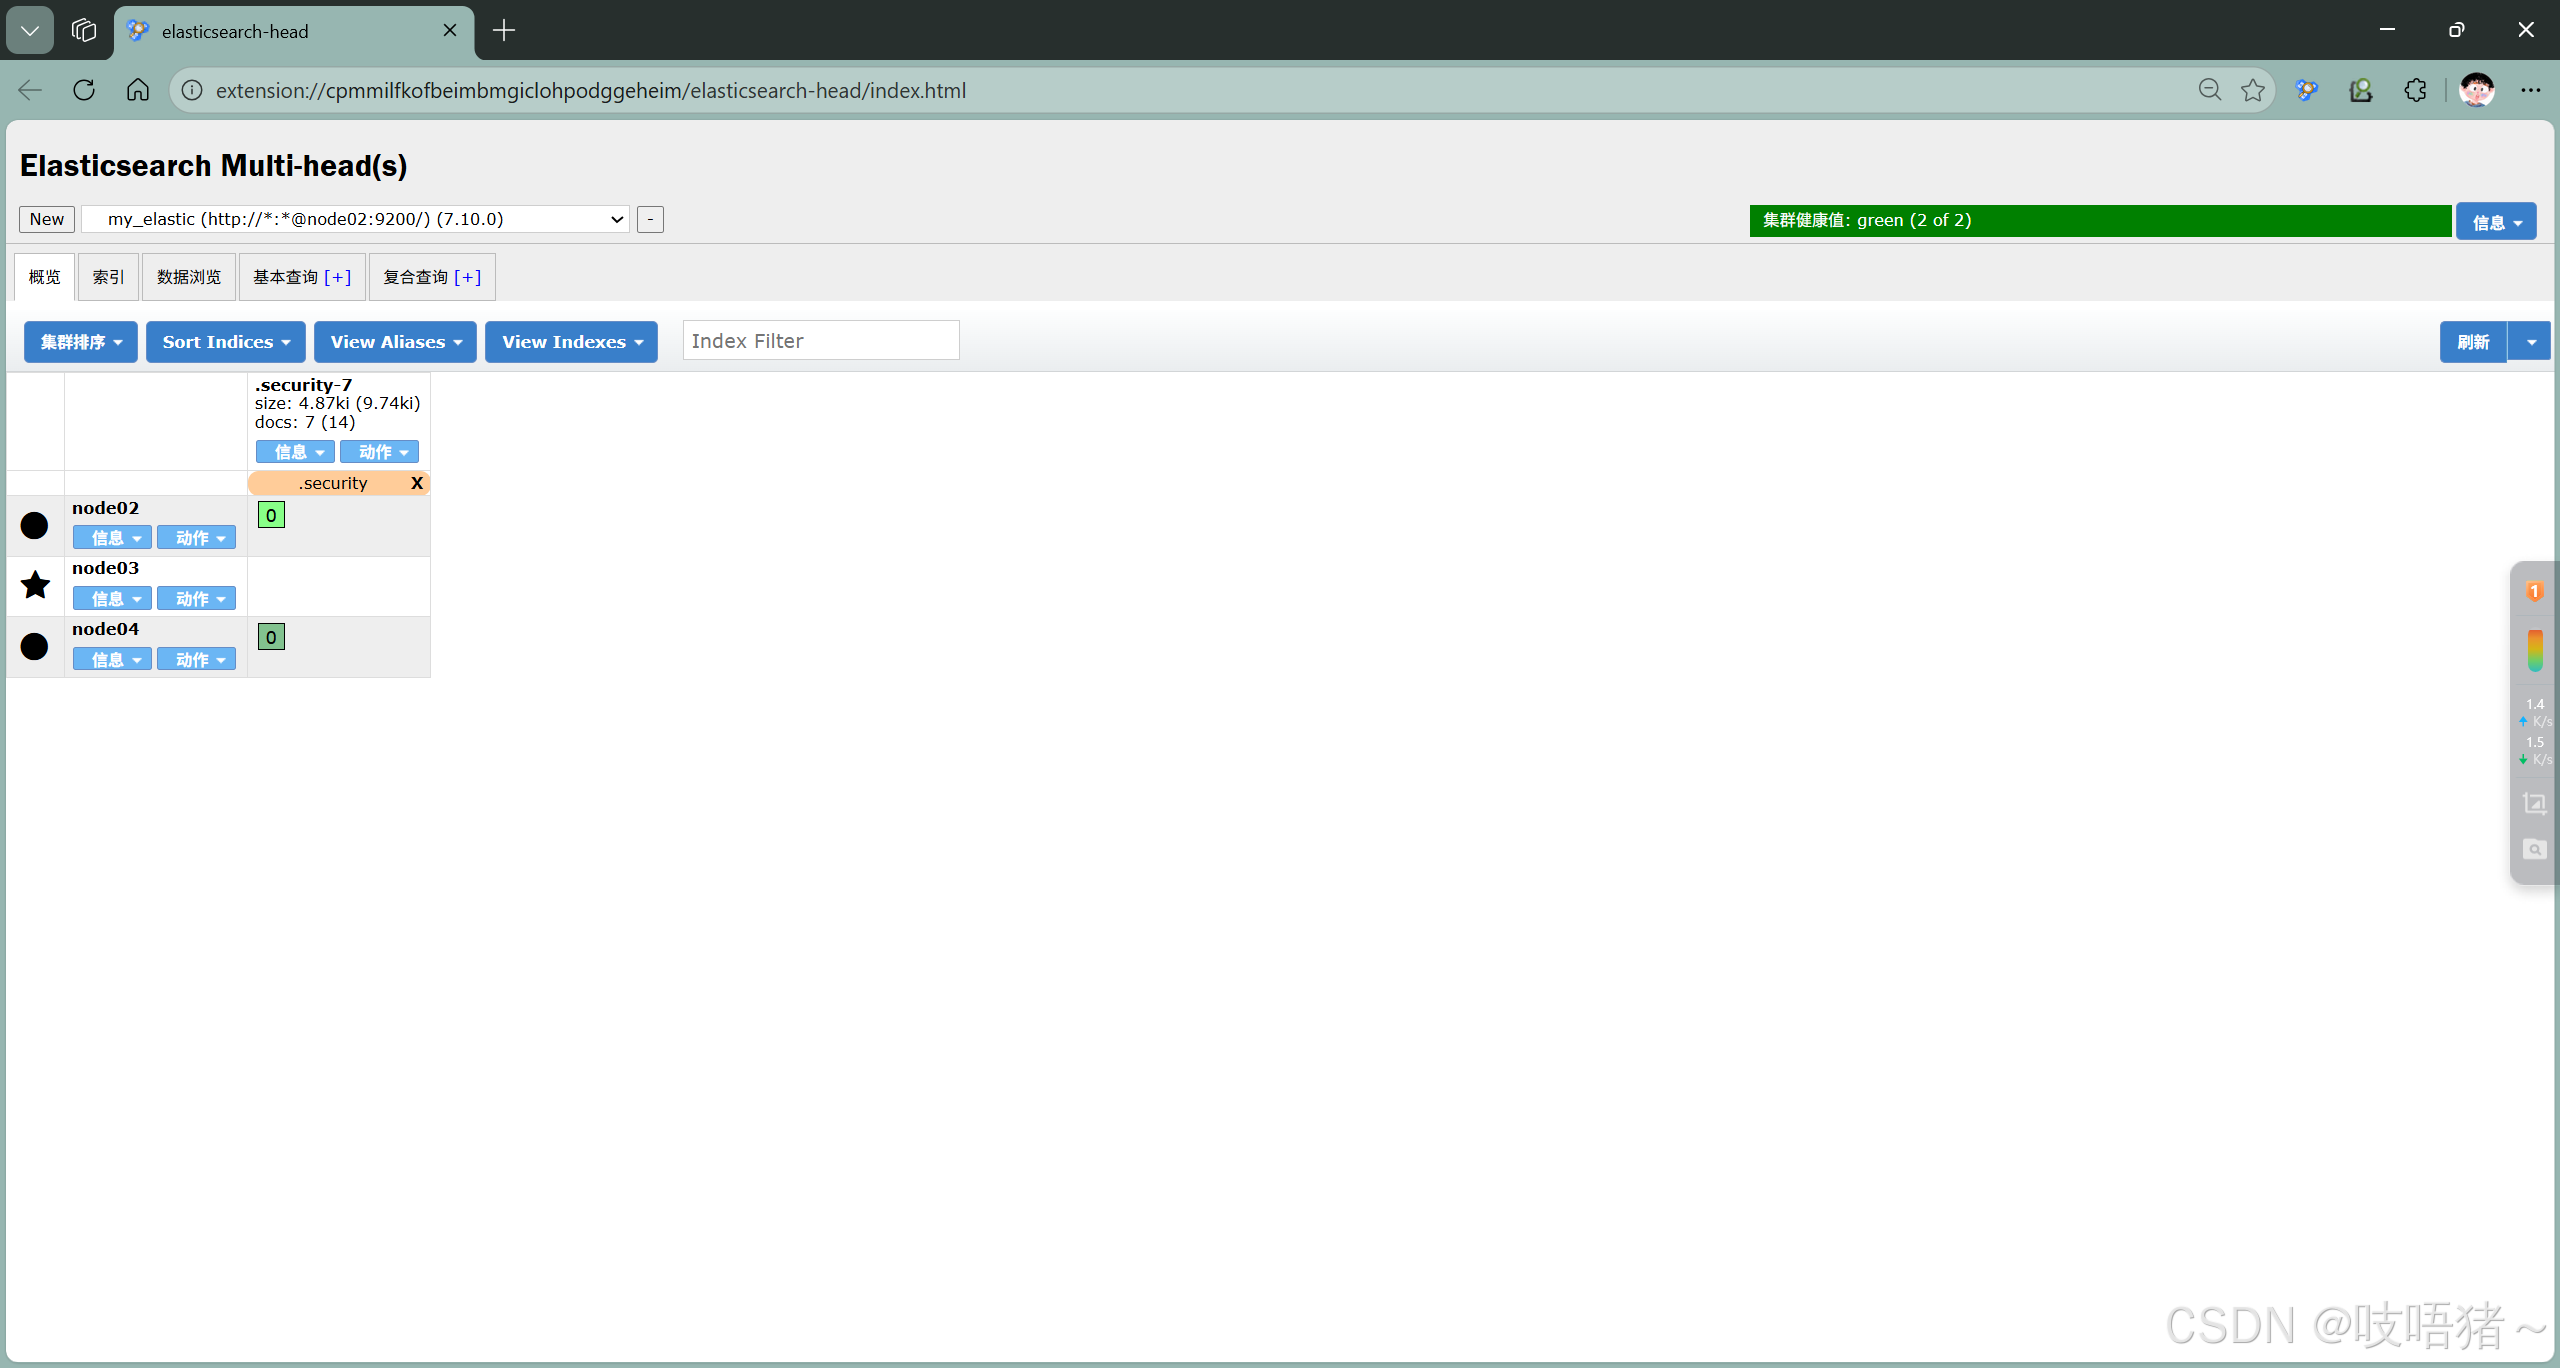
6、远程连接
此处使用浏览器的Elasticsearch-head 插件