【 声明:版权所有,欢迎转载,请勿用于商业用途。 联系信箱:feixiaoxing @163.com】
对于稍微大一点的soc公司来说,isp、h264和h265编解码、npu、pcie、usb这些重要的ip接口都是自己完成的。当然,如果不考虑成本的话,外购ip也是可以的。就拿isp来说,要做好它,首先算法团队需要设计好算法,这一步通常是用python、matlab实现,部分也会用c/c++实现。等到算法团队ok,数字前端团队就会拿过来修改成rtl代码,综合出来自己简单测试下。数字这边ok了,前期会综合为fpga bit文件交给测试团队测试,后期layout之后,等流片后再测试一遍。这是基本的测试流程。当然,我们今天是用python把isp算法仿真一遍,流程要简单的多。
1、开源代码地址
开源代码还是昨天说的这个Infinite-ISP,
https://github.com/10x-Engineers/Infinite-ISP/tree/main2、入口地址
入口的代码位于isp-pipeline.py,这一点可以从执行命令可以看出来,里面有一个main函数,
"""
File: isp_pipeline.py
Description: Executes the complete pipeline
Code / Paper  Reference:
Author: 10xEngineers Pvt Ltd
------------------------------------------------------------
"""

from infinite_isp import InfiniteISP

CONFIG_PATH = "./config/configs.yml"
RAW_DATA = "./in_frames/normal"
FILENAME = None

if __name__ == "__main__":

    infinite_isp = InfiniteISP(RAW_DATA, CONFIG_PATH)

    # set generate_tv flag to false
    infinite_isp.execute(img_path=FILENAME)
3、InifinitISP类
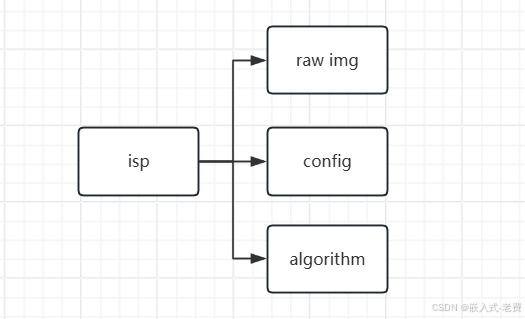
整体main函数内容比较简单,里面就是注册了一个InifinieISP类的对象,然后就用这个对象,执行了里面execute函数。回到isp本身,其实一个isp要执行起来,一个是输入图像,一个是加载配置文件,最后是执行算法。其中加载配置文件,就是在InifiniteISP初始化对象的时候完成的,位于infinite_isp.py,
class InfiniteISP:
    """
    Infinite-ISP Pipeline
    """

    def __init__(self, data_path, config_path):
        """
        Constructor: Initialize with config and raw file path
        and Load configuration parameter from yaml file
        """
        self.data_path = data_path
        self.load_config(config_path)
4、InfiniteISP构造函数
整体InfiniteISP构造函数不复杂,里面除了设置data_path之外,就是加载一下配置文件。配置文件里面,就是一些基本信息,比如文件名、图像大小配置、哪些算法打开、哪些算法没有打开、是否需要打印调试信息、各个算法模块的配置参数信息。这些配置参数就是前期isp tunning配置好的那些数据。
    def execute(self, img_path=None):
        """
        Start execution of Infinite-ISP
        """
        if img_path is not None:
            self.raw_file = img_path
            self.c_yaml["platform"]["filename"] = self.raw_file

        self.load_raw()

        # Print Logs to mark start of pipeline Execution
        print(50 * "-" + "\nLoading RAW Image Done......\n")
        print("Filename: ", self.in_file)

        # Note Initial Time for Pipeline Execution
        start = time.time()

        if not self.render_3a:
            # Run ISP-Pipeline once
            self.run_pipeline(visualize_output=True)
            # Display 3A Statistics
        else:
            # Run ISP-Pipeline till Correct Exposure with AWB gains
            self.execute_with_3a_statistics()

        util.display_ae_statistics(self.ae_feedback, self.awb_gains)

        # Print Logs to mark end of pipeline Execution
        print(50 * "-" + "\n")

        # Calculate pipeline execution time
        print(f"\nPipeline Elapsed Time: {time.time() - start:.3f}s")
5、execute函数
完成InfiniteISP构造之后,下面就开始执行execute函数了。整个函数内容看上去代码多了一点,但是主要分成两部分,一部分是加载裸图数据,即self.load_raw函数,有兴趣的同学可以跟进去看一下。还有一个是今天的重点,调用pipeline函数,即调用self.run_pipeline或者是self.execute_with_3a_statistics。其中,是直接调用self.run_pipeline,还是self.execute_with_3a_statistics,取决于config配置文件里面render_3a的设定,即
platform:
  filename: "ColorChecker_2592x1536_12bits_RGGB.raw"
  disable_progress_bar: false
  leave_pbar_string: false
  render_3a: false
  # npy, png or both
  save_format: both
6、流水线执行函数run_pipeline
整理函数的流程不算复杂,所有算法模块都是边创建、边执行的。执行到最后,把结果导出来就可以了。因为流水线本身的性质,后者的输入,就是前者的输出,
     def run_pipeline(self, visualize_output=True):
        """
        Simulation of ISP-Pipeline
        """

        # =====================================================================
        # Cropping
        crop = Crop(self.raw, self.platform, self.sensor_info, self.parm_cro)
        cropped_img = crop.execute()

        # =====================================================================
        #  Dead pixels correction
        dpc = DPC(cropped_img, self.sensor_info, self.parm_dpc, self.platform)
        dpc_raw = dpc.execute()
比如函数开始的这段内容,一开始输入的self.raw,也就是前期加载的图片。加载好了之后,创建crop对象,crop继续调用execute函数,返回值cropped_img也是一张图片。继续把cropped_img作为参数,传递给DPC,生成dpc对象。这样dpc就可以调用它的execute函数,生成dpc_raw image了。当然,也有一些算法是为了获得统计信息将来作用于其他模块,并不是生成中间图像的,
        # =====================================================================
        # Gamma
        gmc = GC(ccm_img, self.platform, self.sensor_info, self.parm_gmc)
        gamma_raw = gmc.execute()

        # =====================================================================
        # Auto-Exposure
        aef = AE(gamma_raw, self.sensor_info, self.parm_ae)
        self.ae_feedback = aef.execute()

        # =====================================================================
        # Color space conversion
        csc = CSC(gamma_raw, self.platform, self.sensor_info, self.parm_csc, self.parm_cse )
        csc_img = csc.execute()
大家可以留心一下CSC的参数gamma_raw,这里的参数是从gmc.execute那里获取的结果。中间aef虽然也执行了,但是目的是为了获得self.ae_feedback这个数值。而self.ae_feedback最终其实是为了Digital gain使用的,这里只是为了做某种统计而已。一个模块的统计参数,用于入参配置另外一个模块,这也是isp一个重要特点,不然isp就是一个简单的流水帐了,模块和模块之间仅有img的交流,没有参数的交流了。
至此,isp的处理流程就分析完了。