使用JustAuth 开始集成第三方应用授权登录,以下以gitee 为例实现
项目依赖
xml
    <dependency>
            <groupId>org.springframework.boot</groupId>
            <artifactId>spring-boot-starter-web</artifactId>
        </dependency>

   <dependency>
            <groupId>me.zhyd.oauth</groupId>
            <artifactId>JustAuth</artifactId>
            <version>1.16.7</version>
      </dependency>

        <!-- 如果你需要处理JSON,可添加fastjson依赖(可选) -->
        <dependency>
            <groupId>com.alibaba</groupId>
            <artifactId>fastjson</artifactId>
            <version>2.0.45</version>
        </dependency>
Gitee 创建应用获取clientId和clientSecret 并填写回调地址
首先你需要去 Gitee 开放平台创建应用,获取关键配置:
访问Gitee 第三方应用管理,登录后点击创建应用。
填写应用名称、应用描述,重定向 URI要和你代码中配置的redirectUri完全一致(这是授权后 Gitee 回调的地址)。
创建完成后,你会得到Client ID和Client Secret,这两个是核心配置。
实现代码
java
package com.learn.controller;
import com.learn.result.ResData;
import jakarta.servlet.http.HttpServletRequest;
import jakarta.servlet.http.HttpServletResponse;
import me.zhyd.oauth.AuthRequestBuilder;
import me.zhyd.oauth.config.AuthConfig;
import me.zhyd.oauth.model.AuthCallback;
import me.zhyd.oauth.model.AuthResponse;
import me.zhyd.oauth.model.AuthUser;
import me.zhyd.oauth.request.AuthRequest;
import me.zhyd.oauth.utils.AuthStateUtils;
import org.springframework.web.bind.annotation.GetMapping;
import org.springframework.web.bind.annotation.RestController;
import java.io.IOException;
@RestController
public class AuthController {
@GetMapping("/login")
public ResData<?> login(HttpServletResponse response) throws IOException {
AuthRequest authRequest = getAuthRequest();
// 2. 生成授权地址(前端跳转这个地址进行Gitee登录授权)
String authorizeUrl = authRequest.authorize(AuthStateUtils.createState());
return ResData.ok("操作成功", authorizeUrl);
}
@GetMapping(value = "/lgb")
public ResData<?> lgb(HttpServletRequest request, AuthCallback callback) {
// String code = request.getParameter("code");
// String state = request.getParameter("state");
// AuthCallback callback = AuthCallback.builder()
// .code(code)
// .state(state)
// .build();
AuthRequest authRequest = getAuthRequest();
AuthResponse<AuthUser> login = authRequest.login(callback);
AuthUser authUser = login.getData();
return ResData.ok(authUser);
}
private AuthRequest getAuthRequest() {
return AuthRequestBuilder.builder()
.source("gitee")
.authConfig((source) -> {
// 通过 source 动态获取 AuthConfig
// 此处可以灵活的从 sql 中取配置也可以从配置文件中取配置
return AuthConfig.builder()
.clientId("67a73a6ebd5f659e365eab214ddc516ebd8580b1a61c390127350eb9119da6a0")
.clientSecret("84b06497a1d0c113b99553c04ab6d116337f5490f2fcfa573f84065346920d87")
.redirectUri("http://me64995b.natappfree.cc/lgb")
.build();
})
.build();
}
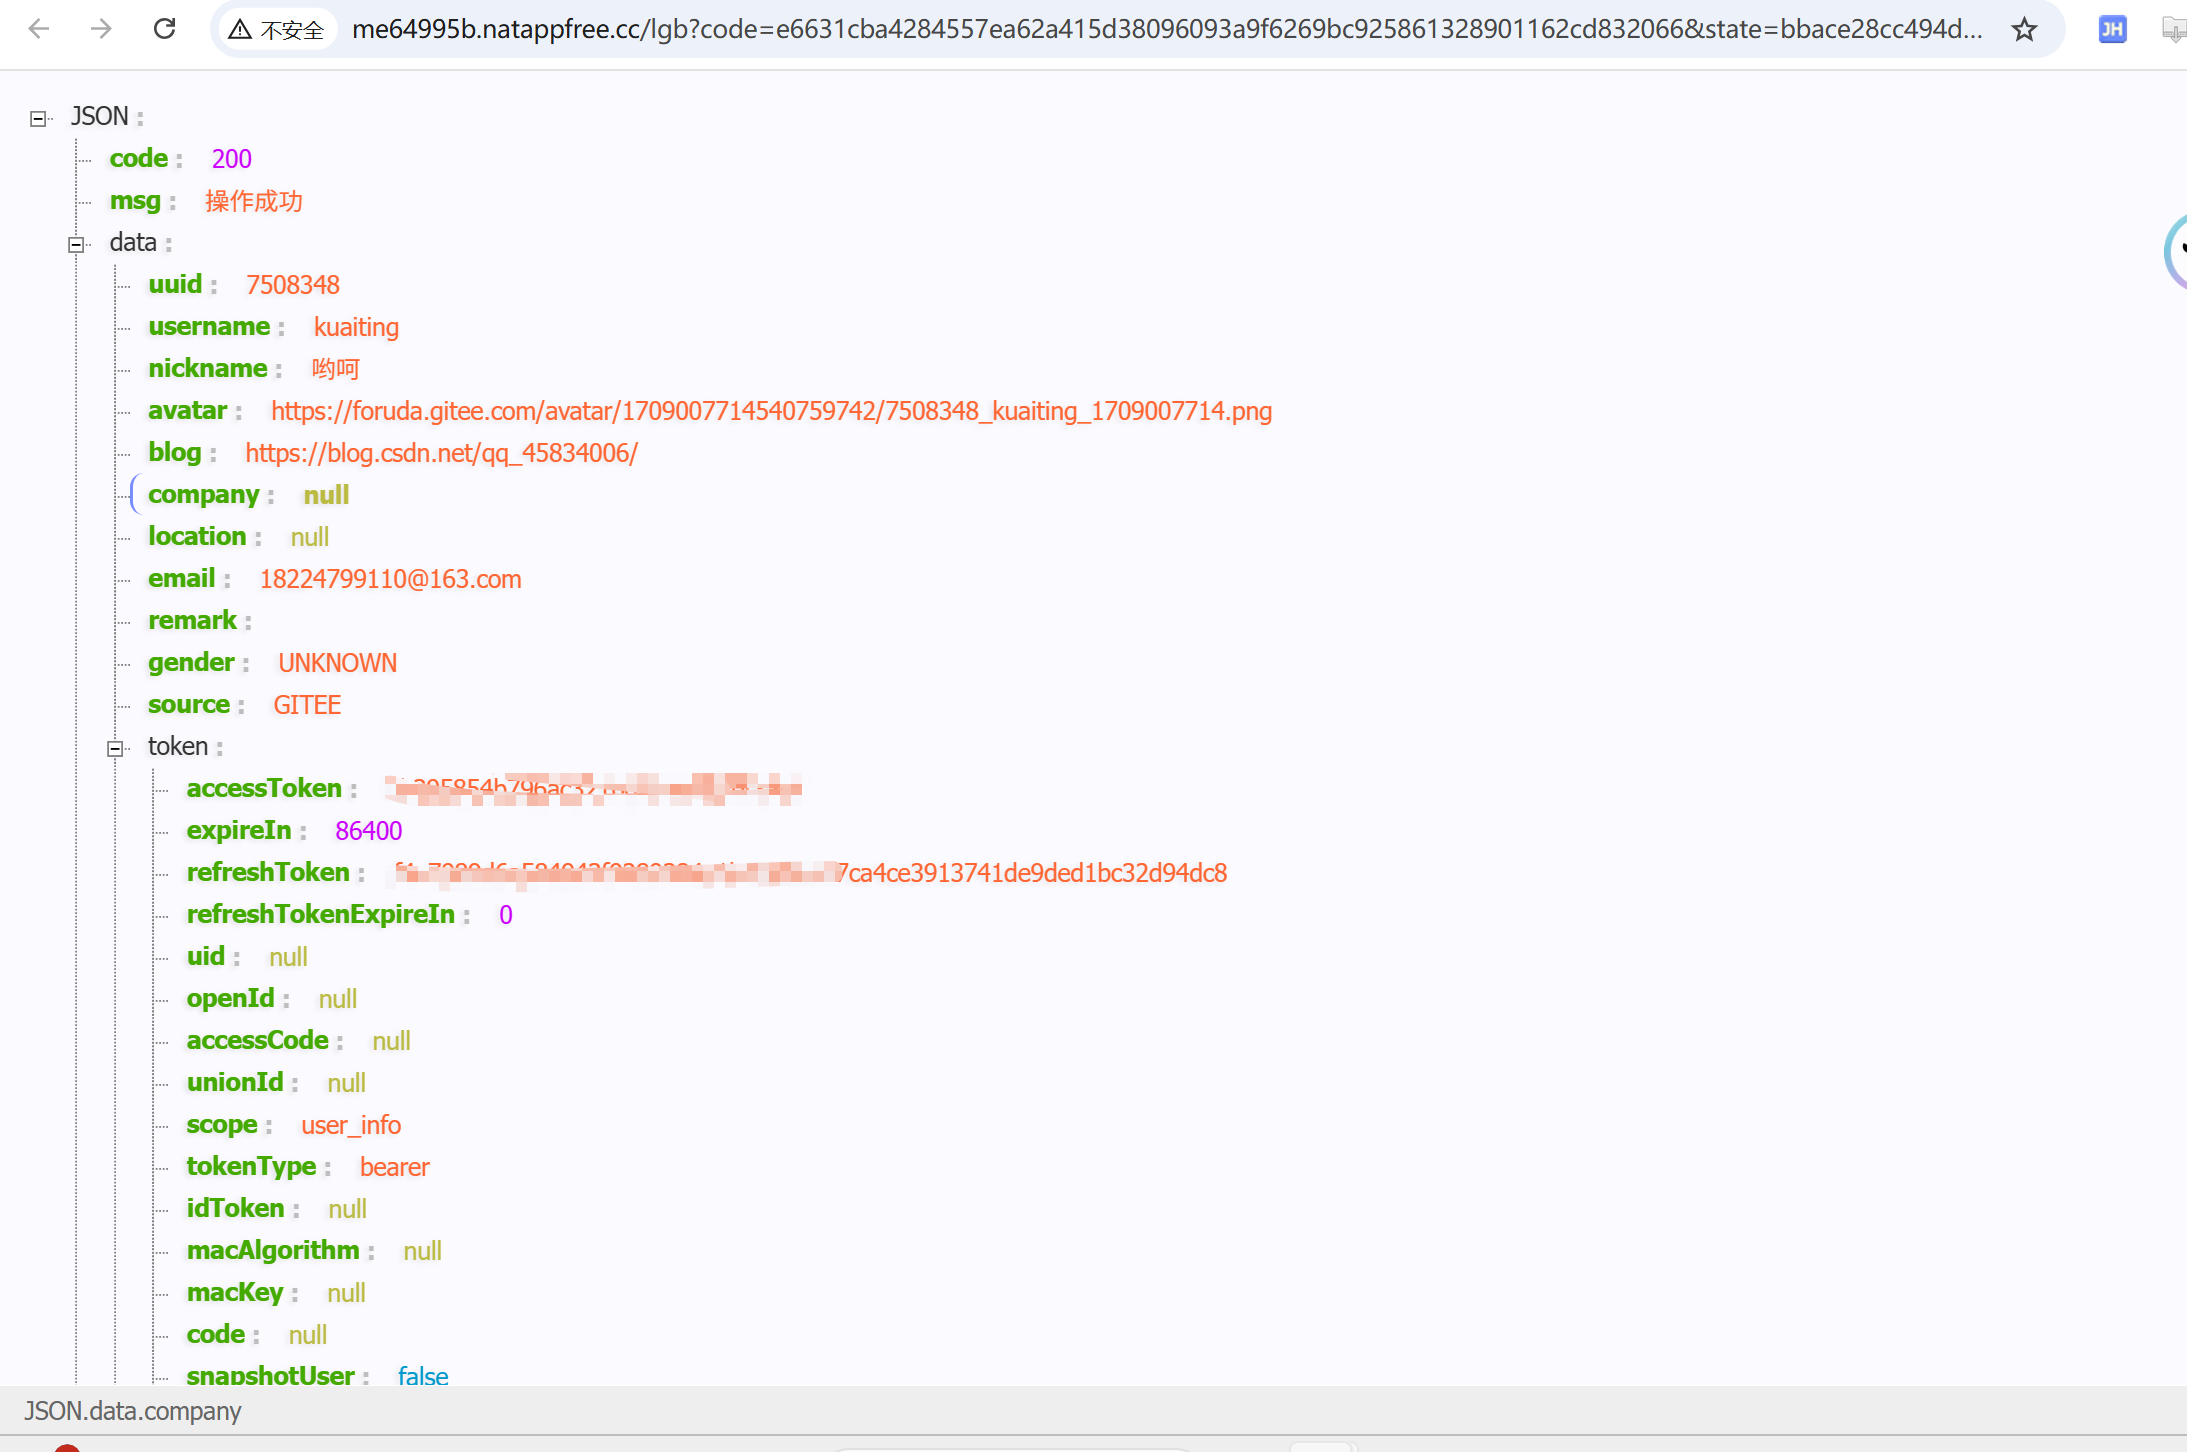
}这里需要注意的是默认和返回xml文件信息给您 那您可能需要配置返回JSON 两种方式解决
方式1:
java
@Configuration
public class WebMvcConfig implements WebMvcConfigurer {

    @Override
    public void addResourceHandlers(ResourceHandlerRegistry registry) {
        // 添加对 favicon.ico 的处理,避免 NoResourceFoundException 错误
        registry.addResourceHandler("/favicon.ico")
                .addResourceLocations("classpath:/static/favicon.ico");
    }

    @Override
    public void configureMessageConverters(List<HttpMessageConverter<?>> converters) {
        // 清空默认的所有消息转换器
        converters.clear();
        // 只添加JSON转换器(使用Jackson处理JSON)
        converters.add(new MappingJackson2HttpMessageConverter());
    }
}
方式2:
java
 // 2. 回调接口:强制返回JSON
    @GetMapping(value = "/gitee/callback", produces = MediaType.APPLICATION_JSON_VALUE)
    public AuthResponse giteeCallback(String code, String state) {
        // 原代码...
    }
最终展示效果: