最近 Skills 在各个地方不停的出现在自己视野中,索性简单了解下。
Anthropic 官方在 2025 年 10 月 16 日 正式发布了 Claude Skills 功能,(Claude App / Claude Code / API / Agent SDK)支持。
在 2025 年 12 月 18 日 推出了 Agent Skills 的 开放标准(Open Standard),意味着 Skill 不再仅限 Claude 独有,和 MCP 一样,朝着通用、跨平台可采用的规范方向发展(Cursor 目前只有 Nightly 版支持)。
先给个定义:
Skill 是一种模块化、可复用的能力包,用于将特定任务的专业知识、工作流程和可执行逻辑进行结构化封装,使 AI 在执行该类任务时具备稳定、一致且可持续演进的行为能力。
Agent 自主决策,会根据目标主动选择 Skill,并在执行过程中渐进展开、动态调整行动路径。
稍微有一点抽象,下边再展开一下。
背景
过去一年,AI 圈几乎所有人都在谈 Agent(一文入门 agent:从理论到代码实战)。自动执行任务、调用工具、跨系统操作、像人一样工作------Agent 被寄予了太多期待。但一个越来越明显的事实是:Agent 很聪明,却始终"不好用"。
不是因为模型不够强,而是因为------我们一直在用「错误的方式」构建它们。
Agent 的问题,不在智能,而在「专业性」
今天的 Agent,像一个极其聪明但毫无行业经验的新人。
它可以:
- 推理
- 写代码
- 调用 API
- 拆解任务
但它并不真正懂你的工作。
你必须:
- 在每次对话里反复解释背景
- 手把手教流程
- 不断纠错
- 接受它"这次记住了,下次又忘了"
这不是智能问题,而是专业知识无法沉淀的问题。
一个很直观的类比是:
看病时,你会选一个 IQ 300、记得住所有医学理论的天才,还是一个做了十年临床的一线医生?
Agent 今天更像前者------聪明,但不稳定、不一致、不可复用。
真正缺的不是 Agent,而是「可复用的专业能力」
很多团队尝试的解决方案是:为每个场景造一个新 Agent。
- 一个写代码的 Agent
- 一个做财报的 Agent
- 一个分析数据的 Agent
- 一个写方案的 Agent
结果是:
- Agent 数量失控
- 维护成本极高
- 能力彼此割裂
- 行为不可预测
而 Anthropic 团队在实践中发现了一件关键的事:
Agent 本身,其实已经足够通用了。
真正稀缺的,不是「会思考的东西」,而是被整理、被固化、能反复调用的专业流程。
这,就是 Skill 出现的背景。
什么是 Skill?
Skill = 一个装着"专业流程"的文件夹。
不是模型参数,不是 Prompt,不是黑盒工具,而是清晰、可读、可维护的文件结构。
一个 Skill 里通常包括:
- 使用说明(SKILL.md)
- 明确的执行流程
- 可运行的脚本或代码
- 模板、示例、资源文件
它的本质不是"聪明",而是经验的封装。
为什么 Skill 比 Tool、Prompt 都优?
-
它不占用上下文
Skill 采用「按需加载」的方式:默认只向 Agent 暴露必要的元信息,只有在任务过程中判断需要某项能力时,才会主动读取对应 Skill 的完整内容。
这意味着,Agent 可以同时「拥有」上百个 Skill,却不必一次性把它们全部塞进上下文,而是根据当前任务自行决策该调用哪一个、在什么时候调用。
上下文被用在真正需要的地方,能力也因此变得可组合、可扩展。
-
它是可维护的
和 Prompt 最大的不同在于:
- Skill 是文件
- 文件可以版本控制
- 可以回滚、演进、审计
这让 Agent 的行为第一次变得:
- 可预测
- 可复制
- 可传承
-
它是真正的「知识沉淀」
Prompt 是一次性的对话技巧,Skill 是可复用的操作知识。
它记录的不是「你怎么说」,而是「事情应该怎么做」。
Skill × MCP,完整的 Agent 架构
Anthropic 在实践中逐渐形成了一套清晰的分层结构:
-
模型(Model)
负责思考和推理
-
运行时(Runtime)
提供文件系统、代码执行能力
-
MCP Server
连接外部世界(API、数据、系统)
-
Skill
提供专业判断与执行方式
MCP 负责「能做什么」,Skill 负责「应该怎么做」,Agent 本身,只是一个执行载体。
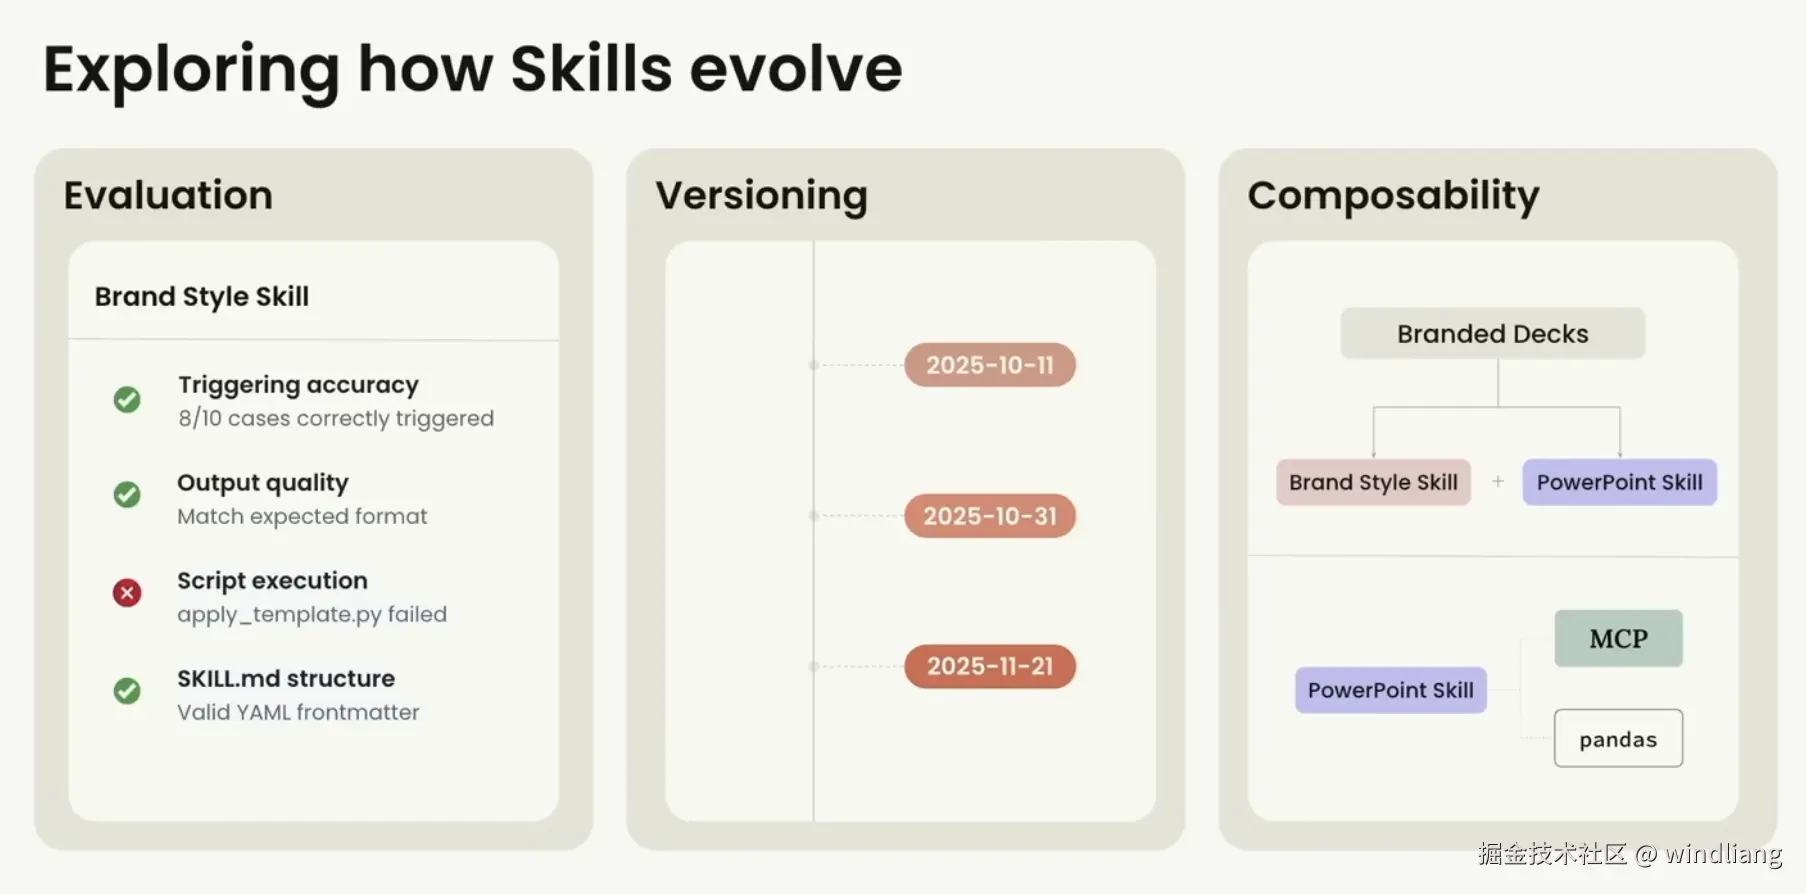
Skill 未来方向
-
Testing & Evaluation(测试与评估)
可以像现在的软件一样进行测试、分析 Skill。
-
Versioning(版本演进与追溯)
新增版本控制,比如像现在的 node 包版本一样。
-
Skill dependencies(Skill 之间的依赖)
Skill 引入另一个 Skill,互相组合依赖,构建更加强大的 Skill。
具体实例
anthropics/skills: Public repository for Agent Skills 官方展示了些 Claude Skills ,涵盖创意应用(艺术、音乐、设计)到技术任务(测试 Web 应用、MCP 服务器生成)再到企业工作流程(通信、品牌等)。
看一下 web-artifacts-builder:
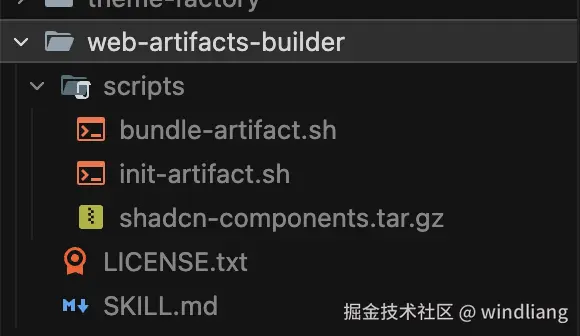
一个 SKILL.md,还有两个脚本文件。其中 SKILL.md 如下,新建一个网站的技能(中文是我后来补的):
markdown
---
name: web-artifacts-builder
description: Suite of tools for creating elaborate, multi-component claude.ai HTML artifacts using modern frontend web technologies (React, Tailwind CSS, shadcn/ui). Use for complex artifacts requiring state management, routing, or shadcn/ui components - not for simple single-file HTML/JSX artifacts.
description: 一套用于创建复杂的多组件 claude.ai HTML 工件的工具集,使用现代前端 Web 技术(React、Tailwind CSS、shadcn/ui)。适用于需要状态管理、路由或 shadcn/ui 组件的复杂工件 - 不适用于简单的单文件 HTML/JSX 工件。
license: Complete terms in LICENSE.txt
---
# Web Artifacts Builder
# Web 工件构建器
To build powerful frontend claude.ai artifacts, follow these steps:
要构建强大的前端 claude.ai 工件,请按照以下步骤操作:
1. Initialize the frontend repo using `scripts/init-artifact.sh`
1. 使用 `scripts/init-artifact.sh` 初始化前端仓库
2. Develop your artifact by editing the generated code
2. 通过编辑生成的代码来开发您的工件
3. Bundle all code into a single HTML file using `scripts/bundle-artifact.sh`
3. 使用 `scripts/bundle-artifact.sh` 将所有代码打包成单个 HTML 文件
4. Display artifact to user
4. 向用户展示工件
5. (Optional) Test the artifact
5. (可选)测试工件
**Stack**: React 18 + TypeScript + Vite + Parcel (bundling) + Tailwind CSS + shadcn/ui
**技术栈**:React 18 + TypeScript + Vite + Parcel(打包)+ Tailwind CSS + shadcn/ui
## Design & Style Guidelines
## 设计与样式指南
VERY IMPORTANT: To avoid what is often referred to as "AI slop", avoid using excessive centered layouts, purple gradients, uniform rounded corners, and Inter font.
非常重要:为避免通常被称为"AI 垃圾"的设计,请避免使用过多的居中布局、紫色渐变、统一的圆角和 Inter 字体。
## Quick Start
## 快速开始
### Step 1: Initialize Project
### 步骤 1:初始化项目
Run the initialization script to create a new React project:
运行初始化脚本以创建新的 React 项目:
```bash
bash scripts/init-artifact.sh <project-name>
cd <project-name>
```
This creates a fully configured project with:
这将创建一个完全配置好的项目,包含:
- ✅ React + TypeScript (via Vite)
- ✅ React + TypeScript(通过 Vite)
- ✅ Tailwind CSS 3.4.1 with shadcn/ui theming system
- ✅ Tailwind CSS 3.4.1 与 shadcn/ui 主题系统
- ✅ Path aliases (`@/`) configured
- ✅ 已配置路径别名(`@/`)
- ✅ 40+ shadcn/ui components pre-installed
- ✅ 预安装 40+ 个 shadcn/ui 组件
- ✅ All Radix UI dependencies included
- ✅ 包含所有 Radix UI 依赖
- ✅ Parcel configured for bundling (via .parcelrc)
- ✅ 已配置 Parcel 用于打包(通过 .parcelrc)
- ✅ Node 18+ compatibility (auto-detects and pins Vite version)
- ✅ Node 18+ 兼容性(自动检测并固定 Vite 版本)
### Step 2: Develop Your Artifact
### 步骤 2:开发您的工件
To build the artifact, edit the generated files. See **Common Development Tasks** below for guidance.
要构建工件,请编辑生成的文件。请参阅下面的**常见开发任务**以获取指导。
### Step 3: Bundle to Single HTML File
### 步骤 3:打包为单个 HTML 文件
To bundle the React app into a single HTML artifact:
要将 React 应用打包成单个 HTML 工件:
```bash
bash scripts/bundle-artifact.sh
```
This creates `bundle.html` - a self-contained artifact with all JavaScript, CSS, and dependencies inlined. This file can be directly shared in Claude conversations as an artifact.
这将创建 `bundle.html` - 一个自包含的工件,所有 JavaScript、CSS 和依赖项都已内联。此文件可以直接在 Claude 对话中作为工件共享。
**Requirements**: Your project must have an `index.html` in the root directory.
**要求**:您的项目必须在根目录中有一个 `index.html`。
**What the script does**:
**脚本的作用**:
- Installs bundling dependencies (parcel, @parcel/config-default, parcel-resolver-tspaths, html-inline)
- 安装打包依赖(parcel、@parcel/config-default、parcel-resolver-tspaths、html-inline)
- Creates `.parcelrc` config with path alias support
- 创建支持路径别名的 `.parcelrc` 配置
- Builds with Parcel (no source maps)
- 使用 Parcel 构建(无源映射)
- Inlines all assets into single HTML using html-inline
- 使用 html-inline 将所有资源内联到单个 HTML 中
### Step 4: Share Artifact with User
### 步骤 4:与用户共享工件
Finally, share the bundled HTML file in conversation with the user so they can view it as an artifact.
最后,在对话中与用户共享打包的 HTML 文件,以便他们可以将其作为工件查看。
### Step 5: Testing/Visualizing the Artifact (Optional)
### 步骤 5:测试/可视化工件(可选)
Note: This is a completely optional step. Only perform if necessary or requested.
注意:这是一个完全可选的步骤。仅在必要时或应要求时执行。
To test/visualize the artifact, use available tools (including other Skills or built-in tools like Playwright or Puppeteer). In general, avoid testing the artifact upfront as it adds latency between the request and when the finished artifact can be seen. Test later, after presenting the artifact, if requested or if issues arise.
要测试/可视化工件,请使用可用工具(包括其他 Skills 或内置工具,如 Playwright 或 Puppeteer)。一般来说,避免提前测试工件,因为这会在请求和看到完成的工件之间增加延迟。如果被要求或出现问题,在展示工件后再进行测试。
## Reference
## 参考
- **shadcn/ui components**: https://ui.shadcn.com/docs/components
- **shadcn/ui 组件**:https://ui.shadcn.com/docs/components初始化网站的脚本 scripts/init-artifact.sh 完全固定化:
bash
#!/bin/bash
# Exit on error
set -e
# Detect Node version
NODE_VERSION=$(node -v | cut -d'v' -f2 | cut -d'.' -f1)
echo "🔍 Detected Node.js version: $NODE_VERSION"
if [ "$NODE_VERSION" -lt 18 ]; then
echo "❌ Error: Node.js 18 or higher is required"
echo " Current version: $(node -v)"
exit 1
fi
# Set Vite version based on Node version
if [ "$NODE_VERSION" -ge 20 ]; then
VITE_VERSION="latest"
echo "✅ Using Vite latest (Node 20+)"
else
VITE_VERSION="5.4.11"
echo "✅ Using Vite $VITE_VERSION (Node 18 compatible)"
fi
# Detect OS and set sed syntax
if [[ "$OSTYPE" == "darwin"* ]]; then
SED_INPLACE="sed -i ''"
else
SED_INPLACE="sed -i"
fi
# Check if pnpm is installed
if ! command -v pnpm &> /dev/null; then
echo "📦 pnpm not found. Installing pnpm..."
npm install -g pnpm
fi
# Check if project name is provided
if [ -z "$1" ]; then
echo "❌ Usage: ./create-react-shadcn-complete.sh <project-name>"
exit 1
fi
PROJECT_NAME="$1"
SCRIPT_DIR="$(cd "$(dirname "${BASH_SOURCE[0]}")" && pwd)"
COMPONENTS_TARBALL="$SCRIPT_DIR/shadcn-components.tar.gz"
# Check if components tarball exists
if [ ! -f "$COMPONENTS_TARBALL" ]; then
echo "❌ Error: shadcn-components.tar.gz not found in script directory"
echo " Expected location: $COMPONENTS_TARBALL"
exit 1
fi
echo "🚀 Creating new React + Vite project: $PROJECT_NAME"
# Create new Vite project (always use latest create-vite, pin vite version later)
pnpm create vite "$PROJECT_NAME" --template react-ts
# Navigate into project directory
cd "$PROJECT_NAME"
echo "🧹 Cleaning up Vite template..."
$SED_INPLACE '/<link rel="icon".*vite.svg/d' index.html
$SED_INPLACE 's/<title>.*</title>/<title>'"$PROJECT_NAME"'</title>/' index.html
echo "📦 Installing base dependencies..."
pnpm install
# Pin Vite version for Node 18
if [ "$NODE_VERSION" -lt 20 ]; then
echo "📌 Pinning Vite to $VITE_VERSION for Node 18 compatibility..."
pnpm add -D vite@$VITE_VERSION
fi
echo "📦 Installing Tailwind CSS and dependencies..."
pnpm install -D tailwindcss@3.4.1 postcss autoprefixer @types/node tailwindcss-animate
pnpm install class-variance-authority clsx tailwind-merge lucide-react next-themes
echo "⚙️ Creating Tailwind and PostCSS configuration..."
cat > postcss.config.js << 'EOF'
export default {
plugins: {
tailwindcss: {},
autoprefixer: {},
},
}
EOF
echo "📝 Configuring Tailwind with shadcn theme..."
cat > tailwind.config.js << 'EOF'
/** @type {import('tailwindcss').Config} */
module.exports = {
darkMode: ["class"],
content: [
"./index.html",
"./src/**/*.{js,ts,jsx,tsx}",
],
theme: {
extend: {
colors: {
border: "hsl(var(--border))",
input: "hsl(var(--input))",
ring: "hsl(var(--ring))",
background: "hsl(var(--background))",
foreground: "hsl(var(--foreground))",
primary: {
DEFAULT: "hsl(var(--primary))",
foreground: "hsl(var(--primary-foreground))",
},
secondary: {
DEFAULT: "hsl(var(--secondary))",
foreground: "hsl(var(--secondary-foreground))",
},
destructive: {
DEFAULT: "hsl(var(--destructive))",
foreground: "hsl(var(--destructive-foreground))",
},
muted: {
DEFAULT: "hsl(var(--muted))",
foreground: "hsl(var(--muted-foreground))",
},
accent: {
DEFAULT: "hsl(var(--accent))",
foreground: "hsl(var(--accent-foreground))",
},
popover: {
DEFAULT: "hsl(var(--popover))",
foreground: "hsl(var(--popover-foreground))",
},
card: {
DEFAULT: "hsl(var(--card))",
foreground: "hsl(var(--card-foreground))",
},
},
borderRadius: {
lg: "var(--radius)",
md: "calc(var(--radius) - 2px)",
sm: "calc(var(--radius) - 4px)",
},
keyframes: {
"accordion-down": {
from: { height: "0" },
to: { height: "var(--radix-accordion-content-height)" },
},
"accordion-up": {
from: { height: "var(--radix-accordion-content-height)" },
to: { height: "0" },
},
},
animation: {
"accordion-down": "accordion-down 0.2s ease-out",
"accordion-up": "accordion-up 0.2s ease-out",
},
},
},
plugins: [require("tailwindcss-animate")],
}
EOF
# Add Tailwind directives and CSS variables to index.css
echo "🎨 Adding Tailwind directives and CSS variables..."
cat > src/index.css << 'EOF'
@tailwind base;
@tailwind components;
@tailwind utilities;
@layer base {
:root {
--background: 0 0% 100%;
--foreground: 0 0% 3.9%;
--card: 0 0% 100%;
--card-foreground: 0 0% 3.9%;
--popover: 0 0% 100%;
--popover-foreground: 0 0% 3.9%;
--primary: 0 0% 9%;
--primary-foreground: 0 0% 98%;
--secondary: 0 0% 96.1%;
--secondary-foreground: 0 0% 9%;
--muted: 0 0% 96.1%;
--muted-foreground: 0 0% 45.1%;
--accent: 0 0% 96.1%;
--accent-foreground: 0 0% 9%;
--destructive: 0 84.2% 60.2%;
--destructive-foreground: 0 0% 98%;
--border: 0 0% 89.8%;
--input: 0 0% 89.8%;
--ring: 0 0% 3.9%;
--radius: 0.5rem;
}
.dark {
--background: 0 0% 3.9%;
--foreground: 0 0% 98%;
--card: 0 0% 3.9%;
--card-foreground: 0 0% 98%;
--popover: 0 0% 3.9%;
--popover-foreground: 0 0% 98%;
--primary: 0 0% 98%;
--primary-foreground: 0 0% 9%;
--secondary: 0 0% 14.9%;
--secondary-foreground: 0 0% 98%;
--muted: 0 0% 14.9%;
--muted-foreground: 0 0% 63.9%;
--accent: 0 0% 14.9%;
--accent-foreground: 0 0% 98%;
--destructive: 0 62.8% 30.6%;
--destructive-foreground: 0 0% 98%;
--border: 0 0% 14.9%;
--input: 0 0% 14.9%;
--ring: 0 0% 83.1%;
}
}
@layer base {
* {
@apply border-border;
}
body {
@apply bg-background text-foreground;
}
}
EOF
# Add path aliases to tsconfig.json
echo "🔧 Adding path aliases to tsconfig.json..."
node -e "
const fs = require('fs');
const config = JSON.parse(fs.readFileSync('tsconfig.json', 'utf8'));
config.compilerOptions = config.compilerOptions || {};
config.compilerOptions.baseUrl = '.';
config.compilerOptions.paths = { '@/*': ['./src/*'] };
fs.writeFileSync('tsconfig.json', JSON.stringify(config, null, 2));
"
# Add path aliases to tsconfig.app.json
echo "🔧 Adding path aliases to tsconfig.app.json..."
node -e "
const fs = require('fs');
const path = 'tsconfig.app.json';
const content = fs.readFileSync(path, 'utf8');
// Remove comments manually
const lines = content.split('\n').filter(line => !line.trim().startsWith('//'));
const jsonContent = lines.join('\n');
const config = JSON.parse(jsonContent.replace(//*[\s\S]*?*//g, '').replace(/,(\s*[}]])/g, '$1'));
config.compilerOptions = config.compilerOptions || {};
config.compilerOptions.baseUrl = '.';
config.compilerOptions.paths = { '@/*': ['./src/*'] };
fs.writeFileSync(path, JSON.stringify(config, null, 2));
"
# Update vite.config.ts
echo "⚙️ Updating Vite configuration..."
cat > vite.config.ts << 'EOF'
import path from "path";
import react from "@vitejs/plugin-react";
import { defineConfig } from "vite";
export default defineConfig({
plugins: [react()],
resolve: {
alias: {
"@": path.resolve(__dirname, "./src"),
},
},
});
EOF
# Install all shadcn/ui dependencies
echo "📦 Installing shadcn/ui dependencies..."
pnpm install @radix-ui/react-accordion @radix-ui/react-aspect-ratio @radix-ui/react-avatar @radix-ui/react-checkbox @radix-ui/react-collapsible @radix-ui/react-context-menu @radix-ui/react-dialog @radix-ui/react-dropdown-menu @radix-ui/react-hover-card @radix-ui/react-label @radix-ui/react-menubar @radix-ui/react-navigation-menu @radix-ui/react-popover @radix-ui/react-progress @radix-ui/react-radio-group @radix-ui/react-scroll-area @radix-ui/react-select @radix-ui/react-separator @radix-ui/react-slider @radix-ui/react-slot @radix-ui/react-switch @radix-ui/react-tabs @radix-ui/react-toast @radix-ui/react-toggle @radix-ui/react-toggle-group @radix-ui/react-tooltip
pnpm install sonner cmdk vaul embla-carousel-react react-day-picker react-resizable-panels date-fns react-hook-form @hookform/resolvers zod
# Extract shadcn components from tarball
echo "📦 Extracting shadcn/ui components..."
tar -xzf "$COMPONENTS_TARBALL" -C src/
# Create components.json for reference
echo "📝 Creating components.json config..."
cat > components.json << 'EOF'
{
"$schema": "https://ui.shadcn.com/schema.json",
"style": "default",
"rsc": false,
"tsx": true,
"tailwind": {
"config": "tailwind.config.js",
"css": "src/index.css",
"baseColor": "slate",
"cssVariables": true,
"prefix": ""
},
"aliases": {
"components": "@/components",
"utils": "@/lib/utils",
"ui": "@/components/ui",
"lib": "@/lib",
"hooks": "@/hooks"
}
}
EOF
echo "✅ Setup complete! You can now use Tailwind CSS and shadcn/ui in your project."
echo ""
echo "📦 Included components (40+ total):"
echo " - accordion, alert, aspect-ratio, avatar, badge, breadcrumb"
echo " - button, calendar, card, carousel, checkbox, collapsible"
echo " - command, context-menu, dialog, drawer, dropdown-menu"
echo " - form, hover-card, input, label, menubar, navigation-menu"
echo " - popover, progress, radio-group, resizable, scroll-area"
echo " - select, separator, sheet, skeleton, slider, sonner"
echo " - switch, table, tabs, textarea, toast, toggle, toggle-group, tooltip"
echo ""
echo "To start developing:"
echo " cd $PROJECT_NAME"
echo " pnpm dev"
echo ""
echo "📚 Import components like:"
echo " import { Button } from '@/components/ui/button'"
echo " import { Card, CardHeader, CardTitle, CardContent } from '@/components/ui/card'"
echo " import { Dialog, DialogContent, DialogTrigger } from '@/components/ui/dialog'"即使完全不懂前端技术的人通过这个 Skill 也可以创建一个现代化的网站,而且更加标准化,而不是像之前一样让 Agent 自己发挥。
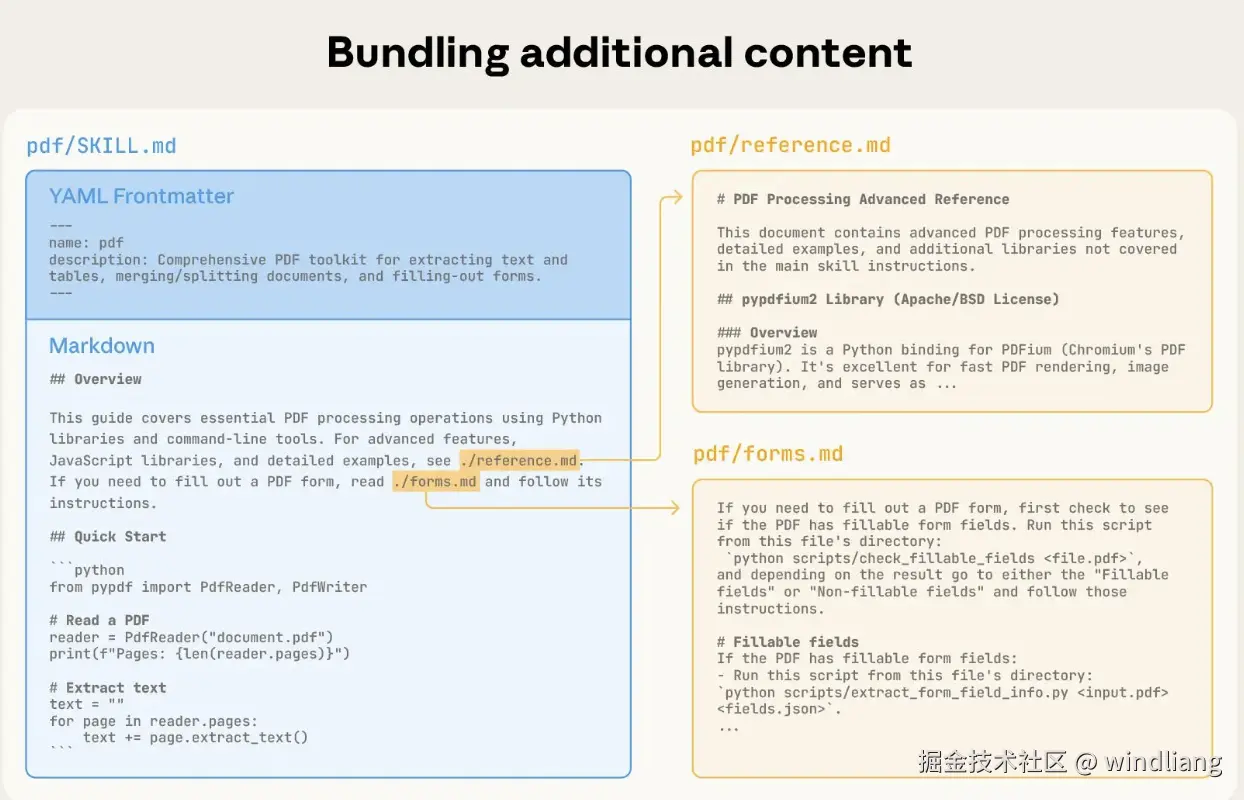
另外看一下官方介绍的 pdf 的 Skill。
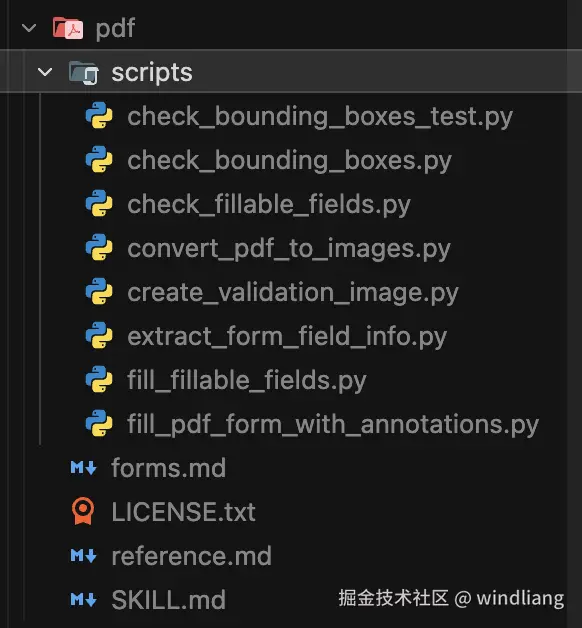
最关键的在于 If you need to fill out a PDF form, read forms.md。这就是之前说的渐进式展开的能力,一个技能我们可以提供很多文档,但 agent 不会一次性读取,它只有需要的时候才去读取。
除了官方提供的,ComposioHQ/awesome-claude-skills: A curated list of awesome Claude Skills, resources, and tools for customizing Claude AI workflows 社区也分享了很多 Skills 。
但在项目中引入 Skills 时,一定要自行阅读和审核,官方也提示了相关风险:
技能通过指令和代码为 Claude 提供新功能。虽然这使它们变得强大,但也意味着恶意技能可能会在它们被使用的环境中引入漏洞,或指示 Claude 窃取数据并采取非预期行动。
我们建议仅从可信来源安装技能。在从不太可信的来源安装技能时,在使用前应彻底审核。首先,阅读技能捆绑文件的内容,了解其作用,特别关注代码依赖和捆绑资源(如图像或脚本)。同样,注意技能中的指令或代码,这些指令或代码指示 Claude 连接到可能不受信任的外部网络来源。
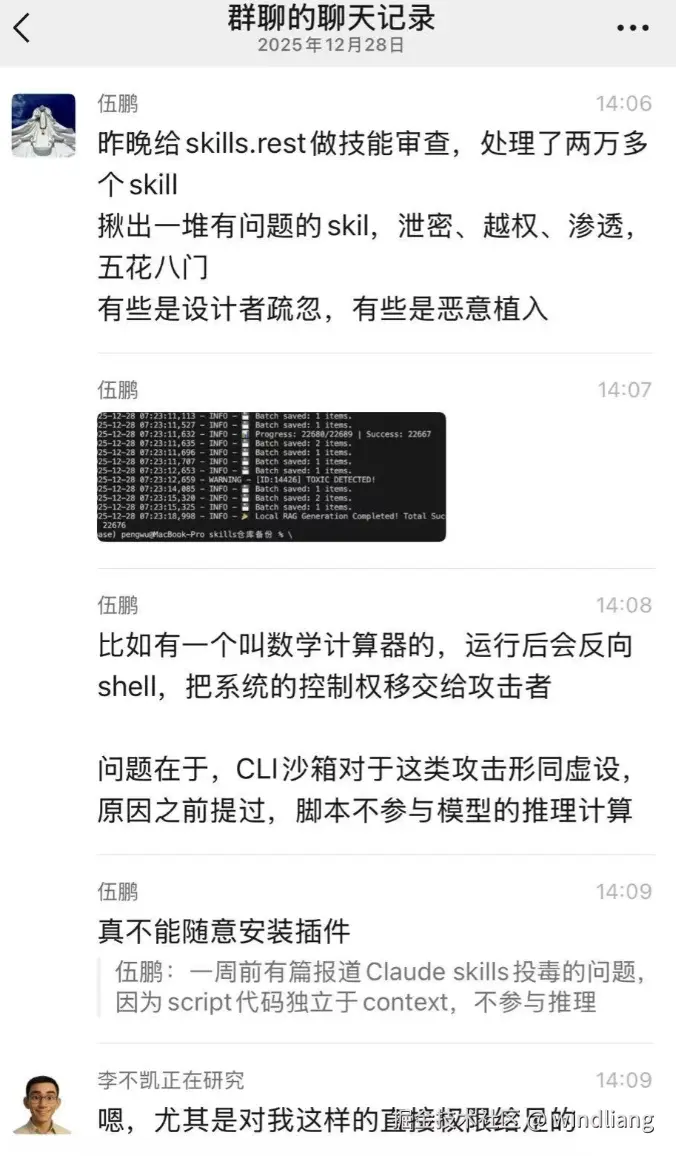
社区已经看到有人遇到过 Skills 投毒:
总
Skills 不仅仅是为开发者准备的,它可以沉淀各个领域的 Skills,和当前的计算机类比下:
- 模型 ≈ CPU 处理器
- Agent Runtime ≈ 操作系统
- Skill ≈ 应用软件
- MCP ≈ 外设(键盘、摄像头、音响)
真正产生长期价值的,从来都不是 CPU 本身,而是建立在其上的应用生态。Skill 正是 AI 时代的应用层。
未来我们可以把平常自己的经验总结写下来,把流程装进文件夹,把能力交给 Skill。
Agent 只是入口,Skill 才是资产。
参考资料
Equipping agents for the real world with Agent Skills \ Anthropic
Don't Build Agents, Build Skills Instead -- Barry Zhang & Mahesh Murag, Anthropic - YouTube