本文还是按照ctf wiki上的文章学习编译内核,原文链接内核源码下载与编译 - CTF Wiki,原文大致上还是ctf wiki上的,本文针对学习本文章时可能出现的问题和下载资源时有时资源消失做出来一些解答,写于2026年1月3日,按照此文大概可以畅通无阻的完成这次实验,那么就此开始
目录
[内核源码下载与编译 ¶](#内核源码下载与编译 ¶)
[验证内核签名 ¶](#验证内核签名 ¶)
[重新执行 make menuconfig](#重新执行 make menuconfig)
[编译内核 ¶](#编译内核 ¶)
[基本的内核模块 ¶](#基本的内核模块 ¶)
[Kbuild 构建系统 ¶](#Kbuild 构建系统 ¶)
[编译内核模块 ¶](#编译内核模块 ¶)
[内核模块的载入与卸载 ¶](#内核模块的载入与卸载 ¶)
[提供用户态接口 ¶](#提供用户态接口 ¶)
[文件节点交互 ¶](#文件节点交互 ¶)
[创建文件节点 ¶](#创建文件节点 ¶)
[1. proc 节点核心 API](#1. proc 节点核心 API)
[2. 安全拷贝函数](#2. 安全拷贝函数)
[3. 偏移量ppos的作用](#3. 偏移量ppos的作用)
[1. 加载内核模块](#1. 加载内核模块)
[使用 busybox 构建文件系统](#使用 busybox 构建文件系统)
[I.获取 busybox 源码](#I.获取 busybox 源码)
[II.编译 busybox 源码](#II.编译 busybox 源码)
[I. 打包为 cpio 文件](#I. 打包为 cpio 文件)
[cpio 文件](#cpio 文件)
[I. 使用 cpio 文件作为文件系统](#I. 使用 cpio 文件作为文件系统)
内核源码下载与编译 
要完成对 Linux 内核的漏洞利用与调试等,我们首先需要搭建一个可用的 Linux 运行环境。本节主要讲述如何获取内核源码并编译生成内核镜像文件(bzImage)
们选择下载与编译最新的 LTS 版本 `6.12.15版本,6.12.16的版本现在没有了,我们下载的是这个linux-6.12.15.tar.xz,,为了加速下载进程,我们选择使用清华的镜像站进行下载,并进行解压:
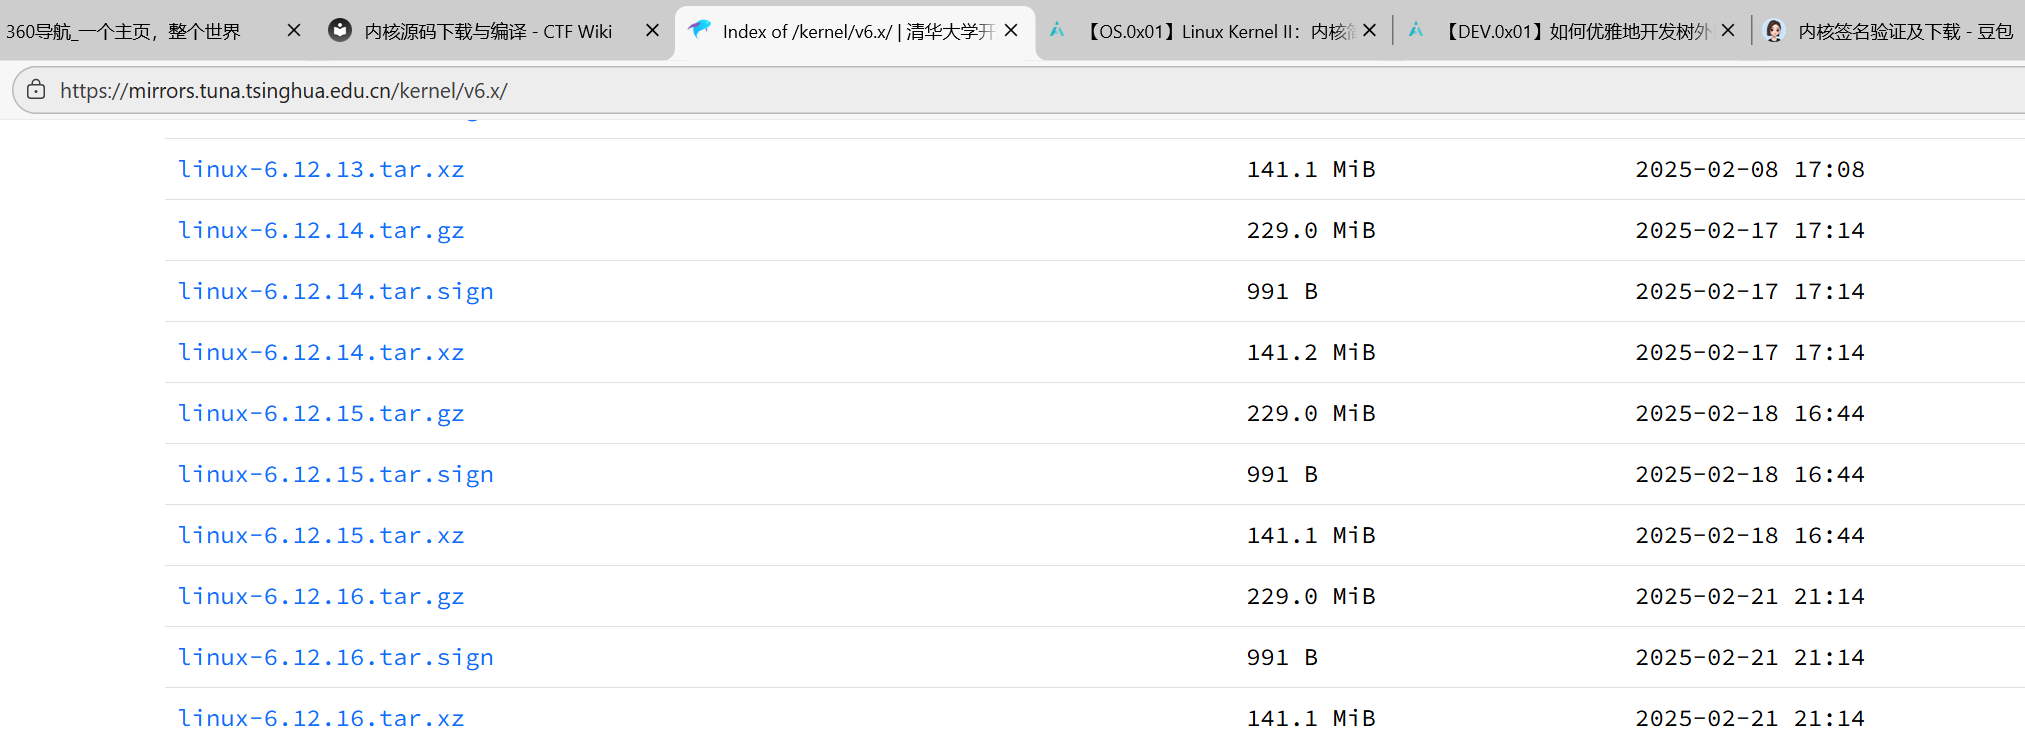
$ wget https://mirrors.tuna.tsinghua.edu.cn/kernel/v6.x/linux-6.12.16.tar.xz
--2025-02-27 12:39:53-- https://mirrors.tuna.tsinghua.edu.cn/kernel/v6.x/linux-6.12.16.tar.xz
Resolving mirrors.tuna.tsinghua.edu.cn... 2402:f000:1:400::2, 101.6.15.130
Connecting to mirrors.tuna.tsinghua.edu.cn|2402:f000:1:400::2|:443... connected.
HTTP request sent, awaiting response... 200 OK
Length: 147993844 (141M) [application/octet-stream]
Saving to: ‘linux-6.12.16.tar.xz’
linux-6.12.16.tar.xz 100%[=========================================>] 141.14M 3.86MB/s in 42s
2025-02-27 12:40:37 (3.33 MB/s) - ‘linux-6.12.16.tar.xz’ saved [147993844/147993844]
$ unxz ./linux-6.12.15.tar.xz验证内核签名 
为了防止内核被恶意修改,内核团队提供了签名校验,在发布内核时,发布者会对内核进行签名。因此为了校验,我们首先需要导入内核维护者的公钥,这里我们选择导入 Linus Torvalds 和 Greg Kroah-Hartman 的公钥:
$ gpg2 --locate-keys torvalds@kernel.org gregkh@kernel.org
pub rsa4096 2011-09-23 [SC]
647F28654894E3BD457199BE38DBBDC86092693E
uid [ unknown] Greg Kroah-Hartman <gregkh@kernel.org>
sub rsa4096 2011-09-23 [E]
pub rsa2048 2011-09-20 [SC]
ABAF11C65A2970B130ABE3C479BE3E4300411886
uid [ unknown] Linus Torvalds <torvalds@kernel.org>
sub rsa2048 2011-09-20 [E]如果没有gpg2的话,在这里下载
mkdir tmp
sudo mount rootfs.img ./tmp/
sudo cp -rfp _install/* ./tmp/
sudo umount ./tmpsudo apt update
sudo apt install gnupg2 -y接下来我们从清华大学镜像站下载内核签名进行校验:
$ wget https://mirrors.tuna.tsinghua.edu.cn/kernel/v6.x/linux-6.12.15.tar.sign
--2025-02-27 12:44:33-- https://mirrors.tuna.tsinghua.edu.cn/kernel/v6.x/linux-6.12.16.tar.sign
Resolving mirrors.tuna.tsinghua.edu.cn... 2402:f000:1:400::2, 101.6.15.130
Connecting to mirrors.tuna.tsinghua.edu.cn|2402:f000:1:400::2|:443... connected.
HTTP request sent, awaiting response... 200 OK
Length: 991 [application/octet-stream]
Saving to: ‘linux-6.12.16.tar.sign’
linux-6.12.16.tar.sign 100%[=========================================>] 991 --.-KB/s in 0s
2025-02-27 12:44:35 (2.36 GB/s) - ‘linux-6.12.16.tar.sign’ saved [991/991]
$ gpg2 --verify linux-6.12.16.tar.sign
gpg: assuming signed data in 'linux-6.12.15.tar'
gpg: Signature made Sat Feb 22 00:02:55 2025 AEDT
gpg: using RSA key 647F28654894E3BD457199BE38DBBDC86092693E
gpg: Good signature from "Greg Kroah-Hartman <gregkh@kernel.org>" [unknown]
gpg: WARNING: This key is not certified with a trusted signature!
gpg: There is no indication that the signature belongs to the owner.
Primary key fingerprint: 647F 2865 4894 E3BD 4571 99BE 38DB BDC8 6092 693E注意到这里报了一个 WARNING,因为我们导入的公钥没有可信的签名,无法证明其确实来自于 Linus Torvalds 和 Greg Kroah-Hartman。为了消除这个问题,我们可以选择使用 TOFU 信任对应的密钥:
$ gpg2 --tofu-policy good 38DBBDC86092693E
gpg: Setting TOFU trust policy for new binding <key: 647F28654894E3BD457199BE38DBBDC86092693E, user id: Greg Kroah-Hartman <gregkh@kernel.org>> to good.
接下来我们重新对内核签名进行验证,现在可以发现已经没有报错了,说明这份内核源码是可信的:
$ gpg2 --trust-model tofu --verify ./linux-6.12.15.tar.sign
gpg: assuming signed data in './linux-6.12.16.tar'
gpg: Signature made Sat Feb 22 00:02:55 2025 AEDT
gpg:                using RSA key 647F28654894E3BD457199BE38DBBDC86092693E
gpg: Good signature from "Greg Kroah-Hartman <gregkh@kernel.org>" [full]
gpg: gregkh@kernel.org: Verified 1 signatures in the past 0 seconds.  Encrypted
     0 messages.
在验证成功后,我们就可以解压缩压缩包得到内核源码:
$ tar -xf linux-6.12.16.tar前面我们通过下载内核源码,得到了编写内核必须的工具,现在我们就可以来编译内核了
一般我们还需要下载ncurses 库
# 1. 更新软件源(避免下载失败)
sudo apt update -y
# 2. 彻底卸载旧的ncurses(如有残留),重新安装完整依赖
sudo apt purge -y libncurses5-dev libncursesw5-dev
sudo apt install -y build-essential libncurses5-dev libncursesw5-dev flex bison openssl libssl-dev libelf-dev dwarves pkg-config-
pkg-config:内核编译时用来定位 ncurses 库的路径(报错提示里明确提到需要); -
libncursesw5-dev:宽字符版 ncurses,新版内核 menuconfig 依赖这个; -
其他依赖是内核编译的基础,一并补装避免后续问题。
执行以下命令,检查 ncurses 头文件和库是否存在:
# 检查ncurses头文件(必须有输出)
ls /usr/include/ncurses*.h
# 检查ncurses库文件(必须有输出)
ls /usr/lib/x86_64-linux-gnu/libncurses*.so
重新执行 make menuconfig
回到内核源码目录,再次执行:
cd ~/move/kernel/linux-6.12.15
make menuconfig
弹出图形化界面之后我们使用<-和->键选中exit直接退出
编译内核 
接下来我们进行内核镜像的编译,我们通常要获得的是压缩后的内核镜像文件 bzImage ,因此我们在源码目录下使用如下命令进行编译:
$ make bzImage这个编译内核的过程比较长,大概半个小时的样子,可以先吃个饭,吃完饭后差不多就编译好了
编译完之后可能发现bzImage并不在当前目录,bzImage的位置在这个目录
arch/x86/boot/bzImage你看到的 vmlinux 等文件是编译中间 / 核心产物,用途如下:
| 文件 | 类型 | 用途 |
|---|---|---|
vmlinux |
未压缩、带调试符号的内核镜像 | 用于 GDB/KGDB 调试(你开启了调试信息,这个文件是调试核心);不可直接启动 |
arch/x86/boot/bzImage |
压缩后的可启动内核镜像 | 可直接写入引导分区、或通过 GRUB 启动(实际系统运行的内核);无调试符号 |
System.map |
内核符号表 | 对应 vmlinux 的函数 / 变量地址,调试时定位问题用 |
modules.builtin |
内置模块清单 | 标记哪些功能编译进内核(*)、哪些是可加载模块(M) |
我们主要关注于编译产物中的两个文件:
-
vmlinux:编译生成的 ELF 格式的原始内核镜像文件,通常位于源码根目录下。 -
bzImage:前者进行压缩后的内核镜像文件,通常位于arch/架构/boot/bzImage(注意对于 x86-64 而言仍是x86目录)。
这里我们给出常见内核文件格式的介绍:
-
bzImage:目前主流的 kernel 镜像格式,即 big zImage(即 bz 不是指 bzip2),适用于较大的(大于 512 KB) Kernel。这个镜像会被加载到内存的高地址,高于 1MB。bzImage 是用 gzip 压缩的,文件的开头部分有 gzip 解压缩的代码,所以我们不能用 gunzip 来解压缩。
-
zImage:比较老的 kernel 镜像格式,适用于较小的(不大于 512KB) Kernel。启动时,这个镜像会被加载到内存的低地址,即内存的前 640 KB。zImage 也不能用 gunzip 来解压缩。
-
vmlinuz:vmlinuz 不仅包含了压缩后的 vmlinux,还包含了 gzip 解压缩的代码。实际上就是 zImage 或者 bzImage 文件。该文件是 bootable 的。 bootable 是指它能够把内核加载到内存中。对于 Linux 系统而言,该文件位于 /boot 目录下。该目录包含了启动系统时所需要的文件。
-
vmlinux:静态链接的 Linux kernel,以可执行文件的形式存在,尚未经过压缩。该文件往往是在生成 vmlinuz 的过程中产生的。该文件适合于调试。但是该文件不是 bootable 的。
-
vmlinux.bin :也是静态链接的 Linux kernel,只是以一个可启动的 (bootable) 二进制文件存在。所有的符号信息和重定位信息都被删除了。生成命令为:
objcopy -O binary vmlinux vmlinux.bin。 -
uImage:uImage 是 U-boot 专用的镜像文件,它是在 zImage 之前加上了一个长度为 0x40 的 tag 而构成的。这个 tag 说明了这个镜像文件的类型、加载位置、生成时间、大小等信息
基本的内核模块 
我们首先写一个基础的内核模块,源码文件结构组织如下:
$ tree .
.
├── Makefile
└── src
├── Kbuild
└── main.c
2 directories, 3 filesmain.c 的内容如下,其定义了一个初始化函数a3kmod_init() ,该函数会在模块载入时被调用,同时其定义了一个退出函数 a3kmod_exit() ,该函数会在模块被卸载时被调用:
/**
* Copyright (c) 2025 arttnba3 <arttnba@gmail.com>
*
* This work is licensed under the terms of the GNU GPL, version 2 or later.
**/
#include <linux/kernel.h>
#include <linux/module.h>
#include <linux/init.h>
static __init int a3kmod_init(void)
{
printk(KERN_INFO "[a3kmod:] Hello kernel world!\n");
return 0;
}
static __exit void a3kmod_exit(void)
{
printk(KERN_INFO "[a3kmod:] Goodbye kernel world!\n");
}
module_init(a3kmod_init);
module_exit(a3kmod_exit);
MODULE_AUTHOR("arttnba3");
MODULE_LICENSE("GPL v2");Kbuild 构建系统 
Kbuild 是 Linux kernel 构建系统的一部分,简而言之,当我们在源码目录下编写了 Kbuild 文件之后,在编译时 Linux kernel 的编译基础设施便会根据 Kbuild 来自动地编译好我们的内核模块,若没有 Kbuild 则会选择寻找 Makefile 。
下面是一个最基础的 Kbuild 文件的示例,语法上有点类似于 Makefile:
# module name
MODULE_NAME ?= a3kmod
obj-m += $(MODULE_NAME).o
# compiler flags
ccflags-y += -I$(src)/include
# entry point
$(MODULE_NAME)-y += main.o各符号说明如下:
-
MODULE_NAME:一个简单的自定义变量,我们用来定义我们的模块名。 -
obj-m:这个符号用来指定要被编译的内核模块列表,+=意味着添加上我们的内核模块,而$(MODULE_NAME).o则是我们的内核模块编译的后期产物,这通常由单个或多个目标文件合并而成,最后会被链接为$(MODULE_NAME).ko文件,也就是我们所熟悉的 LKM ELF;如果要将模块编译进内核 ELF 文件(vmlinux)中,则应当使用obj-y。 -
ccflags-y:ccflags意味着编译选项,-y意味着开启的编译选项,这里我们添加了-I选项以引入我们自己的头文件目录(只是作为示范,本节实际上不涉及复杂代码结构),更多编译选项可以参见 GCC 的文档。 -
$(MODULE_NAME)-y:$(MODULE_NAME).o所需要的目标文件,-y意味着编译过程需要该文件,这里我们加入了一个main.o,意味着我们的源码目录下应当有一个main.c。
相应地,由于我们已经在 Kbuild 当中指示了模块的构建行为,我们只需要在源码根目录的 Makefile 当中写入通用性内容,这里我们的 Makefile 写入如下:
# SPDX-License-Identifier: GPL-2.0
# Copyright (c) 2025 arttnba3 <arttnba@gmail.com>
A3KMOD_ROOT_DIR=$(shell pwd)
A3KMOD_SRC_DIR=$(A3KMOD_ROOT_DIR)/src
LINUX_KERNEL_SRC=/lib/modules/$(shell uname -r)/build
all:
@$(MAKE) -C $(LINUX_KERNEL_SRC) M=$(A3KMOD_SRC_DIR) modules
clean:
@$(MAKE) -C $(LINUX_KERNEL_SRC) M=$(A3KMOD_SRC_DIR) clean
.PHONY: clean简要说明如下(想更详细了解可自行深入学习 Makefile 语法):
-
A3KMOD_ROOT_DIR、A3KMOD_SRC_DIR:这些变量指定了源码目录为当前目录下的src文件夹,$(shell pwd)意味着其值为pwd命令的结果。 -
LINUX_KERNEL_SRC:这个变量指定了 Linux 内核源码目录,对于绝大多数 Linux 发行版而言,在安装了相应的软件包(例如linux-headers)后,在/lib/modules/$(shell uname -r)/build目录下都会存放着当前所用内核的源码以及编译系统文件,其中$(shell uname -r)意味着其值为uname -r的结果。默认会运行该命令。
-
@$(MAKE):@$(MAKE)指定了使用当前环境中的MAKE命令(这意味着我们在运行make命令时可以可以通过指定MAKE=更改其路径,默认值是make)。 -
-C $(LINUX_KERNEL_SRC):make 指令进入到内核源码目录进行。 -
modules:执行内核源码 Makefile 中的modules项,意味着进行内核模块编译行为。 -
M=$(A3KMOD_SRC_DIR):指定参数M的值,对modules项而言代表要编译的内核模块的源码路径。
-
-
clean::和all标签传递的基本一致,不同在于最后执行的行为是clean,意味着清理编译产物。 -
.PHONY:"伪目标",即相比同名文件而言优先找 Makefile 中的标签定义,这里将clean标签声明为伪目标。
makefile的文件不需要改变,因为$(shell pwd)就是pwd命令,会自动读取当前文件下的目录
在我们按照特定文件树写好文件之后
编译内核模块 
完成这些之后,我们便能开始编译内核模块了,我们只需要运行如下命令:
$ make -j$(nproc) all但是如果是LINUX_KERNEL_SRC仍指向系统默认内核,会导致编译失败,这里我们使用的是gcc12版本进行编译
先安装 gcc-12:
sudo apt update
sudo apt install -y gcc-12 g++-12
在Makefile中添加这几句
CC=gcc-11
ARCH=x86_64
CROSS_COMPILE=x86_64-linux-gnu-
之后改用这个命令进行编译
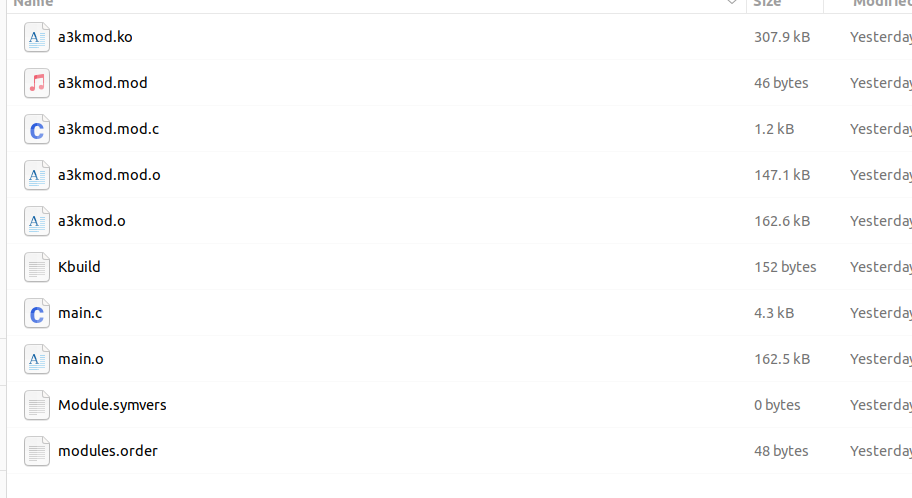
CC=gcc-12 make -j$(nproc) all之后我们可以看到原本main.c的内容经过编译链接后得到一堆的内核模块文件
内核模块的载入与卸载 
我们可以通过 insmod 命令直接载入一个内核模块:
$ sudo insmod a3kmod.ko类似地,我们可以使用 rmmod 命令卸载一个内核模块:
$ sudo rmmod a3kmod提供用户态接口 
接下来我们为我们的内核模块添加可供用户态应用程序交互的方式,一个比较常见的方式是我们的内核模块在载入后创建一个虚拟文件节点,用户态应用程序打开该节点后通过 read() 、 write() 、 ioctl() 等系统调用进行交互。
本节我们简单介绍如何创建一个可供用户态交互的 procfs ( Process file system )的文件节点。
文件节点交互 
我们的文件节点支持通过 read() 、 write() 、 ioctl() 等系统调用进行交互,而这实际上需要我们在内核空间当中定义相应的操作函数。对于 procfs 而言,其支持的操作通过 struct proc_ops 这一函数表进行定义:
struct proc_ops {
    unsigned int proc_flags;
    int (*proc_open)(struct inode *, struct file *);
    ssize_t (*proc_read)(struct file *, char __user *, size_t, loff_t *);
    ssize_t (*proc_read_iter)(struct kiocb *, struct iov_iter *);
    ssize_t (*proc_write)(struct file *, const char __user *, size_t, loff_t *);
    /* mandatory unless nonseekable_open() or equivalent is used */
    loff_t  (*proc_lseek)(struct file *, loff_t, int);
    int (*proc_release)(struct inode *, struct file *);
    __poll_t (*proc_poll)(struct file *, struct poll_table_struct *);
    long    (*proc_ioctl)(struct file *, unsigned int, unsigned long);
#ifdef CONFIG_COMPAT
    long    (*proc_compat_ioctl)(struct file *, unsigned int, unsigned long);
#endif
    int (*proc_mmap)(struct file *, struct vm_area_struct *);
    unsigned long (*proc_get_unmapped_area)(struct file *, unsigned long, unsigned long, unsigned long, unsigned long);
} __randomize_layout;
这里我们简单地为 proc_read() 与 proc_write() 实现对应的函数原型,其功能为拷贝数据到用户进程以及从用户进程读取数据,并将函数指针放入我们的 proc_ops 中:
#include <linux/proc_fs.h>
#define A3KMOD_BUF_SZ 0x1000
static char a3kmod_buf[A3KMOD_BUF_SZ] = { 0 };
static ssize_t a3kmod_proc_read
(struct file *file, char __user *ubuf, size_t size, loff_t *ppos)
{
ssize_t err;
size_t end_loc, copied;
end_loc = size + (*ppos);
if (end_loc < size || (*ppos) > A3KMOD_BUF_SZ) {
return -EINVAL;
}
if (end_loc > A3KMOD_BUF_SZ) {
end_loc = A3KMOD_BUF_SZ;
}
copied = end_loc - (*ppos);
if (copied == 0) {
return 0; // EOF
}
err = copy_to_user(ubuf, &a3kmod_buf[*ppos], copied);
if (err != 0) {
return err;
}
*ppos = end_loc;
return copied;
}
static ssize_t a3kmod_proc_write
(struct file *file, const char __user *ubuf, size_t size, loff_t *ppos)
{
ssize_t err;
size_t end_loc, copied;
end_loc = size + (*ppos);
if (end_loc < size || (*ppos) > A3KMOD_BUF_SZ) {
return -EINVAL;
}
if (end_loc > A3KMOD_BUF_SZ) {
end_loc = A3KMOD_BUF_SZ;
}
copied = end_loc - (*ppos);
if (copied == 0) {
return 0; // EOF
}
err = copy_from_user(&a3kmod_buf[*ppos], ubuf, copied);
if (err != 0) {
return err;
}
*ppos = end_loc;
return copied;
}
static struct proc_ops a3kmod_proc_ops = {
.proc_read = a3kmod_proc_read,
.proc_write = a3kmod_proc_write,
};创建文件节点 
我们在模块初始化函数中调用 proc_create() 创建我们的 procfs 文件节点,各个参数分别指定了节点名、权限、父节点(为 NULL 则挂到 procfs 的根节点)、函数表,并在模块卸载时销毁该节点:
static struct proc_dir_entry *a3kmod_proc_dir_entry;
static __init int a3kmod_init(void)
{
printk(KERN_INFO "[a3kmod:] Hello kernel world!\n");
a3kmod_proc_dir_entry = proc_create("a3kmod", 0666, NULL, &a3kmod_proc_ops);
if (IS_ERR(a3kmod_proc_dir_entry)) {
return PTR_ERR(a3kmod_proc_dir_entry);
}
return 0;
}
static __exit void a3kmod_exit(void)
{
printk(KERN_INFO "[a3kmod:] Goodbye kernel world!\n");
proc_remove(a3kmod_proc_dir_entry);
}这里我们简单润色一下,生成一个比较完整一点的main.c文件
// SPDX-License-Identifier: GPL-2.0
#include <linux/init.h>
#include <linux/module.h>
#include <linux/kernel.h>
#include <linux/proc_fs.h>
#include <linux/uaccess.h> // copy_to_user/copy_from_user
#define A3KMOD_PROC_NAME "a3kmod_proc" // proc节点名:/proc/a3kmod_proc
#define A3KMOD_BUF_SZ 0x1000 // 4KB缓冲区
static char a3kmod_buf[A3KMOD_BUF_SZ] = {0}; // 内核缓冲区
static struct proc_dir_entry *a3kmod_proc_entry; // proc节点句柄
// ====================== proc_read 回调 ======================
static ssize_t a3kmod_proc_read(
struct file *file, char __user *ubuf, size_t size, loff_t *ppos)
{
ssize_t err;
size_t end_loc, copied;
// 边界检查:防止数值溢出/越界
end_loc = size + (*ppos);
if (end_loc < size || (*ppos) > A3KMOD_BUF_SZ) {
return -EINVAL;
}
// 限制读取范围不超过缓冲区
if (end_loc > A3KMOD_BUF_SZ) {
end_loc = A3KMOD_BUF_SZ;
}
copied = end_loc - (*ppos);
if (copied == 0) {
return 0; // EOF(读取到末尾)
}
// 内核→用户态拷贝数据(安全拷贝,避免直接访问用户态内存)
err = copy_to_user(ubuf, &a3kmod_buf[*ppos], copied);
if (err != 0) {
return -EFAULT; // 拷贝失败返回错误码
}
*ppos = end_loc; // 更新文件偏移量
return copied; // 返回实际读取的字节数
}
// ====================== proc_write 回调 ======================
static ssize_t a3kmod_proc_write(
struct file *file, const char __user *ubuf, size_t size, loff_t *ppos)
{
ssize_t err;
size_t end_loc, copied;
// 边界检查:防止数值溢出/越界
end_loc = size + (*ppos);
if (end_loc < size || (*ppos) > A3KMOD_BUF_SZ) {
return -EINVAL;
}
// 限制写入范围不超过缓冲区
if (end_loc > A3KMOD_BUF_SZ) {
end_loc = A3KMOD_BUF_SZ;
}
copied = end_loc - (*ppos);
if (copied == 0) {
return 0; // EOF(写入到末尾)
}
// 用户态→内核拷贝数据(安全拷贝)
err = copy_from_user(&a3kmod_buf[*ppos], ubuf, copied);
if (err != 0) {
return -EFAULT; // 拷贝失败返回错误码
}
*ppos = end_loc; // 更新文件偏移量
return copied; // 返回实际写入的字节数
}
// ====================== proc_ops 函数表 ======================
static const struct proc_ops a3kmod_proc_ops = {
.proc_read = a3kmod_proc_read,
.proc_write = a3kmod_proc_write,
.proc_lseek = no_llseek, // 禁用lseek(可选,避免偏移量乱改)
};
// ====================== 模块初始化/卸载 ======================
static int __init a3kmod_init(void)
{
// 创建/proc/a3kmod_proc节点
a3kmod_proc_entry = proc_create(
A3KMOD_PROC_NAME, // 节点名
0666, // 权限:用户/组/其他都可读写
NULL, // 父目录(NULL=根/proc)
&a3kmod_proc_ops // 操作函数表
);
if (!a3kmod_proc_entry) {
pr_err("a3kmod: create proc entry failed!\n");
return -ENOMEM;
}
pr_info("a3kmod: loaded successfully! /proc/%s created\n", A3KMOD_PROC_NAME);
return 0;
}
static void __exit a3kmod_exit(void)
{
// 销毁/proc/a3kmod_proc节点
proc_remove(a3kmod_proc_entry);
pr_info("a3kmod: unloaded successfully! /proc/%s removed\n", A3KMOD_PROC_NAME);
}
// 模块注册
module_init(a3kmod_init);
module_exit(a3kmod_exit);
// 必须声明GPL协议(否则内核加载警告)
MODULE_LICENSE("GPL");
MODULE_AUTHOR("henhen");
MODULE_DESCRIPTION("A3kmod with procfs user-space interface");
MODULE_VERSION("1.0");改程序的主要功能
1. proc 节点核心 API
| 函数 | 作用 |
|---|---|
proc_create() |
创建 /proc 下的节点,参数:节点名、权限、父目录、操作函数表; |
proc_remove() |
销毁 proc 节点(模块卸载时必须调用,否则会内存泄漏); |
no_llseek |
禁用 lseek 系统调用(可选),避免用户态修改ppos导致缓冲区越界; |
2. 安全拷贝函数
-
copy_to_user(用户态地址, 内核态地址, 长度):内核→用户态拷贝(必须用,不能直接指针访问); -
copy_from_user(内核态地址, 用户态地址, 长度):用户态→内核拷贝(必须用,防止用户态恶意内存访问); -
返回值:0 = 成功,非 0 = 失败(返回未拷贝的字节数)。
3. 偏移量ppos的作用
-
类似文件的 "读写指针",记录当前读写位置;
-
读取到缓冲区末尾时返回 0(用户态会识别为 EOF);
-
边界检查防止
ppos溢出(比如size很大导致end_loc超过A3KMOD_BUF_SZ)
完整测试流程
1. 加载内核模块
cd ~/move/kernel/test/tree/src
sudo insmod a3kmod.ko
# 验证proc节点创建
ls /proc/a3kmod_proc # 能看到该文件即成功
dmesg | grep a3kmod # 看到"loaded successfully"日志,测试 proc 节点读写:
# 1. 写入数据到/proc/a3kmod
echo "Hello a3kmod procfs!" | sudo tee /proc/a3kmod
# 2. 读取数据(验证写入成功)
cat /proc/a3kmod
# 预期输出:Hello a3kmod procfs!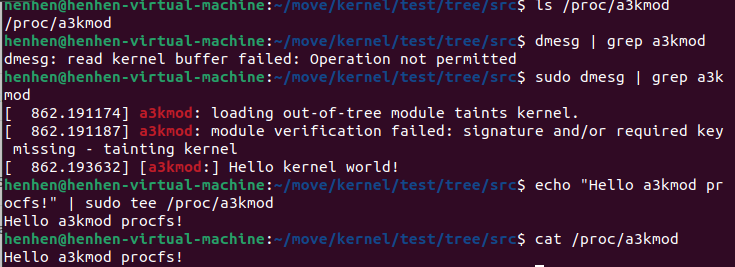
如果我们想要更加用户化和便捷的文件系统的话可以用busybox来生成文件系统最后挂载到我们生成的内核文件里面
使用 busybox 构建文件系统
BusyBox 是一个集成了三百多个最常用 Linux 命令和工具的软件,包含了例如 ls 、cat 和 echo 等常见的命令,相比起各大发行版中常用的 GNU core utilities ,BusyBox 更加的轻量化,且更容易进行配置,因此我们将用 busybox 为我们的内核提供一个基本的用户环境
一、编译busybox
I.获取 busybox 源码
我们首先在 busybox.net 下载自己想要的版本,笔者这里选用 busybox-1.33.0.tar.bz2 这个版本:
$ wget https://busybox.net/downloads/busybox-1.33.0.tar.bz2如果发现官网没有响应的话,直接拿GitHub上的源码,地址,下载zip后直接拿到虚拟机上
https://github.com/mirror/busyboxII.编译 busybox 源码
接下来我们配置编译选项,进入到源码根目录运行如下命令进入图形化配置界面:
$ make menuconfig勾选 Settings ---> Build static binary file (no shared lib)
若是不勾选则需要单独配置 libc,比较麻烦,因为没有libc的话我们还要写libc的代码,这里作为演示我们就取消吧
接下来就是编译了,速度会比编译内核快很多:
$ make -j$(nproc)
$ make install
编译完成后会生成一个 _install 目录,接下来我们将会用它来构建我们的文件系统
建立文件系统
I.初始化文件系统
一些简单的初始化操作...
$ cd _install
$ mkdir -pv {bin,sbin,etc,proc,sys,dev,home/ctf,root,tmp,lib64,lib/x86_64-linux-gnu,usr/{bin,sbin}}
$ touch etc/inittab
$ mkdir etc/init.d
$ touch etc/init.d/rcS
$ chmod +x ./etc/init.d/rcS
II.配置初始化脚本
首先配置 etc/inttab ,写入如下内容:
::sysinit:/etc/init.d/rcS
::askfirst:/bin/ash
::ctrlaltdel:/sbin/reboot
::shutdown:/sbin/swapoff -a
::shutdown:/bin/umount -a -r
::restart:/sbin/init
在上面的文件中指定了系统初始化脚本,因此接下来配置 etc/init.d/rcS,写入如下内容,主要是挂载各种文件系统:
#!/bin/sh
mount -t proc none /proc
mount -t sysfs none /sys
mount -t devtmpfs devtmpfs /dev
mount -t tmpfs tmpfs /tmp
mkdir /dev/pts
mount -t devpts devpts /dev/pts
echo -e "\nBoot took $(cut -d' ' -f1 /proc/uptime) seconds\n"
setsid cttyhack setuidgid 1000 sh
poweroff -d 0 -f然后在根目录下创建 init 文件,写入如下内容:(这个init文件还是必须的,有的博客说不需要,但实际上没有这个文件还是不行)
#!/bin/sh
chown -R root:root /
chmod 700 /root
chown -R ctf:ctf /home/ctf
mount -t proc none /proc
mount -t sysfs none /sys
mount -t tmpfs tmpfs /tmp
mkdir /dev/pts
mount -t devpts devpts /dev/pts
echo 1 > /proc/sys/kernel/dmesg_restrict
echo 1 > /proc/sys/kernel/kptr_restrict
echo -e "\nBoot took $(cut -d' ' -f1 /proc/uptime) seconds\n"
cd /home/ctf
su ctf -c sh
poweroff -d 0 -f别忘了添加可执行权限:
$ chmod +x ./initIII.配置用户组
$ echo "root:x:0:0:root:/root:/bin/sh" > etc/passwd
$ echo "ctf:x:1000:1000:ctf:/home/ctf:/bin/sh" >> etc/passwd
$ echo "root:x:0:" > etc/group
$ echo "ctf:x:1000:" >> etc/group
$ echo "none /dev/pts devpts gid=5,mode=620 0 0" > etc/fstab
在这里建立了两个用户组 root 和 ctf ,以及两个用户 root 和 ctf
打包文件系统为镜像文件
I. 打包为 cpio 文件
使用如下命令打包文件系统为 cpio 格式
$ find . | cpio -o --format=newc > ../../rootfs.cpio也可以这么写
$ find . | cpio -o -H newc > ../core.cpio向文件系统中添加文件
若是我们后续需要向文件系统中补充一些其他的文件,可以选择在原先的_install文件夹中添加(不过这样的话若是配置多个文件系统则会变得很混乱),也可以解压文件系统镜像后添加文件再重新进行打包
cpio 文件
I.解压磁盘镜像
$ cpio -idv < ./rootfs.cpio该命令会将磁盘镜像中的所有文件解压到当前目录下
II.重打包磁盘镜像
和打包磁盘镜像的命令一样
$ find . | cpio -o --format=newc > ../new_rootfs.cpio使用qemu运行内核
终于到了最激动人心的时候了:我们即将要将这个Linux内核跑起来------用我们自己配置的文件系统与内核
安全起见,我们并不直接在真机上运行这个内核,而是使用qemu在虚拟机里运行
配置启动脚本
I. 使用 cpio 文件作为文件系统
首先将先前的bzImage和rootfs.cpio放到同一个目录下,这里我们放在根目录,也就是前缀为busybox的目录
接下来编写启动脚本
$ touch boot.sh写入如下内容:
#!/bin/sh
qemu-system-x86_64 \
    -m 128M \
    -kernel ./bzImage \
    -initrd  ./rootfs.cpio \
    -monitor /dev/null \
    -append "root=/dev/ram rdinit=/sbin/init console=ttyS0 oops=panic panic=1 loglevel=3 quiet kaslr" \
    -cpu kvm64,+smep \
    -smp cores=2,threads=1 \
    -nographic \
    -s
部分参数说明如下:
-
-m:虚拟机内存大小 -
-kernel:内核镜像路径 -
-initrd:初始文件系统路径,cpio 文件系统会被载入到内存当中(initramfs) -
-monitor:将监视器重定向到主机设备/dev/null,这里重定向至 null 主要是防止CTF 中被人通过监视器直接拿 flag
-append:附加参数选项
-
kaslr:开启内核地址随机化,你也可以改为nokaslr进行关闭以方便我们进行调试 -
rdinit:指定初始启动进程,这里我们指定了/sbin/init作为初始进程,其会默认以/etc/init.d/rcS作为启动脚本 -
loglevel=3&quiet:不输出log -
console=ttyS0:指定终端为/dev/ttyS0,这样一启动就能进入终端界面 -
-cpu:设置CPU选项,在这里开启了smep保护 -
-smp:设置对称多处理器配置,这里设置了两个核心,每个核心一个线程 -
-nographic:不提供图形化界面,此时内核仅有串口输出,输出内容会被 QEMU 重定向至我们的终端 -
-s:相当于-gdb tcp::1234的简写(也可以直接这么写),后续我们可以通过gdb连接本地端口进行调试
运行boot.sh,成功启动~撒花~🌸🌸🌸
