以往的学习中我们通常是利用IDE一键编译链接运行,或者是编写Makefile文件编译链接运行。但是它们都有一个缺点:没有办法跨平台。Windows平台的.vcxproj文件和Linux上的Makefile并不兼容,导致牺牲了跨平台性。因此本期我们就来介绍一个更加强大的工具CMake
相关内容已经上传至作者的个人gitee:CMake 学习: CMake工具开发介绍仓库,虽然标记的是C++喜欢请点个赞谢谢
目录
CMake入门介绍
假设我们正在项目中,如果我们要在不同的平台编译我们的项目,我们就必须在不同的平台编写不同的配置文件
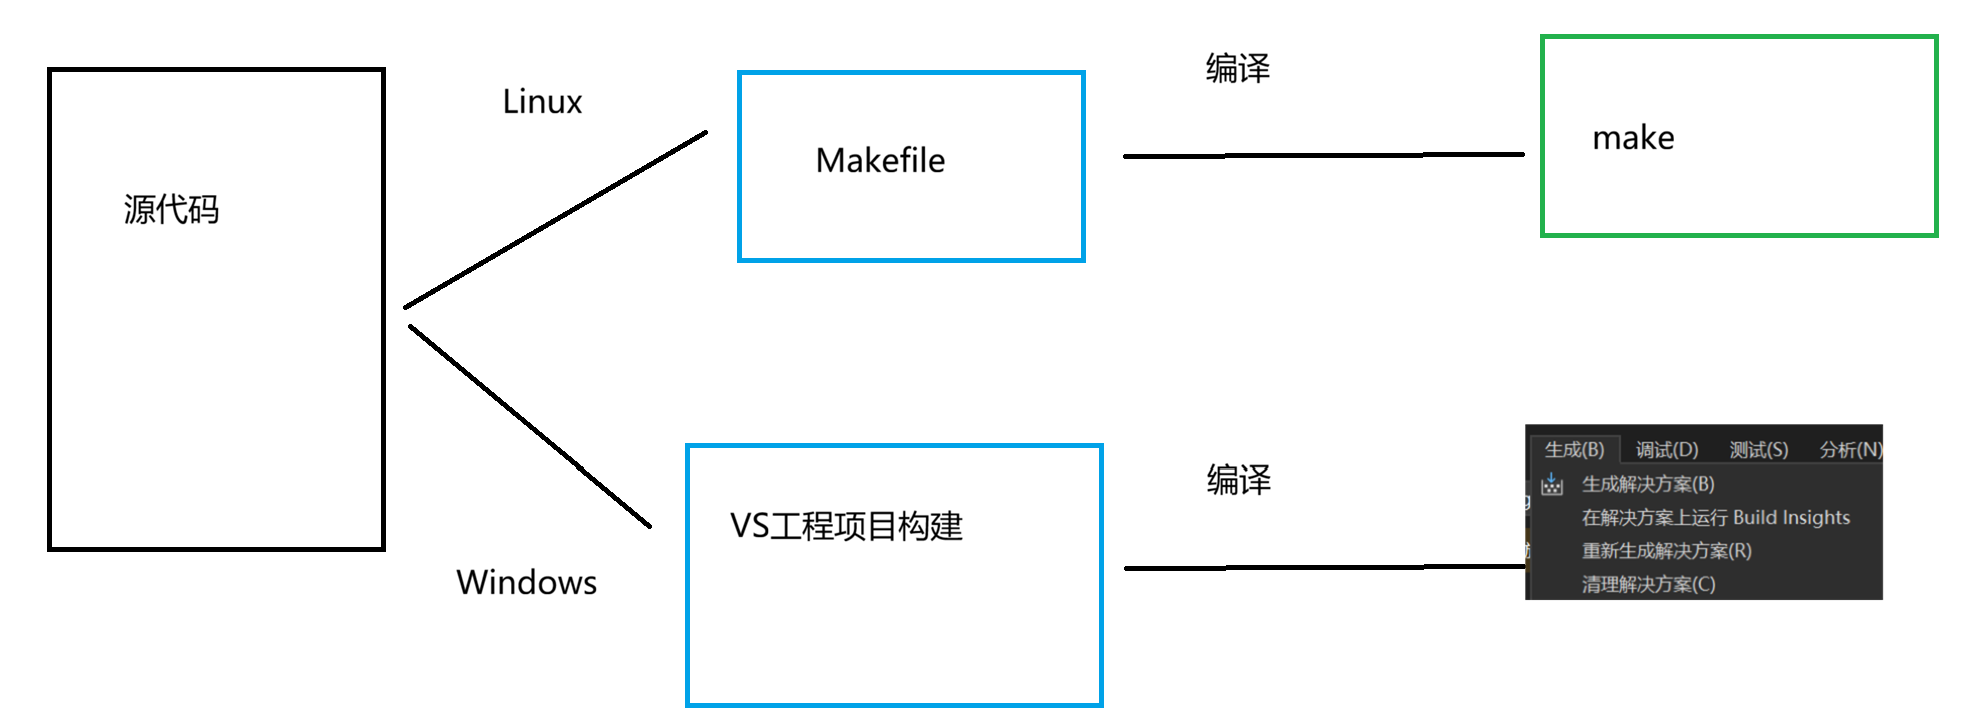
但是这样显然太麻烦了,而且一旦项目体积变大,手写Makefile就不太现实了
那么我们该怎么办呢?这个时候就需要我们用到CMake了
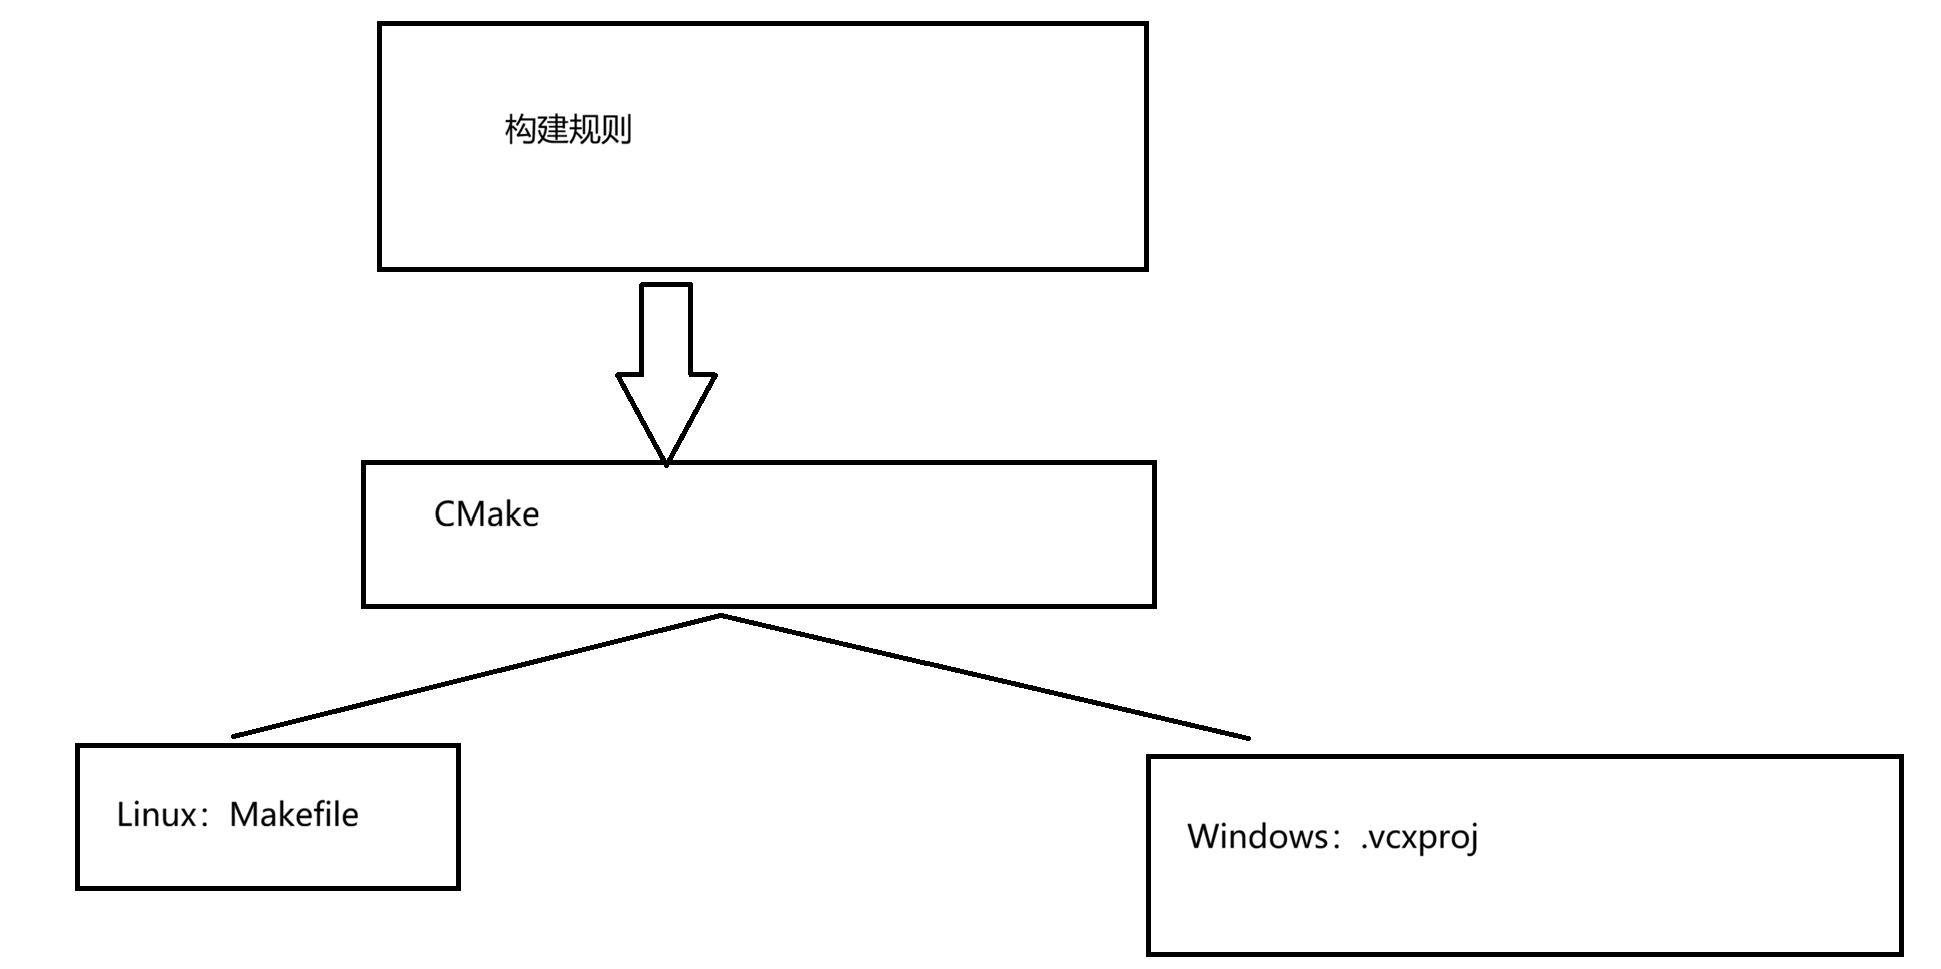
CMake最核心的功能:自动生成各个构建系统对应的构建文件
| 对比维度 | 传统Makefile | CMake | 优势和改进效果 |
|---|---|---|---|
| 跨平台支持 | 需要手动适配不同平台(Linux/macOS/Windows) | 自动生成对应平台的构建文件(Makefile/VS Project/Xcode等) | 一次编写,多处构建,显著提高跨平台开发效率 |
| 语法复杂度 | 语法较为底层,需要编写详细的编译规则和依赖关系 | 声明式高级语法,只需指定目标、源文件和依赖库 | 降低学习成本,减少编写错误,提高可读性 |
| 依赖管理 | 手动指定头文件路径、库路径和链接库 | 内置find_package()、target_link_libraries()等智能命令 |
自动查找系统库,简化第三方库集成 |
| 构建配置 | 需要手动管理Debug/Release等不同配置 | 内置多配置支持,可轻松切换构建类型 | 无需复制多个Makefile,统一管理构建选项 |
| 项目管理 | 大型项目需要拆分并手动管理多个Makefile | 支持模块化,add_subdirectory()轻松管理多目录项目 |
更好的项目组织结构,便于大型项目管理 |
| 自动依赖检测 | 需要手动维护头文件依赖或使用gcc -MM生成 | 自动扫描头文件依赖关系,确保正确重建 | 减少遗漏依赖导致的构建问题 |
| 测试集成 | 需要自行集成测试框架 | 内置CTest,轻松添加和管理测试用例 | 统一测试框架,简化测试流程 |
| 安装打包 | 需要手动编写install规则 | 提供标准化的install()命令和CPack打包工具 | 简化安装和打包过程,支持多种打包格式 |
| 生态系统 | 工具链相对单一 | 丰富的社区模块,支持Qt、Boost等流行库的自动检测 | 快速集成第三方组件,减少配置时间 |
| 可维护性 | 随着项目增长,Makefile变得复杂难维护 | 层次化、模块化的设计保持配置清晰 | 长期项目维护成本显著降低 |
| IDE集成 | 需要额外配置 | 主流IDE(VS Code、CLion、VS等)原生支持 | 开箱即用的IDE体验,更好的代码导航和调试 |
| 生成器支持 | 仅支持Make构建系统 | 支持多种生成器(Ninja、Make、Visual Studio等) | 根据需求选择最优构建后端,如Ninja提供更快的增量构建 |
CMake下载安装配置
CMake官方源码地址:Download CMake
CMake官方英文文档地址:CMake 参考文档 --- CMake 4.2.2 文档
我将演示Linux下的CMake下载安装方式,之后的环境以Ubuntu系统为主,以vscode为主要的编辑器。
下载
APT(Debian/Ubuntu)
bash
sudo apt update
sudo apt install cmake

# 验证版本
cmake --version
YUM/DNF(RHEL/CentOS/Fedora)
bash
# RHEL/CentOS 7
sudo yum install cmake

# RHEL/CentOS 8+/Fedora
sudo dnf install cmake
pacman(Arch/Manjaro)
bash
sudo pacman -S cmakeZypper(openSUSE)
bash
sudo zypper install cmakevscode插件安装
vscode的C/C++环境配置在前期的内容中:https://blog.csdn.net/2401_89119815/article/details/151902554?fromshare=blogdetail&sharetype=blogdetail&sharerId=151902554&sharerefer=PC&sharesource=2401_89119815&sharefrom=from_link
关于vscode的CMake插件安装:
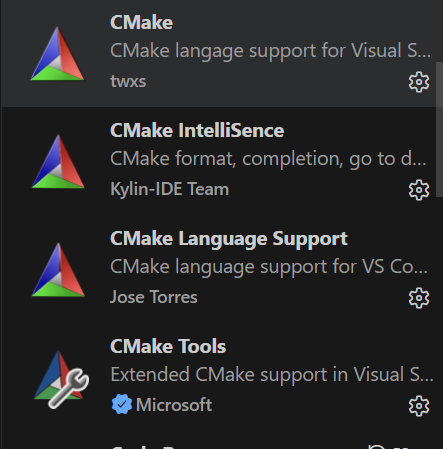
VS Code CMake 插件有以下2点好处:
语法高亮和代码补全 :对 `CMakeLists.txt` 文件提供语法高亮显示,使代码结构更加清晰易读。同时,支持代码补全功能,当你输入 CMake 命令或变量时,插件会自动提示可能的选项,减少手动输入的错误和时间。
智能分析和错误检查:能够对 `CMakeLists.txt` 文件进行智能分析,检查其中的语法错误和潜在问题,并在编辑器中实时显示错误提示和警告信息,帮助你及时发现和解决问题。
测试样例
编写代码
接下来我们以helloworld为测试项目,需要以下两个文件。
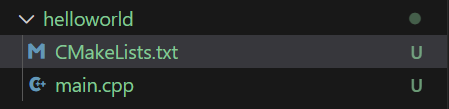
需要注意的是,这里的CMake文件要严格按照这个命名格式,否则CMake文件可能无效
为什么我们的CMake需要设置最低的CMake版本呢?
因为CMake是个不断迭代的工具(目前最新4.x,历史有3.x)。低版本的CMake可能无法解释高版本的CMake的内容,甚至产生不可预知的行为,为了防止这种情况发生,CMake 给我们提供了cmake_minimum_required,这个命令会在配置阶段(cmake命令执行时)检查当前 CMake 版本:
若当前版本低于最低要求,CMake 会直接终止并报错,明确提示 "需要至少 X.X 版本",避免后续因版本不兼容导致的模糊错误。
若当前安装的版本满足要求,则继续执行后续配置流程。
CMake 里的 "目标" 是什么?
在 CMake 中,"目标(Target)" 代表了一个需要被生成的实体,如可执行文件、静态库/动态库等,和Makefile里的目标是一个意思,它是现在CMake里最核心的3个概念之一。
main.cpp
cpp
#include<iostream>

int main()
{
    std::cout<<"hello world\n";
    return 0;
}
CMakeLists.txt
bash
#1设置构建该工程的CMake最低版本
cmake_minimum_required(VERSION 3.18)
#2设置项目名称
project(helloworld)
#3添加构建目标
add_executable(main main.cpp)#第一个参数为目标可执行程序名称,第二个为依赖文件
运行cmake .后即可生成文件:
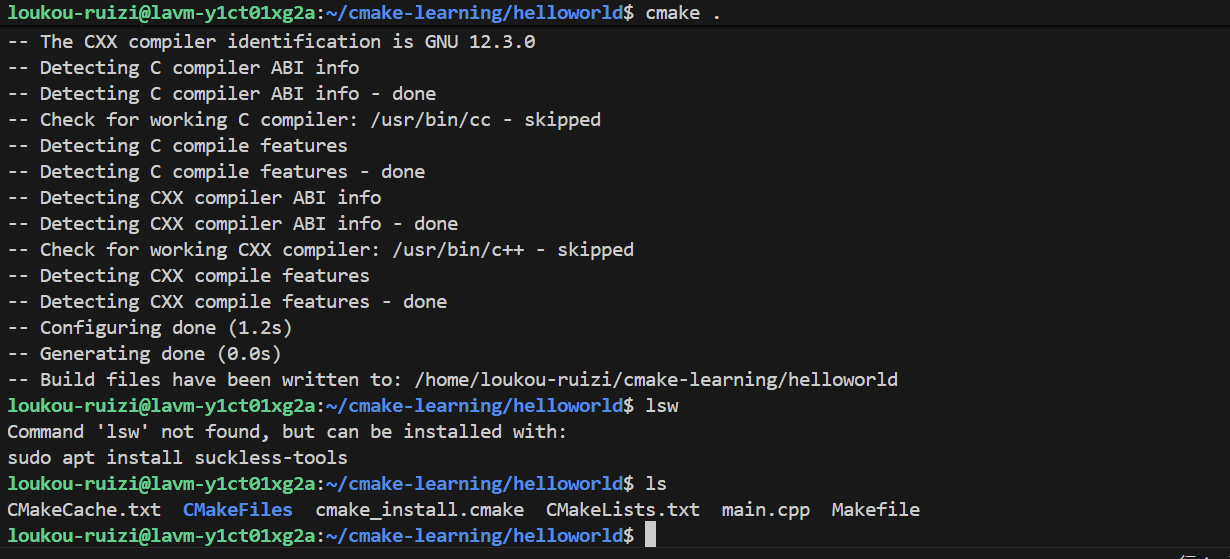
生成的Makefile文件内容是这样的
bash
# CMAKE generated file: DO NOT EDIT!
# Generated by "Unix Makefiles" Generator, CMake Version 4.2

# Default target executed when no arguments are given to make.
default_target: all
.PHONY : default_target

# Allow only one "make -f Makefile2" at a time, but pass parallelism.
.NOTPARALLEL:

#=============================================================================
# Special targets provided by cmake.

# Disable implicit rules so canonical targets will work.
.SUFFIXES:

# Disable VCS-based implicit rules.
% : %,v

# Disable VCS-based implicit rules.
% : RCS/%

# Disable VCS-based implicit rules.
% : RCS/%,v

# Disable VCS-based implicit rules.
% : SCCS/s.%

# Disable VCS-based implicit rules.
% : s.%

.SUFFIXES: .hpux_make_needs_suffix_list

# Command-line flag to silence nested $(MAKE).
$(VERBOSE)MAKESILENT = -s

#Suppress display of executed commands.
$(VERBOSE).SILENT:

# A target that is always out of date.
cmake_force:
.PHONY : cmake_force

#=============================================================================
# Set environment variables for the build.

# The shell in which to execute make rules.
SHELL = /bin/sh

# The CMake executable.
CMAKE_COMMAND = /usr/bin/cmake

# The command to remove a file.
RM = /usr/bin/cmake -E rm -f

# Escaping for special characters.
EQUALS = =

# The top-level source directory on which CMake was run.
CMAKE_SOURCE_DIR = /home/loukou-ruizi/cmake-learning/helloworld

# The top-level build directory on which CMake was run.
CMAKE_BINARY_DIR = /home/loukou-ruizi/cmake-learning/helloworld

#=============================================================================
# Targets provided globally by CMake.

# Special rule for the target edit_cache
edit_cache:
	@$(CMAKE_COMMAND) -E cmake_echo_color "--switch=$(COLOR)" --cyan "No interactive CMake dialog available..."
	/usr/bin/cmake -E echo No\ interactive\ CMake\ dialog\ available.
.PHONY : edit_cache

# Special rule for the target edit_cache
edit_cache/fast: edit_cache
.PHONY : edit_cache/fast

# Special rule for the target rebuild_cache
rebuild_cache:
	@$(CMAKE_COMMAND) -E cmake_echo_color "--switch=$(COLOR)" --cyan "Running CMake to regenerate build system..."
	/usr/bin/cmake --regenerate-during-build -S$(CMAKE_SOURCE_DIR) -B$(CMAKE_BINARY_DIR)
.PHONY : rebuild_cache

# Special rule for the target rebuild_cache
rebuild_cache/fast: rebuild_cache
.PHONY : rebuild_cache/fast

# The main all target
all: cmake_check_build_system
	$(CMAKE_COMMAND) -E cmake_progress_start /home/loukou-ruizi/cmake-learning/helloworld/CMakeFiles /home/loukou-ruizi/cmake-learning/helloworld//CMakeFiles/progress.marks
	$(MAKE) $(MAKESILENT) -f CMakeFiles/Makefile2 all
	$(CMAKE_COMMAND) -E cmake_progress_start /home/loukou-ruizi/cmake-learning/helloworld/CMakeFiles 0
.PHONY : all

# The main clean target
clean:
	$(MAKE) $(MAKESILENT) -f CMakeFiles/Makefile2 clean
.PHONY : clean

# The main clean target
clean/fast: clean
.PHONY : clean/fast

# Prepare targets for installation.
preinstall: all
	$(MAKE) $(MAKESILENT) -f CMakeFiles/Makefile2 preinstall
.PHONY : preinstall

# Prepare targets for installation.
preinstall/fast:
	$(MAKE) $(MAKESILENT) -f CMakeFiles/Makefile2 preinstall
.PHONY : preinstall/fast

# clear depends
depend:
	$(CMAKE_COMMAND) -S$(CMAKE_SOURCE_DIR) -B$(CMAKE_BINARY_DIR) --check-build-system CMakeFiles/Makefile.cmake 1
.PHONY : depend

#=============================================================================
# Target rules for targets named main

# Build rule for target.
main: cmake_check_build_system
	$(MAKE) $(MAKESILENT) -f CMakeFiles/Makefile2 main
.PHONY : main

# fast build rule for target.
main/fast:
	$(MAKE) $(MAKESILENT) -f CMakeFiles/main.dir/build.make CMakeFiles/main.dir/build
.PHONY : main/fast

main.o: main.cpp.o
.PHONY : main.o

# target to build an object file
main.cpp.o:
	$(MAKE) $(MAKESILENT) -f CMakeFiles/main.dir/build.make CMakeFiles/main.dir/main.cpp.o
.PHONY : main.cpp.o

main.i: main.cpp.i
.PHONY : main.i

# target to preprocess a source file
main.cpp.i:
	$(MAKE) $(MAKESILENT) -f CMakeFiles/main.dir/build.make CMakeFiles/main.dir/main.cpp.i
.PHONY : main.cpp.i

main.s: main.cpp.s
.PHONY : main.s

# target to generate assembly for a file
main.cpp.s:
	$(MAKE) $(MAKESILENT) -f CMakeFiles/main.dir/build.make CMakeFiles/main.dir/main.cpp.s
.PHONY : main.cpp.s

# Help Target
help:
	@echo "The following are some of the valid targets for this Makefile:"
	@echo "... all (the default if no target is provided)"
	@echo "... clean"
	@echo "... depend"
	@echo "... edit_cache"
	@echo "... rebuild_cache"
	@echo "... main"
	@echo "... main.o"
	@echo "... main.i"
	@echo "... main.s"
.PHONY : help


#=============================================================================
# Special targets to cleanup operation of make.

# Special rule to run CMake to check the build system integrity.
# No rule that depends on this can have commands that come from listfiles
# because they might be regenerated.
cmake_check_build_system:
	$(CMAKE_COMMAND) -S$(CMAKE_SOURCE_DIR) -B$(CMAKE_BINARY_DIR) --check-build-system CMakeFiles/Makefile.cmake 0
.PHONY : cmake_check_build_system
接下来就是make

运行成功。

流程总结
第一步:编写cmake 配置文件(定义要生成的目标以及源代码列表)
第二步:使用cmake 生成Makefile
第三步:使用make 编译工程
本期关于CMake介绍就到这里了。后续我们还会进一步深入学习CMake的知识。
封面图自取: