本文以YOLOv26为基础,设计研究了基于YOLOv26的4种输电线隐患识别任务,提取影像中的输电线隐患,包含鸟窝、风筝、气球和垃圾,包含完整数据介绍、训练过程和测试结果全流程。
若需要完整数据集和源代码可以私信。
目录
🌷🌷1.数据集介绍
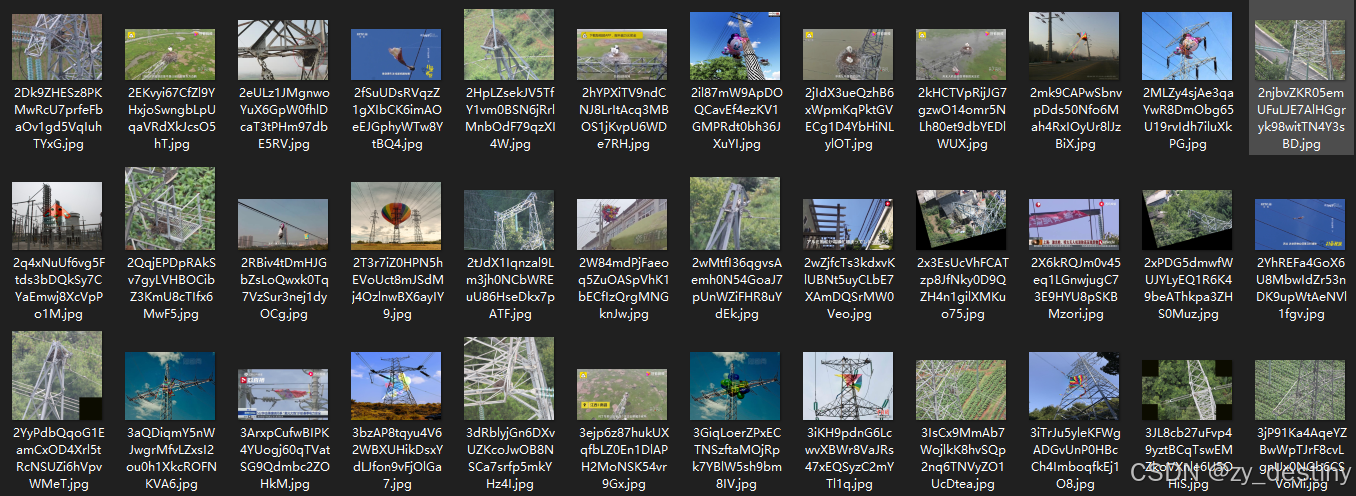
🍉1.1输入影像
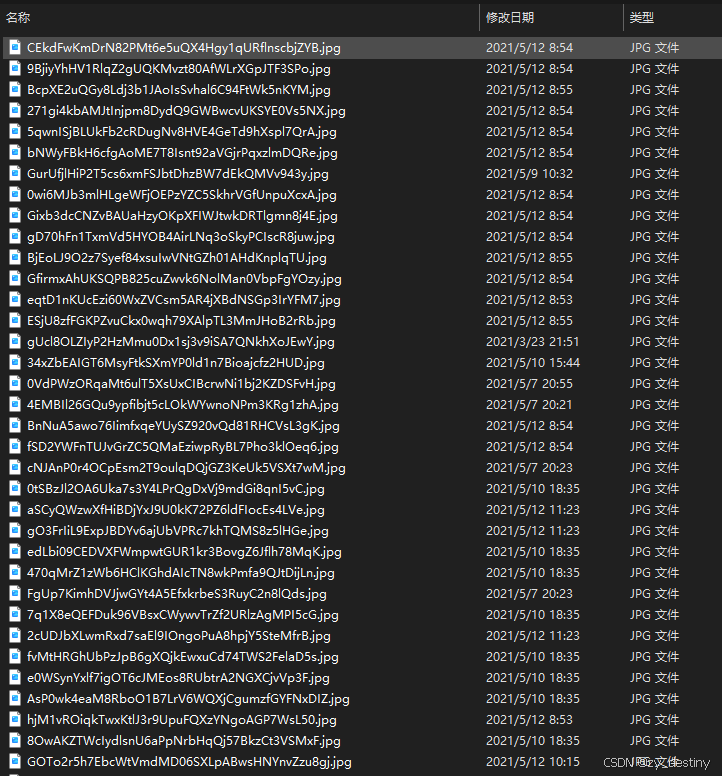
输电线隐患检测数据集总共包含800张样本数据,其中训练集700张,验证集100张,影像尺寸为280*120至8600*5000,部分影像展示如下:
🍉1.2yolo目标检测格式
YOLO(You Only Look Once)目标检测算法使用特定的数据格式进行训练和预测。以下是常见的YOLO数据格式要求:
标注文件格式:
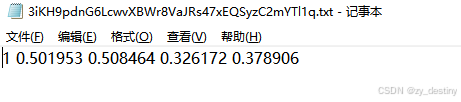
每个图像对应一个同名的.txt文件
每行表示一个边界框,格式为:class_id x_center y_center width height
所有坐标值都是相对于图像宽度和高度的归一化值(0-1之间)
输电线隐患识别数据样本类别包含4类。
bash
0:气球

1:风筝

2:鸟窝

3:垃圾
label为txt格式的yolo目标检测格式,示例txt文件内容为:
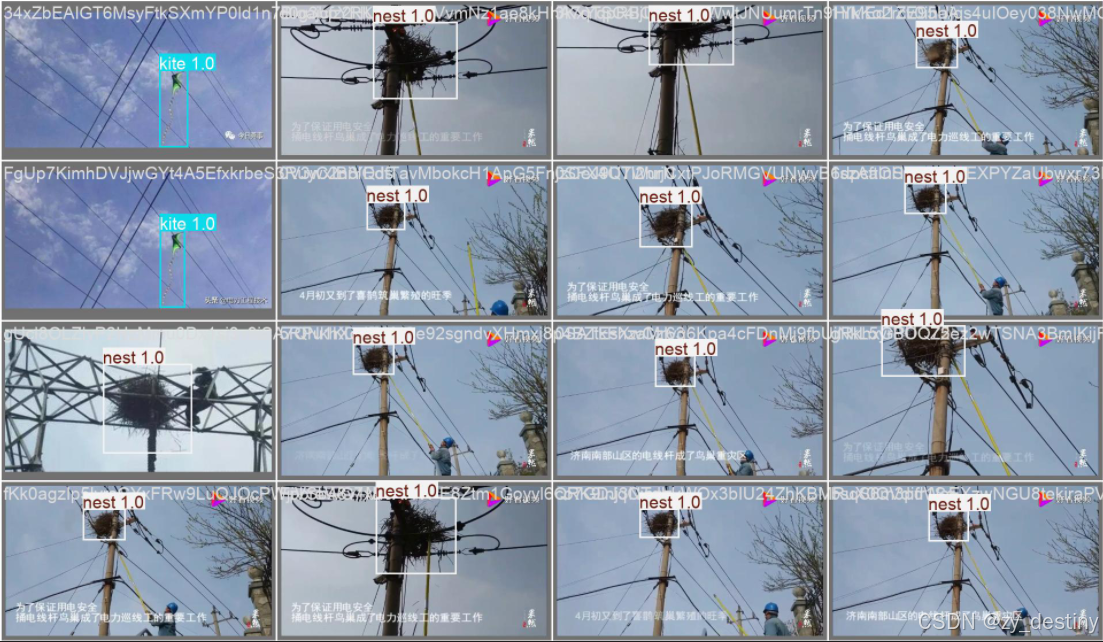
👍👍2.输电线隐患识别实现效果
🍎🍎3.YOLOv26识别输电线隐患算法步骤
通过目标检测方法进行输电线隐患识别的方法不限,本文以YOLOv26为例进行说明。
🍋3.1数据准备
输电线隐患检测数据集总共包含800张样本数据,其中训练集700张,验证集100张。

数据组织:
bash
----power_line_hazards_dataset
       ----images
                ----train
                ----val
        ----labels
                ----train
                ----val
images/train文件夹如下:
labels/train文件夹如下:
模型训练label部分采用的是YOLO格式的txt文件,所以如果自己的数据集是xml格式或者json格式需要进行转换哦,转换可移步这里。
具体txt格式内容如1.数据集介绍中所示。
🍋3.2模型选择
以YOLO26n为例,模型选择代码如下:
python
from ultralytics import YOLO

# Load a model
#model = YOLO('yolo26n.yaml')  # build a new model from YAML
#model = YOLO('yolo26n.pt')  # load a pretrained model (recommended for training)
model = YOLO('yolo26n.yaml').load('yolov26n.pt')  # build from YAML and transfer weights
其中yolo26.yaml为./ultralytics/cfg/models/26/yolo26.yaml,可根据自己的数据进行模型调整,打开yolo26.yaml显示内容如下:
bash
# Parameters
nc: 80 # number of classes
end2end: True # whether to use end-to-end mode
reg_max: 1 # DFL bins
scales: # model compound scaling constants, i.e. 'model=yolo26n.yaml' will call yolo26.yaml with scale 'n'
  # [depth, width, max_channels]
  n: [0.50, 0.25, 1024] # summary: 260 layers, 2,572,280 parameters, 2,572,280 gradients, 6.1 GFLOPs
  s: [0.50, 0.50, 1024] # summary: 260 layers, 10,009,784 parameters, 10,009,784 gradients, 22.8 GFLOPs
  m: [0.50, 1.00, 512] # summary: 280 layers, 21,896,248 parameters, 21,896,248 gradients, 75.4 GFLOPs
  l: [1.00, 1.00, 512] # summary: 392 layers, 26,299,704 parameters, 26,299,704 gradients, 93.8 GFLOPs
  x: [1.00, 1.50, 512] # summary: 392 layers, 58,993,368 parameters, 58,993,368 gradients, 209.5 GFLOPs

# YOLO26n backbone
backbone:
  # [from, repeats, module, args]
  - [-1, 1, Conv, [64, 3, 2]] # 0-P1/2
  - [-1, 1, Conv, [128, 3, 2]] # 1-P2/4
  - [-1, 2, C3k2, [256, False, 0.25]]
  - [-1, 1, Conv, [256, 3, 2]] # 3-P3/8
  - [-1, 2, C3k2, [512, False, 0.25]]
  - [-1, 1, Conv, [512, 3, 2]] # 5-P4/16
  - [-1, 2, C3k2, [512, True]]
  - [-1, 1, Conv, [1024, 3, 2]] # 7-P5/32
  - [-1, 2, C3k2, [1024, True]]
  - [-1, 1, SPPF, [1024, 5, 3, True]] # 9
  - [-1, 2, C2PSA, [1024]] # 10

# YOLO26n head
head:
  - [-1, 1, nn.Upsample, [None, 2, "nearest"]]
  - [[-1, 6], 1, Concat, [1]] # cat backbone P4
  - [-1, 2, C3k2, [512, True]] # 13

  - [-1, 1, nn.Upsample, [None, 2, "nearest"]]
  - [[-1, 4], 1, Concat, [1]] # cat backbone P3
  - [-1, 2, C3k2, [256, True]] # 16 (P3/8-small)

  - [-1, 1, Conv, [256, 3, 2]]
  - [[-1, 13], 1, Concat, [1]] # cat head P4
  - [-1, 2, C3k2, [512, True]] # 19 (P4/16-medium)

  - [-1, 1, Conv, [512, 3, 2]]
  - [[-1, 10], 1, Concat, [1]] # cat head P5
  - [-1, 1, C3k2, [1024, True, 0.5, True]] # 22 (P5/32-large)

  - [[16, 19, 22], 1, Detect, [nc]] # Detect(P3, P4, P5)
主要需要修改的地方为nc,也就是num_class,此处数据集类别为4类,所以nc=4。
如果其他的模型参数不变的话,就默认保持原版yolo26,需要改造模型结构的大佬请绕行。
🍋3.3加载预训练模型
加载预训练模型yolo26n.pt,可以在第一次运行时自动下载,如果受到下载速度限制,也可以自行下载好(下载链接),放在对应目录下即可。

🍋3.4输入数据组织
yolo26还是以yolo格式的数据为例,./ultralytics/cfg/datasets/data.yaml的内容示例如下:
bash
# Train/val/test sets as 1) dir: path/to/imgs, 2) file: path/to/imgs.txt, or 3) list: [path/to/imgs1, path/to/imgs2, ..]
path: ../datasets/coco8  # dataset root dir
train: images/train  # train images (relative to 'path') 4 images
val: images/val  # val images (relative to 'path') 4 images
test:  # test images (optional)

# Classes (80 COCO classes)
names:
  0: person
  1: bicycle
  2: car
  # ...
  77: teddy bear
  78: hair drier
这个是官方的标准coco数据集,需要换成自己的数据集格式,此处建议根据自己的数据集设置新建一个powerline_hazards.yaml文件,放在./ultralytics/cfg/datasets/目录下,最后数据集设置就可以直接用自己的powerline_hazards.yaml文件了。以我的powerline_hazards.yaml文件为例:
bash
path: /home/datasets/powerline_hazards# dataset root dir
train: images/train  # train images (relative to 'path') 4 images
val: images/val  # val images (relative to 'path') 4 images
test: images/test # test images (optional)

names:
  0: balloon
  1: kite
  2: nest
  3: trash
🍭🍭4.目标检测训练代码
准备好数据和模型之后,就可以开始训练了,train.py的内容显示为:
python
from ultralytics import YOLO

model = YOLO("yolo26n-obb.pt")

results = model.train(data="powerline_hazards.yaml", epochs=300, imgsz=1600, device="0", batch = 8)
⭐4.1训练过程
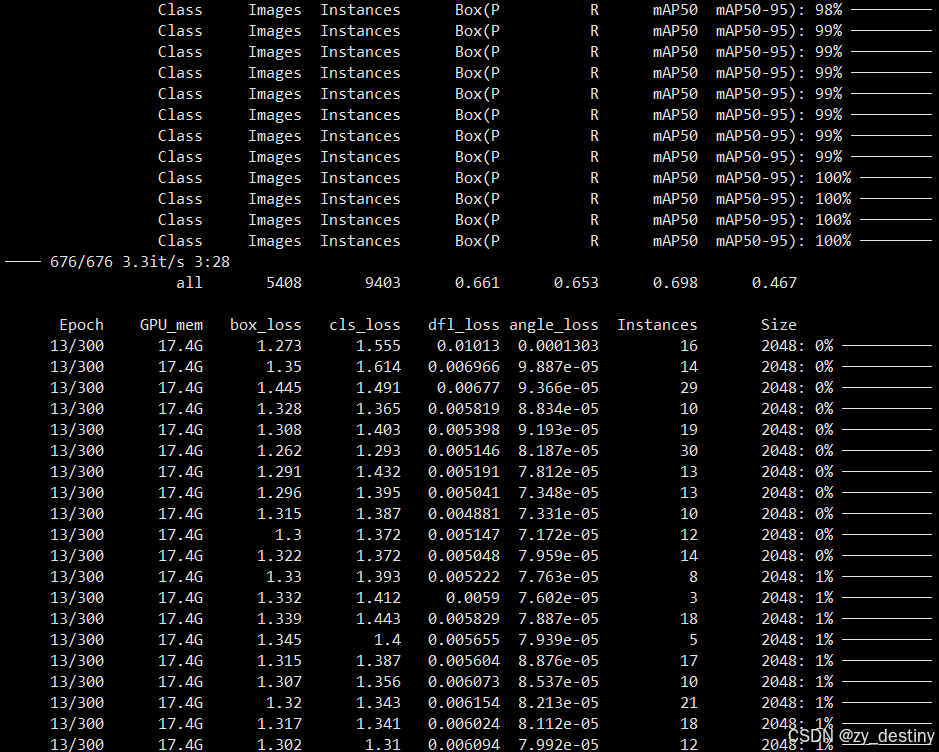
⭐4.2训练结果
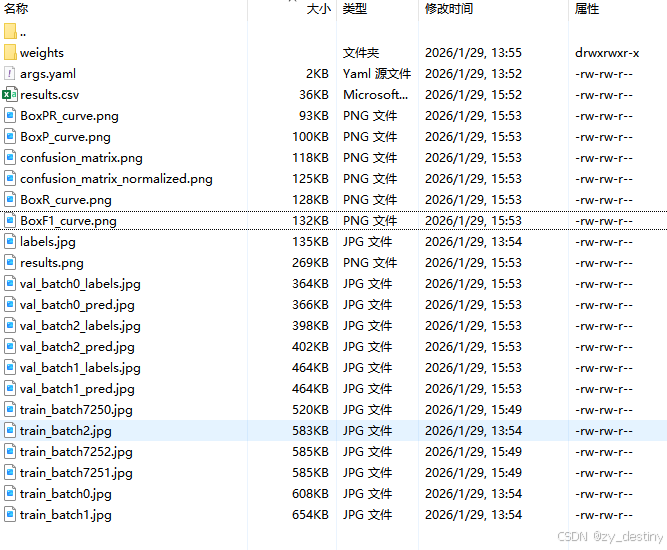
训练完成后会在/runs/detect/目录下生成train或者train+数字的文件夹,存放你的训练结果。
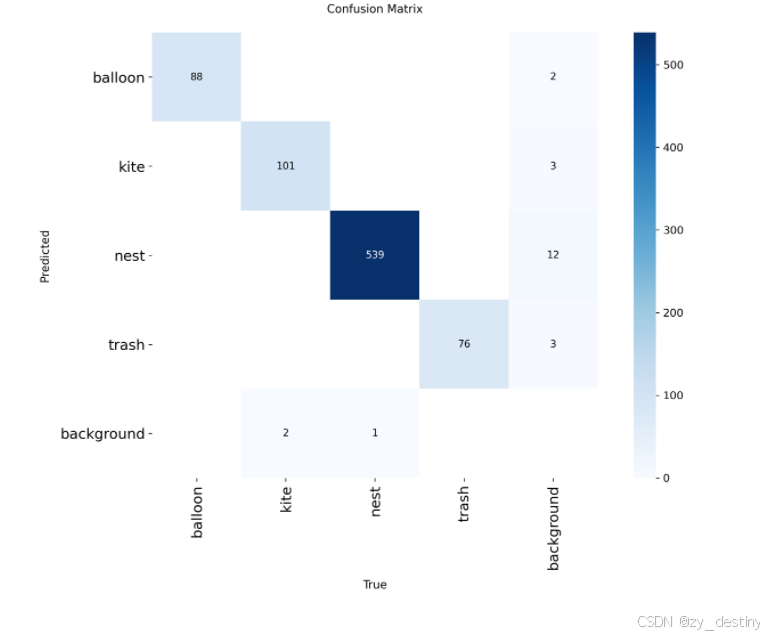
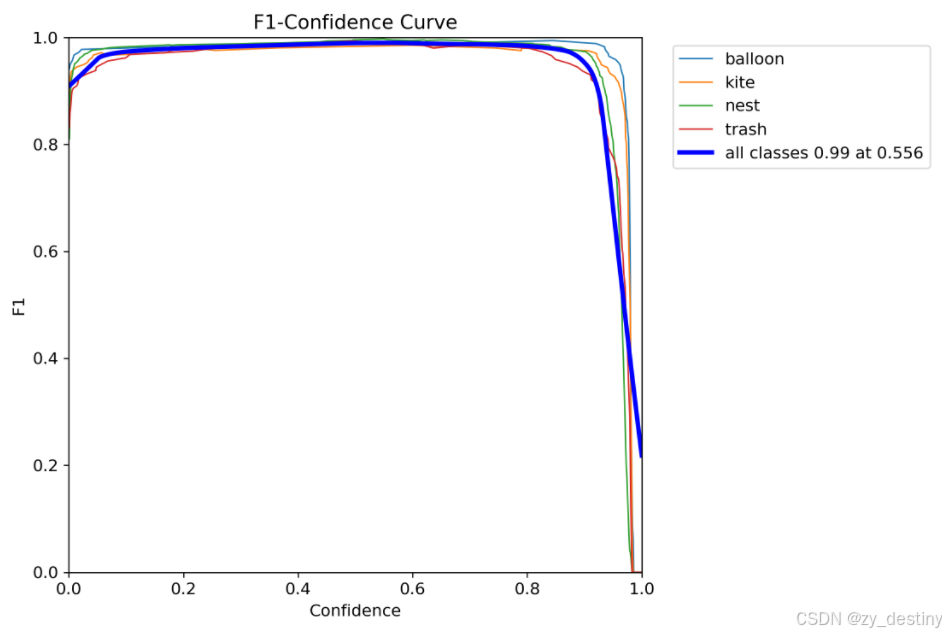
训练完成后F1的结果如下:
其中weights文件夹内会包含2个模型,一个best.pth,一个last.pth。

至此就可以使用best.pth进行推理检测输电线隐患了。
🏆🏆5.目标检测推理代码
批量推理Python代码如下:
python
from ultralytics import YOLO
from PIL import Image
import cv2
import os


model = YOLO('/yolov8/runs/detect/train2/weights/best.pt')  # load a custom model
path = '/home/dataset/images/test/'  #test_image_path_dir
img_list = os.listdir(path)
for img_path in img_list:
###  =============detect=====================
    im1 = Image.open(os.path.join(path,img_path))
    results = model.predict(source=im1, save=True,save_txt=True)
若需要完整数据集和源代码可以私信。
整理不易,欢迎一键三连!!!
送你们一条美丽的--分割线--
🌷🌷🍀🍀🌾🌾🍓🍓🍂🍂🙋🙋🐸🐸🙋🙋💖💖🍌🍌🔔🔔🍉🍉🍭🍭🍋🍋🍇🍇🏆🏆📸📸⛵⛵⭐⭐🍎🍎👍👍🌷🌷