Timer组件
在C#的Windows Forms应用程序中,Timer 组件是一种常用的控件,用于在指定的时间间隔后执行某个操作或方法。Windows Forms 提供了两种不同类型的定时器 ,但当我们谈论"Timer 组件"时,通常指的是 System.Windows.Forms.Timer 类。
System.Windows.Forms.Timer 组件是专为 Windows Forms 应用程序设计的,它运行在 UI 线程上。这意味着当定时器触发时,它会直接在 UI 线程上执行回调方法(即 Tick 事件处理器),这使得更新UI控件(如标签、文本框等)变得非常简单和安全。然而,这也意味着如果回调方法执行时间过长,它可能会阻塞UI,导致应用程序界面响应迟缓。
以下是如何在Windows Forms应用程序中使用 System.Windows.Forms.Timer 组件的基本步骤:
-
添加 Timer 组件
-
在Visual Studio的设计视图中,你可以从工具箱(Toolbox)中拖动Timer控件到你的Form上。
-
或者,你可以在代码中通过
new System.Windows.Forms.Timer()创建一个新的Timer实例。
-
-
设置 Interval 属性
- 通过属性窗口(Properties Window)或代码,设置
Interval属性为你想要的时间间隔(以毫秒为单位) 。例如,如果你想要定时器每秒触发一次,就将Interval设置为 1000。
- 通过属性窗口(Properties Window)或代码,设置
-
编写 Tick 事件处理器
-
双击Timer组件或在属性窗口中找到"事件"(Events)标签,并双击
Tick事件旁边的空白区域,以生成事件处理器的方法模板。 -
在该事件处理器中编写你想要定时执行的代码。
-
-
启动和停止 Timer
-
使用
Start()方法启动Timer。 -
使用
Stop()方法停止Timer。 -
使用 Dispose()方法销毁Timer
-
下面是一个简单的示例,展示了如何在Windows Forms应用程序中使用 System.Windows.Forms.Timer 组件:
public Form04Timer定时器()
{
InitializeComponent();
//设置时间间隔
timer1.Interval = 1000;
}
private void button1_Click(object sender, EventArgs e)
{
timer1.Start();//开启定时器
}
private void button2_Click(object sender, EventArgs e)
{
timer1.Stop();//停止定时器
timer1.Dispose();//销毁定时器
}
//tick事件对应的方法
private void timer1_Tick(object sender, EventArgs e)
{
// Console.WriteLine(DateTime.Now.ToString()+"::::::"+Stopwatch.GetTimestamp());
//更改label的内容
label1.Text = DateTime.Now.ToString();
//更改label的位置
label1.Location = new Point(label1.Location.X + 10, label1.Location.Y + 10);
}
请注意,频繁地在 Tick 事件处理器中显示消息框(如上例所示)并不是一个好的实践,因为它会阻塞UI线程。在实际应用中,你可能只是更新一些UI控件的属性或者调用一些不会阻塞UI线程的方法。
DateTimePicker 控件
Windows 窗体 DateTimePicker控件允许用户从日期或时间列表中选择单个项。 用于表示日期时,它分为两部分显示:以文本表示日期的下拉列表,以及单击列表旁边的向下箭头时显示的时间网格。
通过设计视图添加
-
打开你的WinForms项目。
-
在工具箱(Toolbox)中找到
DateTimePicker控件。 -
将
DateTimePicker控件拖放到窗体上。 -
你可以在属性窗口(Properties Window)中设置
DateTimePicker的属性,如Format(日期时间格式)、ShowCheckBox(是否显示复选框以便用户可以清除选择)、Value(当前选择的日期时间)等。
通过代码添加
如果你想要通过代码来添加 DateTimePicker 控件,你可以按照以下步骤进行:
// 创建一个DateTimePicker控件实例
DateTimePicker dateTimePicker = new DateTimePicker();

// 设置DateTimePicker的属性
dateTimePicker.Location = new System.Drawing.Point(10, 10); // 设置控件在窗体上的位置
dateTimePicker.Size = new System.Drawing.Size(200, 20); // 设置控件的大小
dateTimePicker.Format = DateTimePickerFormat.Short; // 设置日期时间格式为短格式(例如:MM/dd/yyyy)
dateTimePicker.ShowCheckBox = false; // 通常不需要显示复选框
dateTimePicker.Value = DateTime.Now; // 设置当前选择的日期时间为当前时间

// 将DateTimePicker控件添加到窗体的Controls集合中
this.Controls.Add(dateTimePicker);

// 为DateTimePicker的ValueChanged事件添加事件处理器
dateTimePicker.ValueChanged += new EventHandler(DateTimePicker_ValueChanged);

// 事件处理器
private void DateTimePicker_ValueChanged(object sender, EventArgs e)
{
    DateTimePicker dateTimePicker = sender as DateTimePicker;
    // 执行基于用户选择的日期时间的操作
    MessageBox.Show($"您选择的日期时间是:{dateTimePicker.Value.ToShortDateString()}");
}
注意事项
-
DateTimePicker控件的Value属性表示当前选中的日期和时间。你可以通过修改这个属性来改变选中的日期时间,或者在用户改变选择时通过事件处理器来处理变化。 -
ValueChanged事件在用户改变选中的日期或时间时触发。你可以在这个事件的事件处理器中执行基于新选择的日期时间的操作。 -
Format属性允许你设置日期时间的显示格式。DateTimePickerFormat枚举提供了几种预定义的格式选项,如Short、Long、Time等。 -
ShowCheckBox属性允许你控制是否显示一个复选框,以便用户可以清除他们的选择。然而,在大多数情况下,你可能不希望这样做,因此可以将此属性设置为false。
MonthCalendar 控件
Windows 窗体 MonthCalendar 控件为用户查看和设置日期信息提供了一个直观的图形界面。 该控件以网格形式显示日历:网格包含月份的编号日期,这些日期排列在周一到周日下的七个列中,并且突出显示选定的日期范围。
ProgressBar组件
在C#的Windows Forms应用程序中,ProgressBar 组件用于向用户显示某个操作的进度进度条 。它通常显示为一个水平条,其中填充的部分表示进度的百分比。ProgressBar 组件非常适合于长时间运行的操作,比如文件下载、数据处理等,因为它可以为用户提供视觉反馈,表明操作正在进行中且应用程序没有挂起。
以下是如何在Windows Forms应用程序中使用 ProgressBar 组件的基本步骤:
-
添加 ProgressBar 控件
-
在Visual Studio的设计视图中,从工具箱(Toolbox)中拖动ProgressBar控件到你的Form上。
-
或者,在代码中通过
new ProgressBar()创建一个新的ProgressBar实例,并将其添加到Form的Controls集合中。
-
-
设置 ProgressBar 的属性
-
Minimum:进度条的最小值,默认为0。 -
Maximum:进度条的最大值,默认为100。这表示进度条的完整长度。 -
Value:进度条的当前值,它应该在Minimum和Maximum之间。你可以通过修改这个值来更新进度条的显示。 -
Style:进度条的样式,可以是Blocks(默认,显示为一系列块)、Continuous(连续填充)、Marquee(一种特殊的动画效果,通常用于表示不确定的进度)。
-
-
更新 ProgressBar
-
在你的应用程序中,当某个操作正在进行时,你可以根据操作的进度来更新
ProgressBar的Value属性。 -
这通常涉及到在一个循环或后台线程中更新UI控件,但请注意,直接在后台线程中更新UI控件可能会导致问题。为此,你可以使用
Control.Invoke方法(对于Windows Forms)来在UI线程上执行UI更新。
-
以下是一个简单的示例,展示了如何在Windows Forms应用程序中使用 ProgressBar 组件来模拟一个长时间运行的操作:
//定义变量记录进度条的值
private int currentValue = 0;
public Form05PrograssBar进度条()
{
InitializeComponent();
timer1.Interval = 100;
}
private void timer1_Tick(object sender, EventArgs e)
{
if (currentValue < 100)
{
currentValue++;
progressBar1.Value = currentValue;
//Thread.Sleep(100);
}
else {
timer1.Stop();
timer1.Dispose();
MessageBox.Show("文件上传成功!");
}
}
private void button1_Click(object sender, EventArgs e)
{
timer1.Start();
button1.Enabled = false;//当前按钮不能点击
}
private void button2_Click(object sender, EventArgs e)
{
timer1.Stop();
button1.Enabled = true;//当前按钮不能点击
}请记住,上面的示例代码直接在UI线程中执行了长时间运行的操作,这会导致UI界面在操作完成之前无法响应用户输入。在实际应用中,你应该将长时间运行的操作放在后台线程中执行,并通过适当的机制(如 Control.Invoke 或 BeginInvoke)在UI线程上更新 ProgressBar。此外,你还可以考虑使用 async 和 await 关键字来简化异步编程模型的使用。
ImageList组件
在C#的Windows Forms应用程序中,ImageList 组件是一个非常有用的控件,它允许你存储和管理多个图像 ,并且这些图像可以被其他控件(如ListView、TreeView、ToolBar、ComboBox等)引用和使用。ImageList 提供了一种高效的方式来处理大量的图像,因为它减少了应用程序的内存占用,因为它允许控件共享相同的图像实例。
以下是如何在Windows Forms应用程序中使用 ImageList 组件的基本步骤:
-
添加 ImageList 控件
-
在Visual Studio的设计视图中,从工具箱(Toolbox)中拖动ImageList控件到你的Form上。
-
或者,在代码中通过
new ImageList()创建一个新的ImageList实例。
-
-
向 ImageList 添加图像
-
你可以通过设计视图界面上的属性窗口中的"图像"(Images)集合来添加图像。
-
或者,在代码中,使用
Images.Add()方法添加图像。你可以传递一个Image对象或图像文件的路径给这个方法。
-
-
设置 ImageList 的属性
(可选):
-
ColorDepth:设置图像列表中的图像颜色深度。 -
ImageSize:设置图像列表中所有图像的大小。 -
TransparentColor:设置用作图像透明颜色的颜色。
-
-
将 ImageList 与其他控件关联
- 对于支持使用ImageList的控件(如ListView、TreeView等),你需要将控件的
SmallImageList、LargeImageList或其他相关属性设置为你的ImageList实例。
- 对于支持使用ImageList的控件(如ListView、TreeView等),你需要将控件的
以下是一个简单的示例,展示了如何在Windows Forms应用程序中使用 ImageList 组件:
private int index = 0;
public Form06ImageList()
{
string path = "C:\\Users\\miaot\\Desktop\\images\\";
InitializeComponent();
//对imagelist的属性进行设置
imageList1.ColorDepth = ColorDepth.Depth32Bit;
imageList1.ImageSize = new System.Drawing.Size(200, 200);
//添加图片
imageList1.Images.Add(Image.FromFile(path + "1.jpg"));
imageList1.Images.Add(Image.FromFile(path + "2.jpg"));
imageList1.Images.Add(Image.FromFile(path + "3.jpg"));
imageList1.Images.Add(Image.FromFile(path + "4.jpg"));
imageList1.Images.Add(Image.FromFile(path + "5.jpg"));
imageList1.Images.Add(Image.FromFile(path + "6.jpg"));
pictureBox1.Image = imageList1.Images[index];
// pictureBox1.Image = Image.FromFile("C:\\Users\\miaot\\Desktop\\images\\1.jpg");
}
//给图片添加的点击事件::点一次 图片换一次
private void pictureBox1_Click(object sender, EventArgs e)
{
index++;
if (index >=imageList1.Images.Count) {
index = 0;
}
pictureBox1.Image = imageList1.Images[index];
}注意:ImageList 一般不单独使用,一般是配合其他组件使用。 例如 配合 Label Button 等组件使用。
给Label Button 等组件 添加背景图片
Label 中有一个 imageList 选项,可以绑定 ImageList组件中的图片进行显示!
dataGridView 控件
在C#中,DataGridView控件是一个非常强大的工具,用于在Windows窗体应用程序中显示和操作表格数据。它提供了丰富的功能和灵活性,使得数据的展示、编辑、排序、筛选等变得简单直观。
基本使用
-
添加DataGridView控件 : 在Visual Studio的设计视图中,你可以从工具箱(Toolbox)中拖拽
DataGridView控件到你的窗体(Form)上。 -
数据源绑定 :
DataGridView可以绑定到多种数据源,如DataTable、List<T>等。为了演示,我们假设你有一个DataTable,并且想将其数据展示在DataGridView中。DataTable dataTable = new DataTable(); dataTable.Columns.Add("ID", typeof(int)); dataTable.Columns.Add("Name", typeof(string)); dataTable.Rows.Add(1, "Alice"); dataTable.Rows.Add(2, "Bob"); dataGridView1.DataSource = dataTable;
这段代码创建了一个包含两列的DataTable,并添加了两行数据,然后将这个DataTable设置为DataGridView的数据源。
-
自定义列 : 如果你不想通过数据源自动创建列,或者想要调整列的显示方式(如隐藏某些列、改变列标题等),你可以通过
DataGridView的Columns属性来手动操作。DataGridViewTextBoxColumn idColumn = new DataGridViewTextBoxColumn(); idColumn.Name = "ID"; idColumn.HeaderText = "ID"; idColumn.DataPropertyName = "ID"; idColumn.Visible = true; DataGridViewTextBoxColumn nameColumn = new DataGridViewTextBoxColumn(); nameColumn.Name = "Name"; nameColumn.HeaderText = "Name"; nameColumn.DataPropertyName = "Name"; nameColumn.Visible = true; dataGridView1.Columns.Add(idColumn); dataGridView1.Columns.Add(nameColumn); // 然后绑定数据源 dataGridView1.DataSource = dataTable;注意,如果你已经通过数据源自动创建了列,并且只是想要修改某些属性(如列标题),可以直接通过
Columns集合访问这些列。 -
事件处理 :
DataGridView提供了多种事件,如CellClick、RowEnter、CellValueChanged等,允许你在用户与控件交互时执行特定的操作。private void dataGridView1_CellClick(object sender, DataGridViewCellEventArgs e) { MessageBox.Show($"You clicked on cell {e.ColumnIndex}, {e.RowIndex}"); }为了处理这个事件,你需要在设计视图中双击
DataGridView控件,或者手动为CellClick事件添加事件处理程序。
案例
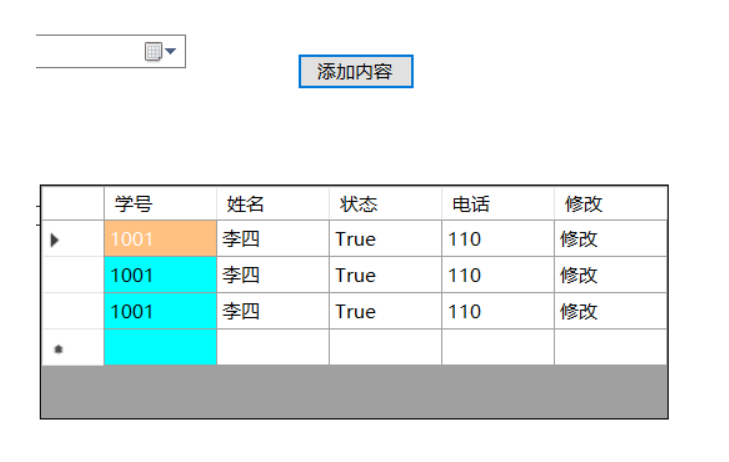
新增数据

如上图,可以添加列来实现效果。
可以通过单击添加按钮,添加一行信息
如下图所示
代码如下
private void button1_Click(object sender, EventArgs e)
        {
            dataGridView1.Rows.Add(new object[] { "1001", "李四", true,"110","修改" });
        }
获取数据
点击 获取数据 按钮后, 获取到 表格中的数据
代码如下:
        private void dataGridView1_CellClick(object sender, DataGridViewCellEventArgs e)
        {
            //获取行数据
           DataGridViewRow row = dataGridView1.Rows[e.RowIndex];
            //获取单元格
           var v=   row.Cells[e.ColumnIndex].Value;

            Console.WriteLine(v.ToString());

        }
TreeView控件
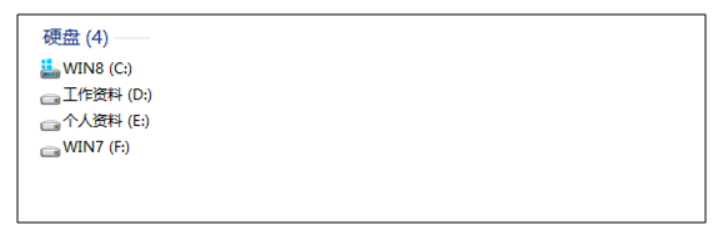
在C#中,TreeView 控件用于显示一个节点(或项)的层次结构,这些节点可以展开或折叠 以显示或隐藏子节点。TreeView 控件非常适合于显示文件系统、组织结构图、分类列表等场景。
以下是一个简单的示例,展示了如何在Windows Forms应用程序中使用TreeView控件:
步骤 1: 创建Windows Forms应用程序
首先,在Visual Studio中创建一个新的Windows Forms App (.NET Framework) 项目。
步骤 2: 添加TreeView控件
-
打开Form的设计视图。
-
从工具箱(Toolbox)中拖动
TreeView控件到Form上。
步骤 3: 填充TreeView
你可以通过代码在Form的构造函数、Load事件处理程序或其他适当的位置填充TreeView。
下面是一个示例,展示了如何在Form的Load事件处理程序中添加一些节点到TreeView:
using System;
using System.Windows.Forms;

namespace WindowsFormsAppTreeViewExample
{
    public partial class Form1 : Form
    {
        public Form1()
        {
            InitializeComponent();
            this.Load += new EventHandler(Form1_Load);
        }

        private void Form1_Load(object sender, EventArgs e)
        {
            // 创建一个根节点
            TreeNode rootNode = new TreeNode("根节点");

            // 创建子节点
            TreeNode childNode1 = new TreeNode("子节点1");
            TreeNode childNode2 = new TreeNode("子节点2");

            // 创建子节点的子节点(孙子节点)
            TreeNode grandchildNode1 = new TreeNode("孙子节点1");

            // 将孙子节点添加到子节点
            childNode1.Nodes.Add(grandchildNode1);

            // 将子节点添加到根节点
            rootNode.Nodes.Add(childNode1);
            rootNode.Nodes.Add(childNode2);

            // 将根节点添加到TreeView控件
            treeView1.Nodes.Add(rootNode);

            // 可选:展开所有节点
            treeView1.ExpandAll();
        }
    }
}在这个示例中,我们首先创建了一个根节点(rootNode),然后创建了两个子节点(childNode1 和 childNode2),接着为 childNode1 创建了一个孙子节点(grandchildNode1)。然后,我们将孙子节点添加到相应的子节点,将子节点添加到根节点,最后将根节点添加到TreeView控件的Nodes集合中。最后,我们调用了ExpandAll()方法来展开所有节点,以便在应用程序启动时显示整个树形结构。
步骤 4: 运行应用程序
现在,你可以运行应用程序并看到TreeView控件中显示的节点层次结构。
进一步操作
-
你可以为
TreeView控件的NodeMouseClick事件添加事件处理程序,以便在用户点击节点时执行特定操作。 -
使用
TreeView控件的SelectedNode属性可以获取当前选中的节点。 -
通过设置节点的
Checked属性,你可以实现具有复选框的TreeView控件。 -
TreeView控件还提供了许多其他属性和方法,允许你自定义其行为和外观。
案例
添加一本书
private void button1_Click(object sender, EventArgs e)
        {
            TreeNode bookNode = new TreeNode("323");
            TreeNode nameNode = new TreeNode("232");

            bookNode.Nodes.Add(nameNode);

            TreeNode root = treeView1.Nodes[0];
            root.Nodes.Add(bookNode);
        }
删除一本书
private void button2_Click(object sender, EventArgs e)
        {
            TreeNode root = treeView1.Nodes[0];

            TreeNodeCollection books = root.Nodes;
            foreach (TreeNode book in books)
            {
                if (book.Text=="西游记")
                {
                     book.Parent.Nodes.Remove(book);
                }
            }
        }
ListView 组件
ListView控件的常用属性:
| 属性 | 说明 |
|---|---|
| Name | 控件的名称 |
| Items | 包含控件中所有项的集合 |
| Columns | 控件中显示的所有列标题的集合 |
| View | 控件的显示视图 |
| LargeImageList | 当控件以大图标视图显示时使用的ImageList |
| SmallImageList | 当控件以小图标视图显示时使用的ImageList |
| GridLines | 在包含控件中的行和列之间是否显示网格线 |
| MultiSelect | 是否可以选择多项 |
| SelectedItems | 获取在控件选定的项 |
| FullRowSelect | 单击某项是否选择其所有子项 |
ListView控件的常用方法:
| 方法 | 说明 |
|---|---|
| Clear | 从控件中移除所有项和列,清空ListView |
ListView控件的常用事件:
| 事件 | 说明 |
|---|---|
| Click | 在单击ListView控件时触发 |
| SelectedIndexChanged | 当选定项发生更改时触发 |
ListView控件具有5种显示视图,由View属性设置,View属性的值及说明见下表:
| 属性值 | 说明 |
|---|---|
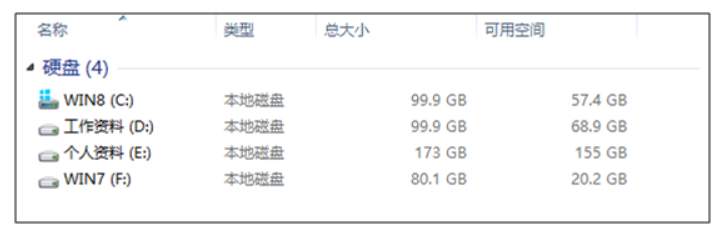
| Details | 详细视图,标准的二维表格,第一行为表头 |
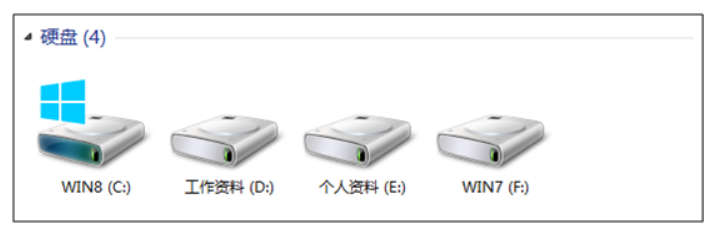
| LargeIcon(默认值) | 大图标,每一项显示为一个大图标 |
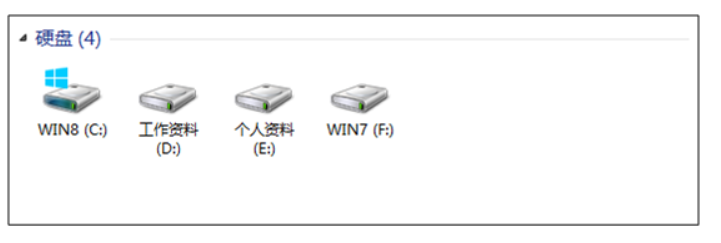
| SmallIcon | 小图标,每一项显示为一个小图标 |
| List | 列表,每项显示一行 |
| Tile | 平铺,显示大图标,并在右侧显示详细信息 |
(1)详细视图(Details)
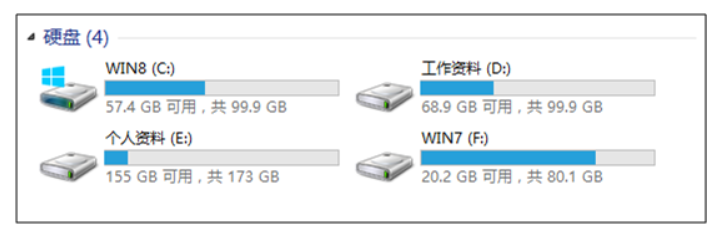
(2)大图标(LargeIcon)
(3)小图标(SmallIcon)
(4)列表(List)
(5)平铺(Tile)
ListView的结构:
(1)ListView控件可以展示多项数据,Items属性表示所有项的集合。
(2)其中每一项均为ListViewItem对象。
(3)每个ListViewItem对象中包含SubItems属性表示该项中所有子项的集合。
(4)其中每个子项均为ListViewSubItem对象。
一、给ListView添加删除项目
示例:使用ListView控件展示游戏人物的信息。
采用两种方法分别实现此功能:
(1)使用ListView编辑器添加,删除项。
(2)使用代码为ListView添加,删除项。
使用ListViewItem集合编辑器添加,删除项:
实现步骤:
(1)创建窗体,并向其中拖入ListView控件
(2)设置ListView控件的Dock属性在父容器中停靠。
(3)向ListView控件中添加,删除列(点击右上角三角,编辑列)。
(4)设置ListView控件的显示视图为Detail,此时可以看到列标题
(5)向ListView控件中添加,删除项(点击右上角三角,编辑项)
(6)添加ListViewItem项目,在text属性中设置第一列内容,在SubItems里面设置后续列内容。
注意:如果该项数据有图片
(1)需要拖入两个ImageList控件,分别存储大图标和小图标的图片。
(2)点击ListView控件右上角三角,将ListView控件与两个ImageList控件关联。
(3)然后直接在该项ListViewItem上设置ImageIndex属性设置图片的索引。
特别注意:如果ListView与ImageList关联,ListView的Detail视图中的行高会随着小图标视图的ImageList的图像高度而改变。而且取消与ImageList的关联后也无法还原,此时可以通过设置ImageList的图像大小来控制行高。
使用代码为ListViewItem添加项:
实现步骤:
(1)创建窗体,并向其中拖入ListView控件
(2)设置ListView控件的Dock属性在父容器中停靠,name属性为lvTimi。
(3)向ListView控件中添加列(点击右上角三角,编辑列)。
(4)设置ListView控件的显示视图为Detail,此时可以看到列标题。
(5)在窗体加载时,编写代码为ListView添加项。
using System;
using System.Collections.Generic;
using System.ComponentModel;
using System.Data;
using System.Drawing;
using System.Linq;
using System.Text;
using System.Threading.Tasks;
using System.Windows.Forms;

namespace _09_ListView_组件
{
    public partial class Form1 : Form
    {
        public Form1()
        {
            InitializeComponent();
            ListView listView = new ListView();

            listView.Location = new Point(50, 50);
            listView.Size = new Size(400, 200);

            listView.Columns.Add("1");
            listView.Columns.Add("1");
            listView.Columns.Add("1");
            listView.Columns.Add("1");
            //
            ListViewItem listItem1 = new ListViewItem("诸葛亮");
            listItem1.SubItems.Add("超弱");
            listItem1.SubItems.Add("超强");
            listItem1.SubItems.Add("非常强");

            ListViewItem listItem2 = new ListViewItem("安其拉");
            listItem2.SubItems.Add("超弱");
            listItem2.SubItems.Add("超强");
            listItem2.SubItems.Add("非常强");

            ListViewItem listItem3 = new ListViewItem("安其拉");
            listItem3.SubItems.Add("超弱");
            listItem3.SubItems.Add("超强");
            listItem3.SubItems.Add("非常强");

            listView.Items.Add(listItem1);
            listView.Items.Add(listItem2);
            listView.Items.Add(listItem3);


            //FullRowSelect:设置是否行选择模式。(默认为false) 提示:只有在Details视图该属性才有意义。
            listView.FullRowSelect=true;
            listView.GridLines = true;
            listView.View = View.Details;
            this.Controls.Add(listView);


        }
    }
}
使用代码为ListViewItem删除项:
//直接通过ListViewItem对象名删除
this.lvTimi.Items.Remove(item1);
//通过索引小标删除
this.lvTimi.Items.RemoveAt(0);
//通过键值对中的键删除,此处的键就是ListViewItem对象的name
this.lvTimi.Items.RemoveByKey("itemAjl");
作业
1 创建一个秒表
显示当前时间和距离过年的时间using System;
using System.Collections.Generic;
using System.ComponentModel;
using System.Data;
using System.Drawing;
using System.Linq;
using System.Text;
using System.Threading.Tasks;
using System.Windows.Forms;
namespace demo05_winform01
{
public partial class Form作业04_秒表 : Form
{
List<Label> list = new List<Label>();
//定义变量 开始和结束之间切换
bool b = true;
//定义变量记录添加的lebel的个数
int count = 0;
//记录开始计时的时间
DateTime dateTimeStart;
Timer timer1,timer2;
public Form作业04_秒表()
{
InitializeComponent();
timer1= new Timer();
timer1.Interval = 10;
timer1.Tick += new EventHandler(timer1_tick);
timer2 = new Timer();
timer2.Interval = 10;
timer2.Tick += new EventHandler(timer2_tick);
}
private void timer2_tick(object o, EventArgs e)
{
TimeSpan timeSpan = DateTime.Now - dateTimeStart;
label4.Text = $"{timeSpan.Hours}:{timeSpan.Minutes}:{timeSpan.Seconds}.{timeSpan.Milliseconds}";
label4.ForeColor = Color.Blue;
}
//显示当前时间
private void timer1_tick(object o,EventArgs e) {
DateTime now = DateTime.Now;
label3.Text = now.ToString("yyyy-MM-dd ddd HH:mm:ss.fff");
label3.ForeColor = Color.Blue;
}
private void Form作业04_秒表_Load(object sender, EventArgs e)
{
timer1.Start();
}
private void button2_Click(object sender, EventArgs e)
{
//获取当前label4的文本
string text = label4.Text;
label5.Text = text;
label5.ForeColor = Color.Red;
Label label = new Label();
label.Text = count + 1 + ":::" + text;
label.ForeColor = Color.Red;
//label.Location = new System.Drawing.Point(560, 140+count%10*30);
label.Size = new System.Drawing.Size(150, 18);
label.TabIndex = 7+(count+1);
list.Add(label);
//窗体中删除所有的lable记录
for (int i=0;i<list.Count;i++) {
if (this.Controls.Contains(list[i])) {
this.Controls.Remove(list[i]);
}
}
//保持列表长度为8
if (list.Count >= 8)
{
list.RemoveAt(0);
}
//窗体中重新加进来
for (int i = 0; i < list.Count; i++)
{
list[i].Location = new System.Drawing.Point(560, 140 + i * 30);
this.Controls.Add(list[i]);
}
//if (list.Count >= 8)
//{
// this.Controls.Remove(list[list.Count - 8]);
//}
//list.Add(label);
//this.Controls.Add(label);
//for (int i=list.Count>=8?list.Count-8:0,j=0;i<list.Count;i++,j++) {
// list[i].Location = new System.Drawing.Point(560, 140 + j * 30);
//}
count++;
}
private void button1_Click(object sender, EventArgs e)
{
if (b)
{
//开始计时 以前的记录清空
for (int i = 0; i < list.Count; i++)
{
if (this.Controls.Contains(list[i]))
{
this.Controls.Remove(list[i]);
}
}
list.Clear();
button2.Enabled = true;
dateTimeStart = DateTime.Now;
//设置label3的文本内容
timer2.Start();
button1.Text = "结束计时";
}
else {
timer2.Stop();
timer2.Dispose();
count = 0;
button2.Enabled = false;
button1.Text = "开始计时";
}
b = !b;
}
}
}2 写一个打地鼠的游戏
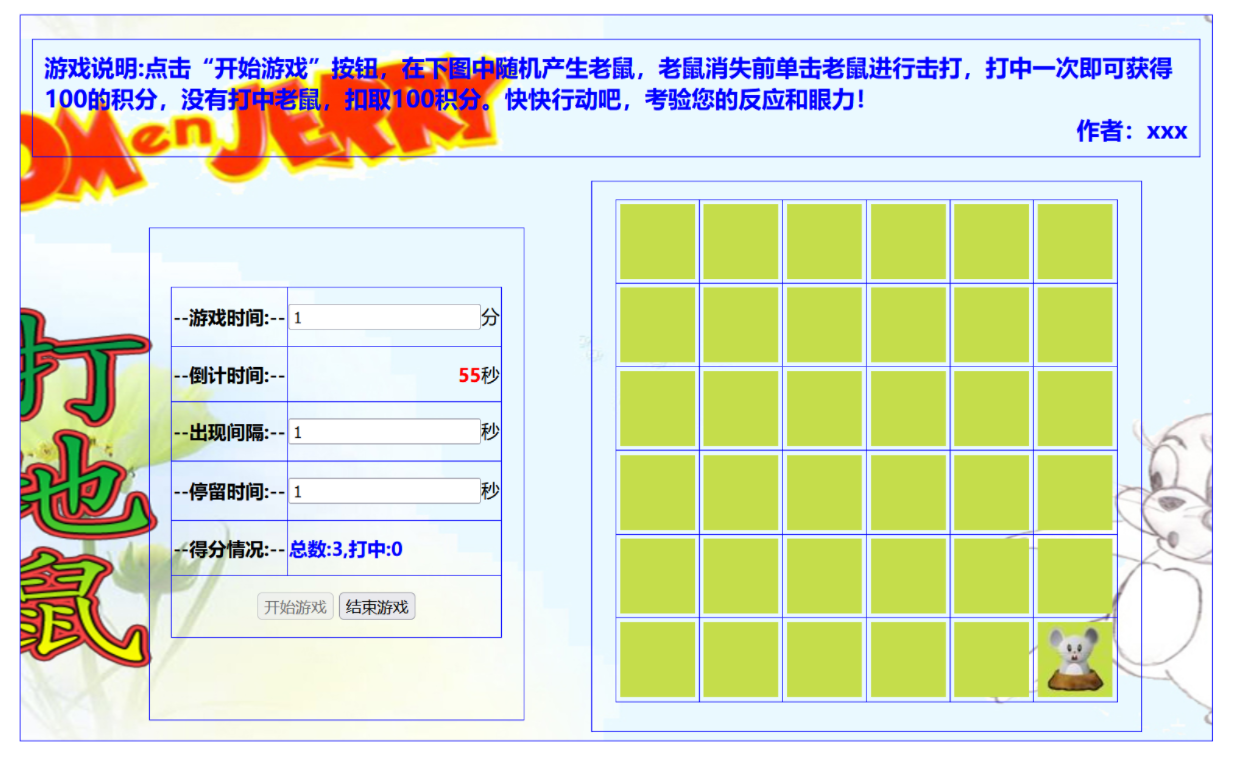
- 地鼠的图片


using System;
using System.Collections.Generic;
using System.ComponentModel;
using System.Data;
using System.Drawing;
using System.Linq;
using System.Reflection.Emit;
using System.Text;
//using System.Threading;
//using System.Threading.Tasks;
using System.Windows.Forms;
namespace demo05_winform01
{
public partial class Form作业05_打地鼠 : Form
{
//定义集合 装所有的游戏按钮
List<Button> list = new List<Button>();
//定义集合记录所有的图片
List<Image> images = new List<Image>();
//定义变量记录所有的参数信息
int total, jianGe, tingLiu;
Timer timerDjs,timerGame;
//定义变量记录次数
int count = 0, get = 0;
//定义引用记录 选中的按钮对象
Button buttonGame;
public Form作业05_打地鼠()
{
InitializeComponent();
label10.Text = "";
label4.Text = "";
loadIamge();
createButton();
}
//游戏
private async void timerGame_tick(object o, EventArgs e)
{
Random random = new Random();
buttonGame = list[random.Next(0,list.Count)];
buttonGame.BackgroundImage=images[1];
//等待0.1秒后 再次更改图片
await System.Threading.Tasks.Task.Delay(tingLiu*1000);
buttonGame.BackgroundImage = images[0];
count++;
}
//每隔1秒钟 倒计时label-1
private void timerDjs_tick(object o,EventArgs e) {
//设置倒计时
label4.Text = int.Parse(label4.Text) - 1 + "";
//设置得分情况
label10.Text = "总分:" + count + ",得分:" + get;
//如果倒计时到0
if (label4.Text=="0") {
stopGame();
}
}
//给参数信息赋值
private void setNum() {
total = int.Parse(textBox1.Text) * 60;
jianGe = int.Parse(textBox3.Text);
tingLiu = int.Parse(textBox4.Text);
label4.Text = total + "";
}
private void button2_Click(object sender, EventArgs e)
{
stopGame();
}
private void stopGame() {
timerDjs.Stop();
timerDjs.Dispose();
timerGame.Stop();
timerGame.Dispose();
button1.Enabled = true;
button2.Enabled = false;
count = 0;
get = 0;
}
private void Form作业05_打地鼠_Load(object sender, EventArgs e)
{
button1.Enabled = true;
button2.Enabled = false; ;
}
private void button1_Click(object sender, EventArgs e)
{
//获取参数
setNum();
//倒计时开始计时
//创建一个timer 进行倒计时
timerDjs = new Timer();
timerDjs.Interval = 1000;
timerDjs.Tick += new EventHandler(timerDjs_tick);
timerDjs.Start();
//开始游戏
//创建一个timer 进行游戏
timerGame = new Timer();
timerGame.Interval = (jianGe + tingLiu) * 1000;
timerGame.Tick += new EventHandler(timerGame_tick);
timerGame.Start();
button1.Enabled = false;
button2.Enabled = true; ;
}
//加载图片
private void loadIamge() {
images.Add( Image.FromFile("F:\\其他专业\\课堂记录java\\02_javaee\\03_js\\JS打地鼠小游戏\\images\\00.jpg"));
images.Add(Image.FromFile("F:\\其他专业\\课堂记录java\\02_javaee\\03_js\\JS打地鼠小游戏\\images\\01.jpg"));
images.Add(Image.FromFile("F:\\其他专业\\课堂记录java\\02_javaee\\03_js\\JS打地鼠小游戏\\images\\02.jpg"));
}
//创建游戏按钮
private void createButton() {
for (int i = 0; i < 25; i++) {
Button button = new Button();
button.Location = new System.Drawing.Point(500+(i%5*80), 114 + i / 5 * 80);
button.Size = new System.Drawing.Size(70, 70);
button.TabIndex = 20+1+i;
button.UseVisualStyleBackColor = true;
this.Controls.Add(button);
//更改背景图片
button.BackgroundImage = images[0];
button.BackgroundImageLayout = ImageLayout.Center;
list.Add(button);
//给所有的按钮添加点击事件
button.Click += new EventHandler(buttonGame_click);
}
}
//为什么比阻塞式等待更好?
//以你之前的 UI 场景为例:
//用 Thread.Sleep(100) 会阻塞 UI 线程,导致界面卡顿、无法响应点击 / 拖拽等操作。
//用 await Task.Delay(100) 则是异步等待:UI 线程会被释放,继续处理其他 UI 事件,100 毫秒后再回到 await 处执行后续代码,界面始终流畅。
//游戏按钮被点击
private async void buttonGame_click(object sender, EventArgs e) {
Button button = ((Button)sender);
if (button == buttonGame && button.BackgroundImage == images[1]) {
get++;
((Button)sender).BackgroundImage = images[2];
// System.Threading. Thread.Sleep(100);
//等待0.1秒后 再次更改图片
await System.Threading.Tasks.Task.Delay(100);
((Button)sender).BackgroundImage = images[0];
}
}
}
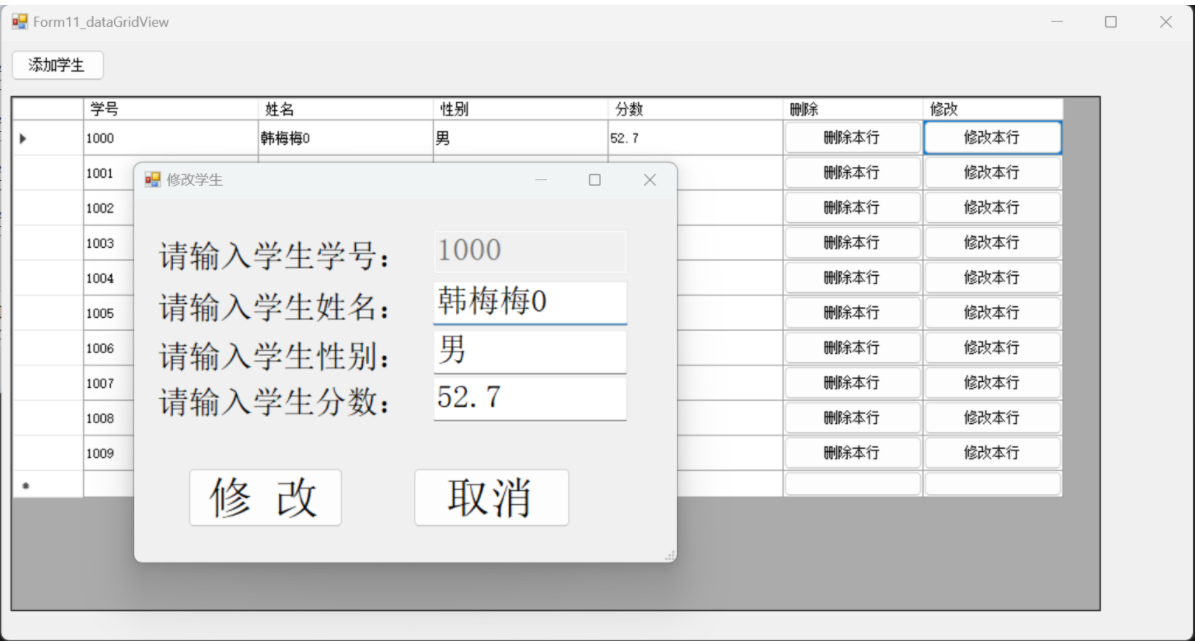
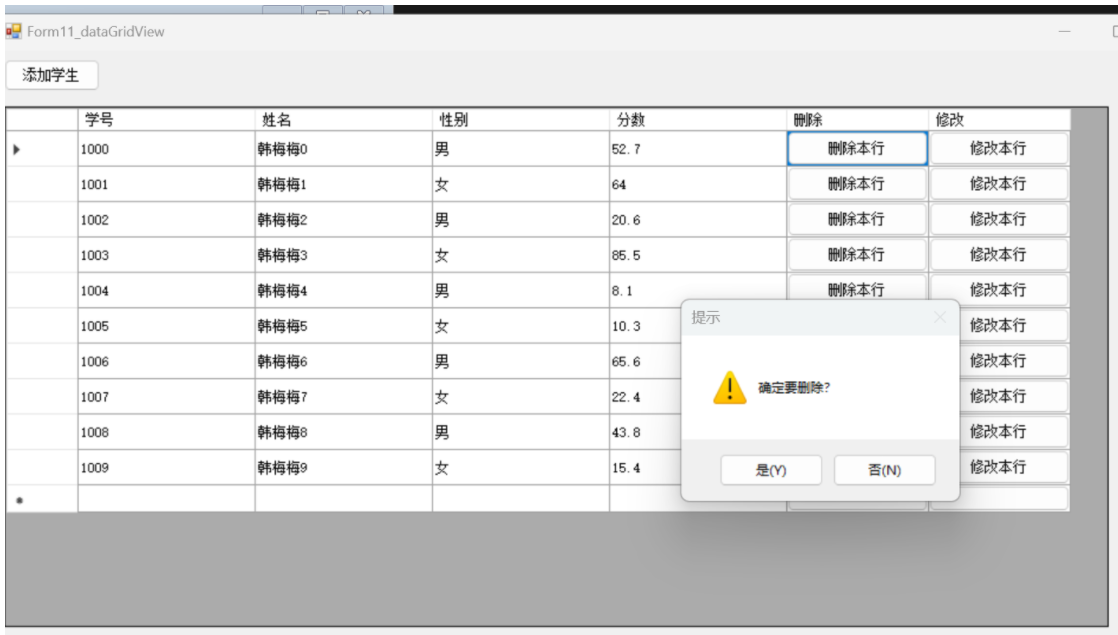
}3 实现学生的增删改查
主页面
using System;
using System.Collections.Generic;
using System.ComponentModel;
using System.Data;
using System.Drawing;
using System.Linq;
using System.Text;
using System.Threading.Tasks;
using System.Windows.Forms;
namespace demo05_winform01
{
public partial class Form11_dataGridView : Form
{
Dictionary<int,Student> data=new Dictionary<int, Student>();
public Form11_dataGridView()
{
InitializeComponent();
deleteColumn();
updateColumn();
initData();
}
//添加修改列
private void updateColumn()
{
DataGridViewButtonColumn updateColumn = new DataGridViewButtonColumn();
updateColumn.Name = "UpdateColumn";
updateColumn.Text = "修改本行";
updateColumn.HeaderText = "修改";
updateColumn.UseColumnTextForButtonValue = true;
updateColumn.Width = 120;
dataGridView1.Columns.Add(updateColumn);
}
//添加删除列
private void deleteColumn() {
DataGridViewButtonColumn deleteColumn = new DataGridViewButtonColumn();
deleteColumn.Name = "DeleteColumn";
deleteColumn.Text = "删除本行";
deleteColumn.HeaderText = "删除";
deleteColumn.UseColumnTextForButtonValue = true;
deleteColumn.Width = 120;
//DataGridViewButtonColumn deleteColumn = new DataGridViewButtonColumn
//{
// Name = "DeleteColumn",
// HeaderText = "删除",
// Text = "删除此行",
// UseColumnTextForButtonValue = true,
// Width = 60
//};
dataGridView1.Columns.Add(deleteColumn);
}
//添加行数据
private void initData() {
//随机数据
data.Clear();
Random rnd = new Random();
for (int i = 0; i < 10; i++) {
Student student = new Student(1000 + i,
"韩梅梅" + i,
i % 2 == 0 ? '男' : '女',
Math.Round(rnd.NextDouble() * 100, 1));
data.Add(student.sid,student);
}
//把data装入表格
foreach (var kv in data) {
dataGridView1.Rows.Add(new object[] {
kv.Value.sid,
kv.Value.sname,
kv.Value.sex,
kv.Value.score
});
}
}
private void button1_Click(object sender, EventArgs e)
{
//跳出添加的窗体 获取输入的信息 然后把添加的信息作为一行添加到datagridlist中
Form11_addStudent addForm= new Form11_addStudent();
DialogResult result= addForm.ShowDialog();
if (addForm.addStudent!=null && result==DialogResult.OK) {
dataGridView1.Rows.Add(new object[] {
addForm.addStudent.sid,
addForm.addStudent.sname,
addForm.addStudent.sex,
addForm.addStudent.score
});
MessageBox.Show("添加学生("+ addForm.addStudent.sid+ ")成功!");
}
}
//单元格被点击
private void dataGridView1_CellClick(object sender, DataGridViewCellEventArgs e)
{
int sid =int.Parse(dataGridView1.Rows[e.RowIndex].Cells[0].Value.ToString());
//判断点击的单元格是不不是删除和修改
if (dataGridView1.Columns[e.ColumnIndex].Name == "DeleteColumn")
{
if (MessageBox.Show("确定要删除?","提示",MessageBoxButtons.YesNo,MessageBoxIcon.Warning)==DialogResult.Yes) {
//删除
dataGridView1.Rows.RemoveAt(e.RowIndex);
}
}
else if (dataGridView1.Columns[e.ColumnIndex].Name == "UpdateColumn")
{
//修改
//跳转到修改页面::
Student updateStudent = data[sid];
Form11_updateStudent updateForm = new Form11_updateStudent(updateStudent);
DialogResult result= updateForm.ShowDialog();
if (updateForm.updateStudent != null && result==DialogResult.OK) {
//更改data
data[sid] = updateForm.updateStudent;
//删除表格的所有数据
dataGridView1.Rows.Clear();
//重新加载data中的所有数据
foreach (var kv in data)
{
dataGridView1.Rows.Add(new object[] {
kv.Value.sid,
kv.Value.sname,
kv.Value.sex,
kv.Value.score
});
}
MessageBox.Show("修改学生("+sid+")成功!");
}
}
else
{
return;
}
}
}
public class Student {
public int sid;
public string sname;
public char sex;
public double score;
public Student() { }
public Student(int sid, string sname, char sex, double score)
{
this.sid = sid;
this.sname = sname;
this.sex = sex;
this.score = score;
}
public override string ToString() {
return $"{sname}:{sid}:{sex}:{score}";
}
}
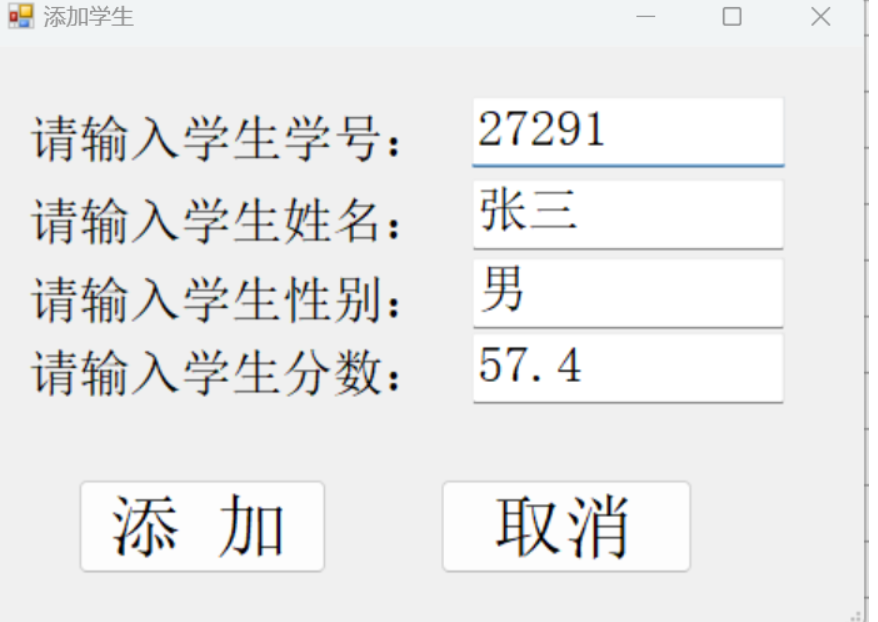
}添加页面
using System;
using System.Collections.Generic;
using System.ComponentModel;
using System.Data;
using System.Drawing;
using System.Linq;
using System.Text;
using System.Threading.Tasks;
using System.Windows.Forms;

namespace demo05_winform01
{
    public partial class Form11_addStudent : Form
    {
        //定义引用记录添加的学生信息
        public Student addStudent;
        Random rd = new Random();
        public Form11_addStudent()
        {
            InitializeComponent();

            initValue();
        }
        //设置默认值
        private void initValue() {
            textBox1.Text = rd.Next(10000, 100000)+"";
            textBox2.Text = "张三";
            textBox3.Text = rd.NextDouble() > 0.5 ? "男" : "女";
            textBox4.Text = Math.Round(rd.NextDouble() * 100, 1)+"";
        }

        private void button1_Click(object sender, EventArgs e)
        {
            addStudent=new Student();
            addStudent.sid=int.Parse(textBox1.Text);
            addStudent.sname=textBox2.Text;
            addStudent.sex = textBox3.Text[0];
            addStudent.score =double.Parse( textBox4.Text);
            this.DialogResult = DialogResult.OK;
            this.Hide();
        }

        private void button2_Click(object sender, EventArgs e)
        {
            this.Hide();
        }
    }
}
修改页面
using System;
using System.Collections.Generic;
using System.ComponentModel;
using System.Data;
using System.Drawing;
using System.Linq;
using System.Text;
using System.Threading.Tasks;
using System.Windows.Forms;

namespace demo05_winform01
{
    public partial class Form11_updateStudent : Form
    {
        //定义引用记录添加的学生信息
        public Student updateStudent;
        Random rd = new Random();
        public Form11_updateStudent(Student s)
        {
            updateStudent = s;
            InitializeComponent();
            initValue();


        }
        //设置默认值
        private void initValue() {
            textBox1.Text = updateStudent.sid+"";
            textBox2.Text = updateStudent.sname;
            textBox3.Text = updateStudent.sex + "";
            textBox4.Text = updateStudent.score + "";
            //id对应的text不能编辑
            textBox1.Enabled = false;
        }

        private void button1_Click(object sender, EventArgs e)
        {
            updateStudent.sname=textBox2.Text;
            updateStudent.sex = textBox3.Text[0];
            updateStudent.score =double.Parse( textBox4.Text);
            this.DialogResult = DialogResult.OK;
            this.Hide();
        }

        private void button2_Click(object sender, EventArgs e)
        {
            updateStudent = null;
            this.Hide();
        }
    }
}
效果图

4 扩展
把学生增删改查的数据库设置为student.txt 实现对数据的持久化存储