记录自己在学习使用OpenCV的过程 我使用的是4.10.0 版本
Android 集成OpenCV 步骤
- 下载OpenCV
- 新建工程
- 依赖OpenCV
- 初始化及逻辑处理
1、下载OpenCV 并解压到自己的电脑
官网 地址:https://opencv.org/releases/
个人地址:https://pan.baidu.com/s/19fPjLcV9Y7ZRL3-Uqy-XAQ
提取码: encv
2、新建工程
在Android Studio 中创建一个空的项目
步骤
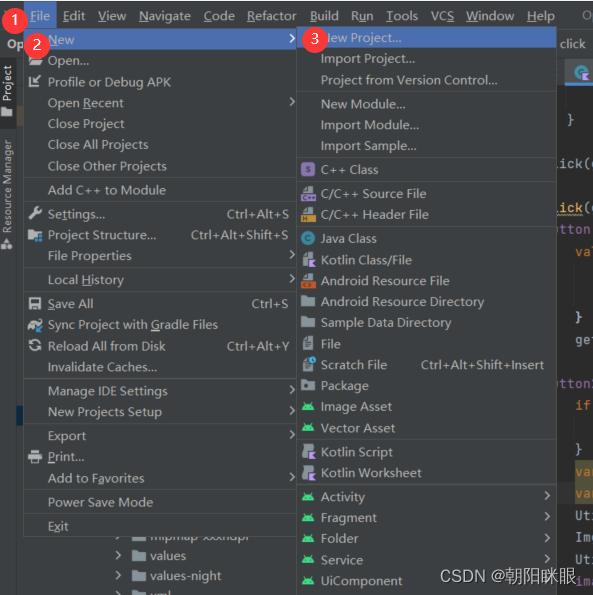
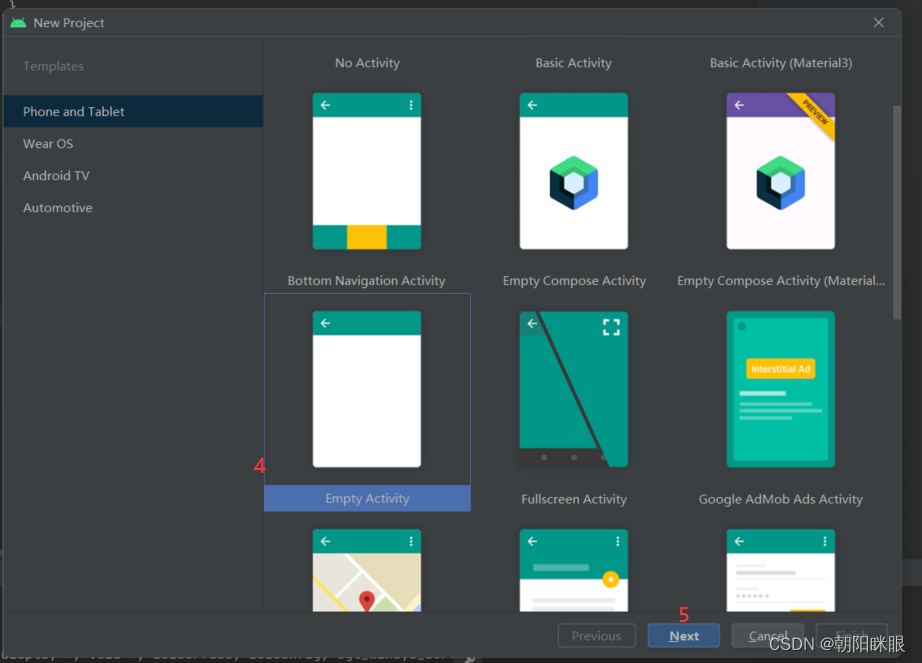
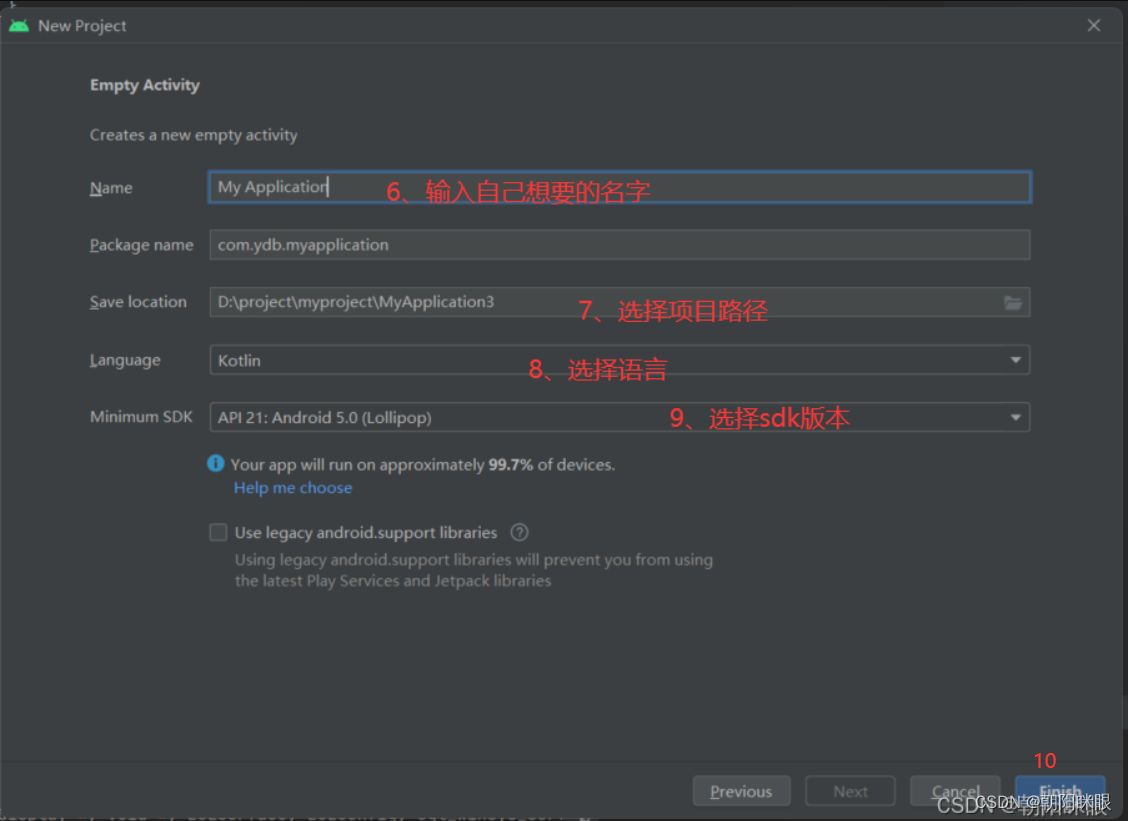
3、依赖 OpenCV
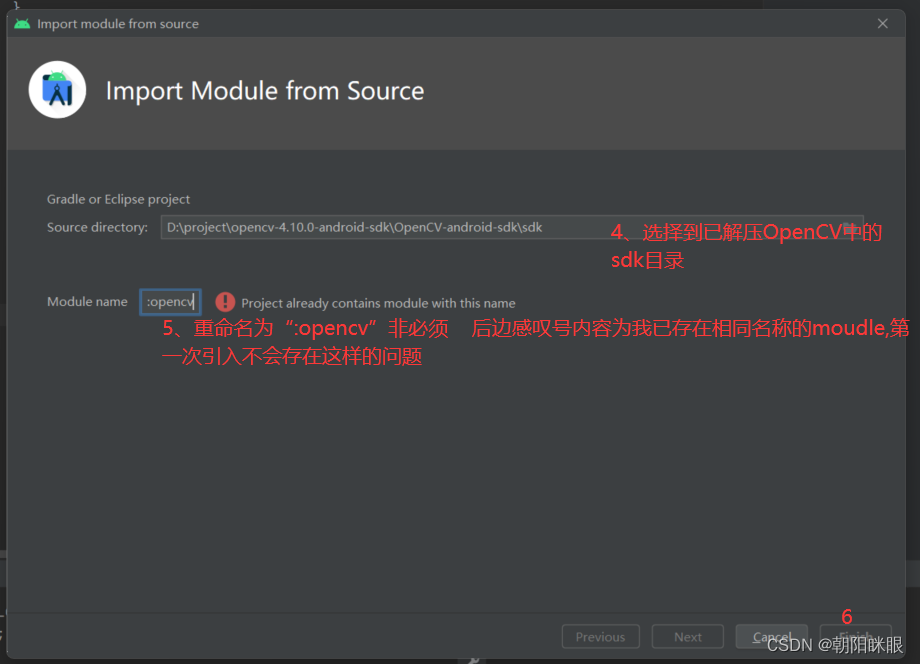
a、集成OpenCV到工程
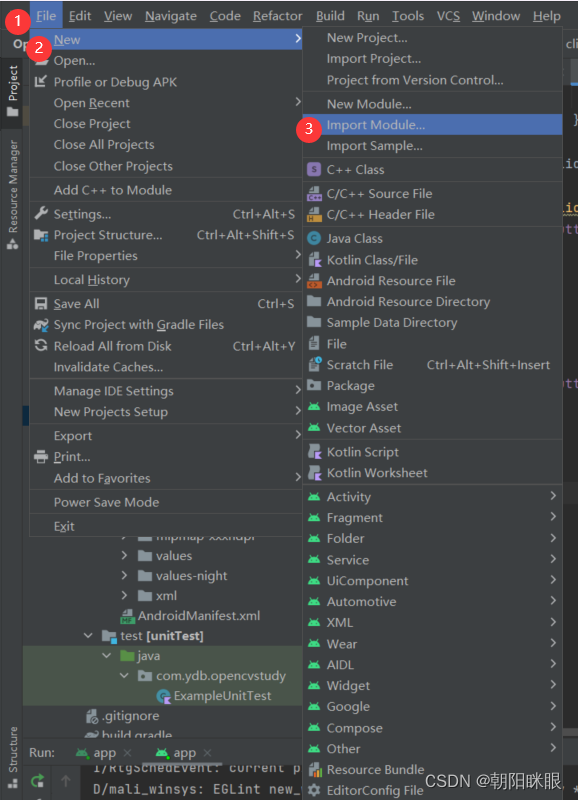
b、在app中添加依赖
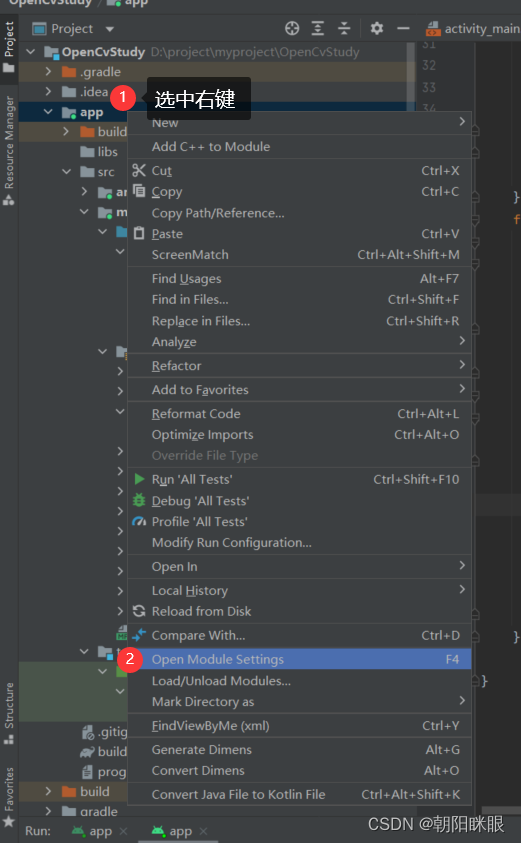
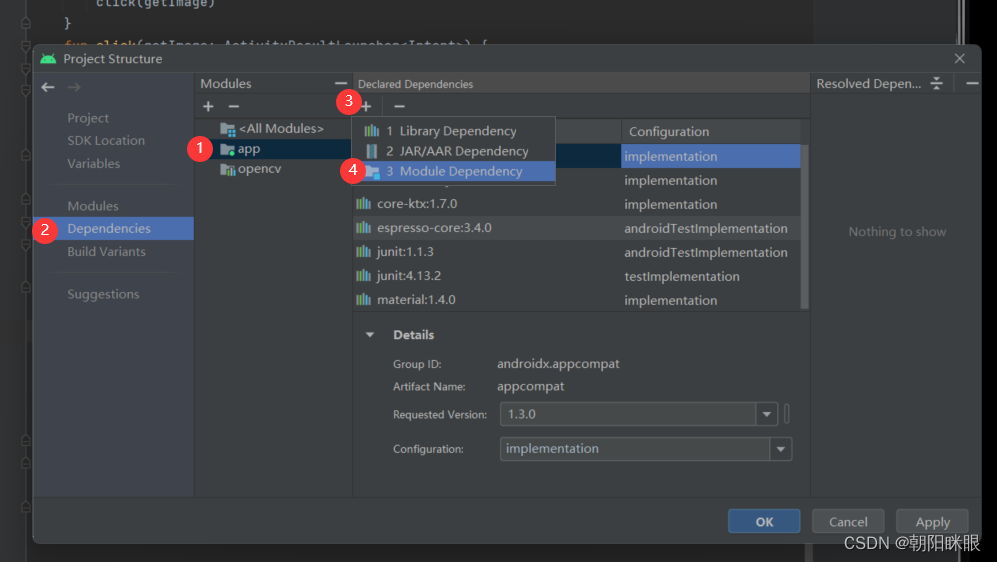
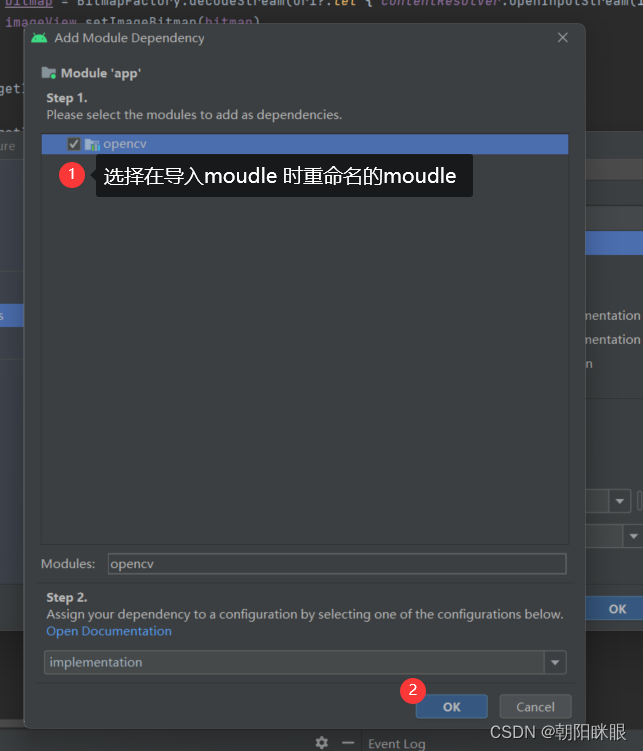

至此app已依赖OpenCV
初始化及逻辑处理
1、初始化
java
  if (OpenCVLoader.initLocal()) {
            Log.i(TAG, "OpenCV loaded successfully")
        } else {
            Log.e(TAG, "OpenCV initialization failed!")
            Toast.makeText(this, "OpenCV initialization failed!", Toast.LENGTH_LONG)
                .show()
            return
        }
2、逻辑处理
本次为图片灰度处理的例子
本案例中使用了registerForActivityResult 跳转页面,因为StartActivityForResult 已过时
java
  val getImage = registerForActivityResult(ActivityResultContracts.StartActivityForResult()){result->
           if (result.resultCode == Activity.RESULT_OK) {
               val uri: Uri? = result.data?.data
               println(result.data)
               println(uri)
               bitmap = BitmapFactory.decodeStream(uri?.let { contentResolver.openInputStream(it) })
               imageView.setImageBitmap(bitmap)
           }
        }
        click(getImage)
java
 fun click(getImage: ActivityResultLauncher<Intent>) {
        button.setOnClickListener{
            val intents = Intent(Intent.ACTION_GET_CONTENT).apply {
                type="image/*"
                addCategory(Intent.CATEGORY_OPENABLE)
            }
            getImage.launch(intents);
        }
        button2.setOnClickListener {
            if (bitmap == null){
                return@setOnClickListener;
            }
            var bit = bitmap!!.copy(Bitmap.Config.ARGB_8888, false);
            var src = Mat(bit?.height!!, bit?.width!!, CvType.CV_8UC3)
            Utils.bitmapToMat(bit,src);
            Imgproc.cvtColor(src,src,Imgproc.COLOR_BGR2GRAY);
            Utils.matToBitmap(src,bitmap);
            imageView.setImageBitmap(bitmap)
        }
    }
布局文件
java
<?xml version="1.0" encoding="utf-8"?>
<androidx.constraintlayout.widget.ConstraintLayout xmlns:android="http://schemas.android.com/apk/res/android"
    xmlns:app="http://schemas.android.com/apk/res-auto"
    xmlns:tools="http://schemas.android.com/tools"
    android:layout_width="match_parent"
    android:layout_height="match_parent"
    tools:ignore="MissingConstraints"
    tools:context=".MainActivity">

    <ImageView
        android:id="@+id/imageView"
        android:layout_width="match_parent"
        android:layout_height="250dp"
        app:layout_constraintLeft_toLeftOf="parent"
        app:layout_constraintRight_toRightOf="parent"
        tools:srcCompat="@tools:sample/avatars"
        android:scaleType="fitXY"
        />

    <Button
        android:id="@+id/button"
        android:layout_width="wrap_content"
        android:layout_height="wrap_content"
        android:text="加载图片"
        app:layout_constraintLeft_toLeftOf="parent"
        app:layout_constraintTop_toBottomOf="@id/imageView"
        app:layout_constraintBottom_toBottomOf="parent"
        android:layout_marginLeft="20dp"/>

    <Button
        android:id="@+id/button2"
        android:layout_width="wrap_content"
        android:layout_height="wrap_content"
        android:text="灰度化"
       app:layout_constraintRight_toRightOf="parent"
        app:layout_constraintTop_toBottomOf="@id/imageView"
        app:layout_constraintBottom_toBottomOf="parent"
        android:layout_marginRight="20dp"/>

</androidx.constraintlayout.widget.ConstraintLayout>
至此本次图片灰度处理已经结束