- 🍨 本文为 🔗365天深度学习训练营中的学习记录博客
- 🍖 原作者: K同学啊
一、前期准备
1.导入数据
python
import tensorflow as tf
import pandas as pd
import numpy as np
df=pd.read_csv("E:/heart.csv")
df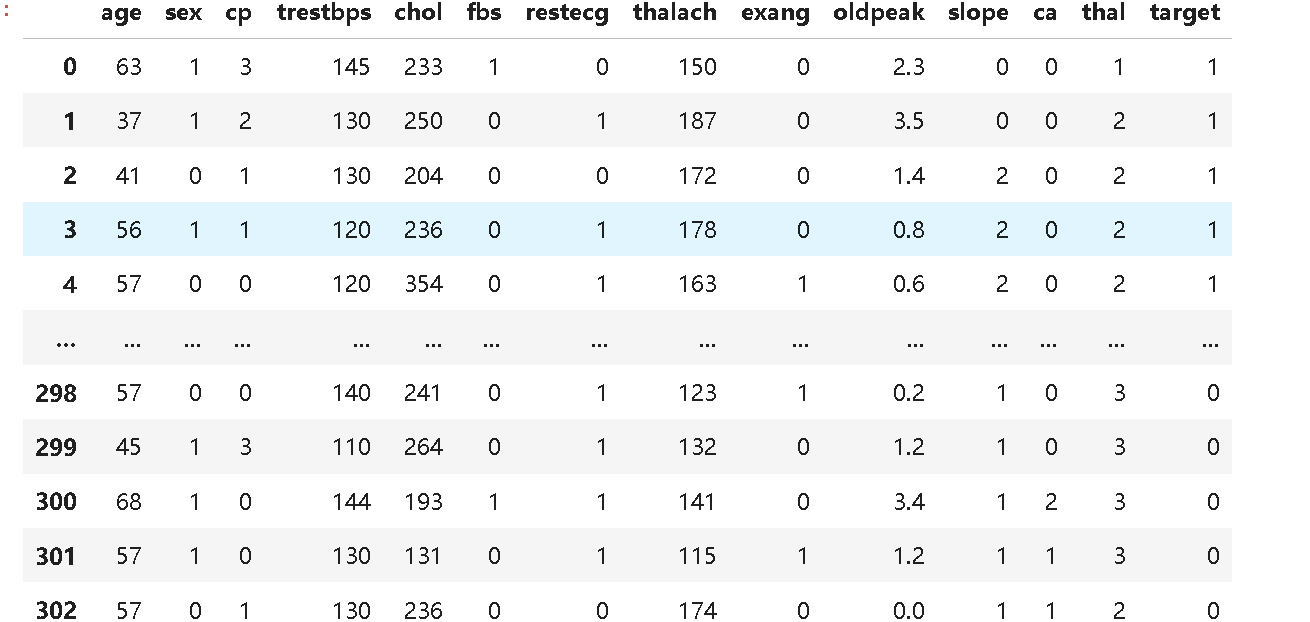
2.检查数据是否有空值
python
df.isnull().sum()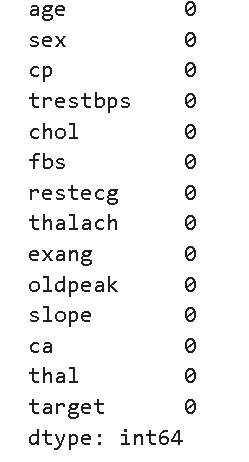
二、数据预处理
1.划分训练集与测试集
python
from sklearn.preprocessing import StandardScaler
from sklearn.model_selection import train_test_split
X=df.iloc[:,:-1]
y=df.iloc[:,-1]
X_train,X_test,y_train,y_test=train_test_split(X,y,test_size=0.1,random_state=1)
2.标准化
python
#将每一列特征标准化为标准正太分布,注意,标准化是针对每一列而言的#
sc=StandardScaler()
X_train =sc.fit_transform(X_train)
X_test = sc.transform(X_test)
X_train =X_train.reshape(X_train.shape[0],X_train.shape[1],1)
X_test =X_test.reshape(X_test.shape[0],X_test.shape[1],1)
三、构建RNN模型
python
import tensorflow
from tensorflow.keras.models import Sequential
from tensorflow.keras.layers import Dense,LSTM,SimpleRNN
model= Sequential()
model.add(SimpleRNN(200,input_shape=(13,1),activation='relu'))
model.add(Dense(100,activation='relu'))
model.add(Dense(1,activation='sigmoid'))
model.summary()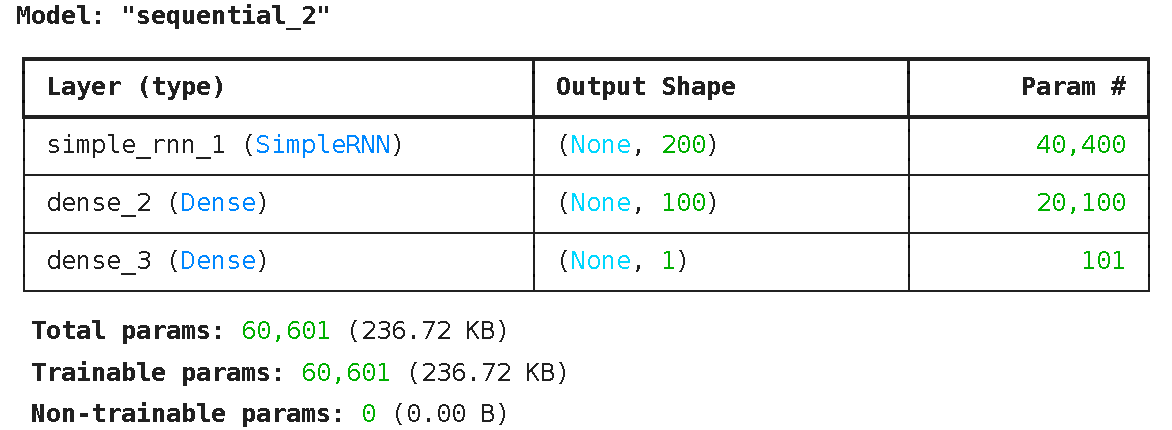
四、编译模型
python
opt=tf.keras.optimizers.Adam(learning_rate=0.0001)
model.compile(loss='binary_crossentropy',optimizer=opt,metrics=['accuracy'])
五、训练模型
python
epochs=100
history=model.fit(X_train,y_train,epochs=epochs,batch_size=128,validation_data=(X_test,y_test),verbose=1)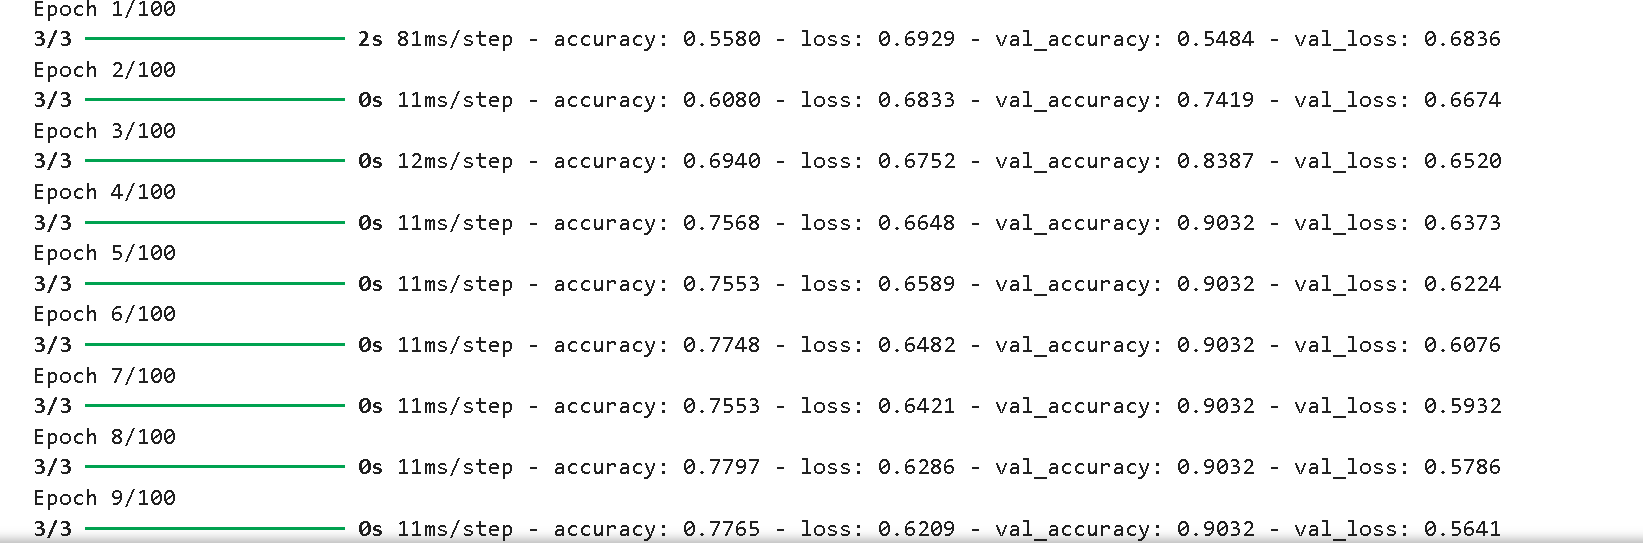 六、模型评估
python
import matplotlib.pyplot as plt
from datetime import datetime
current_time=datetime.now()
acc=history.history['accuracy']
val_acc=history.history['val_accuracy']
loss=history.history['loss']
val_loss=history.history['val_loss']
epochs_range = range(epochs)

plt.figure(figsize=(14, 4))
plt.subplot(1, 2, 1)

plt.plot(epochs_range,acc, label='Training Accuracy')
plt.plot(epochs_range, val_acc, label='Test Accuracy')
plt.legend(loc='lower right')
plt.title('Training and Validation Accuracy')
plt.xlabel(current_time) # 打卡请带上时间戳,否则代码截图无效

plt.subplot(1, 2, 2)
plt.plot(epochs_range, loss, label='Training Loss')
plt.plot(epochs_range, val_loss, label='Test Loss')
plt.legend(loc='upper right')
plt.title('Training and Validation Loss')
plt.show()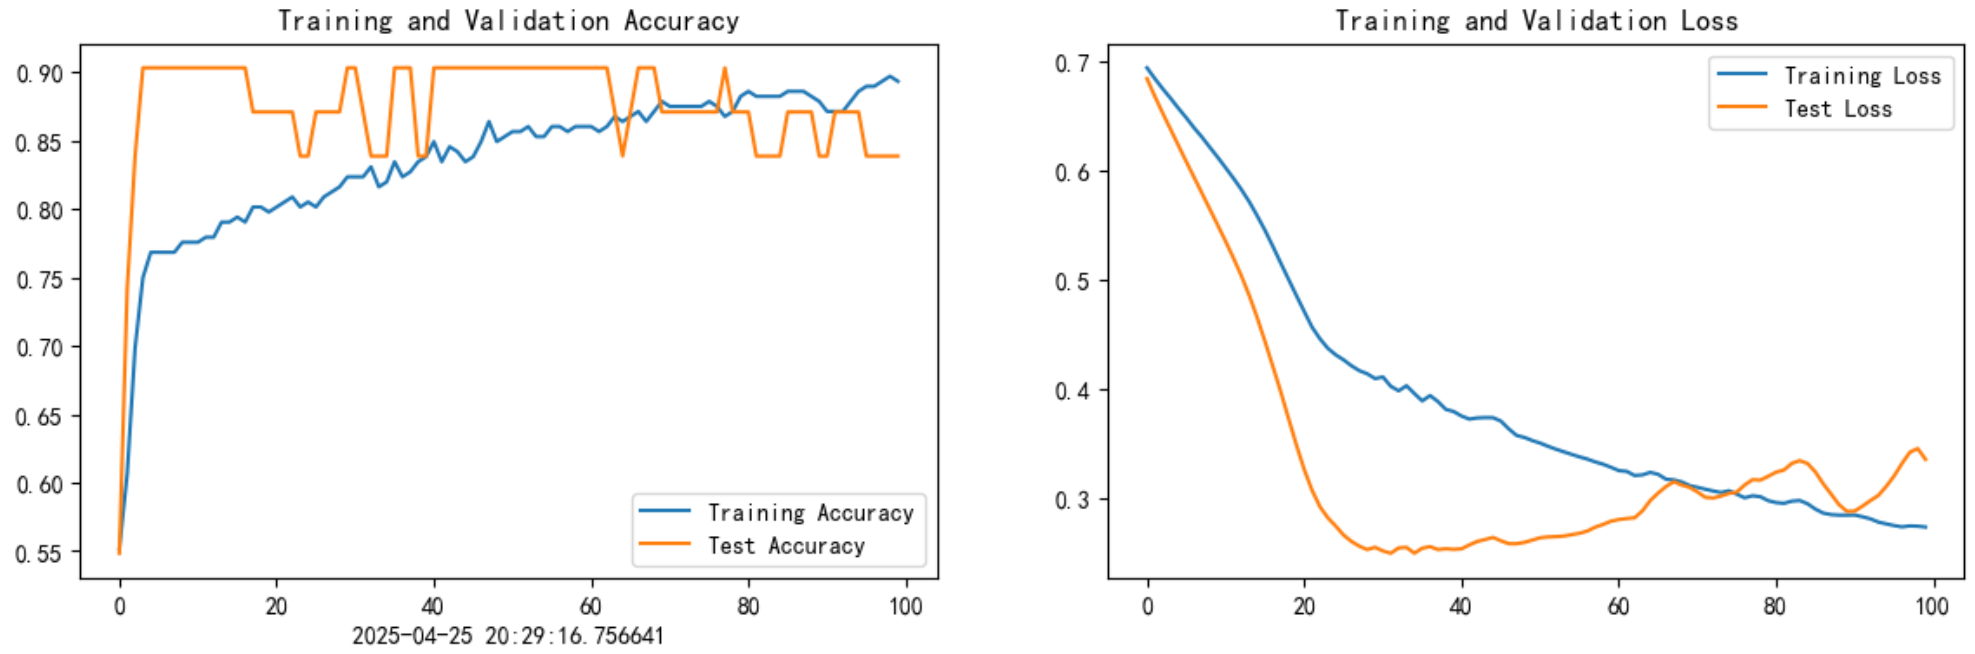
python
scores=model.evaluate(X_test,y_test,verbose=0)
print("%s:%2f%%" % (model.metrics_names[1],scores[1]*100))
compile_metrics:83.6451%
七、总结
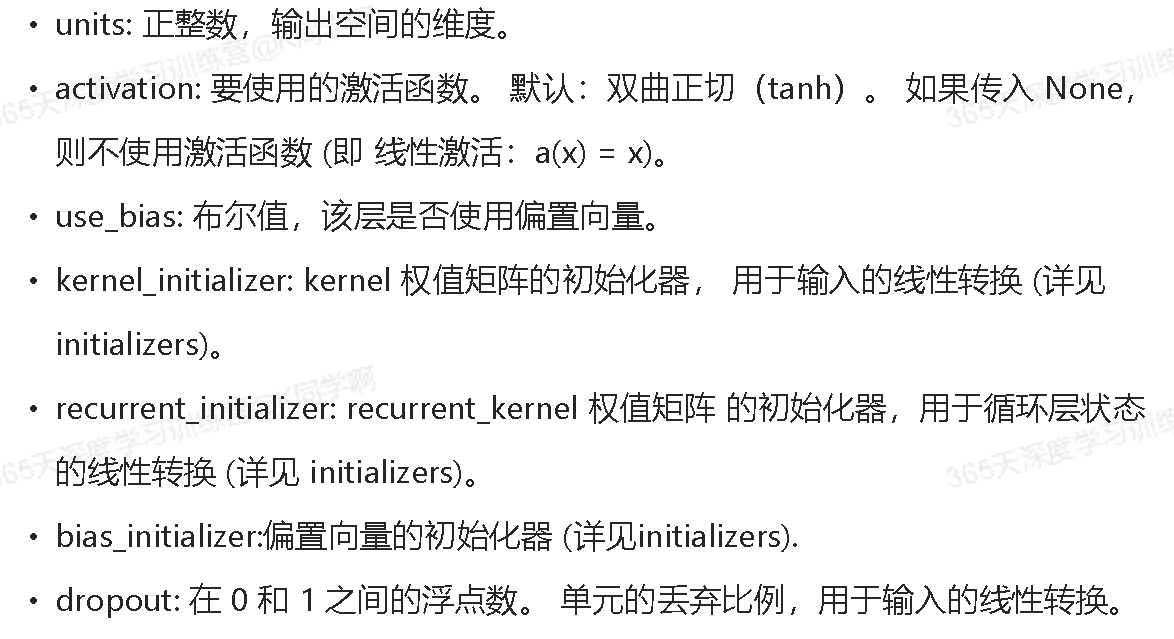
1.RNN函数原型