3.Linux 网络相关命令
记录开发板常见的网络命令
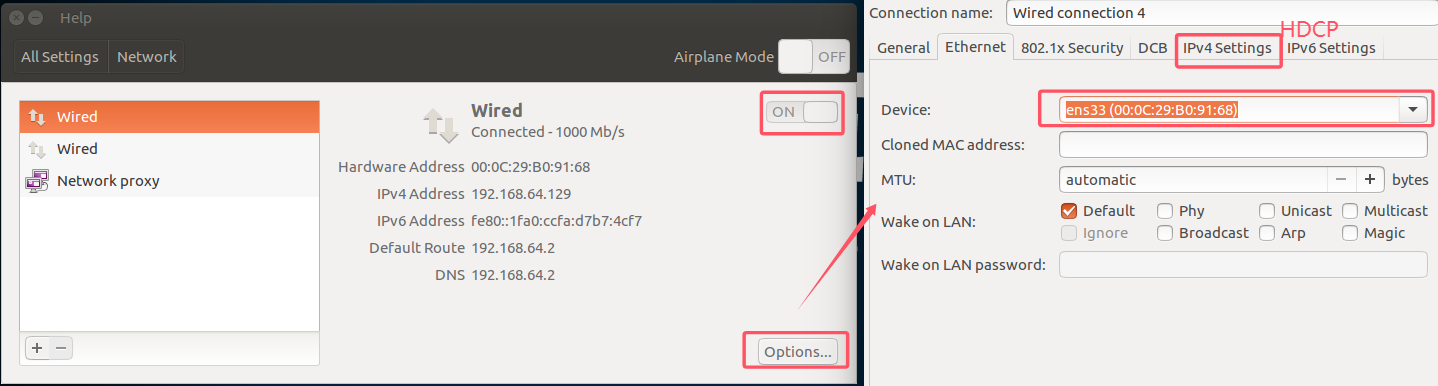
在linux中默认网卡为ens33
在嵌入式linux中默认网卡为eth0 eth1
makefile
//设置ip地址为192.168.1.156
sudo ifconfig ens33 192.168.5.10

//启动
ifconfig eth0 up
//关闭
ifconfig eth0 down
//重启
ifconfig eth0 reload

//ping
ping www.baidu.com

//指定自己的ip去ping
ping -I 192.168.1.11 www.baidu.com
//指定eth1网络去ping
ping www.baidu.com -I eth1

//设置wlan0的ip地址和子网掩码
ifconfig wlan0 192.168.1.11 netmask 255.255.255.0
ifconfig eth0 192.168.1.123 netmask 255.255.255.0
//设置DNS
vi /etc/resolv.conf
//添加以下内容
nameserver 114.114.114.114
nameserver 192.168.3.1     //自己的网关
//保存退出重启

udhcpc -i wlan0

route   //查看路由
添加DNS服务地址
c
echo "nameserver 114.114.114.114" > /etc/resolv.conf或者
vi /etc/resolv.conf
nameserver 114.114.114.114
nameserver 192.168.3.1     //自己的网关
重启
网络测试工具
ubuntu下载后作为服务器端
c
sudo apt-get install iperf3
iperf3 -s
开发板作为客户端,192.168.1.15为ubuntu的ip地址
c
iperf3 -c 192.168.1.15 -i 1
c
Connecting to host 192.168.1.15, port 5201
[ 4] local 192.168.1.103 port 41794 connected to 192.168.1.15 port 5201
[ ID] Interval Transfer Bandwidth Retr Cwnd
[ 4] 0.00-1.00 sec 11.7 MBytes 98.0 Mbits/sec 0 232 KBytes
[ 4] 1.00-2.00 sec 11.2 MBytes 93.8 Mbits/sec 0 232 KBytes
[ 4] 2.00-3.00 sec 11.2 MBytes 93.8 Mbits/sec 0 232 KBytes
[ 4] 3.00-4.00 sec 11.2 MBytes 94.3 Mbits/sec 0 232 KBytes
[ 4] 4.00-5.00 sec 11.3 MBytes 94.9 Mbits/sec 0 232 KBytes
[ 4] 5.00-6.00 sec 11.2 MBytes 93.8 Mbits/sec 0 232 KBytes
[ 4] 6.00-7.00 sec 11.2 MBytes 94.4 Mbits/sec 0 232 KBytes
[ 4] 7.00-8.00 sec 11.1 MBytes 93.3 Mbits/sec 0 232 KBytes
[ 4] 8.00-9.00 sec 11.3 MBytes 94.9 Mbits/sec 0 232 KBytes
[ 4] 9.00-10.00 sec 11.2 MBytes 93.8 Mbits/sec 0 232 KBytes
- - - - - - - - - - - - - - - - - - - - - - - - -
[ ID] Interval Transfer Bandwidth Retr
[ 4] 0.00-10.00 sec 113 MBytes 94.5 Mbits/sec 0 sender
[ 4] 0.00-10.00 sec 112 MBytes 94.0 Mbits/sec receiver
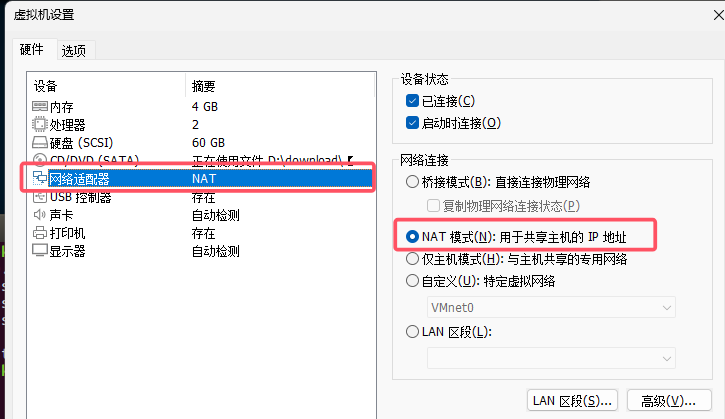
iperf Done.NAT模式:
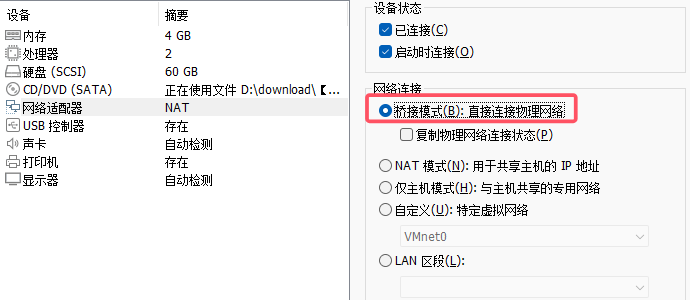
桥接模式
1.控制面板\网络和 Internet\网络连接
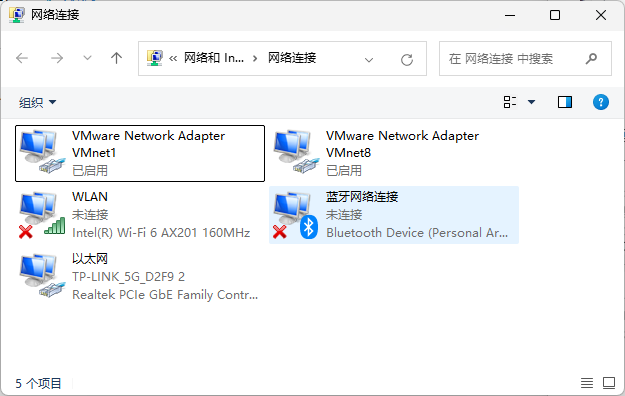
本机网络没有任何问题,但是虚拟机不能上网,采取下面措施:
可以出现问题时对VMnet1 和VMnet8 禁用后重启,即可上网
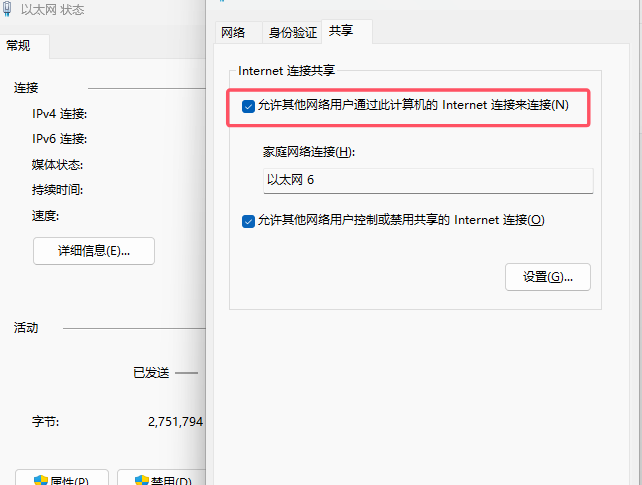
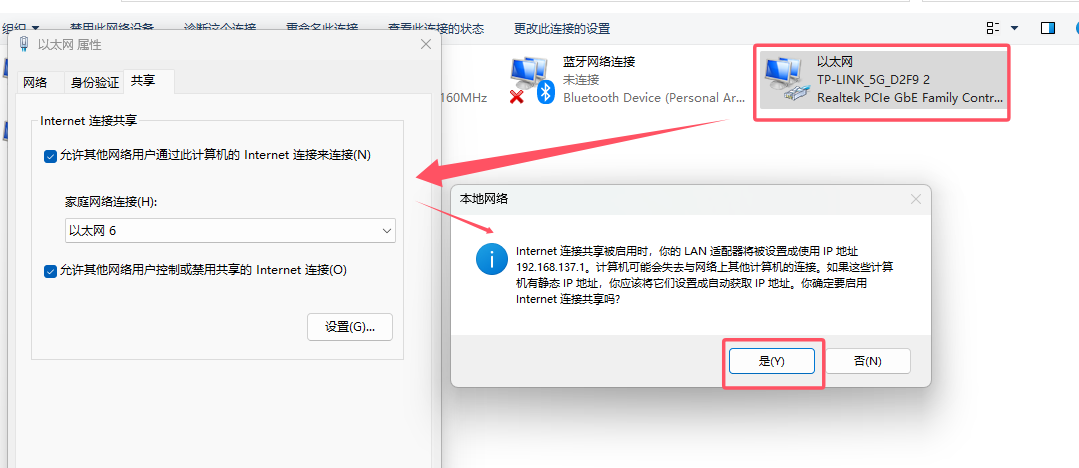
对以太网共享给以太网6用于开发板的上网功能
方法一:
对于校园网环境:准备两根网线
开发板一根网线用于和其他网络设备进行通信,此时不能上网

另外一根用于上网,等待eth1网卡获得IP后,就可以访问外网了
c
udhcpc -i eth1方法二:使用以太网的网络共享,这样默认主机地址为192.168.137.1
在开发板上重启eth0网卡即可 down / up
给linux系统添加两个网卡分别是nat 和 桥接
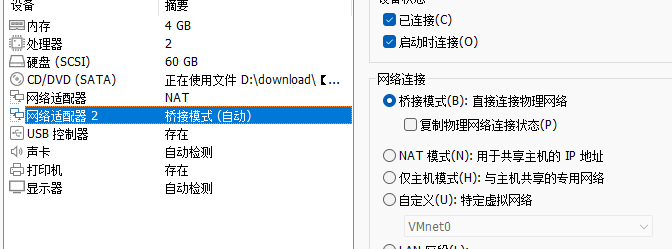
配置第一个网卡为用于上网
配置第二个网卡用于通信
添加网络ens37用于和外部usb设备进行连接
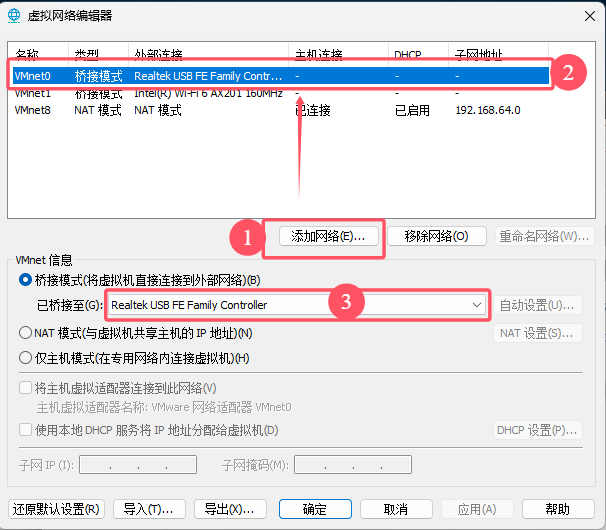
选择刚新添加的网络
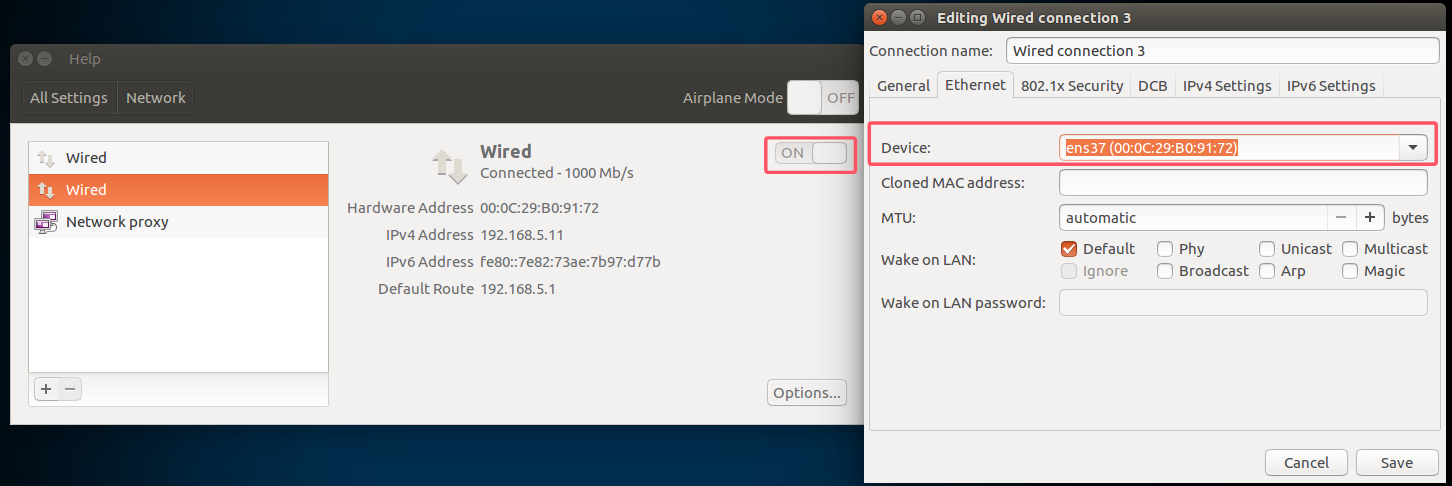
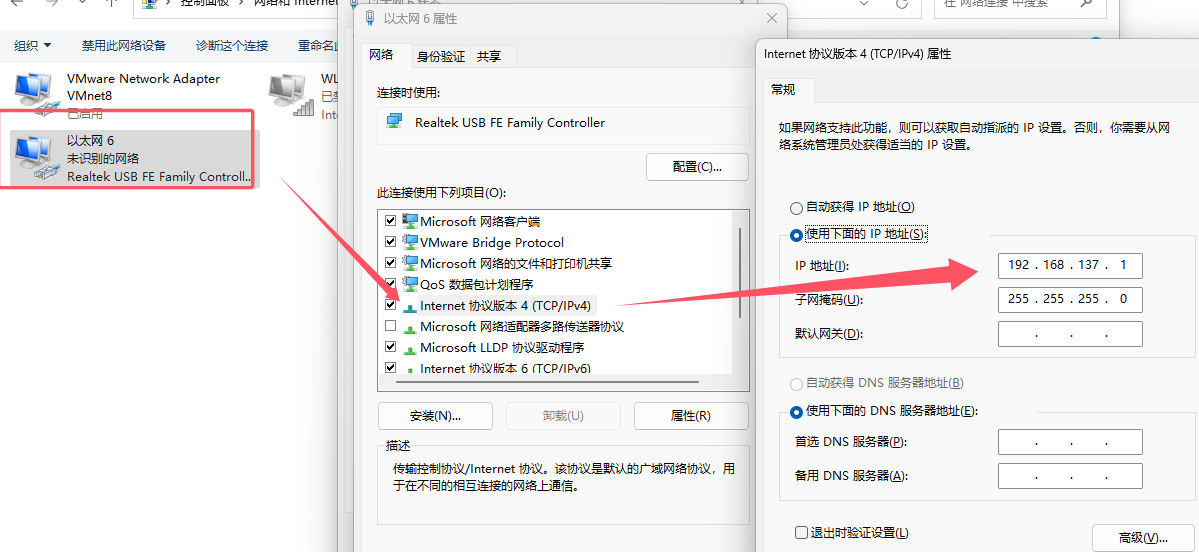
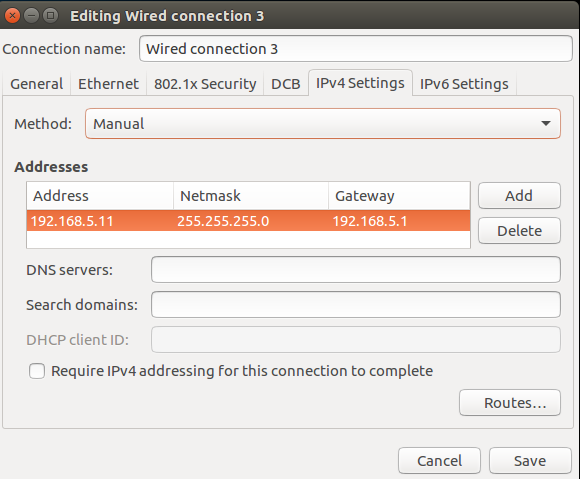
配置其ip地址
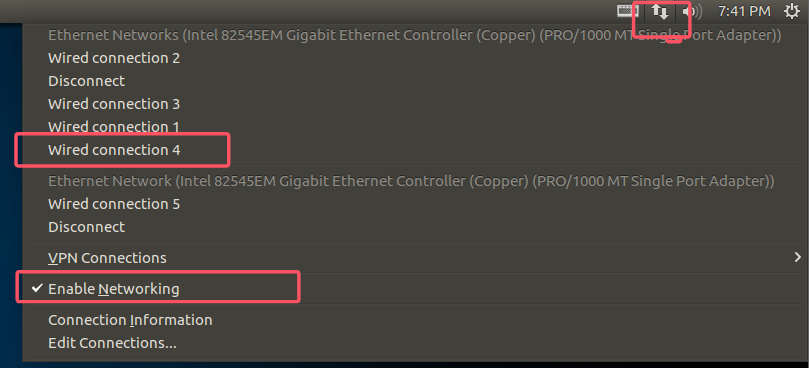
2.在linux中专门有配置网络相关的app

linux没有网络
查看linux的外设(u盘)
c
alientek@Ubuntu16:~$ ls /dev/sd*
/dev/sda  /dev/sda1  /dev/sdb  /dev/sdb1
alientek@Ubuntu16:~$
sd表示是SATA硬盘或者其它外部设备
sda表示磁盘一 其下分区有一个sda1
sdb是我插入的U盘,下面也有一个分区sdb1
**若出现以下情况:能识别到,但无法连接
解决办法:
因为每个人安装的路径是不一样的哦,打开虚拟机的安装位置,找到后缀.vmx的文件,其实就是你操作系统(如ubuntu)安装的位置,记得打开文件的后缀名。打开后将属性 usb.restrictions.defaultAllow 由 FALSE 修改为 TRUE,保存然后启动 vm 就正常了。