一、数据集介绍
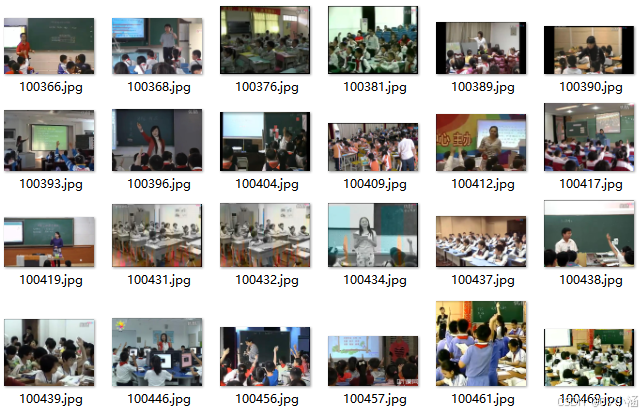
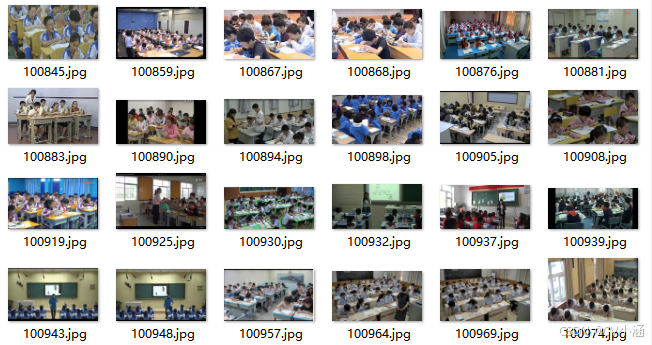
【数据集】yolo11课堂行为检测数据集 2090 张 ,目标检测,包含YOLO/VOC格式标注,训练、验证、测试集已划分。
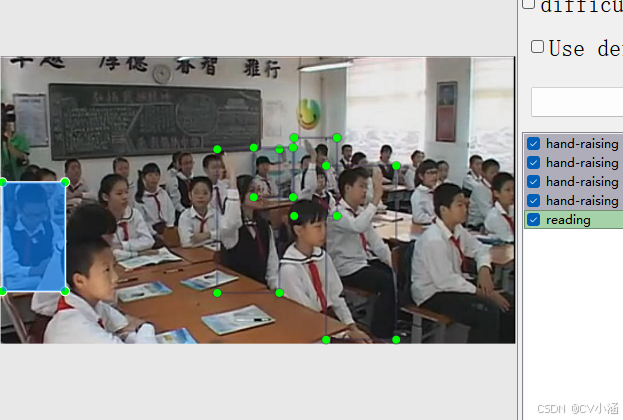
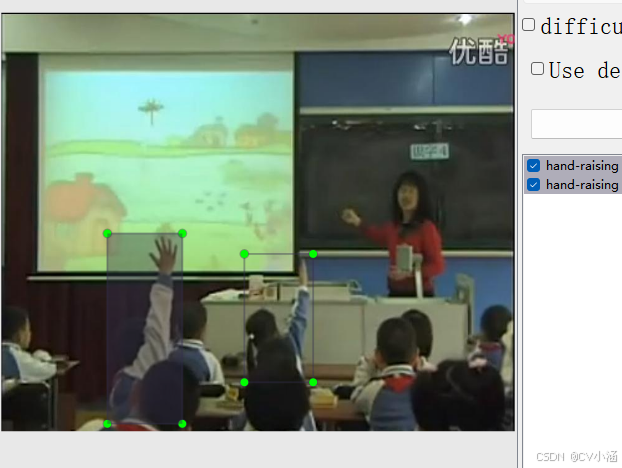
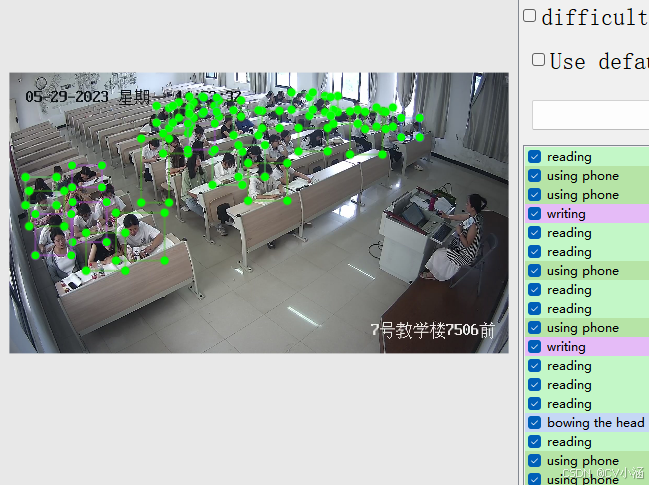
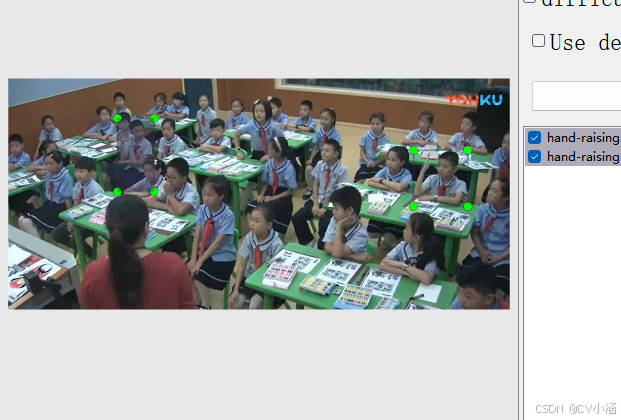
数据集中标签包含6种分类 :names: 'hand-raising', 'reading', 'writing','using phone', 'bowing the head', 'leaning over the table',代表举手,阅读,书写,使用手机,低头,趴在桌子上。
检测场景为学校教室、培训班、办公室等场景 ,可用于课堂秩序实时维护、个性化教学辅助、学习状态评估与反馈、教学效果优化支撑 等。
文章底部或主页私信获取数据集~
1、数据概述
课堂行为识别的重要性
课堂是学生学习的核心场景,学生课堂行为(如专注听讲、走神、趴桌、交头接耳等)直接影响学习效果与课堂秩序。但传统课堂管理存在明显短板:单名教师需同时关注数十名学生,难以兼顾每个学生的动态,尤其后排或角落学生的细微行为易被忽略;对学生行为的记录依赖主观记忆,缺乏客观数据支撑,难以精准判断学生学习状态;若出现突发行为(如学生身体不适、打闹),教师可能因专注授课而发现滞后,影响干预及时性。
YOLO 算法凭借 "实时动态识别 + 多行为分类" 的优势,有效破解上述难题:其一,可通过教室部署的摄像头实现全时段、无死角监测,无需教师分散授课注意力,就能覆盖全班学生;其二,能精准区分不同课堂行为(如专注看黑板、低头玩手机、趴桌睡觉、小组讨论),避免主观判断误差;其三,检测数据可实时同步至教师终端,且能自动记录行为发生时间与频次,为后续分析提供客观依据,推动课堂管理从 "经验判断" 向 "数据驱动" 转型,是辅助教师优化教学、关注学生状态的关键技术。
基于YOLO的学生课堂行为检测系统
-
课堂秩序实时维护:YOLO 可实时识别扰乱课堂秩序的行为(如交头接耳、打闹、擅自离座),一旦发现异常立即轻提醒教师(如终端弹窗),帮助教师及时介入引导,避免行为扩散影响全班学习节奏。同时,对频繁出现小动作的学生,系统可标记提醒教师重点关注,减少课堂纪律问题。
-
个性化教学辅助:通过持续检测学生专注度相关行为(如看黑板时长、记笔记动作、是否走神),YOLO 可辅助教师判断学生对知识点的接受情况。若某一知识点讲解时,多数学生出现走神,教师可及时调整教学方式(如增加互动、放慢节奏);对长期专注度低的学生,教师可课后针对性沟通,分析原因并提供帮助。
-
学习状态评估与反馈:系统自动记录学生每日课堂行为数据(如专注时段、活跃次数、趴桌频率),生成简洁报告供教师与家长参考。教师可据此了解学生课堂参与度,家长也能直观掌握孩子在校学习状态,形成家校共育合力,帮助学生调整学习习惯。
-
安全隐患及时排查:课堂中可能出现学生突发不适(如趴桌不起、面色异常)或危险行为(如玩尖锐物品、攀爬桌椅),YOLO 可快速捕捉这类异常,及时提醒教师查看,避免因教师未察觉导致延误处理,保障学生课堂安全。
-
教学效果优化支撑:长期积累的课堂行为数据,可帮助教师分析不同教学环节(如理论讲解、小组讨论、实验操作)的学生参与度差异。例如,若实验环节学生专注度普遍更高,教师可适当增加实践教学占比,优化课程设计,提升整体教学效果。
该数据集含有 2090 张图片,包含Pascal VOC XML 格式和YOLO TXT 格式,用于训练和测试学校教室、培训班、办公室等场景进行课堂行为识别。
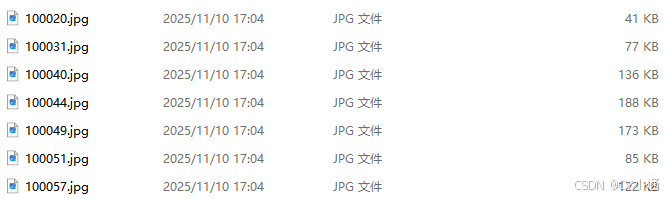
图片格式为jpg格式,标注格式分别为:
YOLO:txt
VOC:xml
数据集均为手工标注,保证标注精确度。
2、数据集文件结构
class-act/
------test/
------------Annotations/
------------images/
------------labels/
------train/
------------Annotations/
------------images/
------------labels/
------valid/
------------Annotations/
------------images/
------------labels/
------data.yaml
- 该数据集已划分训练集样本,分别是:test 目录(测试集)、train 目录(训练集)、valid目录(验证集);
- Annotations文件夹为Pascal VOC格式的XML文件 ;
- images文件夹为jpg格式的数据样本;
- labels文件夹是YOLO格式的TXT文件;
- data.yaml是数据集配置文件,包含课堂行为检测的目标分类和加载路径。


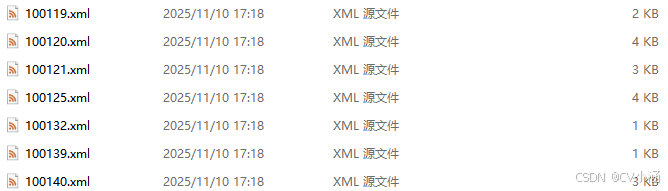

Annotations目录下的xml文件内容如下:
XML
<?xml version="1.0" encoding="utf-8"?>
	<annotation>
		<folder>driving_annotation_dataset</folder>
		<filename>100020.jpg</filename>
		<size>
			<width>726</width>
			<height>382</height>
			<depth>3</depth>
		</size>
		<object>
			<name>hand-raising</name>
			<pose>Unspecified</pose>
			<truncated>0</truncated>
			<difficult>0</difficult>
			<bndbox>
				<xmin>68</xmin>
				<ymin>106</ymin>
				<xmax>122</xmax>
				<ymax>192</ymax>
			</bndbox>
		</object>
		<object>
			<name>hand-raising</name>
			<pose>Unspecified</pose>
			<truncated>0</truncated>
			<difficult>0</difficult>
			<bndbox>
				<xmin>115</xmin>
				<ymin>83</ymin>
				<xmax>190</xmax>
				<ymax>221</ymax>
			</bndbox>
		</object>
		<object>
			<name>hand-raising</name>
			<pose>Unspecified</pose>
			<truncated>0</truncated>
			<difficult>0</difficult>
			<bndbox>
				<xmin>190</xmin>
				<ymin>120</ymin>
				<xmax>415</xmax>
				<ymax>378</ymax>
			</bndbox>
		</object>
</annotation>labels目录下的txt文件内容如下:
bash
2 0.47686515057113193 0.571963770821367 0.17459946002076843 0.4630764790350373
2 0.6852871547248183 0.5116731763354394 0.16062346140533057 0.26848248133256747
2 0.7802368362755279 0.7909623664560598 0.22946762893734854 0.41313040781160254
2 0.1461010020768432 0.8307395175186675 0.24946223952924887 0.3268483630097645
2 0.17996855659397717 0.5418287421022401 0.23800415368639669 0.28988282596209075
1 0.5873889442713742 0.23735408385985068 0.15241640706126688 0.3073928776565193
2 0.24093492557978535 0.1079764503159104 0.1254503288335064 0.13424124066628373
1 0.6893923589477328 0.07517748994830556 0.09830151263412945 0.14751751866743248
1 0.8646254482519903 0.09574470132107983 0.12052607822776047 0.15177309017805857
1 0.2572933333333333 0.32482260769672605 0.14873446867428175 0.4170214474439977
2 0.4491948459674628 0.8609928202182653 0.26071241952232604 0.27517690982194143
3、数据集适用范围
- 目标检测 场景,监控识别
- yolo训练模型或其他模型
- 学校教室、培训班、办公室等场景
- 可用于课堂秩序实时维护、个性化教学辅助、学习状态评估与反馈、教学效果优化支撑等。
4、数据集标注结果
4.1、数据集内容
- 场景视角:监控视角数据样本;
- 标注内容:names: 'hand-raising', 'reading', 'writing','using phone', 'bowing the head', 'leaning over the table' ,总计6个分类;
- 图片总量:2090张图片数据;
- 标注类型:含有Pascal VOC XML 格式和yol o TXT格式;
5、训练过程
5.1、导入训练数据
下载YOLOv8项目压缩包,解压在任意本地workspace文件夹中。
下载YOLOv8预训练模型,导入到ultralytics-main项目根目录下。

在ultralytics-main 项目根目录下,创建data文件夹,并在data文件夹下创建子文件夹:Annotations、images、imageSets、labels, 其中,将pascal VOC格式的XML文件 手动导入到Annotations文件夹中,将JPG格式的图像数据导入到images文件夹中,imageSets和labels两个文件夹不导入数据。
data目录结构如下:
data/
------Annotations/ //存放xml文件
------images/ //存放jpg图像
------imageSets/
------labels/
整体项目结构如下所示:

5.2、数据分割
首先在ultralytics-main目录下创建一个split_train_val.py文件,运行文件之后会在imageSets文件夹下将数据集划分为训练集train.txt、验证集val.txt、测试集test.txt,里面存放的就是用于训练、验证、测试的图片名称。
python
import os
import random

trainval_percent = 0.9
train_percent = 0.9
xmlfilepath = 'data/Annotations'
txtsavepath = 'data/ImageSets'
total_xml = os.listdir(xmlfilepath)

num = len(total_xml)
list = range(num)
tv = int(num * trainval_percent)
tr = int(tv * train_percent)
trainval = random.sample(list, tv)
train = random.sample(trainval, tr)

ftrainval = open('data/ImageSets/trainval.txt', 'w')
ftest = open('data/ImageSets/test.txt', 'w')
ftrain = open('data/ImageSets/train.txt', 'w')
fval = open('data/ImageSets/val.txt', 'w')

for i in list:
    name = total_xml[i][:-4] + '\n'
    if i in trainval:
        ftrainval.write(name)
        if i in train:
            ftrain.write(name)
        else:
            fval.write(name)
    else:
        ftest.write(name)

ftrainval.close()
ftrain.close()
fval.close()
ftest.close()
5.3、数据集格式化处理
在ultralytics-main目录下创建一个voc_label.py文件,用于处理图像标注数据,将其从XML格式(通常用于Pascal VOC数据集)转换为YOLO格式。
convert_annotation函数
-
这个函数读取一个图像的XML标注文件,将其转换为YOLO格式的文本文件。
-
它打开XML文件,解析树结构,提取图像的宽度和高度。
-
然后,它遍历每个目标对象(
object),检查其类别是否在classes列表中,并忽略标注为困难(difficult)的对象。 -
对于每个有效的对象,它提取边界框坐标,进行必要的越界修正,然后调用
convert函数将坐标转换为YOLO格式。 -
最后,它将类别ID和归一化后的边界框坐标写入一个新的文本文件。
python
import xml.etree.ElementTree as ET
import os
from os import getcwd
sets = ['train', 'val', 'test']
classes = [ 'hand-raising', 'reading', 'writing','using phone', 'bowing the head', 'leaning over the table'] # 根据标签名称填写类别
abs_path = os.getcwd()
print(abs_path)
def convert(size, box):
dw = 1. / (size[0])
dh = 1. / (size[1])
x = (box[0] + box[1]) / 2.0 - 1
y = (box[2] + box[3]) / 2.0 - 1
w = box[1] - box[0]
h = box[3] - box[2]
x = x * dw
w = w * dw
y = y * dh
h = h * dh
return x, y, w, h
def convert_annotation(image_id):
in_file = open('data/Annotations/%s.xml' % (image_id), encoding='UTF-8')
out_file = open('data/labels/%s.txt' % (image_id), 'w')
tree = ET.parse(in_file)
root = tree.getroot()
size = root.find('size')
w = int(size.find('width').text)
h = int(size.find('height').text)
for obj in root.iter('object'):
difficult = obj.find('difficult').text
cls = obj.find('name').text
if cls not in classes or int(difficult) == 1:
continue
cls_id = classes.index(cls)
xmlbox = obj.find('bndbox')
b = (float(xmlbox.find('xmin').text),
float(xmlbox.find('xmax').text),
float(xmlbox.find('ymin').text),
float(xmlbox.find('ymax').text))
b1, b2, b3, b4 = b
# 标注越界修正
if b2 > w:
b2 = w
if b4 > h:
b4 = h
b = (b1, b2, b3, b4)
bb = convert((w, h), b)
out_file.write(str(cls_id) + " " + " ".join([str(a) for a in bb]) + '\n')
wd = getcwd()
for image_set in sets:
if not os.path.exists('data/labels/'):
os.makedirs('data/labels/')
image_ids = open('data/ImageSets/%s.txt' % (image_set)).read().strip().split()
list_file = open('data/%s.txt' % (image_set), 'w')
for image_id in image_ids:
list_file.write(abs_path + '/data/images/%s.jpg\n' % (image_id))
convert_annotation(image_id)
list_file.close()5.4、修改数据集配置文件
在ultralytics-main目录下创建一个data.yaml文件
python
train: data/train.txt
val: data/val.txt
test: data/test.txt

nc: 6
names: [ 'hand-raising', 'reading', 'writing','using phone', 'bowing the head', 'leaning over the table']
5.5、执行命令
python
model = YOLO('yolov8s.pt')
results = model.train(data='data.yaml', epochs=200, imgsz=640, batch=16, workers=0)
也可以在终端执行下述命令:
bash
yolo train data=data.yaml model=yolov8s.pt epochs=200 imgsz=640 batch=16 workers=0 device=05.6、模型预测
你可以选择新建predict.py预测脚本文件,输入视频流或者图像进行预测。
代码如下:
python
import cv2
from ultralytics import YOLO

# Load the YOLOv8 model
model = YOLO("./best.pt") # 自定义预测模型加载路径

# Open the video file
video_path = "./demo.mp4" # 自定义预测视频路径
cap = cv2.VideoCapture(video_path)

# Get the video properties
frame_width = int(cap.get(cv2.CAP_PROP_FRAME_WIDTH))
frame_height = int(cap.get(cv2.CAP_PROP_FRAME_HEIGHT))
fps = cap.get(cv2.CAP_PROP_FPS)

# Define the codec and create VideoWriter object
fourcc = cv2.VideoWriter_fourcc(*'mp4v')  # Be sure to use lower case
out = cv2.VideoWriter('./outputs.mp4', fourcc, fps, (frame_width, frame_height)) # 自定义输出视频路径

# Loop through the video frames
while cap.isOpened():
    # Read a frame from the video
    success, frame = cap.read()

    if success:
        # Run YOLOv8 inference on the frame
        # results = model(frame)
        results = model.predict(source=frame, save=True, imgsz=640, conf=0.5)

        results[0].names[0] = "道路积水"
        # Visualize the results on the frame
        annotated_frame = results[0].plot()

        # Write the annotated frame to the output file
        out.write(annotated_frame)

        # Display the annotated frame (optional)
        cv2.imshow("YOLOv8 Inference", annotated_frame)

        # Break the loop if 'q' is pressed
        if cv2.waitKey(1) & 0xFF == ord("q"):
            break
    else:
        # Break the loop if the end of the video is reached
        break

# Release the video capture and writer objects
cap.release()
out.release()
cv2.destroyAllWindows()
图片推理,代码如下:
python
import warnings

warnings.filterwarnings('ignore')
from ultralytics import YOLO

if __name__ == '__main__':
    model = YOLO('models/best.pt')
    model.predict(source='test_pic',
                  imgsz=640,
                  save=True,
                  conf=0.25
                  )
也可以直接在命令行窗口或者Annoconda终端输入以下命令进行模型预测:
python
yolo predict model="best.pt" source='demo.jpg'6、获取数据集
文章底部或主页私信获取数据集~
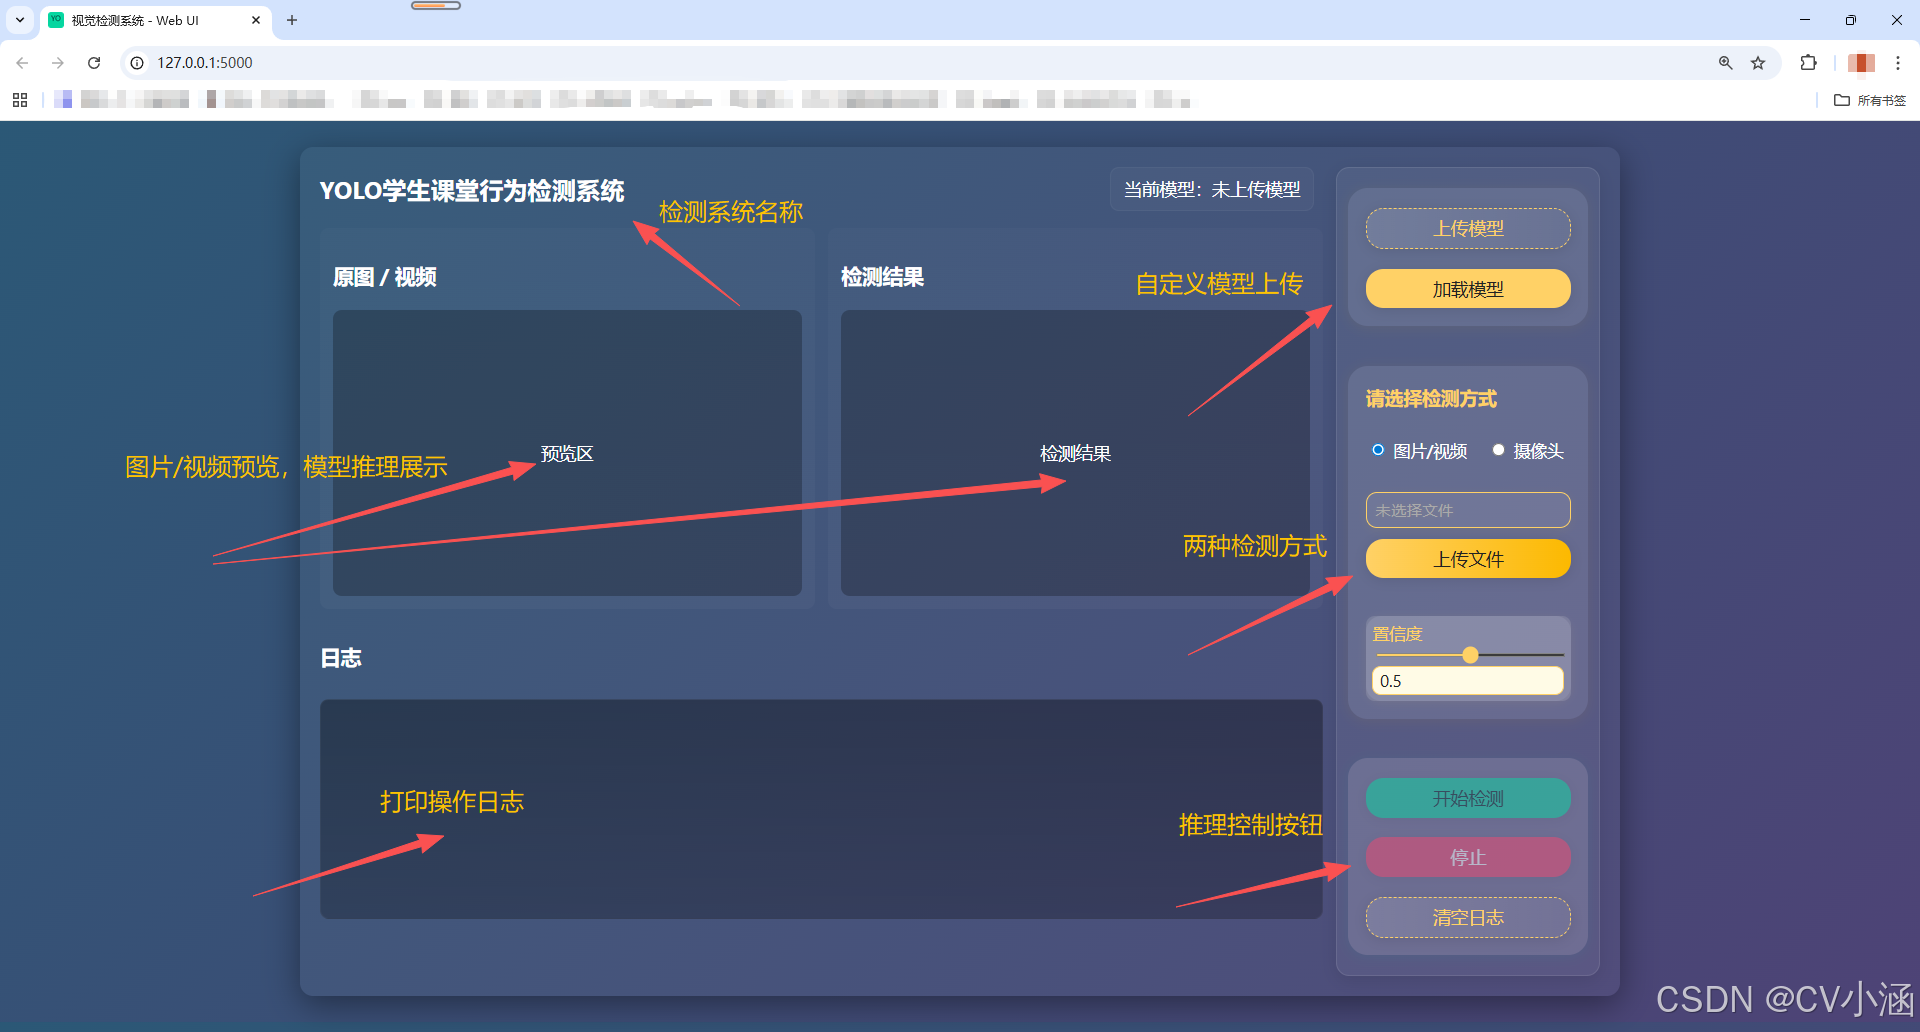
二、YOLO学生课堂行为检测系统
1、功能介绍
1. 模型管理
支持自定义上传模型文件,一键加载所选模型,基于 YOLO 框架进行推理。
2. 图片检测
-
支持上传本地图片文件,自动完成格式校验。
-
对上传图片进行目标检测,检测结果以带有边框和标签的图片形式返回并展示。
-
检测结果可下载保存。
3. 视频检测与实时流
-
支持上传本地视频文件,自动完成格式校验。
-
对视频逐帧检测,检测结果通过 MJPEG 流实时推送到前端页面,用户可边看边等。
-
支持摄像头实时检测(如有接入摄像头)。
4. 置信度阈值调节
-
前端可实时调整检测置信度阈值,动态影响检测结果。
-
阈值调整后,后端推理自动应用新阈值,无需重启。
5. 日志与状态反馈
-
前端集成日志区,实时显示模型加载、推理、文件上传等操作的进度与结果。
-
检测异常、错误信息及时反馈,便于排查。
-
一键清空日志,笔面长期占用内存。
2、创建环境并安装依赖:
bash
conda create -n ultralytics-env python=3.10
conda activate ultralytics-env
pip install -r requirements.txt
3、启动项目
bash
python app.py**打开浏览器访问:**http://localhost:5000
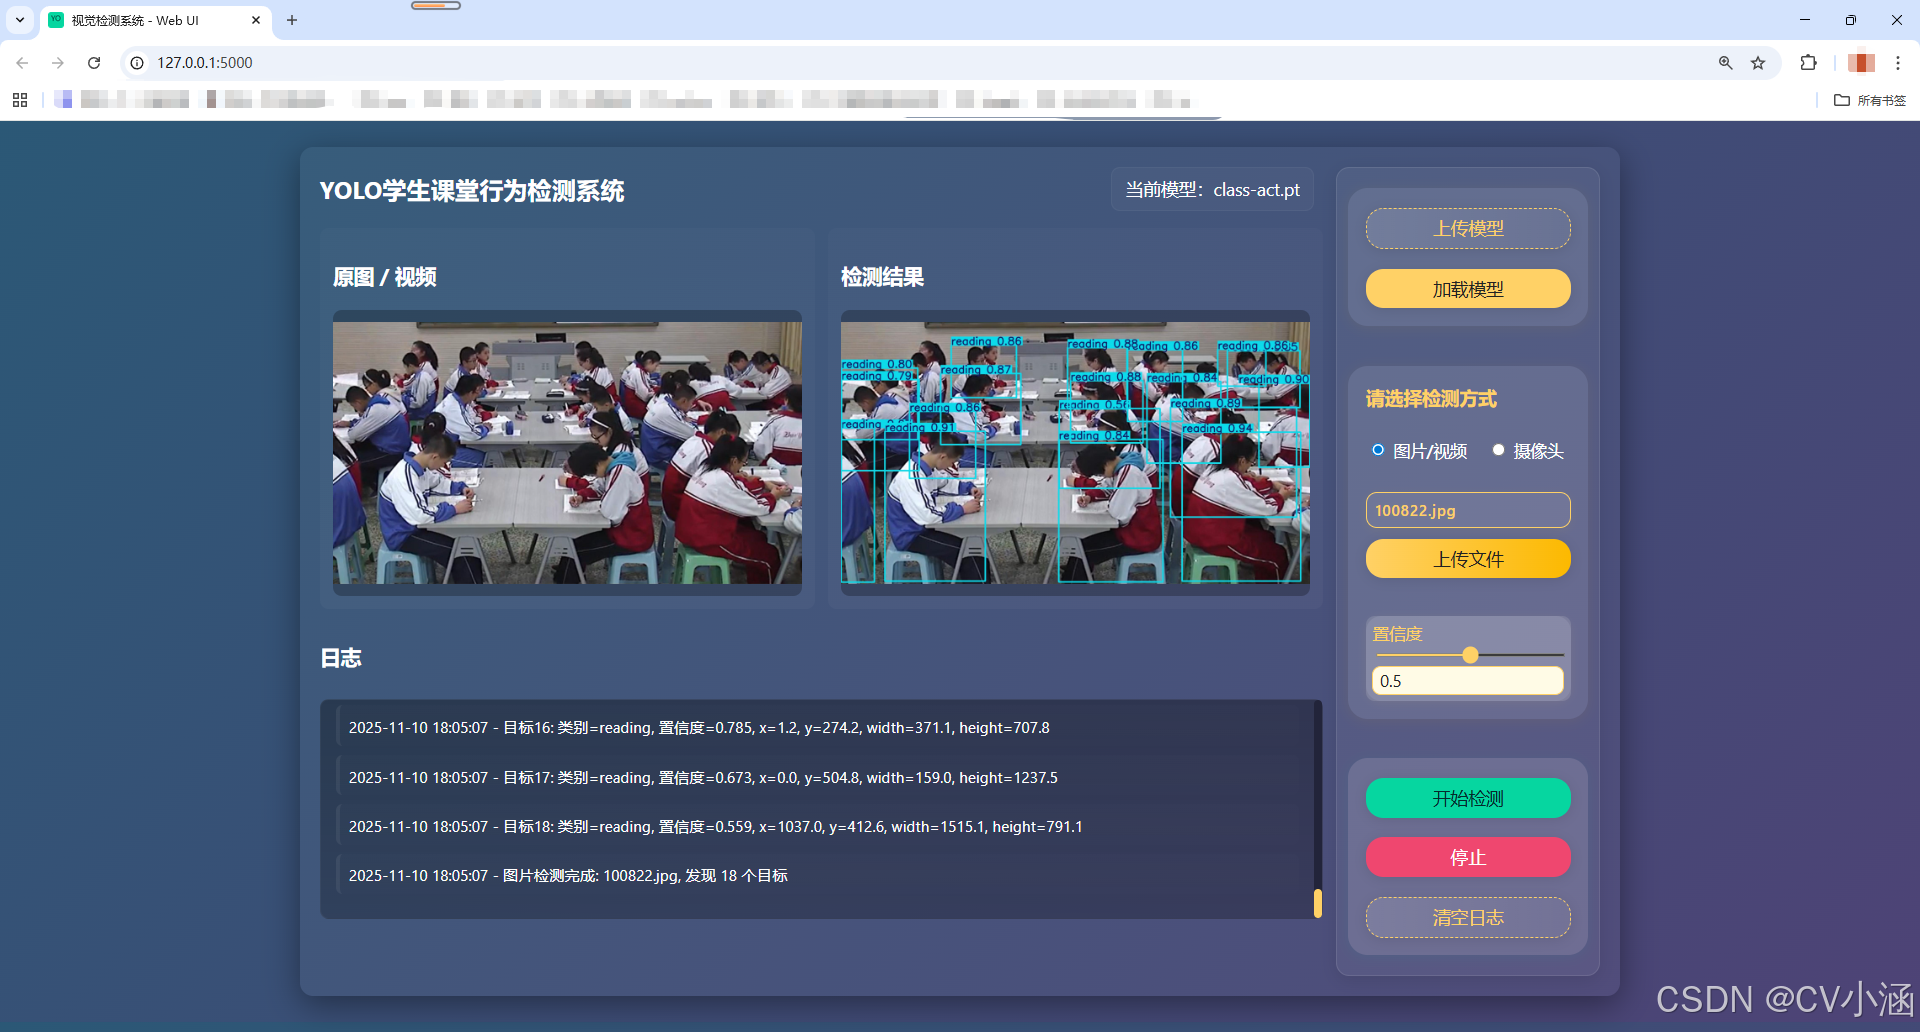
4、效果展示
4.1、推理效果
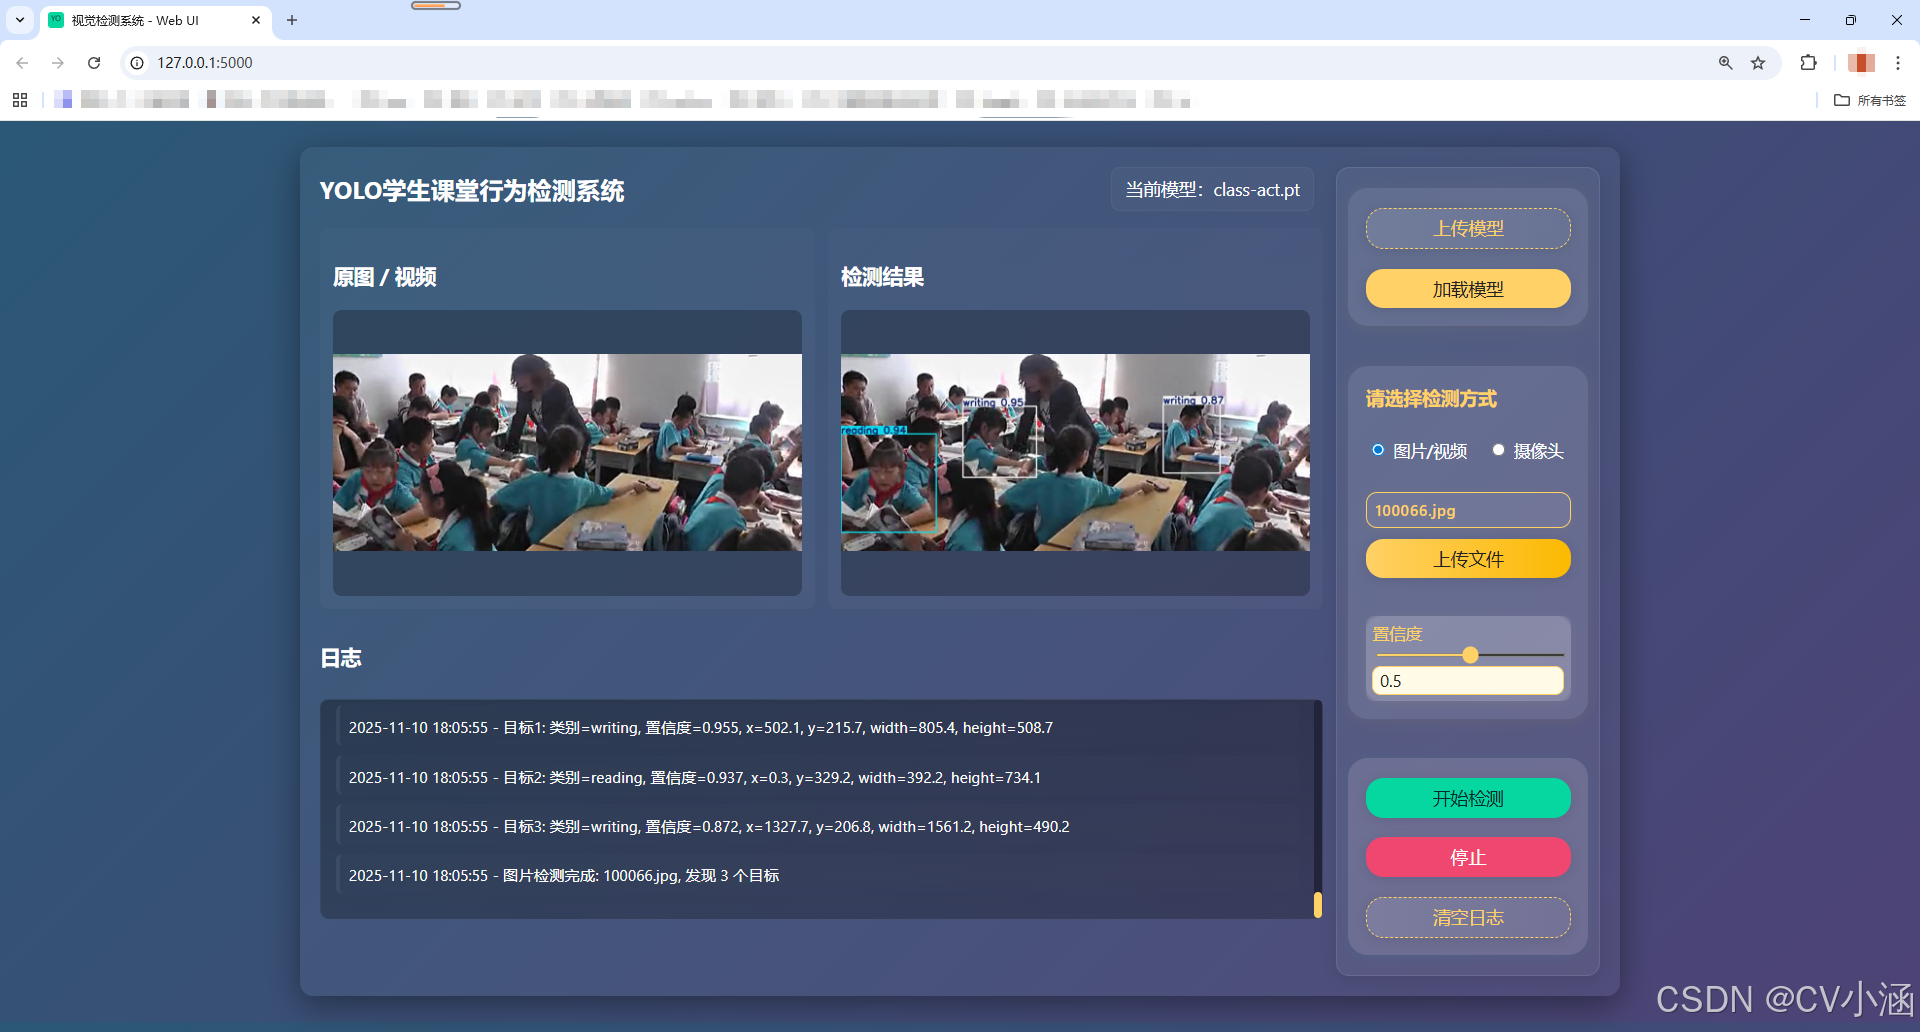
4.2、日志文本框

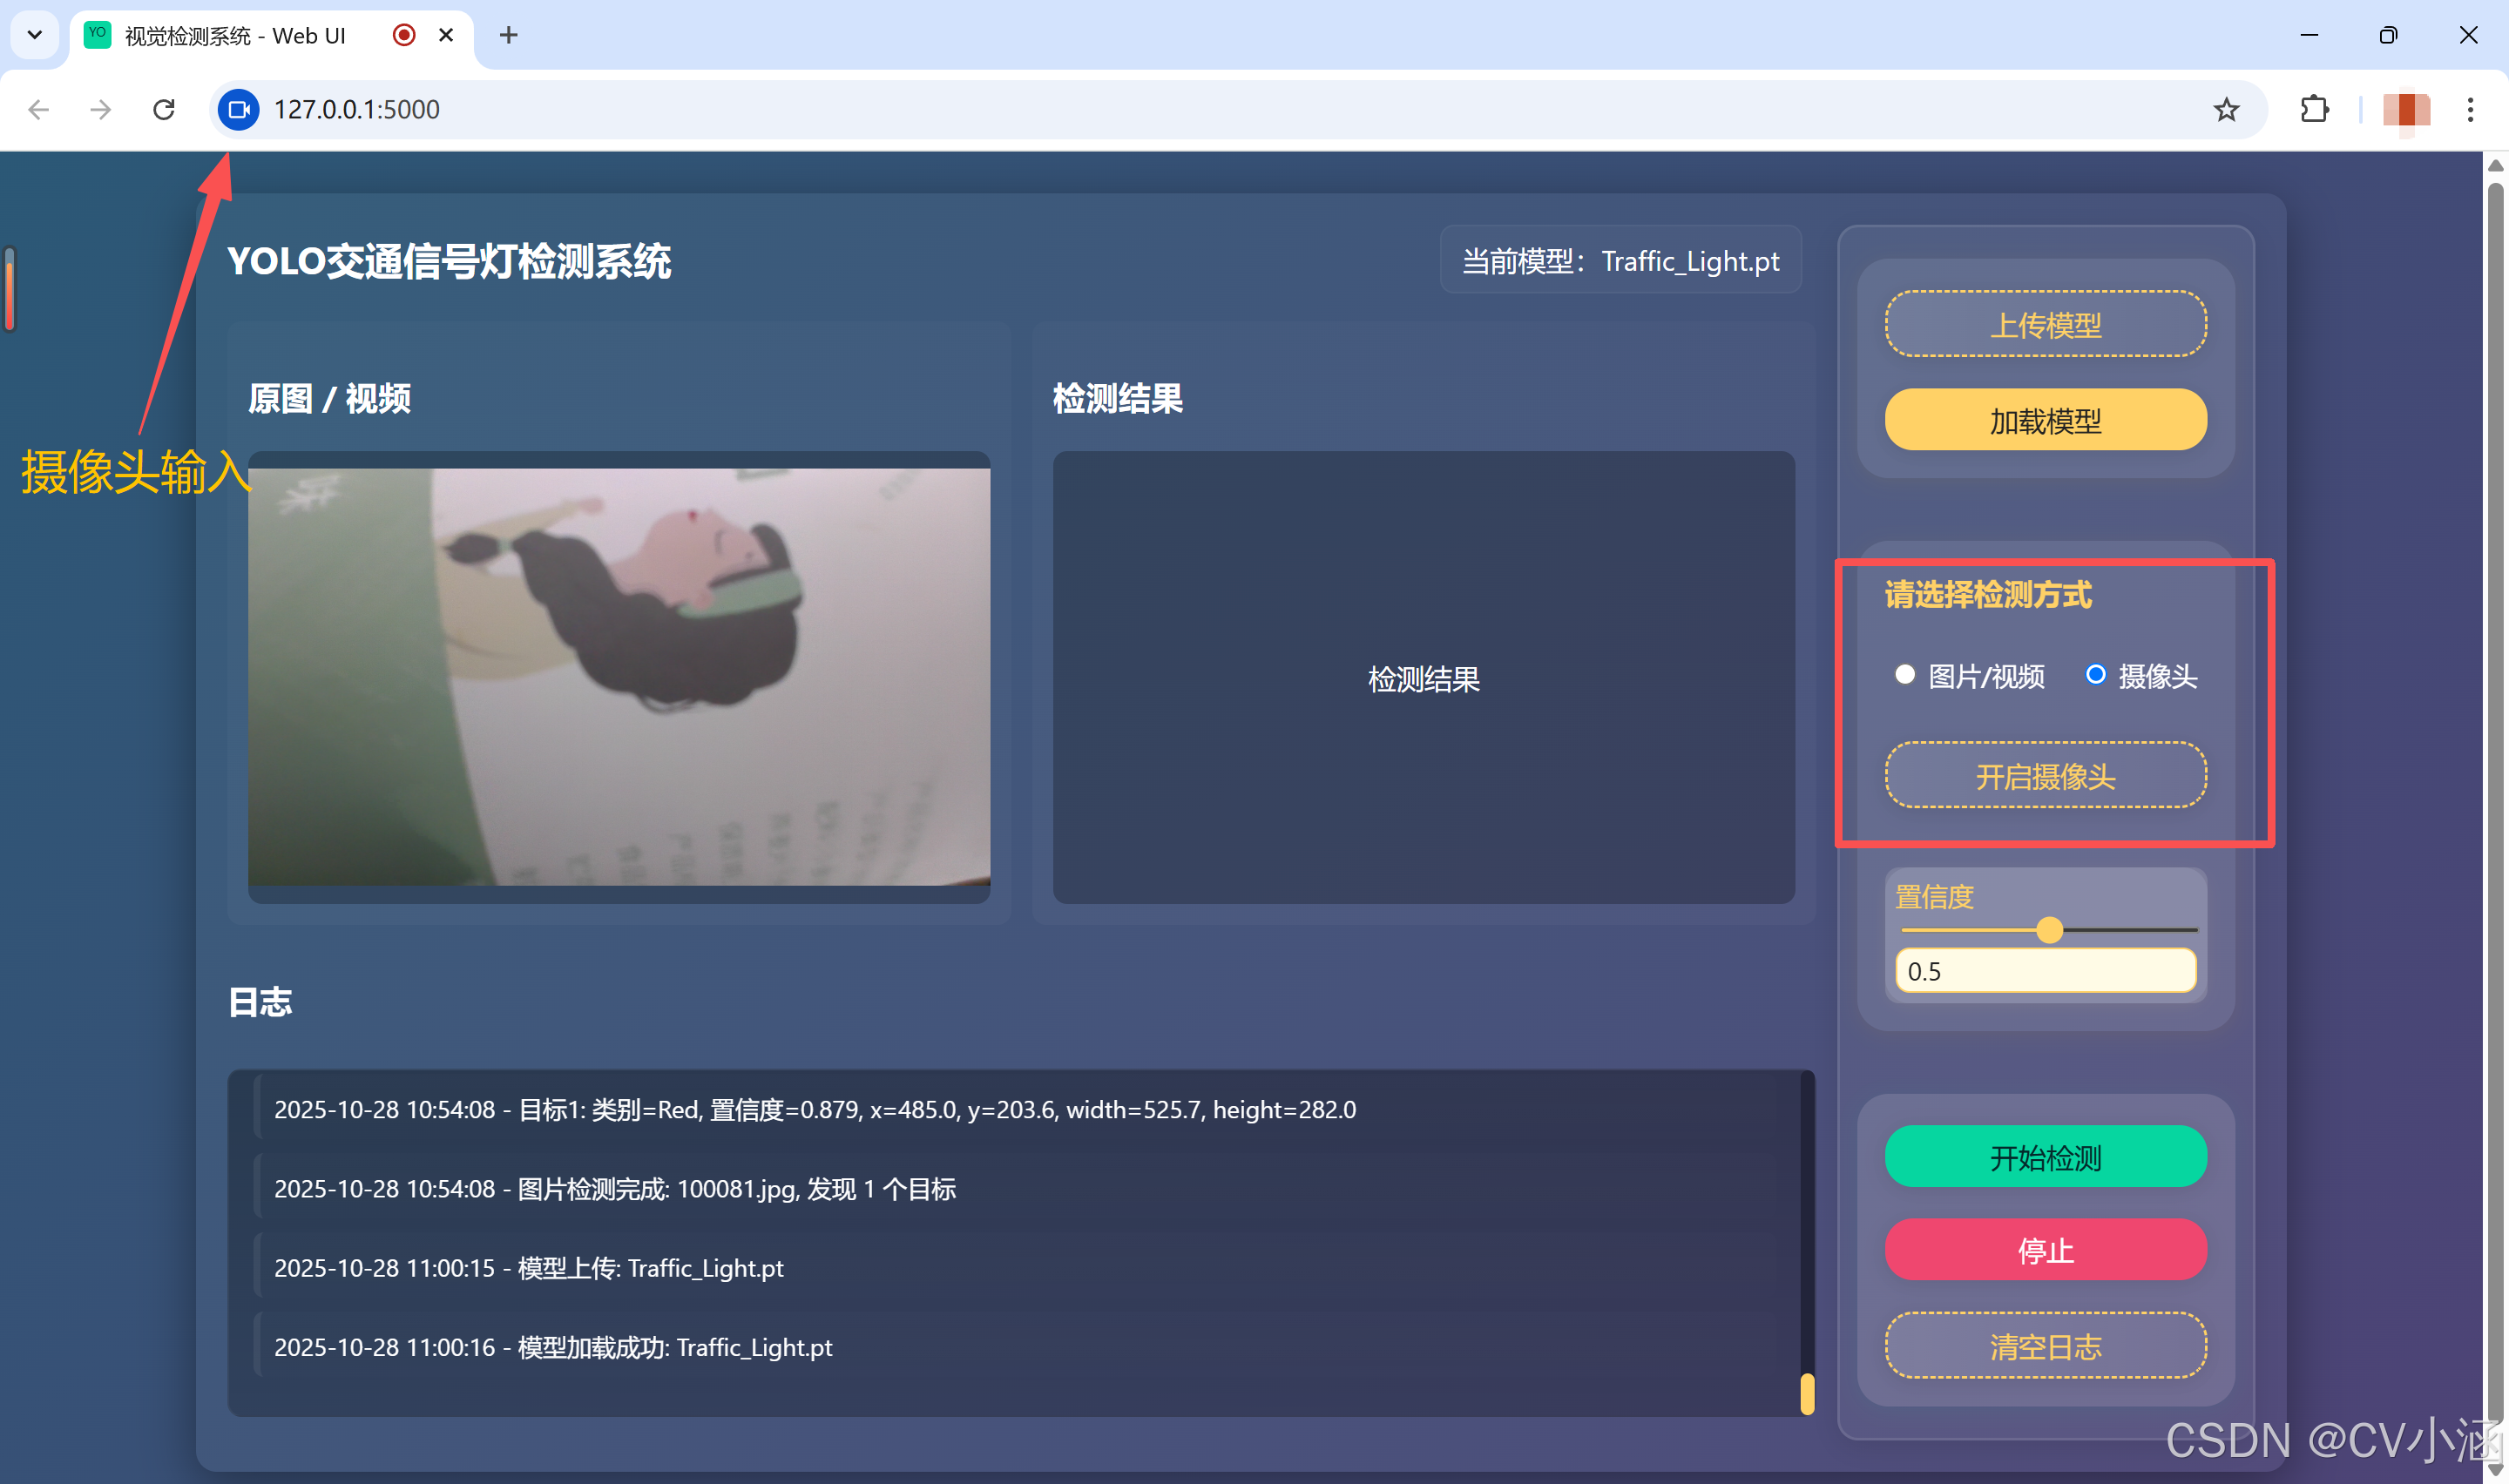
4.3、摄像头检测
以红绿灯检测为例:
5、前端核心页面代码
html
<!doctype html>
<html lang="zh-CN">

<head>
    <meta charset="utf-8">
    <meta name="viewport" content="width=device-width,initial-scale=1">
    <title>视觉检测系统 - Web UI</title>
    <link rel="stylesheet" href="/static/style.css">
    <link rel="icon" href="/favicon.ico">
</head>

<body>
    <div class="container main-flex">
        <!-- 左侧内容区 -->
        <div class="left-content">
            <header>
                <h1>YOLO学生课堂行为检测系统</h1>
                <div id="currentModelDisplay" class="modelDisplay" title="当前模型">当前模型:未上传模型</div>
            </header>
            <main>
                <div class="videoPanel">
                    <div class="pane">
                        <h3>原图 / 视频</h3>
                        <div class="preview" id="srcPreview">预览区</div>
                    </div>
                    <div class="pane">
                        <h3>检测结果</h3>
                        <div class="preview" id="detPreview">检测结果</div>
                    </div>
                </div>
                <section class="logArea">
                    <div class="logHeader">
                        <h3>日志</h3>
                    </div>
                    <div class="logInner">
                        <div id="logs" class="logs"></div>
                    </div>
                </section>
            </main>
        </div>
        <!-- 右侧按钮栏 -->
        <aside class="right-bar">
            <!-- 1. 模型上传/加载区 -->
            <section class="model-section">
                <button id="uploadModelBtn" class="ghost">上传模型
                    <input id="modelFileInput" type="file" accept=".pt" title="选择 .pt 模型文件">
                </button>
                <button id="loadModel">加载模型</button>
            </section>

            <!-- 2. 检测方式选择区 -->
            <section class="detect-mode-section">
                <div class="detect-mode-title">请选择检测方式</div>
                <div class="detect-mode-radio-group">
                    <label><input type="radio" name="detectMode" value="upload" checked> 图片/视频</label>
                    <label><input type="radio" name="detectMode" value="camera"> 摄像头</label>
                </div>
                <div id="detectModeUpload" class="detect-mode-panel">
                    <div class="uploaded-file-name">
                        <span id="uploadedFileName" class="placeholder">未选择文件</span>
                    </div>
                    <div style="height: 22px;"></div>
                    <button id="uploadBtn">上传文件
                        <input id="fileInput" type="file" accept="image/*,video/*" title="上传图片或视频" aria-label="上传图片或视频">
                    </button>
                </div>
                <div id="detectModeCamera" class="detect-mode-panel" style="display:none;">
                    <button id="cameraDetectBtn" class="ghost">开启摄像头</button>
                    <div id="cameraPreview" class="camera-preview">
                        <video id="localCameraVideo" autoplay muted playsinline></video>
                        <div class="camera-controls">
                            <button id="stopCameraBtn" class="ghost">关闭摄像头</button>
                        </div>
                    </div>
                </div>
                <div class="confWrap">
                    <label class="conf">置信度
                        <input id="confRange" type="range" min="0.01" max="0.99" step="0.01" value="0.5">
                        <input id="confValue" type="number" min="0.01" max="0.99" step="0.01" value="0.5">
                    </label>
                </div>
            </section>

            <!-- 3. 操作按钮区 -->
            <section class="action-btn-section">
                <button id="startBtn" disabled class="start">开始检测</button>
                <button id="stopBtn" disabled class="stop">停止</button>
                <button id="clearLogs" class="ghost">清空日志</button>
            </section>
        </aside>
    </div>
    <script src="/static/app.js"></script>
</body>

</html>
6、代码获取
文章底部名片或私信获取系统源码和数据集~
更多数据集请查看
以上内容均为原创。