今天我发表的一篇文章 "在 Elasticsearch 中为结构化文档配置递归分块" 看着很简单。可能很多开发者还是不能得其要领,特别是在最新的版本中,我们的向量在默认的情况下是不在 source 里进行展示的。很难理解其中精髓。我在这篇文章里,使用一个具体的例子来进行展示。
例子
我们可以参考官方文档 "Inference integrations" 来进行展示。首先,我们选择系统自带的 ELSER 模型来进行展示。我们必须安装好 ELSER 模型:

首先我们定义如下的一个 inference endpoint:
PUT _inference/sparse_embedding/recursive_markdown_chunks
{
  "service": "elasticsearch",
  "service_settings": {
    "model_id": ".elser_model_2",
    "num_allocations": 1,
    "num_threads": 1
  },
  "chunking_settings": {
    "strategy": "recursive",
    "max_chunk_size": 25,
    "separators": [
      "\n# ",
      "\n## "
    ]
  }
}我们可以参考文档来了解 recursive 是如何工作的。递归策略根据可配置的分隔符模式列表(例如换行符或 Markdown 标题)拆分输入文本。分块器按顺序应用这些分隔符,递归地拆分超过 max_chunk_size 单词限制的任何分块。如果没有分隔符生成足够小的分块,该策略将退回到句子级拆分。
在上面,我们使用了 custom separator group:也就是基于第一第二级的 heading 来进行分隔提前。
接下来,我们定义一个索引:
PUT recursive_markdown_vectors
{
  "mappings": {
    "properties": {
      "content": {
        "type": "text",
        "copy_to": "inference_field"
      },
      "inference_field": {
        "type": "semantic_text",
        "inference_id": "recursive_markdown_chunks"
      }
    }
  }
}
然后,我们写入文档:
POST recursive_markdown_vectors/_doc/1
{
  "content": "# First Header
This first test sentence has ten total words in it.

## Second header
This second test sentence has ten total words in it.

# Third Header
This third test sendtence has ten total words in it.

## Fourth Header
This Fourth test sendtence has ten total words in it.


## Fifth Header
This fifth test sentence has ten total words in it. This sixth test sentence has ten total words in it. This seventh test sentence has ten total words in it."
}
这样我们就大功告成了。
我们可以使用如下的查询来进行展示:
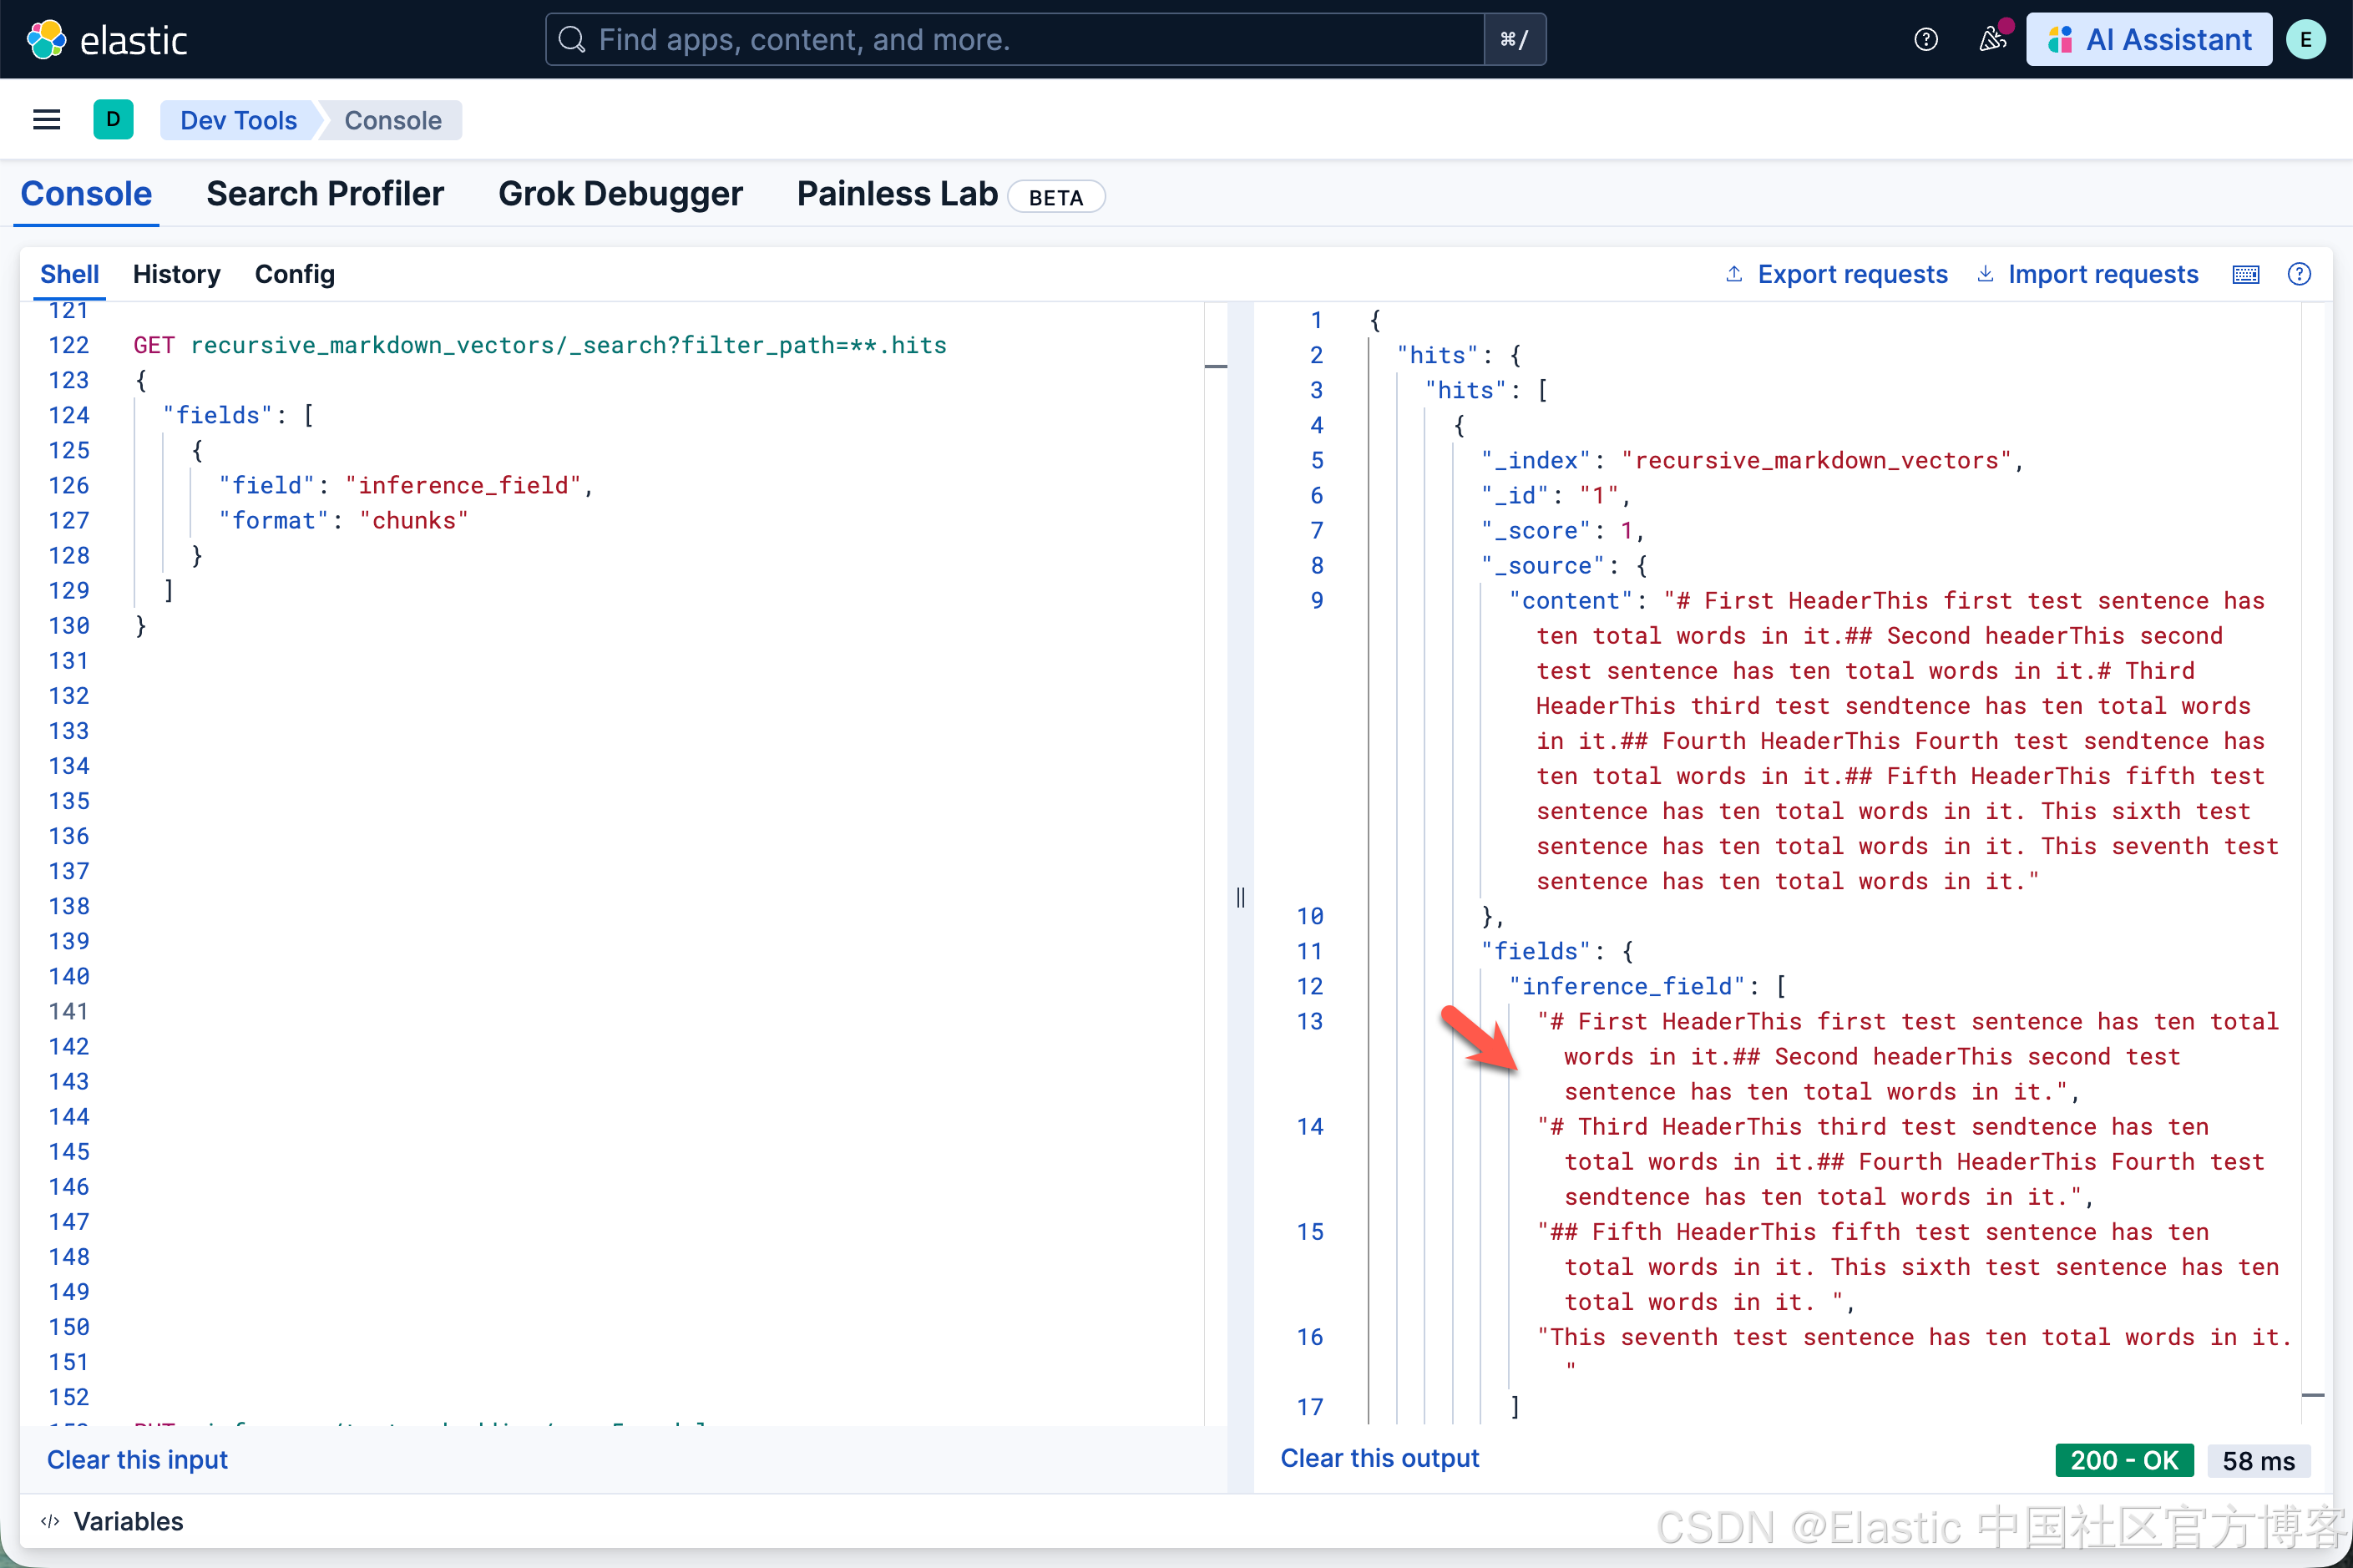
GET recursive_markdown_vectors/_search?filter_path=**.hits
{
  "fields": [
    {
      "field": "inference_field",
      "format": "chunks"
    }
  ]
}注意:上面的 fields 只对 9.2+ 及以上版本起作用。
我们可以看到如下的查询结果:
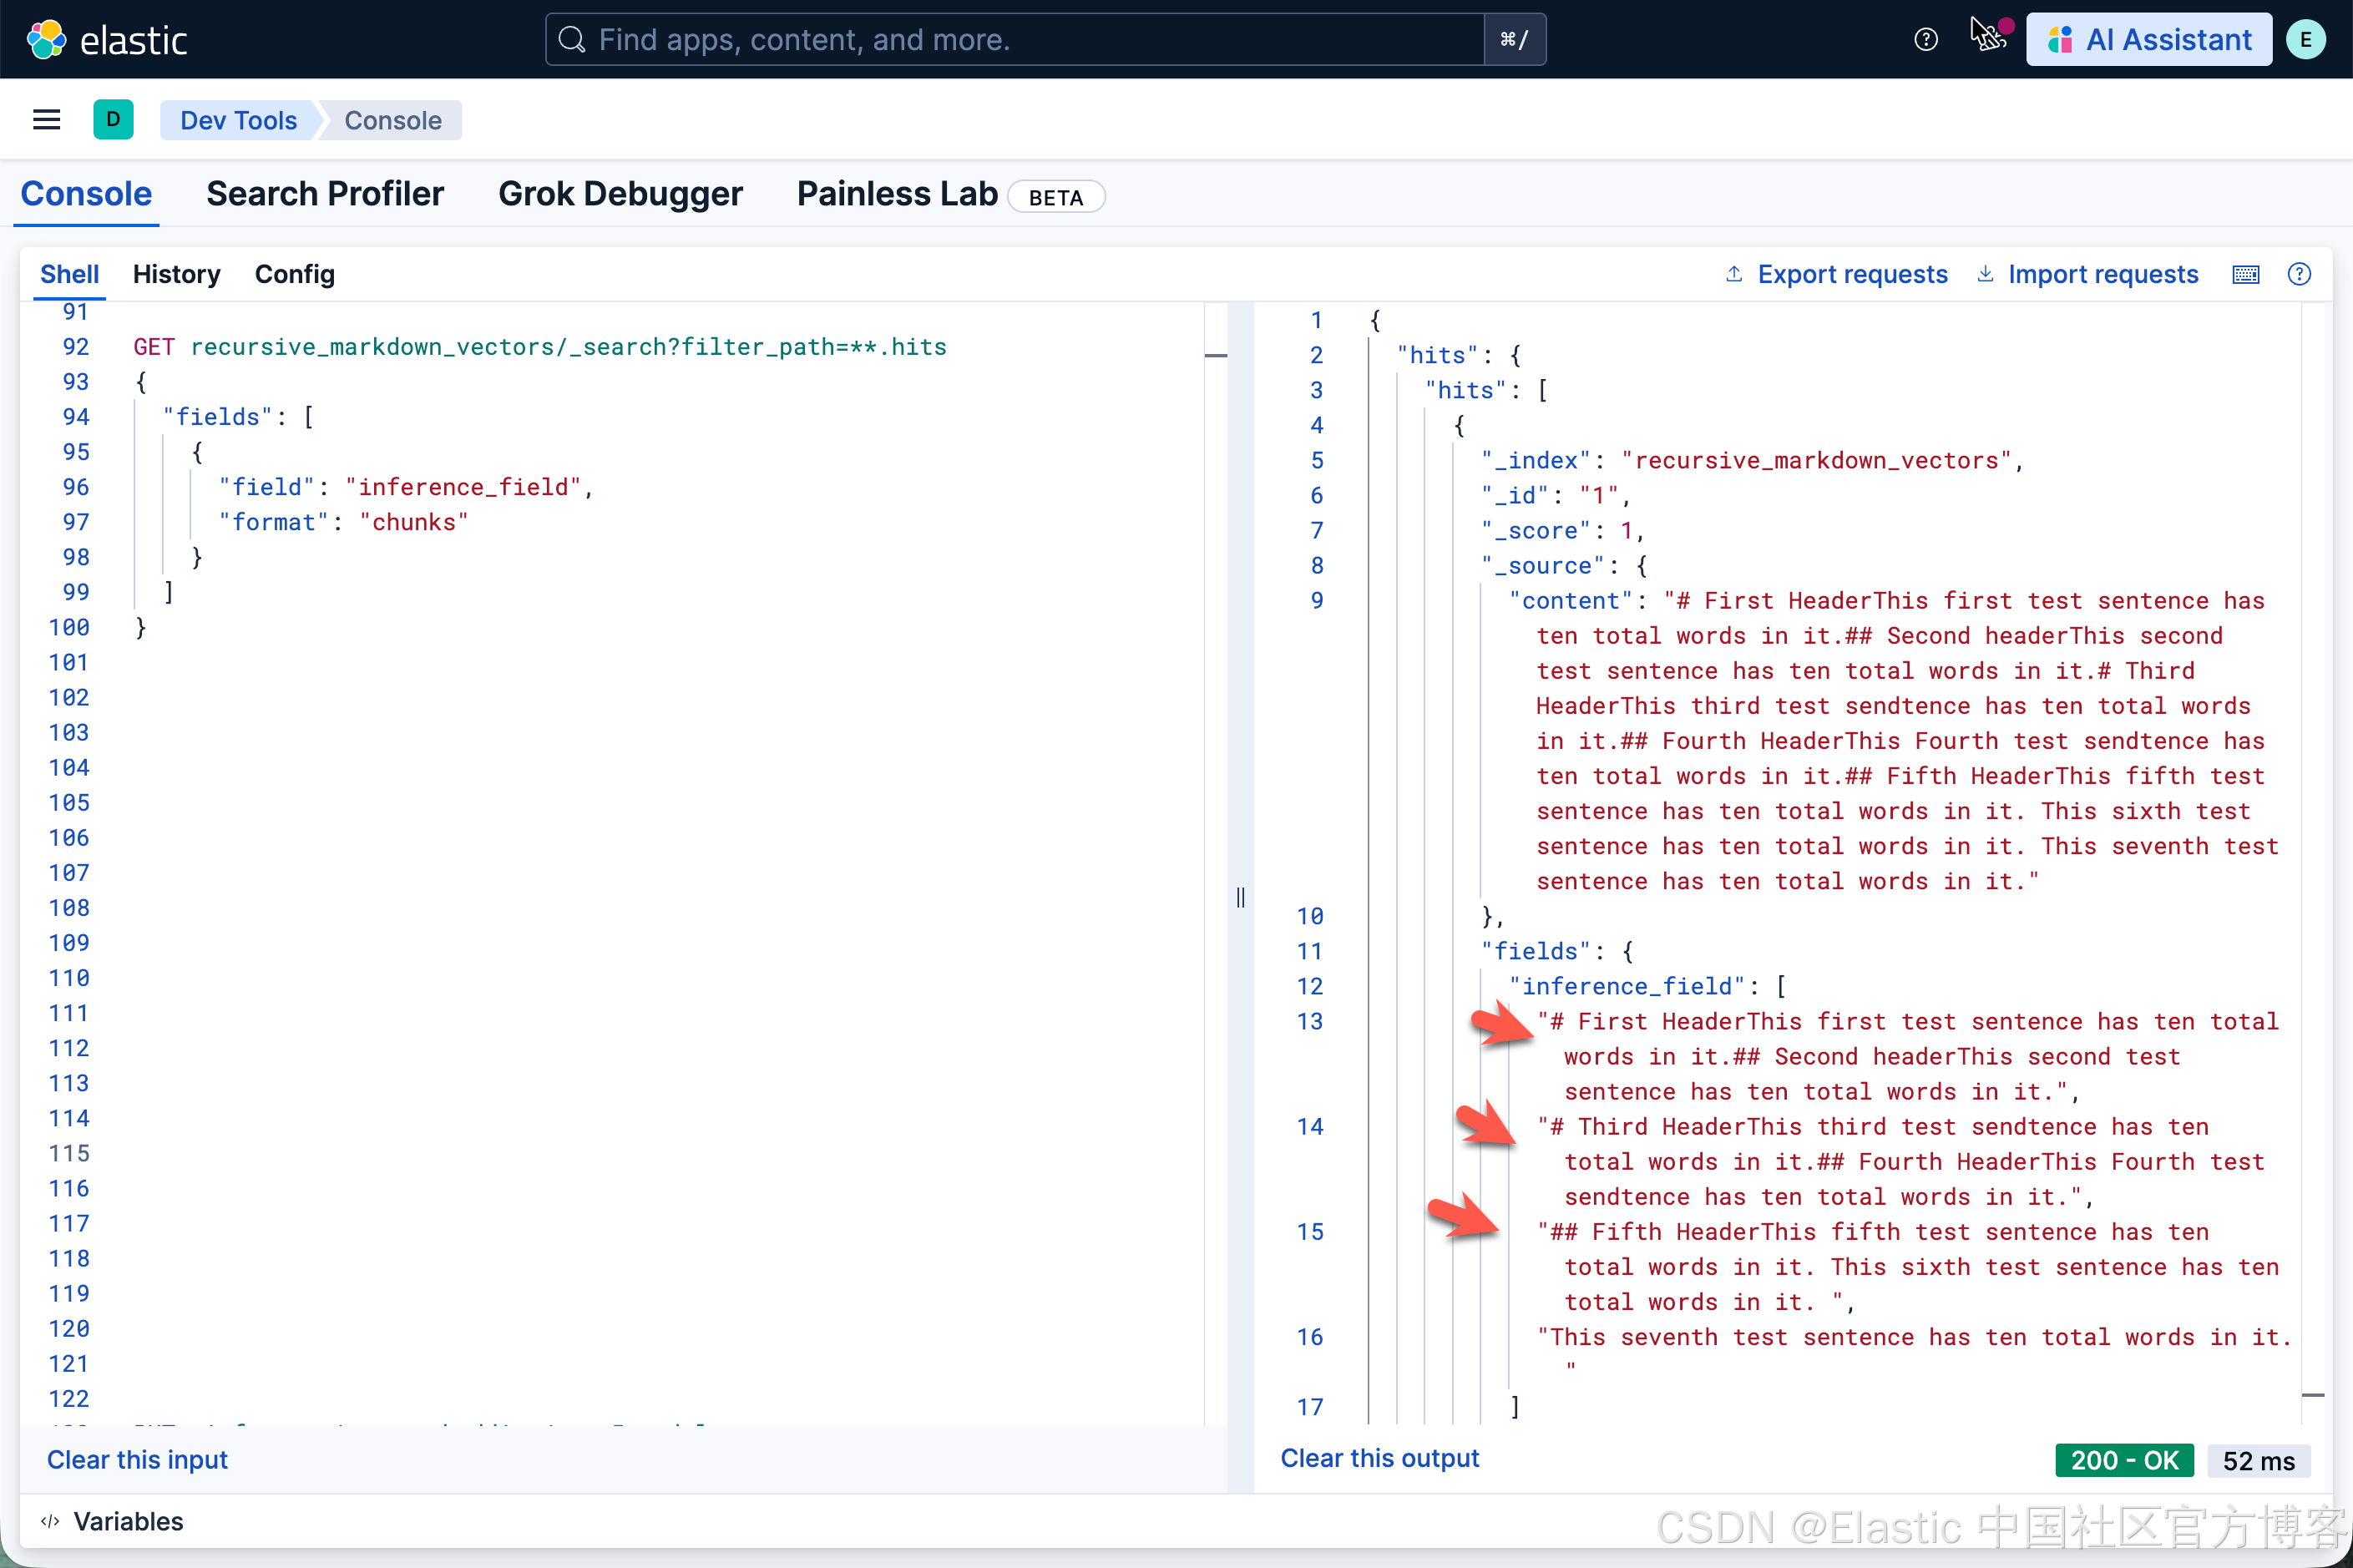
从上面的结果中,我们可以看到有 3 个 chunks。
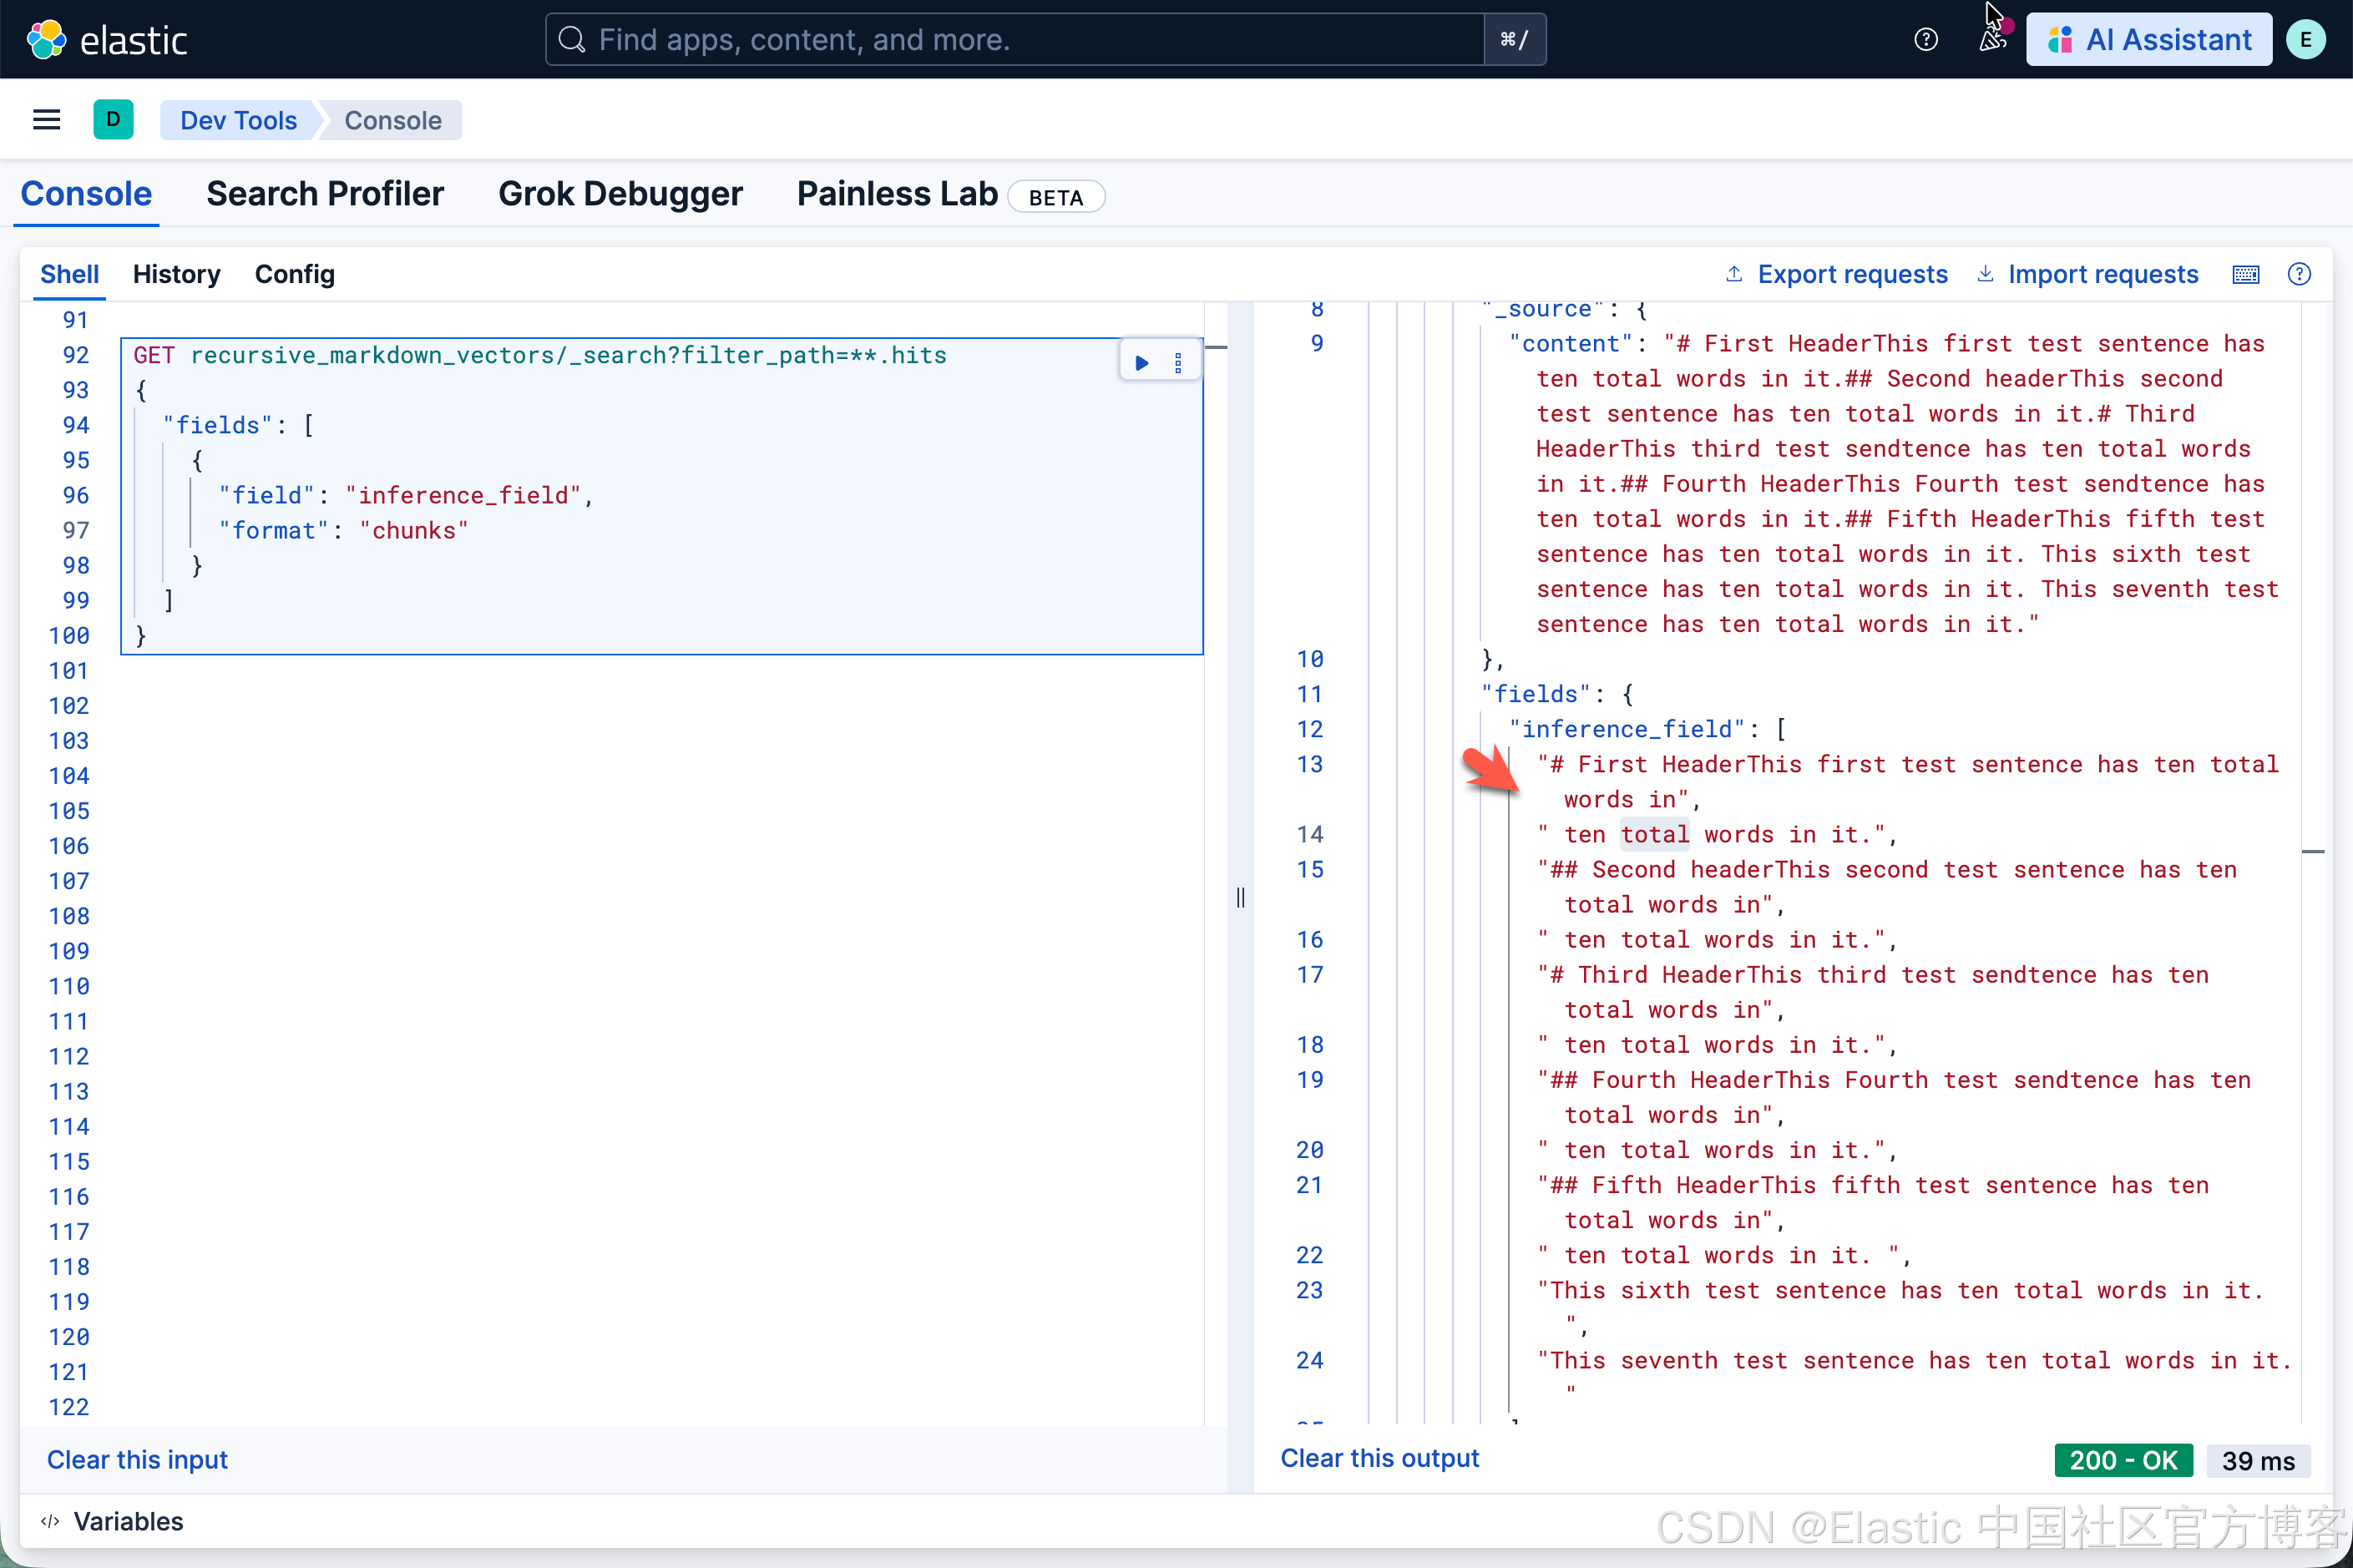
我们接下来把 max_chunk_size 设置为 10,看看最后的结果:
PUT _inference/sparse_embedding/recursive_markdown_chunks
{
  "service": "elasticsearch",
  "service_settings": {
    "model_id": ".elser_model_2",
    "num_allocations": 1,
    "num_threads": 1
  },
  "chunking_settings": {
    "strategy": "recursive",
    "max_chunk_size": 10,
    "separators": [
      "\n# ",
      "\n## "
    ]
  }
}
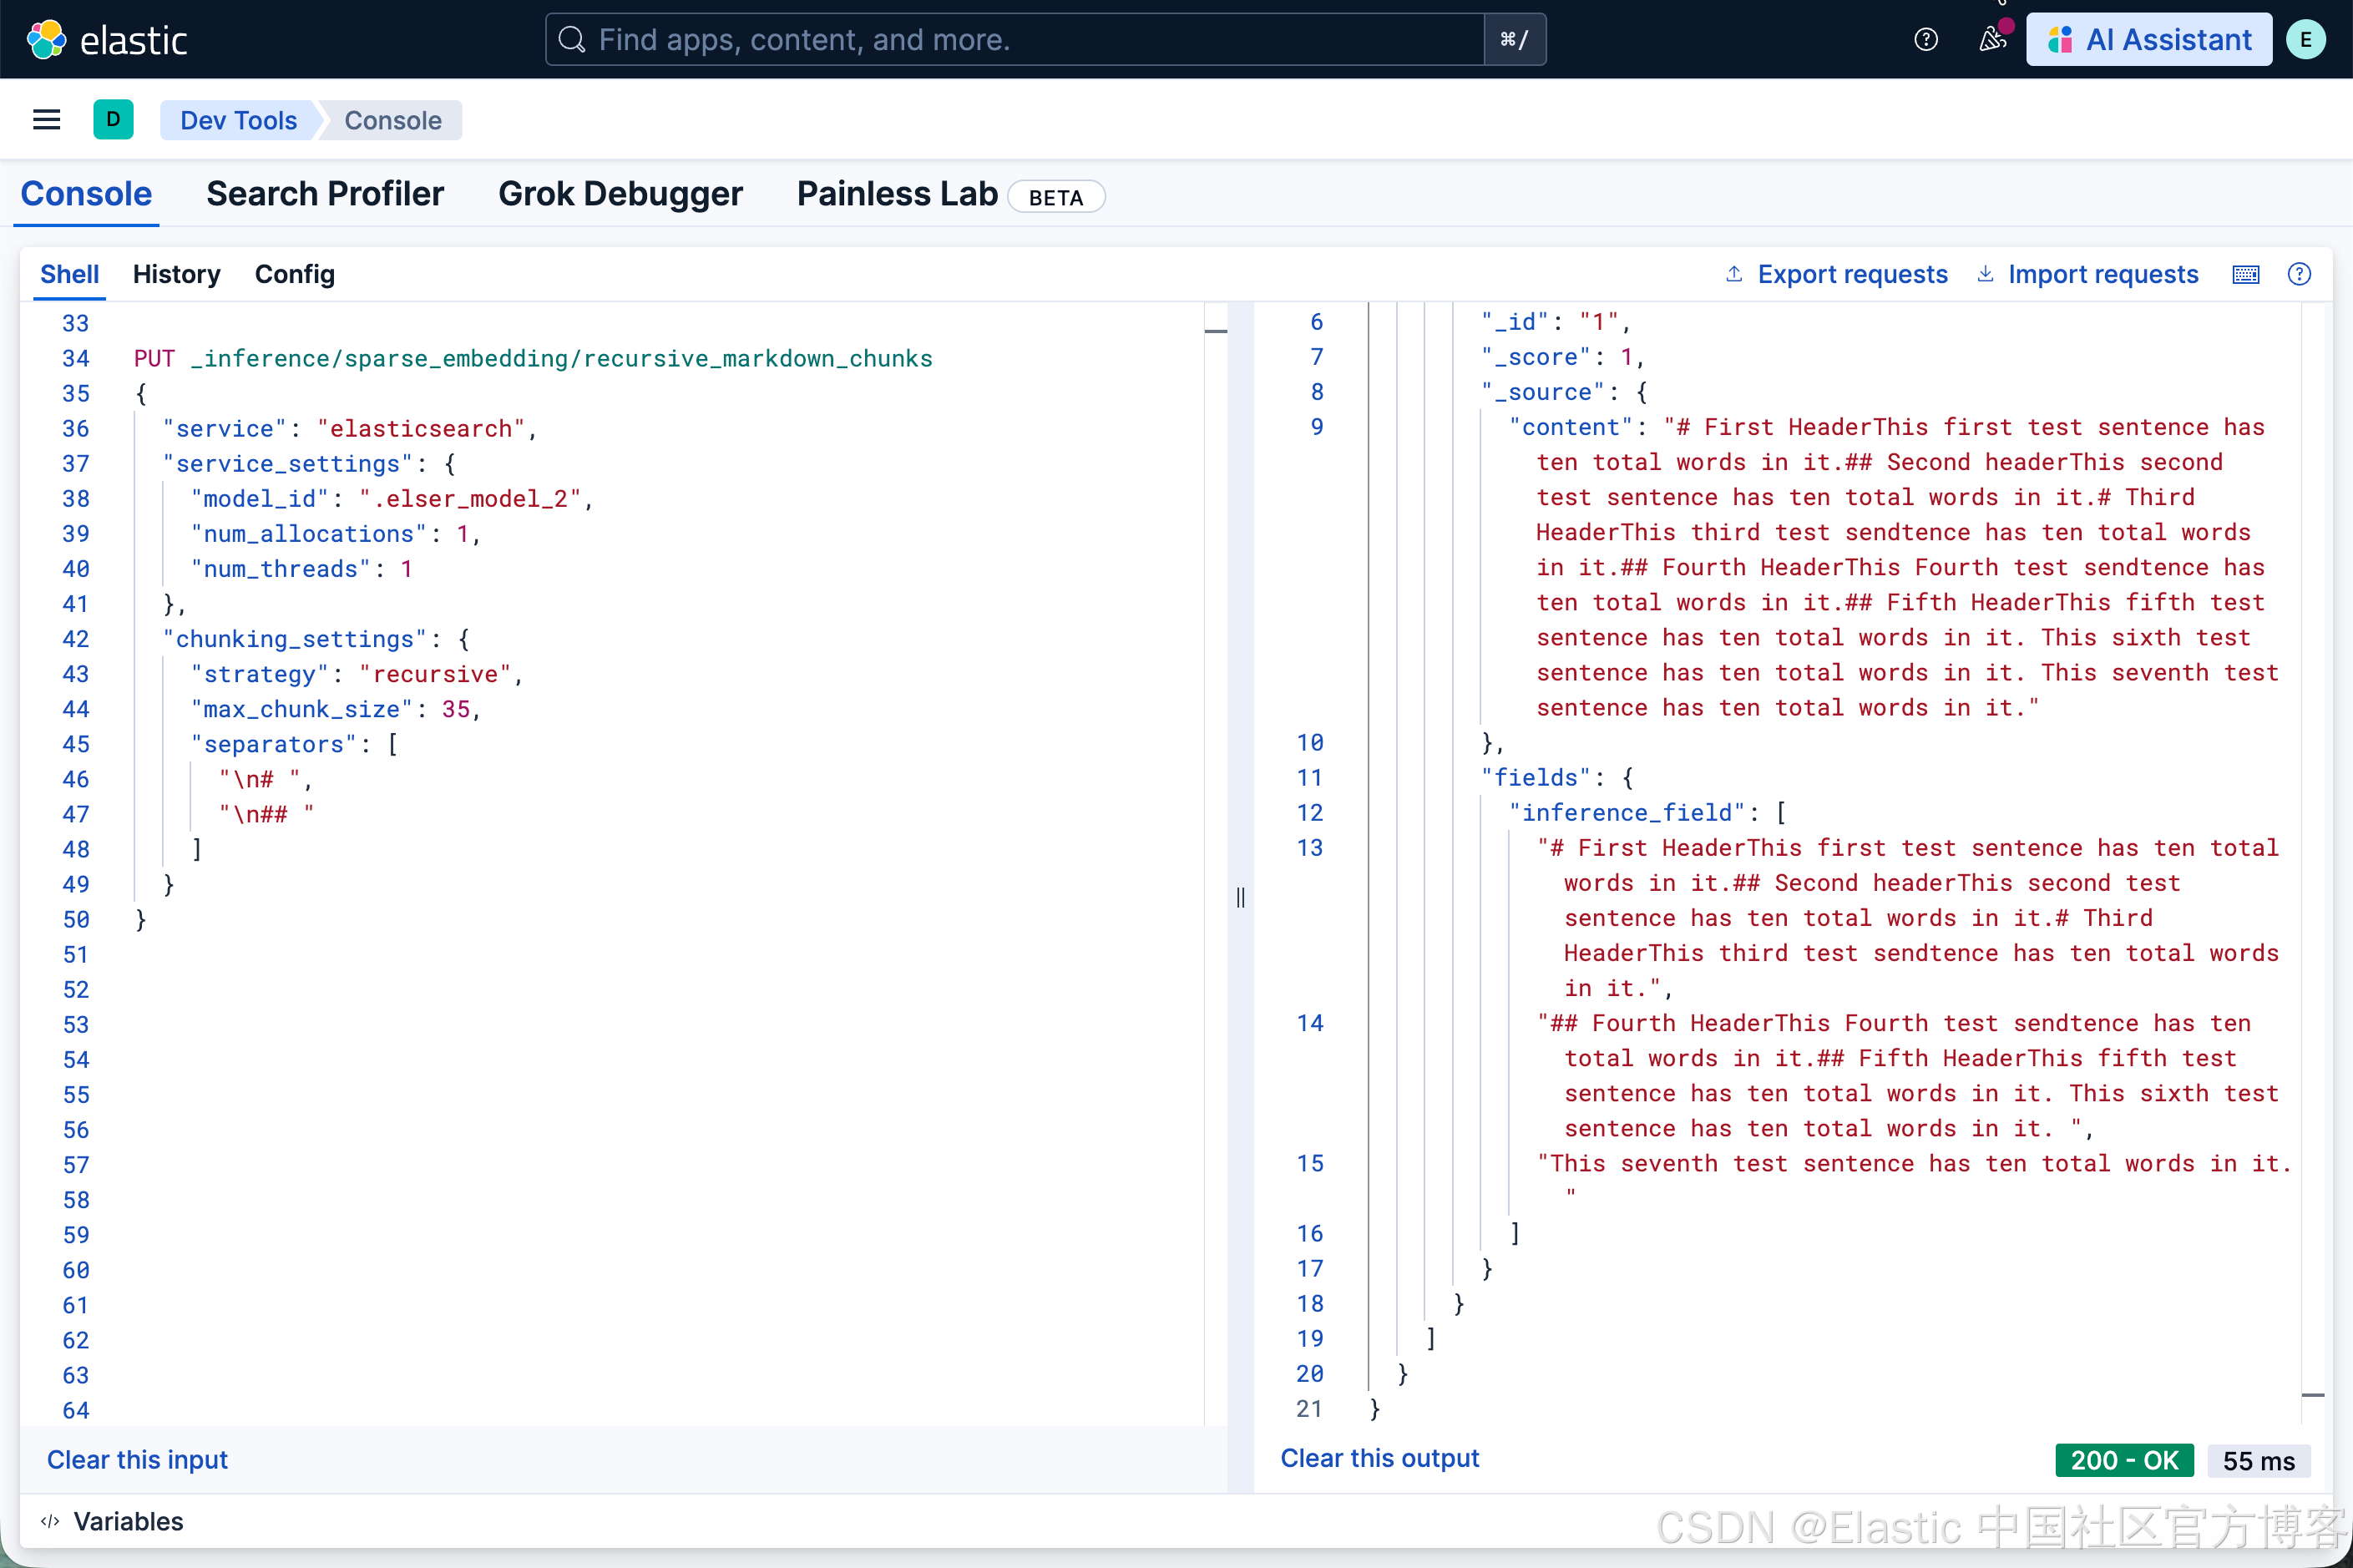
很显然,它和我们之前的分块还是有点不一样。我们可以试试不同的值来看看。
PUT _inference/sparse_embedding/recursive_markdown_chunks
{
  "service": "elasticsearch",
  "service_settings": {
    "model_id": ".elser_model_2",
    "num_allocations": 1,
    "num_threads": 1
  },
  "chunking_settings": {
    "strategy": "recursive",
    "max_chunk_size": 35,
    "separators": [
      "\n# ",
      "\n## "
    ]
  }
}
我们也可以尝试使用 "separator_group": "markdown":
PUT _inference/sparse_embedding/recursive_markdown_chunks
{
  "service": "elasticsearch",
  "service_settings": {
    "model_id": ".elser_model_2",
    "num_allocations": 1,
    "num_threads": 1
  },
  "chunking_settings": {
    "strategy": "recursive",
    "max_chunk_size": 25,
    "separator_group": "markdown"
  }
}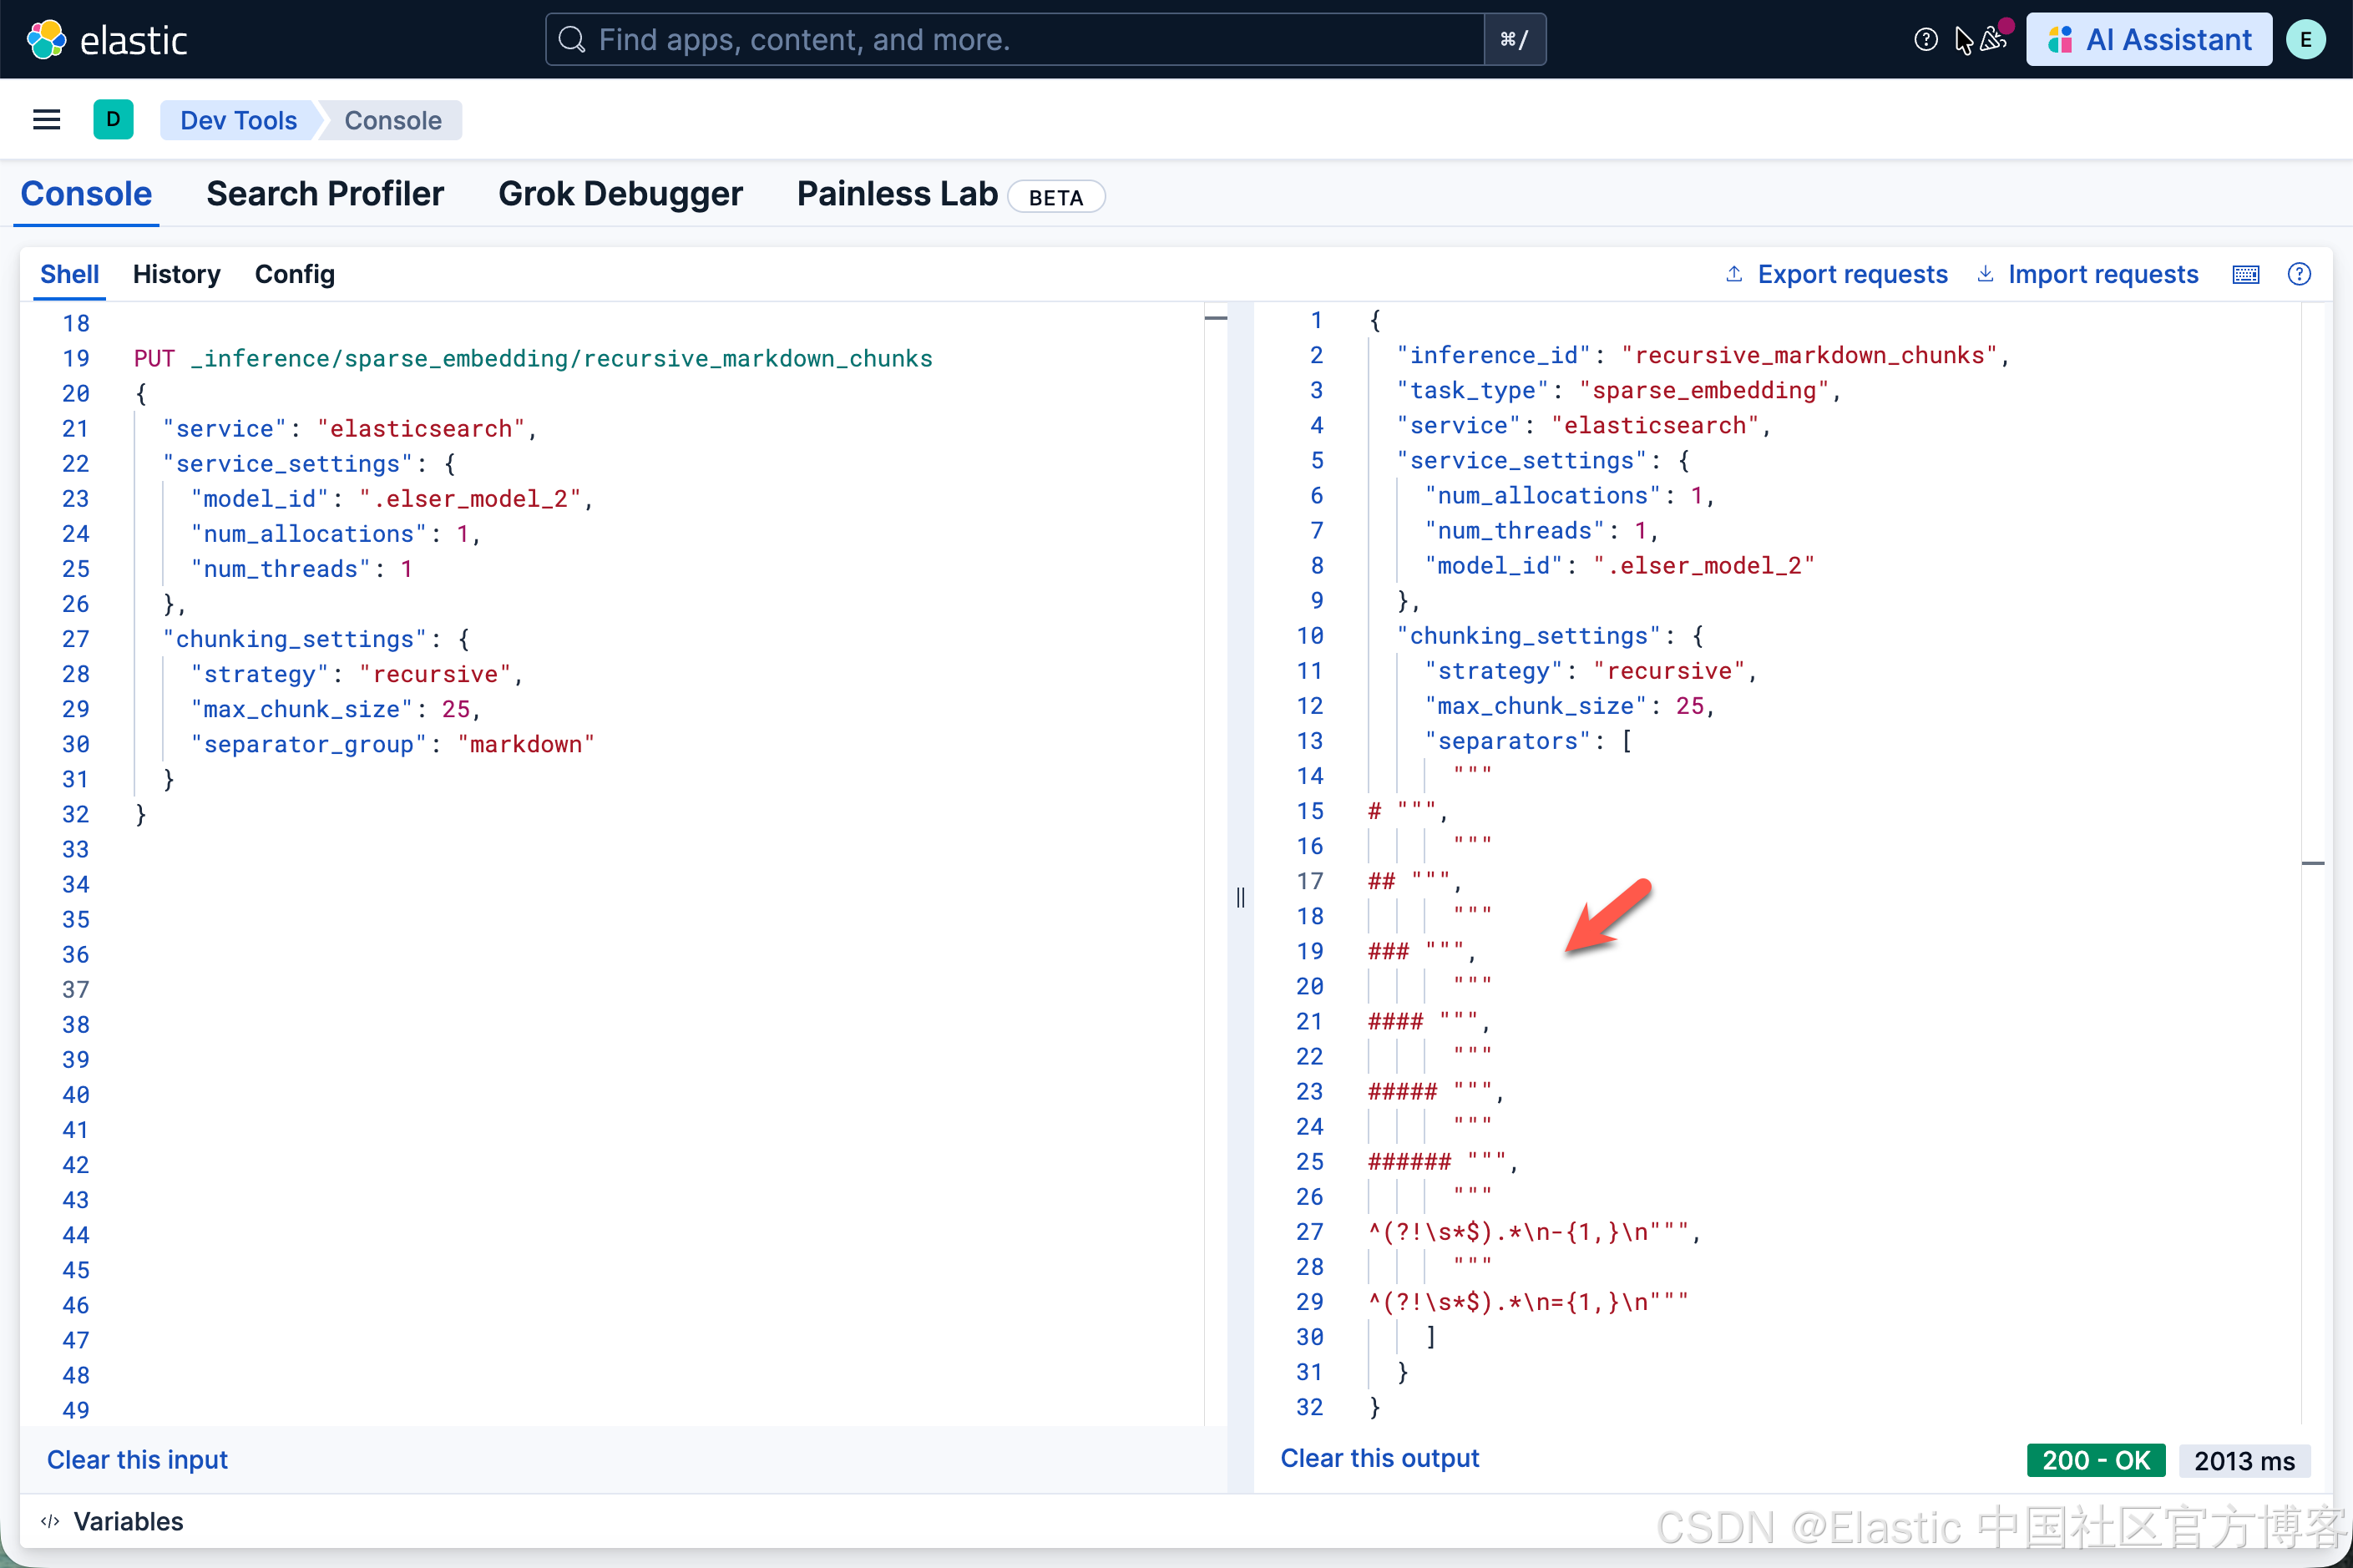
可以看出来,它的结果和我们之前第一个结果的没有什么不一样的,这是因为 markdown 所包含的 separators 里也是对 heading 进行分段的。