很多人第一次接触 OCR 时,会纠结一个问题:
👉 是用在线 OCR 网页?还是直接接 OCR API?
正确姿势其实是:
➡ 先用网页验证效果
➡ 再用 API 接入系统
下面我用一个完整流程,演示怎么选 + 怎么用。
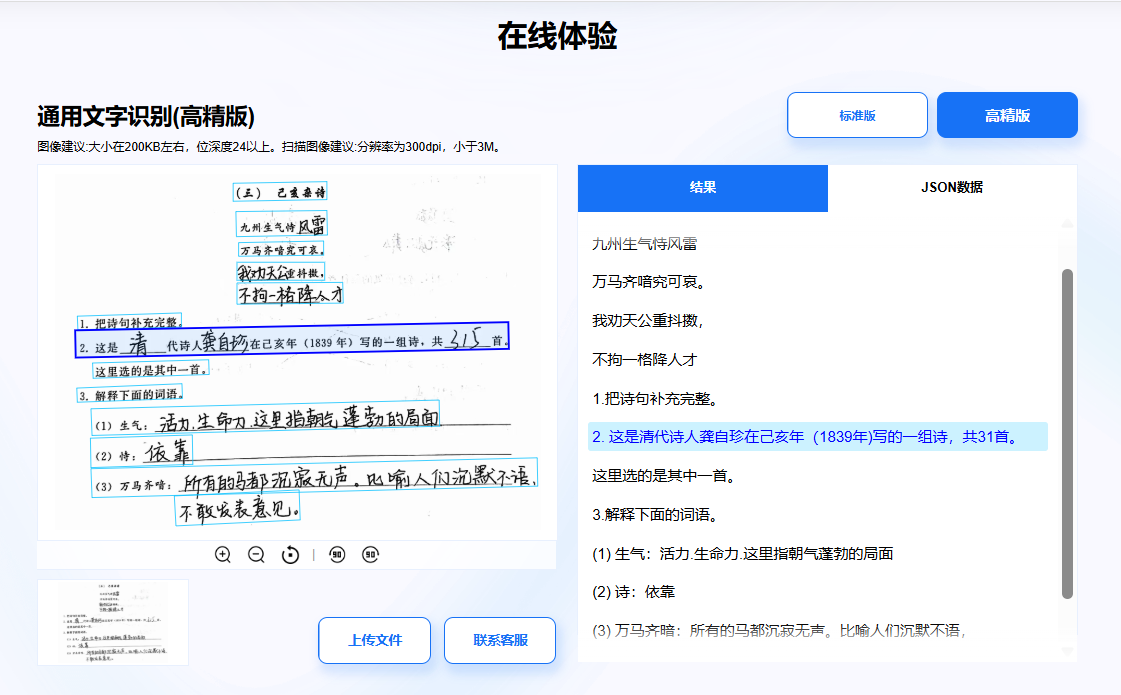
Step 1:用网页先验证 OCR 效果
第一步,不要急着写代码。
先用在线 OCR 网页上传几张真实业务图片,看看识别效果:
👉 比如石榴智能文字识别的API+在线识别工具,网址:https://market.shiliuai.com/general-ocr
重点看:
-
拍照歪斜是否能识别
-
模糊图是否还能读出文字
-
手写字 / 其他需要识别的内空是否可以正常识别
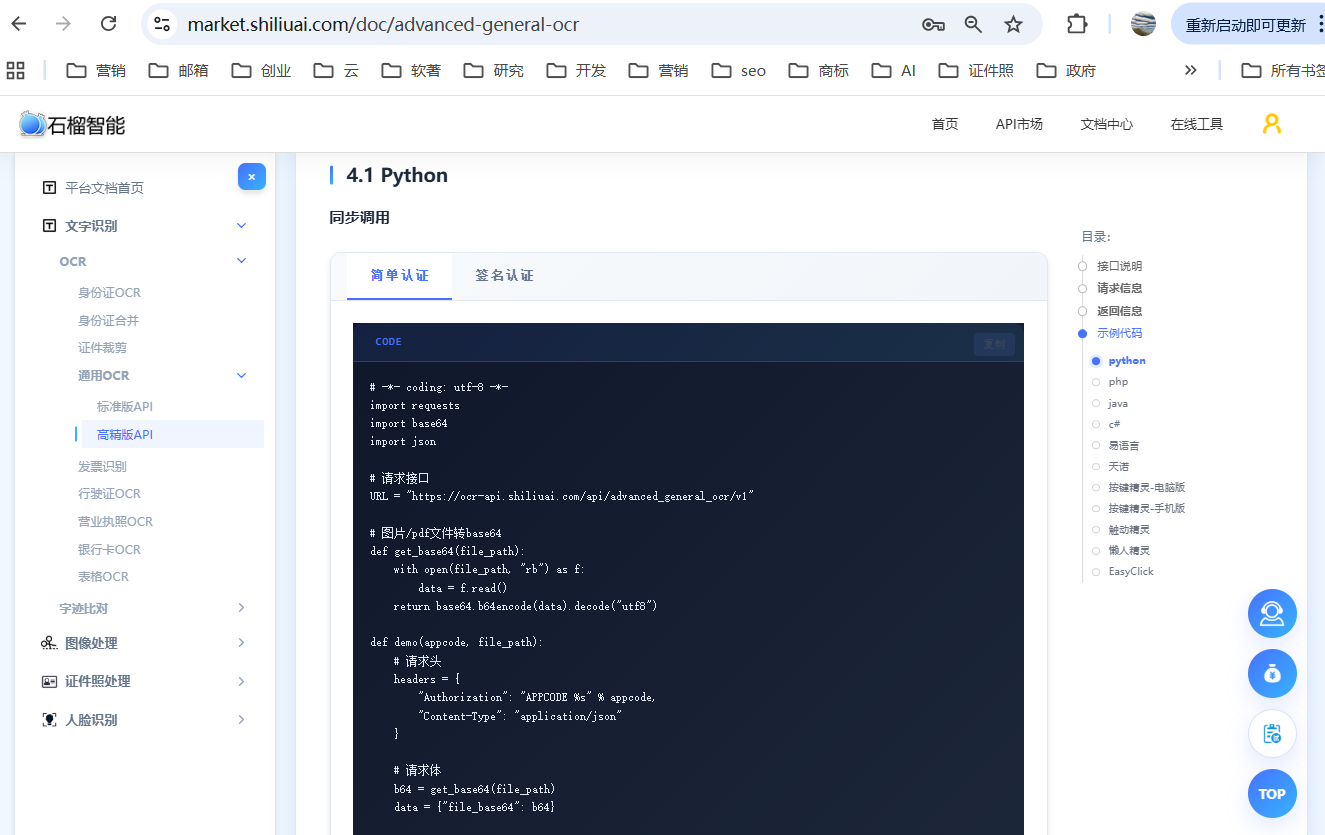
Step 2:确认后,再接入 OCR API
确认网页效果 OK 后,再开始接 API。
示例调用:
cs
// API文档:https://market.shiliuai.com/doc/advanced-general-ocr
using System.Text;
using Newtonsoft.Json;
using Newtonsoft.Json.Linq;

namespace MyCSharpApp
{
    public class Program
    {
        public static string GetBase64(string path)
        {
            string b64 = "";
            try
            {
                // 读取文件内容
                byte[] content = File.ReadAllBytes(path);
                // 转换为Base64
                b64 = Convert.ToBase64String(content);
            }
            catch (Exception e)
            {
                Console.WriteLine(e.Message);
            }
            return b64;
        }

        public static async Task Main(string[] args)
        {
            string url = "https://ocr-api.shiliuai.com/api/advanced_general_ocr/v1";// 请求接口
            string appcode = "你的APPCODE";
            string imgFile = "本地文件路径";

            // 设置请求头
            Dictionary headers = new Dictionary
            {
                { "Authorization", "APPCODE " + appcode }
                // Content-Type 将在创建 StringContent 时设置
            };

            // 请求体
            JObject requestObj = new JObject();
            requestObj["file_base64"] = GetBase64(imgFile);
            string body = requestObj.ToString();

            try
            {
                using (HttpClient client = new HttpClient())
                {
                    // 设置请求头
                    foreach (var header in headers)
                    {
                        client.DefaultRequestHeaders.Add(header.Key, header.Value);
                    }
                    // 创建请求内容
                    StringContent content = new StringContent(body, Encoding.UTF8, "application/json");
                    HttpResponseMessage response = await client.PostAsync(url, content);
                    if (!response.IsSuccessStatusCode)
                    {
                        Console.WriteLine($"Http code: {(int)response.StatusCode}");
                        return;
                    }
                    // 读取响应内容
                    string responseContent = await response.Content.ReadAsStringAsync();
                    JObject resObj = JObject.Parse(responseContent);
                    Console.WriteLine(resObj.ToString(Formatting.Indented));
                }
            }
            catch (Exception e)
            {
                Console.WriteLine(e.Message);
            }
        }
    }
}
还有php,python,java的接入案例,以及三方软件的接入API案例,比如易语言、懒人精灵、天诺等,可以查看代码文档
Step 3:技术选型注意事项
-
OCR 准确率优先
-
接口稳定性优先
-
JSON 结构是否方便入库
-
文档 & 示例是否齐全
总结
正确姿势是:
✔ 网页先试
✔ API 再接
✔ 一套平台解决所有角色需求